You open your pantry and can’t find anything. Sound familiar? You can double your storage and keep everything perfectly organized when you add shelving to a small pantry the smart way. This beginner-friendly, one-afternoon project gives you clear sightlines, stackable zones, and a plan so food stops getting lost.
Start by having a couple of reliable tools on hand: a magnetic stud finder to map studs quickly and a set of adjustable shelf brackets that let you tweak shelf spacing as needs change. You’ll learn how to measure, pick the right boards and brackets, install shelves safely, and organize the finished space for maximum efficiency.
Measure & Plan: How to Add Shelving to a Small Pantry without Guesswork
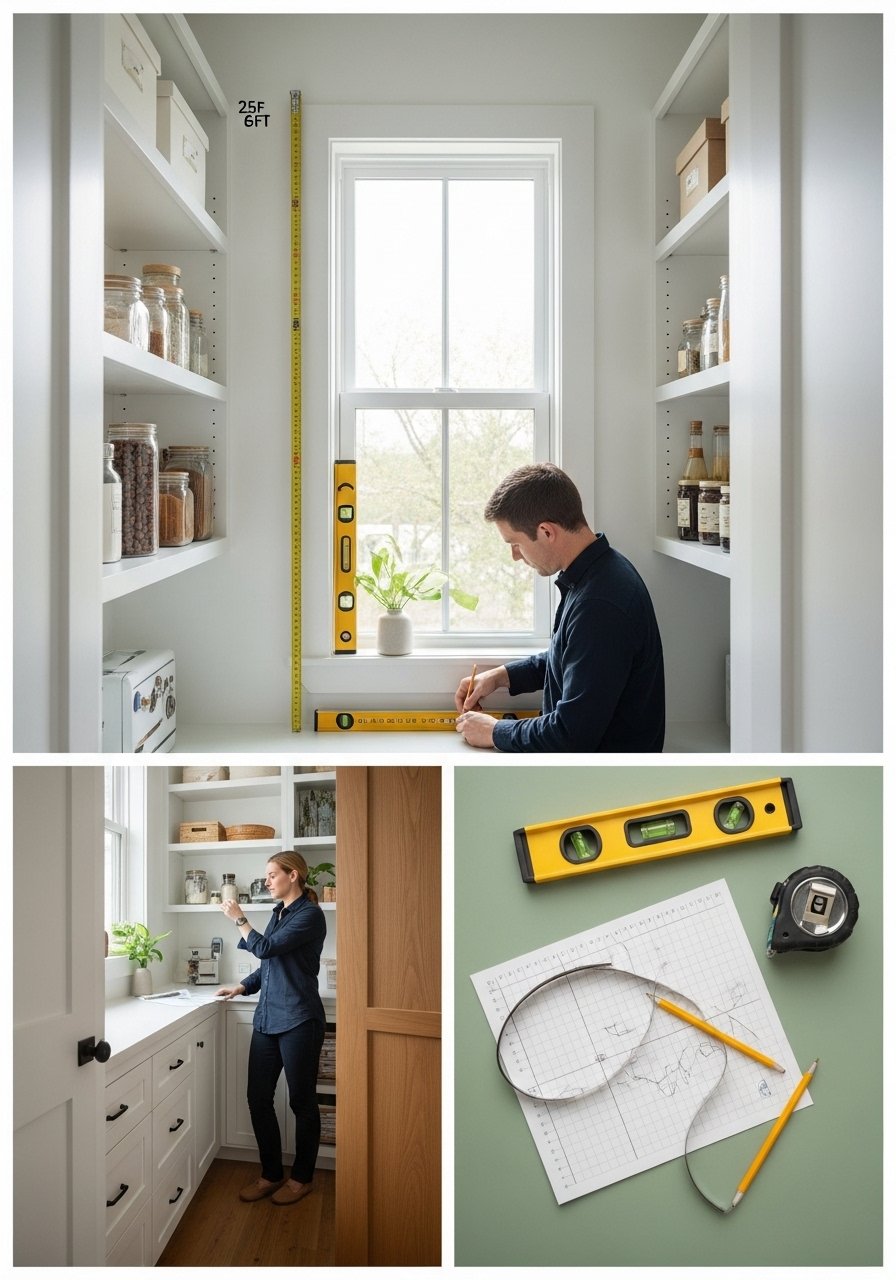
Careful measuring keeps the whole project painless. Typical pantry depth is 12 inches, so plan shelf depths of 10–12 inches for cans and jars. Measure vertical space and aim for shelf spacing of 10–12 inches for dry goods, and 14–16 inches for tall bottles or mixers.
Tools that speed this step:
- Use a 25-foot tape measure for accurate runs.
- Confirm level and plumb with a 24-inch bubble level.
Pro tip: sketch your pantry and decide where you’ll double storage — think two shallower shelves where one used to sit, or a short shelf above a tall zone.
Choose Shelves & Brackets That Fit Your Pantry and Budget
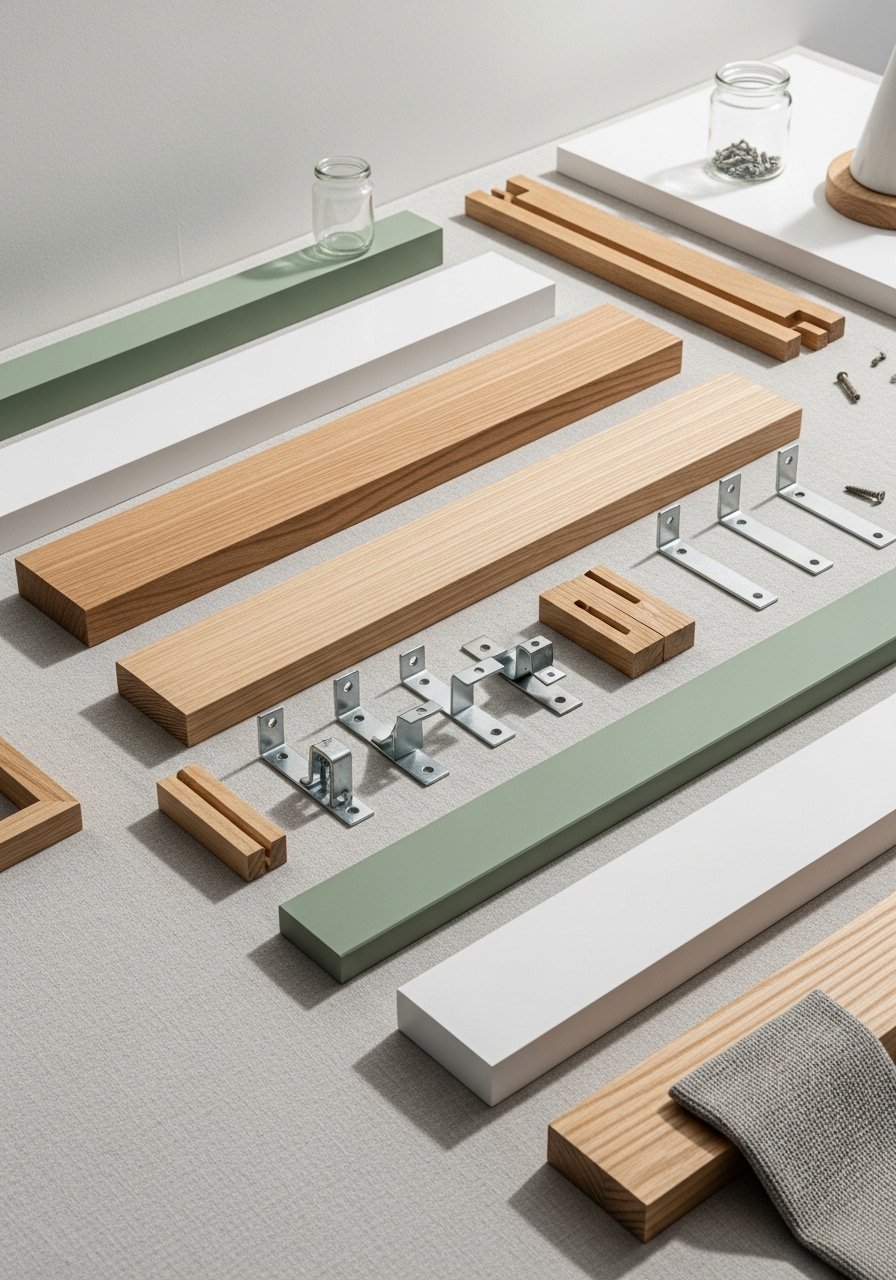
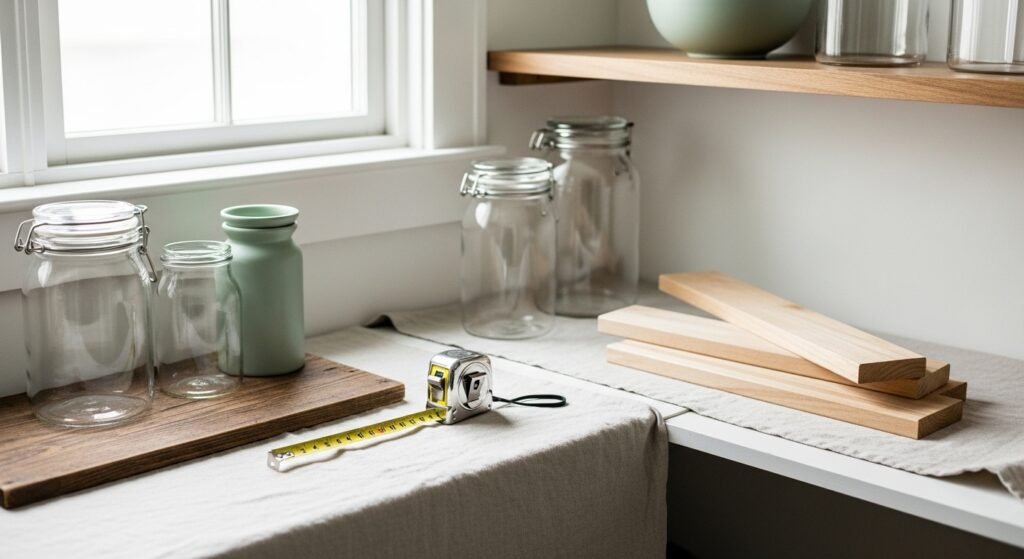
Pick boards and brackets that match your load and look. For a sturdy, budget-friendly shelf use 3/4" pine or birch boards. If you want a floating look, pick hidden hardware.
Helpful buys:
- Pre-cut boards or raw lumber like 1×12 pine board cut to length.
- For adjustable layouts, consider floating shelf brackets or heavy-duty metal brackets.
Measurements to follow:
- Trim boards to fit with 1/4" clearance from the pantry door swing.
- If supporting canned goods, space studs or anchors every 16 inches and use brackets rated for 50+ lbs per shelf.
Install Shelves Step-by-Step (Beginner-Friendly)
This installation is straightforward and doable in a couple of hours.
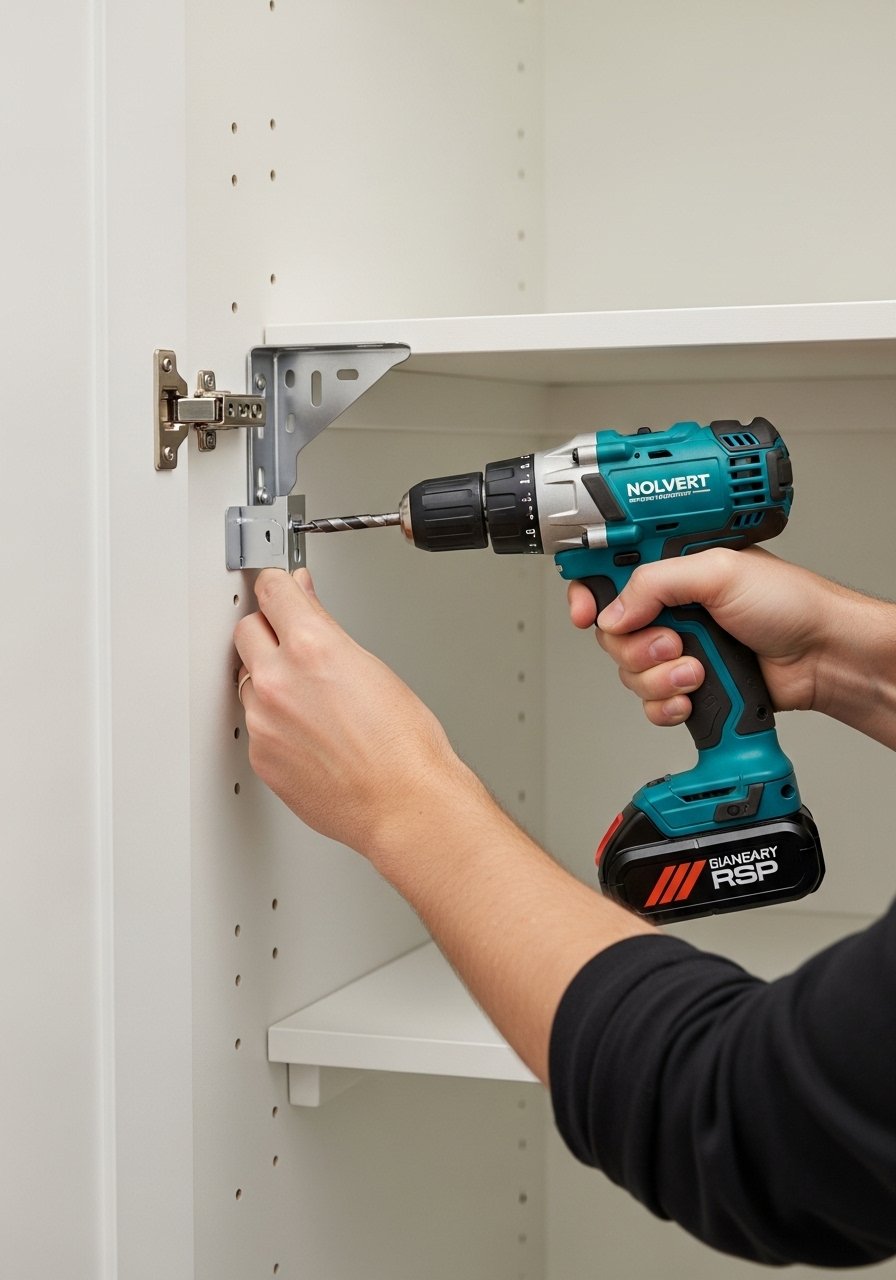
- Mark stud locations with your magnetic stud finder. If studs aren’t where you want them, use anchors.
- Hold the bracket, level it, and mark screw holes.
- Drill pilot holes using a cordless drill driver.
- Fasten brackets with #10 screws into studs or use heavy duty wall anchors where needed.
- Place the board, check level, and secure with short screws through the bracket lip.
Safety tips:
- Double-check that each shelf sits level before loading.
- Expect 2–4 hours for measuring, cutting, and installing three to five shelves.
Organize to Double Your Storage and Keep It Functional
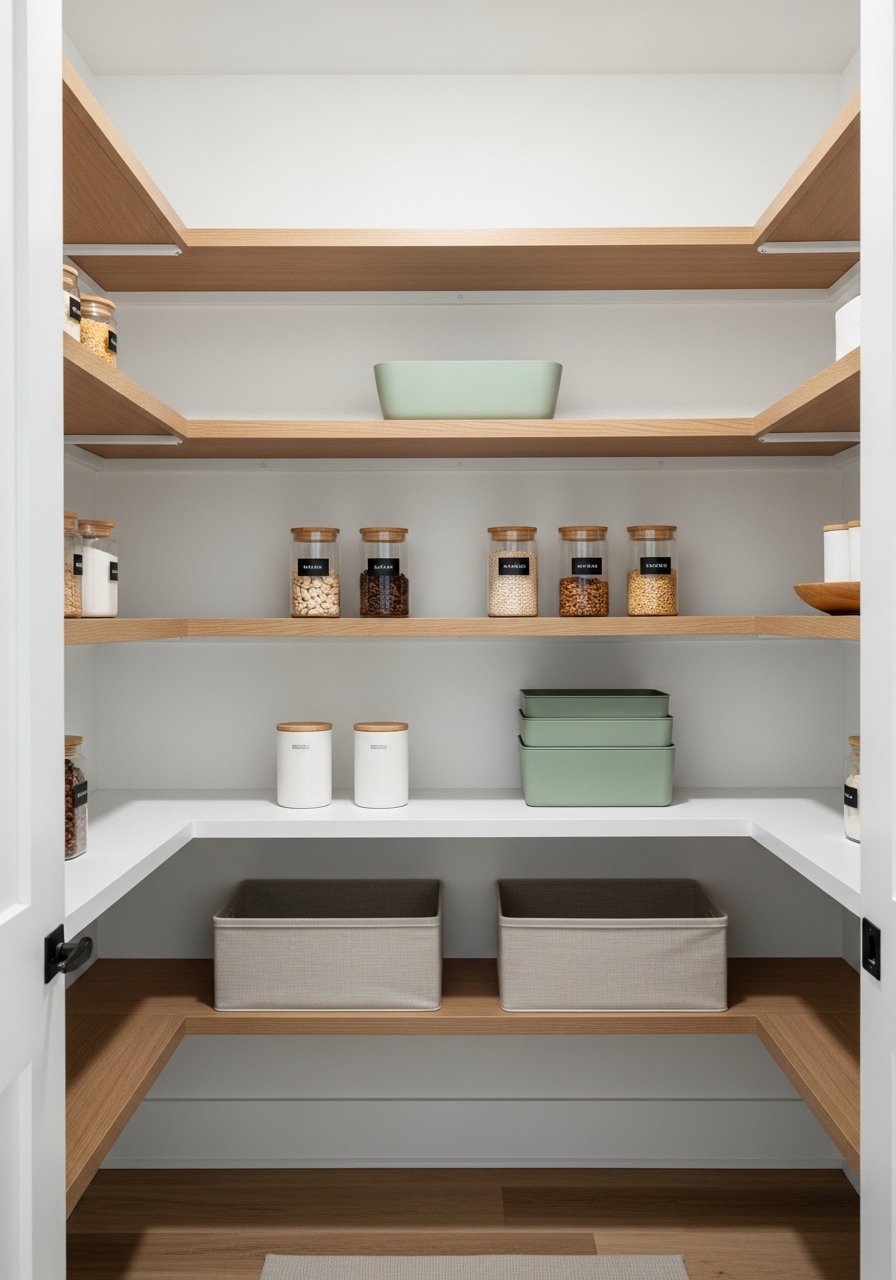
Once shelves are in, organize to maximize capacity and visibility:
- Use uniform containers so you can stack: mason jars for dry goods and stackable pantry organizers for snacks.
- Add a lazy Susan turntable on a deep shelf for oils and bottles.
- Cut shelf chaos with non-slip shelf liner so jars stay put.
Quick organizing workflow:
- Group like items together.
- Put daily-use items at eye level.
- Reserve lower shelves for heavy items and top shelves for overflow.
You’ll likely see at least double the usable space when you switch to stacked, uniform containers and add one or two extra shelves.
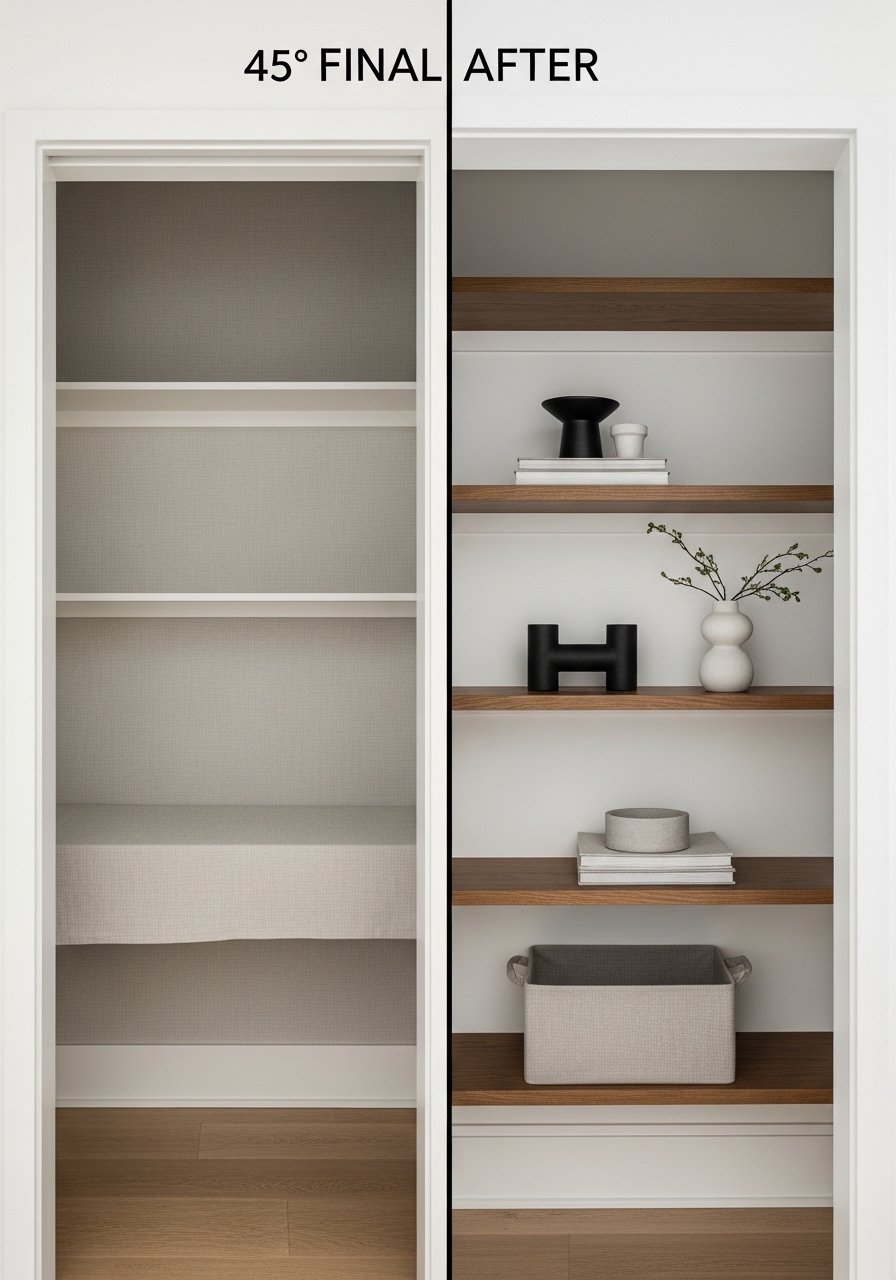
You just learned how to add shelving to a small pantry, cut usable depth, and make every can and jar visible. Pin this one-afternoon plan and try adding one shelf at a time. If you’re buying one tool now, a cordless drill driver will pay for itself over and over. Pin this guide for your next pantry refresh and share it with a friend who hates digging for snacks—what will you store first?


