Small pantry cabinet ideas can turn a tight, cluttered space into a calm, efficient corner you enjoy using every day. If your pantry feels like a black hole of mismatched jars and expired snacks, these 22 projects will give you lovely, space-saving solutions that look like they belong in a home magazine.
You’ll find ideas that use simple woodworking, quick upcycles, clever hardware swaps, and pretty finishing touches. Each project includes a full materials list, step-by-step instructions, realistic drying times, and display tips. I reach for a good drill and my precision craft knife for detailed cuts, and I run thin coats of paint with a flat foam brush for clean results.
These small pantry cabinet ideas are practical and lovely. Grab your tools and let’s make that pantry work harder and look better.
- Pull-Out Spice Drawer (a small pantry cabinet idea)
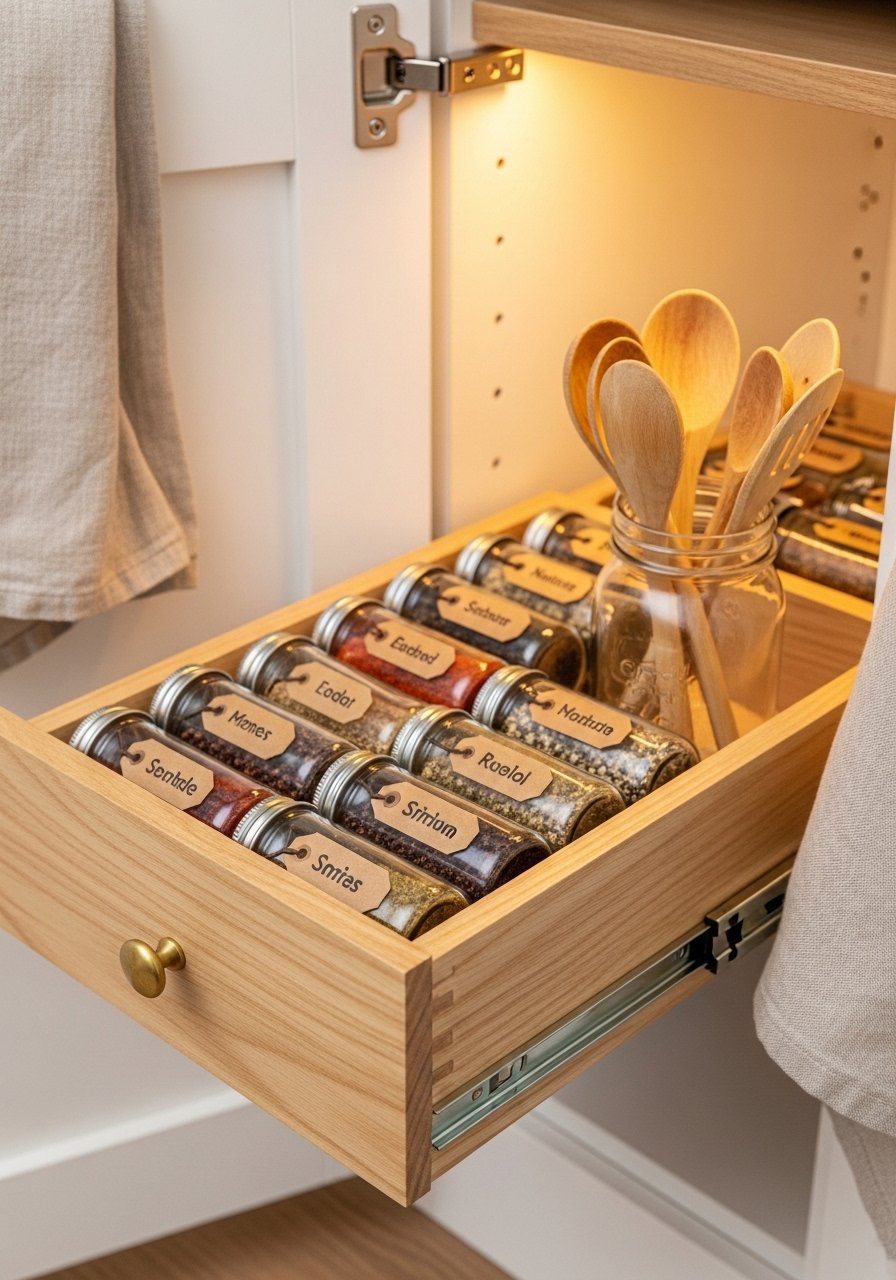
This pull-out spice drawer makes spices easy to scan at eye level. It’s shallow, tidy, and ideal for narrow pantry cabinets where vertical space is limited. The finished look is neat rows of uniform jars with a matte-painted drawer face that feels tactile.
I use a cordless drill for pilot holes and a self-adhesive drawer liner to keep jars from sliding.
Materials
- 1 1×8 pine board, 24" long, cut to size
- 2 12" full-extension drawer slides (pair)
- 1 1/4" birch plywood, 10" x 24"
- 20 2oz glass spice jars with lids
- 1 small brass drawer knob
- 1 can chalk paint, 8 oz (color of choice)
- 1 roll non-adhesive drawer liner, 12" x 10'
- Wood glue, 4 oz
- 8 1" wood screws
- Sandpaper 120 and 220 grit
Instructions
- Cut the 1×8 pine board to the front width of your cabinet minus 3/8" for slide clearance (measure inside cabinet).
- Cut birch plywood to 10" x (front width – 1/2") for bottom. Sand edges smooth with 120 then 220 grit.
- Assemble a shallow box: glue and clamp the front and plywood bottom to two 1×2 sides (roughly 4" tall). Use 1" screws every 6".
- Install drawer slides on both sides of the box, following package spacing (centerline 1-1/4" from top of slide). Pre-drill with a 1/16" bit.
- Mount mating slides to cabinet interior at matching height, ensuring level front-to-back.
- Paint the front with two thin coats of chalk paint, drying 1 hour between coats. Sand lightly between coats for a smooth finish.
- Affix the knob centered horizontally. Place drawer liner in bottom and load jars.
- Slide drawer into cabinet and test for smooth action; adjust screws if binding occurs.
How to Display or Gift It
- Position this spice drawer at eye-level in a small pantry cabinet for instant meal-time efficiency.
- Add kraft paper labels and a tiny linen ribbon on the knob for a gift-ready touch.
- Store extra jars in a narrow stackable organizer inside the pantry. Consider a compact craft organizer drawer set for screw bits and hardware.
- Make several drawers as a matching set for oil, vinegars, and baking spices.
- Tiered Can Shelf Insert
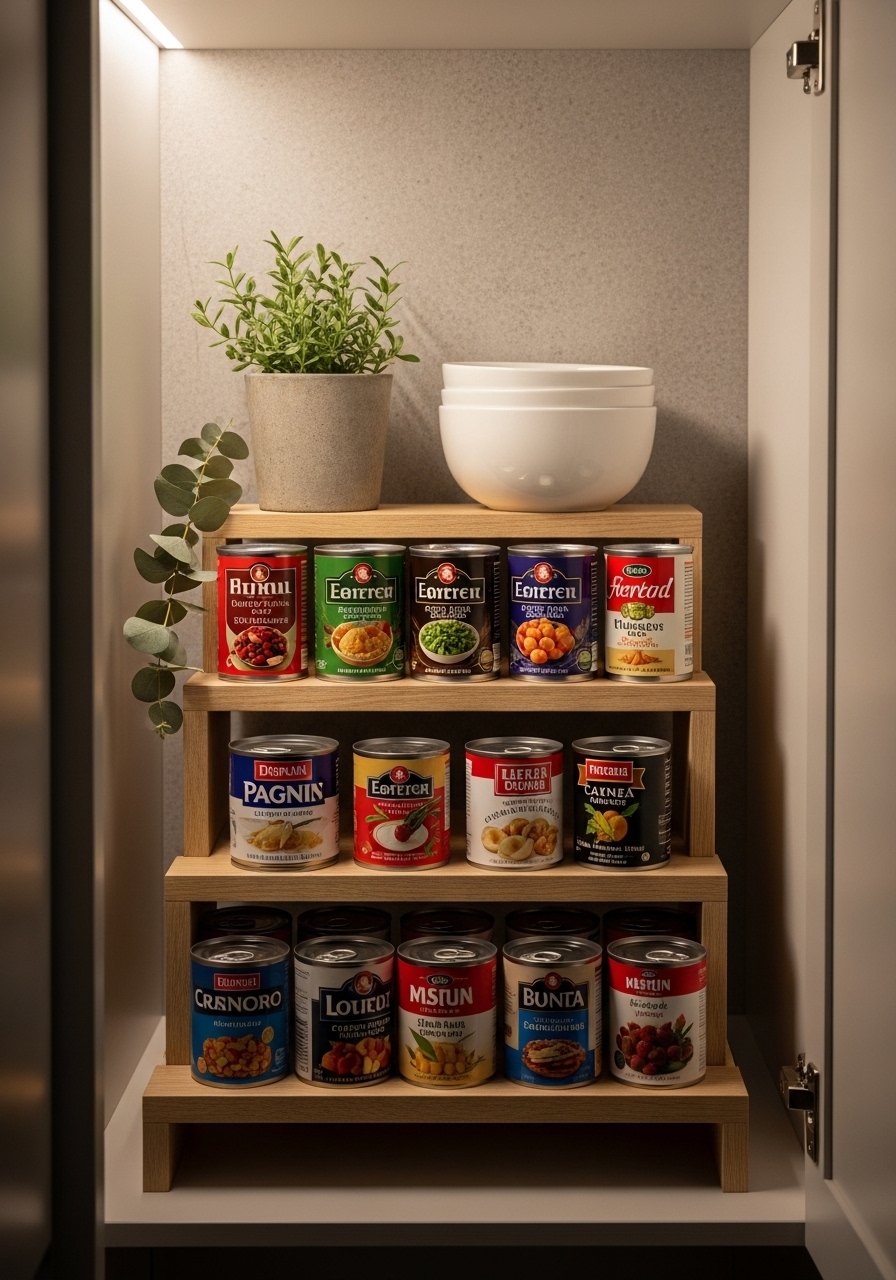
A tiered can shelf makes deep cabinet shelves feel accessible. This project gives you three angled tiers so labels face forward. It’s lightweight and lifts out when you need to deep-clean.
I cut the risers using my self-healing cutting mat and utility knife for veneer trimming.
Materials
- 3 pieces 1/4" plywood, 8" x 24"
- 3 pieces 1/4" plywood risers, 2.5" x 24"
- 12 small wood glue beads or thin 1/4" dowels
- 1 small can of acrylic craft paint, 2 oz
- 1 foam brush
- Sandpaper 220 grit
- Non-slip shelf liner, 8" x 24"
Instructions
- Cut three plywood shelves: bottom flat, middle with a 5° angled cleat, top with 10° angle (use a miter saw to set angle).
- Sand edges smooth. Paint two thin coats with 30 minutes between coats.
- Attach riser strips to rear of each shelf with wood glue and small brad nails (optional). Clamp for 30 minutes.
- Let assembly cure 2 hours before handling.
- Add non-slip liner to each shelf surface to prevent cans rolling forward.
- Place tiers in cabinet and load cans, arranging by label color for a pretty look.
How to Display or Gift It
- Slide this insert into any small pantry cabinet shelf to showcase canned goods neatly.
- Use coordinating paint to match your pantry’s palette.
- Wrap multiple inserts in kraft paper for a practical housewarming gift.
- Store flat between uses in a tall flat organizer or under the sink.
- Door-Mounted Wire Basket System (small pantry cabinet idea)
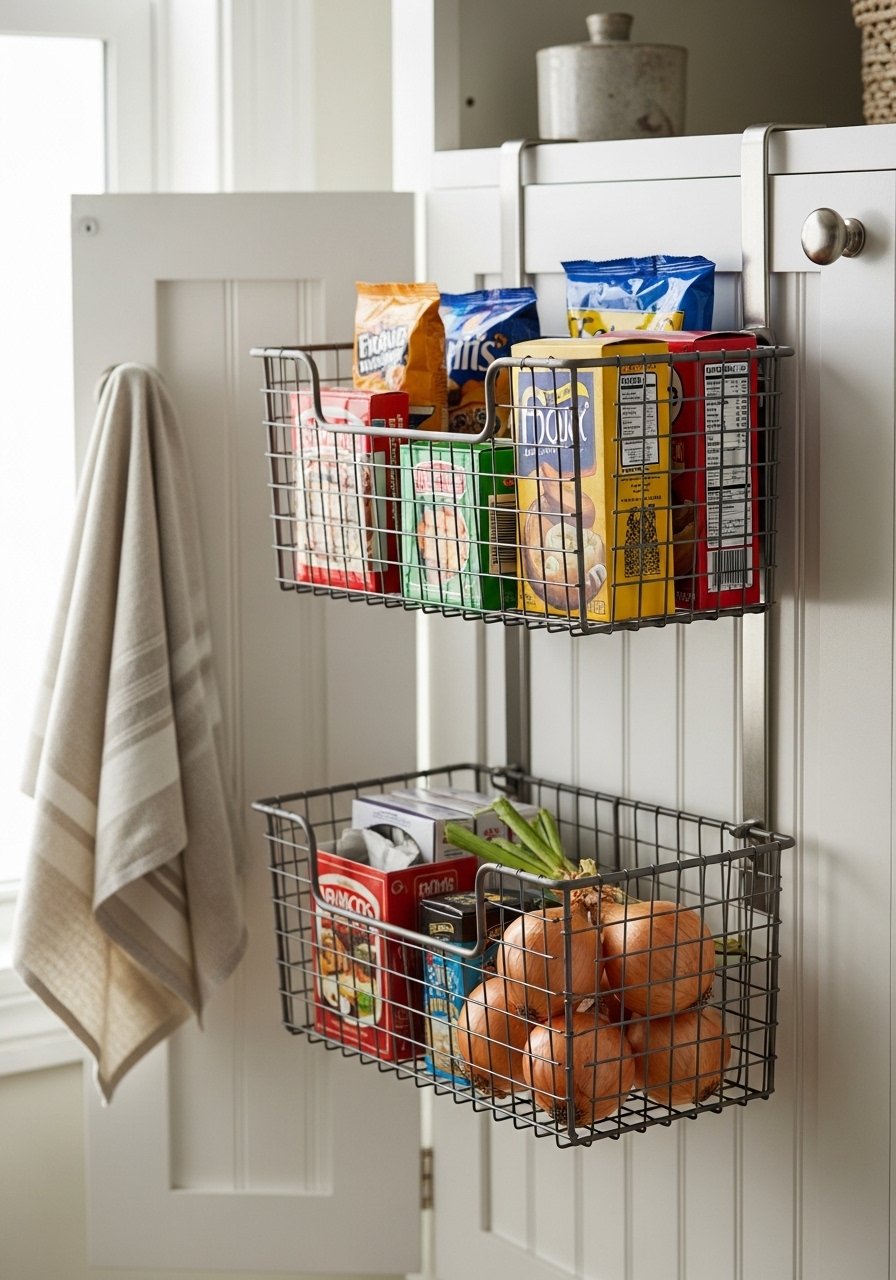
Maximizing the inside of the pantry door is high-impact. These wire baskets add depth without taking shelf space. The visual is airy metal baskets against a crisp white door.
I screw baskets in place with a compact drill driver and use anchors for hollow doors.
Materials
- 3 wire baskets, each 10" W x 3.5" D
- 9 1" wood screws or hollow door anchors
- 1 small magnetic strip (optional) 6"
- 1 can spray paint for metal (if painting), 12 oz
- Measuring tape
- Masking tape
- Pencil
Instructions
- Decide basket layout — stagger baskets vertically with 6" spacing.
- Mark pilot holes on the door interior with pencil. Use masking tape to reduce splintering.
- Drill pilot holes with a 1/8" bit. If hollow core, use hollow door anchors sized to screws.
- Fasten baskets with screws; check level as you go.
- Spray-paint baskets outdoors for a custom finish; allow 24 hours to cure to touch.
- Optional: attach magnetic strip for notes or coupon hold.
- Load baskets and adjust spacing if items interfere with cabinet closing.
How to Display or Gift It
- Use baskets for snack packs, loose onions, or foil and cling wrap boxes.
- Tie a small linen bag on a hook for produce storage.
- If gifting, include a pack of reusable storage bags tucked into the top basket.
- Use a slim over-the-door hook set for hanging aprons outside the pantry.
- Pull-Down Rod for Hanging Utensils
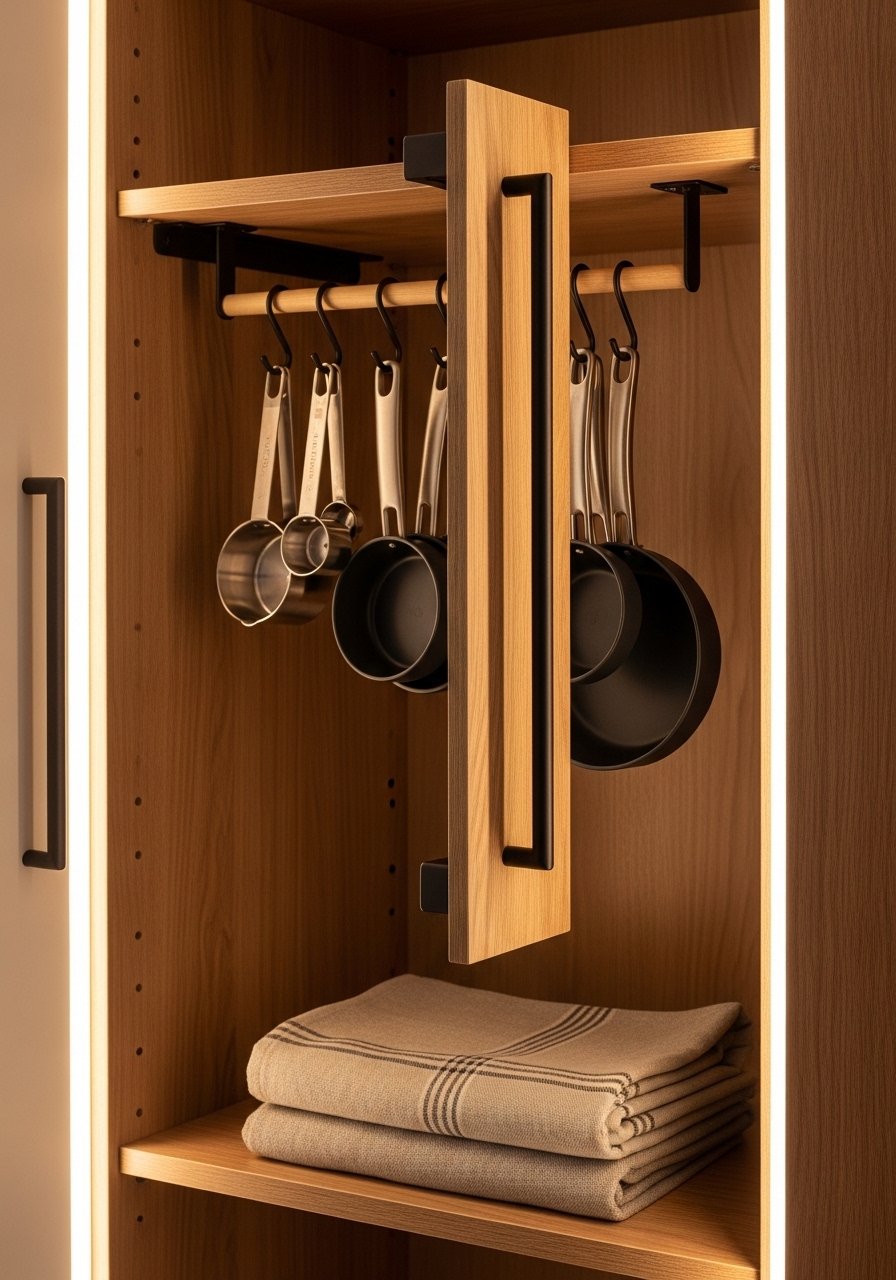
A pull-down rod uses vertical space well for hanging measuring cups, small pans, and tea towels. It’s tactile and keeps items visible and easy to grab.
I install the rod using a compact hardware kit and a tape measure.
Materials
- 1 dowel rod, 3/4" x 18"
- 2 L-shaped rod brackets
- 6 S-hooks 1"
- 2 cabinet catches
- 1 stain or paint sample, 2 oz
- Wood glue, 1 oz
- Drill and 3/16" bit
Instructions
- Cut dowel to width inside cabinet minus 1/4" for clearance.
- Sand and apply one coat of stain; let dry 2 hours. Apply second coat if needed.
- Mark bracket positions at 4" down from top interior for hanging height. Ensure level.
- Drill pilot holes and screw brackets into place.
- Insert dowel, hang S-hooks, and test pull-down motion.
- Install catches to keep dowel from rolling when closed.
- Load utensils and adjust S-hook spacing for balanced load.
How to Display or Gift It
- Hang measuring cups and wooden spoons for a cookbook-ready look.
- Tie a little loop of twine on one S-hook as a decorative touch.
- If gifting, include a set of small wooden utensils inside a linen napkin.
- For storage, remove the dowel and keep it with other spare rods in a long craft organizer.
- Slim Pull-Out Pantry for Baking Sheets (small pantry cabinet idea)
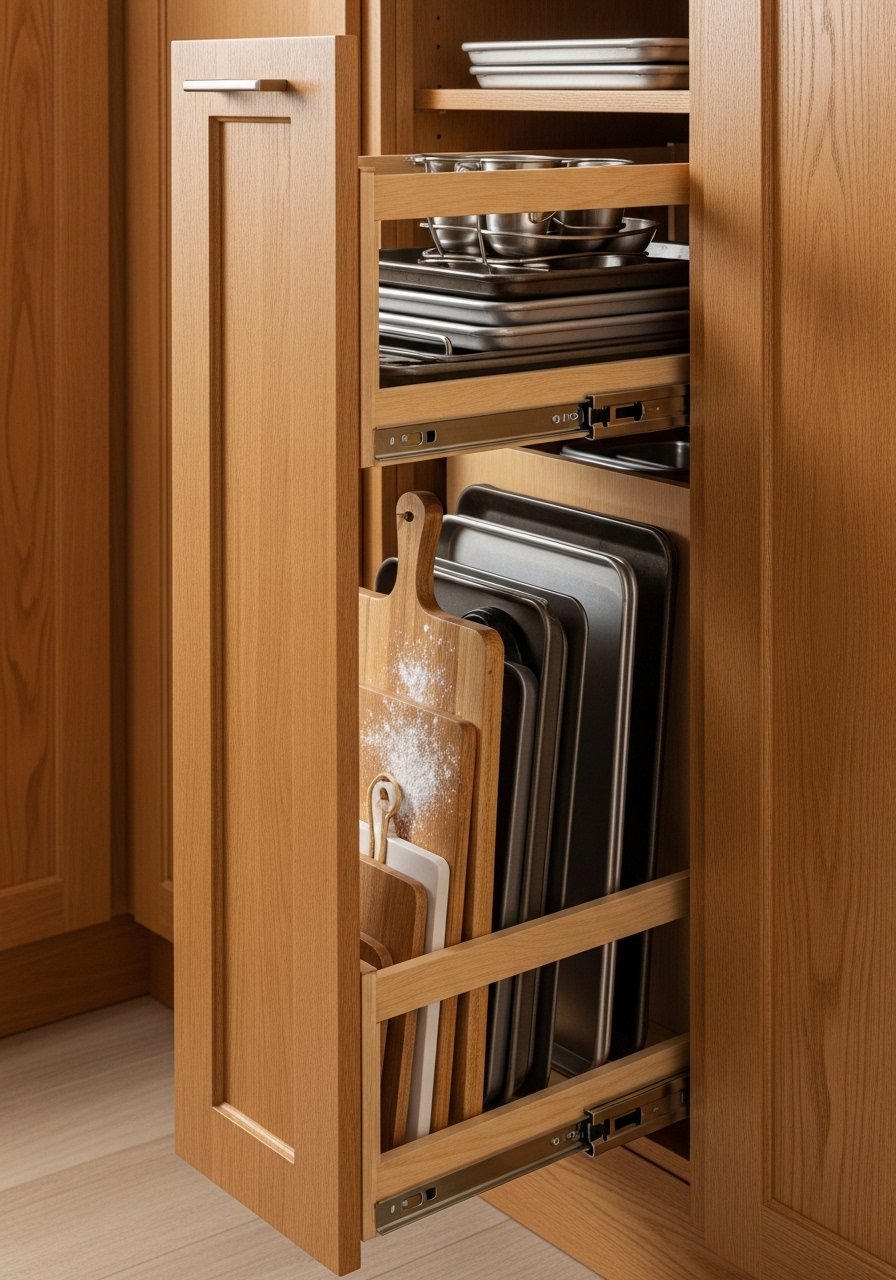
This narrow pull-out keeps muffin tins and sheet pans vertical and easy to slide out. It’s perfect for shallow pantries where horizontal stacking is awkward.
I routed grooves with a straight router bit to keep boards snug.
Materials
- 2 18" full-extension slides
- 1 1/2" plywood panel, 10" x 72" (trimmed to fit)
- 5 vertical dividers, 1/2" x 10" x 7"
- Wood glue
- 1 can clear satin polyurethane, 8 oz
- Sandpaper 120/220
- 1 knob or recessed pull
Instructions
- Measure interior height and width; cut plywood panel to fit with 1/8" clearance each side.
- Cut five dividers 7" tall. Space dividers every 1-1/2"–2" depending on pan thickness.
- Glue dividers to panel with clamps; allow glue to set 30 minutes.
- Sand smooth and apply two thin coats of clear polyurethane, 2 hours drying between coats.
- Attach slides to panel sides and mount mating slides in cabinet, level front-to-back.
- Attach knob or recessed pull, then load pans to test fit.
How to Display or Gift It
- Store pans and cutting boards upright; label the front edge with a small painted notch for visual interest.
- Pair with a slim pan rack inside the pantry for extra organization.
- For gifting, include a set of silicone baking mats tucked into the top slot.
- Keep tools for adjustments in a slim toolbox near the pantry.
- Lazy Susan Makeup for Jars
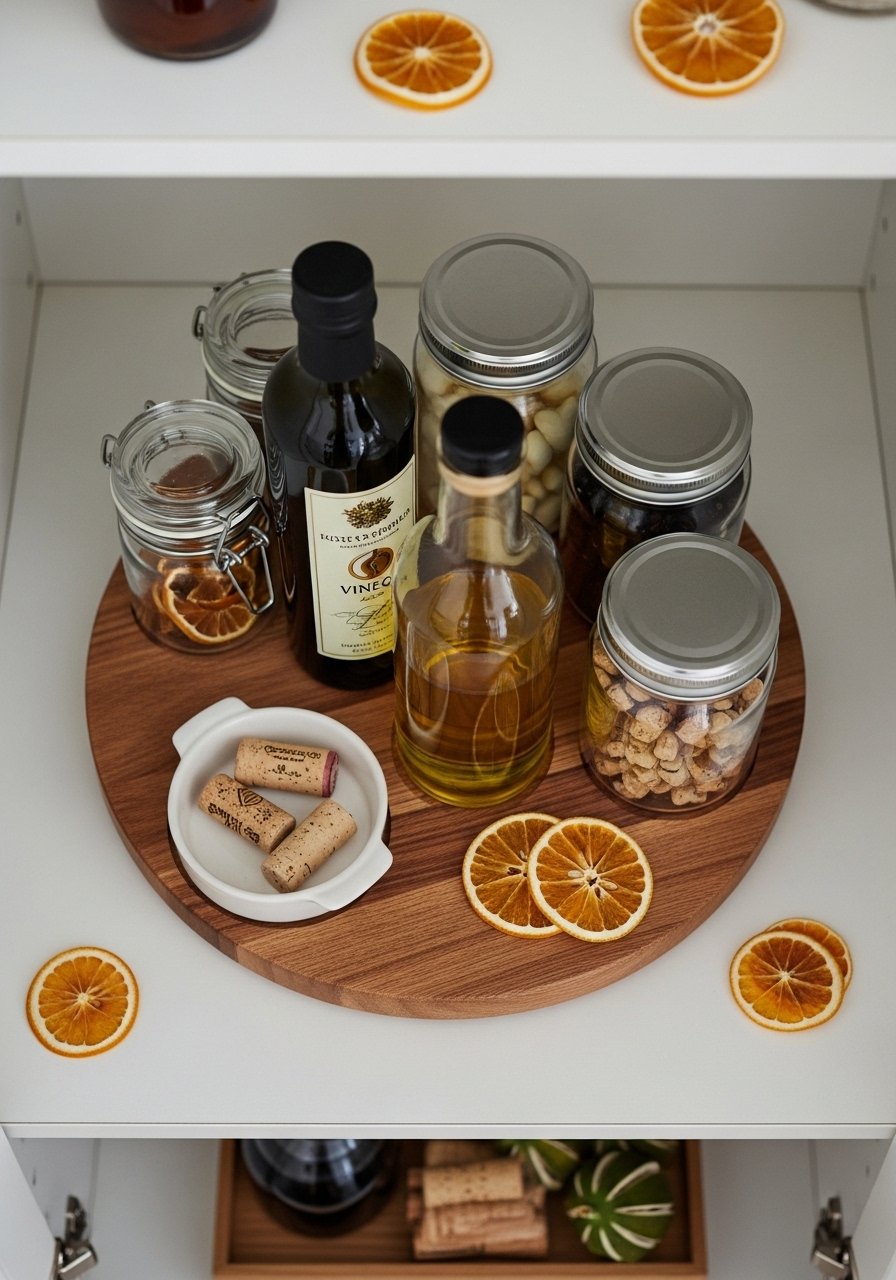
A Lazy Susan turns corner shelves into reachable zones. Use a low-profile turntable to consolidate oils and condiments in one spin.
I choose a low-profile birch Lazy Susan for smooth rotation.
Materials
- 1 12" wood Lazy Susan turntable
- 6–8 glass bottles and jars
- 1 jar pour spout set (for oil)
- 1 small cork coaster
- Non-slip pads (pack of 6)
- Wood polish, 2 oz
Instructions
- Place Lazy Susan on shelf center. Add non-slip pads under corners if shelf is slick.
- Arrange tallest items near the outside, low bottles inside for balance.
- Fit pour spouts to oil bottles for neat dispensing.
- Rotate to test clearance with cabinet door open and shut.
- Wipe with wood polish monthly to keep finish rich.
- Replace non-slip pads annually or when worn.
How to Display or Gift It
- Use the Lazy Susan near your small pantry cabinet entrance for cooking oils and vinegars.
- Add small glass labels to each bottle for a market-style look.
- Gift a matching set: non-slip pads plus a small bottle of wood polish in a kraft box.
- Store extra pour spouts in a small divided craft box.
- Open Bins with Chalkboard Faces

Open bins with chalkboard-painted fronts let you change labels quickly. They’re tactile and add farmhouse charm to small pantry cabinet interiors.
I paint the faces with a small chalkboard paint sample and write with chalk markers.
Materials
- 3 1×8 pine boards, each 12" x 10"
- 3 1/4" plywood bottoms 12" x 9"
- 12 1" wood screws
- 1 can chalkboard paint, 8 oz
- Chalk markers, pack of 4
- Wood glue
- Sandpaper 120 grit
- Ruler and pencil
Instructions
- Cut pine boards to form front and two sides; assemble into a box using wood glue and 1" screws.
- Fit plywood bottom and screw into place.
- Sand smooth and clean dust with a tack cloth.
- Paint front panel with chalkboard paint in two coats; dry 1 hour between coats. Cure 24 hours before writing.
- Mount bins stacked or side-by-side within the pantry.
- Label with chalk markers and erase as needed.
How to Display or Gift It
- Use for frequently used baking supplies for quick identification.
- Add linen liners for a soft interior and easy washing.
- Wrap as a hostess gift with a small bundle of chalk markers tucked inside.
- Stack bins when not in use for compact storage.
- Pull-Out Pet Food Station
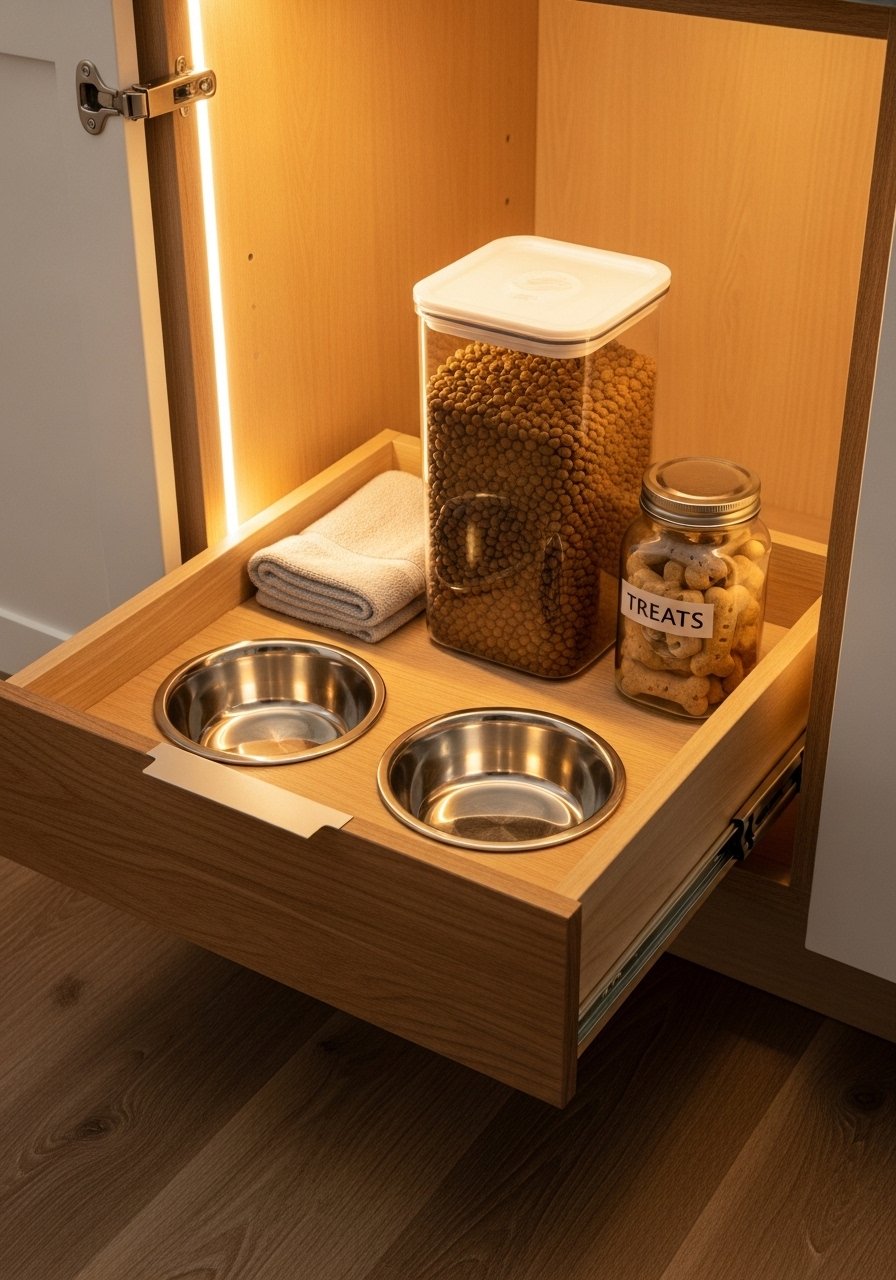
Give your furry friend a dedicated pull-out for bowls and food storage. The recessed bowls prevent sloshing, and the drawer keeps feeding out of sight.
I cut bowl recesses with a hole saw set for even circles.
Materials
- 1 18" wide drawer box, 18" x 20" x 4"
- 2 stainless steel pet bowls, 6" diameter
- 1 10 lb airtight pet food container
- 1 waterproof liner for the bottom, 18" x 20"
- 2 18" full-extension slides
- Wood screws, 8 count
Instructions
- Cut circular recesses in the drawer bottom using a hole saw slightly larger than bowl rim for snug fit.
- Sand edges and seal with a thin coat of polyurethane; dry 2 hours.
- Install slides on drawer box and cabinet, ensuring level placement.
- Place waterproof liner and drop in bowls.
- Store sealed pet food container behind the drawer or on lower shelf.
- Wipe bowls after each meal and pull the drawer out for easy cleaning.
How to Display or Gift It
- Keep the pull-out at a low height for pet access.
- Add a small lint roller in the drawer handle for quick cleanups.
- Gift this setup with a bag of quality treats tucked in the container.
- Store extra liners and bowl replacers in a nearby craft bin.
- Slide-Out Pantry with Built-In LED Strip Lighting (small pantry cabinet idea)
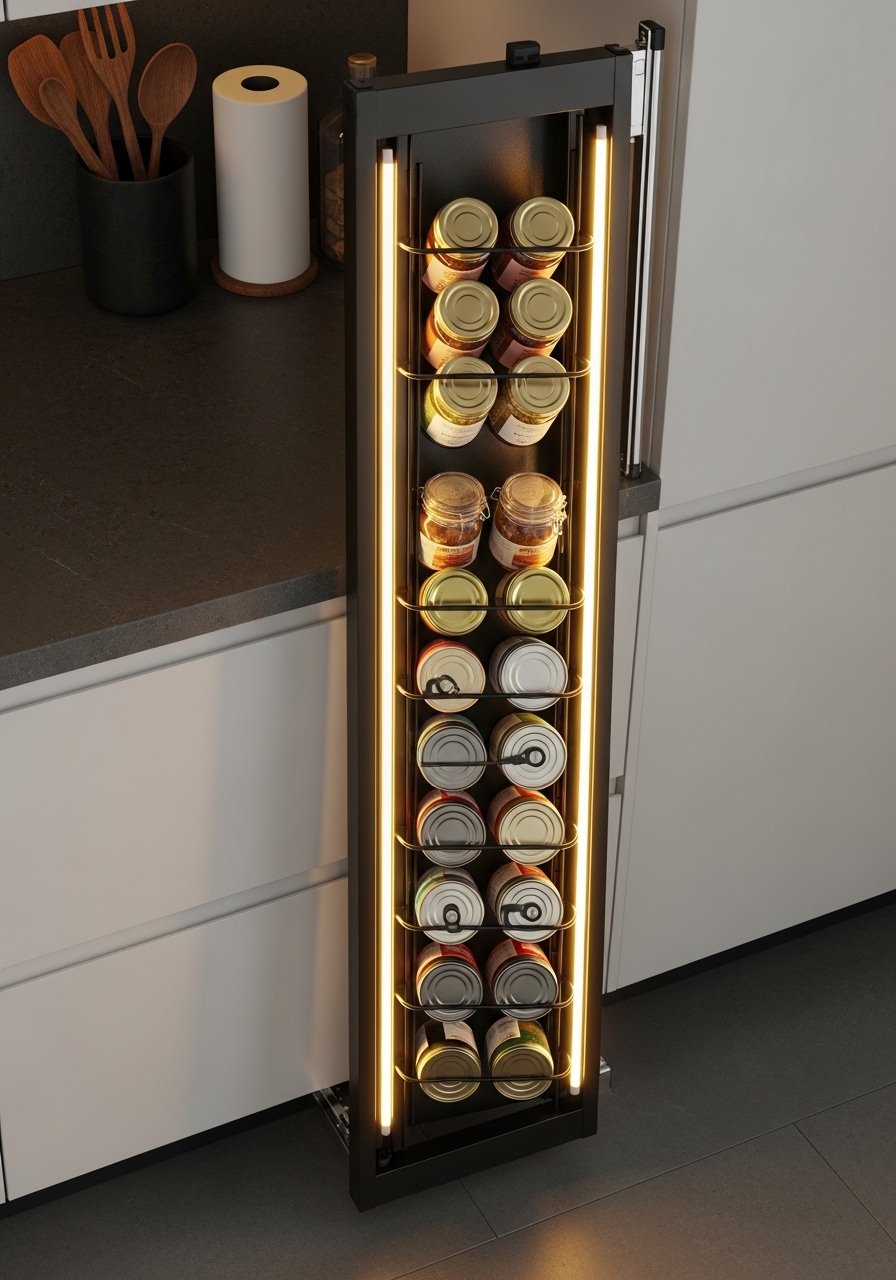
Adding LED strip lighting to a slide-out pantry brings visibility to every item. Warm LEDs create a boutique-store feeling and solve the “I can’t see the back” problem.
I use a low-voltage LED strip kit with adhesive backing.
Materials
- 1 custom slide-out rack, 10" x 24"
- 1 adhesive LED strip kit, 12V with dimmer, 24"
- 1 small power drill
- 1 set of 12" metal slides
- Zip ties, pack of 50
- Screwdriver set
Instructions
- Build or buy a slide-out rack sized to fit with 1/8" clearance.
- Clean underside and adhere LED strip along inner top edge, hiding the wire at the back.
- Route power cable out through back of cabinet to nearest outlet; install low-profile cable grommet.
- Attach dimmer and test the lights; allow adhesive to set 24 hours for best hold.
- Mount rack on slides and test full extension while lit.
- Tidy cables with zip ties and check for heat every week in initial use.
How to Display or Gift It
- Use warm LED setting for a cozy pantry glow or cool white for crisp shopping.
- Tuck a small rechargeable battery pack inside for temporary cordless use.
- Gift the strip kit with a small pack of adhesive cable organizers.
- Keep extra LED strips in a craft storage tray in case you expand.
- Mason Jar Lid Organizer for Lids and Small Items
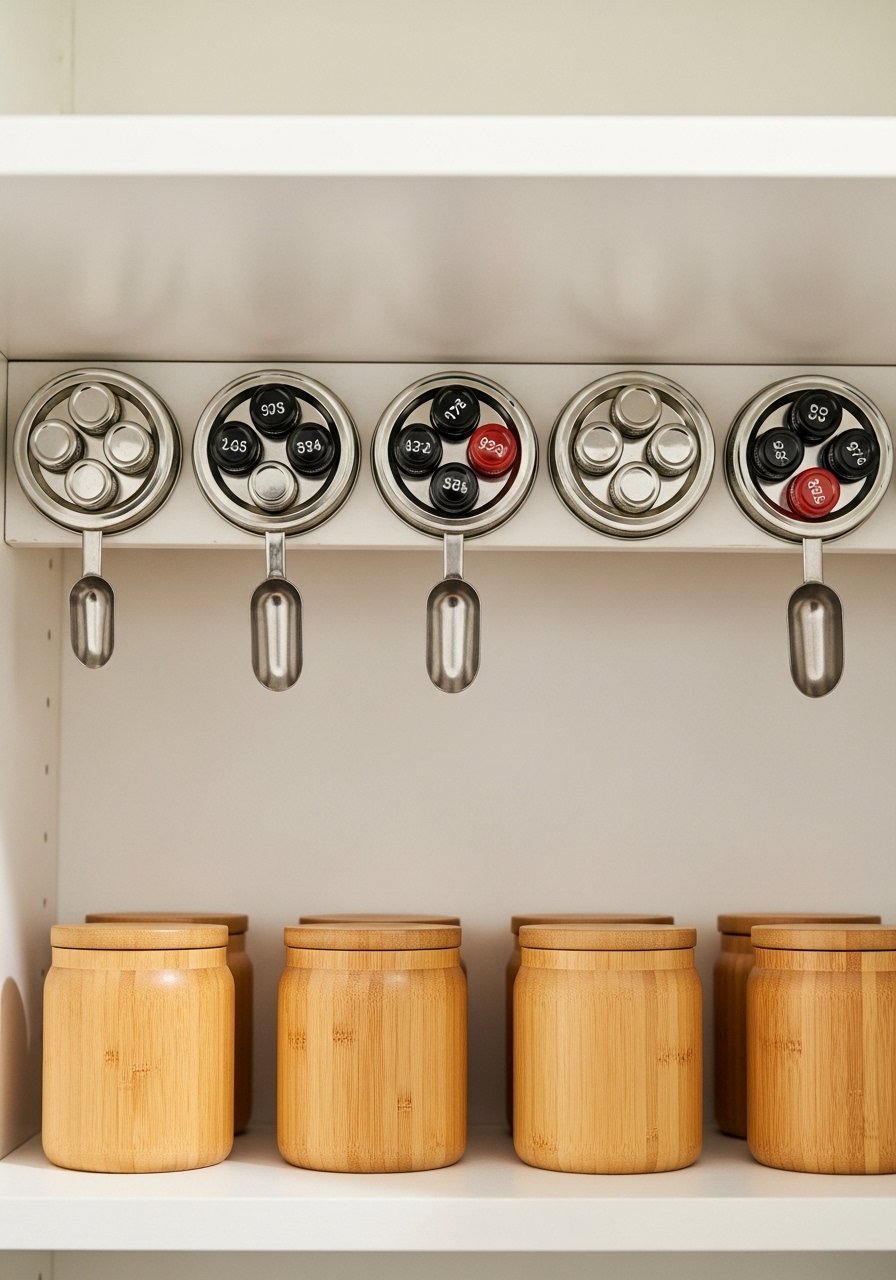
This lid organizer keeps mason jar lids and small scoops visible and easy to grab. Mount lids to the underside of an upper shelf so the jars below screw on without rummaging.
I mount lids with a small screws kit.
Materials
- 10–12 mason jar lids (ring only)
- 10–12 3/8" wood screws
- 1 strip of 1/4" plywood, 2" x shelf length
- 1 drill with 3/32" pilot bit
- Small level
- Pencil
Instructions
- Measure the underside of a shelf and mark lid spacing every 1.5".
- Pre-drill tiny pilot holes for screws in each lid center.
- Screw lids into the shelf underside so rings sit flush but still accept lids screwed from below.
- Test by screwing jars up from below; adjust tightness for easy removal.
- Store lids or small scoops inside the rings for quick access.
- Inspect screws yearly and tighten if any loosen.
How to Display or Gift It
- Use above the area where you store preserved jars or bulk goods.
- Include a small metal scoop on an S-hook for a finished look.
- Gift this as part of a canning kit with lids and jars bundled in kraft paper.
- Store extra rings in a small divided craft organizer.
- Chalkboard Pantry Door with Magnetic Clip Rail
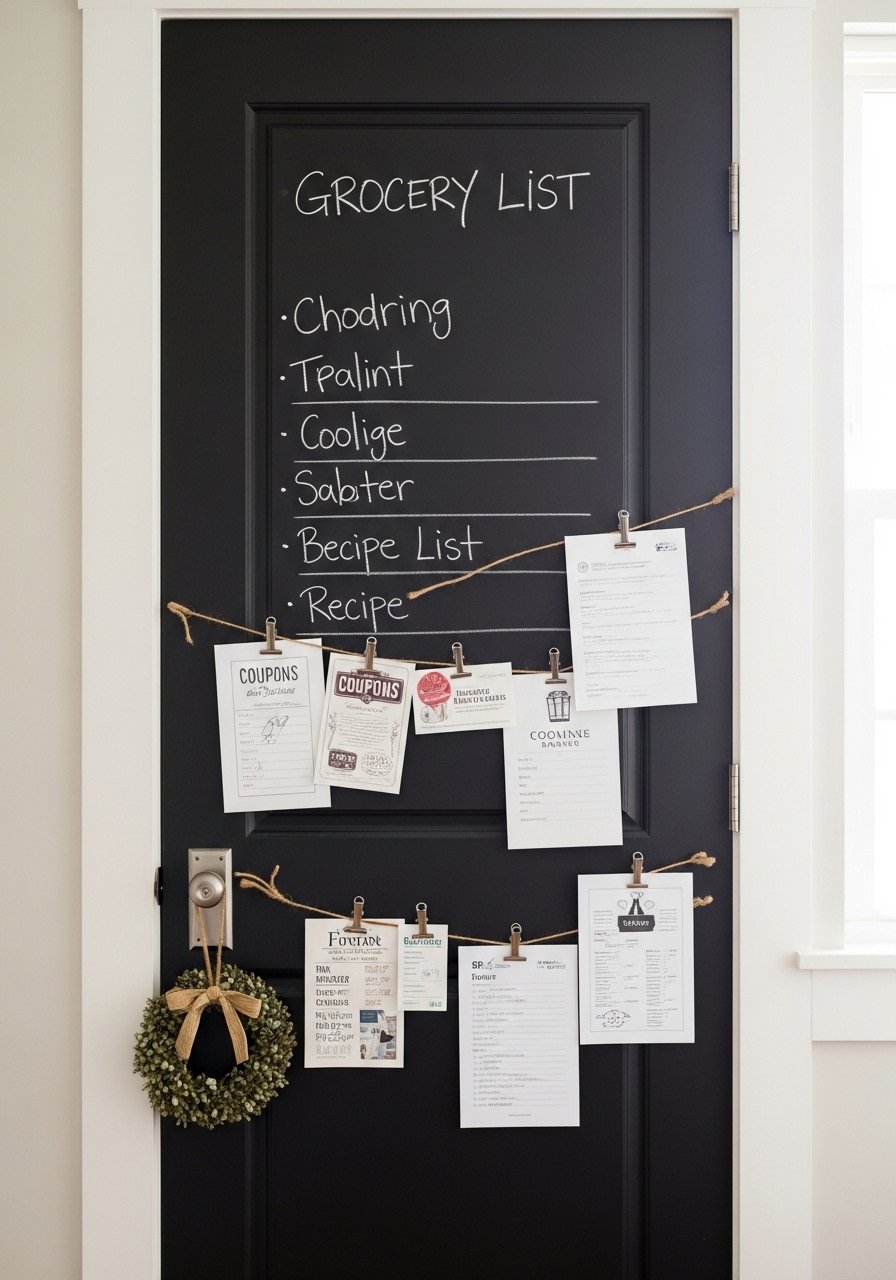
A chalkboard pantry door keeps your grocery list and menu front-and-center. Adding a magnetic clip rail makes receipts and coupons tidy.
I use a chalkboard paint kit that includes primer.
Materials
- 1 can chalkboard paint, 16 oz
- 1 can primer (if door is dark), 8 oz
- 1 magnetic strip rail, 12"
- 1 pack magnetic clips, 6 count
- Painter’s tape
- Foam roller (4")
- Sandpaper 220 grit
Instructions
- Remove door hardware and sand surface lightly.
- Apply primer if needed; let dry 1 hour. Sand and remove dust.
- Tape edges and roll two thin coats of chalkboard paint; 1 hour between coats. Cure 72 hours before heavy use.
- Mount magnetic clip rail at comfortable height using screws.
- Reattach hardware and hang a small wreath or towel loop.
- Use chalk markers or chalk for lists; erase gently with a damp cloth.
How to Display or Gift It
- Keep a small chalkboard eraser in a nearby drawer for quick updates.
- Gift a set of colorful magnetic clips and chalk pens for new homeowners.
- Pair with a small wall-mounted pen holder nearby for convenience.
- For storage, keep an extra jar of chalk markers in a craft organizer.
- Cottagecore Wicker Basket Pull-Outs
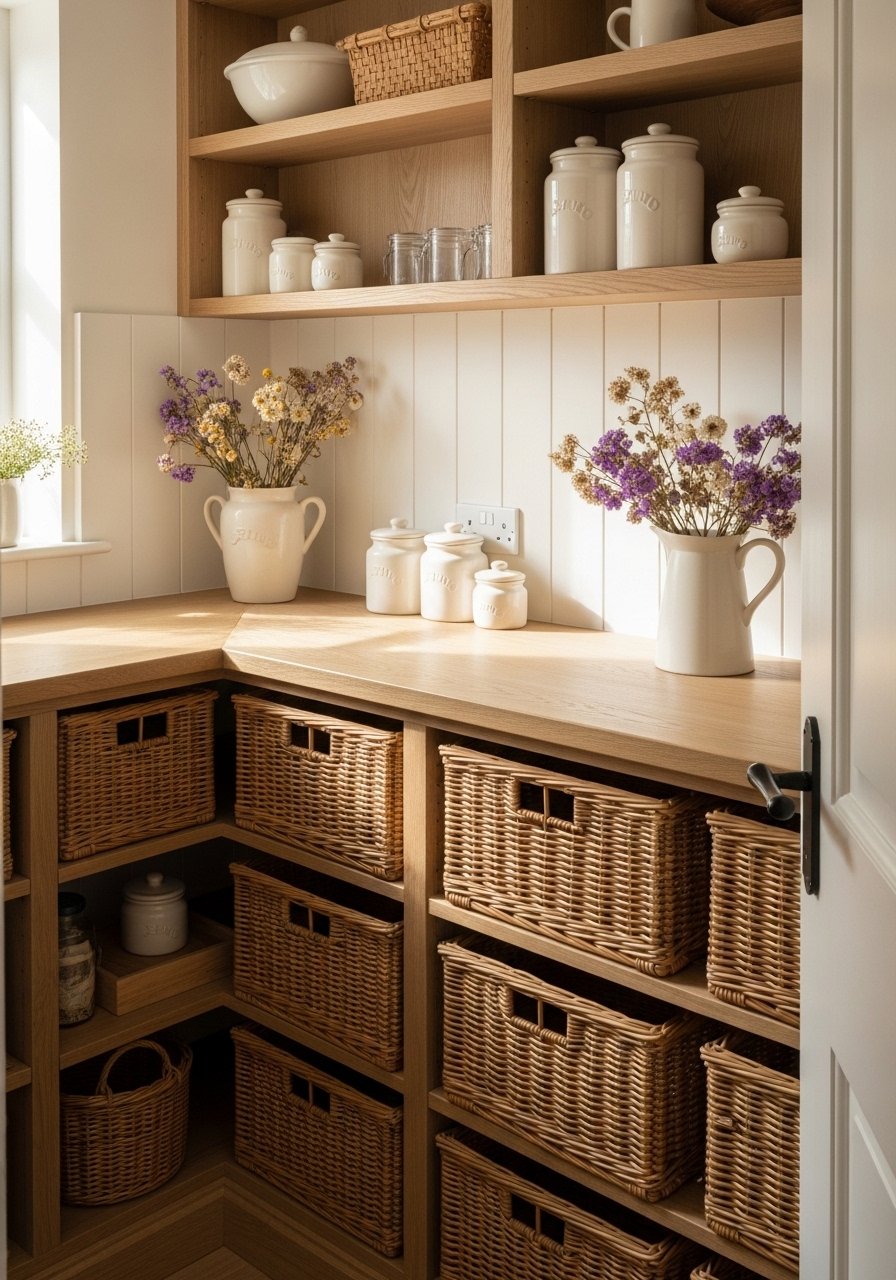
Wicker baskets add softness and texture to a small pantry cabinet. They slide out and conceal snack packets while offering rustic charm.
I line baskets with cotton muslin pre-washed and secured with a glue dot. Use a set of wicker basket liners.
Materials
- 3 wicker baskets, measured to cabinet interior
- 3 cotton muslin liners, pre-washed 12" x basket depth
- 2 small slide rails per basket if needed
- 1 glue dot pack
- Fabric scissors
- Measuring tape
Instructions
- Measure baskets for width and depth; add 1/8" clearance for easy removal.
- Hem muslin liners or use no-sew glue dots to secure liner edges inside basket rim.
- If sliding, screw rails to basket underside and cabinet base per rail instructions.
- Test sliding action and adjust for smoothness.
- Load baskets with snacks, linens, or pantry wraps.
- Wash liners every month or as needed.
How to Display or Gift It
- Place wicker pull-outs on lower shelves for a cozy look that masks clutter.
- Add dried flowers tied to basket handles for seasonal swaps.
- Gift a set of lined baskets filled with pantry staples in a beautiful presentation.
- Store unused liners flat in a fabric storage box inside the pantry.
- Narrow Vertical Wine or Bottle Rack

A narrow vertical rack stores bottles horizontally and keeps them secure in a tight pantry cabinet. It’s minimalist and saves shelf depth.
I cut bottle slots with a jigsaw and a metal guide for clean curves.
Materials
- 1 3/4" plywood panel, 5" x cabinet height
- 4 bottle slot cutouts, spaced 3.5" apart
- Wood glue
- Sandpaper 120/220
- Clear varnish, 4 oz
- Small screws, 6 count
Instructions
- Mark bottle slot locations and trace a 2-1/2" circle arc for each bottle.
- Cut slots carefully with a jigsaw; sand edges smooth.
- Stain or varnish with two thin coats; dry 2 hours between coats.
- Mount panel to the side wall of the pantry with screws.
- Slide bottles into slots horizontally, corks facing the back.
- Check for wobble monthly and tighten as needed.
How to Display or Gift It
- Store a small collection of olive oil, vinegars, or wine near the cooking zone.
- Gift with a bottle opener and a small tasting card tucked nearby.
- Store extra small screws and a bottle stopper set in a craft drawer.
- Pegboard Organizer for Utensils and Tools
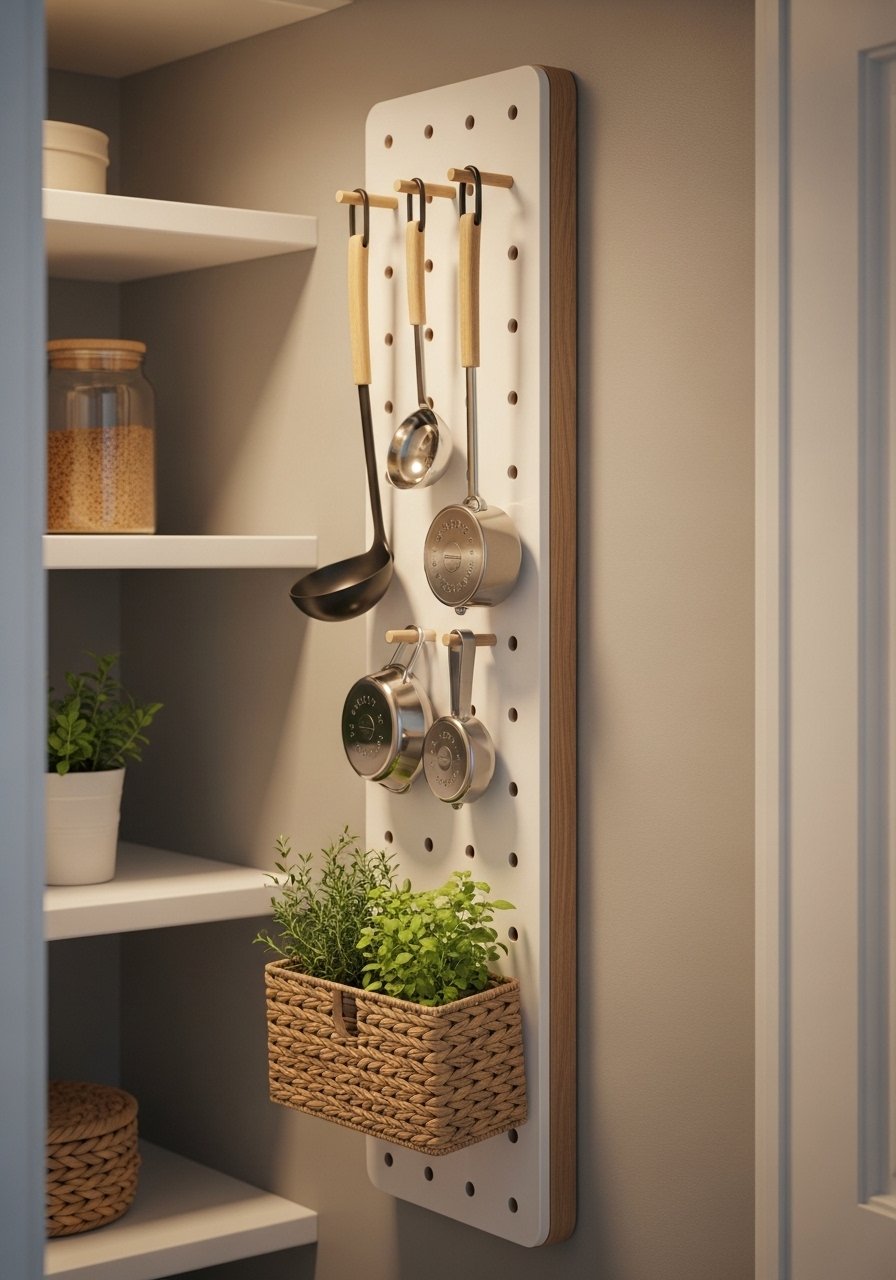
Pegboard brings flexible storage to small pantry cabinet doors or sides. Move hooks as your storage needs change.
I prefer a white pegboard kit with assorted hooks.
Materials
- 1 pegboard panel, 12" x 24"
- 10 assorted pegboard hooks
- 4 small baskets for herbs or packets
- Screws and anchors
- Paint (optional) 2 oz
- Level and pencil
Instructions
- Test-fit pegboard in chosen spot; mark anchor points.
- Drill pilot holes and install anchors for stability.
- Screw pegboard into place, keeping level.
- Arrange hooks and baskets to hold utensils, measuring cups, and small items.
- Rearrange as needs change; pegboard makes swapping fast.
- Wipe baskets and hooks with a damp cloth monthly.
How to Display or Gift It
- Use for whisks, spatulas, and measuring cups for an easy-access setup.
- Add small plant hooks for air plants to soften the look.
- Gift a pegboard starter kit with assorted hooks and a small bag of pegs.
- Store extra hooks in a labeled envelope inside the pantry.
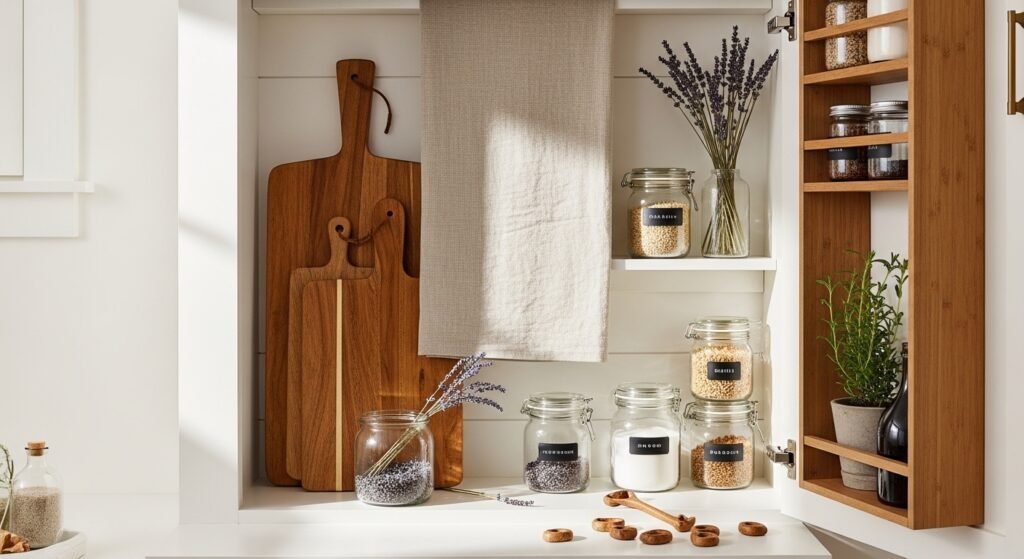
- Pull-Out Spice Rack with Label Spots (small pantry cabinet idea)
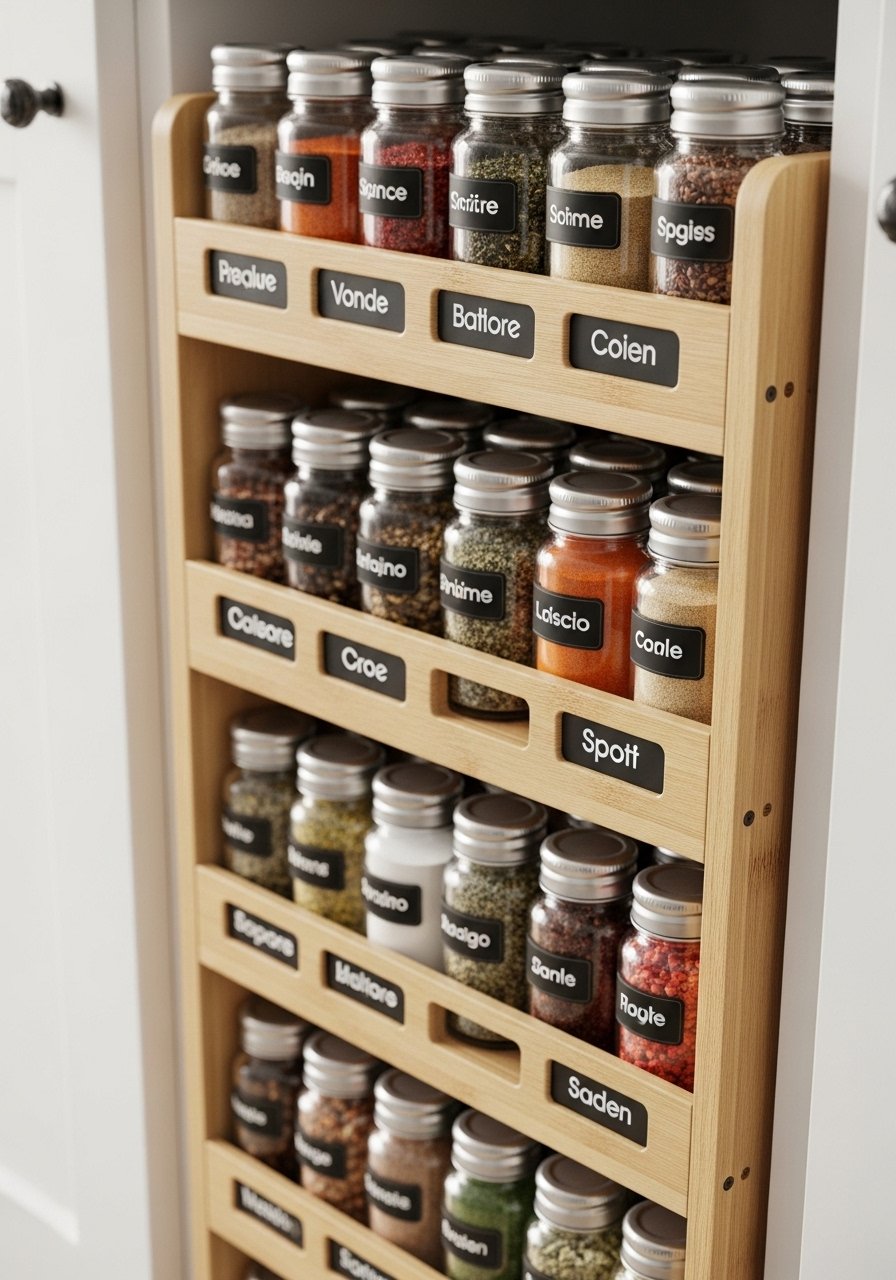
This narrow pull-out spice rack keeps jars upright and clearly labeled. Built-in label slots on the front make quick swaps and batch prep easy.
I use a label maker tape for crisp printed labels when needed.
Materials
- 1 6" x 18" pull-out box
- 12–20 spice jars (2 oz)
- 1 small wooden strip for label slot, 1/2" x front width
- Wood glue
- 2 12" slides
- Chalk marker set
- Sandpaper 220 grit
Instructions
- Build narrow box sized for spice jars with 1/8" clearance each side.
- Attach wooden label slot to front about 1" from top using glue and brad nails.
- Install slides and mount to cabinet interior.
- Paint or stain front, allow 1 hour drying between thin coats.
- Insert jars and write labels on chalk tags or printed tape.
- Slide out to reach spices and replace labels seasonally.
How to Display or Gift It
- Place this pull-out at eye level for quick cooking access.
- Pair with a magnetic spice rack on the door for overflow.
- Gift with a set of matching spice jars and labels for a polished present.
- Store spare labels and tags in a small craft drawer.
- Japandi Floating Shelves with Hidden Lip
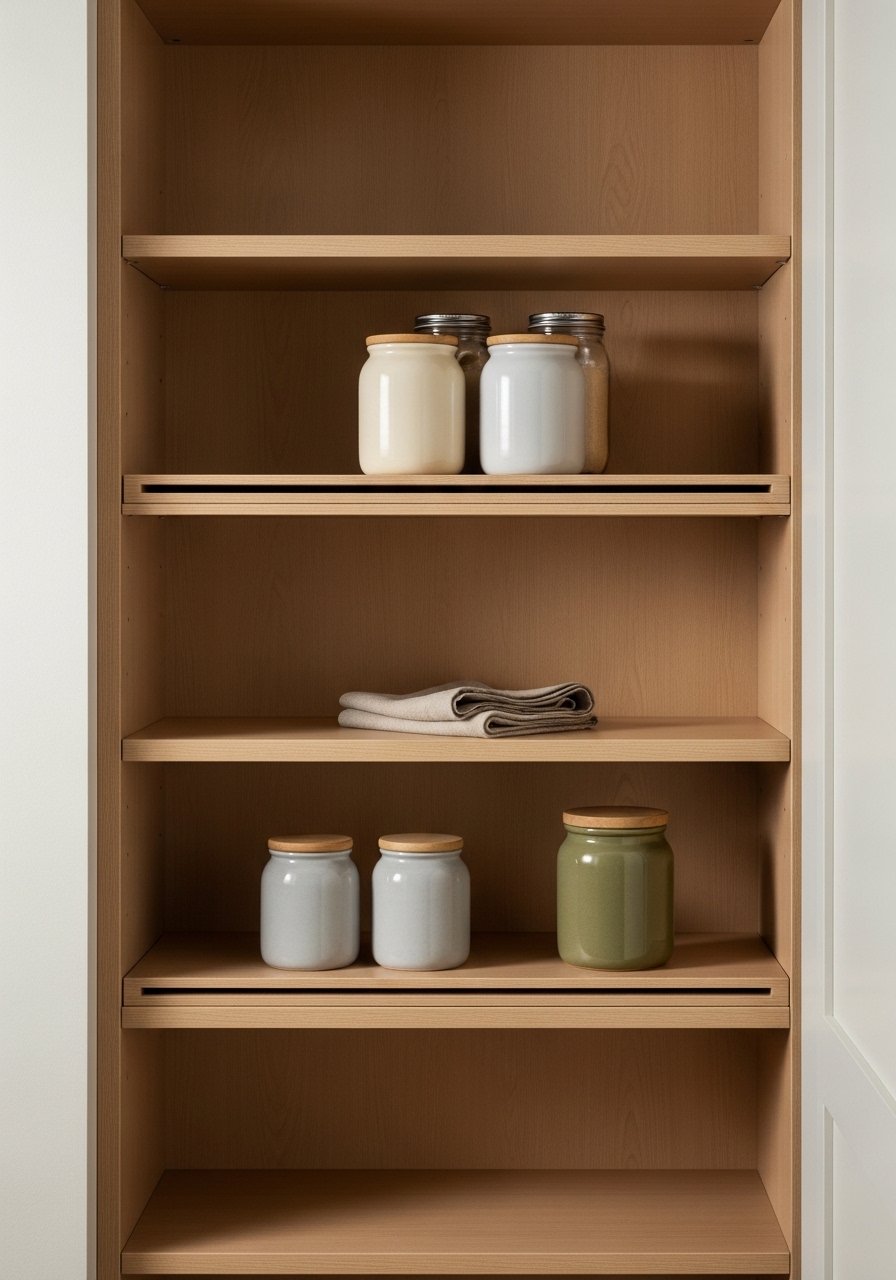
Japandi shelves are made low-profile with a hidden lip to keep jars secure. The aesthetic is calm, neutral, and perfect for minimalist pantries.
I cut the hidden lip with a table saw with a fine-tooth blade for clean edges.
Materials
- 2 floating shelf blanks, 10" x 24" x 3/4"
- 2 hidden lip strips, 3/4" x shelf length
- 1 wood stain (natural), 4 oz
- Concealed shelf hardware kit
- Sanding sponge
- Clear satin wax, 2 oz
Instructions
- Cut floating shelf blanks and lip strips to length. Router the lip into the front edge for a recessed fit.
- Sand and apply one coat of natural stain; dry 2 hours.
- Install concealed hardware per kit instructions to ensure shelves sit flush.
- Slide shelves onto hardware and check level.
- Apply a thin coat of satin wax to protect the finish; dry 1 hour.
- Arrange jars with heavier items near the cabinet interior.
How to Display or Gift It
- Use neutral ceramics and clear jars for a calm, Japandi look.
- Gift a set of matching ceramic canisters for a cohesive housewarming present.
- Store extra hardware in a small labeled bag for future adjustments.
- Tilt-Out Trash or Recycling Bin
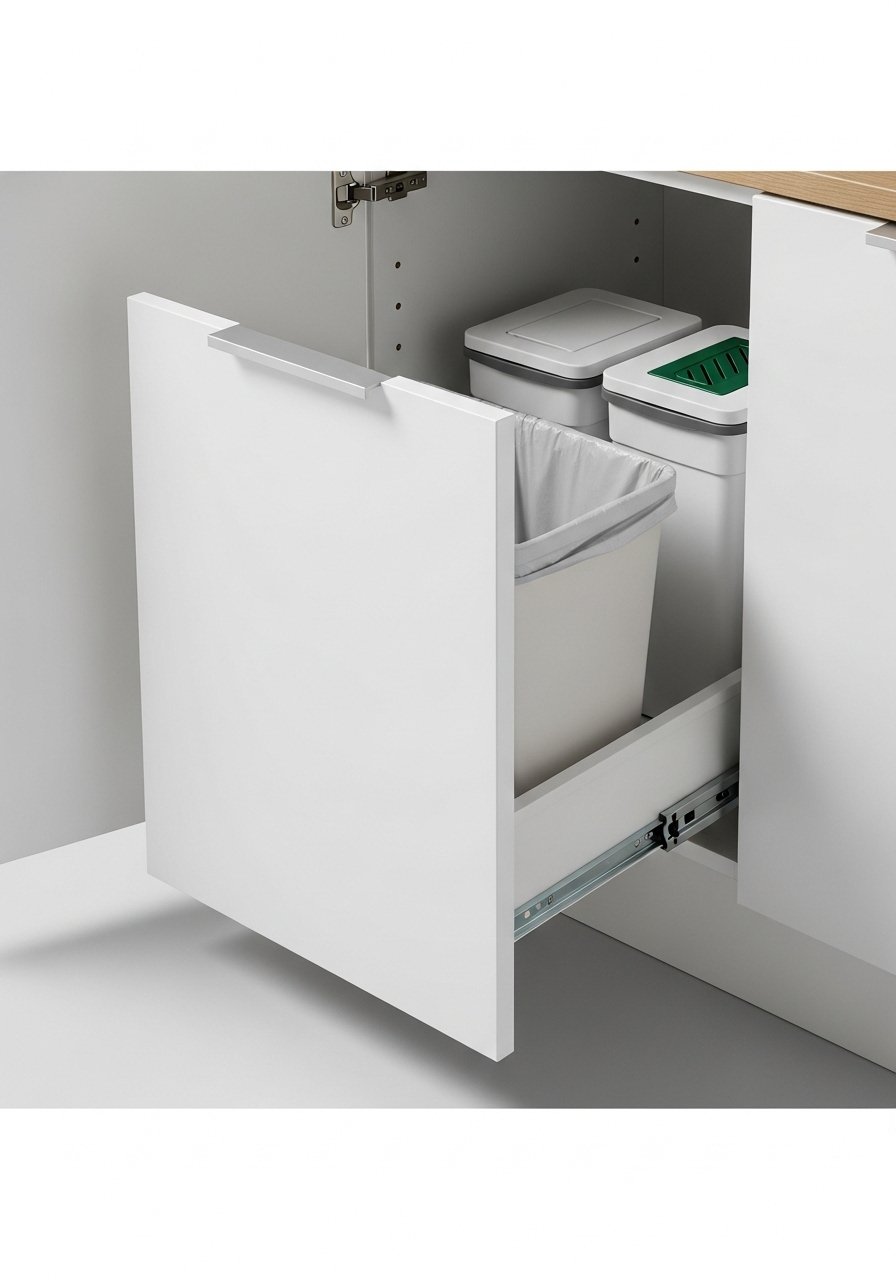
A tilt-out keeps trash hidden and out of the way. This shallow tilt keeps the cabinet door flush and makes removal easy.
I use a tilt-out hinge kit for smooth action.
Materials
- 1 tilt-out front panel, sized to cabinet door
- 1 tilt-out hinge kit
- 1 slim trash bin, 8 qt
- 2 screws (as kit requires)
- Small drill
- Measuring tape
Instructions
- Measure door and bin height; ensure tilt panel can open without hitting toe kick.
- Attach hinge kit to bin and panel per instructions.
- Mount assembly to cabinet face, checking for even tilt and clearance.
- Test action and adjust tension screws so bin tilts smoothly without slamming.
- Add a small compost bucket inside the cabinet next to the bin.
- Empty and clean bins weekly to control odors.
How to Display or Gift It
- Use for recycling, trash, or compost depending on household needs.
- Gift the tilt-out assembly with a set of biodegradable bin liners tucked in.
- Store spare liners in a nearby drawer or craft organizer.
- Pegged Drawer Dividers for Cutlery and Wraps
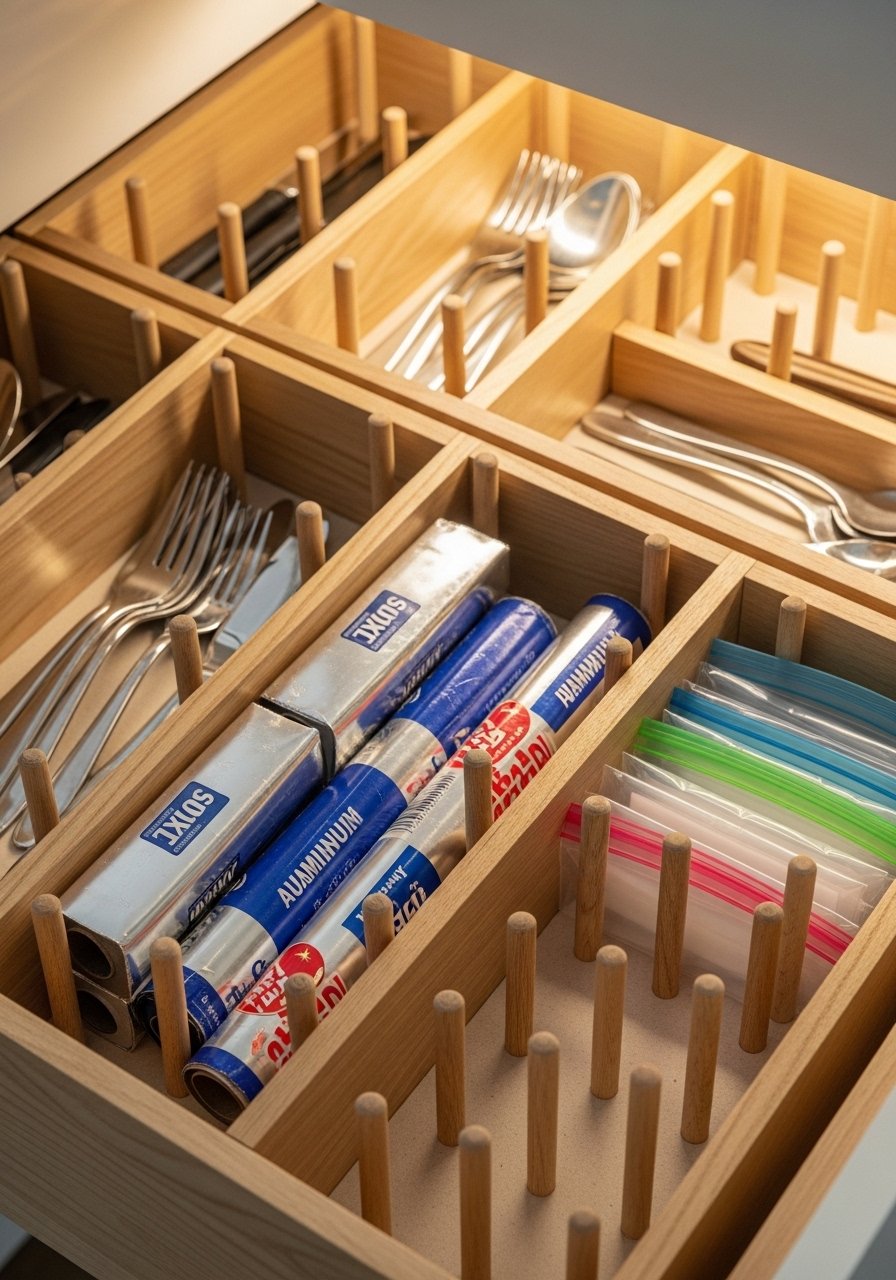
Pegged dividers make drawers adaptable. Move pegs to create larger or smaller slots for utensils, wraps, and food storage materials.
I drill holes precisely using a drill guide jig for even spacing.
Materials
- 1 drawer bottom panel
- 6 divider panels, 1/8" plywood cut to drawer height
- 16 wooden pegs, 1/4" x 1"
- Wood glue
- Drill with 1/4" bit
- Sandpaper 220
Instructions
- Measure drawer interior and plan peg grid spacing at 1" increments.
- Drill a grid of 1/4" holes into drawer bottom for pegs, keeping edges 3/8" from walls.
- Insert pegs where dividers will sit; slide divider panels into pegs.
- Adjust to fit cutlery, rolls, and bags. Add more pegs for smaller compartments.
- Sand top edges of dividers for a smooth feel.
- Reconfigure anytime by moving pegs and panels.
How to Display or Gift It
- Use one drawer for all wrapping supplies and one for cutlery.
- Gift a pegged divider kit with a variety of pegs and small dividers.
- Store extra pegs and panels in a small craft drawer inside the pantry.
- Cedar Shelf Lining for Dry Goods
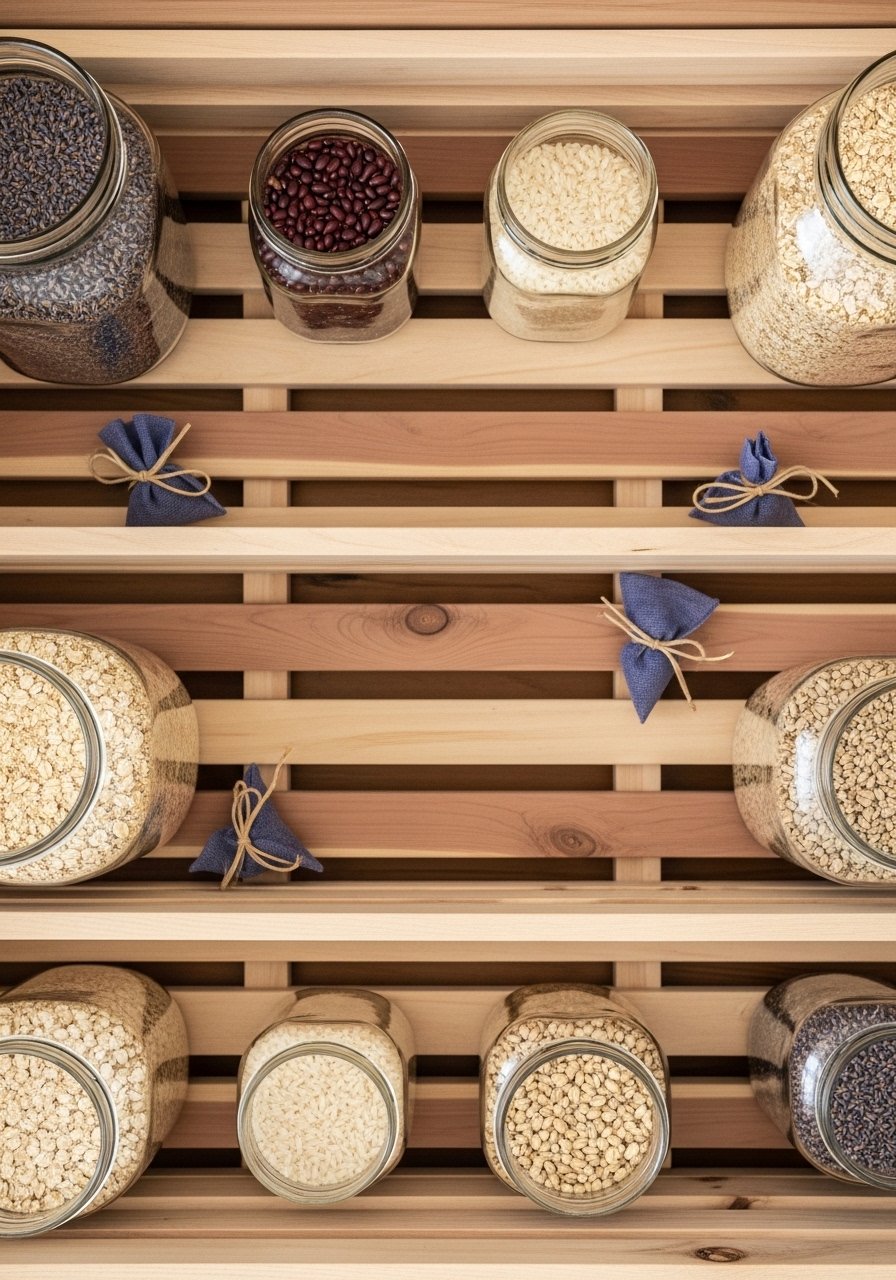
Cedar lining helps ward off pantry moths naturally and smells fresh. Thin cedar slats create a breathable layer under dry goods.
I source cedar shims and seal with a natural wood oil applied lightly.
Materials
- 4–6 cedar shims, 1/8" x 1" x shelf length
- 1 small bottle natural wood oil, 2 oz
- Scissors or snips
- Sandpaper 220 grit
- Measuring tape
Instructions
- Measure shelf depth and cut cedar shims to length.
- Lightly sand the cedar edges and wipe dust.
- Apply one thin coat of natural wood oil and let cure 24 hours.
- Lay shims along shelf interior, spacing slightly for air flow.
- Replace every 12–18 months or if scent fades.
- Keep dry goods in sealed jars to maximize benefit.
How to Display or Gift It
- Use under glass jars to add a subtle cedar aroma when the cabinet opens.
- Gift cedar shims bundled with a sachet of dried lavender.
- Store extra cedar strips in a cool, dry place to retain scent.
- Under-Shelf Slide Baskets
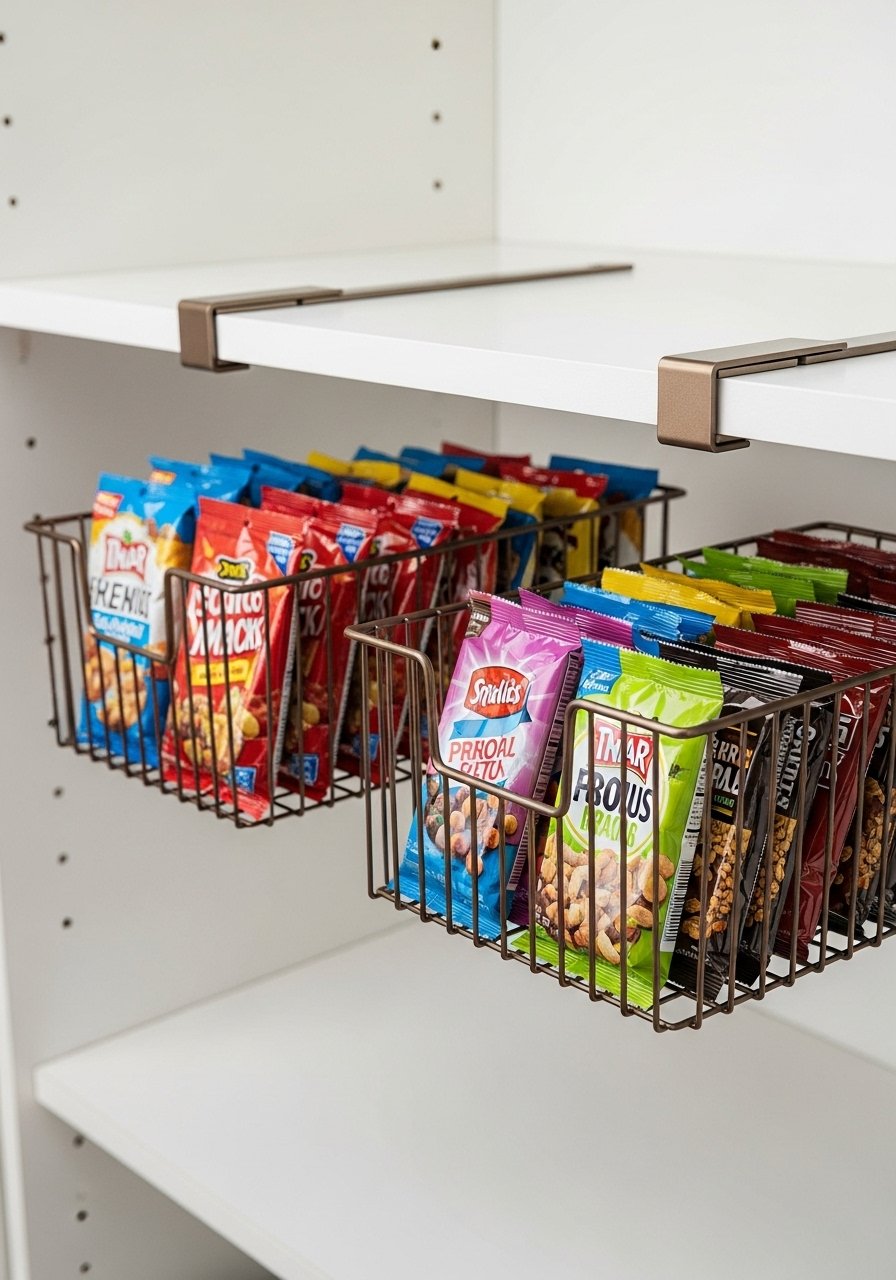
Under-shelf baskets add extra storage without permanent installation. They’re great for snack pouches and single-serve items.
I clip them in place and use a pack of slide baskets sized to my shelves.
Materials
- 2–3 under-shelf slide baskets sized to shelf depth
- Measuring tape
- Small rubber bumpers (optional)
- Ruler and pencil
Instructions
- Slide baskets onto the shelf lip per product directions.
- Ensure baskets don't interfere with cabinet door closing.
- Load with snack pouches and light items only.
- Use rubber bumpers to prevent sliding if shelf is slick.
- Reposition as needed for height changes.
- Clean baskets monthly to avoid crumbs.
How to Display or Gift It
- Use near eye level for snacks kids can reach.
- Gift a basket set with reusable snack bags tucked inside.
- Store extra baskets nested when not used.
- Built-In Cookbook Nook with Tilted Shelf
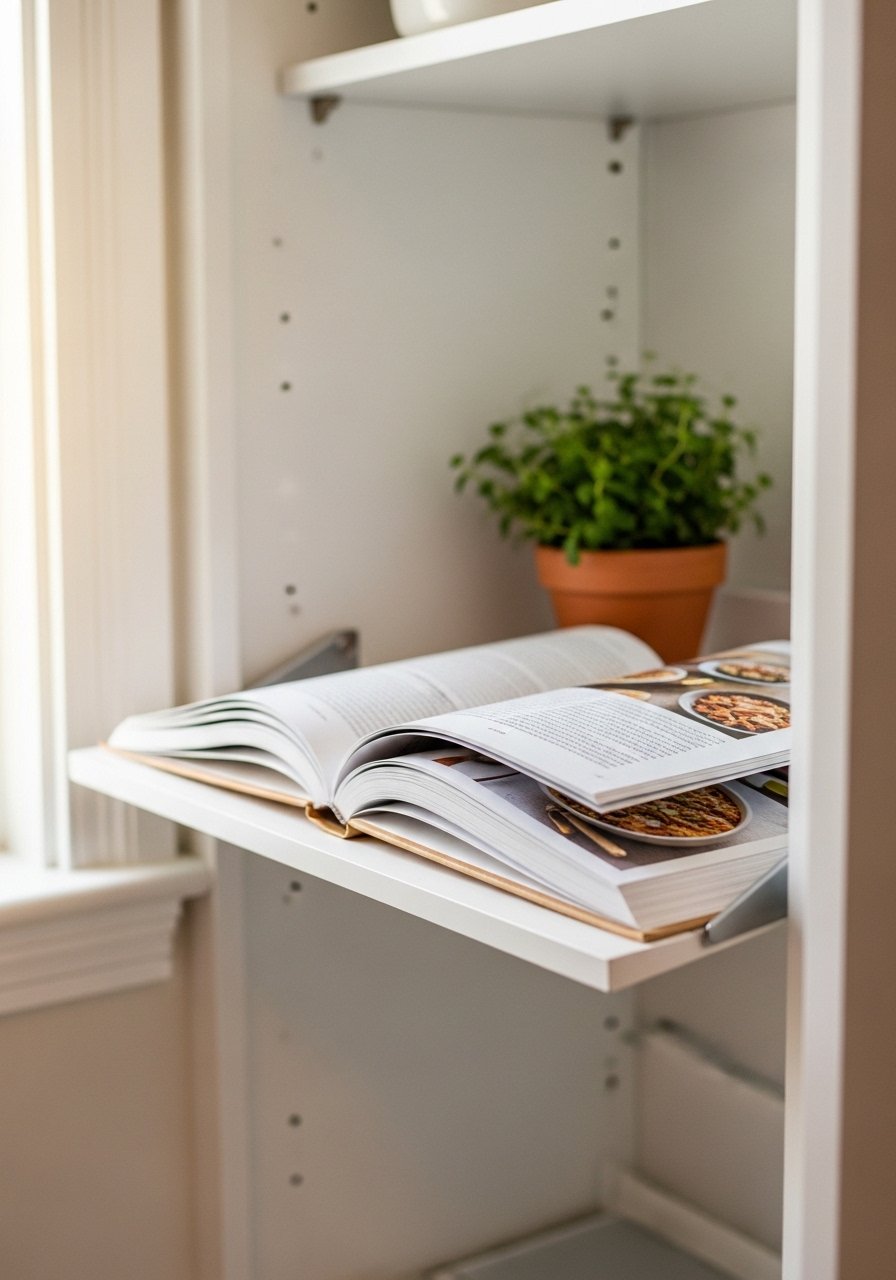
A tilted shelf keeps cookbooks open and readable while you cook. It’s a cozy feature in a compact pantry cabinet and gives the space personality.
I protect the surface with a clear acrylic sheet cut to size.
Materials
- 1 thin plywood shelf, 10" x 12"
- 2 angled cleats, 1/4" x 1/2" x 12"
- 1 small acrylic sheet 10" x 12"
- Wood glue
- Screws, 4 count
- Sandpaper 220
Instructions
- Attach angled cleats to the inside walls of the cabinet at 20° tilt.
- Rest the shelf on the cleats; glue and screw from the underside for security.
- Place acrylic sheet on top of the shelf to resist spills and scratches.
- Arrange cookbooks and test that pages stay open without sliding.
- Clean acrylic with a soft cloth to avoid scratches.
- Swap to a tablet holder for modern recipe reading.
How to Display or Gift It
- Use for family favorites or an open cookbook while cooking.
- Gift with a small stand or a set of recipe cards tucked behind the books.
- Store spare acrylic sheets flat in a craft organizer.
- Slim Rolling Cart Insert for Bulk Bins (small pantry cabinet idea)
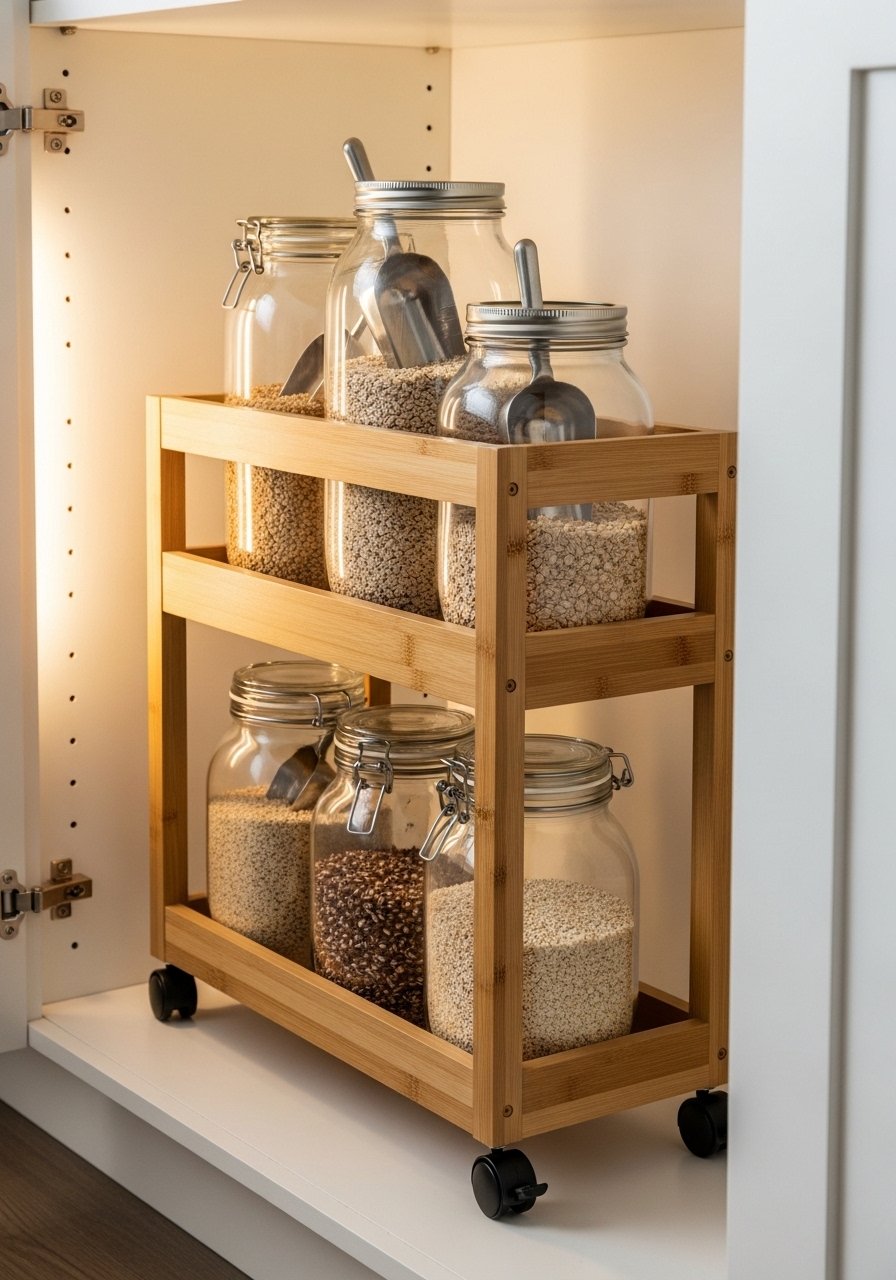
A slim rolling cart fits narrow gaps and brings bulk bins out to you. The casters make deep cabinets accessible without heavy lifting.
I choose small locking casters with a 4-pack caster kit for stability.
Materials
- 1 narrow cart frame, 6" x 24" x 30"
- 4 locking casters (1"–1.5" diameter)
- 3 glass bulk jars with scoops
- 2 thin plywood shelves
- Wood glue and screws
- Drill and screwdriver
Instructions
- Assemble cart frame with two plywood shelves spaced 10" apart.
- Attach locking casters to base with screws; test swivel and lock.
- Sand and finish the cart with a thin coat of water-based varnish; dry 2 hours.
- Load jars and secure with rubber liners to prevent shifting.
- Roll cart into cabinet and lock wheels.
- Check casters for wear every 6 months.
How to Display or Gift It
- Use for flours, grains, and legumes for easy scooping.
- Gift with labeled jars and a small bamboo scoop set.
- Store spare caster parts in a labeled bag inside the cart.
You made it to the end — and now your small pantry cabinet possibilities are overflowing with neat, stylish, and practical ideas. From pull-out spice drawers to cedar-lined shelves and built-in lighting, there’s something here to help you reclaim that little cabinet and make it both beautiful and functional. Pin this list for later and try one project this weekend — which idea will you tackle first?
If you often craft these kinds of upgrades, a reliable hot glue gun with temperature control has saved me time and kept finishes clean across many of these projects. Share your before-and-after photos and tag a friend who loves small pantry cabinet ideas as much as you do — I’d love to see what you build.


