You open the pantry and stare at a jumble of cans, mismatched boxes, and half-used packets. Sound familiar? These small pantry organization ideas are all about making the most of tiny spaces so you can actually find dinner without an archaeological dig.
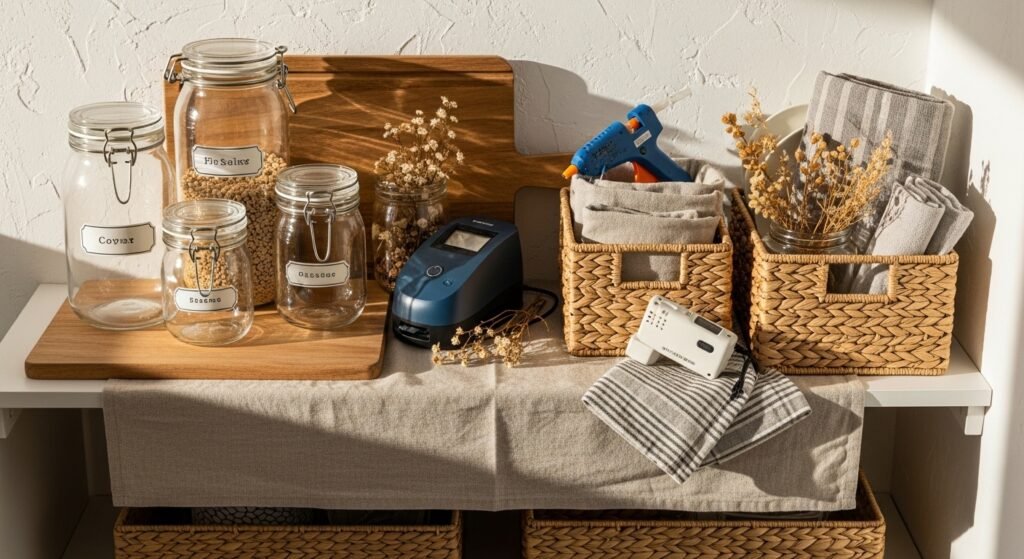
I’ve rounded up 27 doable projects that use common tools like a label maker and a hot glue gun to create tidy, beautiful solutions. You’ll find ideas for clear storage, vertical dividers, pull-out drawers, spice zones, and easy DIY shelf risers you can make in an afternoon. Every project includes exact materials, realistic drying or set times, and troubleshooting tips so you don’t waste supplies.
Grab your label maker for crisp pantry tags and a hot glue gun for quick fixes. Let’s turn that cluttered chaos into a functional, pretty pantry you enjoy opening.
- Clear Jar Zone for Dry Goods
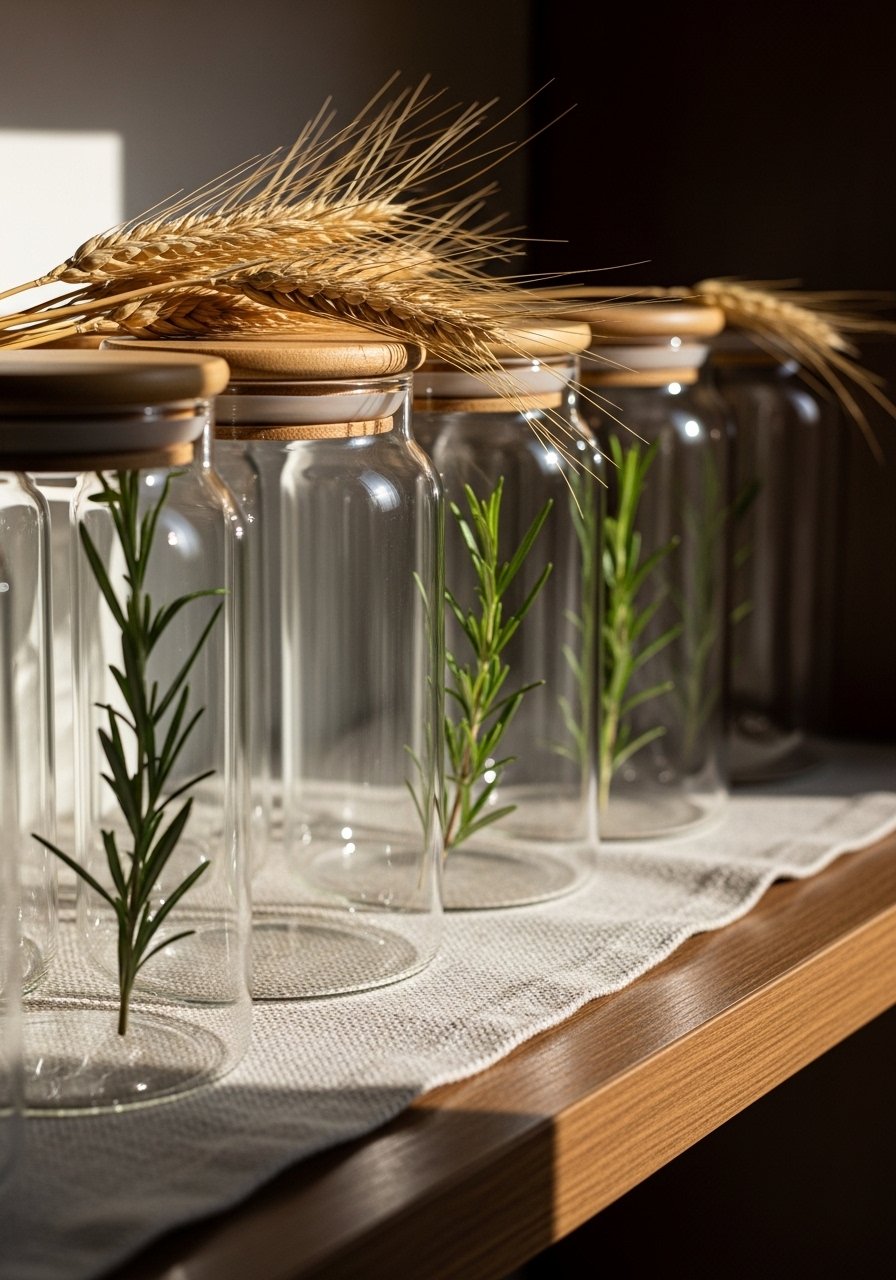
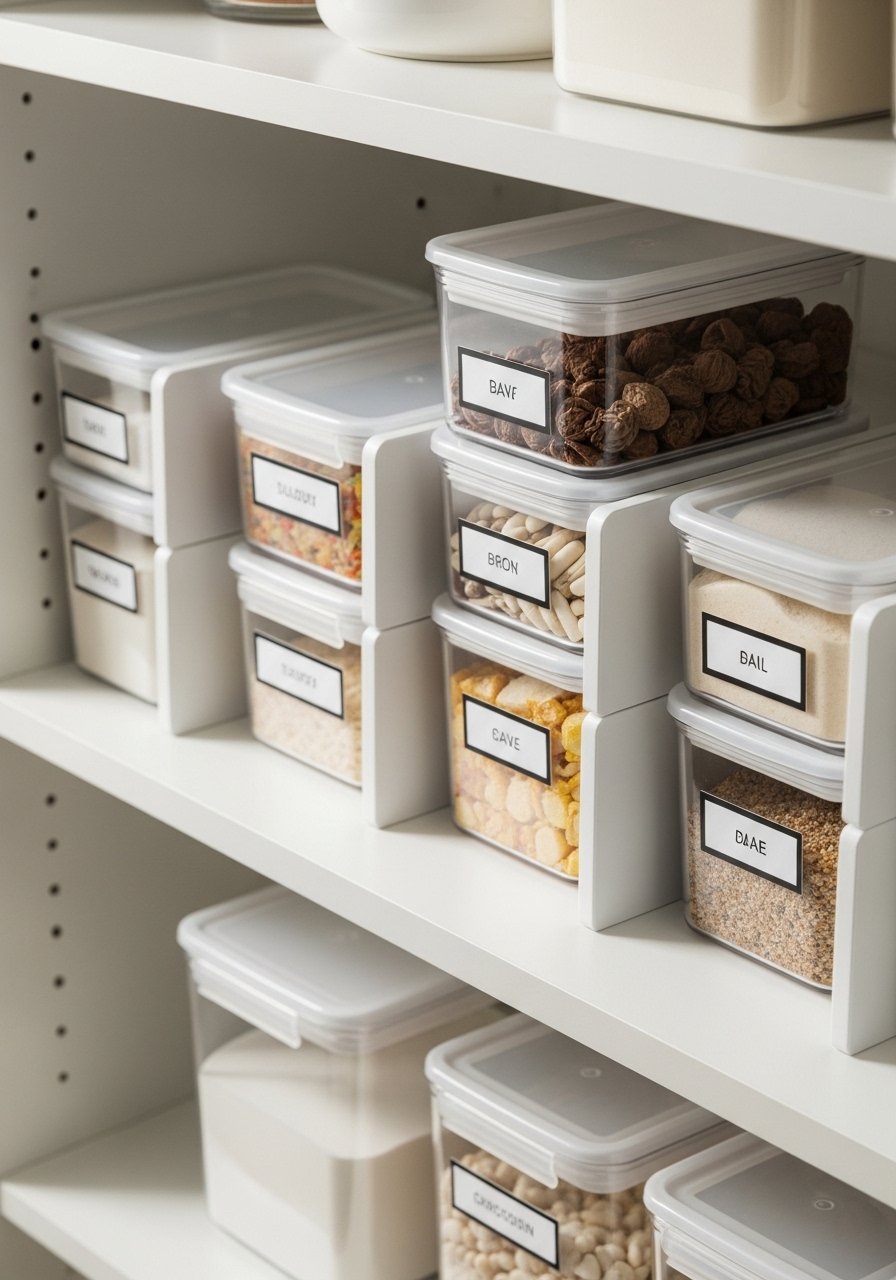
This project gives you a calm, cohesive look by swapping boxes for uniform jars. The finished shelf looks clean and tactile — glass cool to the touch with warm wood lids. Perfect for beginners and anyone who likes a neat grocery runback. Use a silicone gasket jar for airtight storage and my go-to mason jar set if you want matching sizes.
Materials
- 6–10 clear glass jars with wooden lids (250–1000 ml), assorted sizes
- 1 roll waterproof pantry label tape, 12 mm
- Black permanent marker, fine tip
- 1 silicone jar gasket pack, assorted sizes
- 1 set shelf liner, non-slip, 18" x 5'
- Soft cloth for wiping
Instructions
- Measure shelf depth and choose jar sizes that leave 2–3" clearance front to back.
- Wash jars and lids; dry fully — air dry 1 hour to avoid trapped moisture.
- Apply silicone gaskets to lids if not preinstalled for airtight seal.
- Place non-slip shelf liner on shelf and position largest jars at back, smaller in front.
- Cut label tape into 2" strips. Write contents and use-by dates with fine-tip marker.
- Stick labels centered on jar fronts, press for 10 seconds to set.
- Refill jars from bulk bags using a funnel to reduce spills.
- Wipe outside glass with soft cloth for streak-free finish.
How to Display or Gift It
- Line jars on a single shelf for a clean pantry wall; group grains together by color.
- Add a wood tray under jars for easy removal when you need to refill.
- Wrap a set of jars in kraft paper and tie with twine for a practical housewarming gift.
- Store spare labels and marker in a small craft organizer near the pantry.
- Tiered Spice Shelf (Lazy Susan Style)
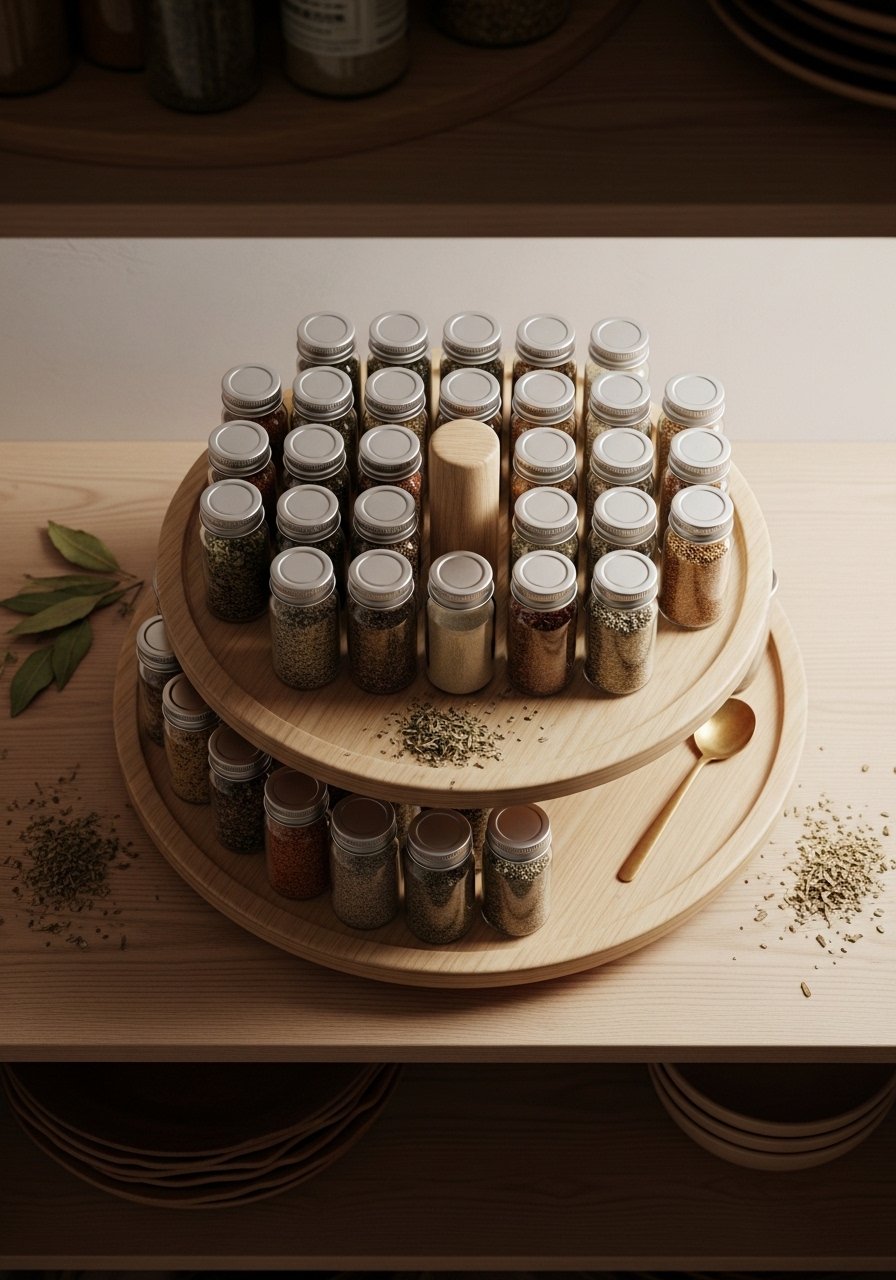
Make every spice visible with a tiered lazy Susan. The finish is warm wood and glass, and the turntable motion feels smooth when you're mid-recipe. Great for cooks who hate digging. I use a compact rotating organizer that fits deep shelves.
Materials
- 1 two-tier wooden lazy Susan, 10" diameter
- 12–20 clear spice jars, 4 oz, with labels
- Fiskars circle punch or label punch, 1" (optional)
- Spice funnel, stainless steel
- Permanent fine-tip marker
- Non-slip pad, 10" round
Instructions
- Clean shelf surface and add non-slip pad to prevent sliding.
- Assemble lazy Susan per manufacturer steps.
- Transfer spices to jars using the funnel to avoid mess.
- Label lids or fronts with spice names; use circle punch for uniform label shapes.
- Place jars on tiers grouped by use (baking, savory).
- Spin gently to check balance; rearrange if wobble occurs.
- Wipe the lazy Susan monthly to clear dust and spice oils.
How to Display or Gift It
- Place the rotating shelf at eye level for quick reach.
- Use small wooden spoons tucked beside jars for gift presentation.
- Wrap in cellophane and gift as a kitchen starter set with a spice jar bundle.
- Pull-Out Crate Drawers
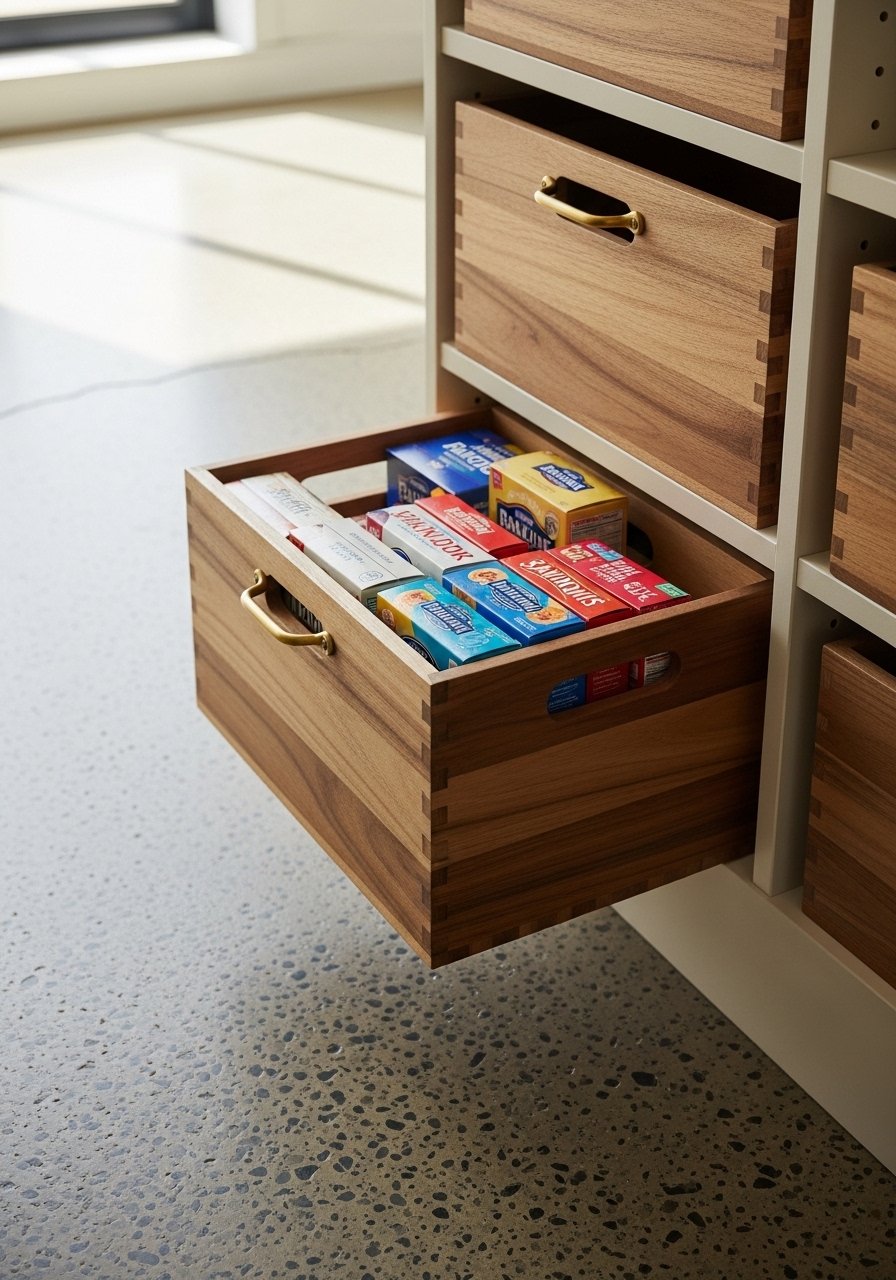
Pull-out crate drawers keep lower shelves usable. They slide like drawers but are cheaper and lighter. The finish is rustic wood with smooth metal handles. Ideal if you don't have room for full cabinet drawers. I mount with sliding runners from a compact drawer slide kit.
Materials
- 3 wooden crates, 12" x 9" x 6"
- 3 sets drawer slides, 12" length
- 3 small cabinet handles, brass or black
- 12 wood screws, 1"
- 1 drill with screwdriver bit
- Sandpaper, 120 grit
- Wood stain or paint, 8 oz
Instructions
- Sand crates smooth and stain or paint; dry time 2–4 hours between coats.
- Measure inside shelf width; mark slide mounting positions centered on each crate.
- Attach slides to crate sides with two screws each, pre-drill pilot holes.
- Mount opposing slide rails to pantry interior at the same height and depth.
- Slide crates in and test movement; adjust screw tightness if binding.
- Attach handles to crate fronts with screws.
- Add shelf liner inside crates for grip.
How to Display or Gift It
- Use crates for baking supplies, snacks, or kids' lunch items.
- Label crate fronts with a painter's tape label then remove when contents change.
- Stack two crates on lower shelves for bulk storage; store extra screws in a small compartment box.
- Tension Rod Cereal Box Organizer
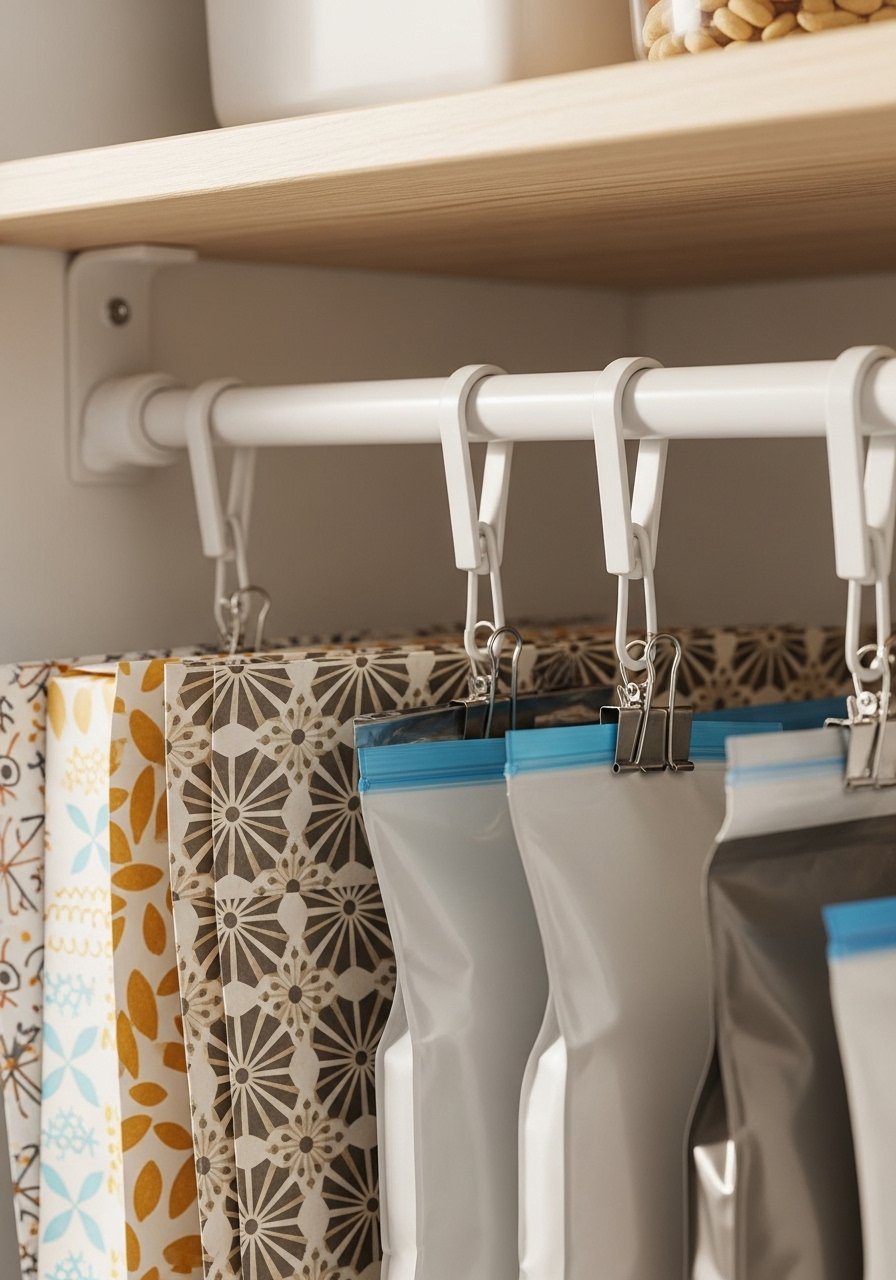
A single tension rod instantly corrals tall boxes and keeps them upright. The texture contrast — smooth metal rod against cardboard — looks tidy and intentional. Great for renters and anyone avoiding permanent hardware. I use a heavy-duty tension rod for stability.
Materials
- 1 heavy-duty tension rod, 24–36" adjustable
- 2–6 binder clips, large
- 1 roll shelf liner, cut to depth
- 1 small measuring tape
- Soft cloth
Instructions
- Measure shelf width where you want the rod placed.
- Adjust rod to fit snugly; position at front of shelf just behind door swing.
- Place shelf liner under rod for non-slip base.
- Stand cereal boxes upright behind the rod; use binder clips on the top edge to secure partially opened boxes.
- For opened boxes, pour contents into labeled food storage bags and clip closed.
- Test rod every month for slippage and retighten as needed.
How to Display or Gift It
- Use two rods for double rows of snacks.
- Add a small chalkboard tag to the rod for weekly meal notes.
- Tuck a small container of clip-sealed bags near the rod for quick reseals.
- Slim Door Rack for Cans (small pantry organization ideas)
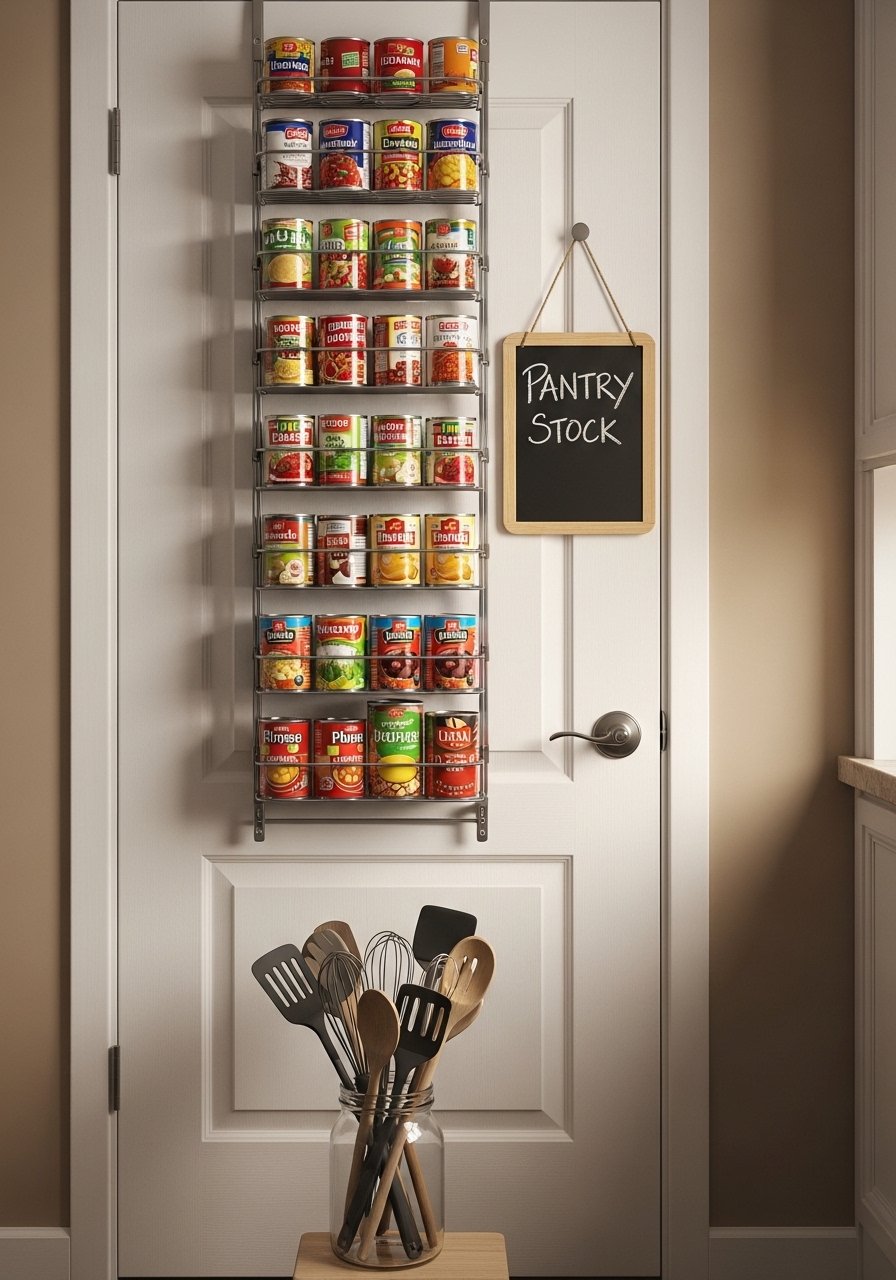
Turn unused door space into a canned-goods station. The metal rack looks balanced and industrial against the door. This is a classic of small pantry organization ideas for those with limited shelf depth. I choose an over-the-door can rack with adjustable tiers.
Materials
- 1 over-the-door can rack, slim profile
- 12–30 cans, assorted sizes
- Door bumpers, 2 small rubber pads
- 1 small step stool (if shelves are high)
- Soft cloth for cleaning
Instructions
- Clean inside of pantry door with mild soap; dry fully.
- Hook rack over door at desired height; place bumpers to prevent scuffing.
- Organize cans by use — dinner, soups, tomatoes — front to back.
- Put heavier cans on lower racks for stability.
- Sweep around door edges monthly; check hooks for wear.
- Replace any bulging cans immediately.
How to Display or Gift It
- Paint the door interior with chalk paint and label rows for quick restock.
- Add magnetic shopping list pad on the door beside the rack.
- Foldable step stool stores nearby for safe access.
- Magnetic Spice Tin Strip
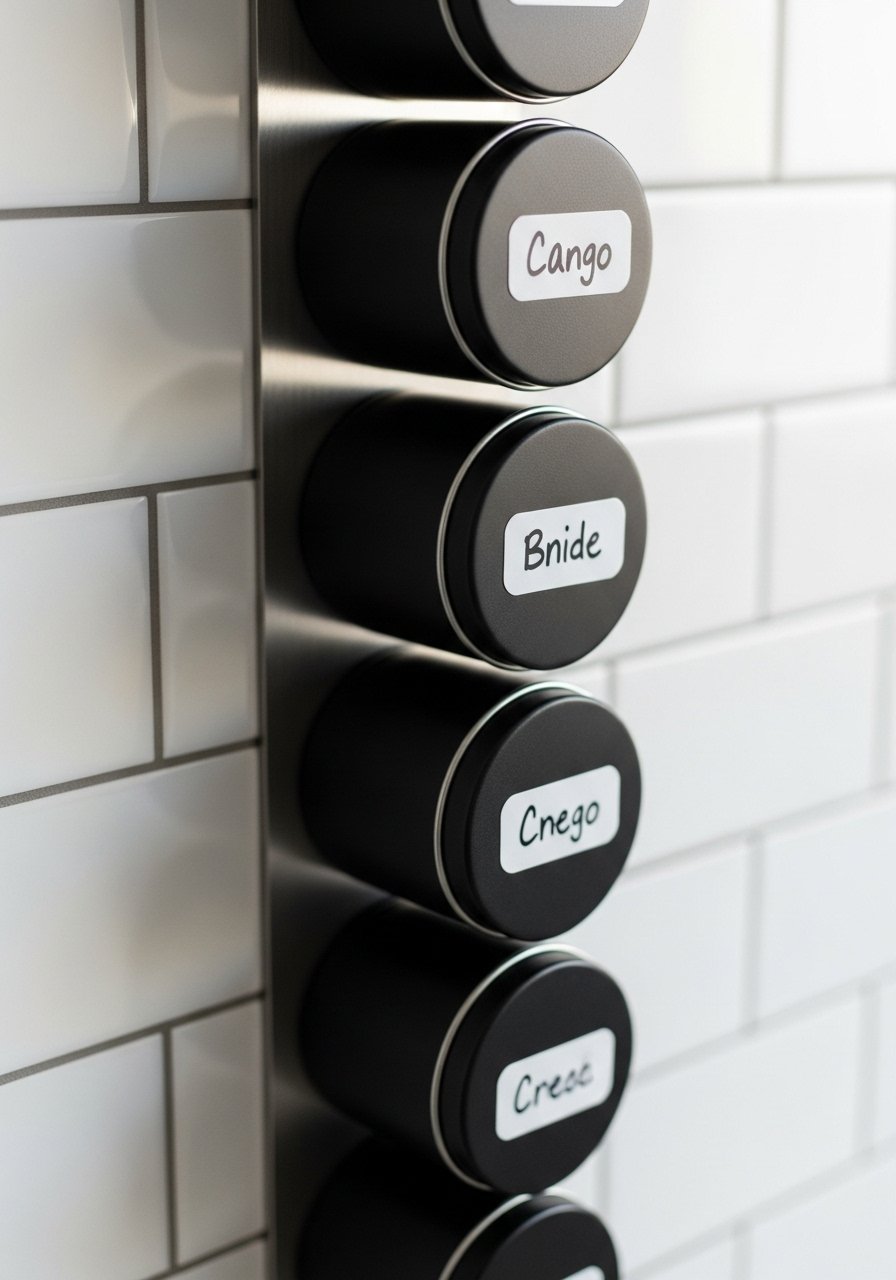
This vertical solution frees shelf space and looks modern. Tins are cool metal with crisp labels. It’s perfect if your pantry is narrow and you want spices displayed like a tiny apothecary. Use a magnetic knife strip or metal bar mounted on the wall.
Materials
- 1 magnetic metal strip, 18–24"
- 12–24 magnetic spice tins, 1.5 oz, round
- Vinyl label sheet, matte
- Permanent marker
- Adhesive hooks, small (if additional support needed)
- Level and pencil
Instructions
- Choose a vertical wall or inside door with 2–3" clearance.
- Use a level to mark mounting holes; screw the metal strip securely.
- Fill tins and ensure lids close firmly; wipe edges clean.
- Add vinyl labels to tins and press for 10 seconds to adhere.
- Stick tins to strip in rows by usage frequency.
- Check magnets monthly for dust and wipe with dry cloth.
How to Display or Gift It
- Group spices by cuisine (Italian, Mexican) for quick meal prep.
- Pair tins with a label kit for consistent text.
- Wrap a set of labeled tins in kraft paper for a foodie gift.
- Acrylic Pull-Out Bins for Snacks
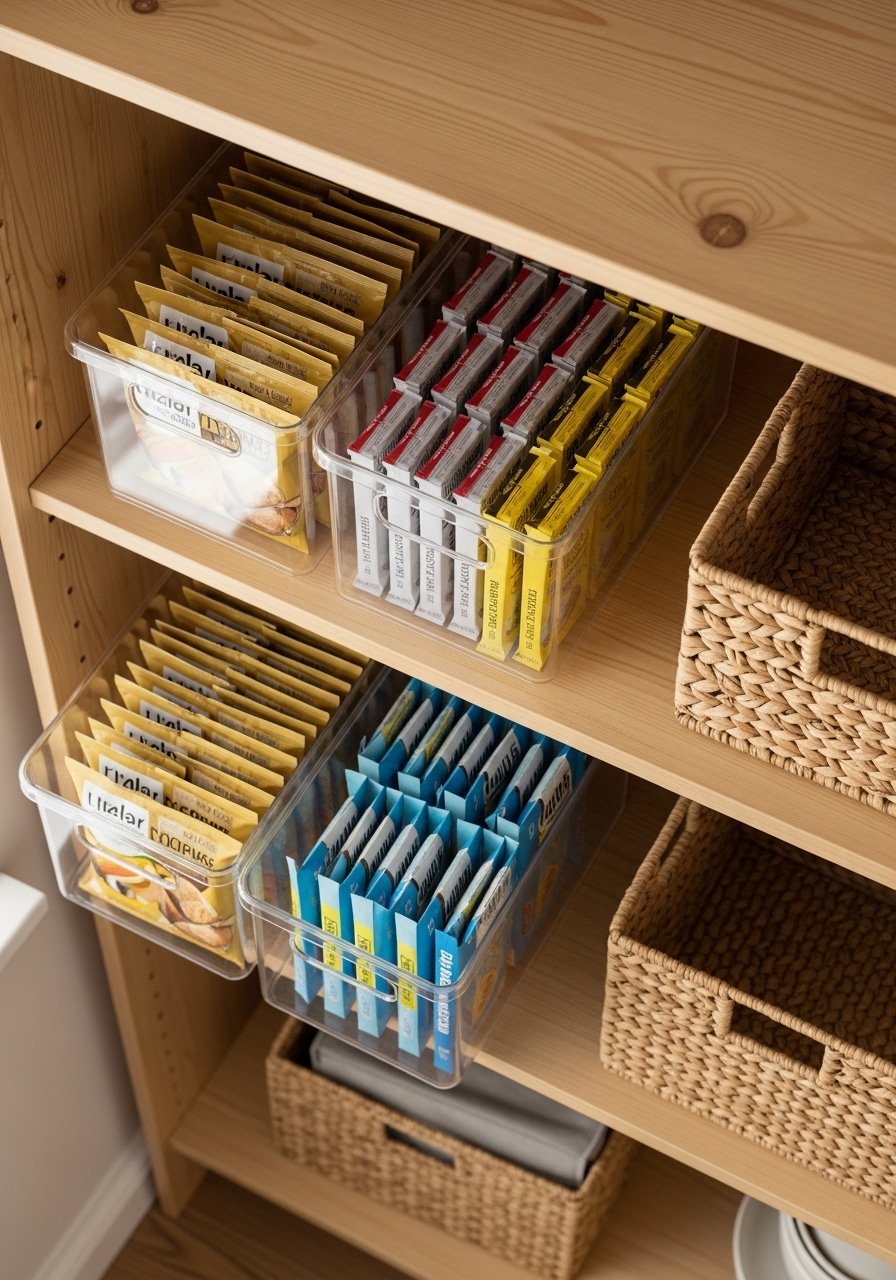
Clear pull-out bins make it obvious what's inside and slide smoothly. The crystal-clear acrylic gives a clean, modern vibe. Great for families who need quick grab-and-go snacks. I order a matching set of acrylic drawer organizers.
Materials
- 3–6 clear acrylic pull-out bins, 12" x 8" x 4"
- Shelf liner, clear or non-slip, cut to bin depth
- Small labels, printable or writable
- Soft cloth for dusting
- Measuring tape
Instructions
- Measure shelf depth and choose bin depth that allows bins to pull out fully.
- Clean shelf and place non-slip liner where bins will sit.
- Fill bins by category: granola bars, chips, fruit snacks.
- Label the front edge of each bin for quick ID.
- Pull bins out to check for snagging; sand any rough shelf edges.
- Wipe acrylic monthly with a microfiber cloth to avoid scratches.
How to Display or Gift It
- Place bins at kid height for independent snack choice.
- Use a small label maker for clean, uniform tags.
- Stack two bins low and two high for vertical snack layers.
- Wire Basket Tiered Cradle
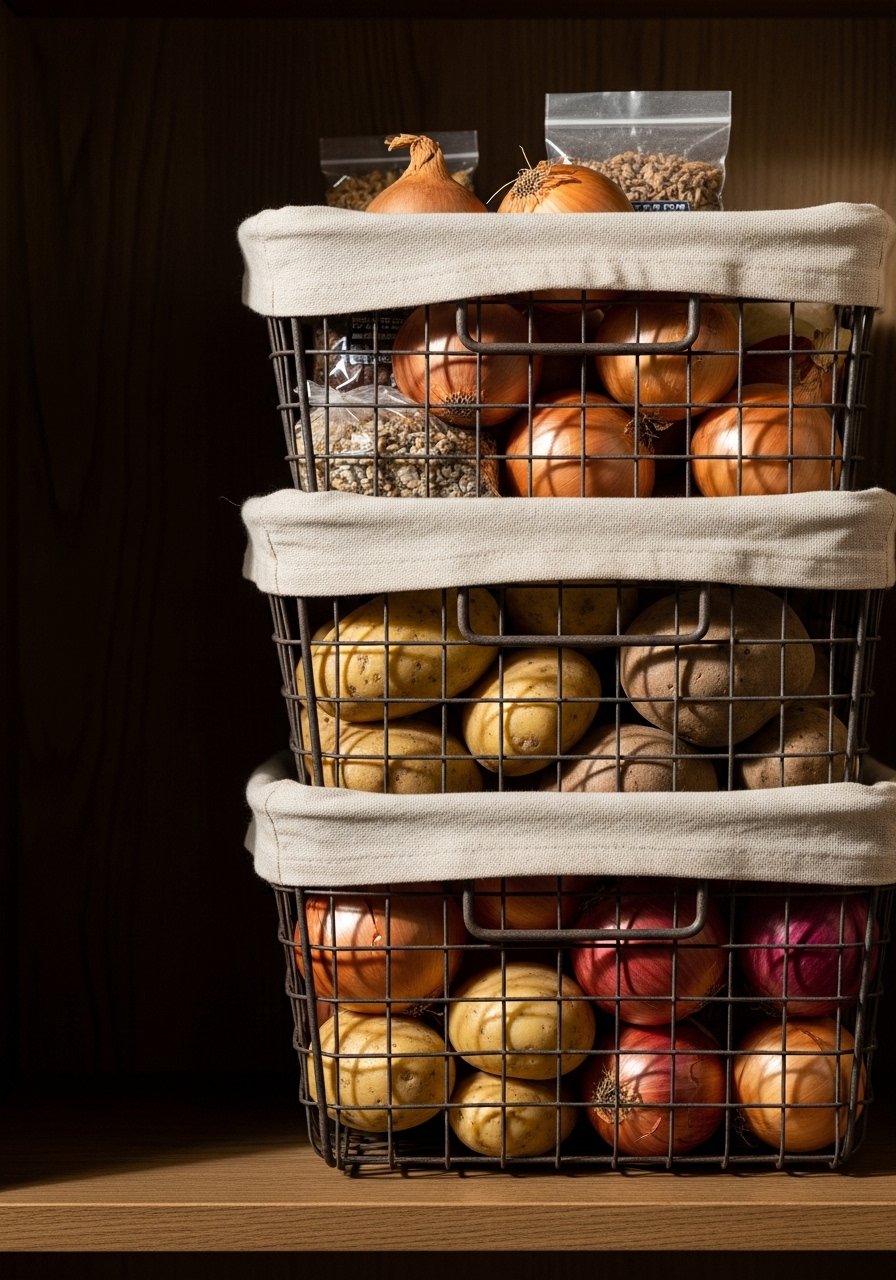
Wire baskets add texture and airflow — great for potatoes and onions. The industrial-metal finish paired with linen liners reads farmhouse or modern-industrial. Perfect for breathability and easy sorting. I like a set of wire baskets with removable liners.
Materials
- 3 stackable wire baskets, 14" x 10" x 6"
- 3 linen liners, pre-cut to basket size
- Zip ties, 6 small (for securing stacks)
- Label tags, kraft
- Permanent marker
- Soft brush for cleaning
Instructions
- Line each basket with linen liner and tuck edges neatly.
- Stack baskets if using vertical cradle; secure with zip ties only if stable.
- Arrange root vegetables; keep potatoes separate from onions.
- Replace liners every 2–3 months; wash linen in cold cycle.
- Rotate produce weekly to avoid sprouted items.
- Dust wire with soft brush if dusty.
How to Display or Gift It
- Leave baskets on lower pantry shelves for a rustic display.
- Use kraft tags tied with twine for quick identification.
- Gift a set of baskets with fresh produce in a kraft box and a kitchen twine roll.
- Under-Shelf Baskets for Canned Goods
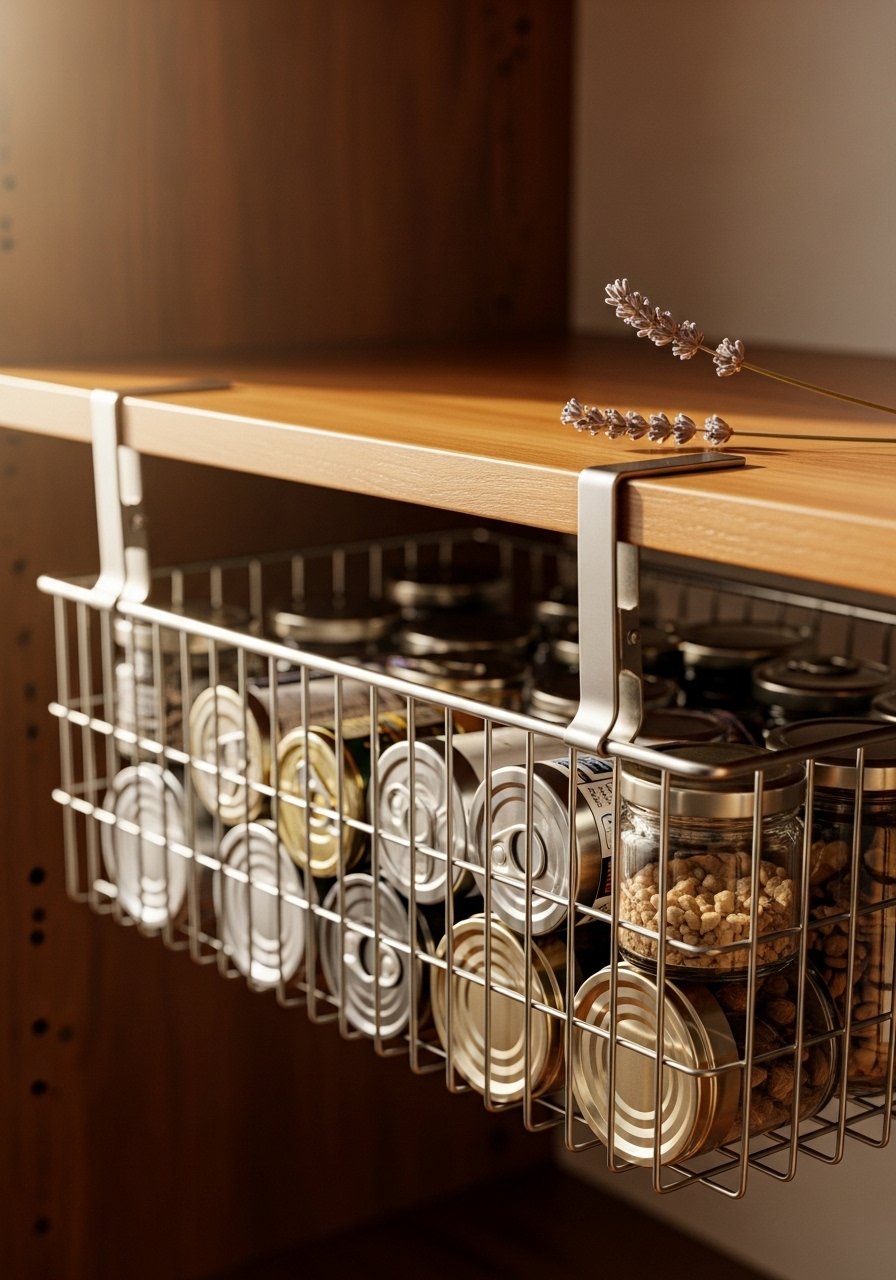
Under-shelf baskets add hidden storage and use dead airspace. Texturally, they make the shelf edge look layered and purposeful. They’re a smart pick if shelf height leaves wasted space. A compact set of under-shelf baskets works well.
Materials
- 2–4 under-shelf metal baskets, 12" x 8" x 3"
- Small cans/jars, assorted
- Measuring tape
- Soft cloth for mounting
Instructions
- Measure shelf thickness to ensure baskets will hook correctly.
- Slide baskets onto shelf edge until secure; test by pulling gently.
- Place small cans and jars into baskets; avoid overloading beyond weight capacity.
- Check hooks monthly for bending.
- Wipe baskets with damp cloth if sticky residues accumulate.
- Remove seasonal items when swapping pantry layout.
How to Display or Gift It
- Use under-shelf baskets for small baking tins or tea packets.
- Add a small stick-on label tab to the front for quick reads.
- Pair baskets with a set of matching shelf liners for neatness.
- Paper Towel and Foil Dispenser Mounted Inside
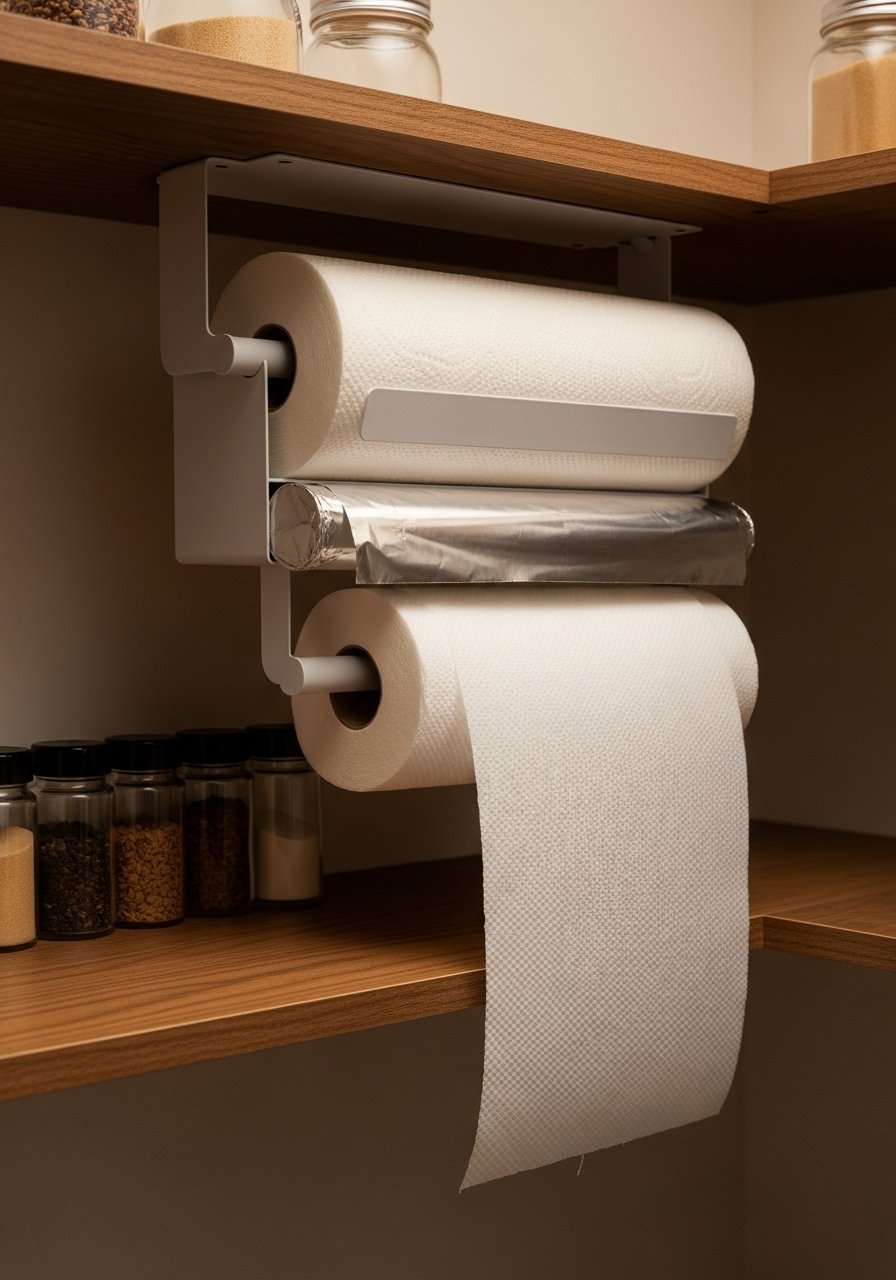
Mounting a paper towel and foil dispenser inside the pantry frees counter space and stores bulky rolls out of sight. The metal dispenser adds a clean, functional line under a shelf. I use a combined kitchen roll dispenser.
Materials
- 1 mounted paper towel + foil dispenser, 16" width
- 1 roll paper towels
- 1 roll aluminum foil
- Screws and anchors, included in kit
- Drill and screwdriver
- Level
Instructions
- Choose a shelf underside with 1–2" clearance from contents below.
- Mark mounting holes with level; pre-drill pilot holes.
- Fasten dispenser per instructions and test roll insertion.
- Thread foil or towels into dispenser and tear off to test cut edge or perforation.
- Wipe dispenser monthly with a damp cloth.
- Refill as needed and rotate stock to avoid sticky edges.
How to Display or Gift It
- Install near a prep shelf for quick reach.
- Add a small container of twist ties and a drawer organizer nearby.
- Gift a mounted dispenser with rolls wrapped in kraft and tied with ribbon.
- Vertical Baking Pan Organizer
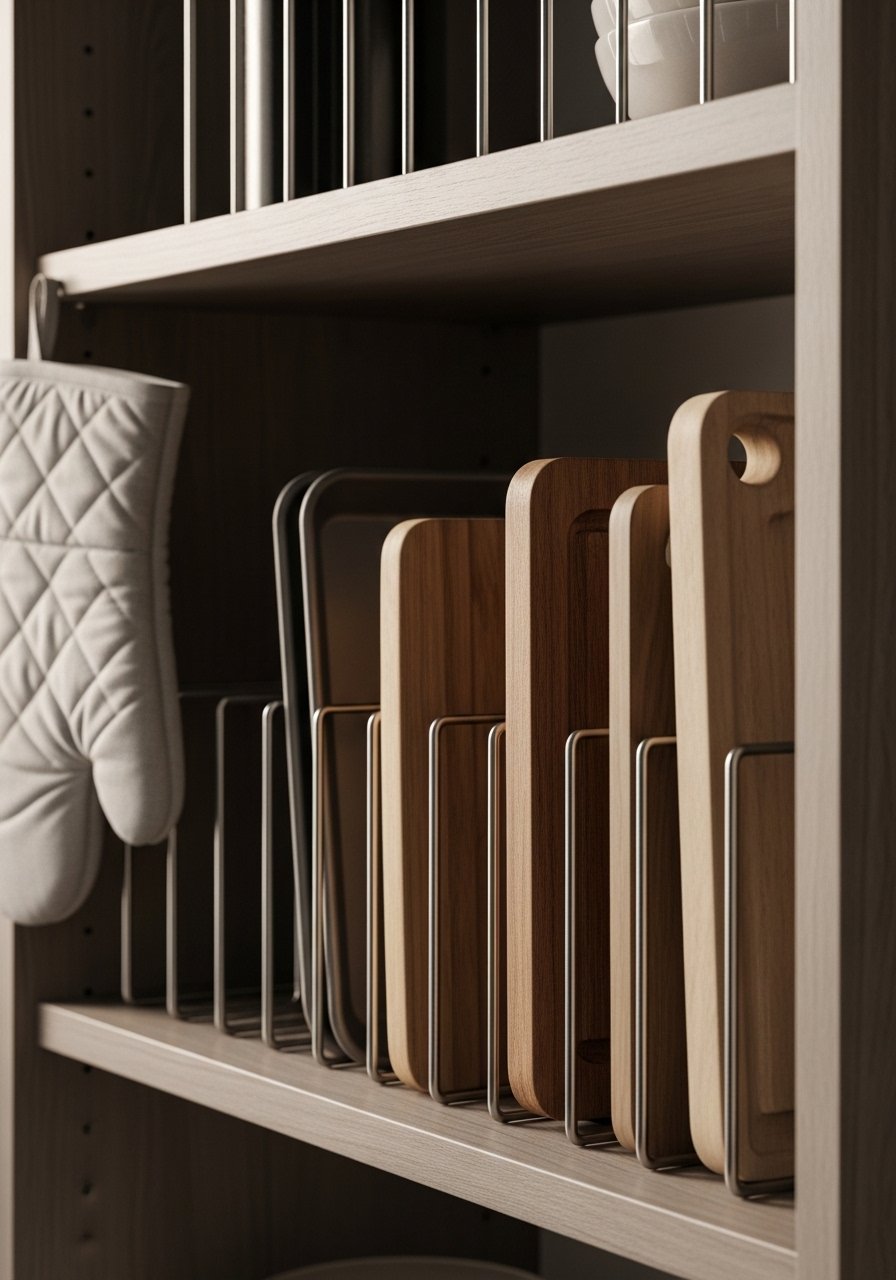
Store baking sheets and cutting boards vertically to reclaim horizontal shelf space. The metal dividers create neat gaps and a satisfying vertical rhythm. This is a space-saver for home bakers with limited depth. A sturdy pan divider set works well.
Materials
- 1 baking pan organizer, adjustable, 10–12 slots
- 3–8 baking sheets/cutting boards
- Soft cloth
- Non-slip feet (if not included)
Instructions
- Measure shelf height to ensure pans fit vertically.
- Position organizer centered on shelf; add non-slip feet if needed.
- Stack heavy pans at back; lighter boards in front.
- Clean pans before storing to avoid grease transfer.
- Remove one at a time to avoid pinching fingers.
- Wipe organizer quarterly to prevent dust buildup.
How to Display or Gift It
- Place organizer in a tall shelf near the oven for fast access.
- Use a small label for the front slot showing commonly used pans.
- Gift with a silicone oven mitt and a pan scrubber.
- Fold-Down Drying Shelf (small pantry organization ideas)

A fold-down shelf gives you pop-up prep space when you need it and tucks away when you don’t. It adds a tactile wooden surface and a sense of workshop-style utility. This is one of the small pantry organization ideas that adds instant function. I recommend a compact folding shelf hinge kit.
Materials
- 1 wood panel, 18" x 10" x 3/4"
- 2 folding shelf hinges, heavy-duty
- Screws and wall anchors
- Sandpaper, 120 grit
- Wood stain or paint, 4 oz
- 1 small support bracket (if needed)
Instructions
- Sand and finish panel; allow 24 hours cure time for stain/paint.
- Mark hinge placement and pre-drill holes on panel and wall.
- Mount hinges and secure panel; test fold-down motion slowly.
- Install support bracket if panel sags under load.
- Store lightweight items on fold-down shelf; avoid heavy appliances.
- Fold up when not in use; check hinge screws quarterly.
How to Display or Gift It
- Use as a tea prep or coffee station in the pantry.
- Add a small jar of spoons and a mug rack below.
- Gift with a hand-stamped apron and a small jar brush.
- Pegboard Modular Pantry Wall
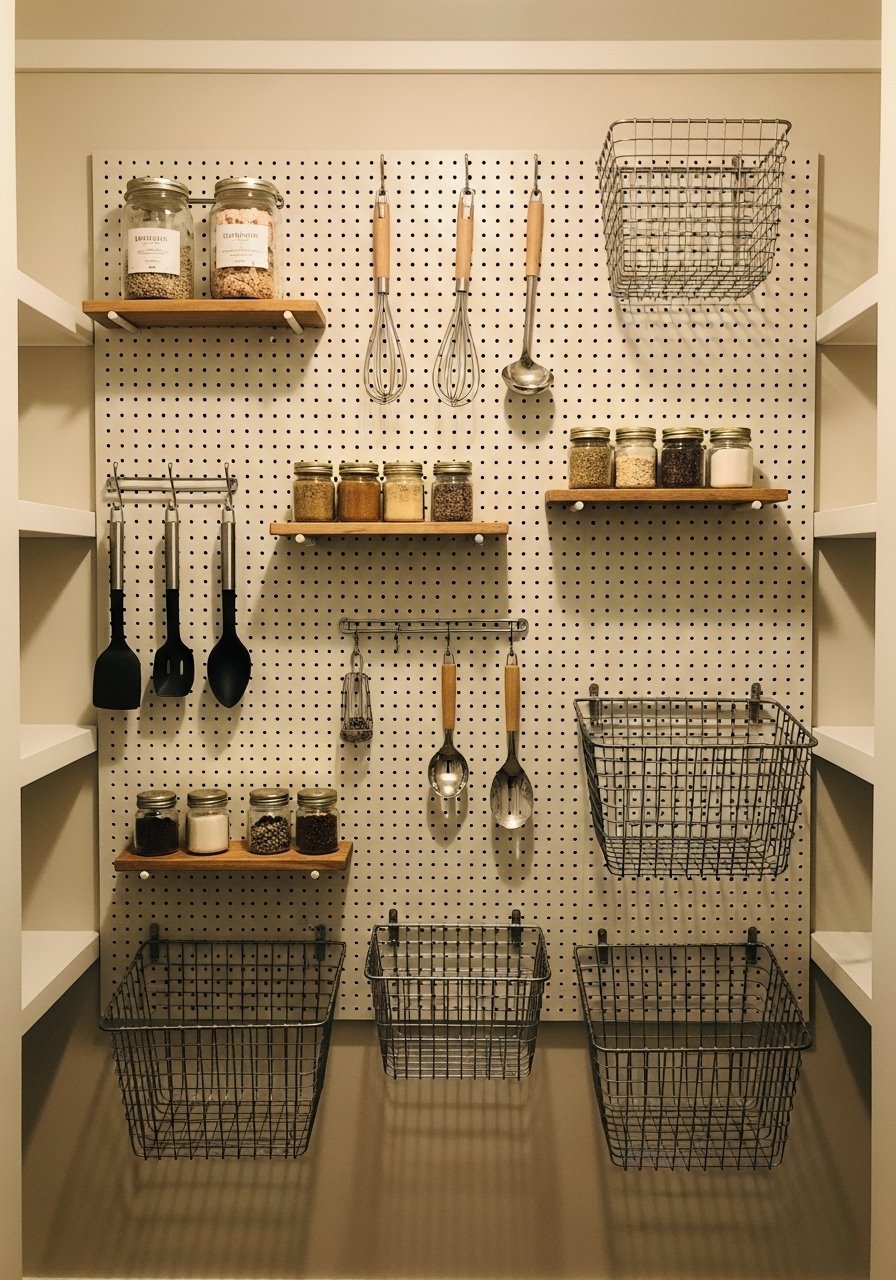
Pegboard lets you customize often and shift hooks as needs change. The finished look is utilitarian-chic and very flexible. Great for craft-minded crafters who like to tinker. I mount a medium-gauge pegboard kit.
Materials
- 1 pegboard panel, 24" x 18"
- Assorted pegboard hooks and shelves, 12 pieces
- Screws and spacers, 6 sets
- Paint (optional), 8 oz
- Level and pencil
Instructions
- Paint pegboard if desired; allow 2–4 hours between coats and 24 hours to cure.
- Mount board using spacers to allow hook insertion.
- Arrange hooks and small shelves by frequency of use.
- Hang utensils, bag clips, and small jars.
- Move pieces as pantry needs evolve.
- Check mounts for secure fit quarterly.
How to Display or Gift It
- Use pegboard for measuring cups, twine, and small tools.
- Add a small utility basket hooked to the board for odds and ends.
- Gift with a starter set of hooks and a printable pantry inventory sheet.
- Drawer-Style Spice Pull-Out
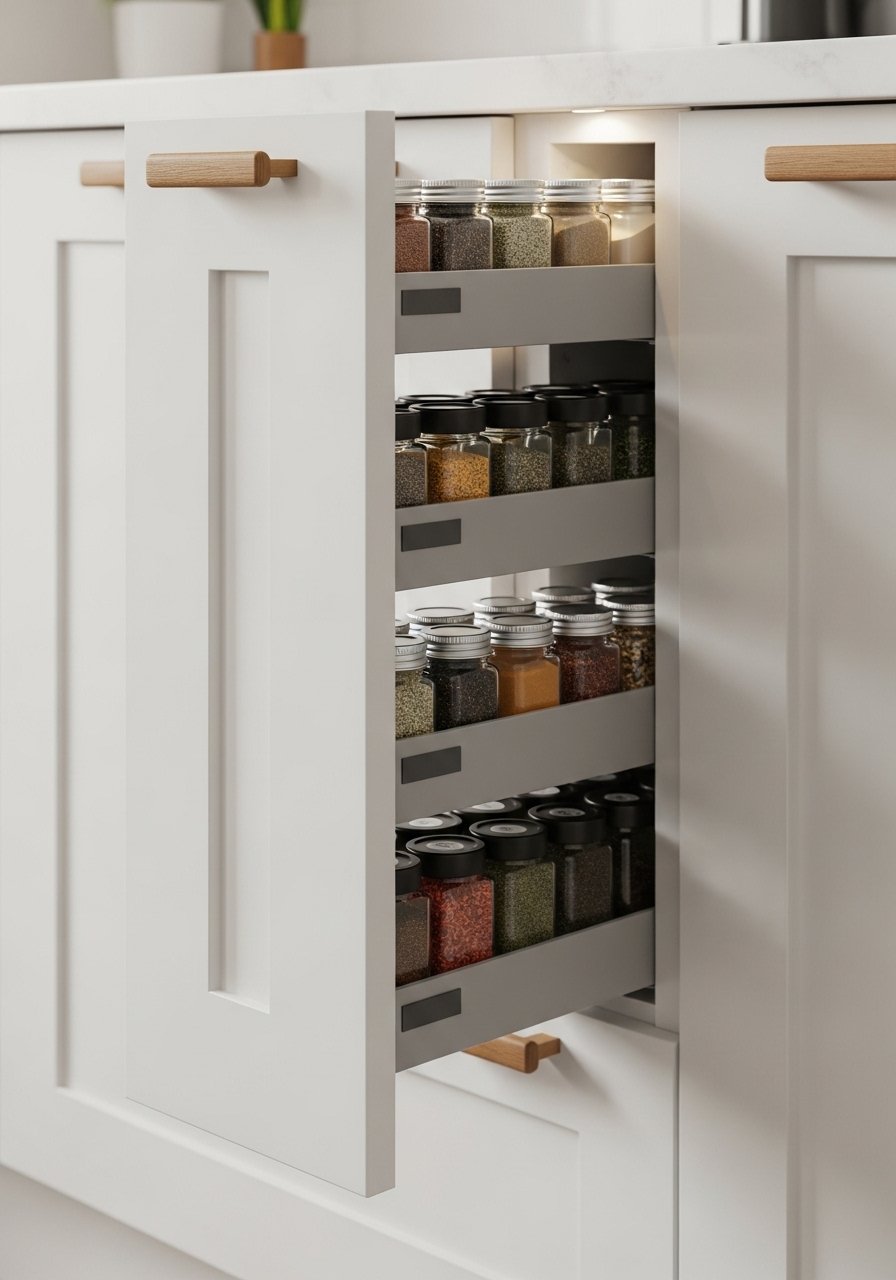
A narrow pull-out drawer conceals spices but keeps them at eye level. The tactile action of sliding the drawer feels very satisfying. Great if you prefer hidden storage to open displays. I build mine with an 18" narrow drawer slide kit.
Materials
- 1 narrow drawer box, 18" x 4" x 3"
- 2 drawer slides, 18"
- 12–20 spice jars
- Label sheet, printable
- Foam insert, 18" x 4" (optional)
- Screws and drill
Instructions
- Build or buy a narrow drawer sized to fit between pantry shelves.
- Mount slides to drawer and interior per instructions.
- Add foam insert with cut slots if desired.
- Fill spice jars and label their tops and fronts.
- Slide drawer in and out to check for rubbing; sand edges if needed.
- Reorganize jars by frequency of use every 6 months.
How to Display or Gift It
- Install at a mid-shelf for easy reach.
- Use a small spice funnel when refilling.
- Gift as part of a spice starter pack with labeled jars.
- Hanging Fruit Sling
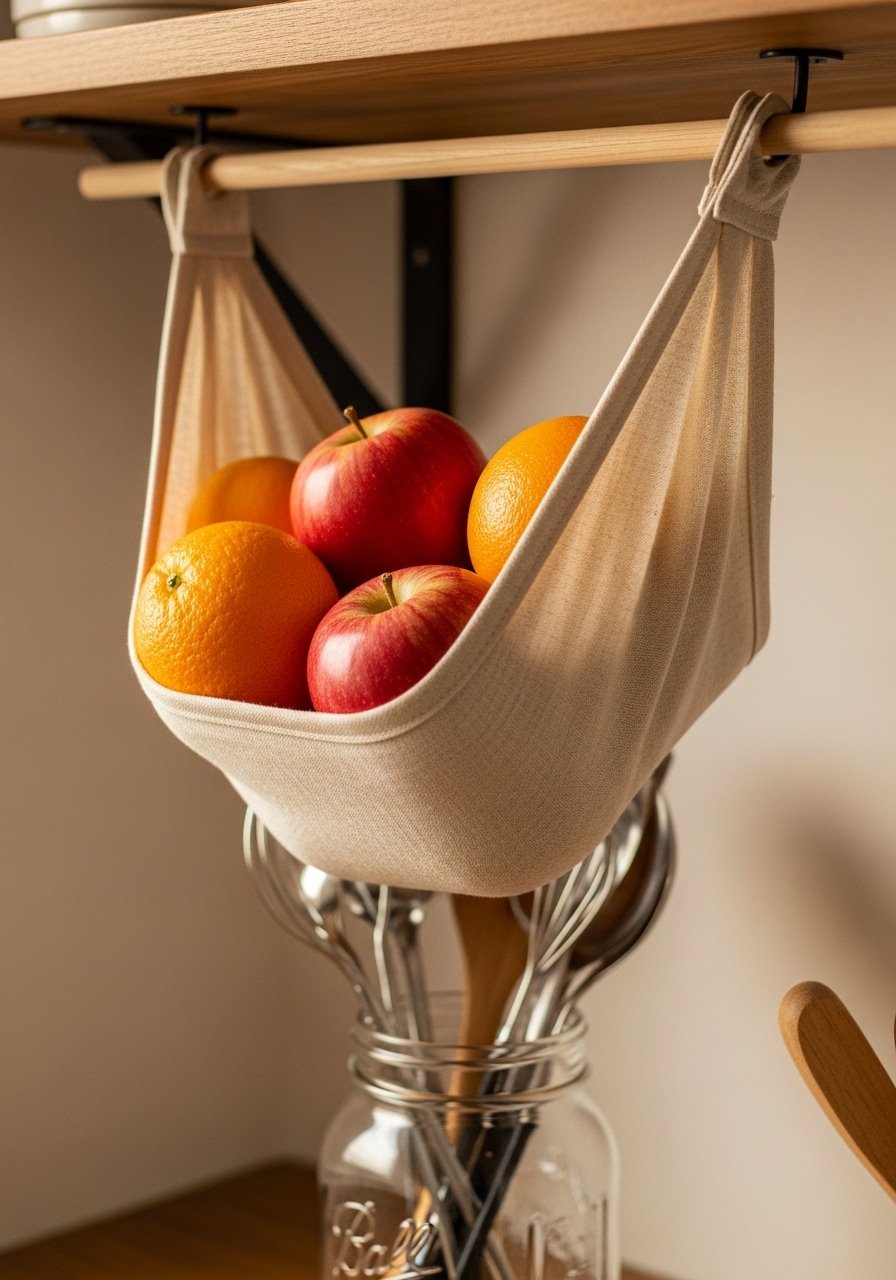
A fabric fruit sling keeps produce off the shelf but within easy reach. The soft linen texture feels cozy and cottagecore. It works well for apples and citrus. Use a sturdy hanging sling kit or sew your own from scrap fabric.
Materials
- 1 linen fruit sling, 12" x 18" with dowel
- 2 ceiling or shelf hooks
- Soft fabric scraps (if making your own)
- Measuring tape
- Small scissors
- Optional sewing kit
Instructions
- Install hooks under a shelf or inside pantry ceiling at equal distances.
- Hang sling by dowel and test weight with one fruit—sling should hold up to 10 lbs.
- Add fruit and avoid overstuffing to prevent bruising.
- Rotate fruit every 2–3 days to reduce spoilage.
- Wash sling monthly per care instructions.
How to Display or Gift It
- Hang near meal prep area for quick snacking.
- Pair with a produce storage bag set to keep fruit fresh.
- Gift with fresh apples and a recipe card tied with twine.
- Label-Layered Mason Jar Kids Snack Station
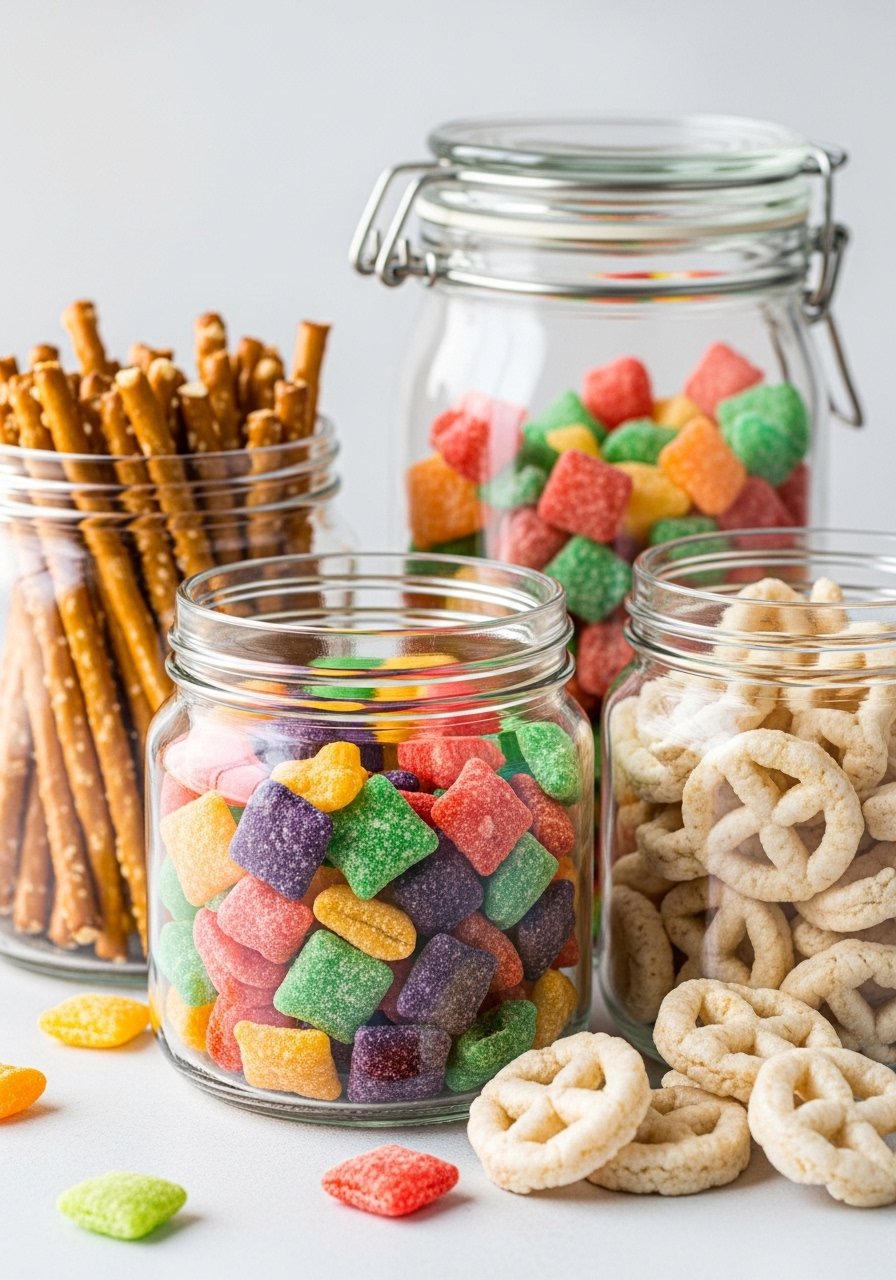
Make snacks kid-accessible with labeled mason jars on a low shelf. The glass feels friendly and the labels bright. Kids love the independence, and you’ll love the order. Use a set of small mason jars for uniformity.
Materials
- 6–8 small mason jars, 8 oz
- Kid-safe labels, laminated or wipeable
- 1 low shelf liner, non-slip
- Measuring tape
- Small step stool (optional)
- Permanent marker
Instructions
- Place non-slip liner on low shelf within kids’ reach.
- Fill jars with pre-portioned snack servings.
- Add kid-safe labels showing contents and portion sizes.
- Teach kids to close lids and return jars after snack time.
- Refill jars weekly and wash lids monthly.
- Keep jars away from very small children (choking/glass risk).
How to Display or Gift It
- Pair jars with a small plastic serving tongs set for hygienic snacking.
- Rotate snack types seasonally to keep interest.
- Gift with a matching kids’ lunchbox for a new school-year ready set.
- Stackable Can Dispenser
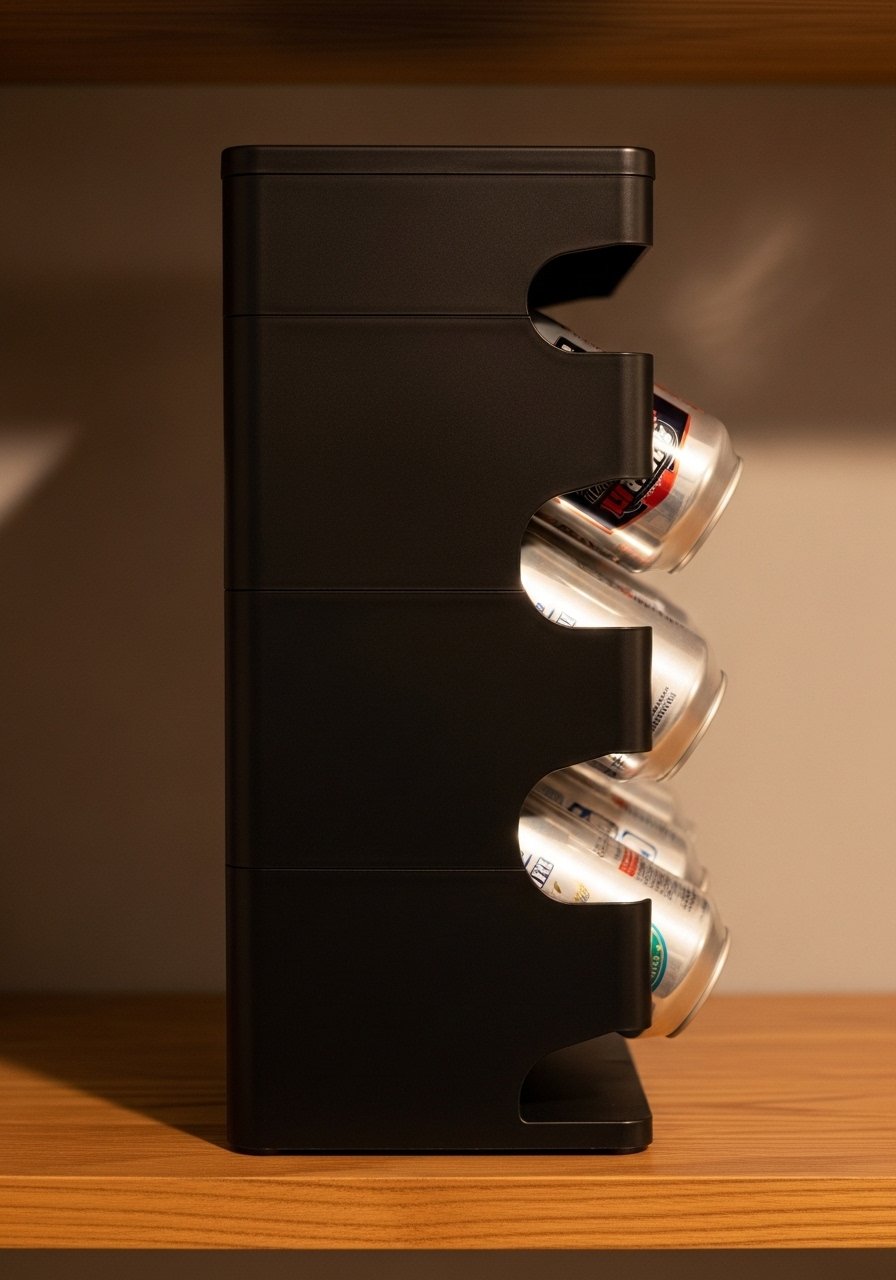
A gravity-fed can dispenser automatically moves the next can forward when you remove one. The plastic feels sleek and functional. It’s a small investment that saves time when grabbing a can. Check out a can dispenser set.
Materials
- 1 stackable can dispenser
- 8–12 cans, standard size
- Rubbing alcohol and cloth (for cleaning)
- Measuring tape
Instructions
- Place dispenser centered on shelf with enough clearance in front.
- Load cans from back to front per dispenser instructions.
- Check that cans slide smoothly; clean track if sticky.
- Keep only similar-sized cans in a single dispenser.
- Replace any dented cans promptly.
How to Display or Gift It
- Use for frequently used canned items like beans or tomatoes.
- Add a small inventory notepad nearby to track restocks.
- Gift as part of a pantry refresh kit with a set of matching labels.
- Clear Bag Dispenser for Frozen Foods
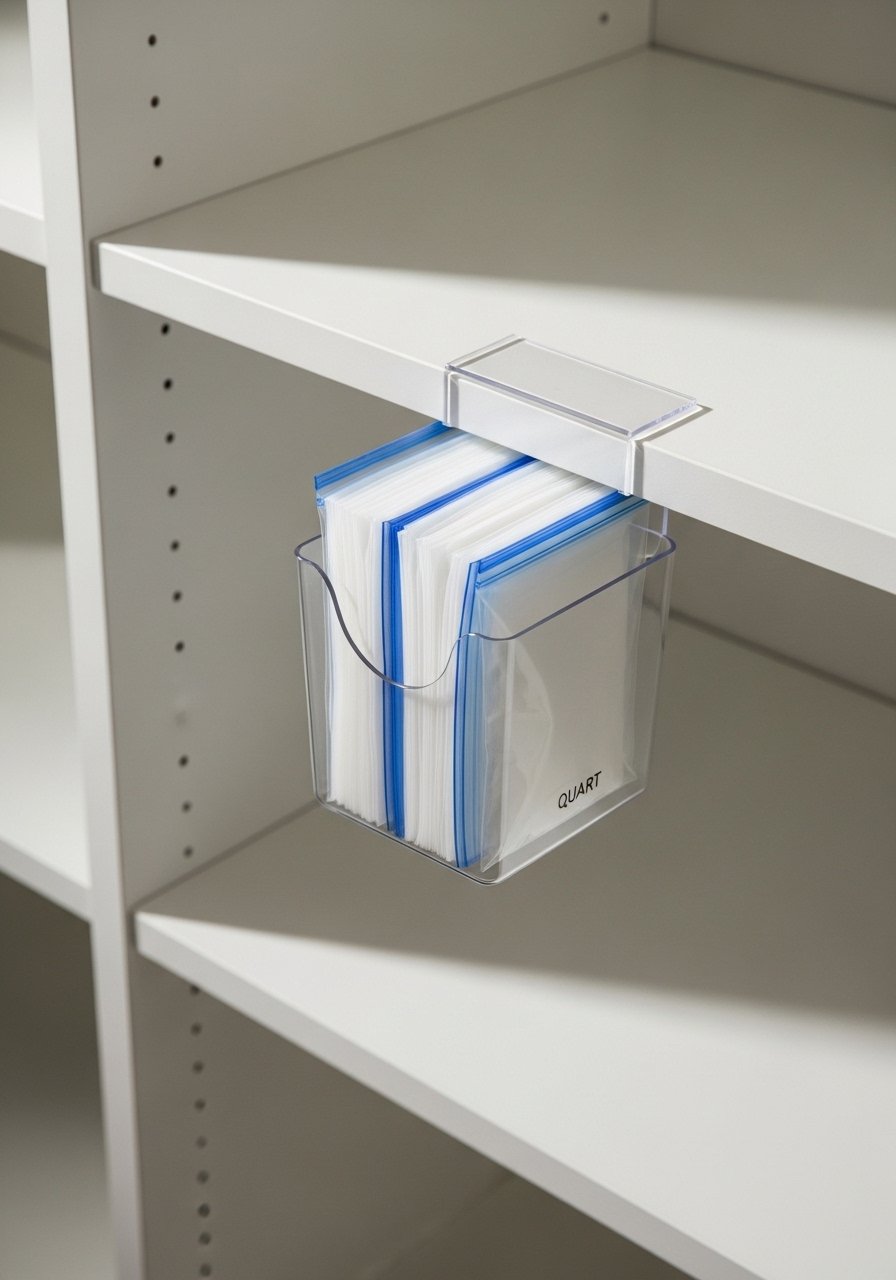
A bag dispenser stores quart and gallon bags neatly and saves drawer space. The clear plastic texture keeps contents visible. It’s a small tweak that reduces kitchen clutter. I like a bag dispenser that mounts inside a pantry.
Materials
- 1 clear bag dispenser, wall-mount
- 1 box each of quart and gallon freezer bags
- Screws and anchors (included)
- Measuring tape
- Soft cloth
Instructions
- Mount dispenser on inside pantry wall at waist height.
- Place boxes of bags inside and pull first bag through the slot.
- Test extraction; remove and reinsert if the bag tears.
- Refill boxes as needed; keep box tops closed to avoid dust.
- Wipe dispenser monthly.
How to Display or Gift It
- Mount near the fold-down shelf for quick packing.
- Pair with a marker set for labeling freezer bags.
- Gift as part of a meal-prep starter set.
- Vertical Wine and Olive Oil Rack
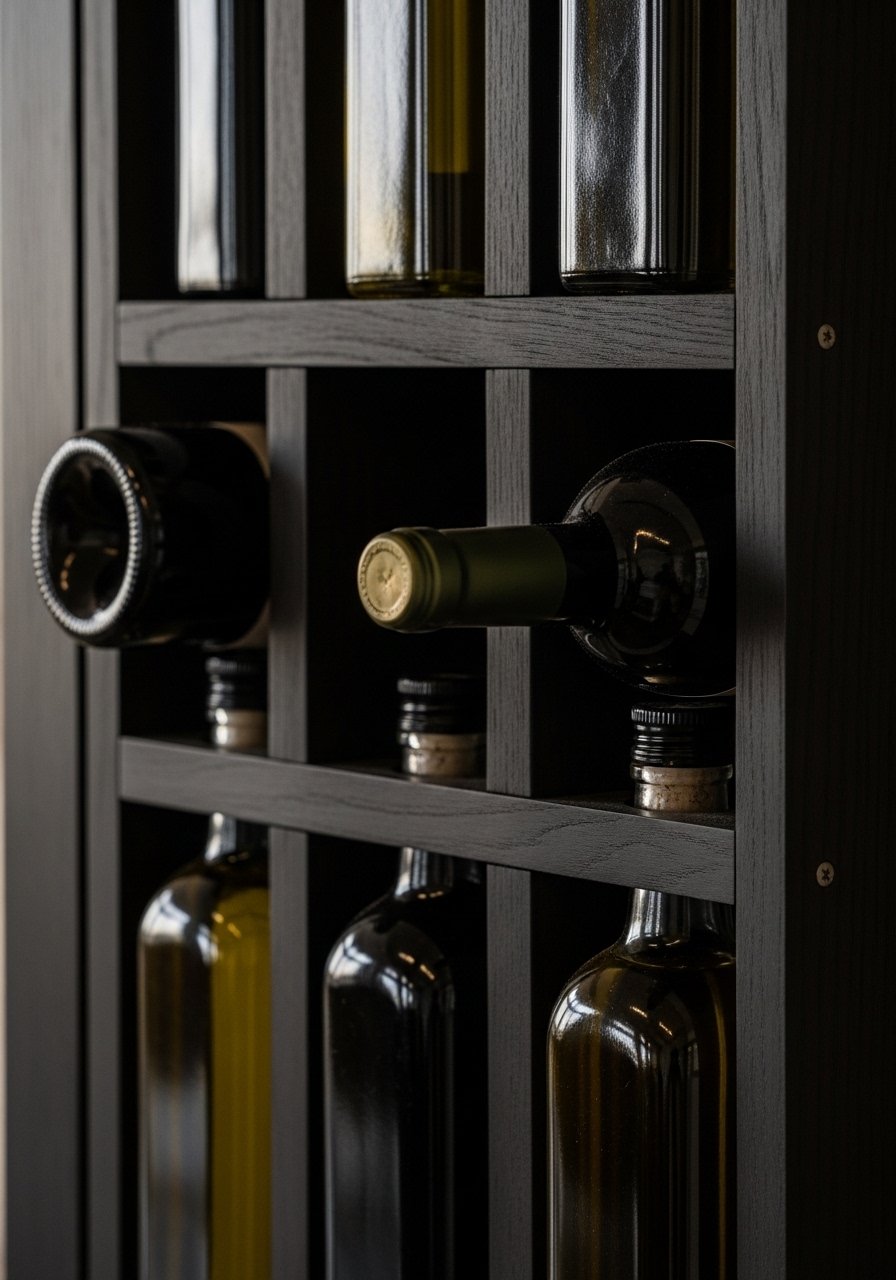
Keep oils and wines from rolling using vertical racks that hold bottles securely. The glass and oil sheen add warmth to the pantry. Great for cooks who like everything visible and upright. A slim bottle rack works best.
Materials
- 1 vertical bottle rack, 10" x 6"
- 3–6 bottles (olive oil, vinegars, wine)
- Soft cloth for wiping bottles
- Measuring tape
Instructions
- Place rack on a shelf with adequate height for tallest bottle.
- Slide bottles into slots with labels facing out.
- Keep oils away from direct light to preserve flavor.
- Wipe necks of bottles after use to avoid sticky drips.
- Reorganize by frequency of use.
How to Display or Gift It
- Group oils beside the stove area for quick reach.
- Add a small pour spout set for neat pouring.
- Gift with a tasting set of specialty oils.
- Slim Label-Led Tier (small pantry organization ideas)
Slim tiered risers give you visibility on deep shelves so the back row isn't hidden. The stepped acrylic offers clean edges and practical visibility. This is another smart small pantry organization ideas pick for canned goods or boxed goods. Use a set of tiered shelf risers.
Materials
- 2–4 slim tiered risers, 10" width
- Clear plastic bins or containers
- Label stickers, matte
- Soft cloth
Instructions
- Place risers on shelf, ensuring flat contact with surface.
- Arrange containers on each step, tallest at the back.
- Label container fronts for quick identification.
- Wipe risers monthly to keep them crystal clear.
- Swap risers to different shelves as your layout changes.
How to Display or Gift It
- Use for canned goods, boxes, or baking supplies.
- Pair with a label kit for matching tags.
- Gift a set with a small note on organizing tips.
- Repurposed Shoe Organizer for Snack Pouches
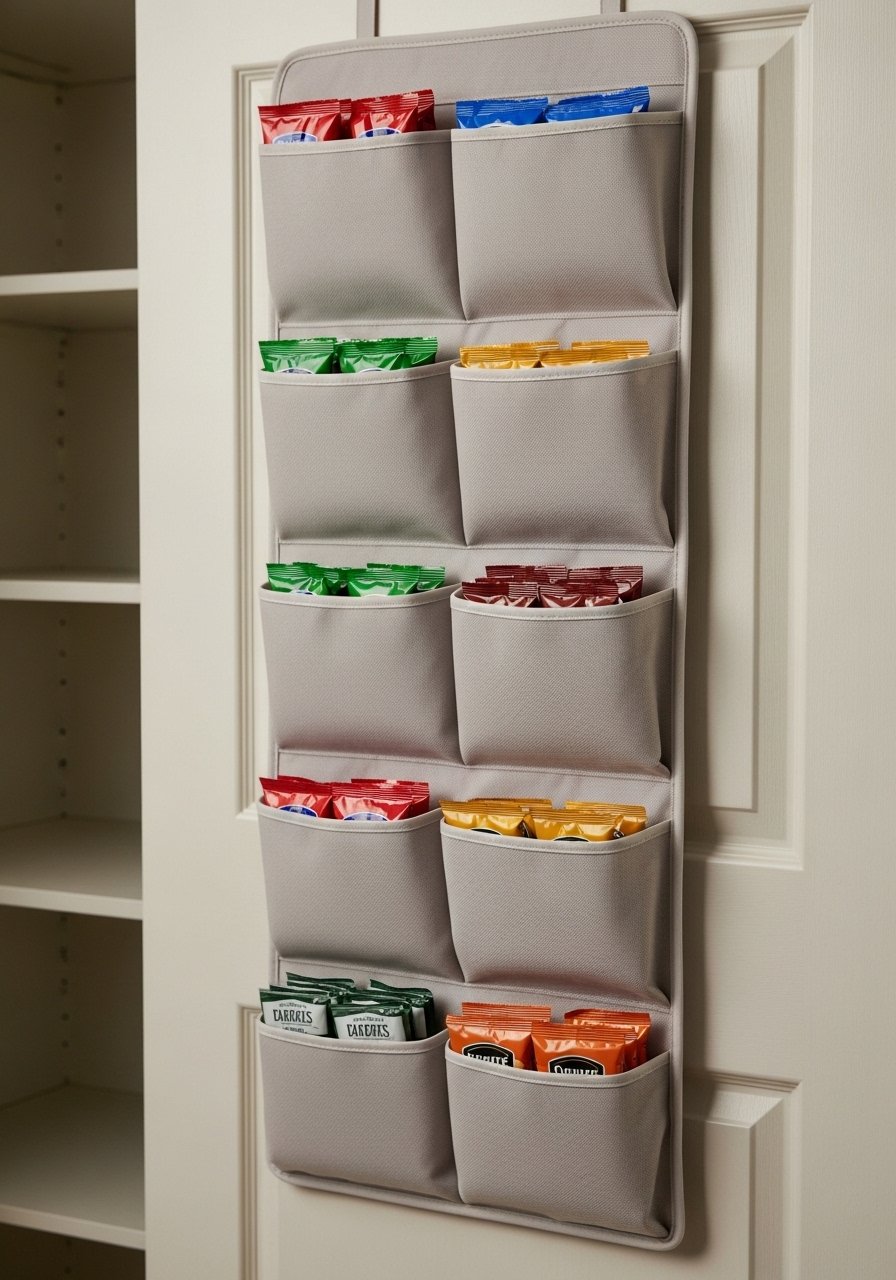
A clear- or fabric-pocket shoe organizer keeps snack pouches and small items contained. Pockets are soft and tactile, easy for kids to see or reach. It’s cheap and reversible. Look for a durable over-the-door shoe organizer.
Materials
- 1 over-the-door shoe organizer, 24 pockets
- Snacks and pouches, assorted
- Measuring tape
- Step stool (if door is high)
Instructions
- Hang organizer over pantry door and ensure it clears when closing.
- Fill pockets with snack pouches and small packets.
- Rotate items to keep fresh stock at the front.
- Wipe organizer as needed and hand-wash fabric types monthly.
- Remove any leaking packets immediately.
How to Display or Gift It
- Use for kids’ snacks, condiment packets, or small baking tools.
- Add a small shopping list clipboard on door for notes.
- Gift loaded pockets as a pantry starter for college students.
- Foldable Crate Stacking System
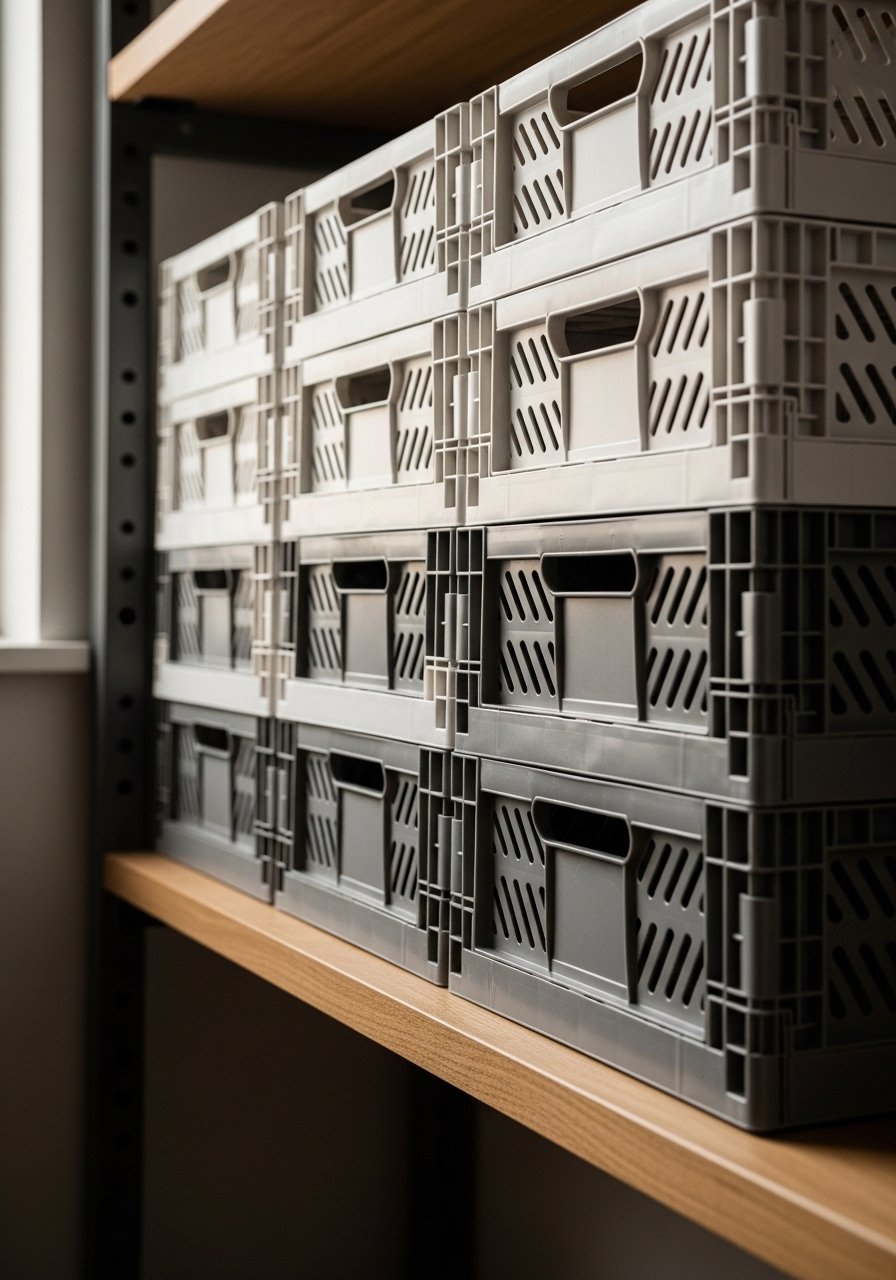
Foldable crates stack to create customizable shelving that can be reconfigured easily. The plastic crates feel sturdy yet light. They’re perfect for renters or seasonal pantry changes. I use a set of foldable plastic crates.
Materials
- 4–6 foldable crates, 16" x 12" x 8"
- Non-slip connectors, 8 pieces
- Shelf liner, cut to crate bottoms
- Measuring tape
Instructions
- Assemble crates per instructions and place liners inside.
- Stack crates using connectors for stability.
- Fill crates with grouped items: baking, snacks, bulk rice.
- Reconfigure stacks when pantry needs change.
- Collapse crates for storage when not in use.
How to Display or Gift It
- Use crates for seasonal baking supplies and rotate them to a garage when not needed.
- Label crate fronts with a removable label.
- Gift a set pre-filled with pantry basics for a new homeowner.
- Bread Box and Staging Board
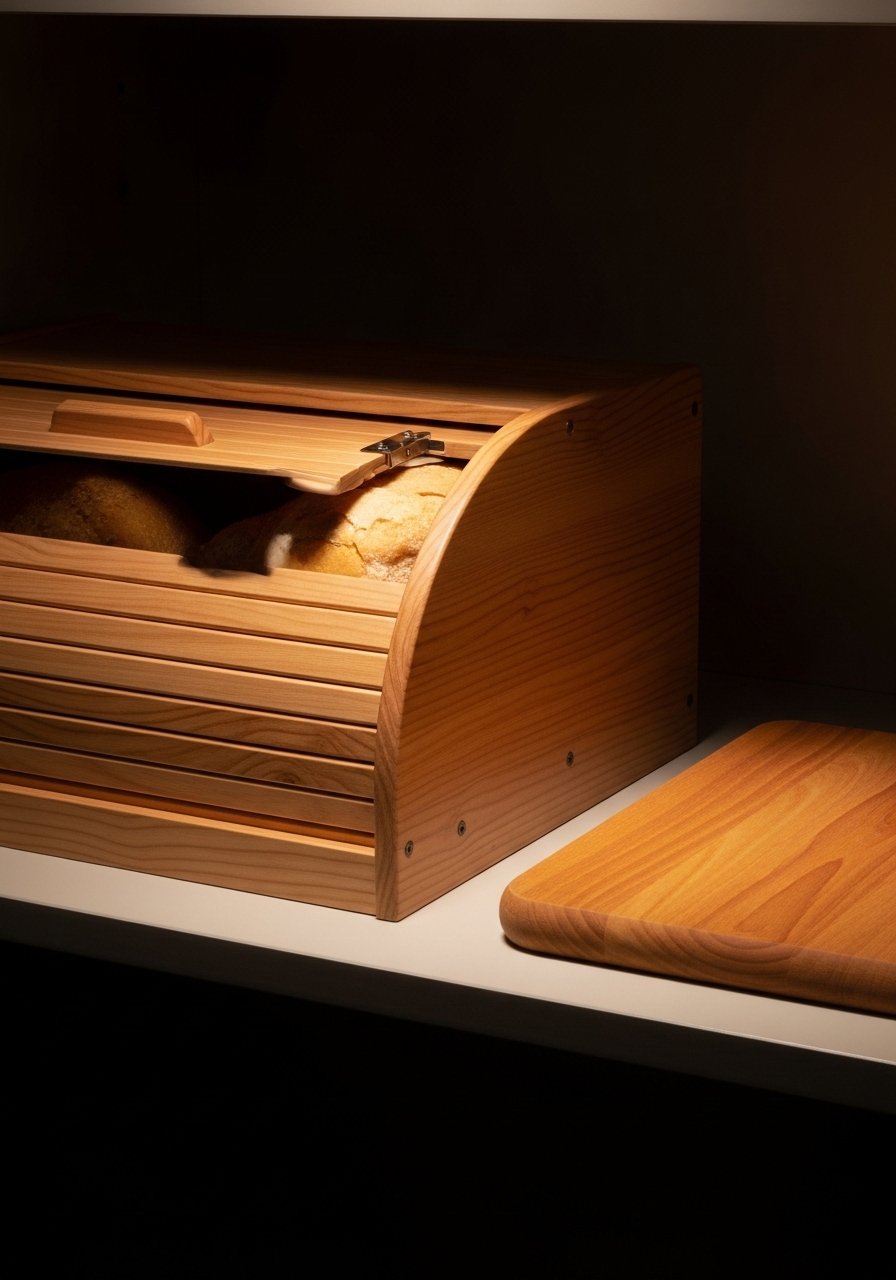
A bread box keeps loaves fresher and looks intentionally styled. Paired with a small staging board, it becomes a ritual spot for slicing. The wood feels warm and tactile. A compact bread box fits most pantries.
Materials
- 1 wooden bread box, 14" x 8" x 7"
- 1 small cutting board, 10" x 6"
- Bread bag set, cotton
- Soft cloth
Instructions
- Place bread box on middle or lower shelf with airflow.
- Keep breads in breathable cotton bags to extend shelf life.
- Check bread weekly for mold; discard if moldy.
- Clean inside box monthly to remove crumbs.
- Use cutting board for slicing and replace as needed.
How to Display or Gift It
- Pair box with a bread knife for an attractive gift.
- Keep board next to the bread box for quick serving.
- Wrap gift with a linen tea towel and twine.
- Can-Opener and Tool Hook Rail
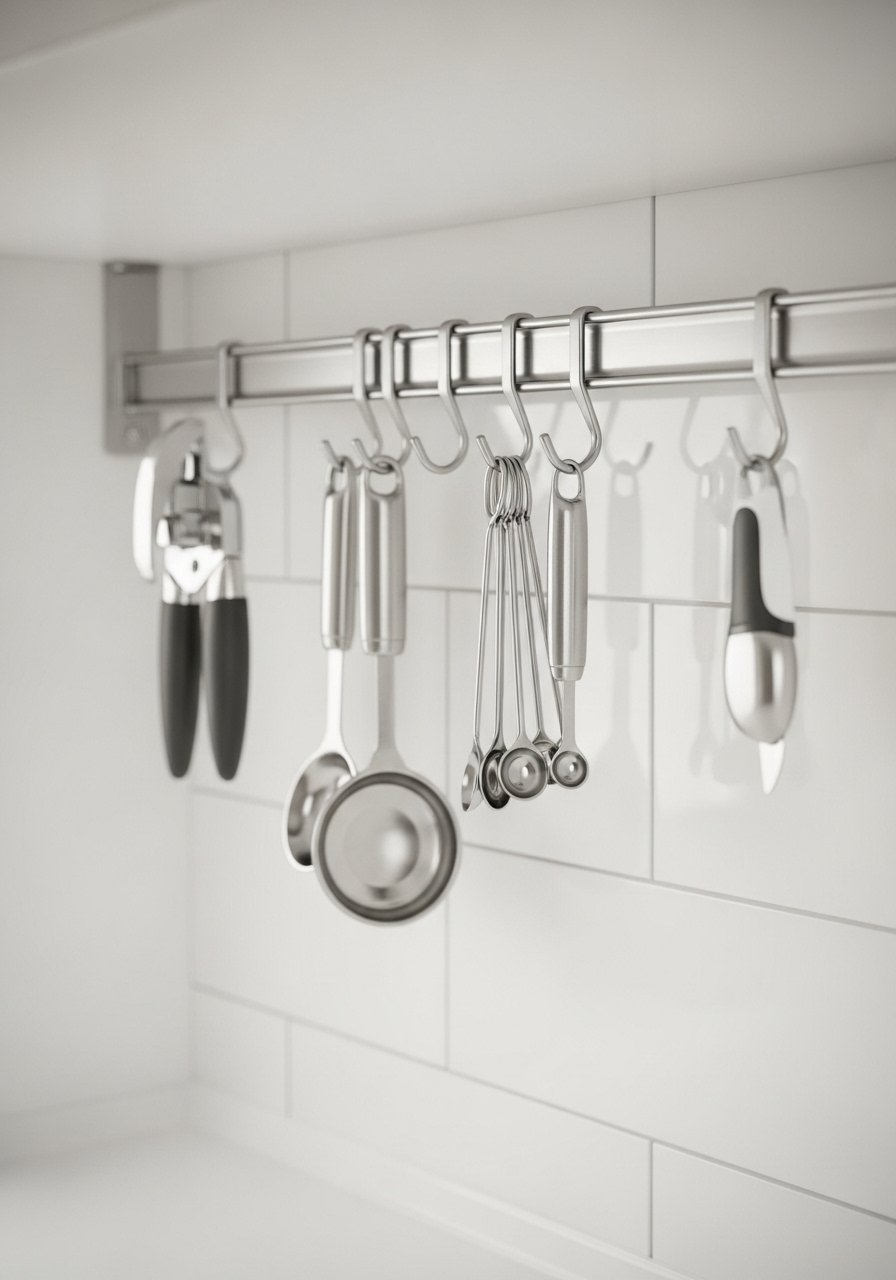
A simple rail with hooks organizes handheld tools and frees drawer space. The metal rail looks workshop-clean and keeps tools visible. Install at eye level for fast access. A slim hook rail set works well.
Materials
- 1 metal rail with hooks, 12–18"
- Can opener, measuring spoons, small grater
- Screws and anchors
- Level
Instructions
- Mount rail to pantry wall at convenient height.
- Hang frequently used tools by type.
- Keep sharp items out of children’s reach.
- Wipe tools after use before hanging to prevent rust.
- Re-evaluate placement seasonally.
How to Display or Gift It
- Place near a prep shelf for quick use.
- Add a small magnetic spice clip to hold recipe cards.
- Gift with a set of measuring spoons and a recipe card.
- Rotating Snack Carousel
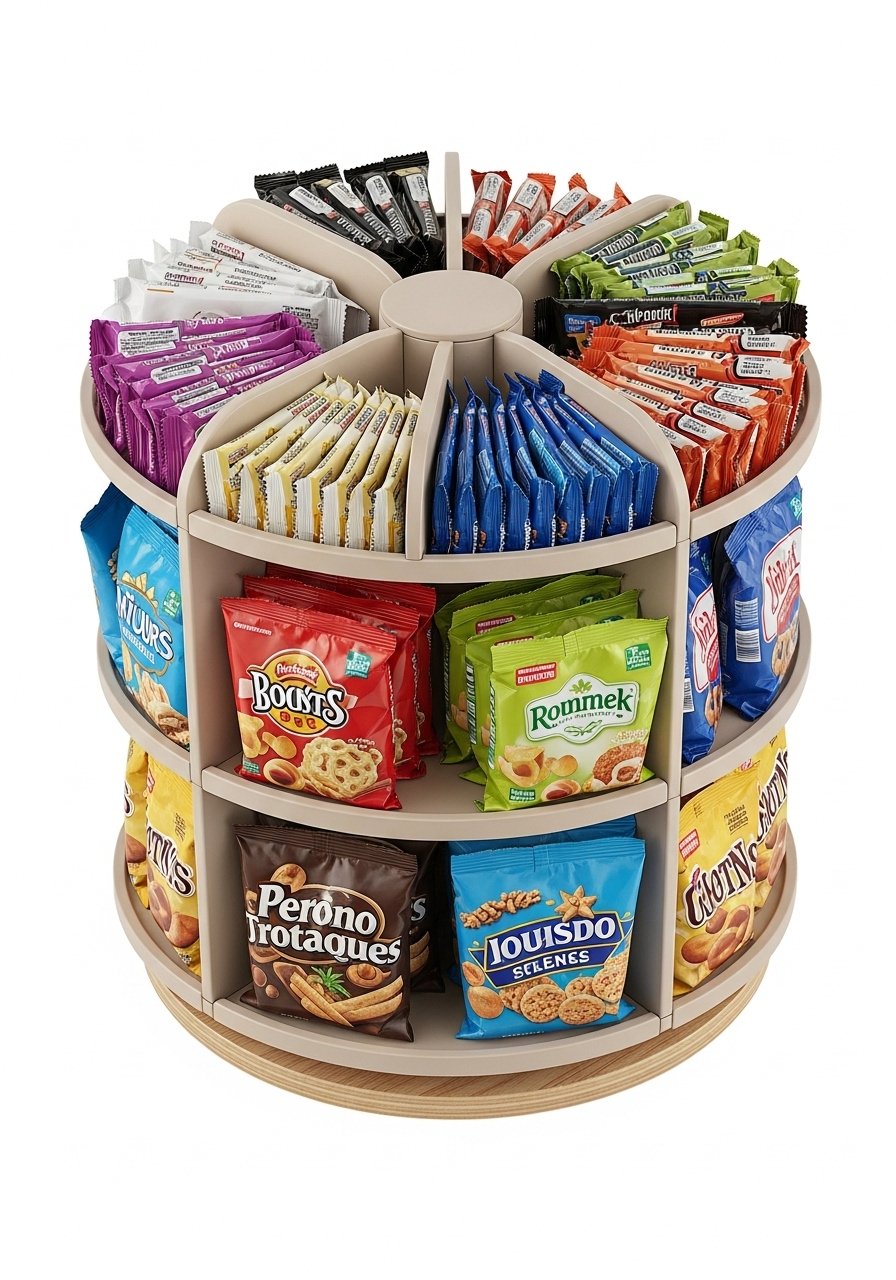
A small rotating carousel keeps grab-and-go items contained and easy to spin through. The tactile spin motion is satisfying and fun for kids. Use a rotating chef's carousel sized for pantry shelves.
Materials
- 1 rotating snack carousel, 10" diameter
- Snack pouches and single-serve packs
- Small labels
- Soft cloth
Instructions
- Place carousel on a stable shelf with center clearance.
- Fill compartments with single-serve snacks.
- Label sections by type: bars, chips, fruit snacks.
- Rotate periodically to ensure older items are used first.
- Wash carousel base monthly per care instructions.
How to Display or Gift It
- Set at kid level for independence.
- Pair with a snack portioning scoop for consistent servings.
- Gift loaded with small treats for a celebratory housewarming.
- Slim Rolling Cart for Baking Supplies
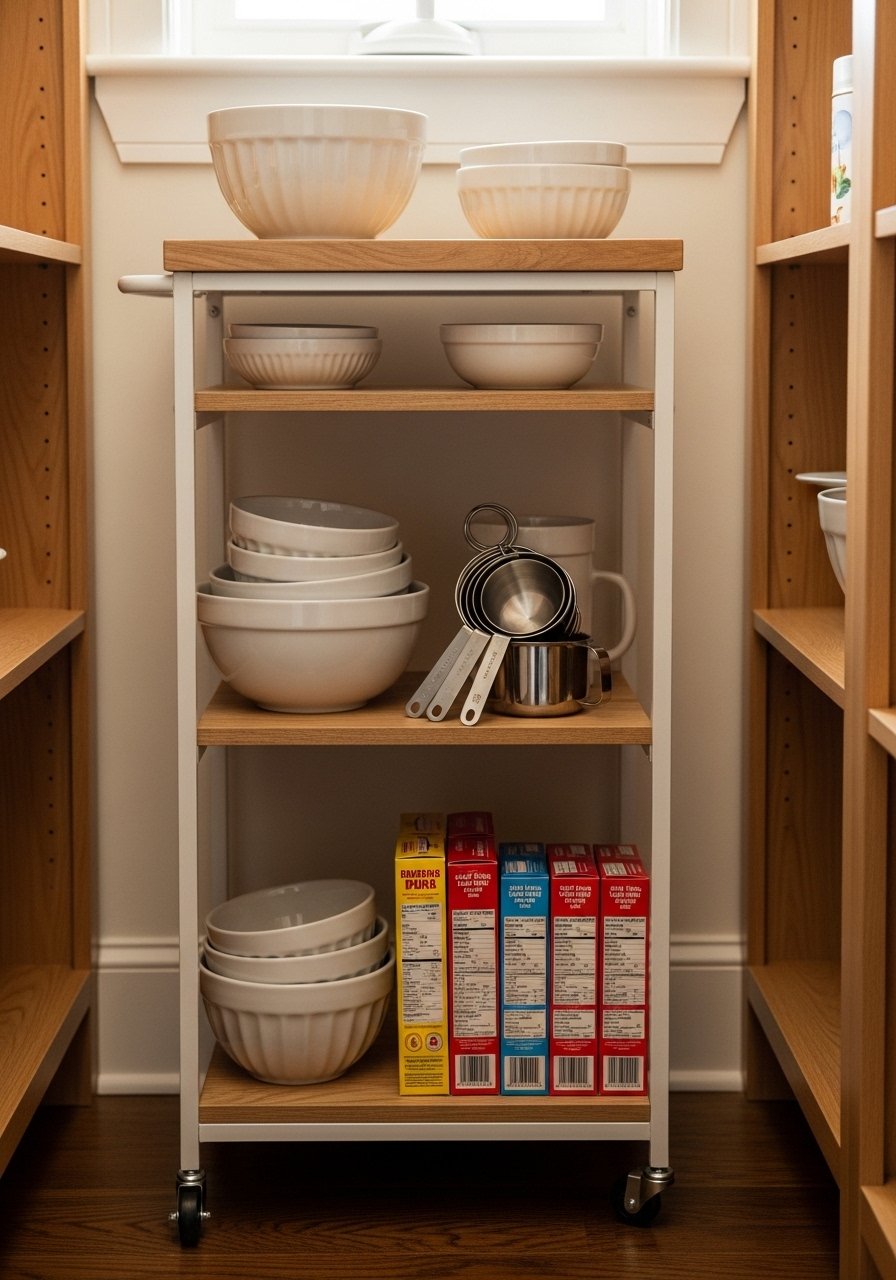
A slim rolling cart tucks into narrow pantry gaps and rolls out when you need it. The mixed metal and wood texture is practical and friendly. Great for bakers who like movable storage. Choose a slim rolling cart with casters.
Materials
- 1 slim rolling cart, 3-tier
- Mixing bowls and measuring sets
- Baking mixes and mason jars
- Caster locks (if not included)
- Soft cloth
Instructions
- Assemble cart and lock casters to test movement.
- Place cart in pantry gap and load heaviest items on bottom.
- Roll out on a flat floor surface when baking.
- Lock casters while in use to prevent sliding.
- Wipe surfaces monthly to reduce flour dust buildup.
How to Display or Gift It
- Use cart for all baking needs and roll it to the counter when needed.
- Pair with a set of nesting mixing bowls.
- Gift as a baking kit with a cookbook and utensils.
- DIY Tiered Can Rack from Crates
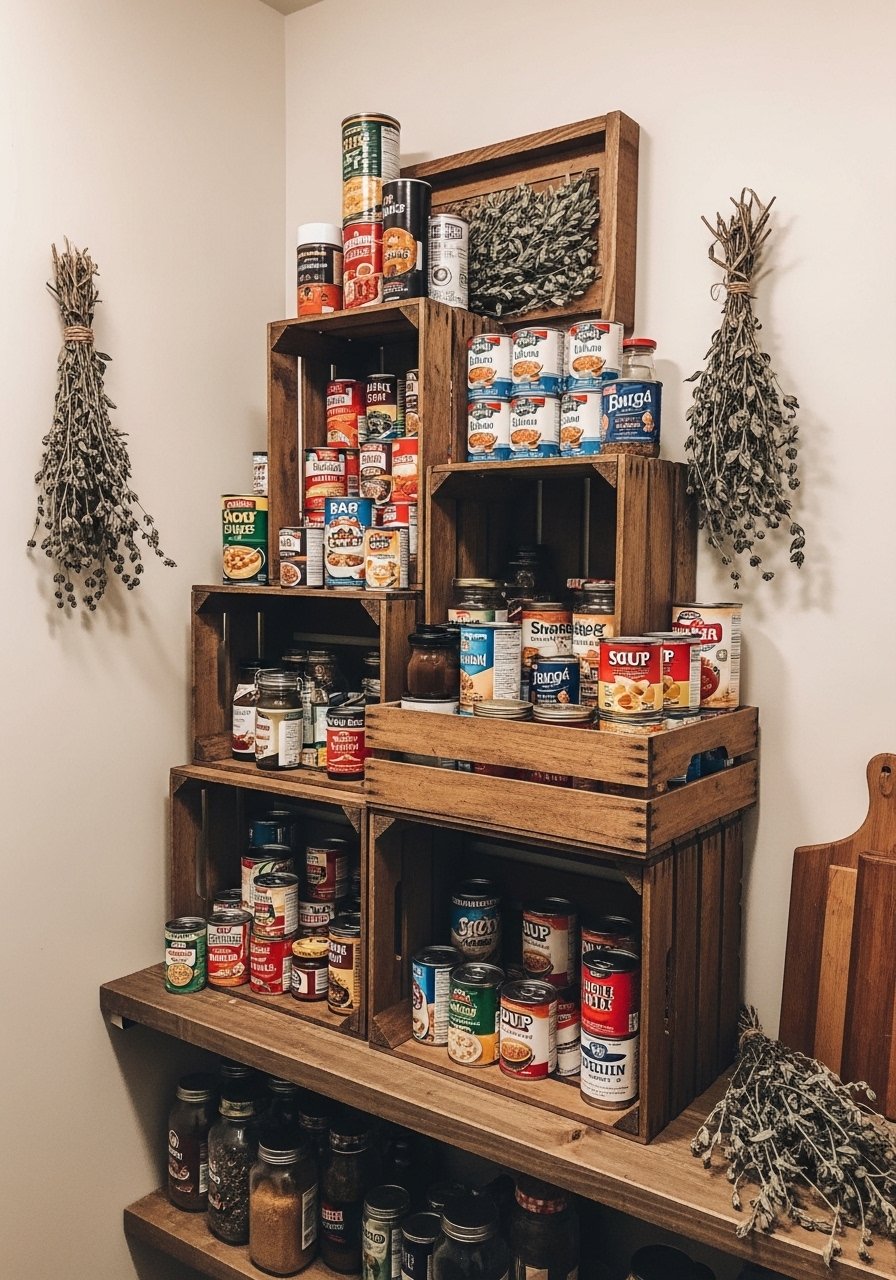
Stacking crates in a staggered tier creates an easy-to-build can rack with a tactile wooden look. The staggered heights show labels and make access simple. This is a budget-friendly project you can build in under an hour.
Materials
- 3 wooden crates, 12" x 9" x 6"
- 4 small rubber feet (adhesive)
- Sandpaper, 120 grit
- Wood stain (optional), 4 oz
- Screws and brackets, small
- Measuring tape
Instructions
- Sand crate edges smooth and stain if desired; dry 2–4 hours between coats.
- Arrange crates in staggered tier on shelf, test stability.
- Attach brackets between crates for extra security if stacking more than two.
- Add rubber feet to bottom crate to prevent sliding.
- Load cans so labels face outward; avoid top-heaviness.
- Recheck brackets quarterly for loosening.
How to Display or Gift It
- Use for soups and canned beans; place near microwave for convenience.
- Add mini chalkboard tags to each tier for category names.
- Gift a small pre-stained crate with a couple of specialty cans as a pantry starter.
Trust me, picking up a quality hot glue gun with temperature control changed how every single one of these projects turned out — no more stringy mess, no more burns. You’ve seen 27 ways to turn tiny, cramped spaces into practical, beautiful pantry spots — from jar zones and magnetic tins to fold-down shelves and rolling carts. Try one or three projects this weekend and pin the post for later.
Which of these small pantry organization ideas are you most excited to try? Share a photo after you finish — friends will love the inspiration, and you might spark someone else to tidy their pantry too.


