
You love the idea of a DIY round coffee table but worry about rough edges, wobbly legs, or a finish that looks store-bought. A simple one-afternoon DIY round coffee table gives you a smooth, stylish piece that fits any living room layout — even if you’re a beginner and short on time.
You’ll learn how to pick the right round top, assemble a sturdy base, and get a glass-smooth finish without high-end tools. A reliable cordless drill and a Kreg pocket hole jig will make the build held-together-strong. For sanding fast, an orbital sander saves hours and gives even results.
Follow the four clear steps below and you’ll have a pinner-worthy coffee table that’s smooth, stable, and styling-ready.
Gather and prep your materials (beginner-friendly, budget options)
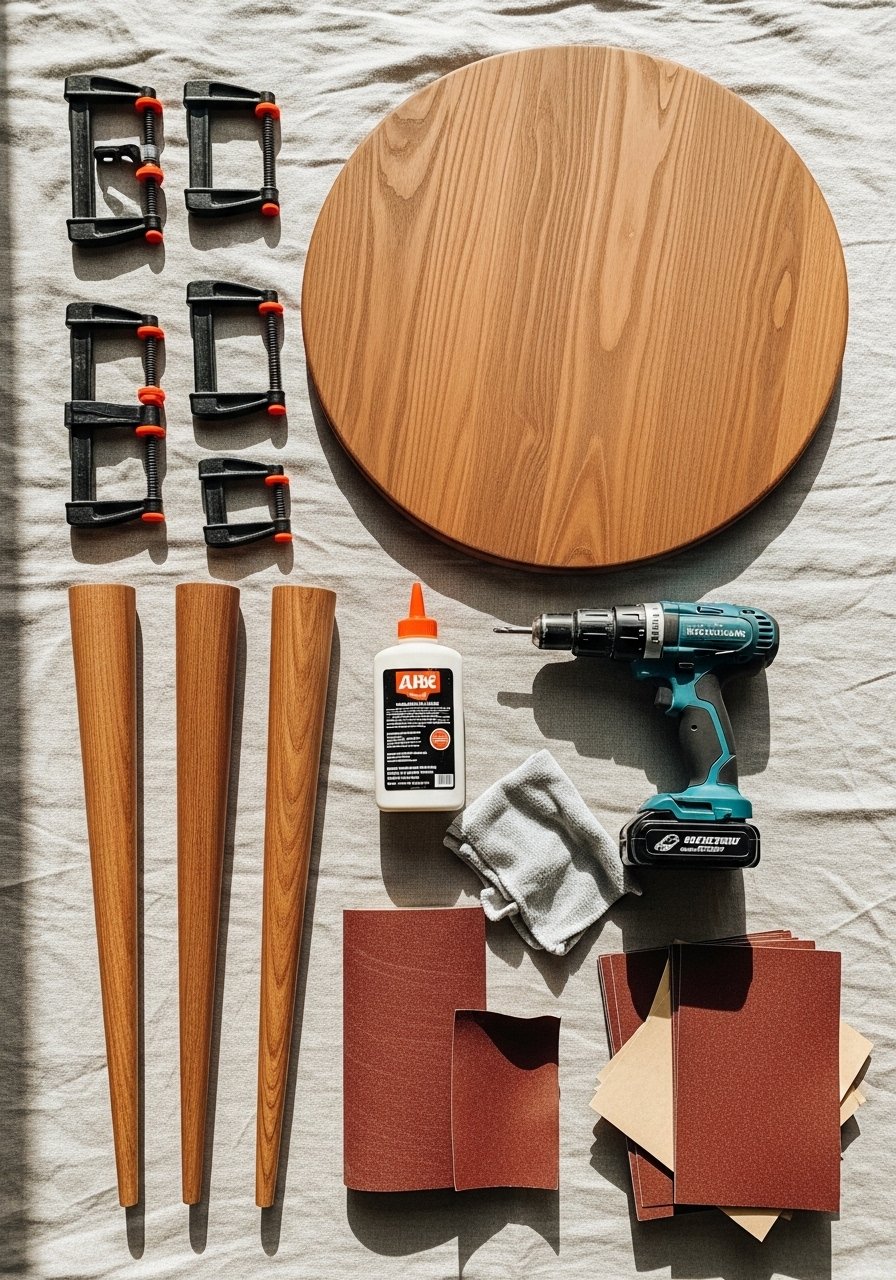
Start by choosing a round top sized for your room. For most living rooms, 30–36 inches diameter is versatile; larger rooms can go 36–42 inches. If you don’t want to cut lumber, a round wood table top speeds things up.
Common prep steps:
- Check the top for flatness and edge smoothness; lightly plane or sand any high spots.
- Pick your legs: hairpin, tapered, or turned. A simple choice is a set of three wooden legs for stability.
- Keep wood glue and pocket screws on hand for strong joins.
Helpful product tips:
- Use a Titebond wood glue for permanent adhesion.
- If you’ll cut your own top, a circular saw guide and clamps speed precise cuts.
Build the base and attach the top (one-afternoon, stable construction)
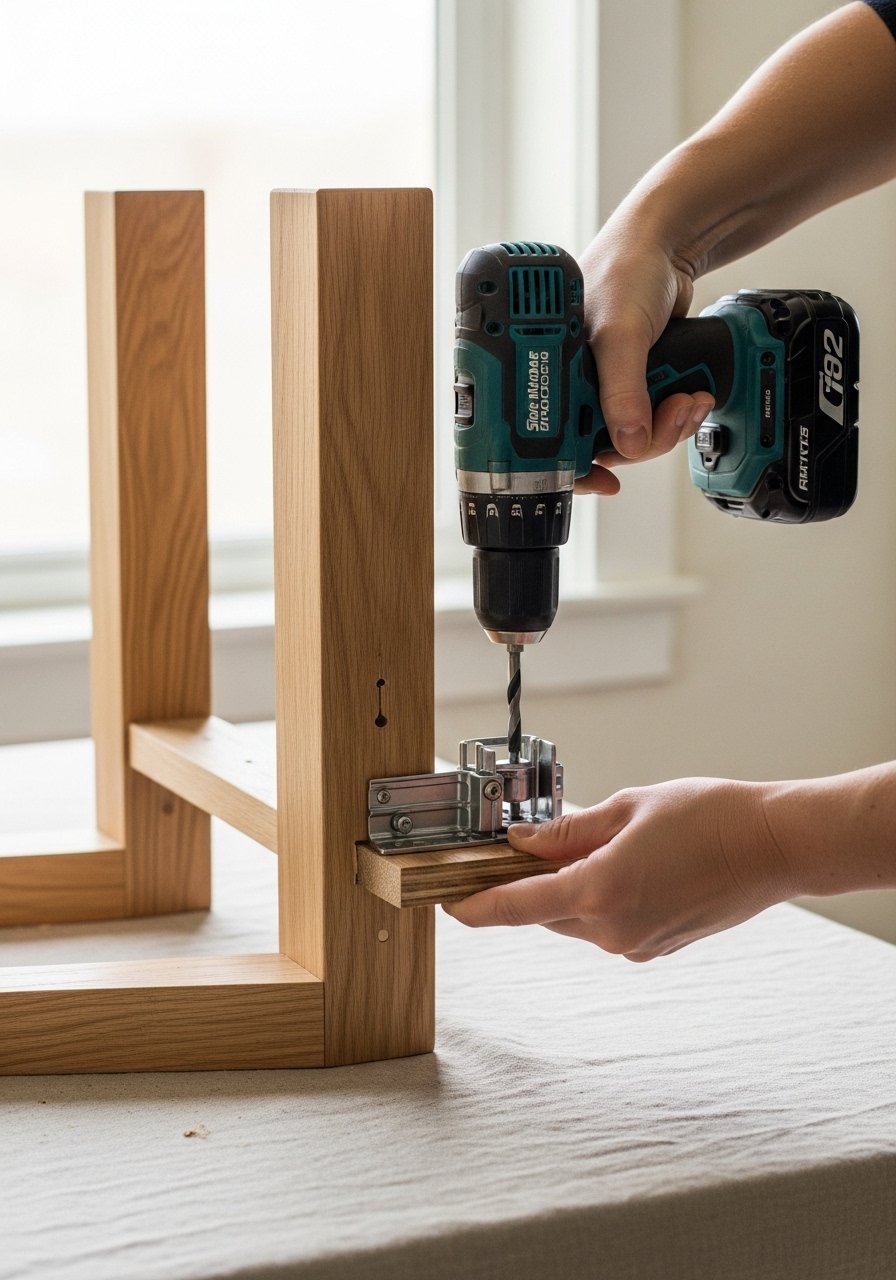
Lay out leg placement: for a 36-inch top, set legs about 12–14 inches from the center toward the outer third. Use these steps:
- Mark three evenly spaced attachment points on the underside.
- Drill pocket holes with your Kreg jig for clean, hidden screws.
- Clamp, glue, and drive pocket screws to join legs to the top.
Pro tips:
- Use a small bead of glue plus screws — glue alone can fail over time.
- If using hairpin legs, position mounting plates flush and pre-drill to avoid splitting.
- Keep a set of small bar clamps handy to hold pieces while the glue sets.
Sanding and getting a smooth finish (smooth, paintable surface)
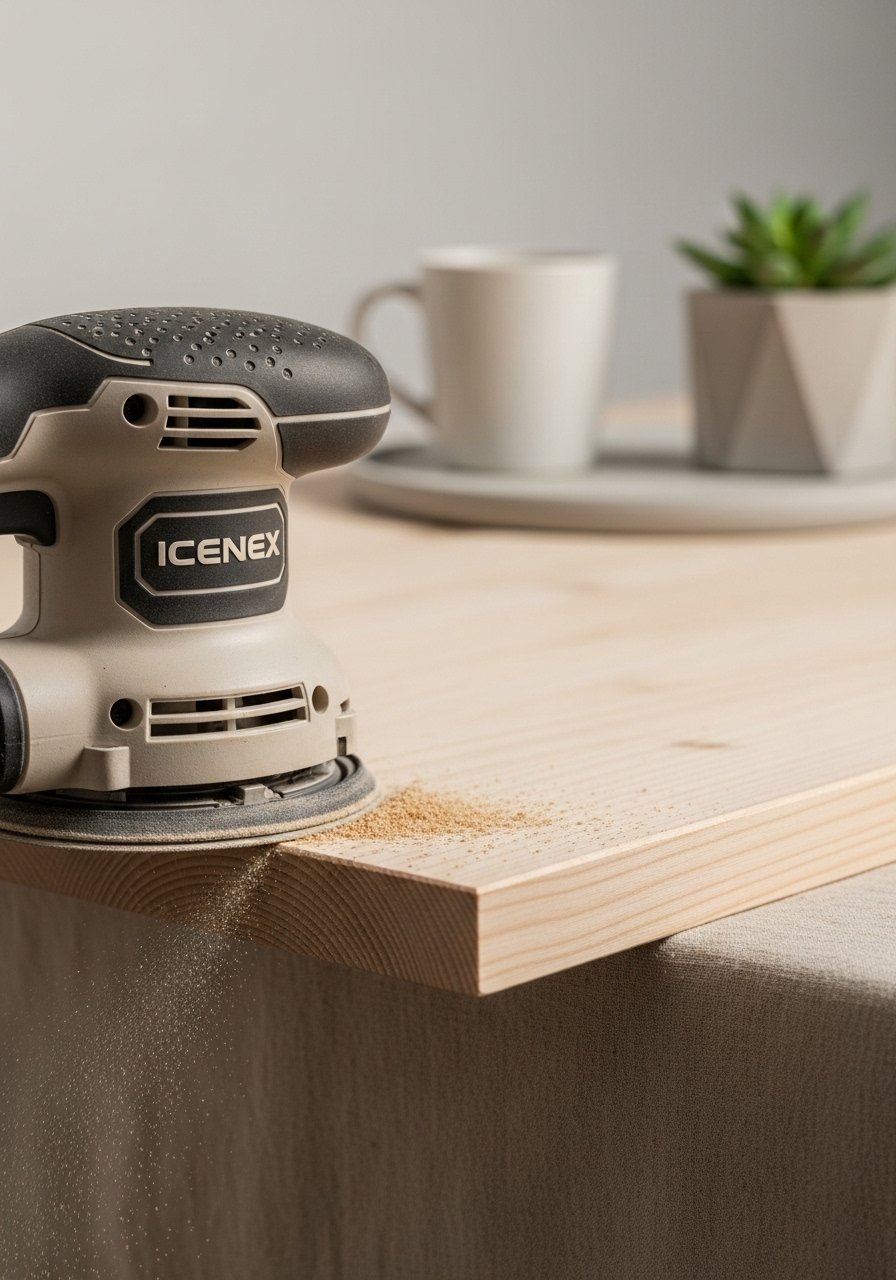
A smooth finish makes the table look professional. Sand in stages:
- Start with 120-grit to remove glue or rough spots.
- Follow with 180-grit, then 220-grit for a silky surface.
- Wipe with a tack cloth between grits.
Products that help:
- An orbital sander and a sandpaper set speed the job.
- For filling knots or small gaps, use a stainable wood filler.
Finishing choices:
- For natural wood: apply a Minwax wood stain then two coats of water-based polyurethane; allow 2–4 hours between coats and light sanding with 320-grit before the final coat.
- For painted surfaces: a coat of primer and two coats of chalk or acrylic paint yield a modern matte look; seal with a clear water-based poly.
Styling, placement, and common troubleshooting (pin-worthy finishing touches)
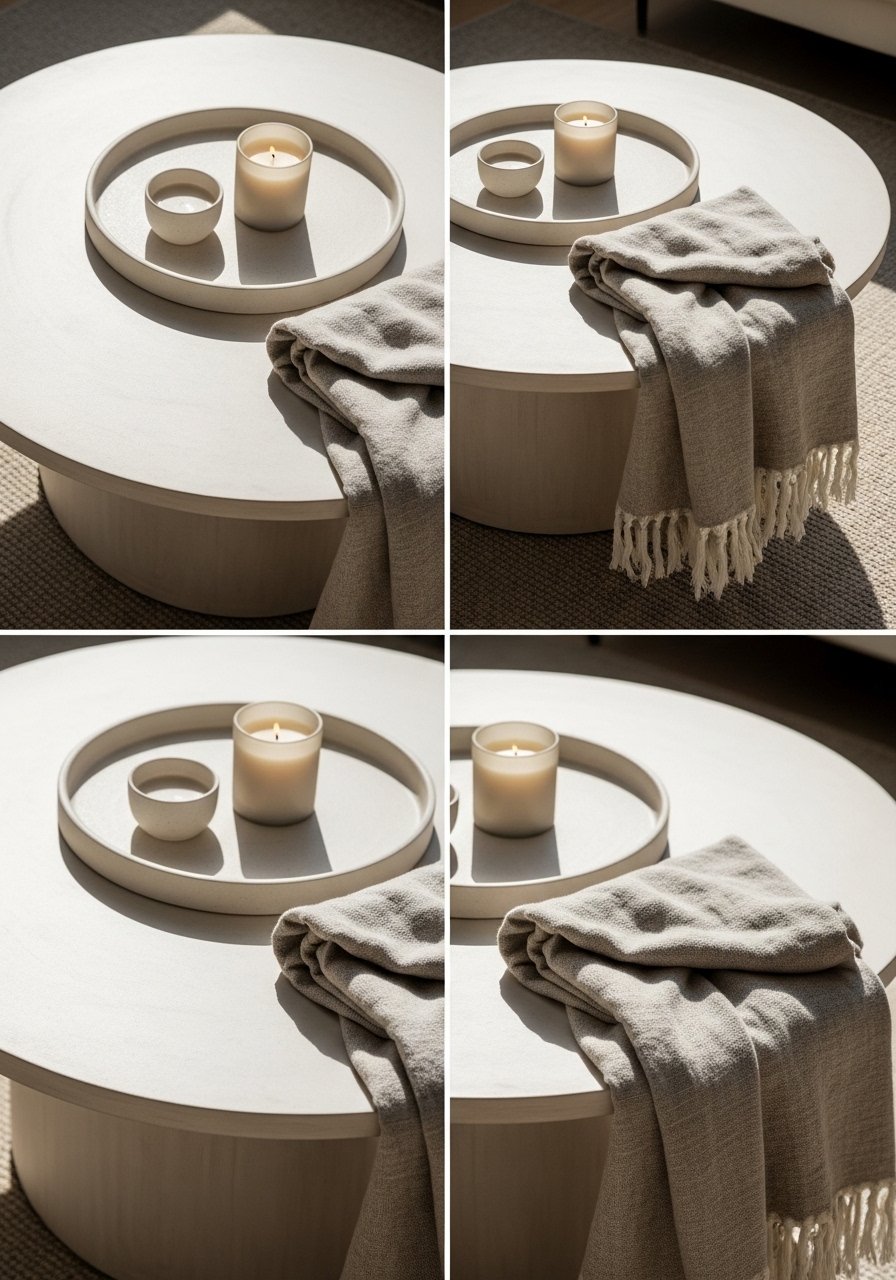
Place the table to anchor your seating: center in front of a sofa or slightly offset in an L-shaped layout. Styling tips:
- Use a tray to group decor and protect the finish.
- For uneven floors, add small felt pads or adjustable leg shims to stop wobble.
Troubleshooting quick fixes:
- Wobble after assembly? Tighten screws and check leg alignment; re-glue joints if needed.
- Finish looks streaky? Sand lightly and apply another thin coat; more thin coats beat one thick coat every time.
- Save time by using a foam brush for quick, even sealant application.
Final presentation ideas:
- Swap in painted legs for contrast.
- Add a woven basket underneath for storage and texture; use a craft organizer basket to keep things tidy.
You just made a smooth, stylish DIY round coffee table that fits any living room layout. Pin this guide, grab the linked tools — like a Kreg pocket hole jig or an orbital sander — and plan one focused afternoon. Save this tutorial for your next craft day and share it with a friend who likes making things. Which leg style will you try first?


