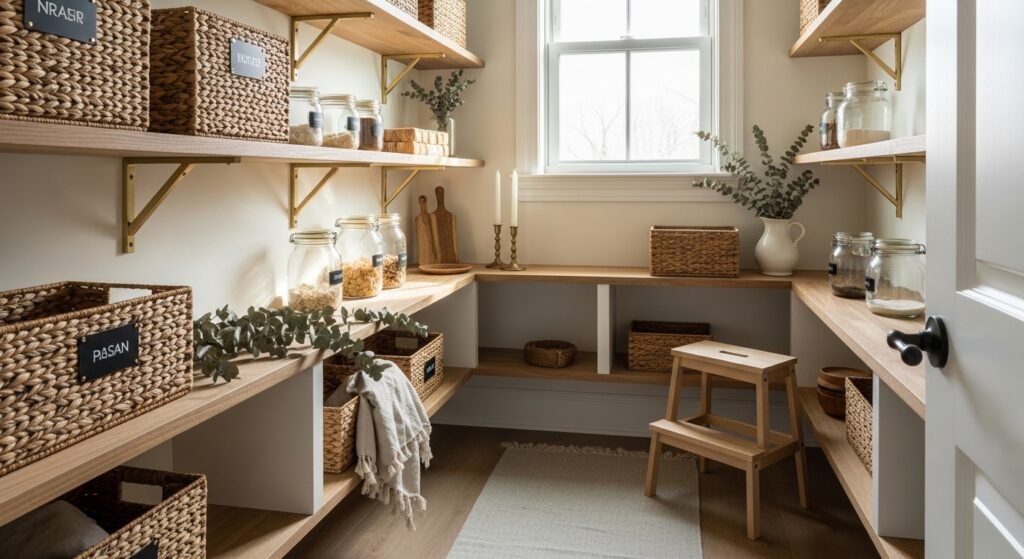
You open the pantry and want it to feel roomy, tidy, and a little bit beautiful. These small walk in pantry ideas are all about making every square foot count—shelving tweaks, smart labels, sliding baskets, and a few crafty touches that add warmth and real function. You'll find projects that add storage, improve visibility, and make daily routines easier without a major remodel.
I like to start simple: peel-and-stick shelf liner for crisp shelves and my Cricut Joy cutting machine for fast custom labels. For glueing fabric trims or lightweight hooks, a low-temp hot glue gun handles most jobs cleanly. Each project below includes exact materials, step-by-step instructions, drying times, and styling tips so you can finish one weekend task at a time.
- Floating Crate Pull-Out Baskets for Deep Shelves
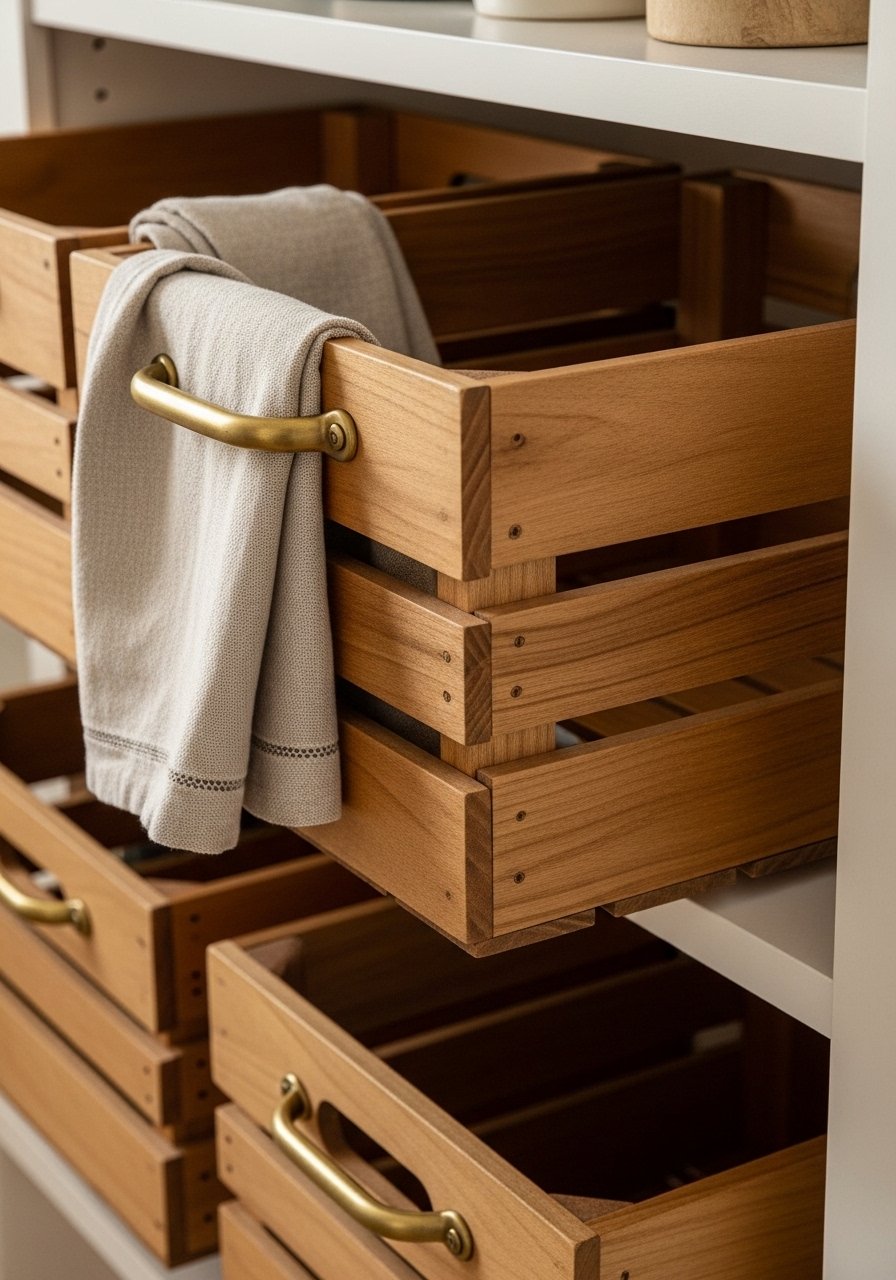
This simple crate-to-pull system turns deep, wasted shelves into accessible storage. The rustic wood grain adds texture, while the pull-outs keep cereals and snacks within reach. Beginners will love how quickly the sliding strips install, and wood glue plus a few screws make this sturdy.
Materials
- 2 wooden milk crates (12" x 10" x 8") per shelf
- 1/2" birch plywood strips, cut to shelf depth for runners (2 strips per crate, 1/2" x shelf depth x 1.5")
- 1 set of drawer slide runners (full-length 12" or shelf depth) per crate
- Wood glue (gel formula, 4 oz)
- #6 x 1" wood screws, 12 pieces
- Sandpaper (120 and 220 grit)
- Paint or stain (matte chalk paint, 8 oz)
- Small brass pull handles, 2 per crate
- Tape measure, pencil, drill, screwdriver
Instructions
- Measure shelf depth and cut plywood runners to match. Sand edges smooth with 120 grit.
- Paint or stain crates and runners; let dry 2 hours, then tack-sand with 220 grit and apply a second coat. Cure 24 hours.
- Attach runners to the shelf floor using wood glue and two screws each; set runners parallel and spaced to match drawer slide width.
- Mount matching slides to the sides of each crate using screws. Check alignment by sliding crate in and out; adjust as needed.
- Install brass handle on front face of crate; pre-drill 1/8" holes to avoid splitting.
- Test full load by placing 10–15 lbs of pantry items; ensure slides move smoothly and crates sit level.
How to Display or Gift It
Slide crates into frequently used shelves and group like with cereal on one row and baking goods on another. Add linen liners for a softer look and tuck a small chalkboard tag for rotating labels. For gifting (housewarming), fill a crate with pantry basics and wrap in cellophane. Store extra runners in a slim craft organizer box for future builds.
- Mason Jar Spice Wall with Magnetic Strip
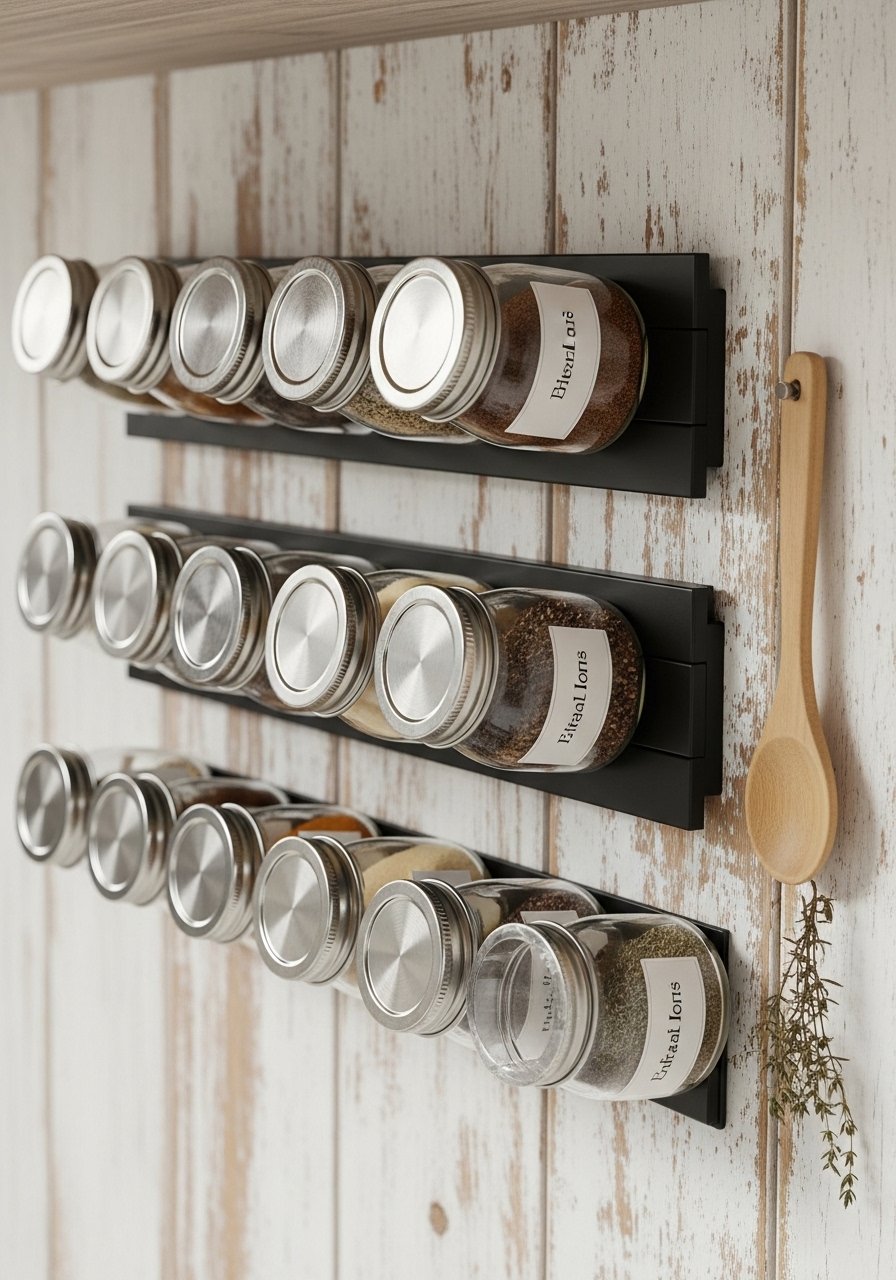
A vertical spice display frees drawer space and makes finding seasonings instant. Mason jars look neat and let you see contents. If you want ultra-fast labeling, run lids through your cutting machine for vinyl labels.
Materials
- 12 oz wide-mouth mason jars, 12 jars
- Strong magnetic strip, 36" length (adhesive-backed)
- Magnetic sheet circles (adhesive, 1.5" diameter) or metal jar lids
- Permanent fine-tip labels or black vinyl cut with a Cricut Joy cutting machine
- Funnel for filling
- Measuring spoons (optional display prop)
- Screwdriver, level, pencil, drill (if anchoring strip with screws)
Instructions
- Clean wall area and measure layout. Mark centerline and level the magnetic strip.
- Peel and stick the magnetic strip to the backsplash; for extra hold, secure with screws at each end.
- Fill jars using a funnel—measure 2/3 full for whole spices, less for powders.
- Attach magnetic circle to jar lid underside or use metal lids. Close jars and check magnetic hold.
- Label each lid with measuring spoons on hand or vinyl labels; let adhesive set 30 minutes.
- Arrange jars on the strip by use frequency—salt, pepper, and paprika up front.
How to Display or Gift It
Group spices by cuisine for a curated look—Italian row, baking row, etc. Add a small wooden shelf below for measuring spoons. For gifting, assemble a mini spice kit in a wooden box and include recipe cards.
- Slim Rolling Baking Sheet Tray

Make those awkward baking sheets accessible by storing them vertically on a narrow pull-out tray. This project saves floor space and keeps pans scratch-free. You'll use simple metal L-brackets and felt pads to protect finishes.
Materials
- 1 slim plywood tray base, 18" x shelf depth x 1/2"
- 2 telescoping wooden runners or narrow drawer slides (full extension)
- 4 metal L-brackets (1.5")
- Felt pads, 12 pieces
- Screws (#6 x 3/4")
- Wood stain or paint, small sample (2 oz)
- Measuring tape, drill, screwdriver, foam brush
Instructions
- Cut plywood to width of shelf opening and sand smooth.
- Stain or paint tray; dry 1 hour between coats, two coats recommended. Cure 12 hours.
- Attach runners to underside; mount the counter slides in the shelf cavity following manufacturer directions.
- Fix L-brackets vertically on tray edges to create slots every 1.5"–2" for pan dividers.
- Stick felt pads to bracket contact points to reduce metal-on-metal noise.
- Slide tray in and organize sheets by size; ensure it extends fully and retracts without rubbing.
How to Display or Gift It
Position near the oven or at countertop height for baking ease. Add a small label on the tray edge with a paint pen for quick identification. For a gift, pair with a silicone baking mat and wrap in kraft paper.
- Labeled Jar Row with Chalkboard Lids
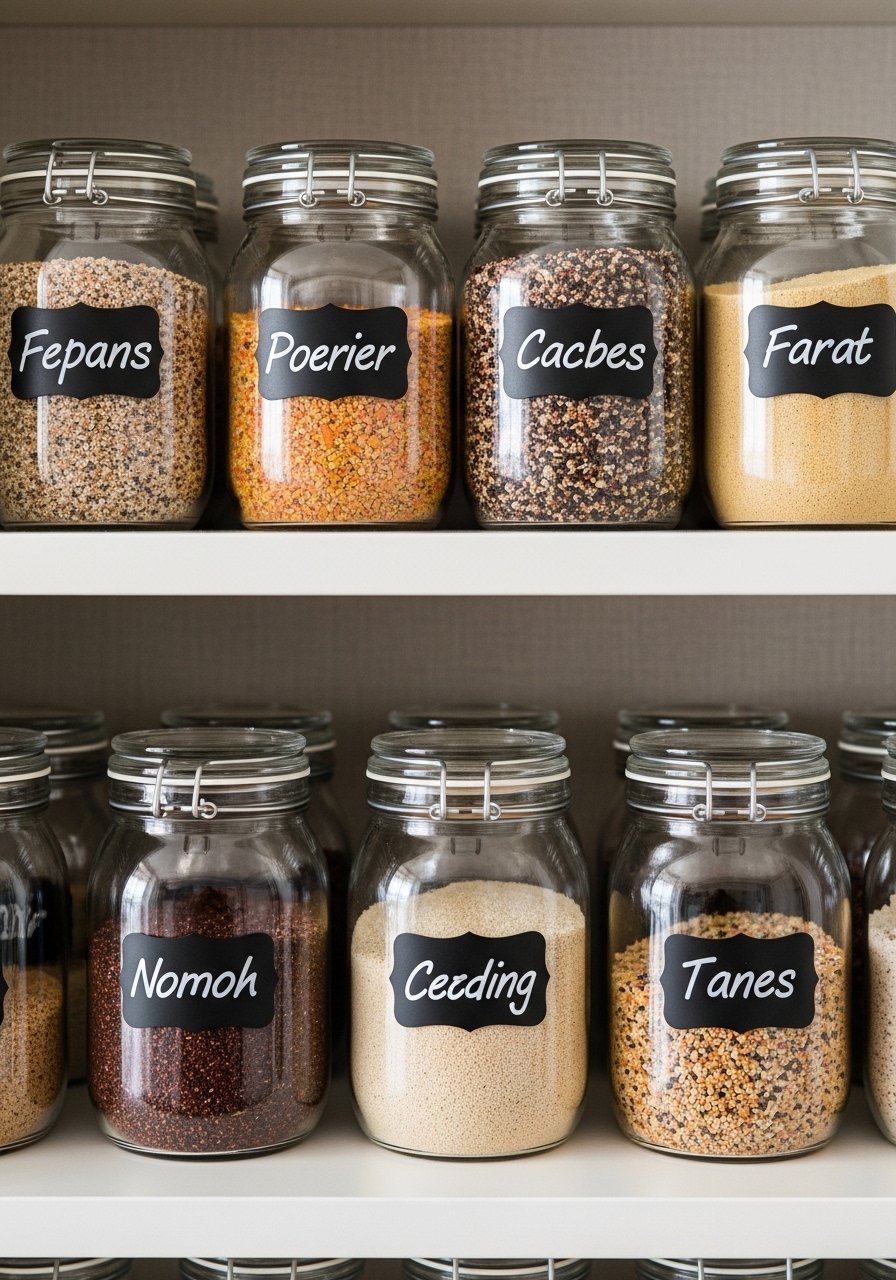
Uniform jars create a calm visual and make pantry items readable at a glance. Chalkboard lids let you swap contents without reprinting labels—perfect when you buy bulk.
Materials
- 16 oz glass storage jars, 12 jars
- Acrylic chalkboard paint, 2 oz
- Foam brush (1")
- Fine white chalk pen
- Sandpaper, 220 grit (for prepping lids)
- Rubbing alcohol, small bottle
- Funnel, jar filling
- Shelf liner, non-slip strip
Instructions
- Clean lids with rubbing alcohol and sand lightly. Apply one thin coat of chalkboard paint with a foam brush.
- Let the coat dry 30 minutes, sand lightly with 220 grit, apply second coat. Cure 24 hours.
- Season lids by rubbing chalk all over and wiping clean for best erasability.
- Fill jars to 3/4 full to avoid spilling when pulling down.
- Write contents with a chalk pen; let ink dry 1 minute.
- Arrange jars on shelf liner to prevent sliding; group by use (baking, grains, snacks).
How to Display or Gift It
Line jars up on a single shelf for a cookbook-style look. Add a small chalkboard sign for rotating sale items. Store extras in stackable craft organizer bins until needed.
- Tension Rod Vertical Can Organizer
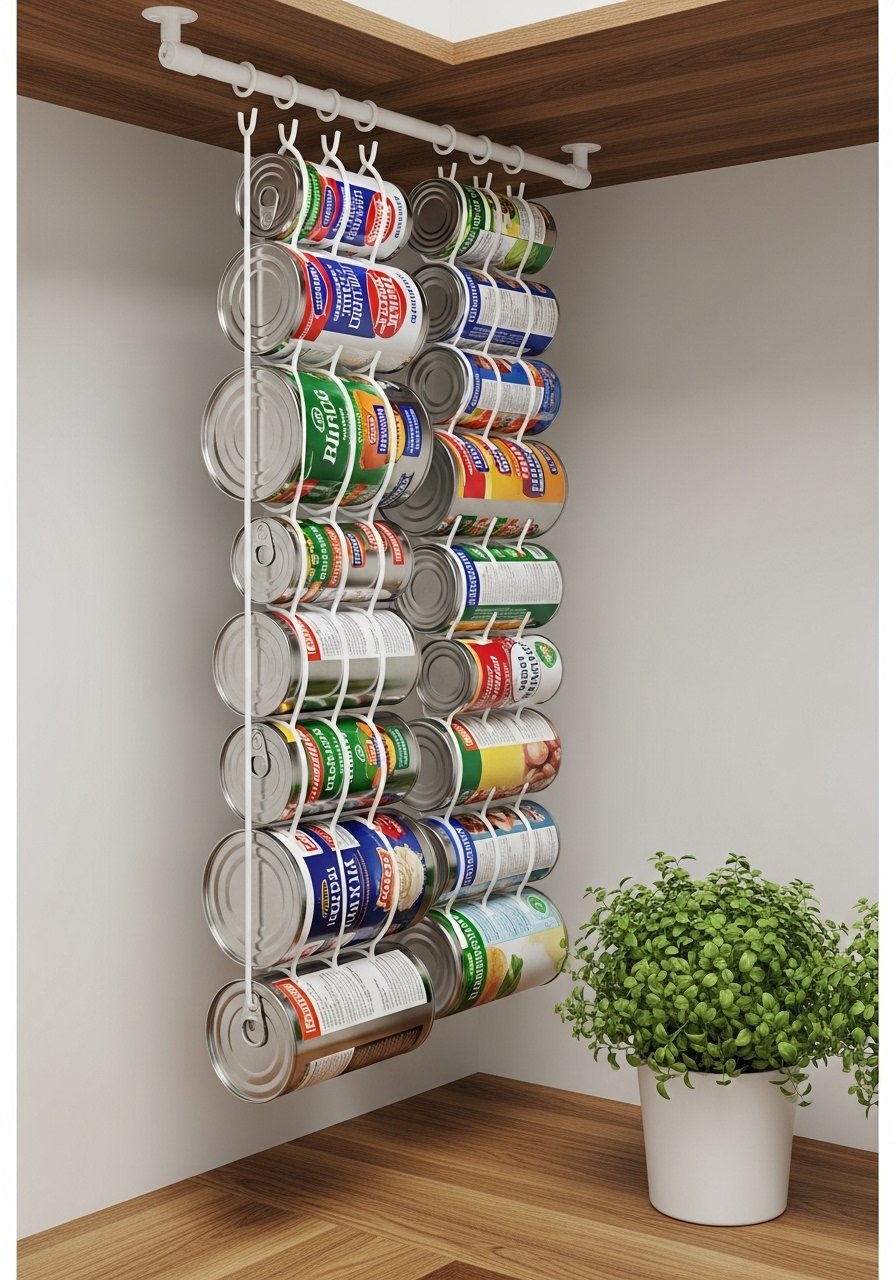
This low-cost trick creates tiered shelving in seconds using a tension rod. It keeps cans visible and uses vertical space behind the door or in a shallow shelf.
Materials
- Adjustable tension rod, 24"–48" range
- Rubber shelf liner, 12" x shelf depth
- Non-slip adhesive squares, 8 pieces
- Small wooden dowels (optional for extra tiers, 1/2" x 6")
- Measuring tape, level
Instructions
- Place rubber liner on shelf for a non-slip base.
- Position the tension rod at a slight forward angle (about 5 degrees) inside the shelf or door recess.
- Test-fit cans in a single row and raise or lower rod to create rolling space.
- Add a second rod above for smaller cans; use dowel pieces cut to depth as spacer if needed.
- Secure rod ends with non-slip adhesive squares for heavy canned loads.
- Replenish from the back to maintain FIFO rotation (first in, first out).
How to Display or Gift It
Use this in a shallow pantry or the back of a door. Place a small label at shelf front to indicate canned types. For gifting, include a set of themed pantry cans like soups or sauces in a decorative tote.
- Pegboard Snack Zone
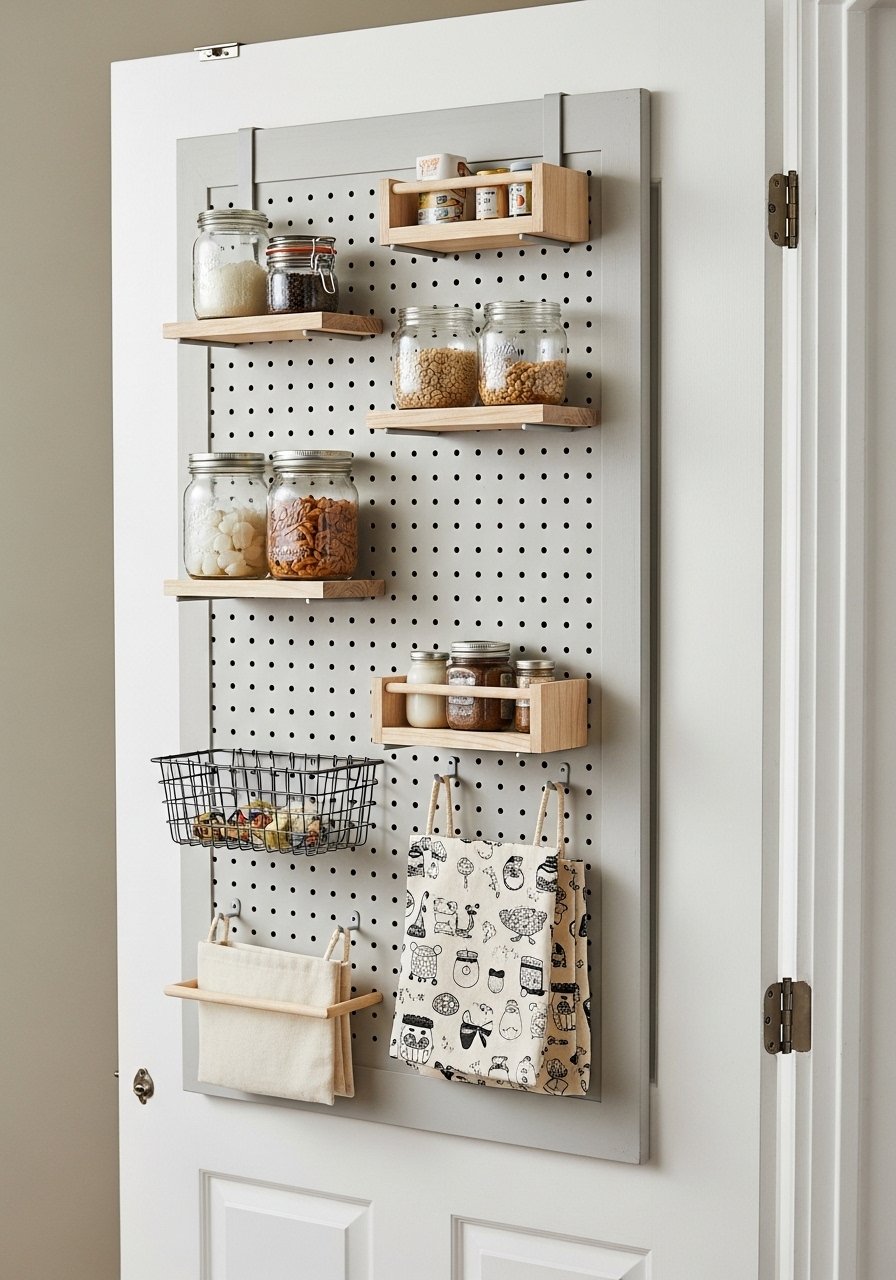
Pegboard is flexible and adapts as your snack needs change. Use hooks for baskets and jars—move them anytime for a new layout.
Materials
- Pegboard panel, 24" x 16"
- Pegboard hooks and shelf accessories (assorted)
- Paint (eggshell finish, 8 oz)
- Small wire baskets, 3
- Mason jar hooks, 6
- Screws and wall anchors
- Stud finder, drill, level
Instructions
- Measure door or wall and cut pegboard to fit if needed.
- Paint both sides and edges; dry 1 hour between coats.
- Mount to studs or use wall anchors following manufacturer instructions.
- Arrange hooks and shelves based on items—jars at eye level, baskets below.
- Hang cloth snack bags from S-hooks for fruit leather or granola bars.
- Adjust configuration monthly as inventory changes.
How to Display or Gift It
Style by color—use woven baskets for a rustic look or metal bins for modern pantries. For gifting, include a set of snack-sized reusable bags and a reusable label set.
- Built-In Step Stool Drawer (small walk in pantry ideas)
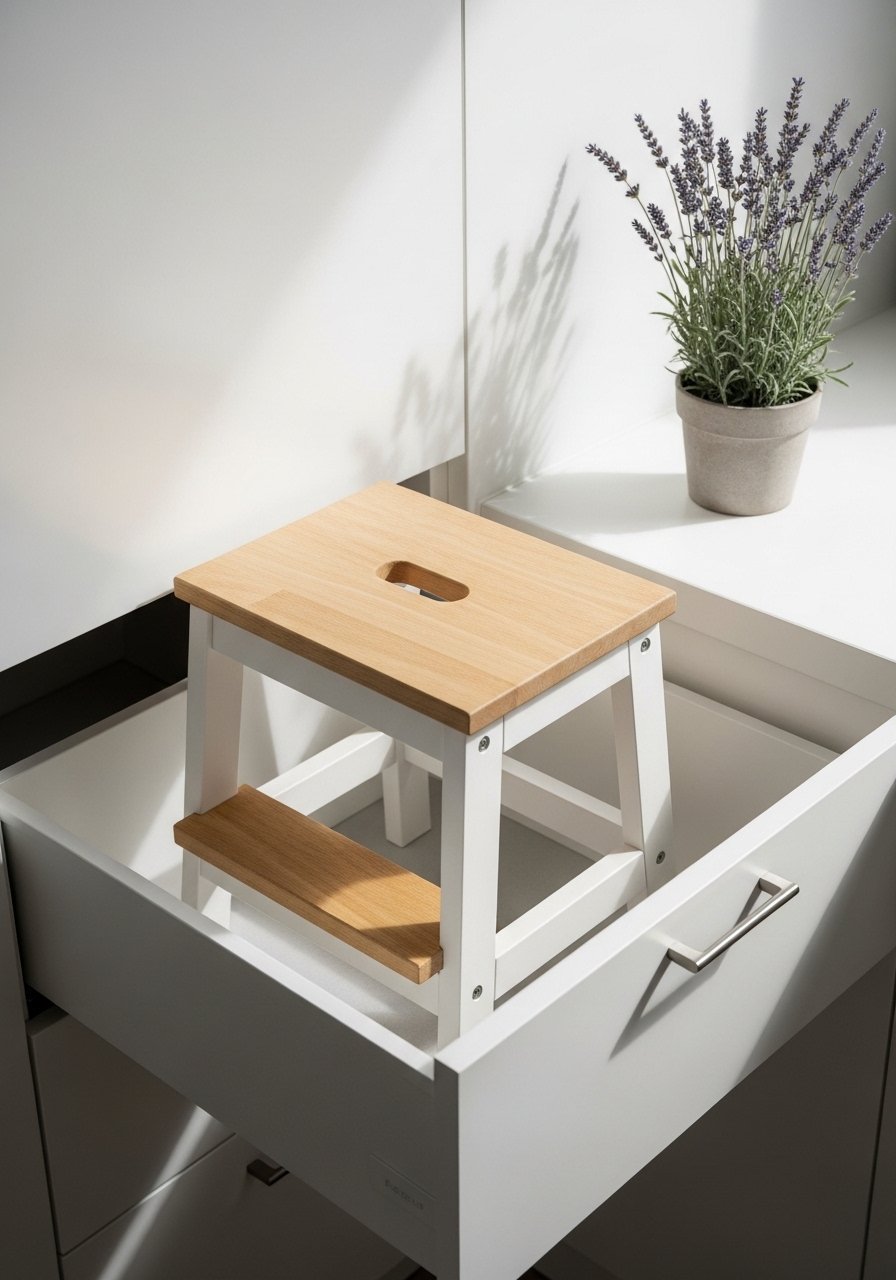
A hidden step stool saves floor space and doubles as a drawer. This is one of my favorite small walk in pantry ideas for anywhere with high shelves—handy and pretty.
Materials
- Compact woodworking plans for step stool (pre-cut kit possible)
- Plywood (3/4" x 12" x 24")
- Full extension drawer slides, 16"
- Wood glue, 4 oz
- #8 x 1" screws
- Sandpaper 120 & 220
- Stain for top, paint for sides (sample jars)
- Small rubber feet
Instructions
- Cut plywood per stool plan; sand edges smooth.
- Assemble stool box with wood glue and screws; clamp and let dry 30 minutes.
- Stain the top and paint the sides; allow 2 hours between coats and cure 24 hours.
- Mount drawer slides in the cabinet cavity at stool drawer height.
- Attach stool box to slides and test movement with weight (~50 lbs).
- Add rubber feet to stool so it doesn’t slip when pulled out.
How to Display or Gift It
Keep the stool drawer at the bottom of the pantry for quick access. Add a leather pull tab for a polished look. For gifting, mount a small brass nameplate on top and include a woodworking finishing oil.
- Wire Shelf Liner with Patterned Fabric Trim

A fabric-lined wire shelf keeps small items from tipping and adds a style moment. The scalloped fabric edge softens industrial shelving.
Materials
- Cotton fabric (1/2 yard)
- Non-slip wire shelf liner (pre-cut to shelf size)
- Fabric glue (4 oz)
- Scissors and pinking shears
- Measuring tape
- Hot glue gun (optional)
- Bias tape (for finishing edge)
Instructions
- Measure shelf length and cut liner slightly smaller than shelf width.
- Cut fabric to cover liner plus 1.5" overlap on each side. Hem or use bias tape for a neat edge.
- Glue fabric to liner with fabric glue, smoothing with a brayer roller to remove bubbles.
- Trim excess fabric and allow glue to dry 1 hour.
- Place lined piece on shelf. For extra hold, tack corners with a dot of hot glue.
- Rotate liners seasonally and launder fabric every 3–4 months.
How to Display or Gift It
Choose a neutral print for a long-lasting look, or a seasonal color for holidays. Store extra liners in a craft organizer drawer. Gift a set of liners with a small ironing board for easy upkeep.
- Sliding Basket Tower for Bottom Shelves
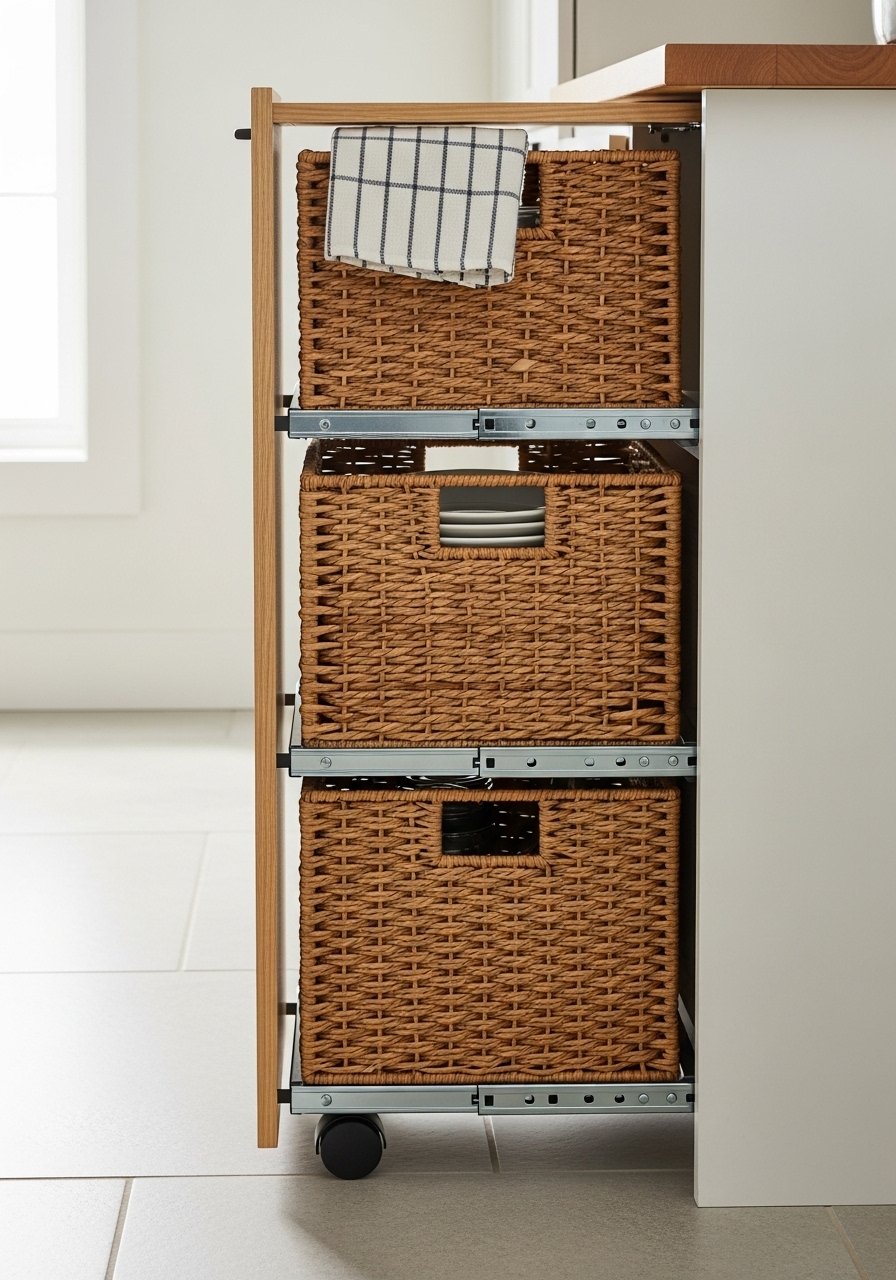
This narrow tower adds several pull-out levels in a shallow footprint—perfect for potatoes, onions, and root vegetables.
Materials
- 3 stacking woven baskets (12" x 10" x 6")
- Narrow rolling cart frame or custom plywood tower (12" x shelf depth)
- Casters (4, lockable)
- Plywood for dividers, 1/2" thick
- Wood glue and screws
- Sandpaper, paint or stain
- Tape measure, drill
Instructions
- Build or buy a narrow rolling frame sized to your shelf (12" width recommended).
- Cut plywood shelves for basket support and secure them spaced 6–8" apart.
- Attach casters to the base; test for floor clearance.
- Slide baskets into each level; add vents by leaving a small forward gap for air circulation.
- Paint or finish and allow to cure 12 hours before loading.
- Label each basket with a removable tag for rotate-and-use tracking.
How to Display or Gift It
Position near the pantry entrance for grab-and-go produce. For gifting, include a small mesh produce bag set.
- Overdoor Hanging Shoe Organizer for Snacks
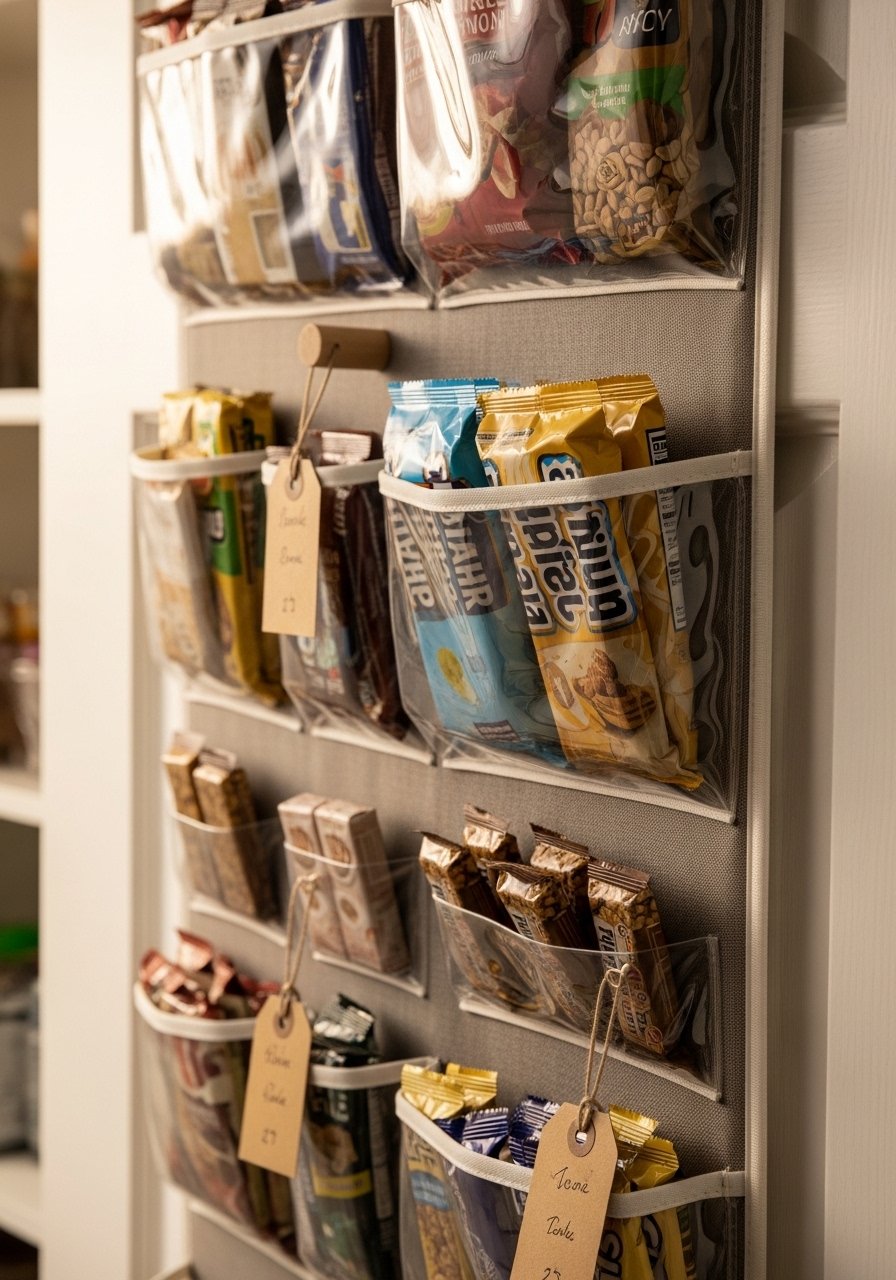
Clear-pocket organizers give instant visibility and separate small items by type. It uses the door panel and keeps shelves free.
Materials
- Overdoor clear pocket organizer, medium size
- Kraft tags and mini clothespins for labeling
- Command hooks (if not using door hang)
- Fabric scissors
- Small notepad for inventory
Instructions
- Hang organizer over door or affix with Command hooks for non-standard doors.
- Sort snacks by type and place into pockets with similar sizes grouped.
- Label pockets with kraft tags clipped by clothespins for rotating items.
- Check monthly and refill from bulk storage to avoid clutter.
- Wash organizer per manufacturer every 6 months.
- Replace worn pockets and rotate by expiry date.
How to Display or Gift It
Keep the organizer on the pantry door or the back of a closet door. For gifting, fill pockets with curated snacks and tie with baker’s twine.
- Tiered Chip & Wrap Station with Tension Shelf
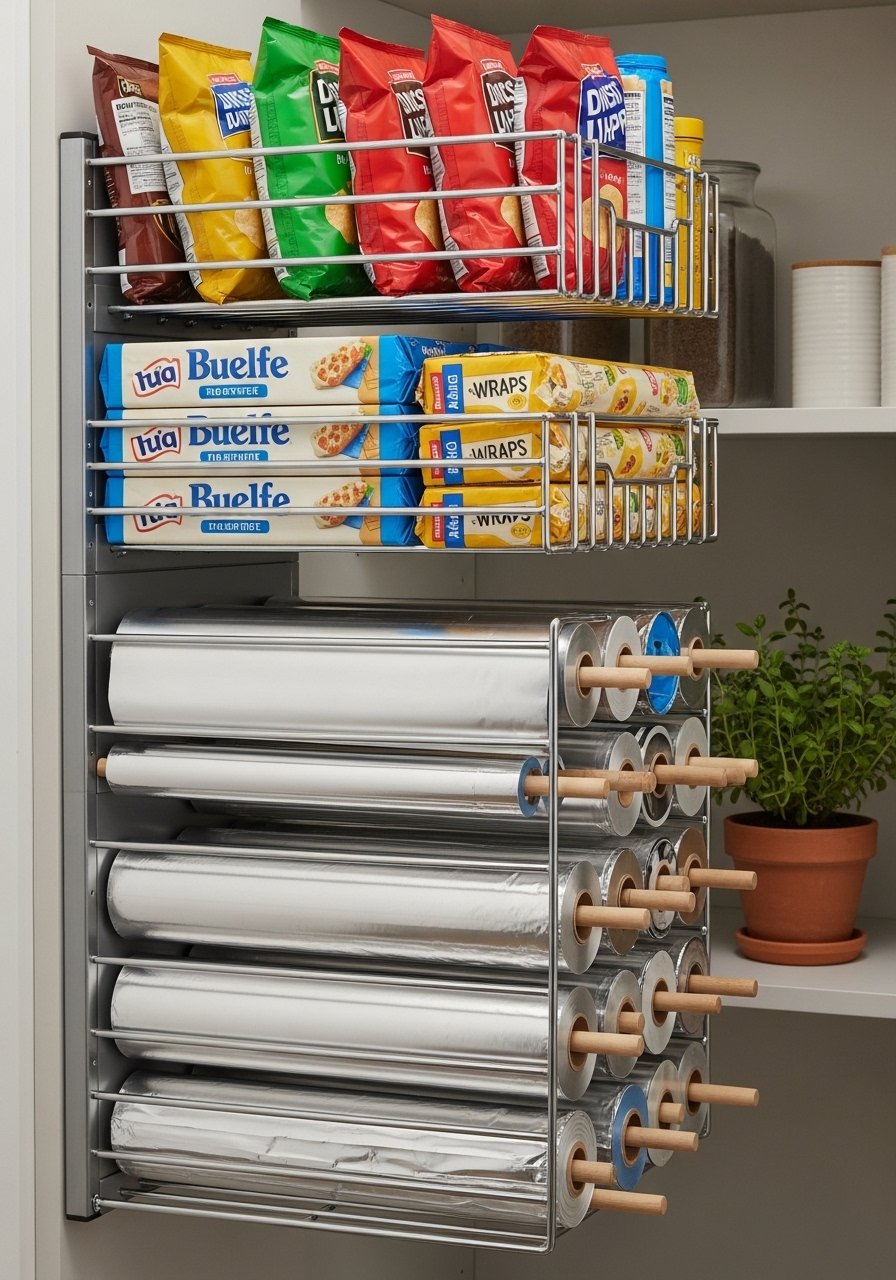
A tiered station organizes chips and wrap supplies together. The dowel spindle dispenses foil or parchment neatly.
Materials
- Tiered wire shelf (2–3 levels, 12" wide)
- Wooden dowel (3/4" x 12") for wrap spindle
- 2 end brackets for dowel
- Drill, saw (to cut dowel)
- Screws and anchors
- Non-slip shelf liner
Instructions
- Assemble the tiered shelf and position where you want it.
- Measure and cut dowel to shelf width; mount end brackets to hold spool rolls.
- Place tiered shelf on non-slip liner to avoid sliding.
- Store chips on top tiers and wraps below for ease.
- Test dispensing of foil and adjust dowel tension; add a small rubber washer to control rotation.
- Refill and wipe shelves monthly.
How to Display or Gift It
Coordinate metal finish of shelf with pantry hardware. Gift with a set of branded reusable food wraps.
- Pull-Down Wire Rack for Heavy Jugs
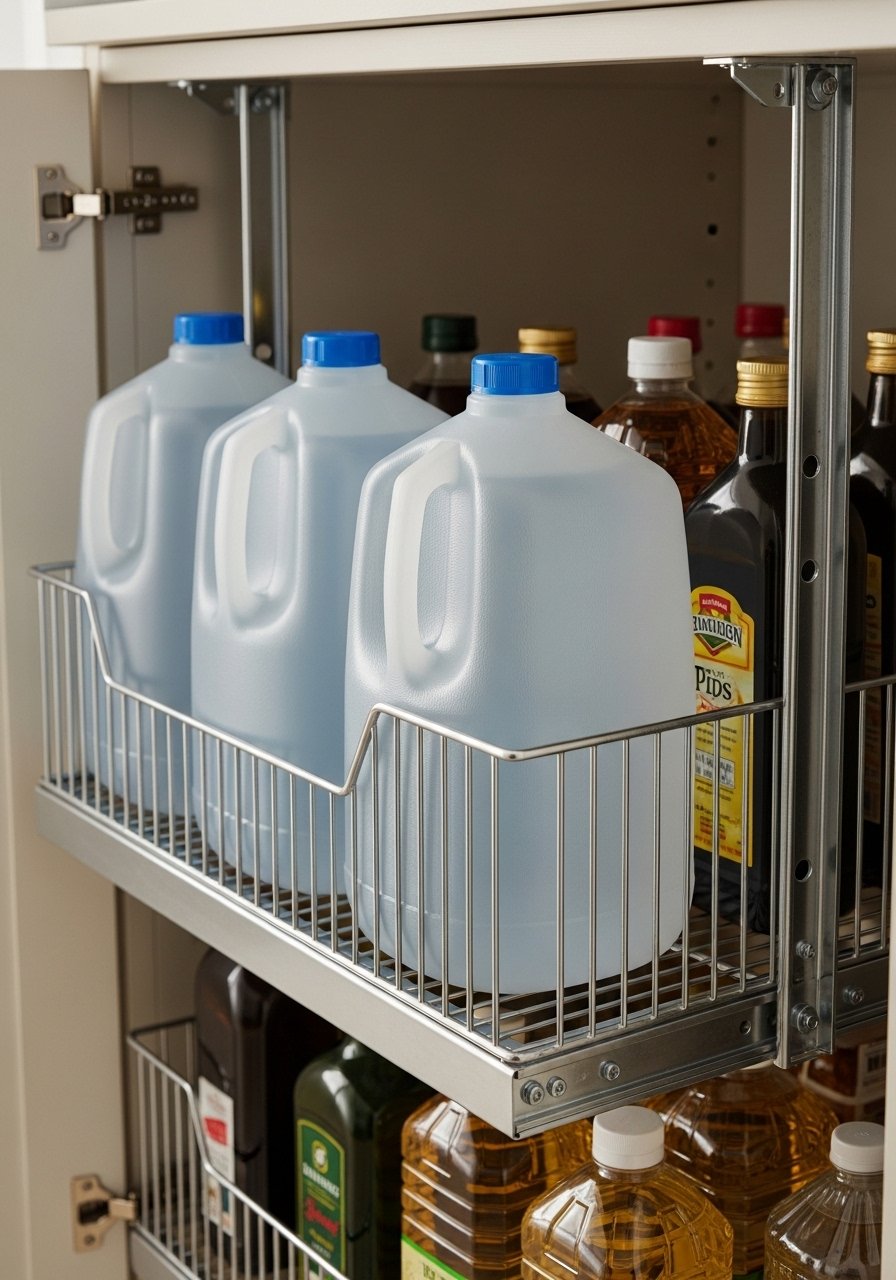
Store heavy bottles on a pull-down rack that safely lowers to access. This reduces strain and keeps bottles secure.
Materials
- Pull-down cabinet rack kit (rated for 40–60 lbs)
- Screws and reinforced mounting board (if needed)
- Measuring tape, stud finder
- Rubber mats for shelf base
Instructions
- Find studs and mount the kit per manufacturer instructions.
- Reinforce shelf with a plywood backing board if your wall is thin.
- Place rubber matting on the rack to prevent bottles sliding.
- Test the lowering mechanism with incremental weight—start light, then add full load.
- Check screws after one week for settling.
- Lubricate pivot with a drop of machine oil annually.
How to Display or Gift It
Best near the entry to the pantry for quick pouring. For gifting, include a labeled bottle of olive oil and a small pour spout.
- Clear Drawer Dividers for Baking Drawer
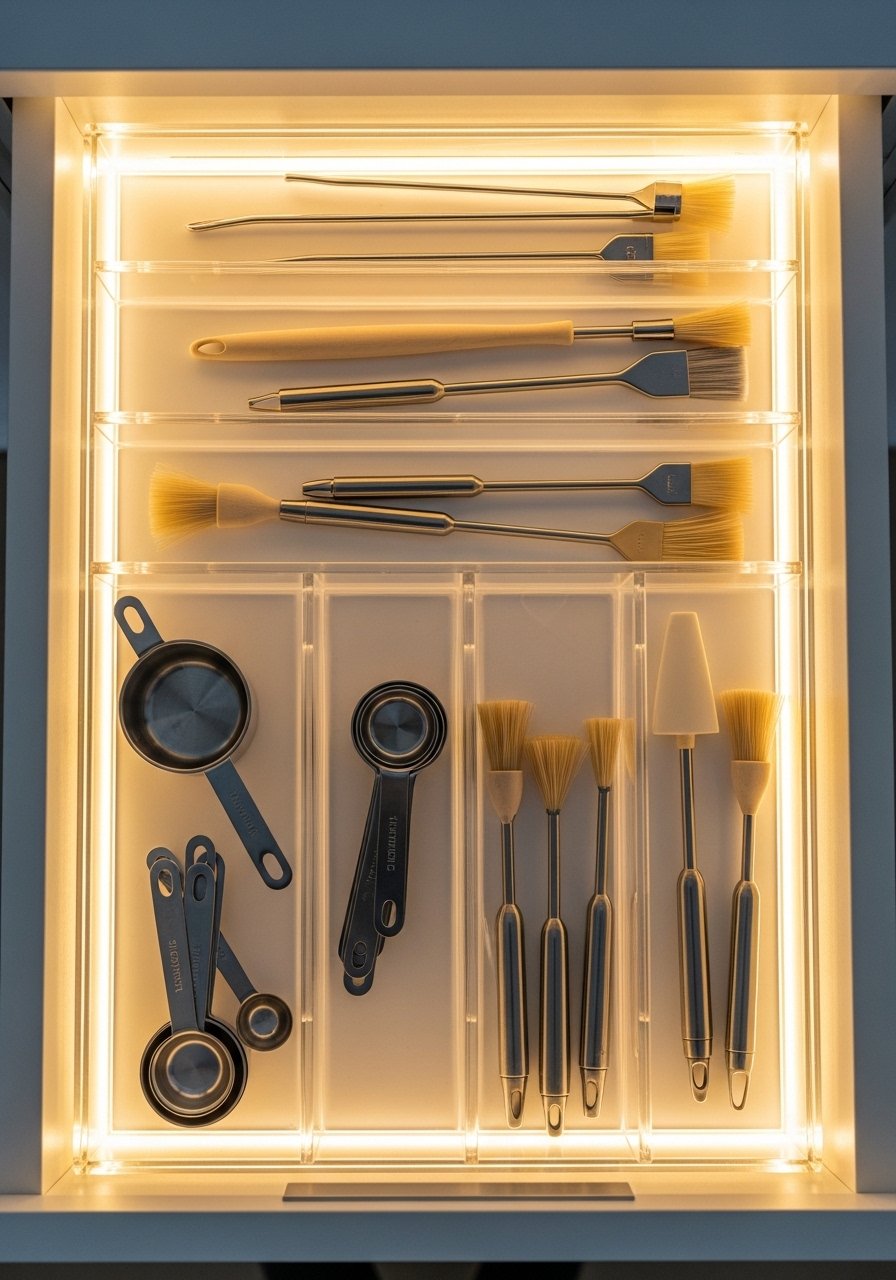
A divided drawer makes baking tools instantly available and prevents jingling. Clear acrylic keeps a clean look.
Materials
- Acrylic drawer dividers, adjustable set
- Drawer liner, non-slip
- Label stickers
- Measuring cup set (if filling as gift)
- Tape measure
Instructions
- Measure drawer interior and set acrylic dividers to fit snugly.
- Place non-slip liner on drawer base.
- Arrange tools in groups—measures, utensils, brushes.
- Label each section for quick restock.
- Clean acrylic dividers with mild soap monthly.
- Reconfigure as needed for seasonal baking tools.
How to Display or Gift It
Slide drawer near countertop for baking prep. For gifting, add a silicone spatula set and package in a small drawer organizer box.
- Chalkboard Menu & Inventory Board (small walk in pantry ideas)
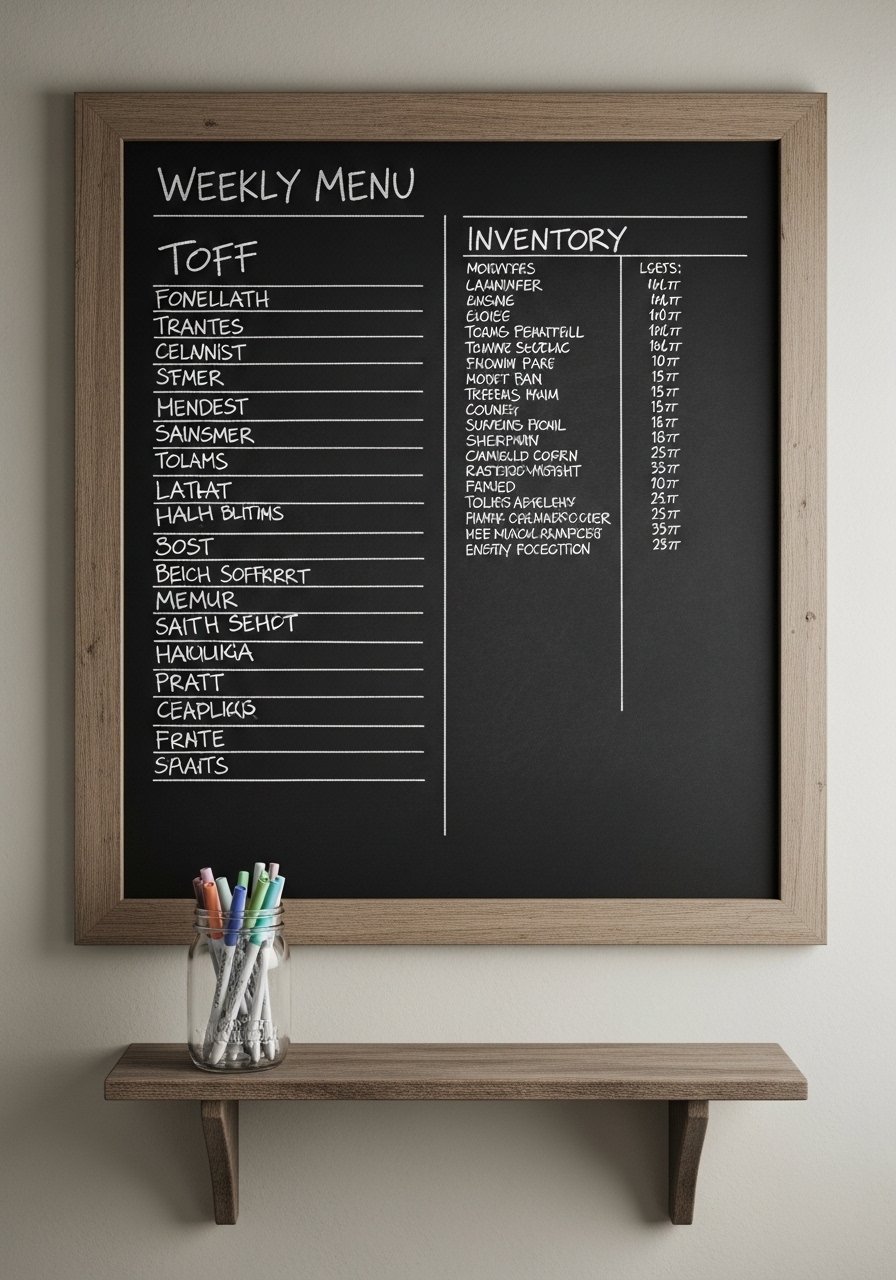
A chalkboard menu helps you plan meals and track pantry staples—one of the clearest small walk in pantry ideas for reducing waste.
Materials
- Framed chalkboard, 18" x 12"
- Liquid chalk markers, set of 4
- Small shelf or pocket for markers
- Screws and anchors
- Dried flower sprig for decoration
Instructions
- Mount chalkboard at eye level in the pantry.
- Write weekly menu and list staples to watch (milk, rice, eggs).
- Use liquid chalk markers for legible writing; dry 30 seconds.
- Erase weekly and update; keep markers in the shelf pocket.
- For meal planning, color-code days or categories.
- Wipe clean monthly with a damp cloth to avoid ghosting.
How to Display or Gift It
Pair with a magnetic pen holder or small mason jar. For gifting, include a recipe card set and chalk markers.
- DIY Clear Tupperware Label System
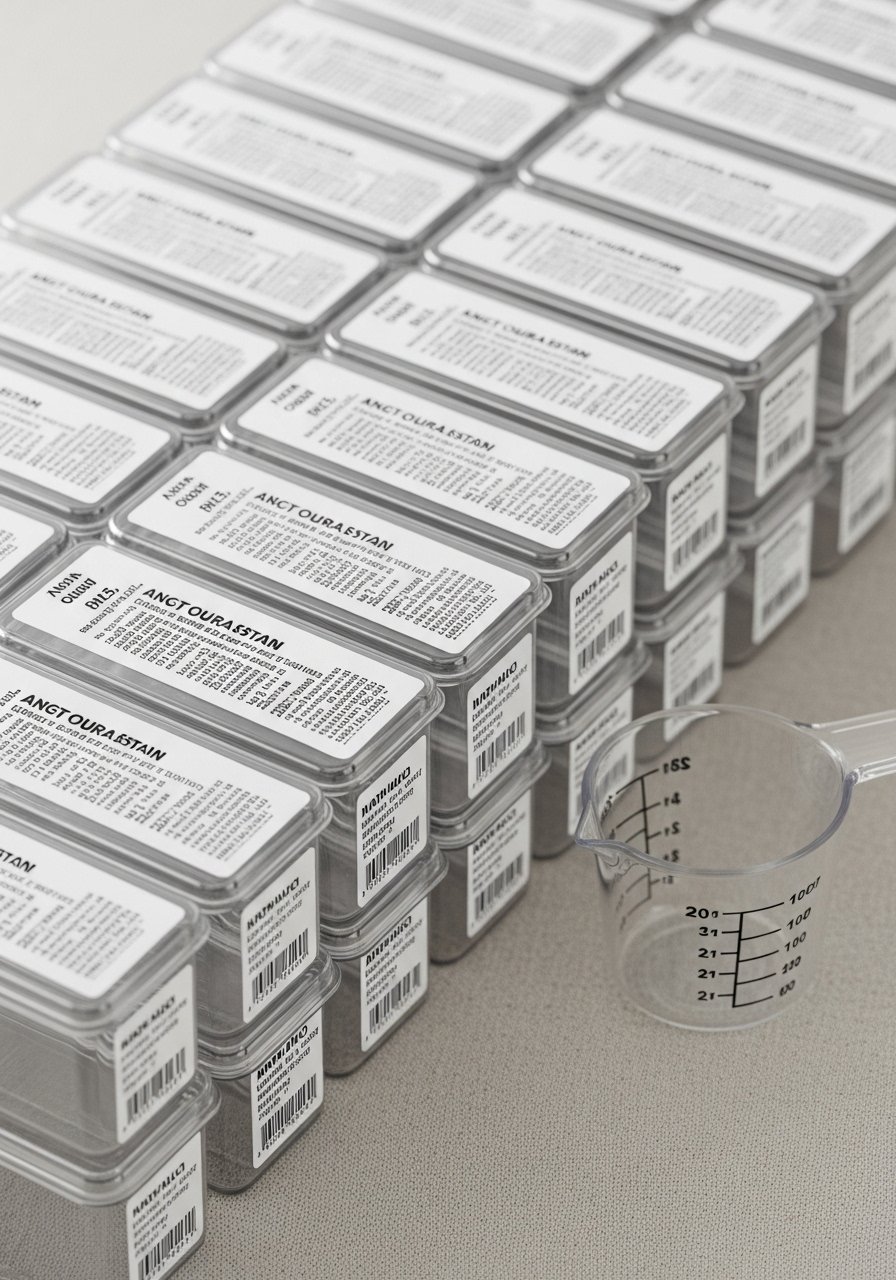
Matching clear containers reduce visual clutter and the labels make contents crystal clear. Use printable adhesive labels cut with a cutting machine for a polished finish.
Materials
- Clear BPA-free food storage containers, 8-piece set
- Printable adhesive label sheets
- Cricut Joy cutting machine or scissors
- Label template (download)
- Permanent printer ink
- Rubbing alcohol for surface prep
Instructions
- Clean container lids with rubbing alcohol for better adhesion.
- Print labels and cut to size with scissors or your cutting machine.
- Apply labels centered and press firmly for full adhesion.
- Allow adhesive to set 24 hours before stacking.
- Rotate labels if contents change; remove with rubbing alcohol.
- Stack by category and leave a small vent for airtight lids.
How to Display or Gift It
Match label font to your pantry aesthetic—script for cottagecore, sans serif for modern. For gifting, fill a container with homemade granola and tie a ribbon.
- Glass Door Insert for Light & Visibility
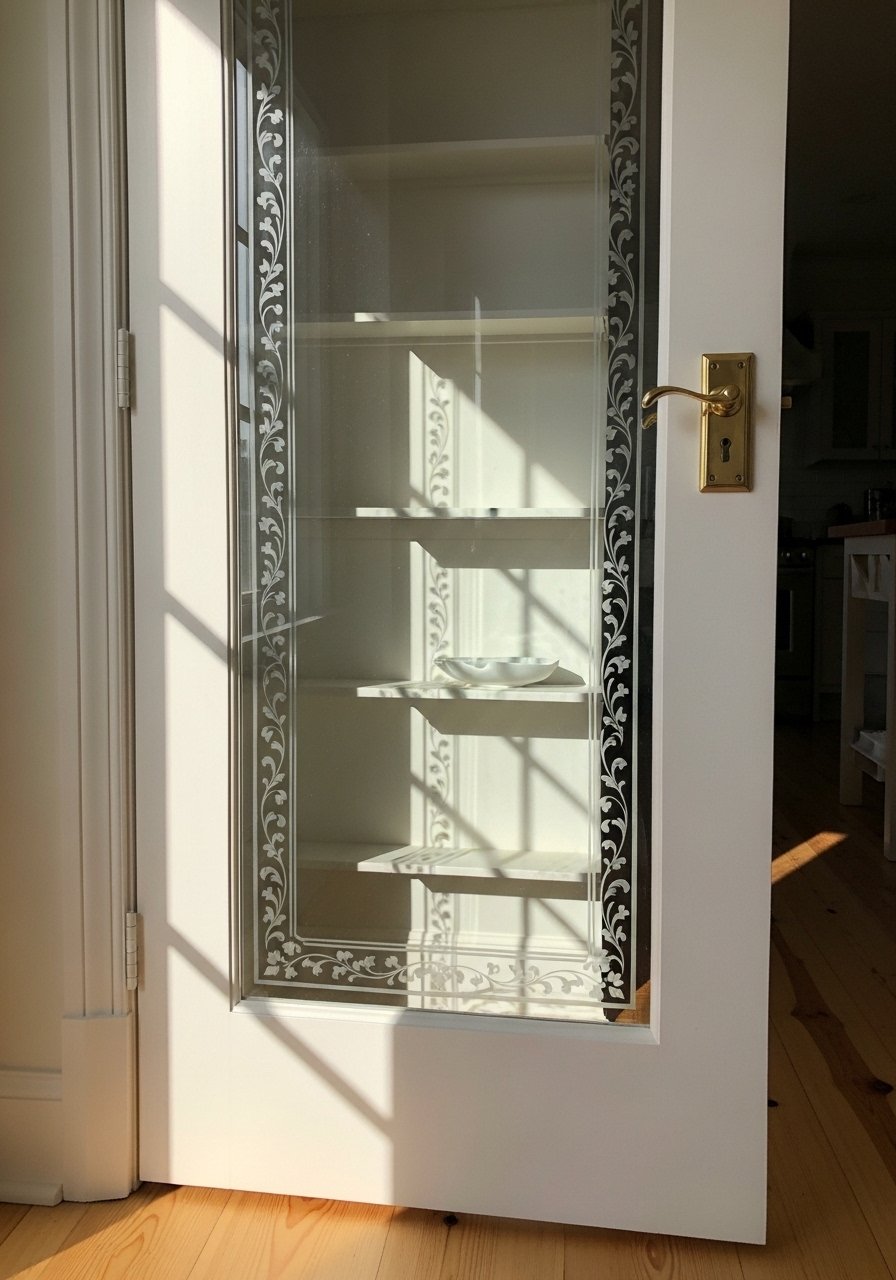
Replacing a solid door panel with glass increases visual space and lets light move through. Frosted glass keeps things looking tidy.
Materials
- Glass or acrylic panel, cut to door opening size (tempered if possible)
- Router and trim kit or pre-made frame
- Silicone sealant
- Screws and hinges
- Safety gloves and goggles
Instructions
- Measure door panel and order tempered glass or cut acrylic to size.
- Remove existing panel and route a shallow rabbet if building frame.
- Fit glass into frame with silicone sealant and clamps; cure 24 hours.
- Rehang door and check swing clearance.
- If privacy desired, apply frosted film and let set 24 hours.
- Clean with glass cleaner and microfiber cloth.
How to Display or Gift It
Glass lets you show styled shelves—arrange decorative jars at eye level. For gifting, offer a bottle of glass cleaner and a microfiber cloth.
- Under-Shelf Basket for Bread & Snacks
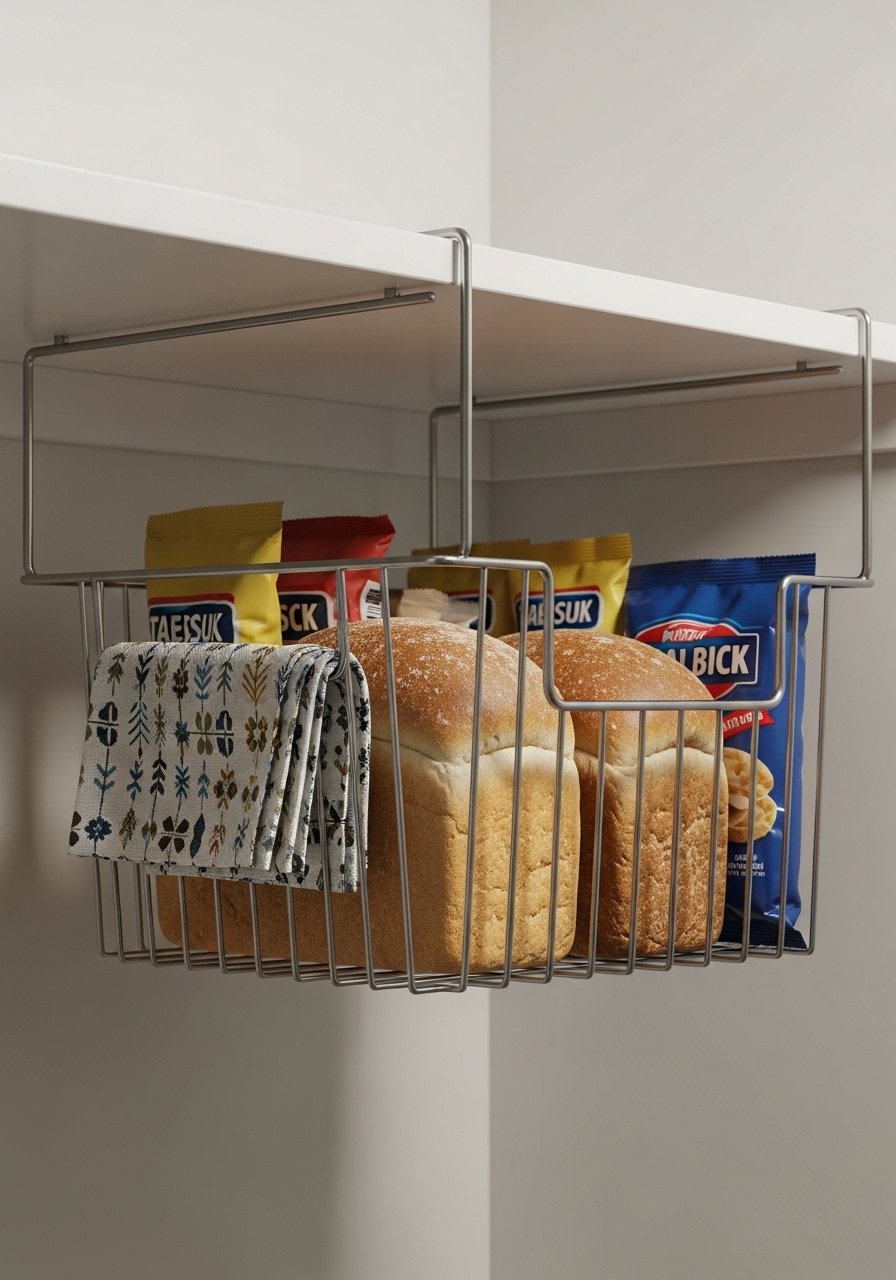
Under-shelf baskets add hanging storage for lightweight items and free shelf surface for jars.
Materials
- Under-shelf wire baskets, set of 2
- Non-slip shelf liner
- S-hooks (for additional hanging)
- Tape measure
Instructions
- Slide basket onto shelf edge; ensure it's flush and secure.
- Line with a small cloth or liner to protect bread.
- Store wrapped breads and snack packs—avoid sharp cans in hanging baskets.
- Rotate breads every 2–3 days to avoid staleness.
- Clean baskets monthly with warm soapy water.
- Use S-hooks for hanging small utensils from the basket lip.
How to Display or Gift It
Include a simple linen bread bag for a tidy look. For gifting, assemble a bread-lover’s kit.
- Vertical Tray Divider for Cutting Boards
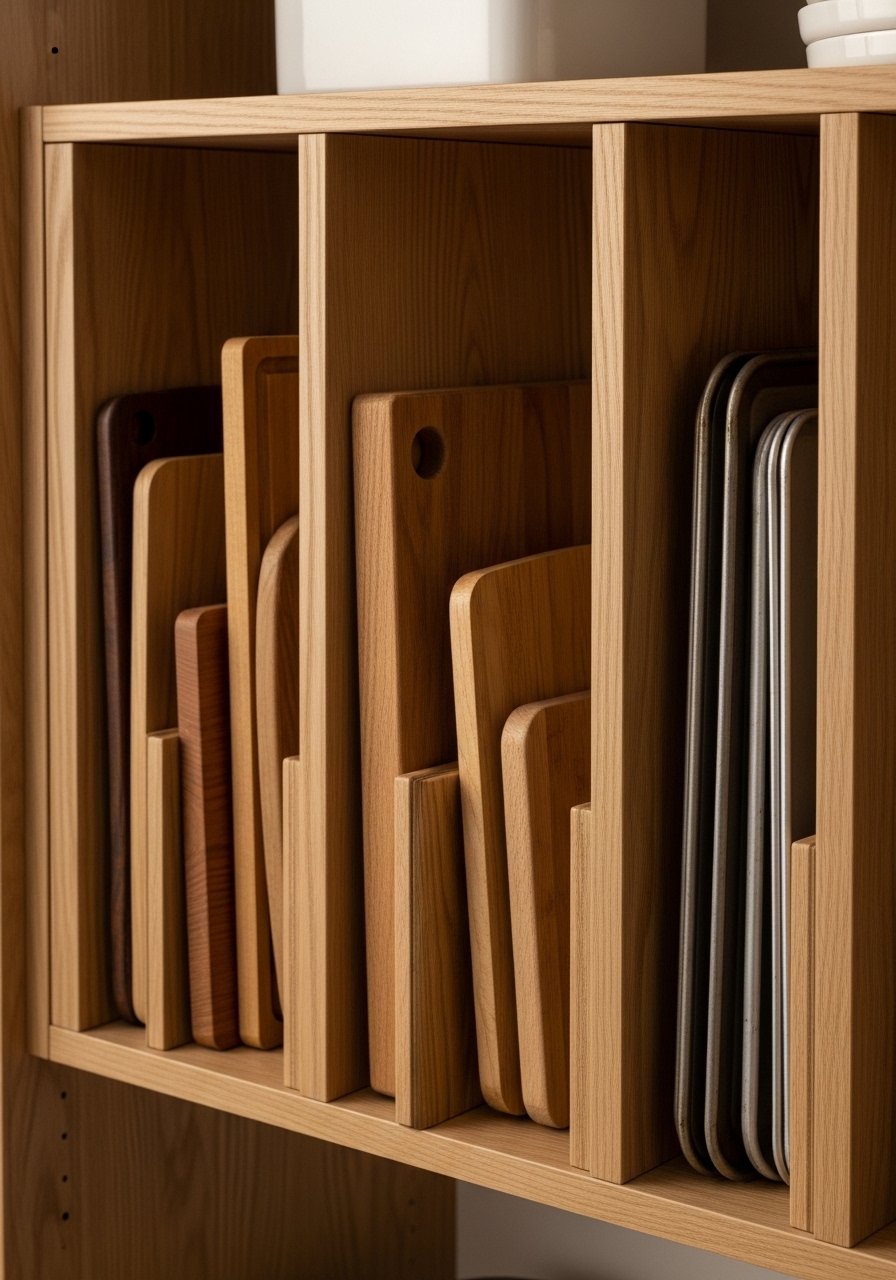
Cutting boards and trays need vertical dividers to stay neat and easy to pull out. This is a quick carpentry-free solution using acrylic or wooden dividers.
Materials
- Acrylic or wood dividers, 4 pieces (8" tall)
- Non-slip pads
- Adhesive Velcro strips (optional)
- Measuring tape, pencil
Instructions
- Measure shelf depth and place dividers spaced to fit boards.
- Stick non-slip pads to the base of each divider.
- If shelf is tall, use Velcro strips to secure dividers to the shelf back.
- Place cutting boards and trays vertically, heaviest at the back.
- Re-space as needed when new boards arrive.
- Wipe dividers with a damp cloth monthly.
How to Display or Gift It
Paint dividers a contrasting color for a design touch. For gifting, include a small bamboo cutting board and cheese knife.
- LED Strip Lighting for Dark Shelves
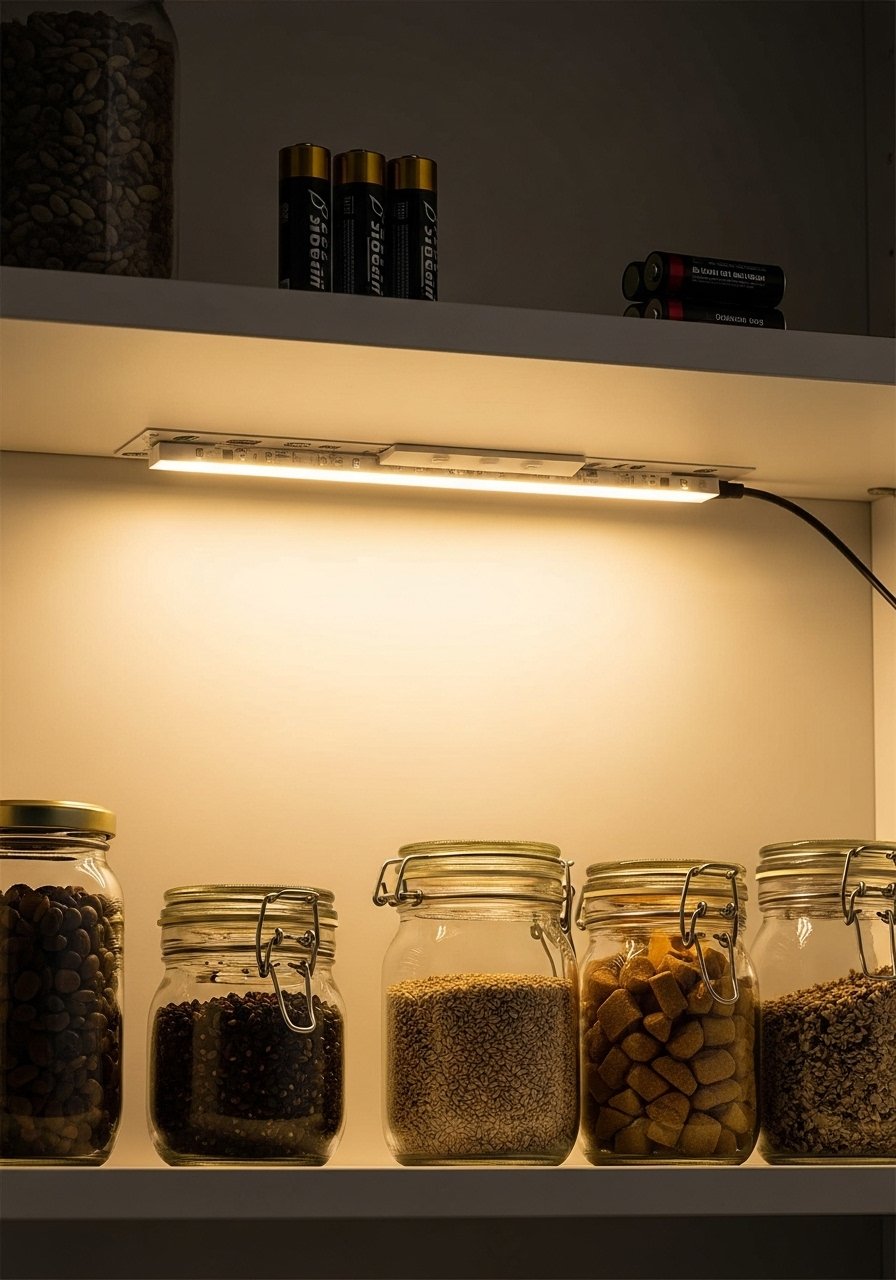
Good lighting reveals what you have and makes small pantries feel bigger. LED strips are low-heat and easy to install.
Materials
- LED strip light kit, warm white, cut-to-length
- Double-sided adhesive pads
- Optional motion sensor switch
- Power adapter or battery pack
- Scissors (for cutting LED strip at marked points)
Instructions
- Measure shelf length and cut LED strip at marked intervals.
- Clean mounting surface with alcohol and apply adhesive pads.
- Stick LED strip under shelf, pressing firmly for 30 seconds.
- Connect to power adapter or battery pack; test lights.
- Install motion sensor if desired per kit instructions.
- Replace batteries yearly if using battery pack; wipe clean monthly.
How to Display or Gift It
Place lights under each shelf for layered illumination. For gifting, include a battery pack or smart plug.
- Recipe Binder & Clip System
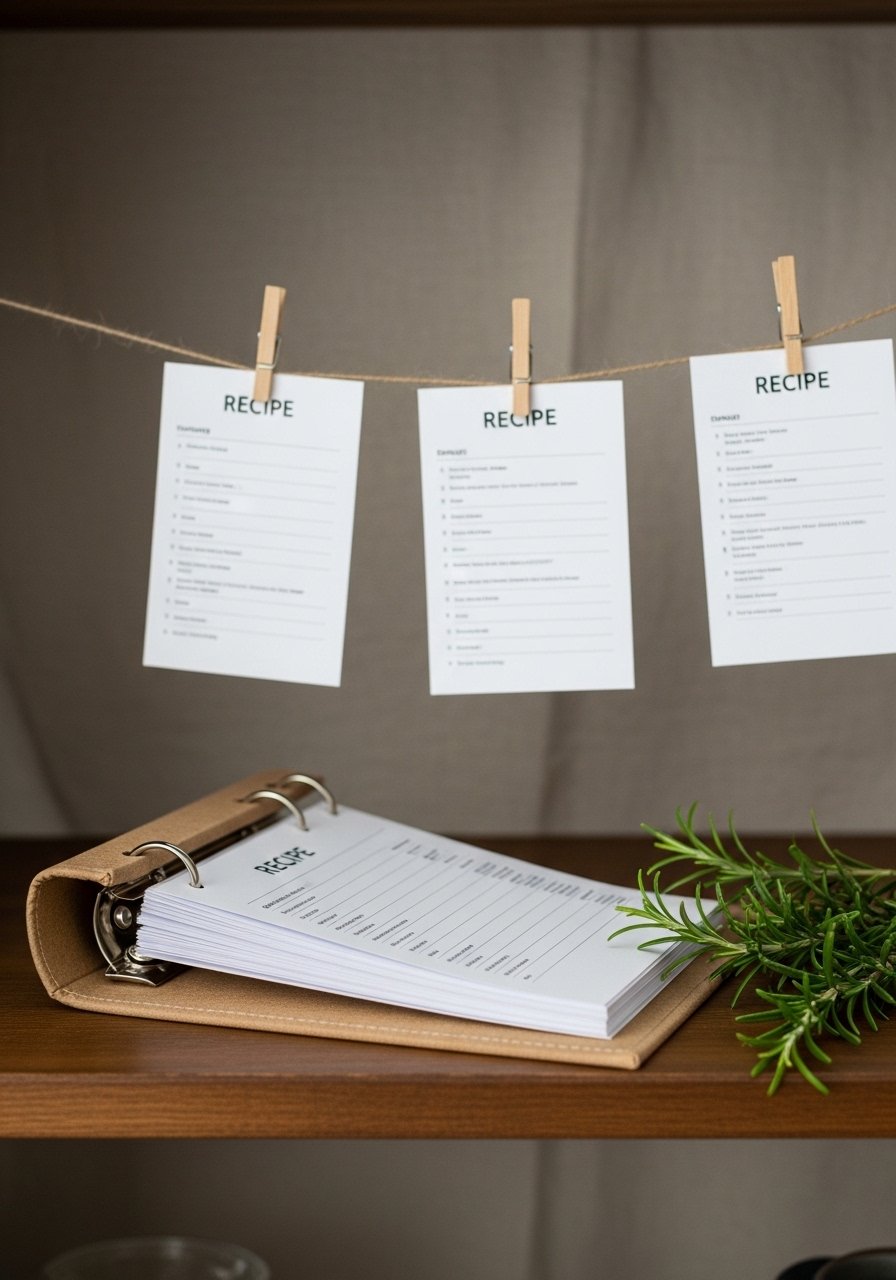
Keep recipes and grocery lists inside the pantry for quick meal planning. A simple binder and clip system keeps paper tidy and accessible.
Materials
- 3-ring binder, A5 or A4
- Plastic sheet protectors, 25-pack
- Mini clipboard clips and twine
- Recipe card printable templates
- Hole punch
Instructions
- Place recipe cards in sheet protectors and store by category in the binder.
- String twine across an inner pantry wall and hang current meal cards with clips.
- Keep a dry-erase meal planning pad on the inside of the door.
- Update grocery list as items run low.
- Wipe sleeves with a damp cloth periodically.
- Use binder tabs to separate breakfasts, lunches, dinners, and baking.
How to Display or Gift It
Store binder at eye level with a small jar of pens. For gifting, include recipe cards and a pretty pen set.
These 20 small walk in pantry ideas give you approachable, stylish ways to make every inch work harder. Try one project this weekend—swap labels, add a pull-out basket, or hang a pegboard—and you'll notice how much more functional the space feels. Save this pin for later so you can build your pantry plan in stages, and share the list with a friend who’s always reorganizing.
Trust me, picking up a quality hot glue gun with temperature control changed how every single one of these projects turned out — no more stringy mess, no more burns. Which idea are you trying first—labels, lighting, or a pull-out solution?


