
If you love the look of high-end furniture but hate the price tag, this list is for you. These 24 genius DIY coffee table ideas on a budget prove you can make something that reads boutique, not bargain. You’ll find builds that use pallet boards, old doors, crates, epoxy accents, and thrifted finds — all with real measurements, simple steps, and realistic drying times.
I keep a small hot glue gun and a foam brush on my work table at all times; they speed things up and stop tiny mistakes from becoming big problems. Try a reliable hot glue gun like this low-temp hot glue gun for delicate surfaces. If you plan to cut vinyl or stencils, my Cricut Joy gets the job done in minutes: Cricut Joy cutting machine.
Throughout this guide you’ll see projects rated for time and skill, clear materials lists with sizes, and step-by-step instructions that include drying and cure times. Grab a cup of coffee and pin the ones you want — you’ll be surprised how many of these cost almost nothing to build.
- Rustic Pallet Coffee Table (Classic Budget Build)
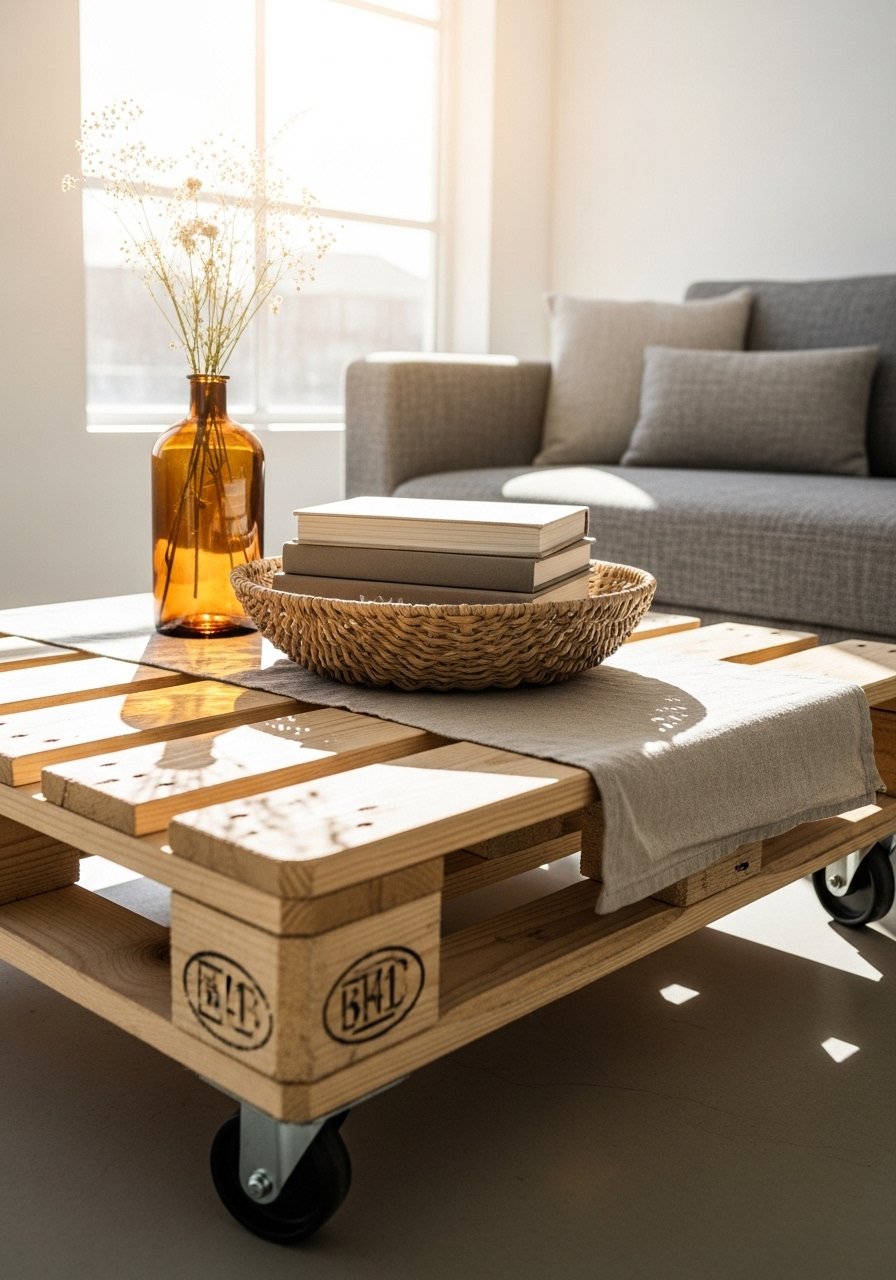
If you find a free pallet, this becomes a near-zero-cost project. The boards give rustic texture and a chunky, farmhouse feel. Beginners will like the forgiving surface — the knotty wood looks intentional and tactile. The finished table feels sturdy under a cup and adds raw, earthy texture to a room.
Materials
- 1 wooden pallet (standard 48" x 40")
- 4 2.5" locking casters
- 2x 2×3 lumber cut to 36" for internal support
- 1/2 cup wood glue
- 10 wood screws (1.25")
- 80 and 120 grit sandpaper (2 sheets each)
- Minwax stain (8 oz, pick a warm walnut)
- Polycrylic matte sealer (8 oz)
Instructions
- Inspect pallet; remove loose nails with pliers. Replace any broken slats.
- Cut two 2×3 supports to 36" and screw them across the middle underside of pallet for stability (use 1.25" screws).
- Sand top with 80 grit to remove rough spots, then finish with 120 grit for a smooth touch (about 10 minutes per side).
- Apply one coat of wood stain with a clean rag. Let stain set 10–15 minutes, then wipe off excess. Dry to touch in 2–4 hours.
- Apply one coat of polycrylic with a foam brush; dry 2 hours. Lightly sand with 220 between coats. Apply 2 coats total.
- Attach casters at corners; pre-drill holes with 1/8" bit to avoid splitting.
- Flip table and check wobble; tighten as needed.
How to Display or Gift It
- Place on an oversized jute rug and stack thrifted books on one corner.
- Add a glass hurricane and a clump of dried wheat for fall styling.
- Wrap as a housewarming gift with kraft paper and twine. For storage, keep excess screws and casters in a small craft organizer like this plastic organizer set.
- Hairpin-Leg Modern Coffee Table (Scandi Look Cheap)
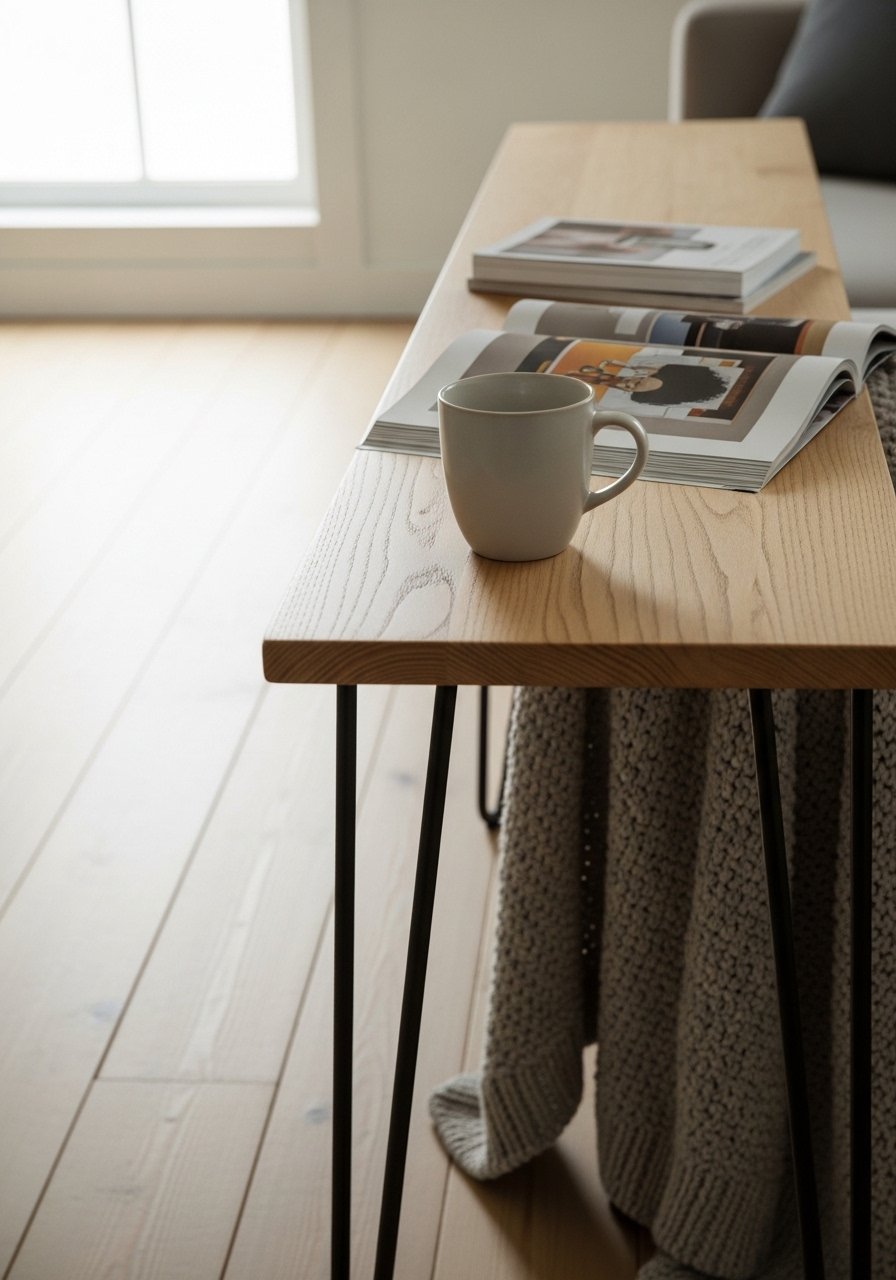
This mid-century-inspired table looks pricey, but hairpin legs are cheap and transform a simple top into a modern piece. The smooth finish and thin profile suit Japandi and minimalist spaces. Good for small living rooms and renters.
Materials
- Pine board 36" x 16" x 1" (sanded)
- 4 3.5" hairpin legs (black)
- Wood filler (if needed)
- 220 grit sandpaper
- Water-based satin polyurethane (8 oz)
- 8 wood screws (1")
- Painter’s tape
Instructions
- Sand board with 220 grit until smooth and wipe dust with a tack cloth.
- Fill knots with wood filler; dry 30 minutes and sand flush.
- Mask edges with painter’s tape for a crisp finish.
- Apply one thin coat of satin polyurethane with a foam brush. Dry 1 hour. Lightly sand; repeat for 2 coats.
- Position legs 1.5" from each corner underside. Pre-drill 1/8" holes.
- Attach legs with screws and tighten evenly.
- Let hardware seat for 1 hour before moving.
How to Display or Gift It
- Pair with a textured tray and a single sculptural vase.
- Use felt pads on feet to protect floors.
- If gifting, slide into a flat gift box and include assembly instructions. Consider a small screwdriver set like this precision screwdriver set to include.
- Tree Stump Coffee Table (Boho Natural)
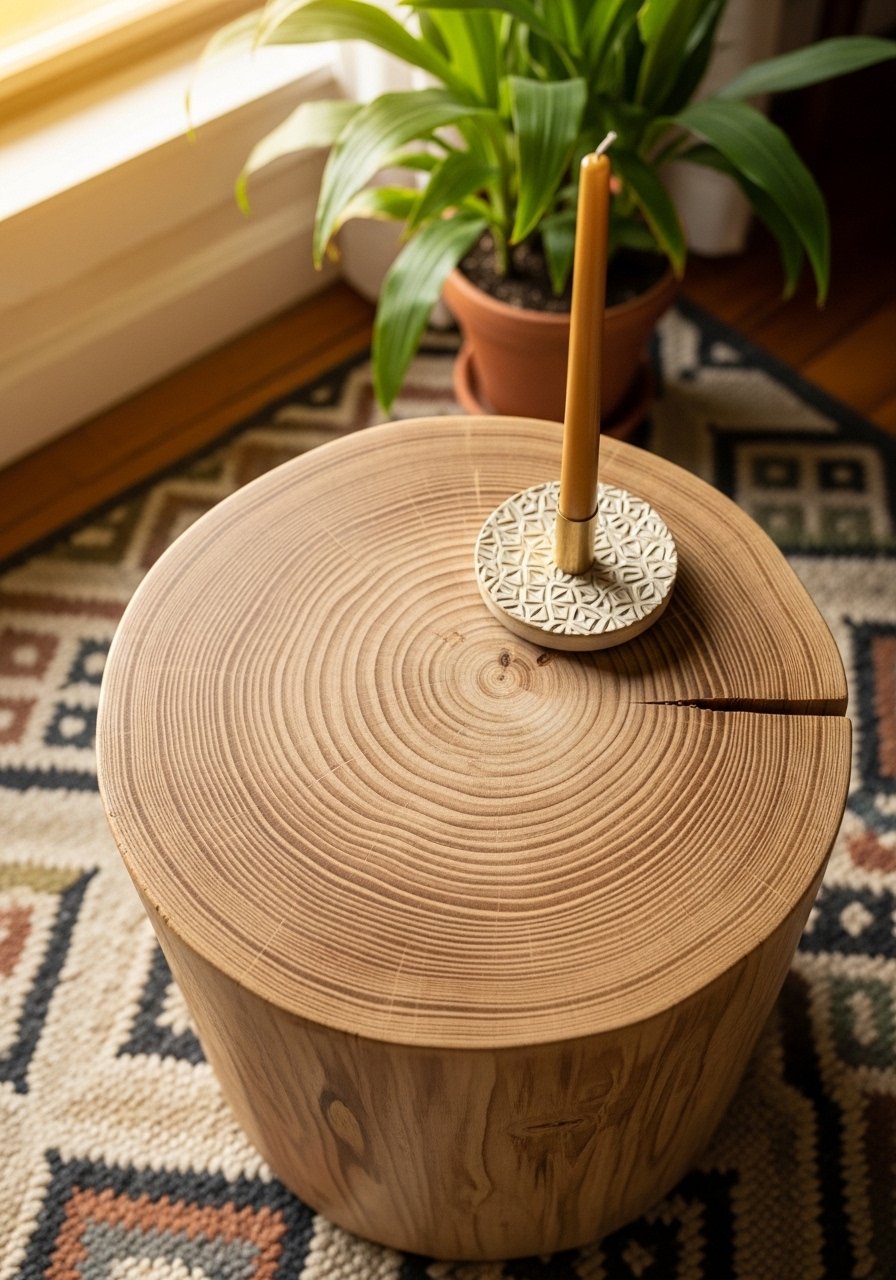
Foraged stumps make stunning one-of-a-kind tables. The rounded edges and grain are tactile and boho-friendly. A light sanding and clear coat are enough to showcase the rings. Ideal for a cottagecore or bohemian living room.
Materials
- Tree stump 18–22" diameter, 16–20" height (air-dried)
- 1 pint outdoor spar urethane (matte)
- 1 package furniture levelers
- Belt sander or 80–120 grit sandpaper
- Tack cloth
- 4 small wood screws
Instructions
- Ensure stump is dry (air-dried at least 6 months). Check for insect activity.
- Sand top with 80 grit, then 120 for a smooth finish (10–15 minutes).
- Wipe with tack cloth to remove sawdust.
- Apply one thin coat of spar urethane with a foam brush; dry 4 hours. Apply 2 coats total, 4 hours between coats.
- Attach adjustable levelers to underside so table sits even; pre-drill 1/8" pilot holes.
- Let cure 24 hours before placing drinks.
How to Display or Gift It
- Group with woven poufs and a low tray for stability.
- Tie a leather handle and add a tag if gifting. Use felt pads when moving to protect floors.
- Cinder Block + Wooden Top (Industrial Cheap Chic)
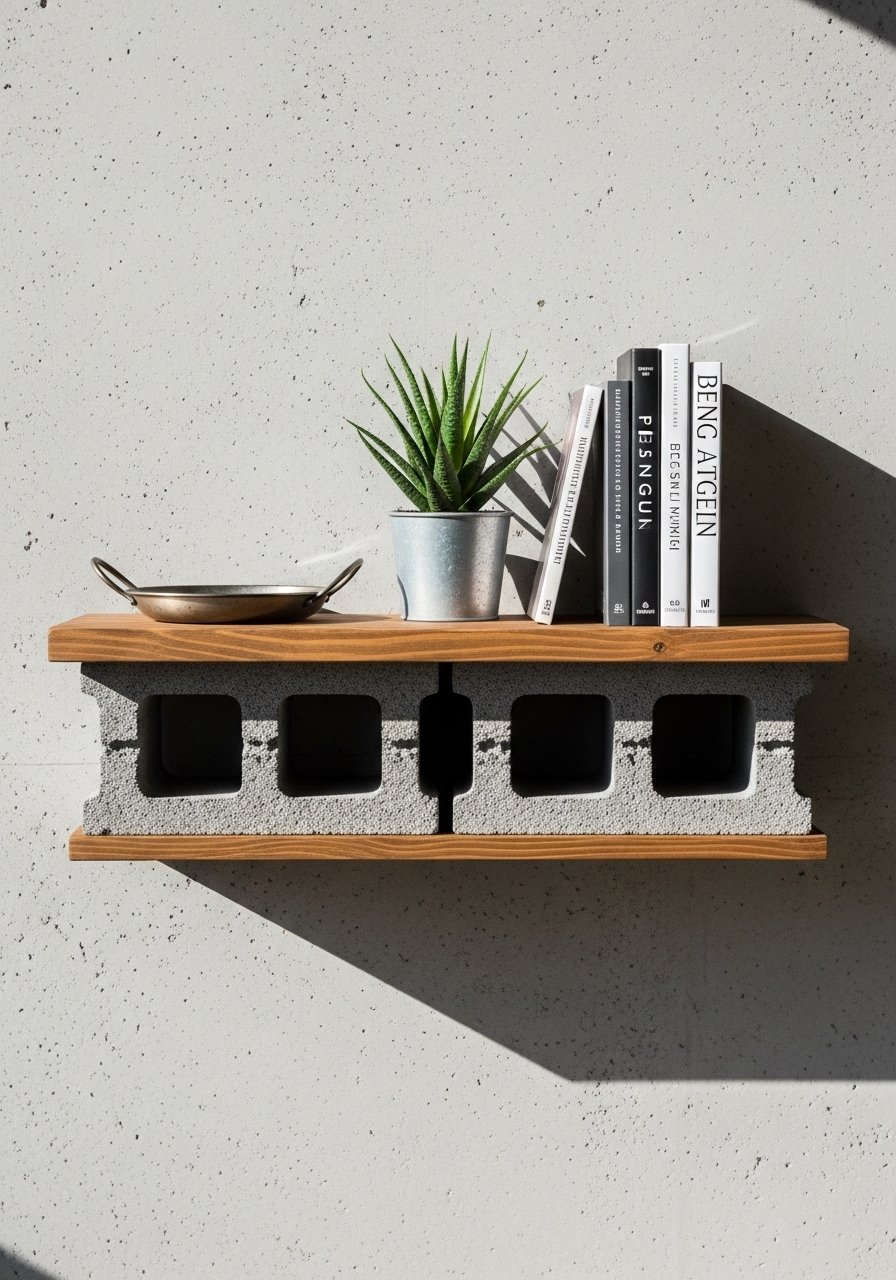
Cinder blocks are cheap and double as storage pockets. Stack them to change height and configuration. The look is raw-industrial and super customizable with paint or stain.
Materials
- 2–4 concrete cinder blocks standard 16" x 8" x 8"
- 1 pine plank 48" x 12" x 1"
- Exterior wood stain 8 oz
- Sandpaper 120 grit
- Non-slip pads (for blocks)
- 1 tube construction adhesive (optional)
Instructions
- Clean cinder blocks; wipe dust.
- Sand plank lightly; apply one coat of stain with a foam brush, wipe excess, dry 2–4 hours.
- Set blocks in desired formation (flat or hollow side out). Place plank atop blocks.
- Add non-slip pads to block tops to prevent tabletop sliding.
- If permanent, apply construction adhesive between block and plank and clamp for 1 hour.
- Let adhesive cure 24 hours before use.
How to Display or Gift It
- Paint blocks with chalk paint for a colored base.
- Fill hollow pockets with rolled throws or books for storage.
- Wrap as a quirky gift with a bow; include a care card about weight limits.
- Thrifted Door Turned Coffee Table (DIY coffee table ideas on a budget)
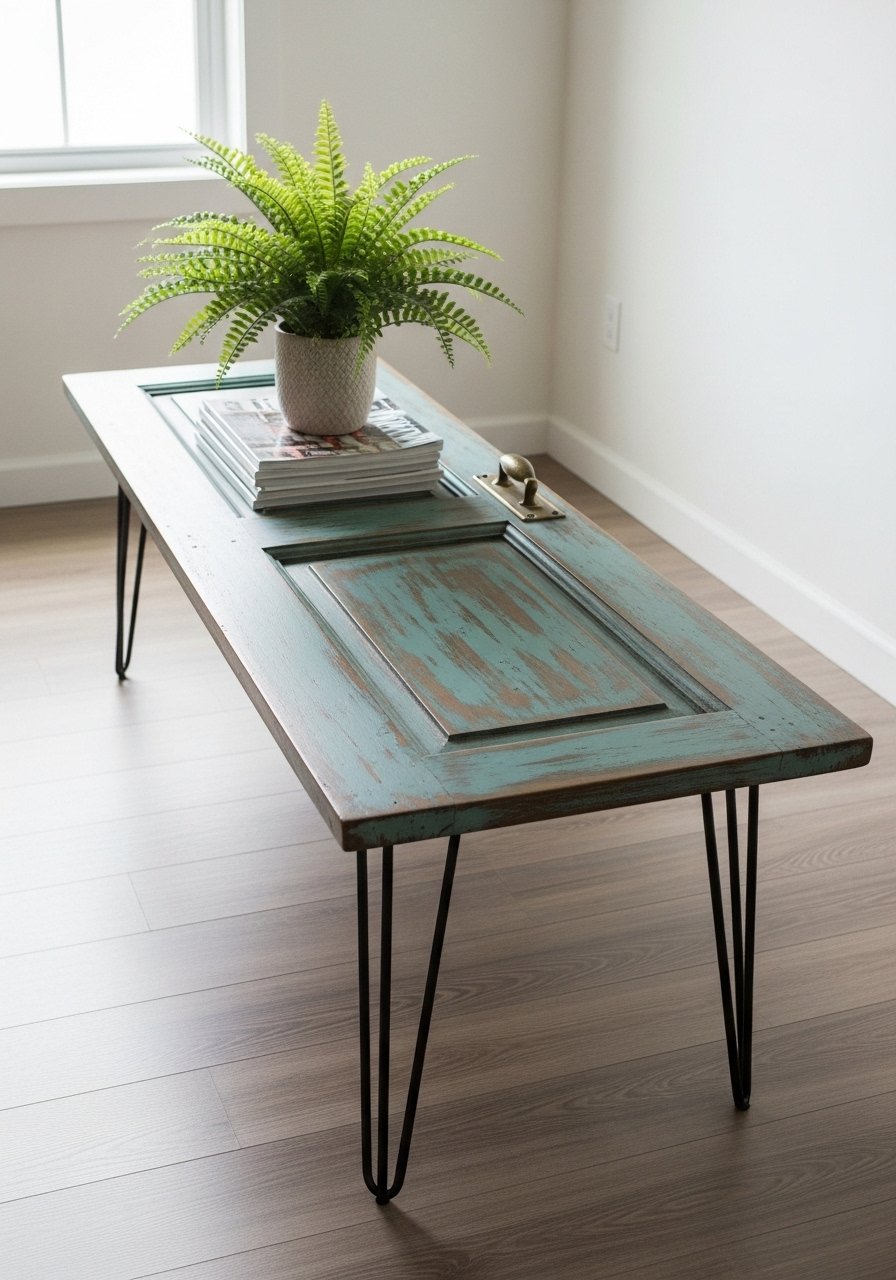
Old doors are long, cheap, and instantly full of character. Sand, paint, and add legs for a dramatic statement piece that looks curated. Great for cottagecore and shabby-chic interiors. This is one of the most dramatic DIY coffee table ideas on a budget.
Materials
- Salvaged door (36"–60" length; cut if needed)
- 4 3.5" hairpin legs
- Orbital sander or 120 grit sandpaper
- Chalk paint (8 oz)
- Clear wax for chalk paint (8 oz)
- 8 wood screws (1")
- Hand saw (if cutting door)
Instructions
- Measure and cut door to desired length if needed. Sand edges smooth with 120 grit.
- Patch holes with wood filler; dry 30 minutes and sand flush.
- Apply chalk paint in thin coats — 2 coats usually enough; dry 1 hour between coats.
- Rub with clear wax using a lint-free cloth; buff for sheen.
- Attach hairpin legs using pre-drilled pilot holes.
- Wait 2 hours before light use; full wax cure 24 hours.
How to Display or Gift It
- Style with woven trays and vintage glassware.
- For gifting, include chalk paint touch-up samples wrapped in tissue.
- Store flat if you disassemble it; use a garment bag for painted finish protection.
- Milk Crate Stacking Table (Modular & Upcycled)
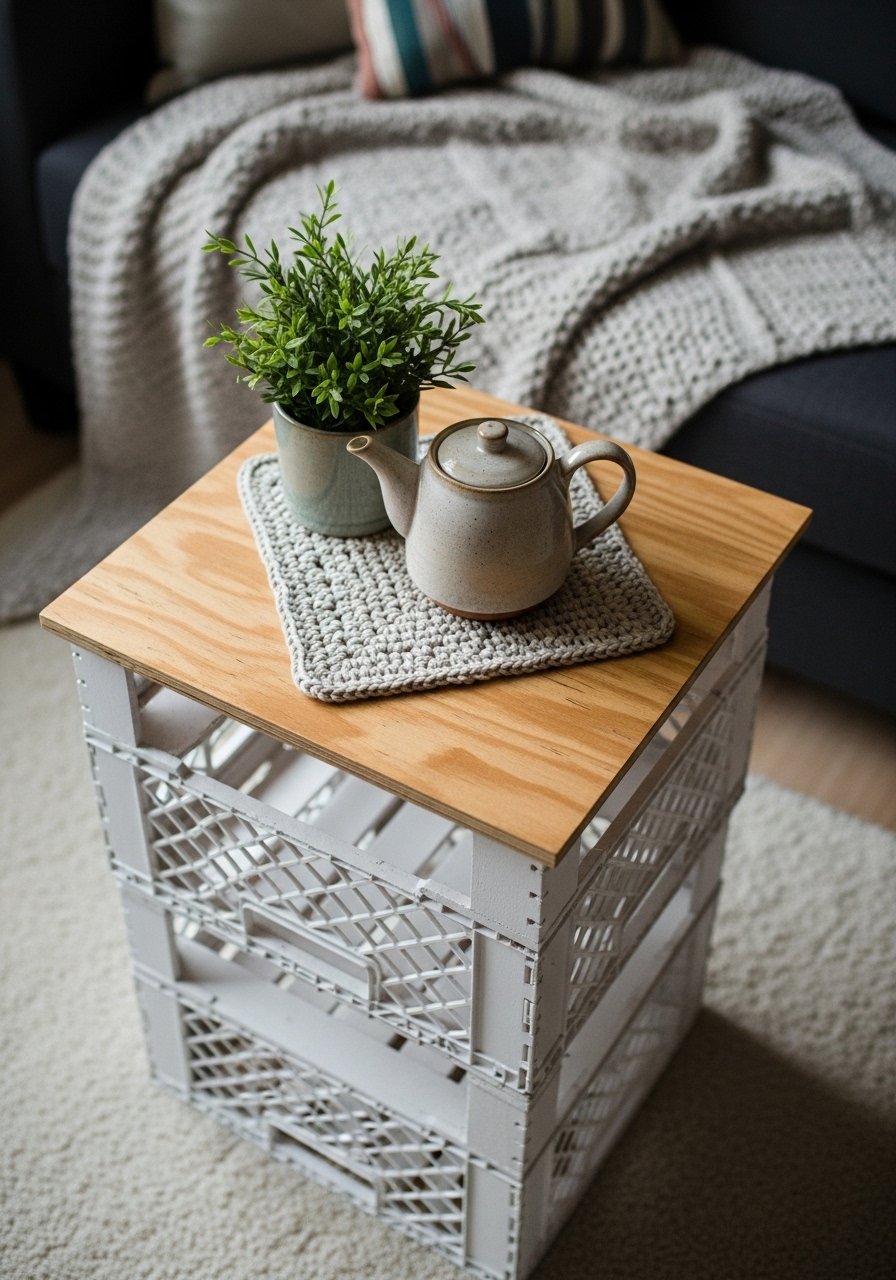
Stack painted milk crates for instant storage and a low table. Add a simple top for stability. This is great for students, apartments, and anyone who likes a modular setup.
Materials
- 3–4 plastic milk crates (12" x 12" x 12")
- 1/2" plywood cut to 36" x 16"
- Spray paint (matte white)
- E6000 or construction adhesive
- Sandpaper 120 grit
- Non-slip shelf liner (1 sheet)
Instructions
- Clean crates and plywood.
- Spray paint crates in thin coats; dry 15 minutes between coats, 2 coats total.
- Sand plywood edges and seal with one coat of polycrylic; dry 1 hour.
- Stack crates and place slightly under plywood top; add non-slip liner between plywood and crates.
- If securing, apply adhesive between crates and plywood; clamp 30 minutes.
- Let adhesive cure 24 hours before loading with heavy objects.
How to Display or Gift It
- Use crates for blankets, board games, or baskets.
- Wrap as a dorm-warming gift with a reusable cloth bag for storage.
- Mid-Century Trunk Coffee Table (Vintage Finds)
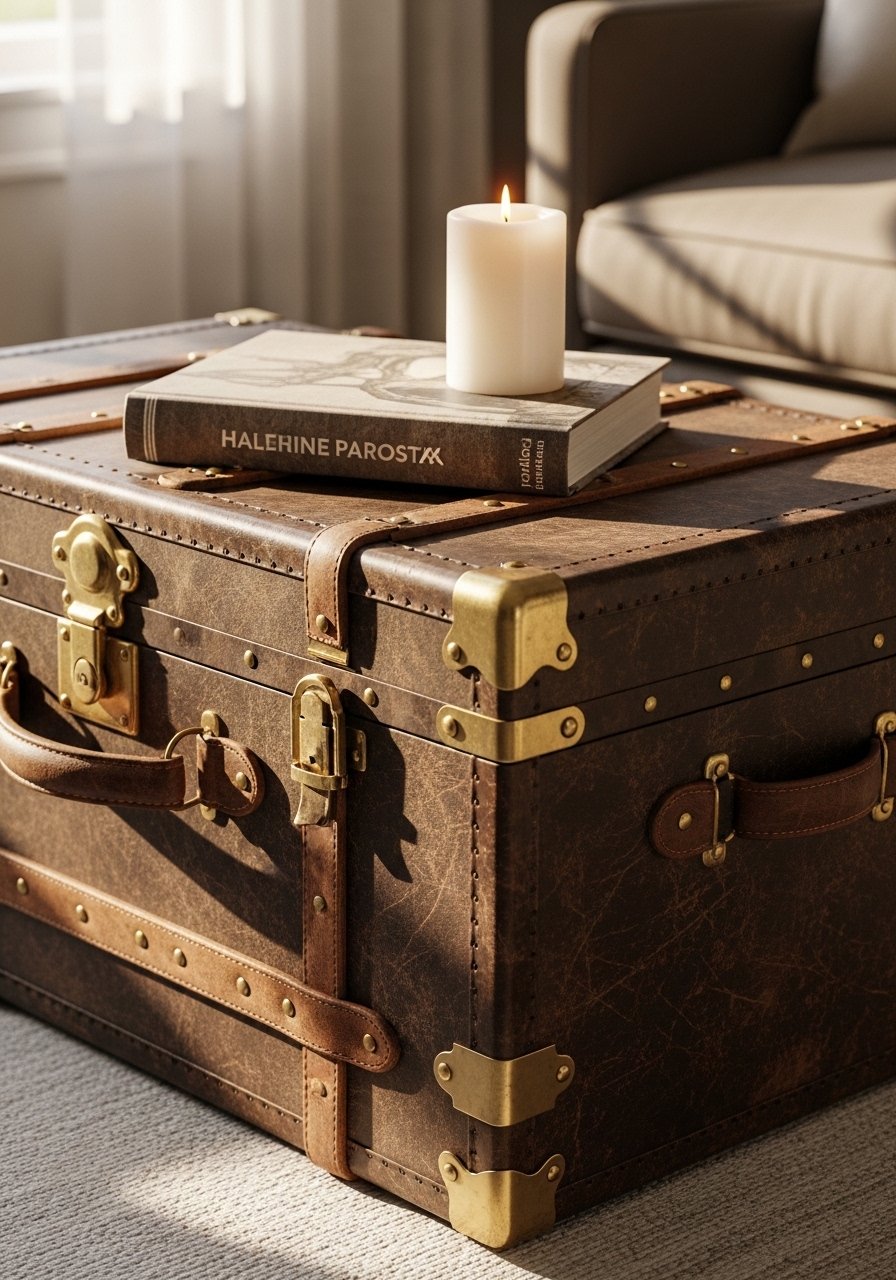
A thrifted trunk is a coffee table and storage solution. Sand and add caster wheels for mobility. When polished, trunks read like curated vintage pieces.
Materials
- Vintage trunk (any size)
- 4 locking casters
- Brasso or metal polish (small jar)
- Leather cleaner (if leather accents)
- Foam brush
- Clear furniture wax
Instructions
- Clean trunk exterior; polish metal hardware with Brasso.
- If leather is dry, apply leather cleaner per product instructions.
- Attach casters to underside with pilot holes.
- Apply clear furniture wax to wooden surfaces; buff after 30 minutes.
- Let trunk sit 12 hours before using as a table to ensure finishes set.
How to Display or Gift It
- Top with a tray to protect finish.
- Store seasonal throws inside trunk.
- Gift it as an heirloom with a typed story of the trunk’s origin.
- Resin River Coffee Table (High-End Look, Low-Cost Tips)
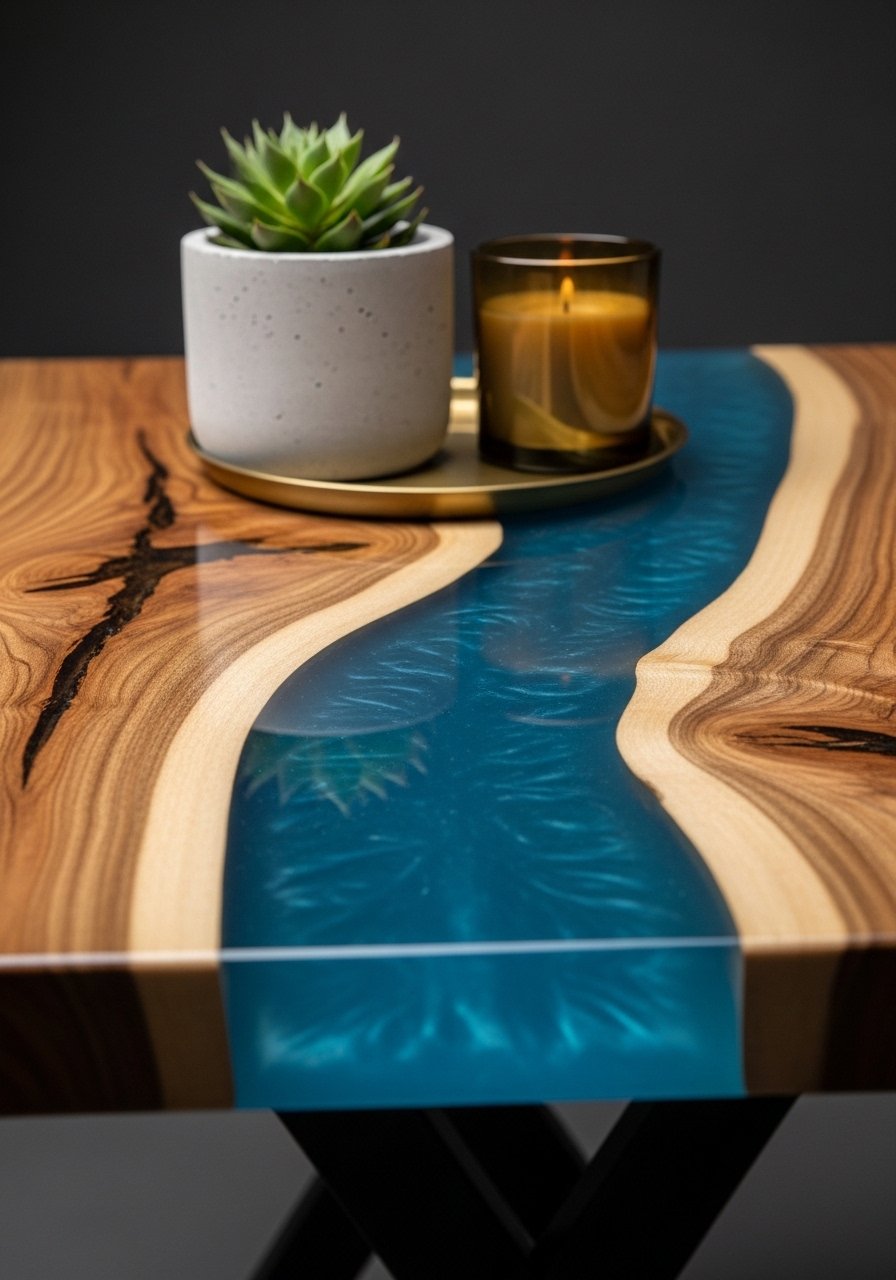
Epoxy gives a luxe, glossy centerpiece. You can simulate a resin river using minimal resin in a routed groove or by using colored alcohol ink in a clear resin. This project requires careful mixing and ventilation.
Materials
- Live-edge slab or two joined boards (36" x 16")
- 2-part epoxy resin kit (enough for 1/2 gallon)
- Pigment powders or alcohol inks (blue/green)
- Painter’s tape
- Plastic mixing cups and stir sticks
- Torch or heat gun
Instructions
- Seal the wood with a thin coat of resin to block bubbles; let tack-free in 4–6 hours.
- Tape underside to prevent drips.
- Mix epoxy per kit instructions. Stir slowly for 3 minutes, scraping sides.
- Add pigment to one cup and slowly pour into routed groove or split between slabs.
- Use heat gun for bubbles — 5–10 seconds passes. Left tack-free in 4–6 hours, fully cured in 72 hours.
- Sand any drips and buff with a polishing compound if necessary.
How to Display or Gift It
- Keep coasters handy; epoxy is durable but not impervious to hot pans.
- Wrap carefully for gifting with soft foam and a box.
- If shipping, pad corners and include a care card.
- Painted Tile Inlay Table (Mediterranean Look)
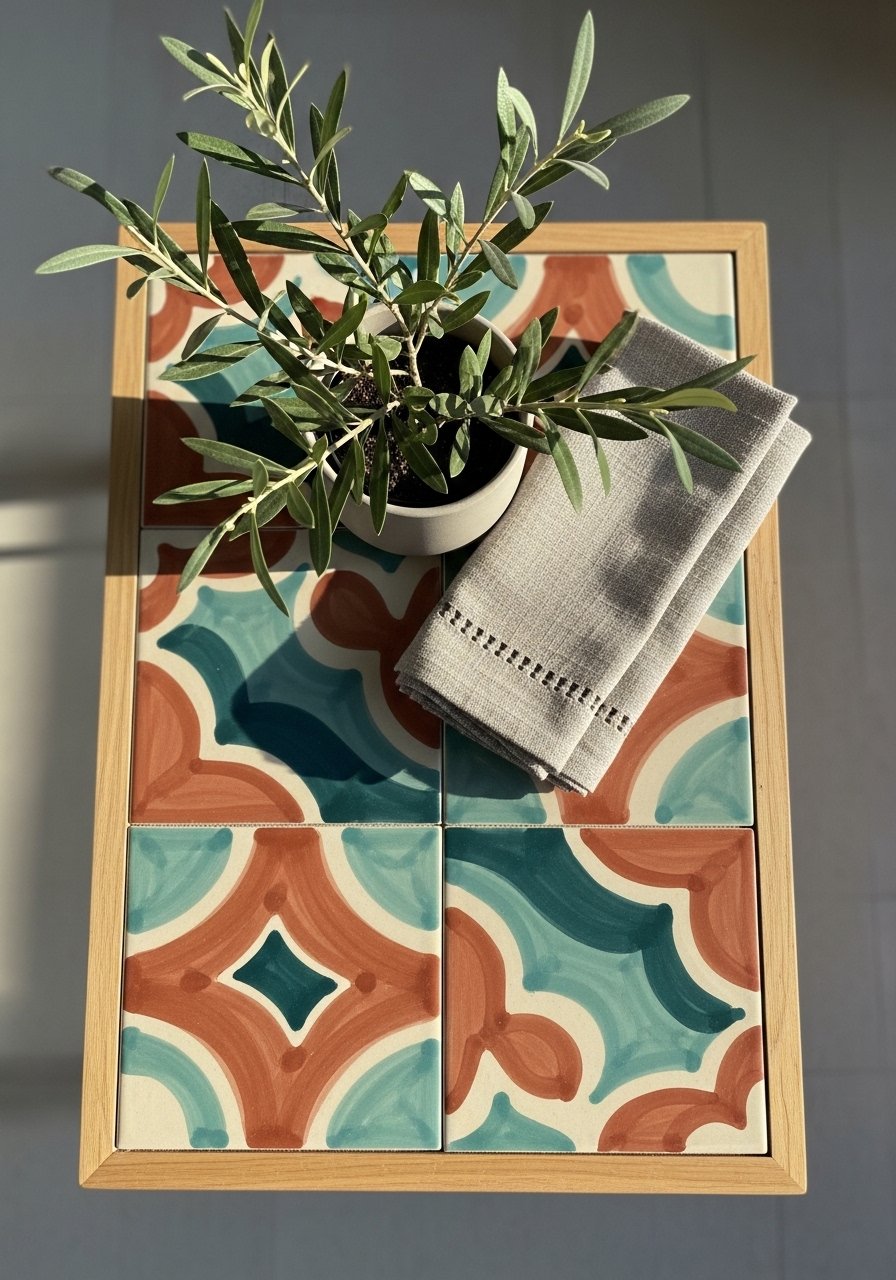
Tile inlay creates a decorative surface that looks custom-made. Use inexpensive peel-and-stick tiles or thrifted ceramic pieces. Grout and a clear sealer finish the look.
Materials
- Small plywood top 32" x 16"
- Ceramic tiles (12–16 tiles)
- Thinset or tile adhesive
- Grout (unsanded)
- Tile sealer
- Notched trowel and sponge
Instructions
- Measure and dry-fit tiles in your desired pattern.
- Spread thinset with a notched trowel in small sections.
- Press tiles firmly; allow thinset to set 24 hours.
- Mix and apply grout; wipe excess with damp sponge after 10–15 minutes.
- Let grout cure 24 hours; apply tile sealer per product label and wait 4 hours.
- Attach legs to plywood underside.
How to Display or Gift It
- Pair with textured throw pillows.
- Gift as a hostess present with tile care instructions.
- Store spare tiles and grout in a small craft organizer for future repairs.
- Suitcase Coffee Table (Travel-Chic)
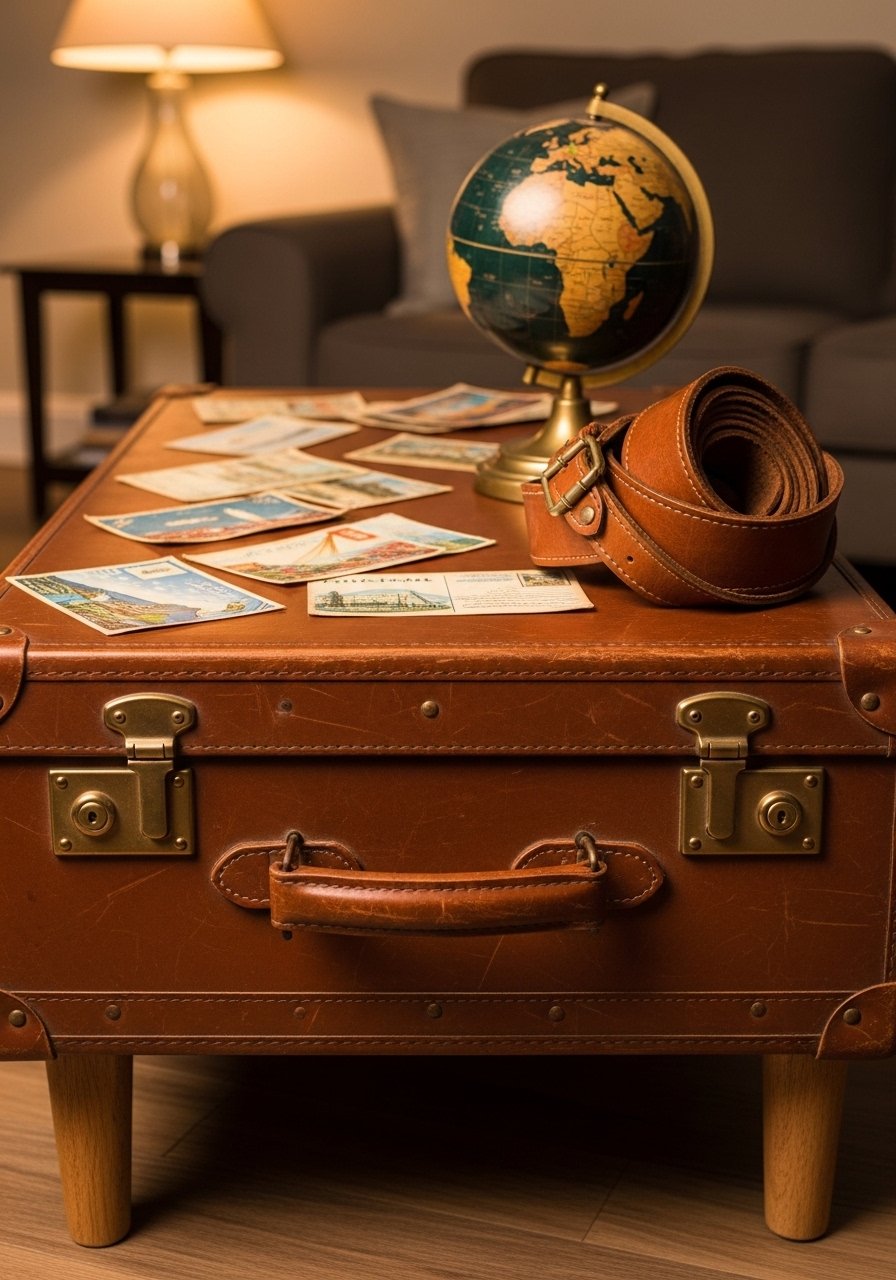
Old suitcases add instant character and hidden storage. Combine two suitcases or mount one on a low wooden base. The worn patina reads designer.
Materials
- Vintage suitcase (medium)
- Plywood base 24" x 16" x 1/2"
- 4 short wooden legs (2.5")
- Wood glue and screws
- L-brackets for secure attachment
- Felt pads
Instructions
- Attach legs to plywood base with screws.
- Secure suitcase to plywood with L-brackets from inside the suitcase.
- Add felt pads to feet.
- Let hardware set 1 hour before use.
How to Display or Gift It
- Style with travel memorabilia and a stack of well-loved books.
- For gifting, include a note about the suitcase’s origin and a small travel journal.
- Rope-Wrapped Coffee Table (Coastal Boho)
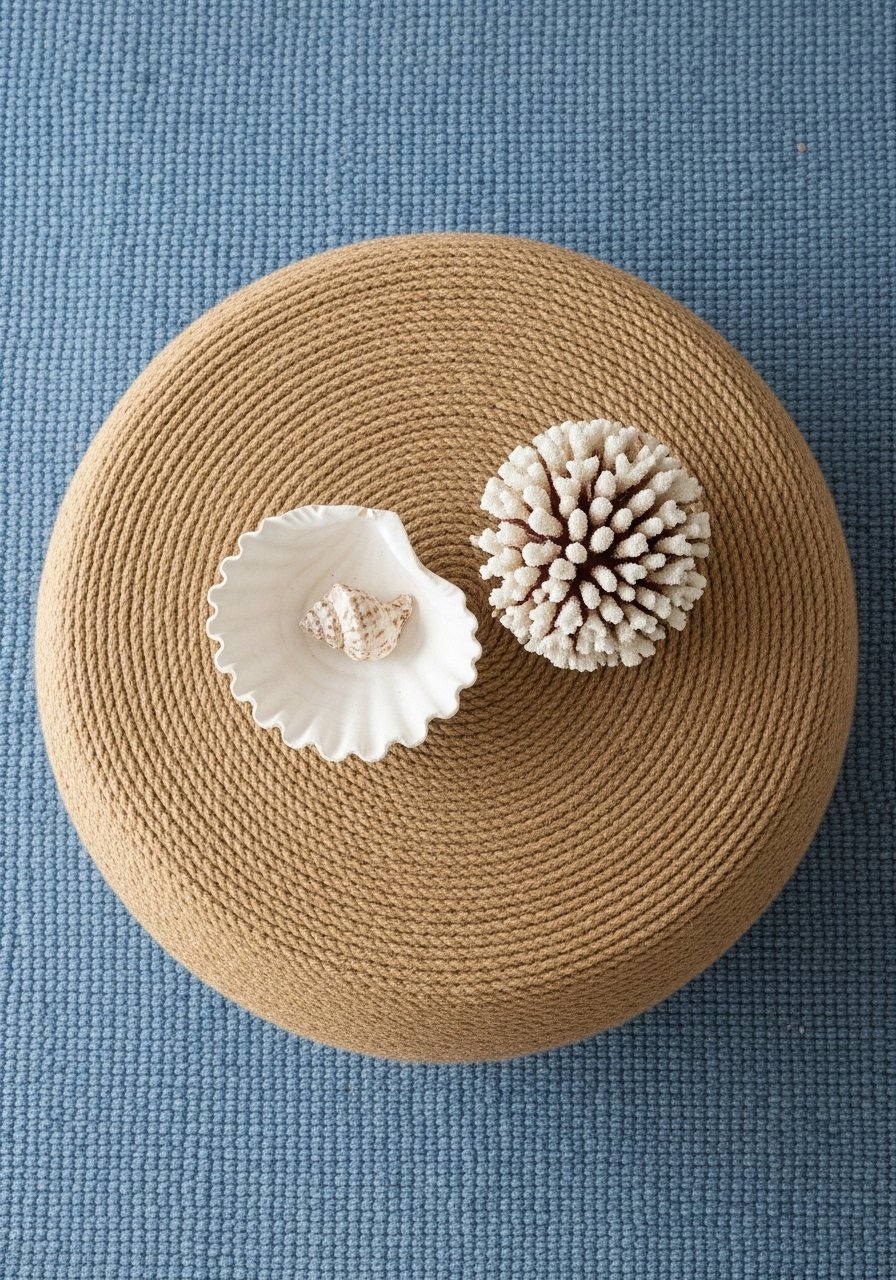
Wrapping a thrifted table with jute rope instantly creates a coastal, textural piece. The tactile finish is warm and natural.
Materials
- Round thrifted table (top diameter 24")
- 3mm natural jute rope (about 50 feet)
- Low-temp hot glue sticks
- Hot glue gun
- Scissors
- Spray sealer (matte)
Instructions
- Clean surface. Start from the underside or center and hot-glue the rope in place, wrapping tightly.
- Apply glue every 2–3 inches for a secure hold.
- Trim and tuck the end, securing with a dab of glue.
- Spray two light coats of matte sealer; dry 30 minutes between coats.
- Let sealer cure 2 hours before light use.
How to Display or Gift It
- Use a woven tray to protect rope from spills.
- For gifting, pair with a jar of extra rope for future repairs.
- Faux Marble Painted Table (DIY coffee table ideas on a budget)
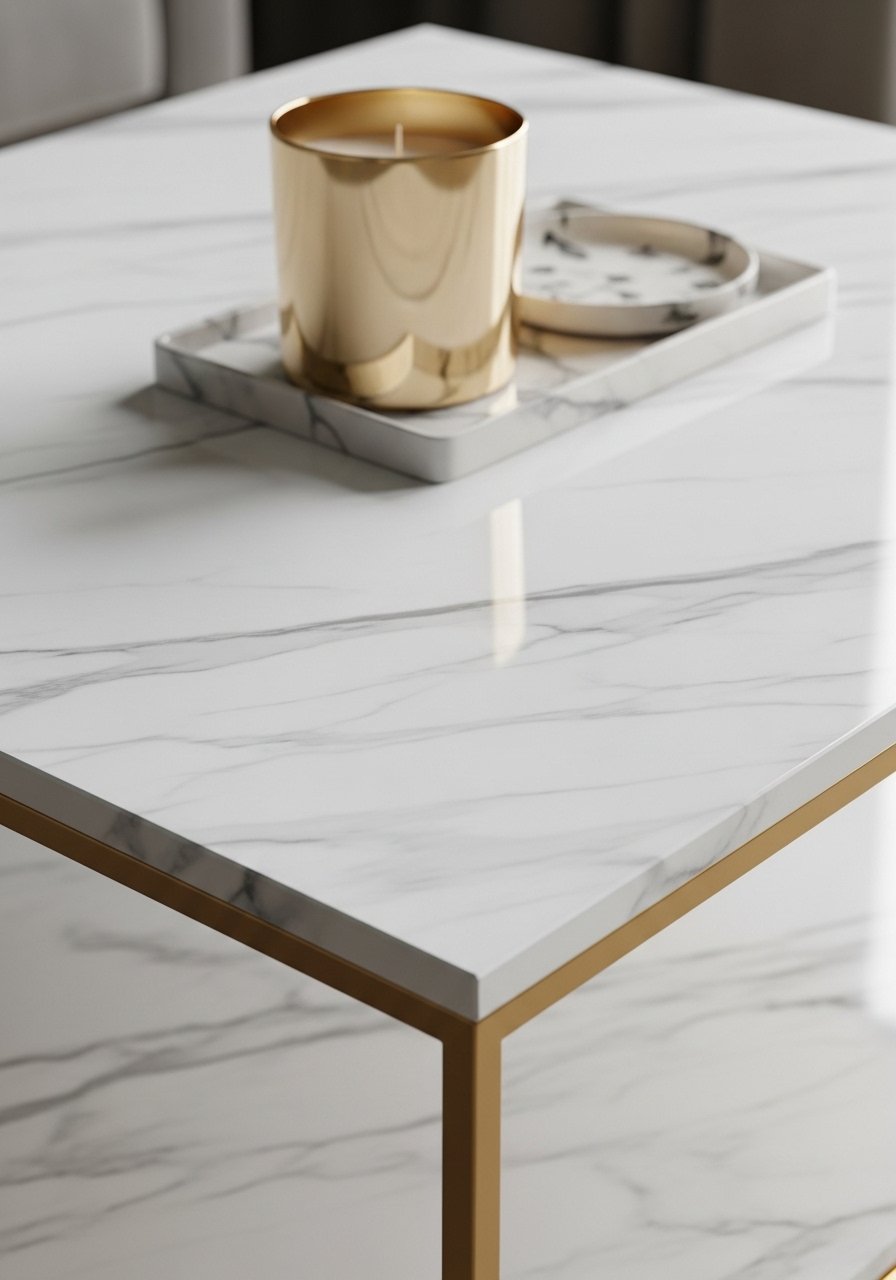
You can fake marble with paint, glaze, and a feather brush. The result is elegant and surprisingly convincing when sealed properly. This is one of the best DIY coffee table ideas on a budget for a luxe look.
Materials
- MDF or plywood table top 36" x 18"
- White chalk paint (8 oz)
- Grey glaze or acrylic paint for veining
- Feather fan brush and fine liner brush
- Clear epoxy or polyurethane for sealer
- Painter’s tape
Instructions
- Prime and paint the top with white chalk paint. Apply 2 coats, drying 1 hour between.
- Mix grey paint with glaze medium for translucency.
- Use feather brush to create soft veining, then refine with a liner brush. Practice on scrap first.
- After 2 hours dry, seal with one thin coat of epoxy or two coats of polyurethane—epoxy cures tack-free in 24 hours and fully in 72 hours.
- Let sealer cure fully per product instructions before use.
How to Display or Gift It
- Pair with brass or gold accents for contrast.
- Wrap carefully and include care tips for painted surfaces.
- Mid-Century Nightstand Flip (TV Tray to Coffee Table)
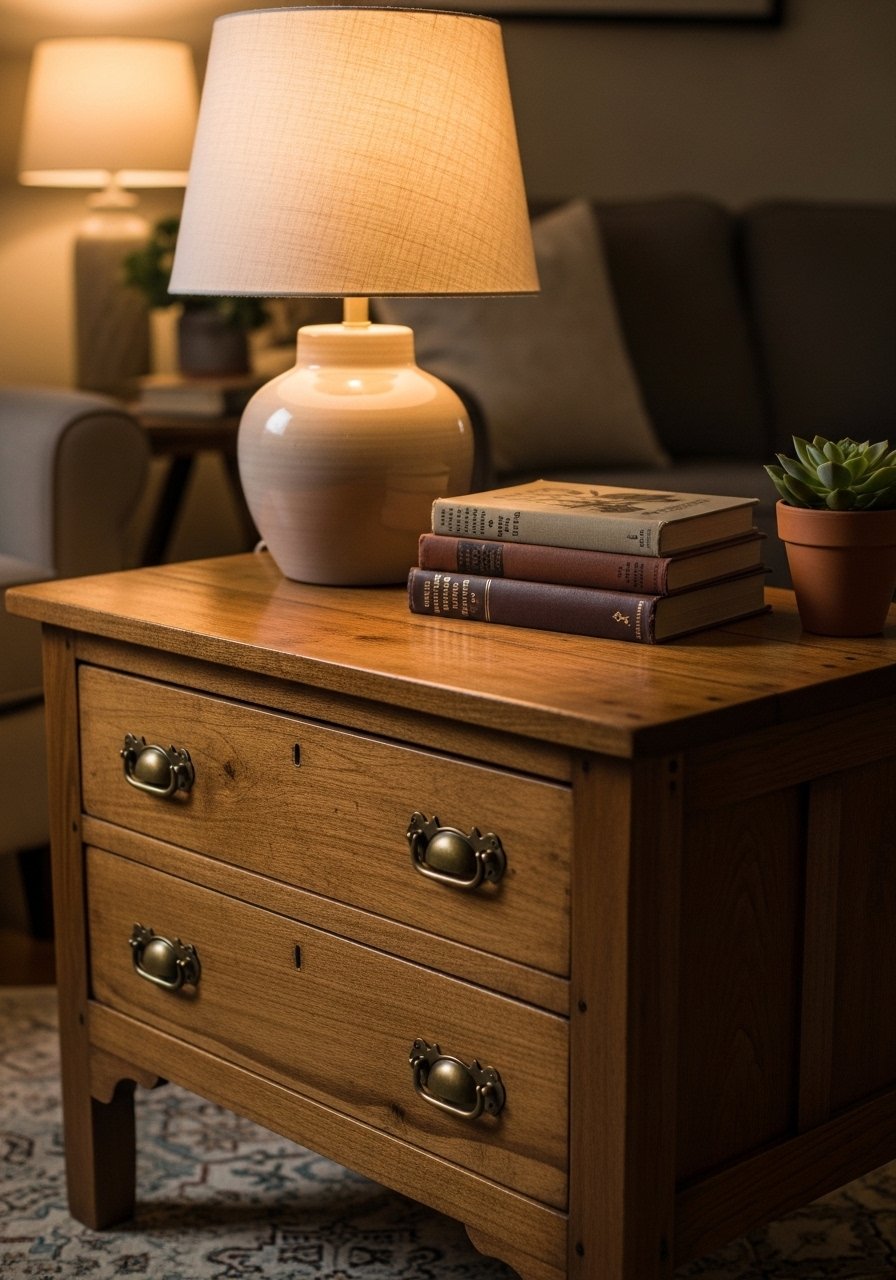
A thrifted nightstand repurposed into a coffee table offers storage and a small footprint. Replacing hardware and refinishing the top gives it a fresh, high-end vibe.
Materials
- Nightstand (thrift shop find)
- Sandpaper 120 and 220 grit
- Wood stain and cloth
- New drawer pulls (2)
- Clear wax or polyurethane
- Screwdriver and 1" screws
Instructions
- Remove drawers and hardware. Sand the top smooth.
- Stain top, wipe excess, dry 2–4 hours.
- Apply clear wax per directions or two coats of poly; dry 2 hours between.
- Replace hardware for modern look.
- Reinsert drawers and center on living room rug.
How to Display or Gift It
- Use as a smaller coffee table in tight spaces.
- Add a tray to corral remotes and coasters.
- Gift with a matching lamp or reading book.
- Painted Geometric Coffee Table (Graphic Modern)
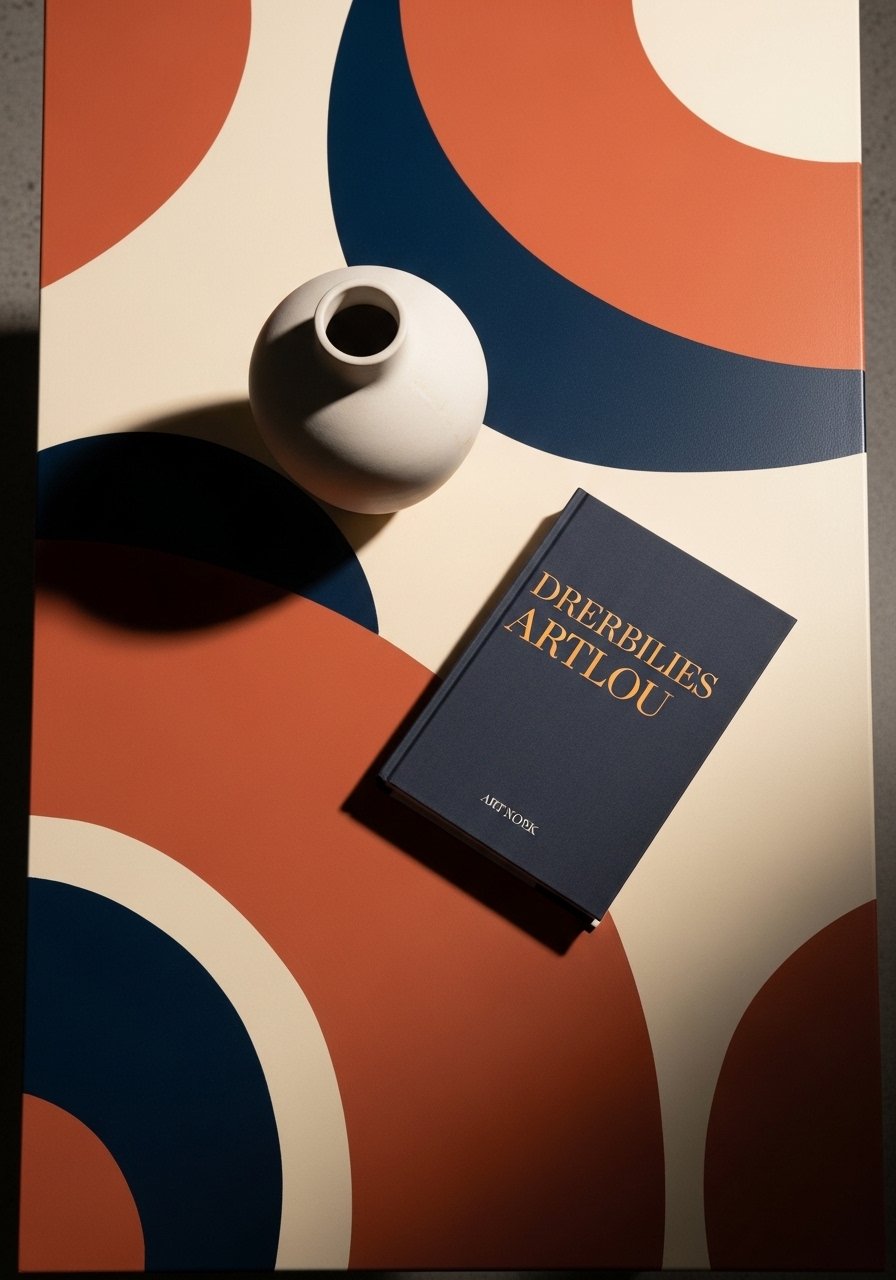
Crisp geometric shapes and contrasting paint colors turn a plain top into a statement. Use painter’s tape for sharp lines and a brayer roller for smooth coverage.
Materials
- Table top 36" x 18"
- Acrylic chalk paints in 3 colors
- Painter’s tape
- Brayer roller
- Foam brushes
- Polycrylic matte sealer
Instructions
- Sand and prime table top.
- Tape design with painter’s tape; press edges firmly.
- Roll paint in thin coats using brayer. Allow 30 minutes between coats. Two coats usually.
- Remove tape carefully after paint is dry to the touch (about 30–45 minutes).
- Seal with two coats polycrylic; dry 1 hour between coats.
How to Display or Gift It
- Coordinate with throw cushions in your chosen colors.
- Gift as a custom piece for a friend who loves graphic design.
- Crate Stack with Glass Top (Light & Airy)
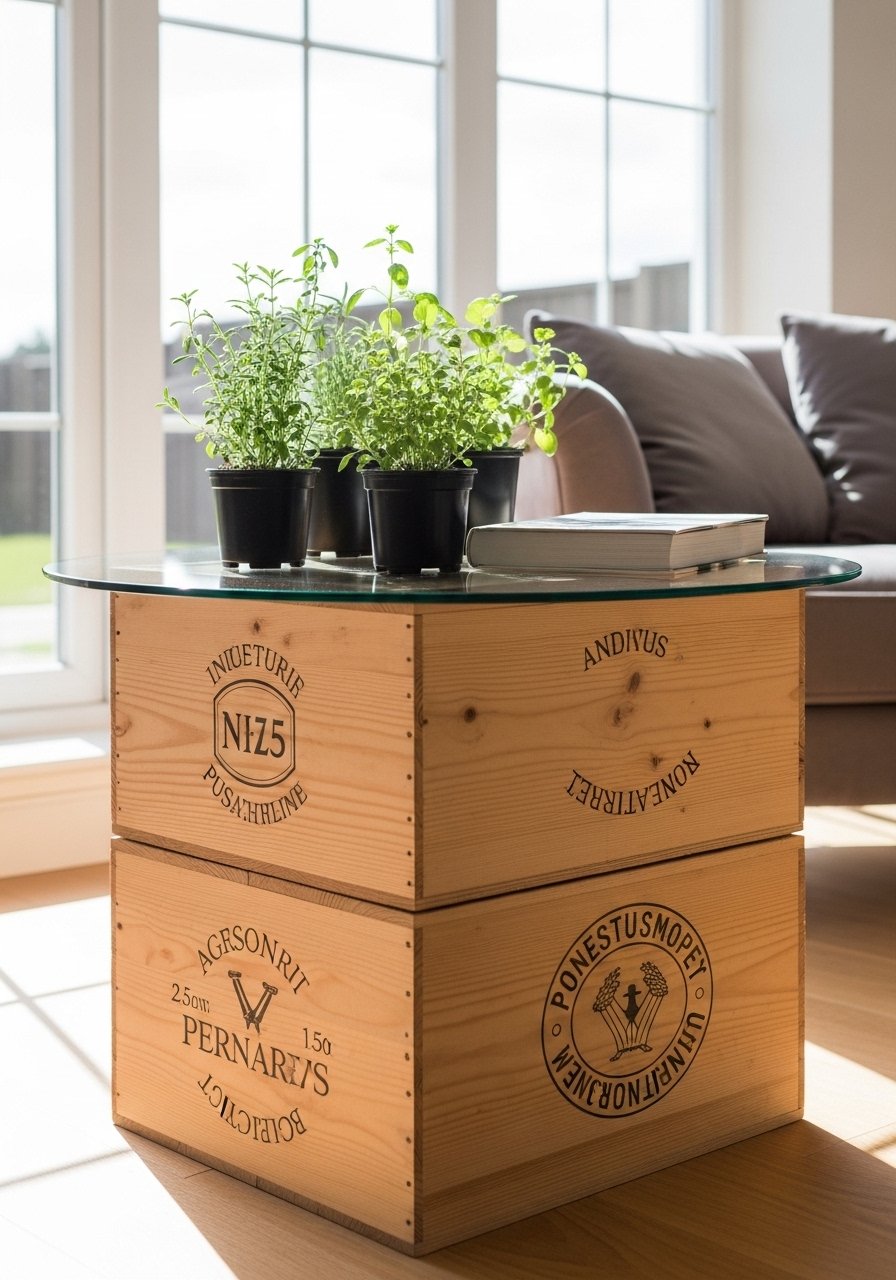
Wine crates are rustic and stackable. Adding a glass top makes the piece feel more refined. The hollow crates offer magazine storage.
Materials
- 2 wooden crates (12" x 16")
- Round tempered glass 30" diameter
- Sandpaper 120 grit
- Wood glue and small nails
- Felt pads for glass
Instructions
- Sand crates and glue any loose slats; let dry 1 hour.
- Stack crates and secure with small nails if permanent.
- Place felt pads on top corners to cushion glass.
- Set tempered glass on top. No adhesive recommended for safety.
How to Display or Gift It
- Fill crates with throws or books.
- Use as a display table for plants.
- Gift with a set of coasters and care card about tempered glass.
- Minimalist Floating Tray Table (Scandi Minimal)
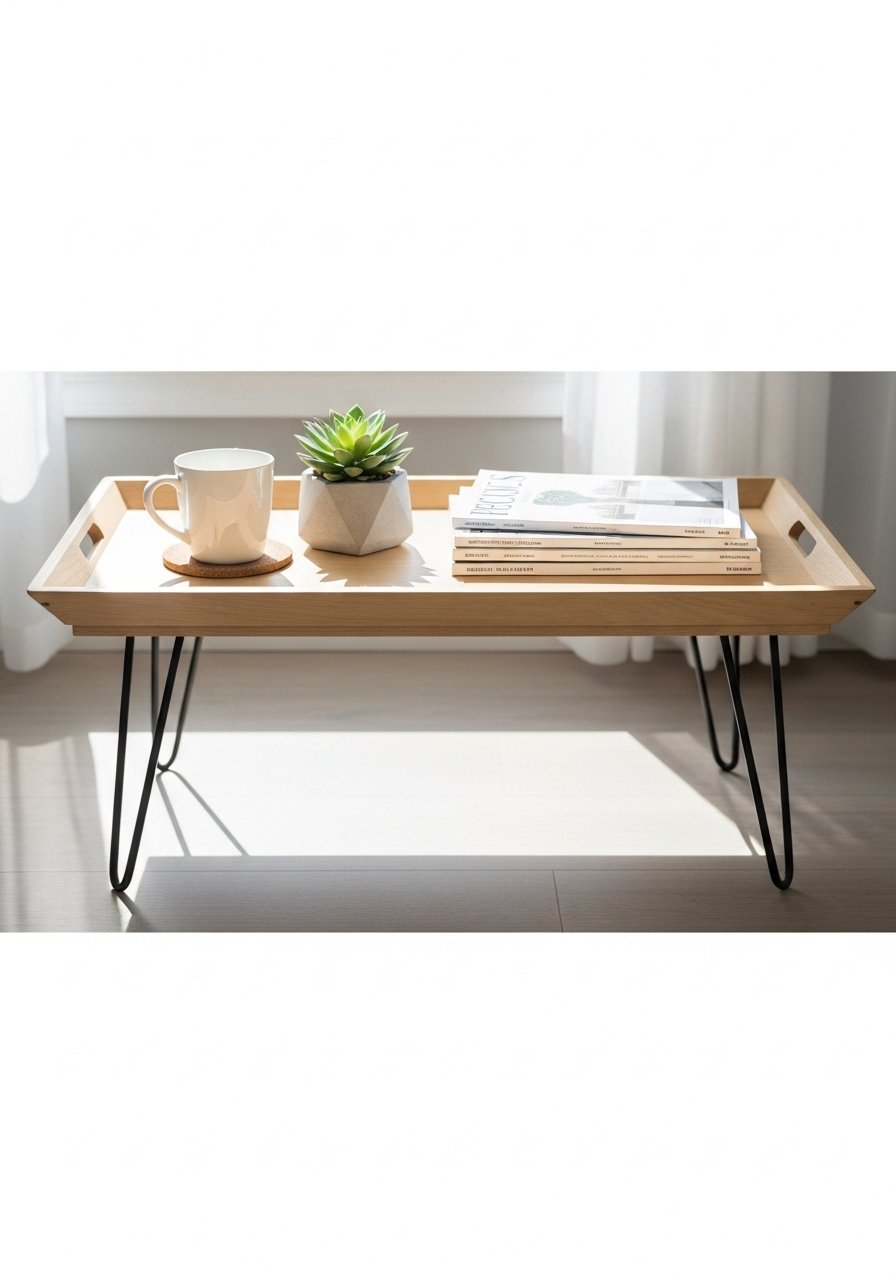
A shallow tray top on legs feels light and airy. Use thin plywood and raised edges for a bistro-inspired look. This suits apartments and small rooms.
Materials
- 1/2" plywood 36" x 16"
- 1" strips for raised edge (36" and 16")
- 4 hairpin legs 3.5"
- Wood glue, brad nails
- Sandpaper 120 grit
- Paint or stain of choice
Instructions
- Cut plywood and edge strips. Glue and nail edge strips to create tray lip.
- Sand and paint or stain. Dry times: stain 2–4 hours; paint 1 hour between coats.
- Attach hairpin legs with screws.
- Let glue set 1 hour before use.
How to Display or Gift It
- Use as a lightweight coffee table or serving tray.
- Wrap as a gift with a set of linen napkins.
- Concrete-Topped Coffee Table (Modern Industrial)
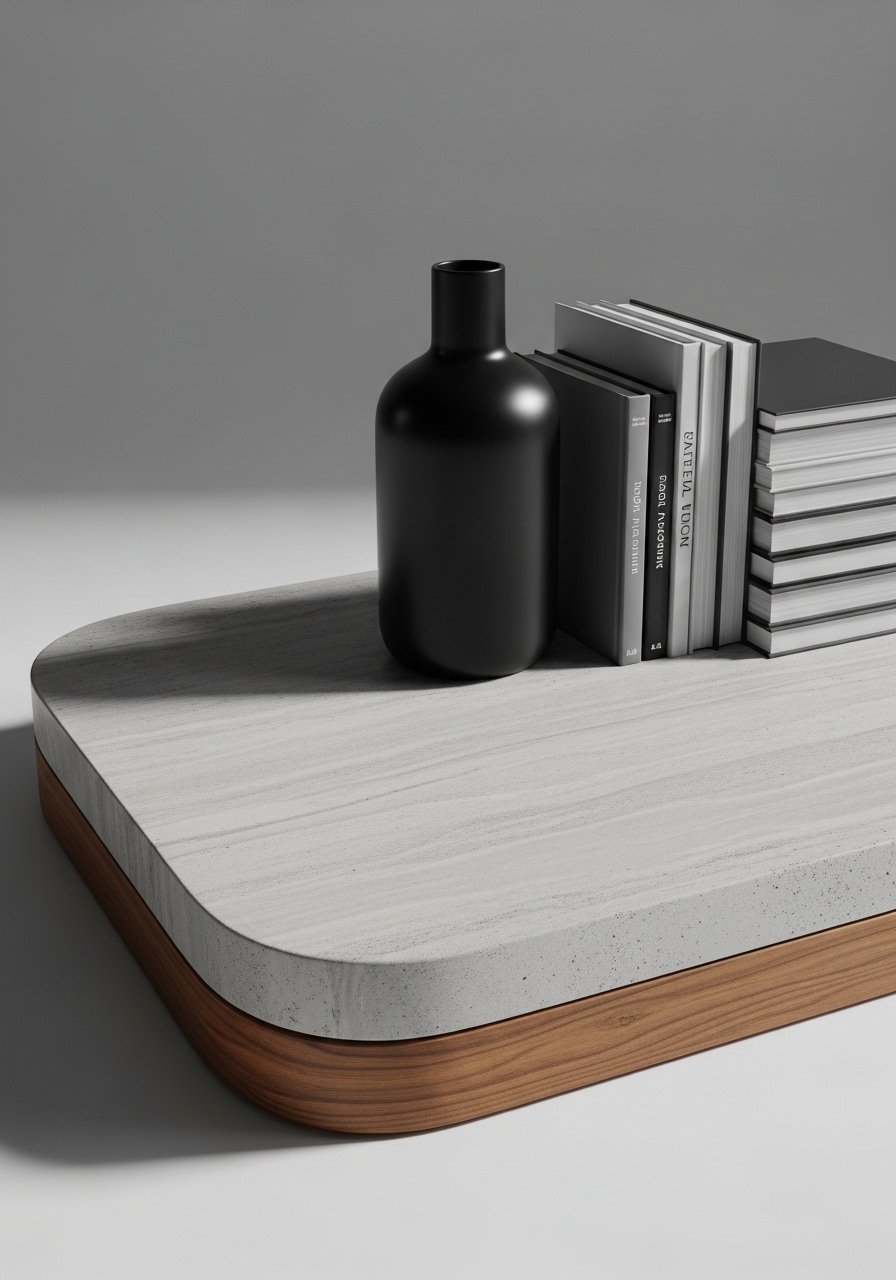
A thin concrete top offers a modern, weighty look. Use a plywood mold and quick-setting concrete mix for a thin slab. Concrete is heavy; add a sturdy base.
Materials
- Quick-set concrete mix (suitable for 1" slab)
- Plywood mold (36" x 18" x 1.5")
- Non-stick mold release
- Rebar mesh or fiber reinforcement
- Sandpaper 120 grit for smoothing edges
- Sealer for concrete
Instructions
- Build mold and coat with mold release.
- Mix concrete per package; pour into mold to 1" thickness. Embed fiber reinforcement.
- Tap mold to release air bubbles; let set 24–48 hours.
- Remove from mold and sand edges gently.
- Seal with concrete sealer; dry 24 hours.
- Mount on wooden base with adhesive and bolts; allow 24 hours cure.
How to Display or Gift It
- Pair with metal or wood base for contrast.
- Keep indoors and avoid rapid temperature changes.
- Gift with care notes on sealing and maintenance.
- Stenciled World Map Table (Travel-Theme)
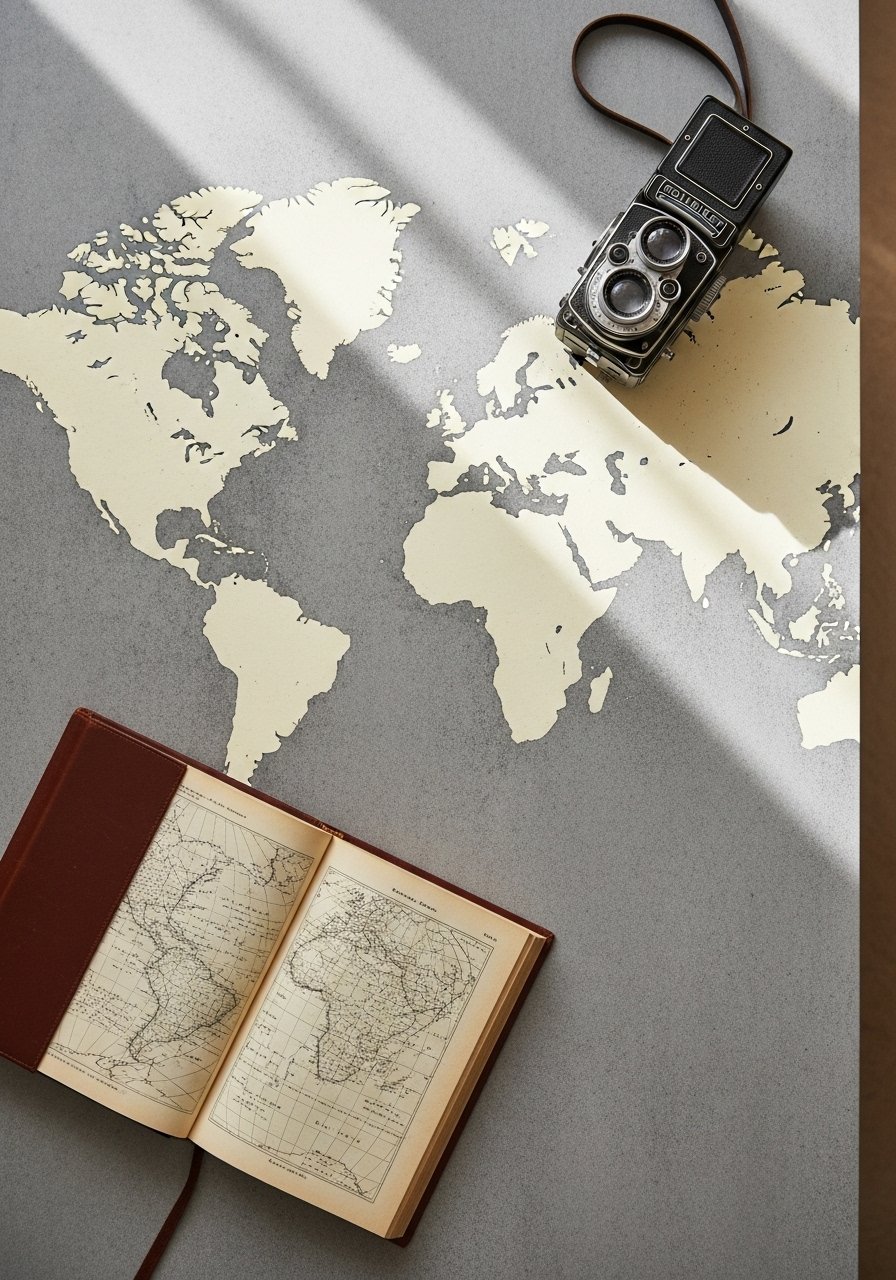
Stenciling a map gives global flair. Use a projector or vinyl stencil for accuracy. Works well on thrift finds.
Materials
- Table top
- World map stencil
- Chalk paint base color
- Acrylic paint for stencil
- Foam roller and stencil brushes
- Clear sealer
Instructions
- Paint base color and let dry 1 hour.
- Secure stencil and pounce with foam roller using thin paint layers.
- Remove stencil carefully; touch up with fine brush.
- Seal with one coat of polycrylic; dry 1 hour.
- Let cure 24 hours.
How to Display or Gift It
- Pair with travel books and souvenirs.
- Gift to a traveler with an accompanying journal.
- Folding Tray Ottoman Table (Dual-Purpose)
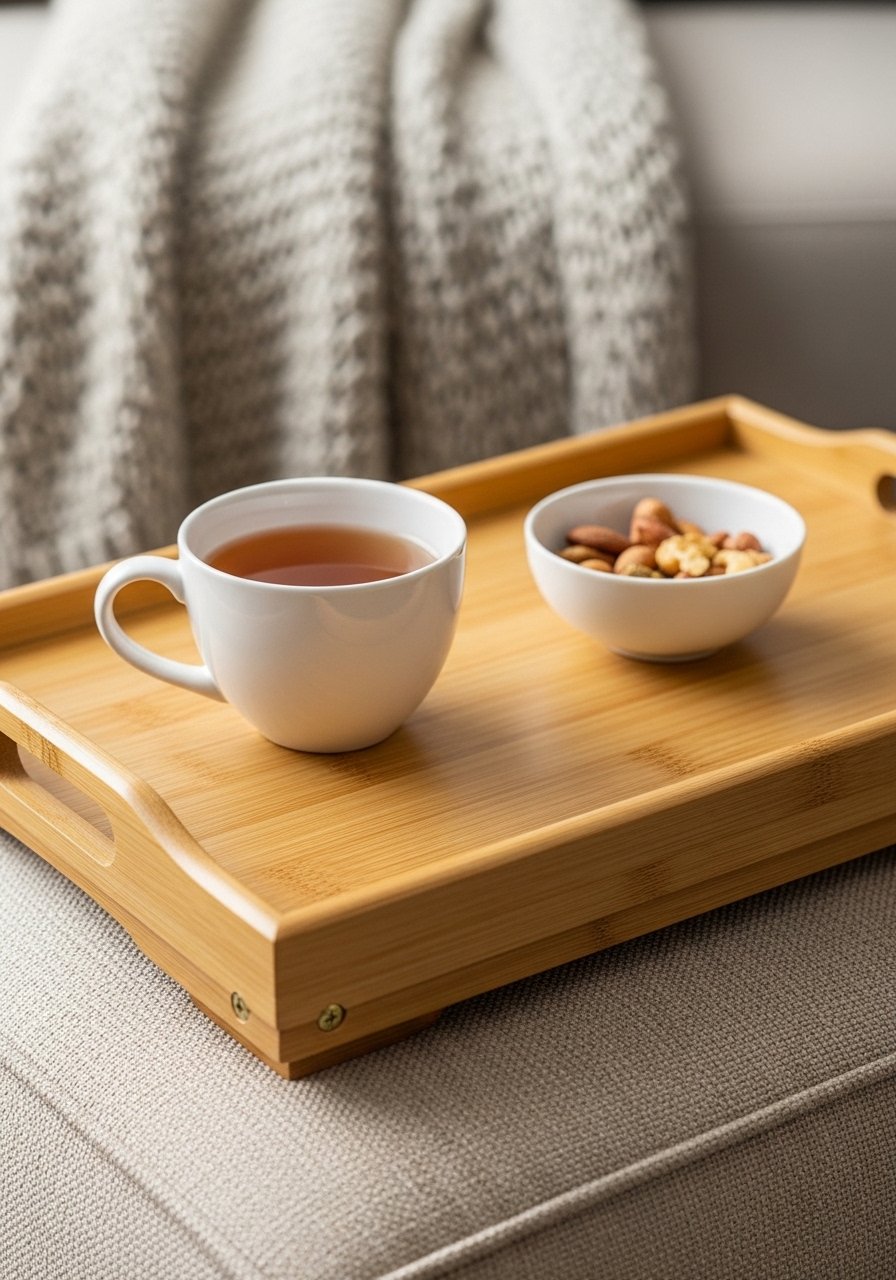
A wooden tray converted into a removable tabletop across an ottoman is practical and portable. Use high sides and handles for serving too.
Materials
- Wooden folding tray (30" x 16")
- Sandpaper 120 grit
- Paint or stain
- Clear sealer (polycrylic)
- Felt pads for bottom
Instructions
- Sand tray and paint or stain. Dry times: paint 1 hour between coats.
- Seal with polycrylic; dry 1 hour between coats, 2 coats total.
- Add felt pads to bottom to protect upholstery.
- Use on top of an ottoman; remove when serving food.
How to Display or Gift It
- Store tray on an entry hall hook when not in use.
- Gift with a small set of linen coasters.
- Newspaper-Decoupage Table (Vintage Collage)
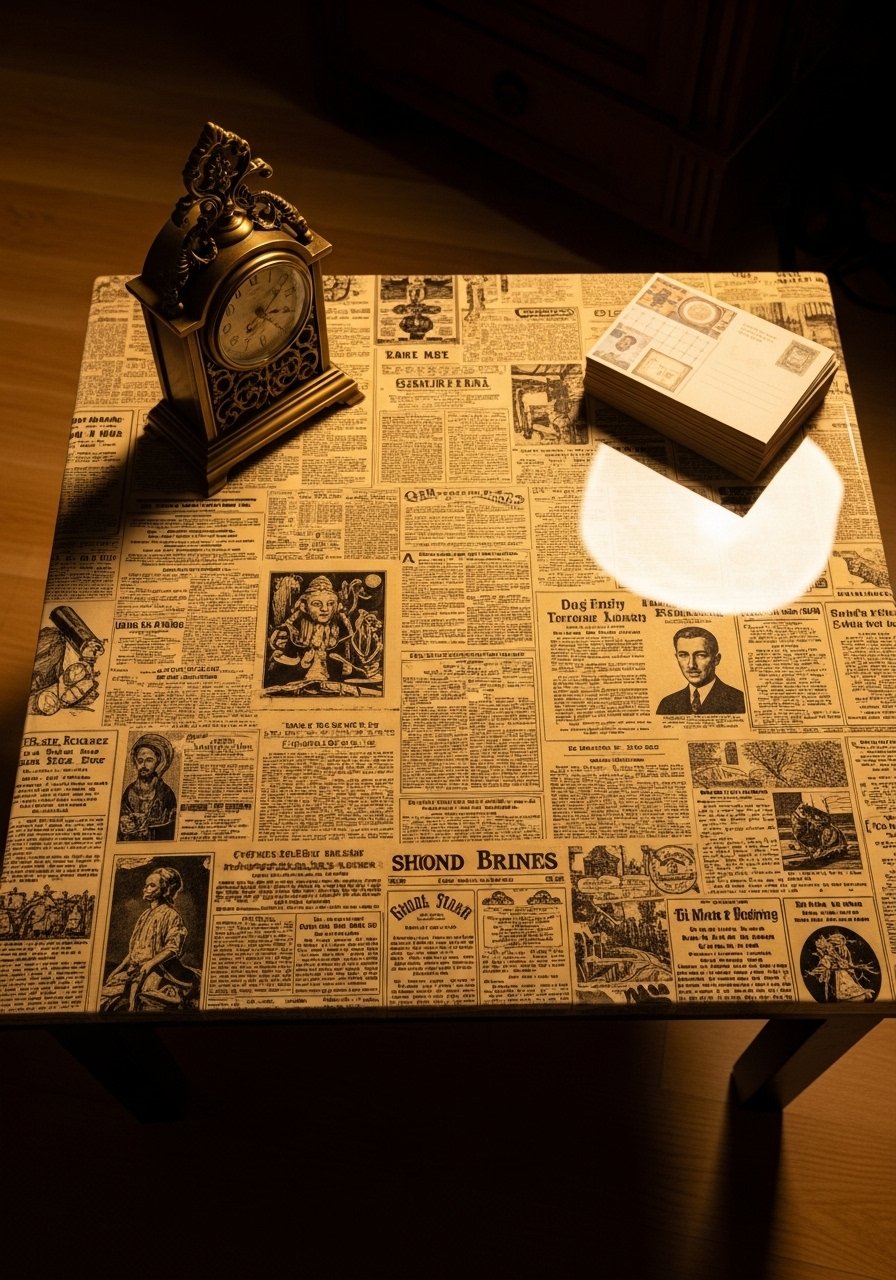
Mod Podge and antiques look like thrift store chic when sealed well. This technique masks imperfections and adds narrative.
Materials
- Table top
- Mod Podge gloss (8 oz)
- Old newspapers or book pages
- Foam brush
- Scissors
- Sandpaper 220 grit for smoothing
Instructions
- Cut clippings and arrange dry for layout.
- Apply thin Mod Podge coat to a small section, lay paper, smooth with brayer.
- Repeat until covered. Seal with 3 coats of Mod Podge, drying 15–20 minutes between coats.
- Lightly sand between coats for dust-free finish.
- Let final coat cure 24 hours before use.
How to Display or Gift It
- Pair with leather-bound books for a library look.
- Gift as a nostalgic piece with a note about the papers used.
- Mirror-Topped Coffee Table (Light Enhancer)
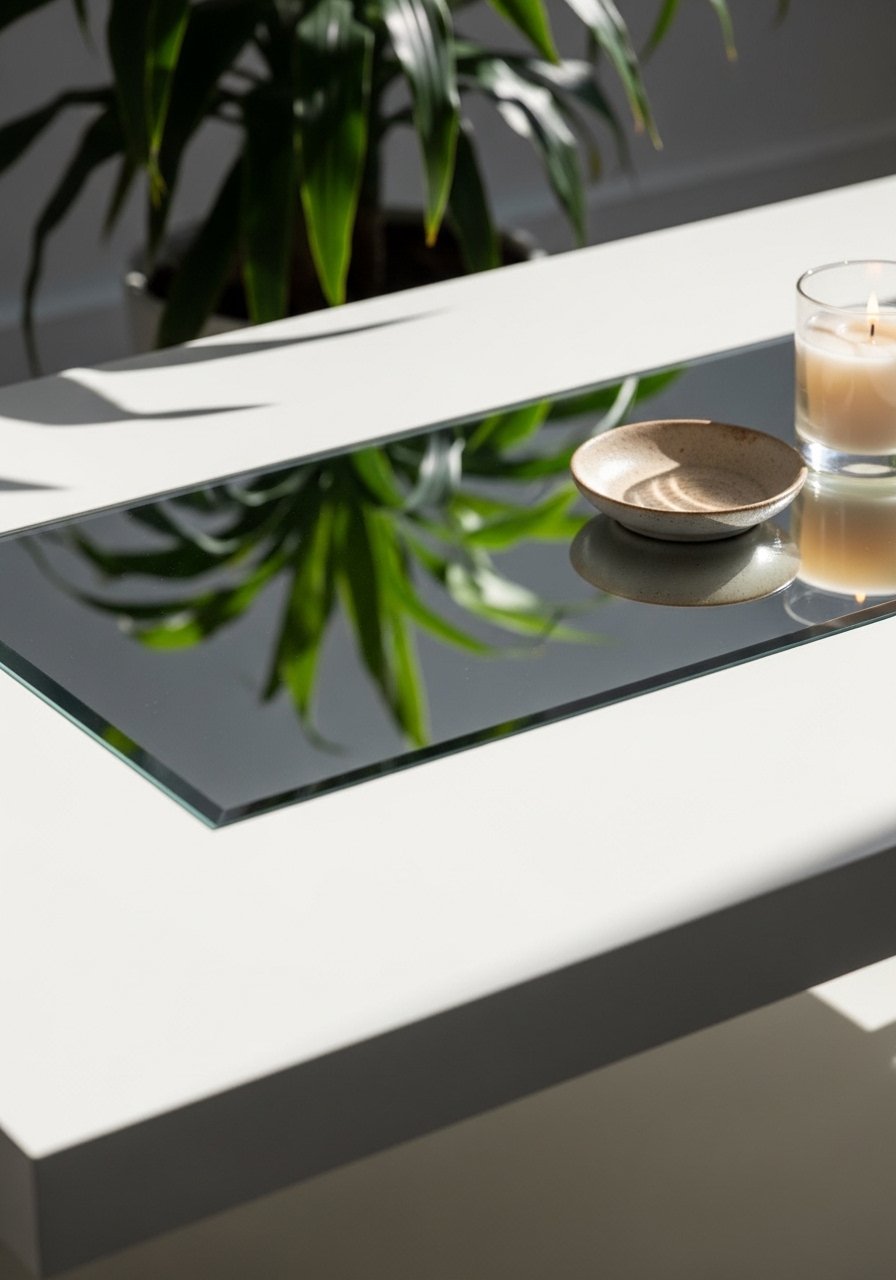
A mirrored top reflects light and makes rooms feel bigger. Use tempered mirror cut to size and secure with rubber bumpers.
Materials
- Table base
- Tempered mirror cut to tabletop size
- Rubber bumpers
- Clear silicone adhesive
- Gloves and protective eyewear
Instructions
- Clean base and set bumpers at corners and center.
- Place mirror on bumpers. For permanent, apply clear silicone around perimeter and let set 24 hours.
- Handle with care; tempered glass can shatter if struck.
How to Display or Gift It
- Pair with bright metallic accessories.
- Wrap with heavy wrapping and label fragile if gifting.
- Chalkboard Paint Table (Kid-Friendly)
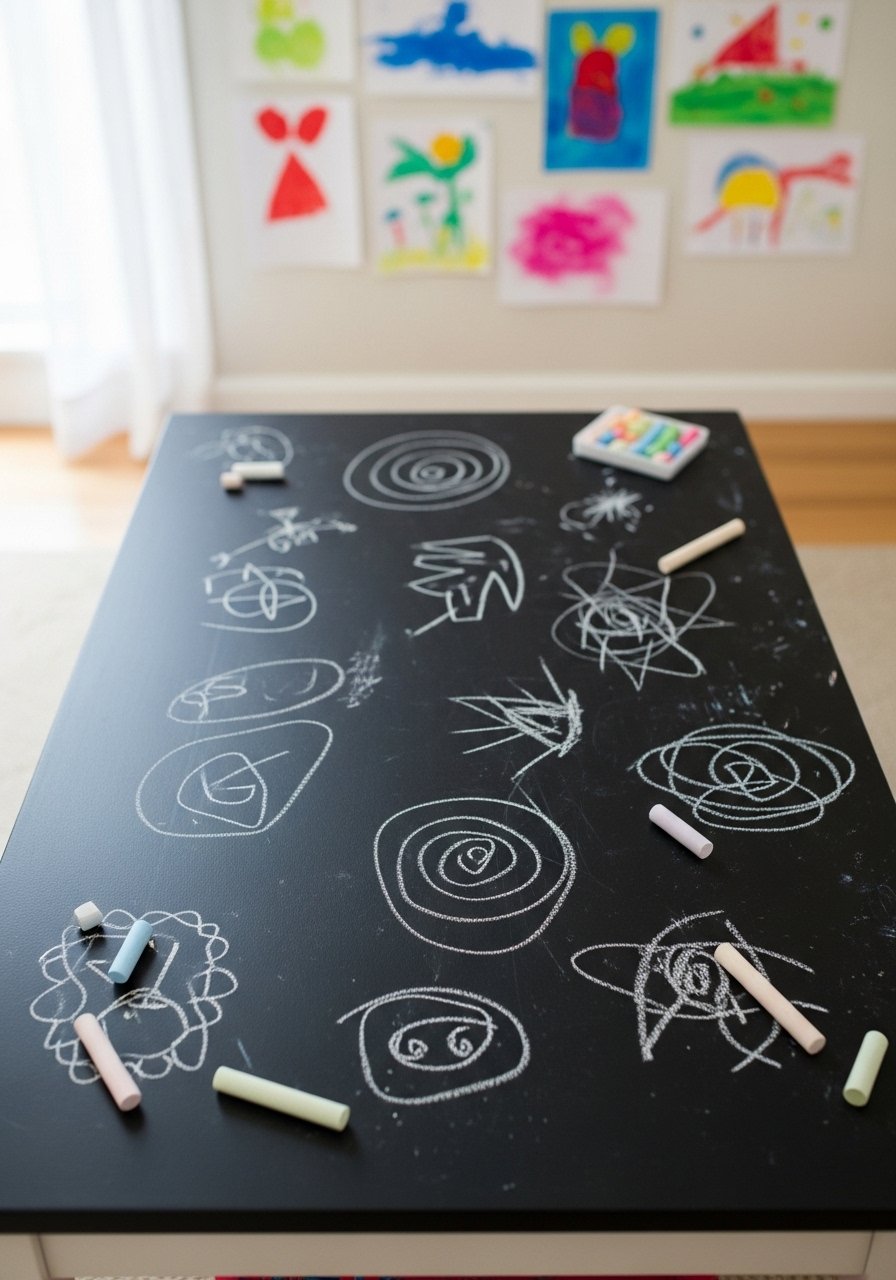
Chalkboard tables are playful and practical for family rooms. Chalk cleans right off and the surface can be refreshed often.
Materials
- Table top
- Chalkboard paint (8 oz)
- Foam roller
- Sandpaper 120 grit
- Chalk and eraser
- Clear sealer (optional for matte finish)
Instructions
- Sand table and apply primer if needed.
- Paint 2 coats of chalkboard paint; dry 1 hour between coats.
- Season chalkboard by rubbing full-side chalk then erase.
- Optionally seal edges with a clear matte sealer; dry 1 hour.
How to Display or Gift It
- Include a small jar of colorful chalk for gifting.
- Clean with damp cloth when needed and re-season every few months.
- Nested Crate Coffee Table (Expandable)

Nested crates slide out to expand table size or tuck away for space-saving. Paint each crate a different tone for gradient style.
Materials
- 3 wooden crates 12" x 12"
- Wood screws
- Felt pads
- Sandpaper 120 grit
- Paint or stain
Instructions
- Sand and paint crates in desired colors; dry 1 hour between coats.
- Attach felt pads underside to allow sliding without scratching floors.
- Stack or slide crates as needed. Secure with small screws if permanent.
How to Display or Gift It
- Use for game nights and movie trays.
- Gift with a small board game tucked inside.
- Repurposed Window Pane Coffee Table (Cottagecore)

An old window offers panes for a charming tabletop. Back the panes with reclaimed wood or leave them clear and place a tray underneath for display.
Materials
- Old window pane frame 36" x 18"
- Plywood base 36" x 18" x 1/2"
- Wood glue and small nails
- Clear silicone
- Paint or stain for frame
- Felt pads
Instructions
- Clean glass and frame. Replace any cracked panes.
- Build a shallow plywood box base to house the window.
- Set window into base and secure with clear silicone; dry 24 hours.
- Paint or stain frame and let dry 2–4 hours.
- Add felt pads to bottom.
How to Display or Gift It
- Arrange dried sprigs or small objects under glass for a vignette.
- Gift as a seasonal tabletop with an included bouquet of dried lavender.
Thank you for making it this far — you now have 24 real, low-cost ways to craft a coffee table that looks high-end. These DIY coffee table ideas on a budget cover rustic, modern, boho, and industrial styles so you can pick what fits your home and skill level. Save or pin the ones that call to you and try one this weekend.
If you only take one tool home from this list, a temperature-controlled hot glue gun will speed assembly and reduce mess across projects — I find it changes how smoothly builds go. Pick one up here: temperature control hot glue gun.
Which of these DIY coffee table ideas on a budget will you try first? Share a photo with a friend who’d love to make one too — and pin this guide for easy access next time you hit a flea market or see a great free pallet.


