You’ve got a stack of old pallets and a weekend waiting — perfect. These 20 DIY pallet coffee table ideas walk you through quick, budget-friendly builds that look intentionally rustic and hold up to daily life. Whether you want a simple pallet coffee table for a cozy farmhouse living room or a weatherproof version for your screened porch, there’s something here you can build in an afternoon or across a weekend.
I’ll show clear materials lists, step-by-step instructions with exact measurements and drying times, and realistic troubleshooting tips so your project doesn’t hit common snags. Grab a good orbital sander and a reliable hot glue gun — they’ll save hours of fuss. If you prefer a precision option for cutting accents, I use my Cricut Explore cutting machine for stencils and small vinyl details. Ready? Pin the ones you love and let’s turn that pallet pile into coffee table magic.
- Rustic Pallet Coffee Table with Hairpin Legs
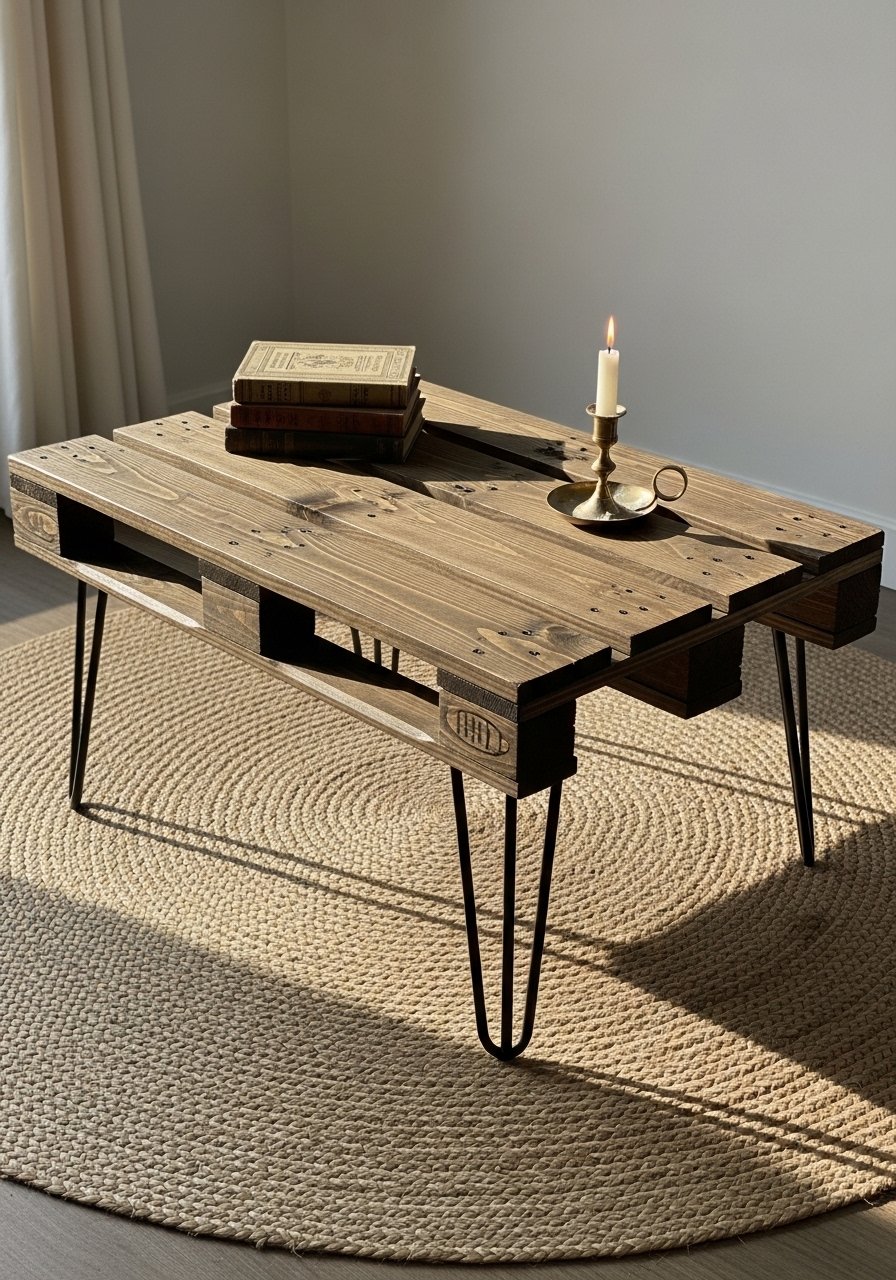
This classic pallet build keeps the original slatted top and pairs it with metal hairpin legs for a mid-century meets farmhouse vibe. The top feels slightly textured and warm after a single coat of stain. Beginners will love how few cuts are required.
Materials
- 1 single Euro pallet (approx 40" x 48") cleaned
- 4 hairpin legs, 16" height (pre-drilled)
- 3/4" plywood scrap, 40" x 12" (for center support)
- 1 cup wood stain, walnut or weathered oak
- 1 pint water-based polyurethane, satin (2 coats)
- 8 wood screws, #8 x 1-1/4"
- Wood glue, 4 oz
- Sandpaper: 80, 120, 220 grit
- Painter’s tape, 1" width
Instructions
- Disassemble or use pallet whole depending on condition. Remove any protruding nails with pliers.
- Sand the top surface with 80 grit, then progress to 120 and finish with 220 for a smooth touch (about 20–30 minutes sanding).
- Attach the plywood center support underneath across the middle with wood glue and #8 x 1-1/4" screws, countersink heads.
- Wipe dust and apply one coat of stain with a lint-free rag; let sit 5–10 minutes, then wipe off. Dry time: 8 hours.
- Lightly sand between coats and apply two thin coats of polyurethane, 2-hour recoat time, fully cure 24–48 hours.
- Screw on hairpin legs at corners using pre-drilled holes; use painter’s tape to mark leg placement for even alignment.
- Flip upright and check for wobble; tighten screws if needed.
How to Display or Gift It
- Place on a low jute rug and stack coastal books with a ceramic tray.
- Add a bowl of seasonal fruit for color and texture.
- Wrap legs in kraft paper and tie with twine for gifting.
- Store disassembled legs in a small hardware organizer until assembly.
- Try hairpin legs if you want a sleek metal base.
- Pallet Coffee Table with Hidden Storage Drawers
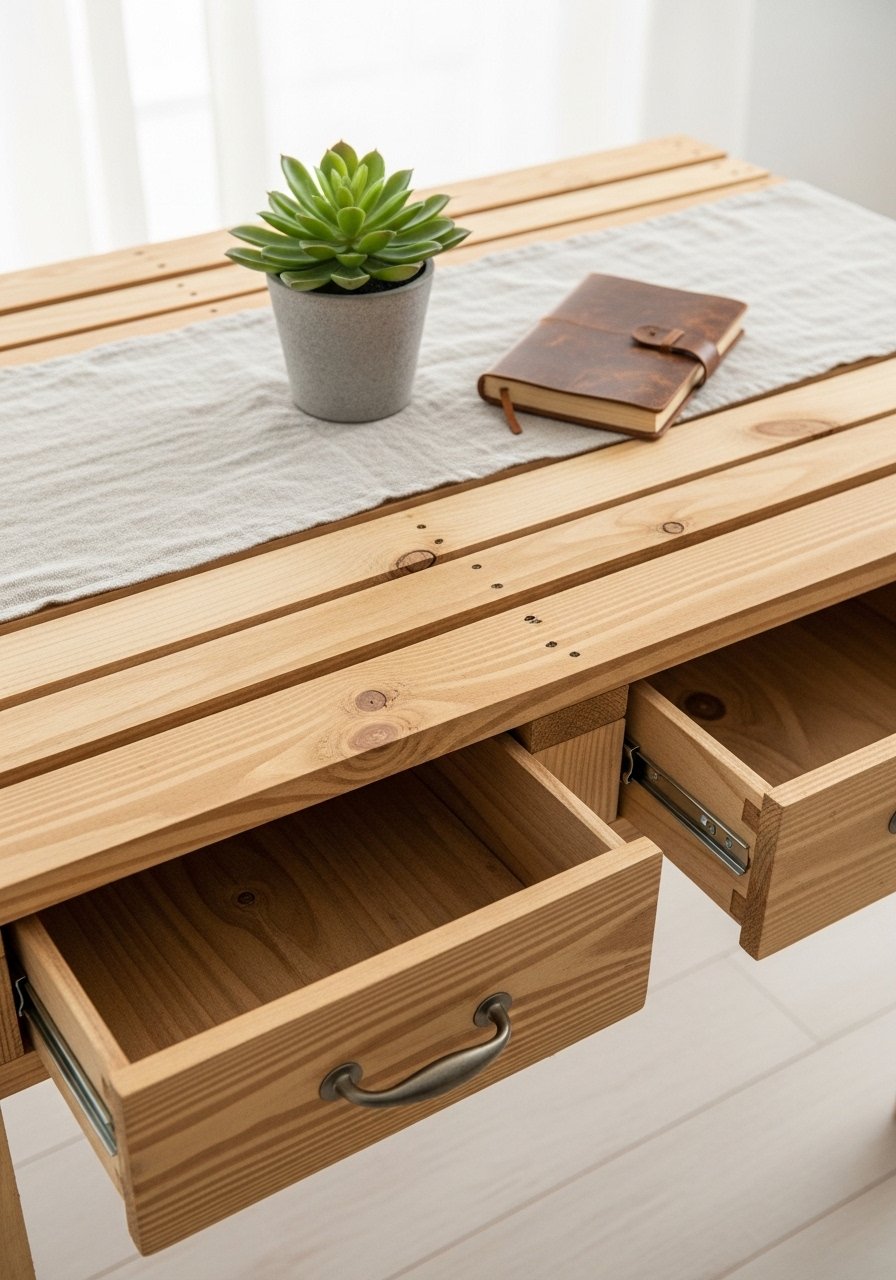
This version keeps the pallet look while adding functional storage. The drawers slide on wooden runners and stow magazines, remotes, or throws. It feels sturdy and practical — perfect for small living rooms.
Materials
- 1 pallet, top slatted intact (40" x 48")
- 2 shallow drawer boxes, 36" x 12" x 4" (built from 1/2" plywood)
- 2 wooden drawer runners, 36" length
- 8 wood screws, #8 x 1"
- 1/2 cup wood glue
- 1 can chalk paint, 8 oz (optional accent)
- Clear wax or topcoat, 4 oz
- Sandpaper: 120, 220 grit
- Drawer pulls, 2
Instructions
- Cut pallet base to desired footprint (e.g., 40" x 24") using a circular saw.
- Build two drawer boxes from 1/2" plywood: cut to 36" x 12" with 4" sides; glue and secure with brad nails.
- Sand drawer faces and pallet interior surfaces with 120, finish with 220.
- Install wood runners inside the pallet cavity and fit drawers to test slide; adjust with spacer shims.
- Paint or stain drawer fronts; cure paint 2–4 hours between thin coats, then finish with wax for durability.
- Secure drawer stops inside to prevent full pull-out. Add pulls and test operation.
How to Display or Gift It
- Keep a small tray on top for remote control and a coaster set.
- Package with care: slide drawers out slightly, tie ribbon around the body for gifting.
- For storage until gifting, use kraft gift boxes to keep hardware together.
- Minimalist Japandi Pallet Coffee Table (Low, Light, Calm)
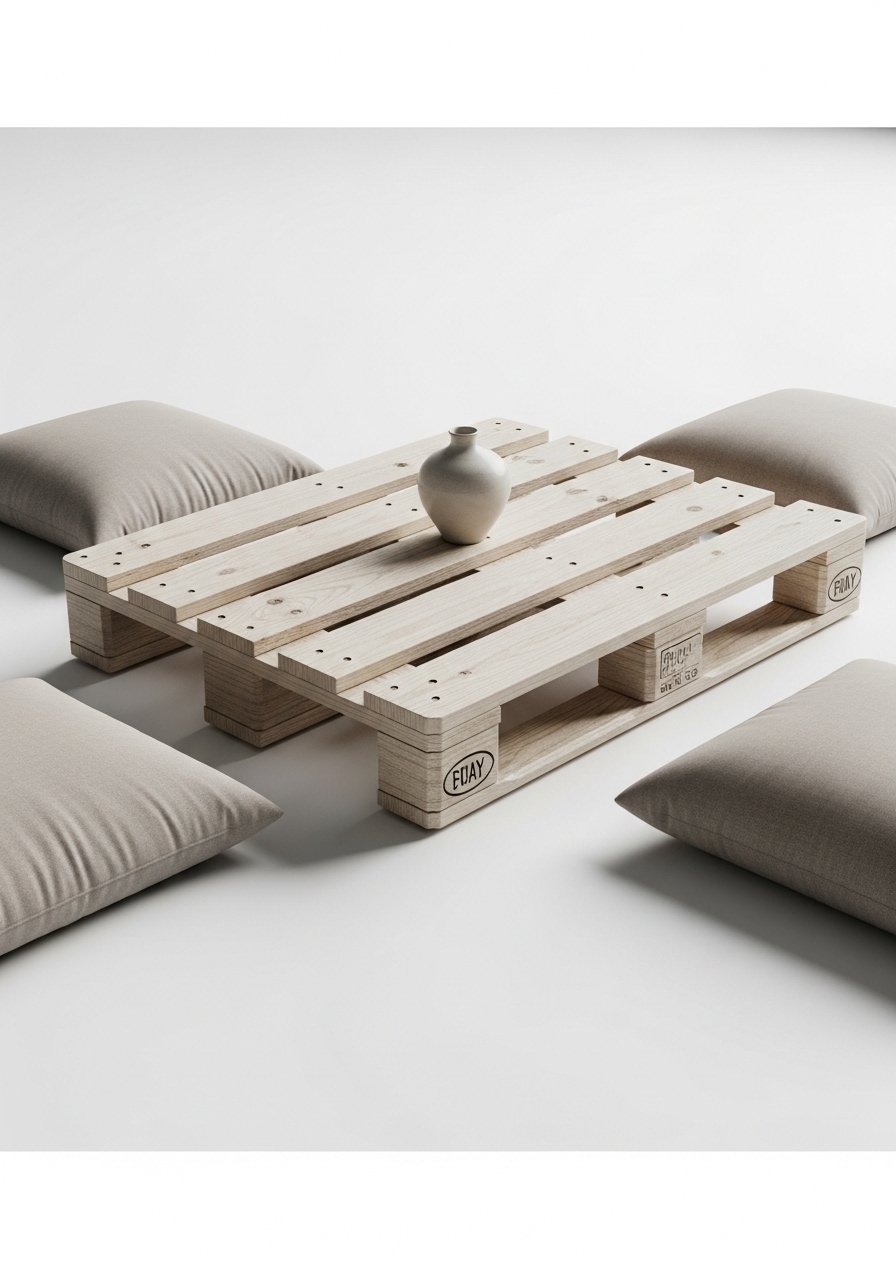
This low pallet coffee table embraces Japandi minimalism: pale tones, clean lines, and low profile. Sand lightly, bleach if desired, then finish with a natural oil for a soft matte feel.
Materials
- 1 pallet, cut to 36" x 36"
- 2" wood screws, #8 x 2"
- Natural tung oil, 8 oz
- Fine sandpaper, 180 and 220 grit
- Measuring tape
- Hand plane or block plane (optional for smoothing)
- Felt pads for underside
Instructions
- Square the pallet to 36" x 36" using a circular saw. Sand with 180, finish with 220.
- Optionally plane edges for rounded, soft corners.
- Apply one coat of tung oil with a clean cloth; soak in 15 minutes, wipe excess. Dry 24 hours.
- Apply a second thin coat; full cure 72 hours. The finish should feel dry and matte.
- Add felt pads to underside to protect flooring.
How to Display or Gift It
- Pair with neutral linen cushions and a low tray of stones.
- For gifting, wrap in breathable muslin and include a small care card.
- Store in a dry place lined with craft storage trays.
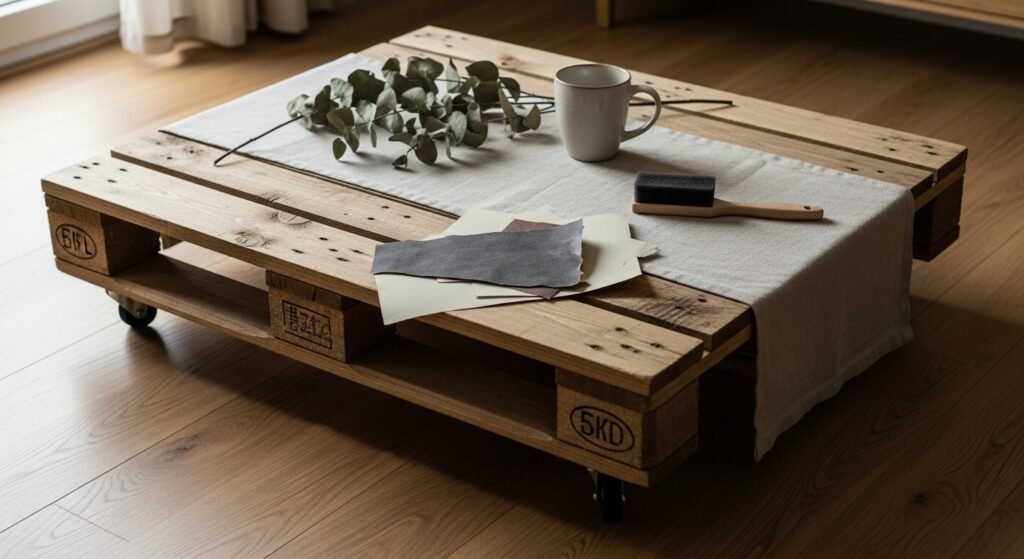
- Pallet Coffee Table with Casters for Flexibility
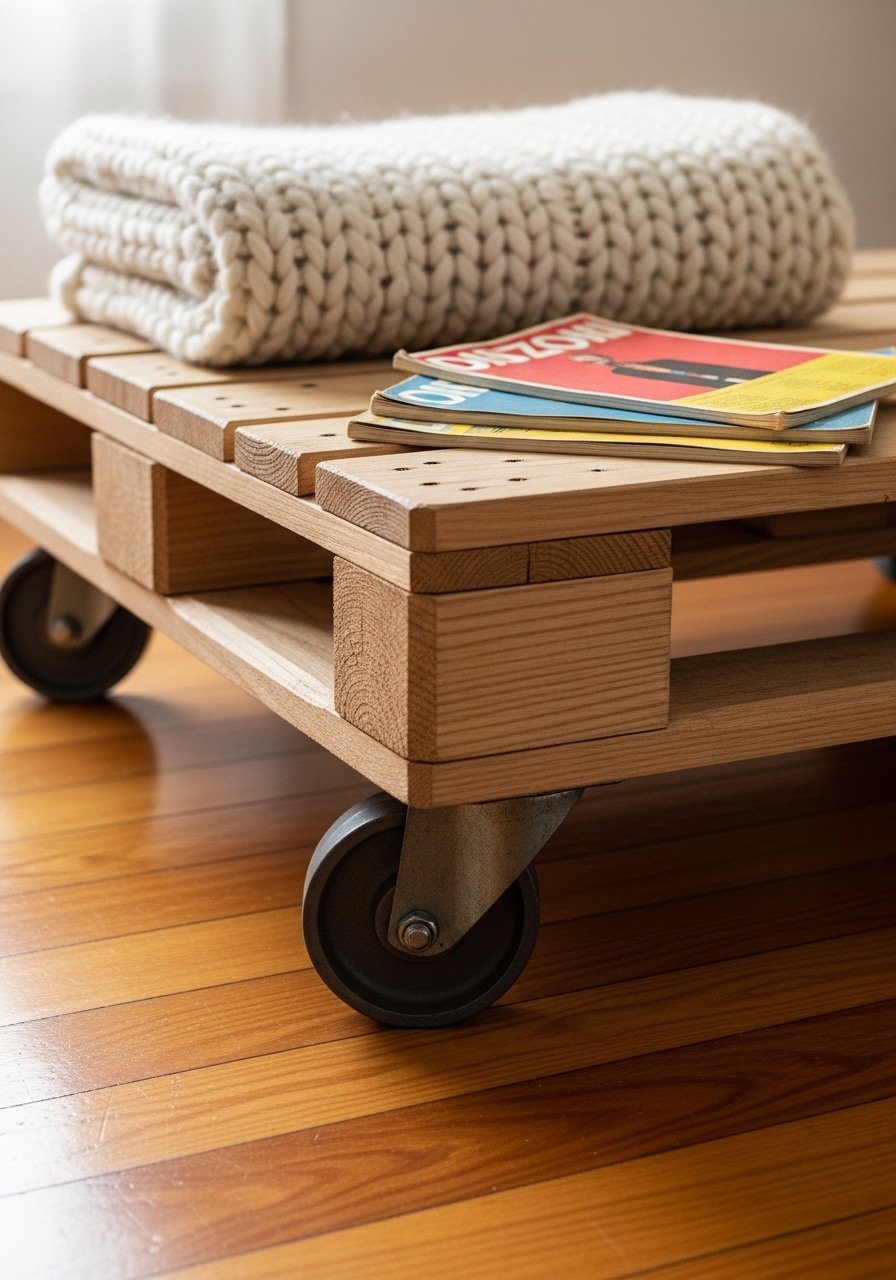
Add locking casters to your pallet table so it moves easily for cleaning or entertaining. It still reads rustic but gains function — great if you rearrange often.
Materials
- 1 pallet, 40" x 48"
- 4 heavy-duty locking casters, 2" or 3" wheel diameter (rated 200+ lbs)
- Corner braces, 4
- Wood screws, #10 x 1-1/2"
- Drill with driver bit
- Sandpaper, 120 grit
- Exterior wood stain (optional for porch use)
Instructions
- Clean and sand the pallet top lightly with 120 grit.
- Attach corner braces to underside corners for a flat mounting surface.
- Mark caster centers and pre-drill pilot holes. Bolt casters using provided bolts, tightening firmly.
- Test roll and lock casters to confirm stability.
- If using outdoors, stain and seal the top with exterior stain; dry time 8–12 hours between coats.
How to Display or Gift It
- Use on patios or sunrooms where mobility matters.
- Add a tray to corral items when rolling.
- Store spare caster bolts in a small hardware organizer or mason jar set for gifts.
- DIY Pallet Coffee Table with Glass Top Insert
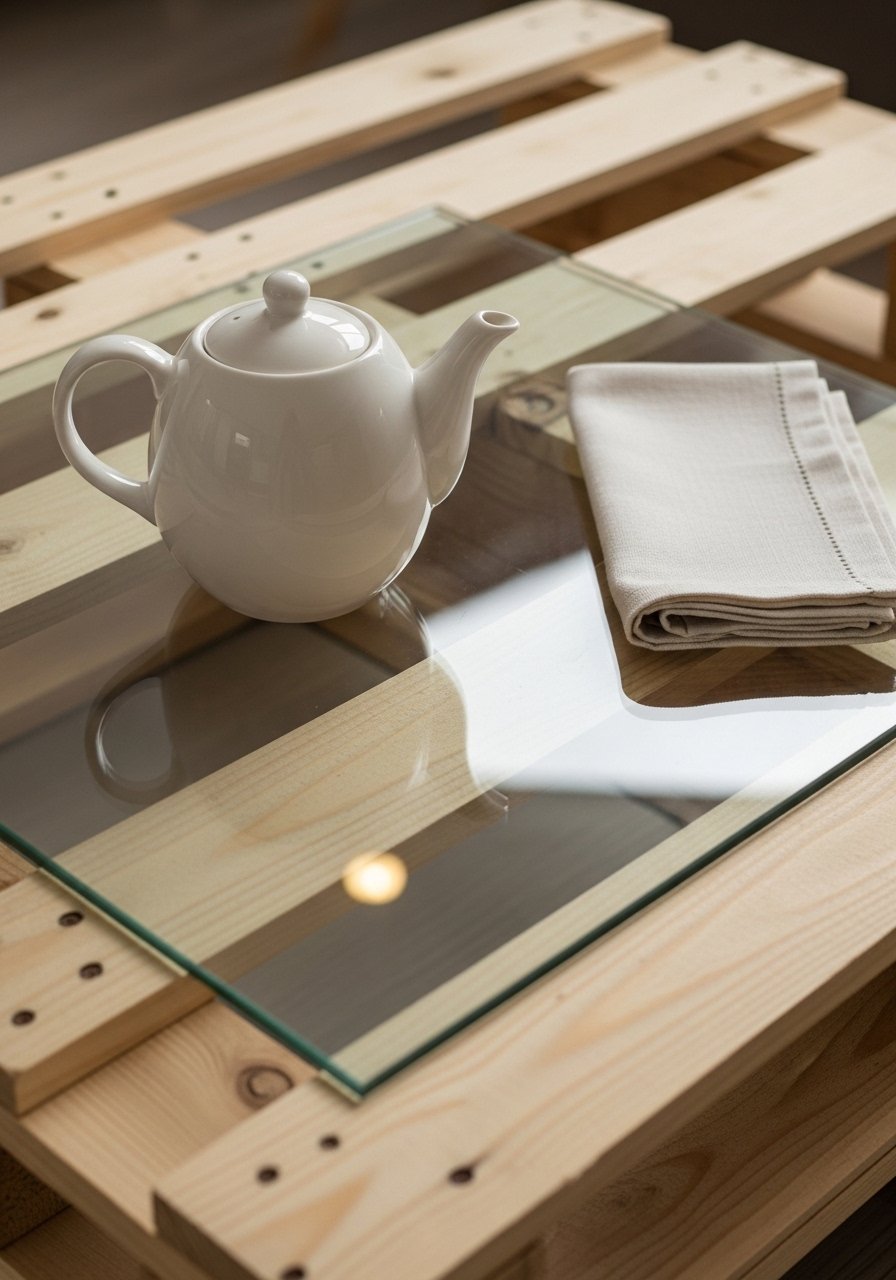
Give the rustic slatted top a refined touch by adding a tempered glass inset. The glass protects the wood and creates a smooth surface for drinks while letting the pallet texture show through.
Materials
- 1 pallet, 40" x 48" (center slats removable)
- Tempered glass top, 36" x 24" x 1/4" (cut to fit inset)
- Rubber bumper pads, small, 8
- Silicone adhesive, 1 oz tube (clear)
- Sandpaper, 120 and 220 grit
- Measuring tape
- Gloves and eye protection
Instructions
- Remove select center slats to create a recessed area 36" x 24". Clean edges and sand smooth.
- Place rubber bumper pads at corners of recess so glass sits slightly elevated.
- Set tempered glass carefully onto pads; use silicone adhesive sparingly under edge points for stability—allow 24 hours cure.
- Clean glass with glass cleaner and soft cloth before display.
How to Display or Gift It
- Style with a minimal vase and stack of art books.
- Wrap glass portion separately in bubble wrap if gifting.
- Keep extra rubber pads in a small craft organizer for future projects; try rubber bumper pads.
- Pallet Coffee Table with Epoxy River Inlay
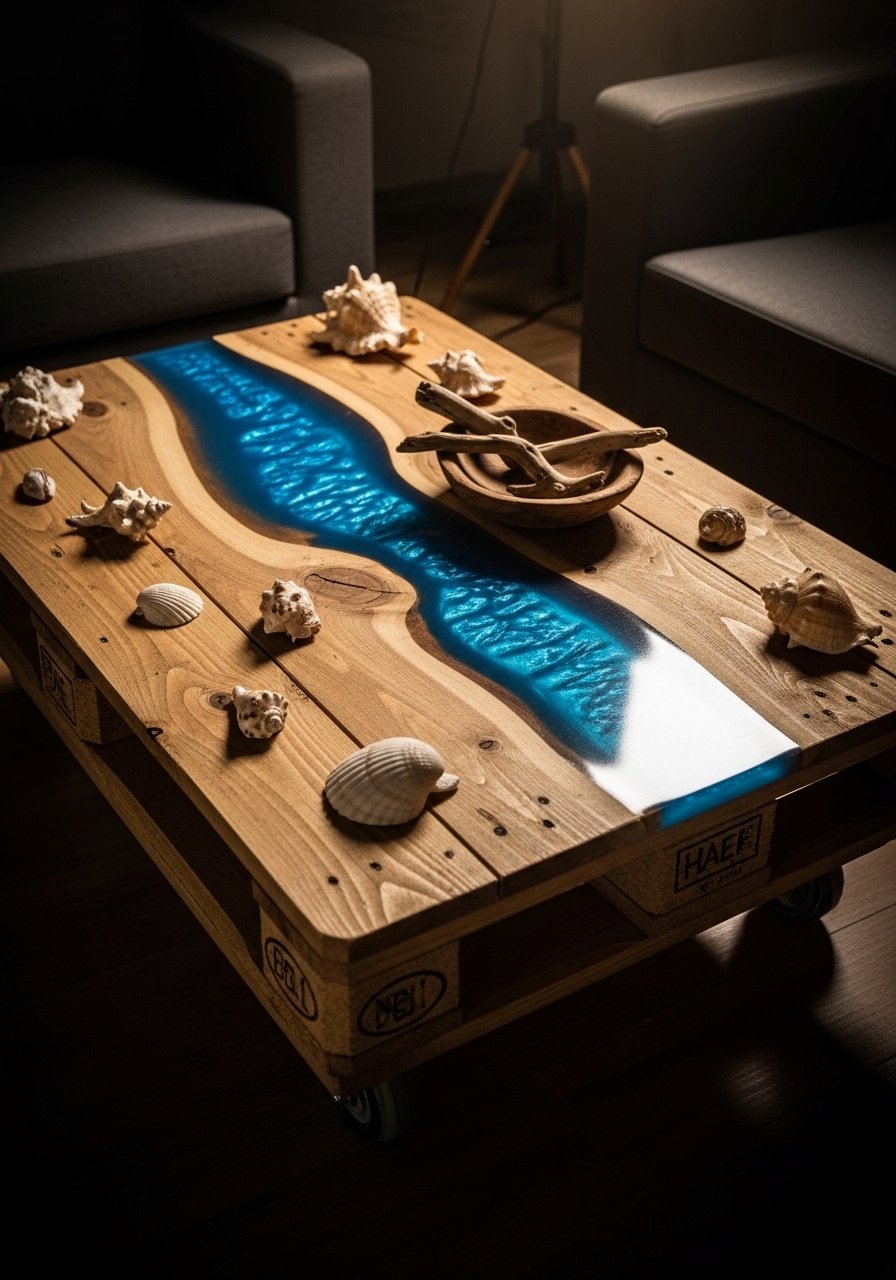
This pallet coffee table pairs rough wood grain with a glossy epoxy river. The effect is modern and eye-catching but still retains a rustic base. Expect curing times and precision when pouring resin.
Materials
- 1 pallet, split and reassembled with gap (approx 36" x 24")
- Epoxy resin kit, clear (2 lb kit covers small table)
- Alcohol ink or pigment, blue (0.5 oz)
- Plastic mixing cups and stir sticks
- Painter’s tape and caulk to create a dam
- Disposable gloves and respirator mask
- Orbital sander with 120–220 grit
- Polishing compound for final buff
Instructions
- Prepare the pallet board: sand to 120/220, clean dust thoroughly.
- Create a dam along the river edges with painter’s tape and silicone bead to prevent leaks.
- Mix epoxy per kit instructions (usually 1:1 by volume) for 3–5 minutes, then add pigment.
- Pour slowly into the dam. Pop bubbles with a heat gun held 6–8 inches away for 5–10 seconds.
- Let cure 24–48 hours before light sanding and a second thin pour if needed. Full cure 72 hours.
- Sand flush and buff to a gloss with polishing compound.
How to Display or Gift It
- This table is a showpiece — keep simple décor to let resin pop.
- Seal edges with felt pads to protect floors.
- For safe transport, wrap in moving blankets and include a small bottle of polish for care. Buy a trusted epoxy resin kit for best results.
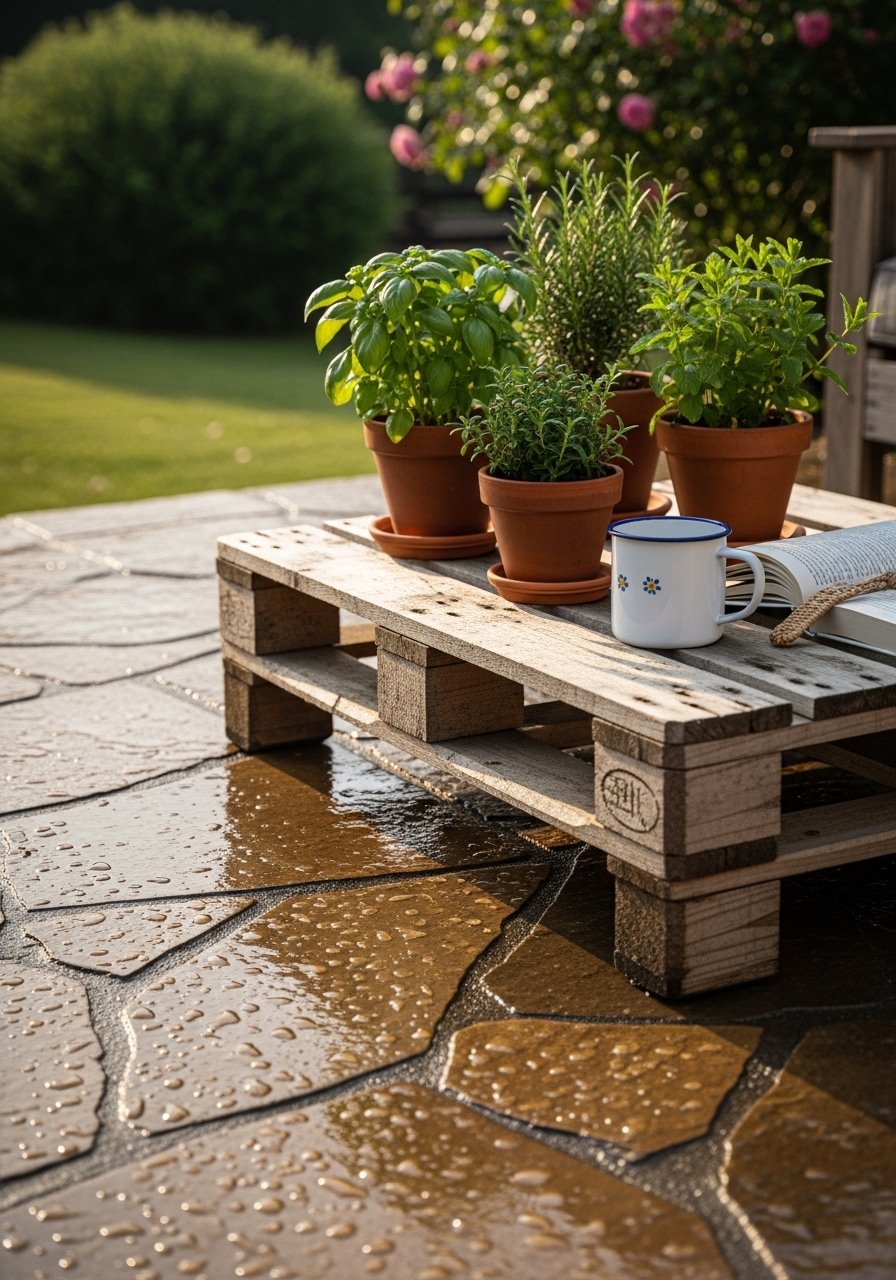
- Boho Pallet Coffee Table with Macramé Shelf
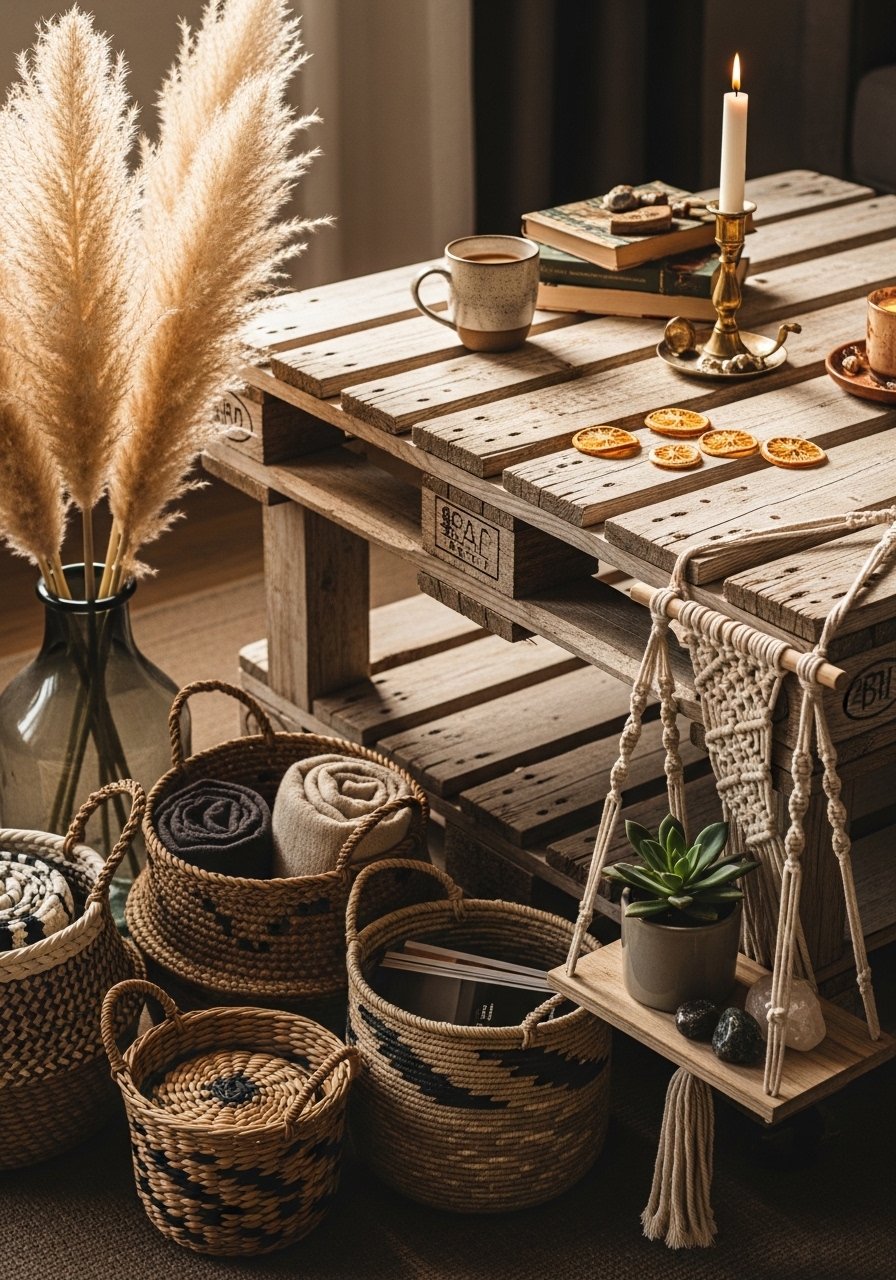
Add a soft, woven macramé shelf under the pallet surface to stash throws or magazines. It adds texture and a boho accent while staying lightweight.
Materials
- 1 pallet, 40" x 24"
- 3mm single-strand macramé cord, 50 yards
- Wooden dowels, 2 x 36"
- 2 heavy-duty eye screws
- Measuring tape
- Scissors
- Hot glue gun, low-temp glue sticks (6)
Instructions
- Sand pallet top lightly for smoothness.
- Screw eye screws into underside corners to anchor dowels.
- Make a simple macramé panel: measure and cut 10 cords at 6-ft each. Knot a square knot pattern across the dowel.
- Attach second dowel and secure ends with hot glue. Trim fringe evenly.
- Hang macramé panel beneath the pallet and tuck soft items inside.
How to Display or Gift It
- Style with plants in terracotta pots and woven coasters.
- Bundle a small macramé care tag as a gift.
- Store extra cord and dowel in a craft organizer like small storage bins.
- Outdoor Weatherproof Pallet Coffee Table with Stain and Seal
Make a pallet coffee table that stands up to sun and rain with exterior stain and a marine-grade topcoat. Perfect for screened porches or patios.
Materials
- 1 pallet, structurally sound
- Exterior wood stain, 1 quart
- Marine spar varnish, 1 quart (2 coats)
- Brushes: 2" flat synthetic and foam brush
- Sandpaper, 120 grit
- Deck screws, #10 x 2"
- Silicone caulk, small tube (for seams)
Instructions
- Sand foreign debris and smooth rough edges with 120 grit.
- Apply one coat exterior stain with a flat brush; dry 8–12 hours.
- Apply two coats marine spar varnish with 6–8 hours between coats; full cure 72 hours.
- Replace any weak slats, fastening with deck screws.
- Caulk seams to prevent moisture wicking.
How to Display or Gift It
- Keep under a covered area when not in use.
- Pair with outdoor cushions and a waterproof tray.
- Store varnish and brushes in a sealed kit like plastic tool organizer.
- Pallet Coffee Table with Tile Inlay Top
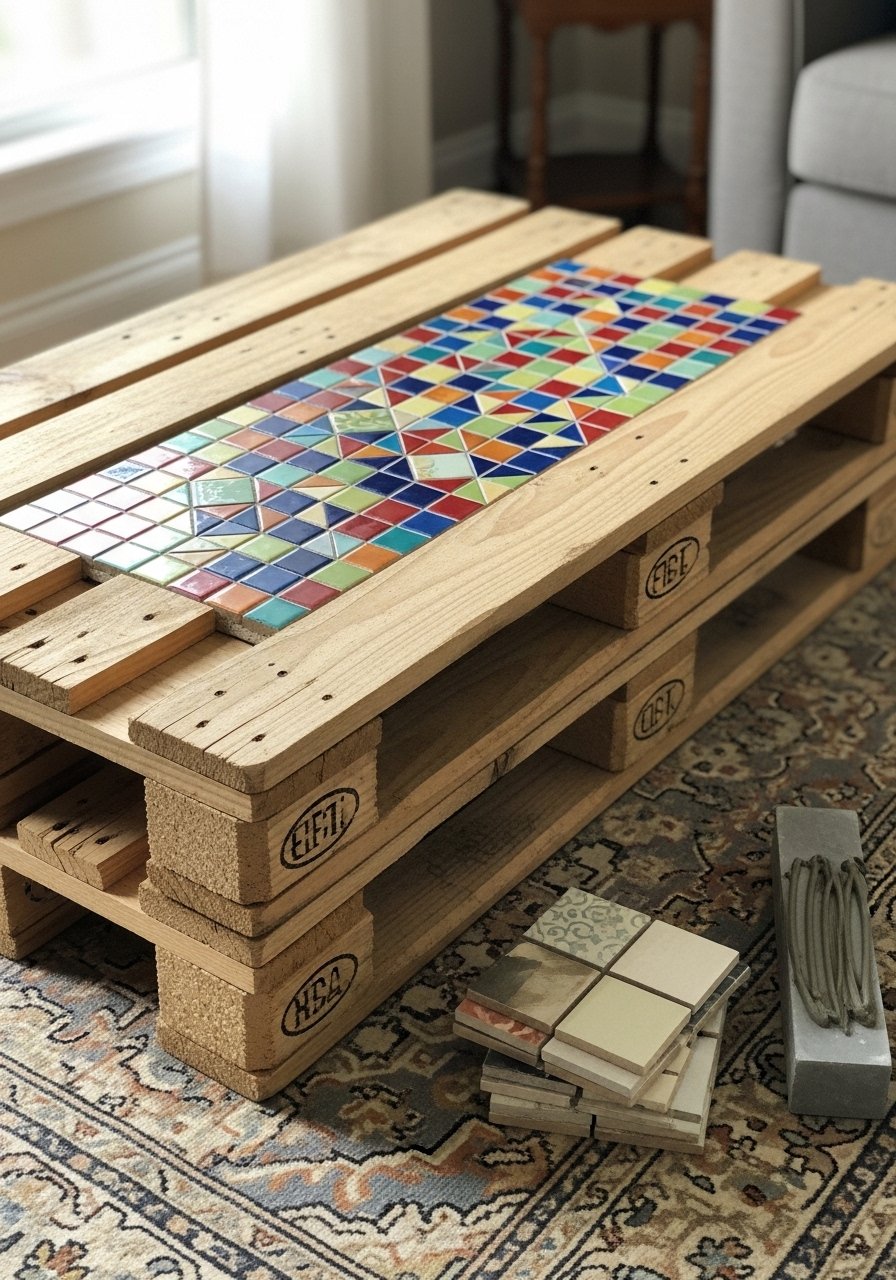
Place ceramic tiles in a recessed inlay for a colorful, wipe-clean surface. This is great for kitchens or sunrooms and creates a Mediterranean touch.
Materials
- 1 pallet, top prepared with recessed area 24" x 12"
- Ceramic tiles, 12 tiles 6" x 6"
- Thin-set mortar, 1 lb
- Grout, 1 lb (sand or unsanded per tile type)
- Notched trowel (1/4")
- Sponge and bucket
- Tile spacers
- Measuring tape and pencil
Instructions
- Create a recessed inlay to accept tile depth plus mortar (~3/8").
- Mix thin-set and spread with notched trowel. Press tiles into place with spacers.
- Let thin-set set 24 hours, then grout. Wipe excess grout with a damp sponge.
- Allow grout to cure 48–72 hours before heavy use.
How to Display or Gift It
- Style with Mediterranean ceramics and citrus bowls.
- For gifting, wrap tiles separately and include a small grout bag.
- Keep spare grout in a small sealed container.
- DIY Pallet Coffee Table with Lift-Top (Keyword in Title)
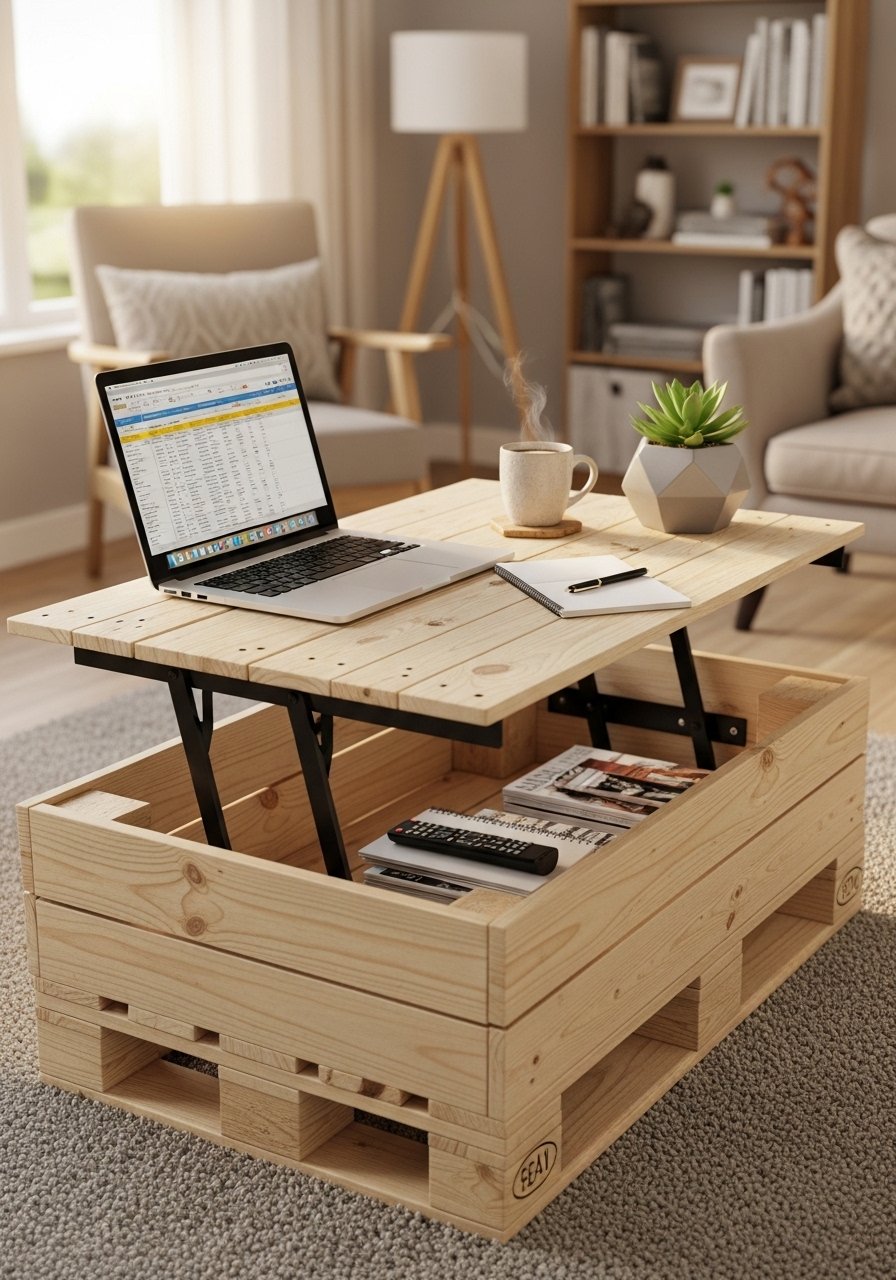
A lift-top pallet coffee table gives you a surface for laptops and dining while hiding storage. The mechanism is simple and provides everyday convenience.
Materials
- 1 pallet, trimmed to 40" x 24"
- Lift-top hinges/mechanism, medium-duty (pair)
- Plywood panel, 40" x 24" x 1/2"
- 2 small gas struts (optional for soft opening)
- Wood screws, #8 x 1"
- Sandpaper, 120 grit
- Paint or stain, small can
- Soft-close hardware (optional)
Instructions
- Build a hinge frame: attach a plywood top to pallet hinges at the rear edge using screws.
- Install lift-top mechanism per manufacturer instructions; test for balanced lift.
- Sand and finish visible top surface; allow 2 hours dry between paint coats.
- Add gas struts if desired for soft lift — mount per spec.
How to Display or Gift It
- Keep a felt pad under laptop to prevent scratching.
- Gift with a small cable organizer tucked inside storage.
- Store extra hinge screws and hardware in a small parts organizer.
- Round Pallet Coffee Table (Cut Pallet into a Circle)
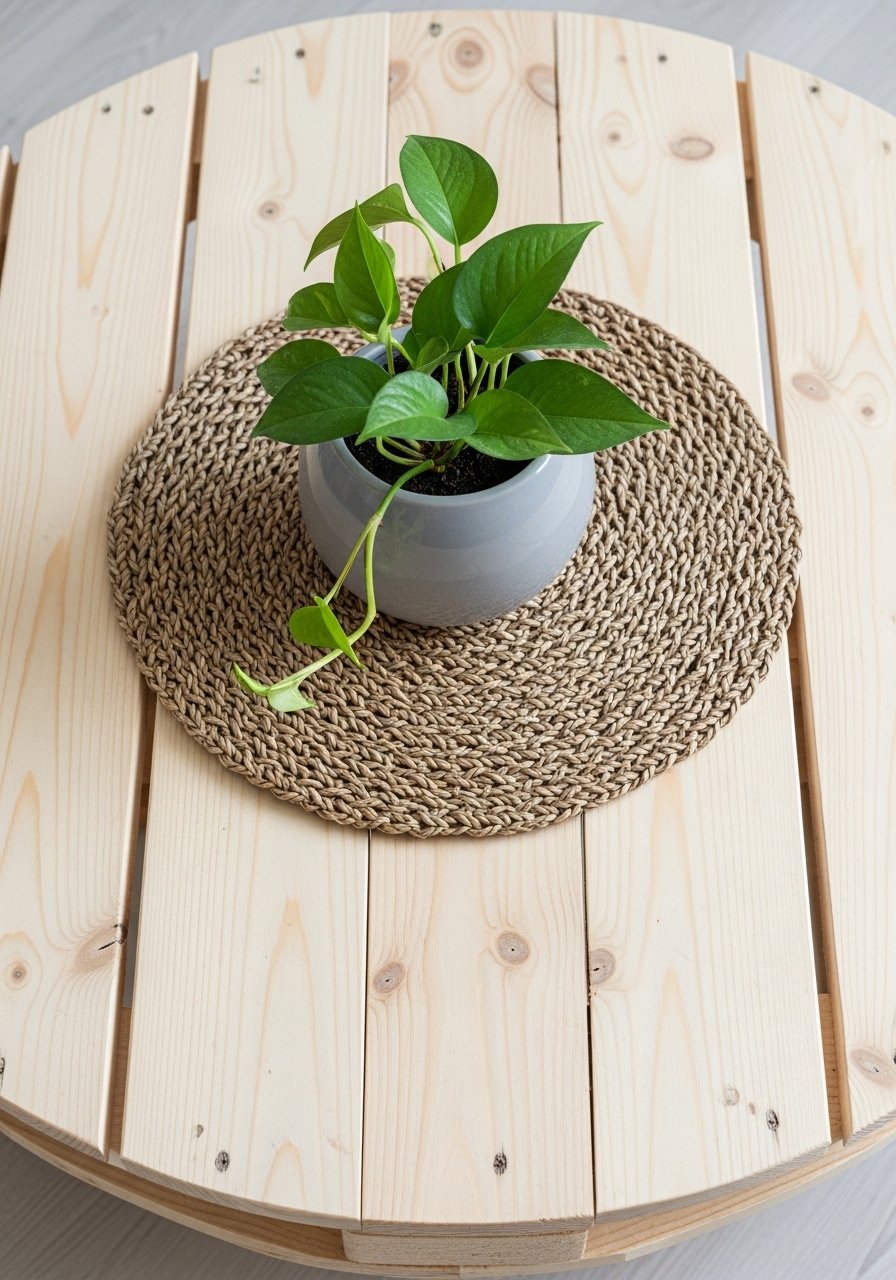
Cut a pallet into a round tabletop for a softer silhouette. This project uses a jigsaw and a simple edge band for a tidy finish.
Materials
- 1 pallet, enough slats to form 36" diameter
- Jigsaw with wooden blade
- 1 strip edge banding, 2" wide
- Wood glue
- Sandpaper, 120 and 220 grit
- Rotary sanding block (optional)
- 1 cup wood stain or paint
Instructions
- Arrange slats into a circular form; trace a 36" circle template.
- Use a jigsaw to cut the circle. Sand perimeter smooth.
- Apply edge banding with wood glue and clamp for 1 hour, then trim edges.
- Stain or paint; dry 4–6 hours between coats.
How to Display or Gift It
- Works well with rounded rugs and poufs.
- For gifting, include a care card and a small bottle of finish.
- Store the jigsaw blade in a tool case.
- Pallet Coffee Table with Planter Boxes (Indoor Greenery)

Integrate shallow planter boxes into the top for a living centerpiece. Use succulents or faux plants for low maintenance.
Materials
- 1 pallet, center slats removed for planter cavities
- 2 shallow wooden planter boxes, 18" x 8" x 3"
- Landscape fabric, small piece per planter
- Potting mix, 6 quarts if using live plants
- Succulents, 6–8 small plants
- Outdoor sealant for planter interiors
- Staple gun and staples
Instructions
- Build or fit planter boxes into the recessed areas; line with landscape fabric and staple.
- Seal planter interiors with an outdoor sealant; let cure 24 hours.
- Fill with potting mix and arrange succulents; water lightly after planting.
- For faux plants, secure with hot glue to prevent shifting.
How to Display or Gift It
- Keep on a bright windowsill or sunroom table.
- Include a small watering syringe as a gift.
- Store extra potting mix and tools in labeled mason jars.
- Upcycled Pallet Coffee Table with Concrete Overlay
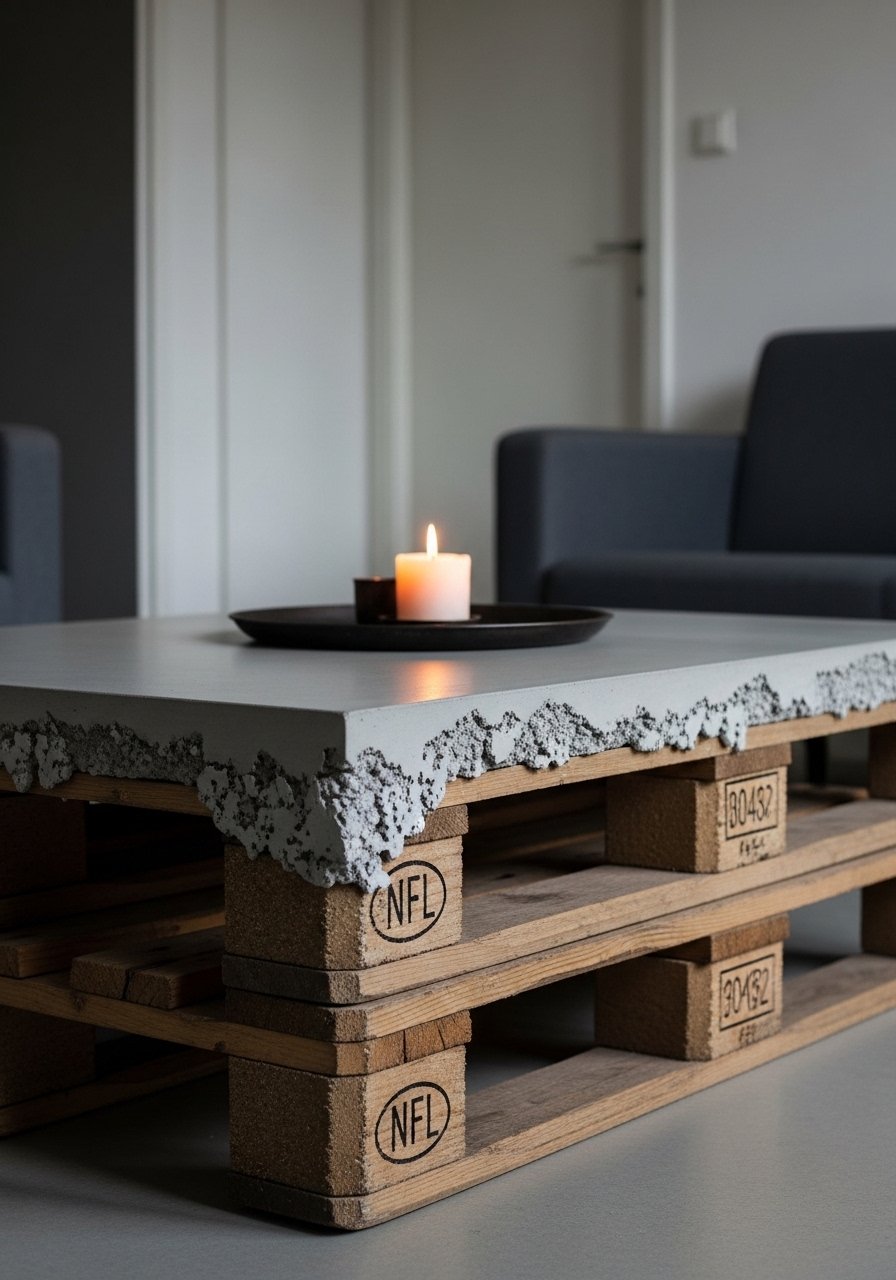
A thin concrete overlay gives a modern industrial look while using the pallet body as a base. Use a micro-bonded mix for a lighter, workable layer.
Materials
- 1 pallet
- Microcement or thin concrete overlay, 10 lb bag (covers small table)
- Trowel and float
- Mixing bucket and paddle
- Bonding agent (per product)
- Protective gloves and mask
- Sealer, 8 oz (penetrating concrete sealer)
Instructions
- Reinforce pallet top with a layer of exterior-grade plywood as substrate.
- Mix microcement per instructions with bonding agent.
- Apply thin coats with a trowel; smooth with float. Two coats, 24 hours between each.
- Sand any rough spots lightly and apply sealer; cure 48 hours.
How to Display or Gift It
- Pair with metal accents and Edison bulbs for industrial charm.
- For gifting, include a small sealer sample and care instructions.
- Store leftover microcement in airtight container.
- Pallet Coffee Table with Chessboard Inlay (Game Table)
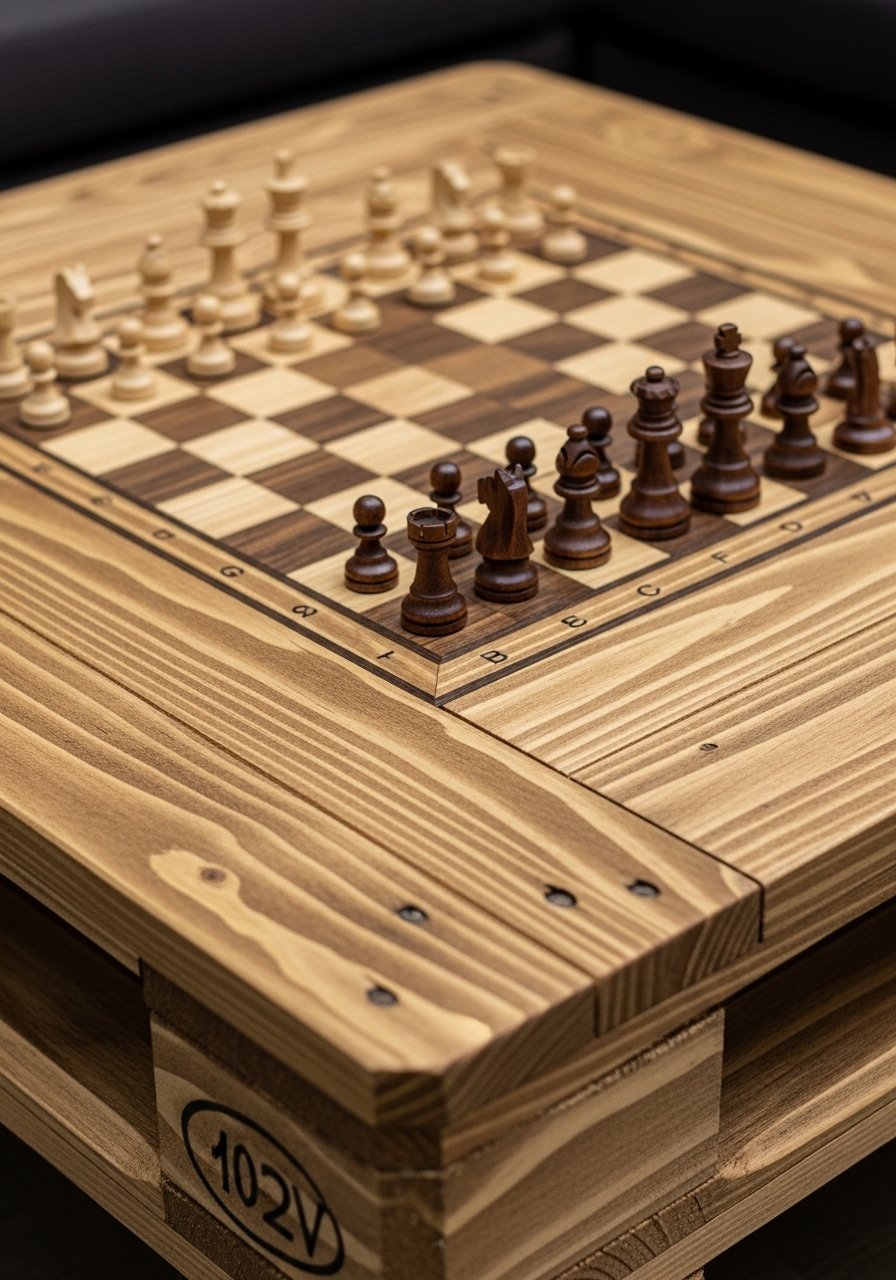
Add a chessboard inlay for game nights. The inlay is a veneered or painted square finished flush with the pallet top.
Materials
- 1 pallet
- Chessboard veneer, 16" x 16" or self-adhesive chessboard vinyl
- Clear epoxy or polyurethane, 1 pint
- Router (optional for recess)
- Fine sandpaper, 220 grit
- Measuring tape
Instructions
- Create a 16" x 16" recess and test-fit the chessboard veneer or tile.
- Glue veneer and sand flush. If using painted squares, tape off and paint alternating squares.
- Seal with two thin coats of epoxy or polyurethane; dry 8 hours between coats.
How to Display or Gift It
- Keep a velvet pouch of chess pieces beneath table as a gift.
- Display with comfortable floor cushions for cozy game nights.
- Store chess pieces in a small fabric pouch set.
- Pallet Coffee Table with Rope-Wrapped Edge (Coastal Vibe)

Wrap the edges in natural jute for a coastal look. The rope adds texture and hides rough cut edges.
Materials
- 1 pallet
- Natural jute rope, 50 ft (5/8" thickness)
- Hot glue gun and glue sticks (high-temp)
- Scissors
- Clear matte sealer sprayed over rope for longevity
Instructions
- Sand edge slightly to remove splinters.
- Secure rope starting at a corner with hot glue, wrapping tightly and gluing every 4–6 inches.
- At the end, tuck and glue the tail for a neat finish.
- Lightly mist a clear matte sealer to protect fibers; dry 1–2 hours.
How to Display or Gift It
- Style with driftwood trays and nautical accents.
- For gifting, pair with coastal-scented candles in kraft packaging.
- Store extra rope in a sealed bin to avoid fraying.
- Pallet Coffee Table with Mid-Century Tapered Legs
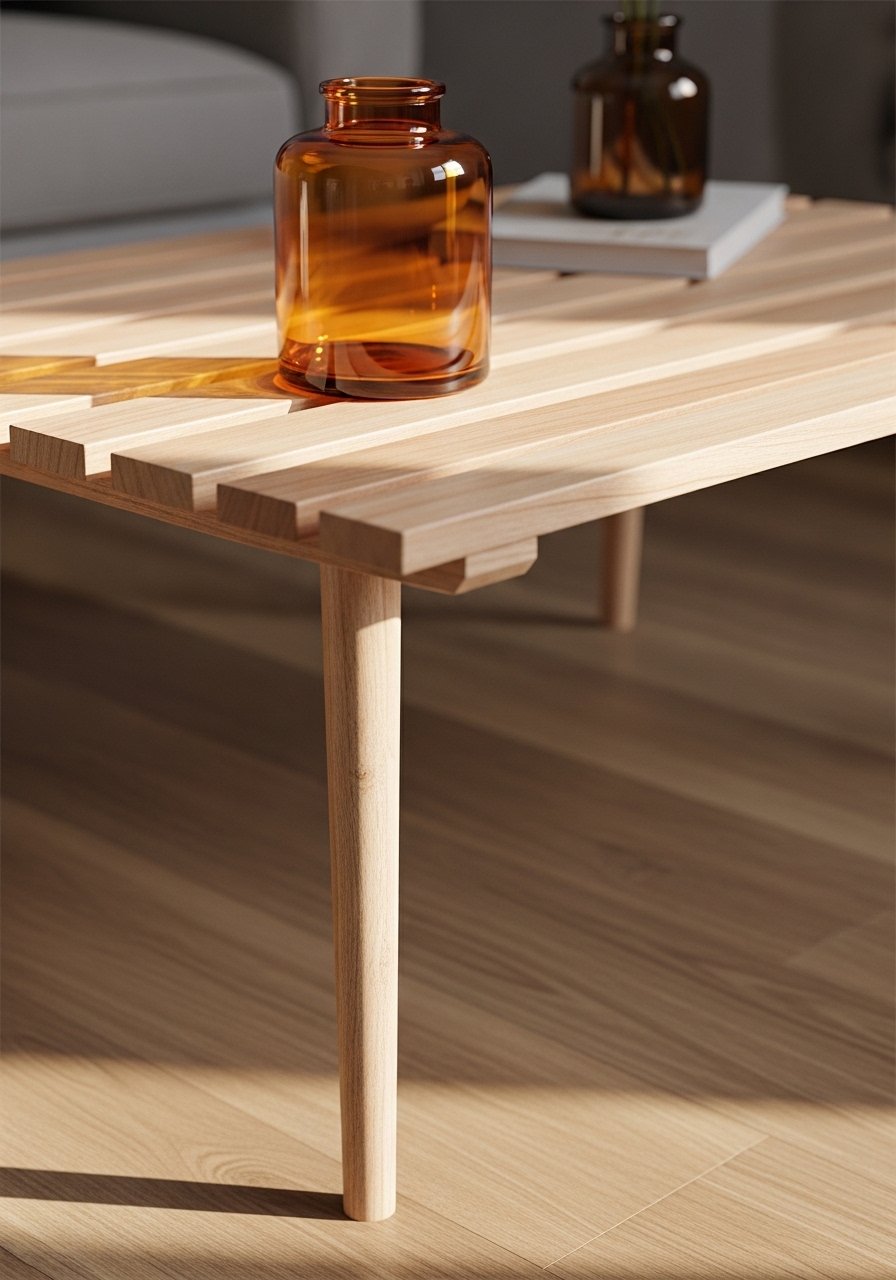
Attach wooden tapered legs for a retro feel. Legs change the table's silhouette while keeping the pallet's rustic top.
Materials
- 1 pallet, trimmed to size
- 4 tapered wooden legs, 16" height (pre-made)
- Mounting plates, 4
- Wood screws appropriate for plates
- Drill
- Sandpaper, 120 grit
- Stain or finish for legs (if unfinished)
Instructions
- Sand the pallet top smooth and finish as desired.
- Attach mounting plates at measured locations and screw legs in.
- Check level and adjust with felt pads if needed.
How to Display or Gift It
- Pair with a retro rug and brass accents.
- For gifting, include leg mounting hardware in a small box.
- Store spare finishing oil for touch ups.
- Pallet Coffee Table with Inset Bottle Cap Mosaic
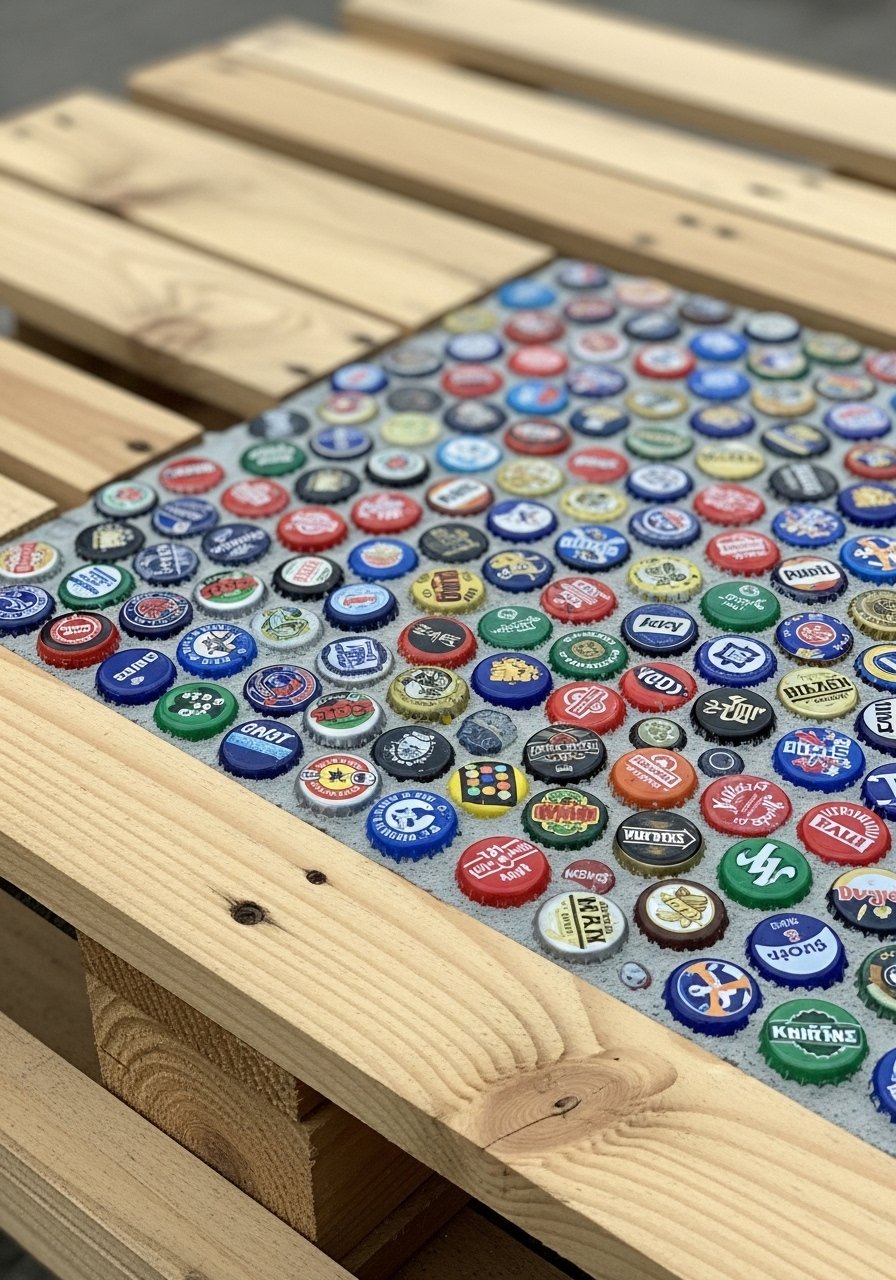
Use flattened bottle caps to create a colorful, recycled mosaic inset. It's playful and eco-friendly.
Materials
- 1 pallet
- ~200 bottle caps, flattened (varied colors)
- Plywood base, 24" x 12"
- Epoxy resin to fill and seal (1 lb)
- Grout (small amount)
- Strong adhesive (E6000 or similar)
- Protective gloves
Instructions
- Arrange bottle caps on plywood in desired pattern and glue down.
- Mix epoxy and pour to fill gaps; remove surface bubbles with a heat gun.
- Cure 24–48 hours, then sand any resin lips and buff.
How to Display or Gift It
- This makes a funky gift for collectors or game rooms.
- Pack flat and explain resin care.
- Store extra caps in a labeled mason jar for future crafts.
- Pallet Coffee Table with Chalkboard Top (Changeable Surface)
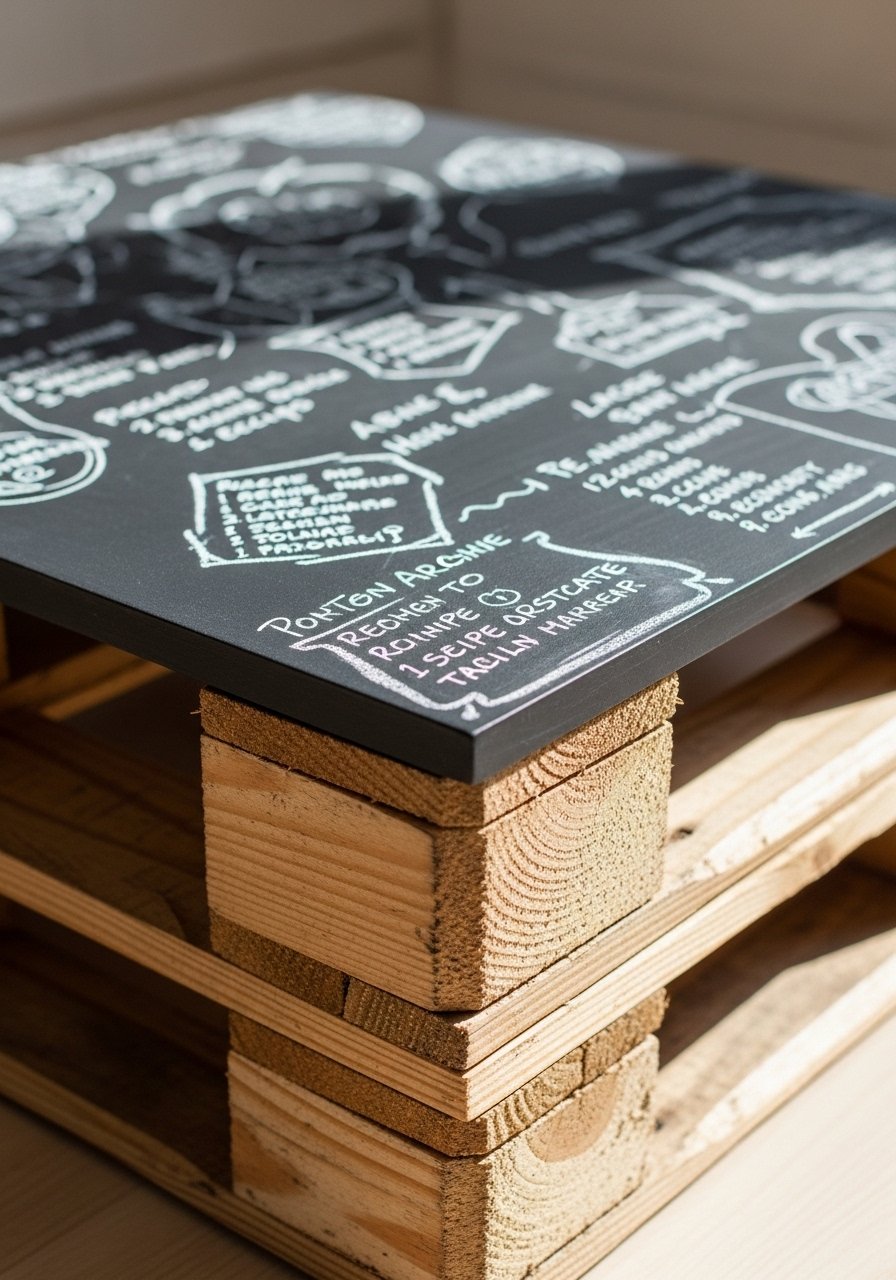
Paint the tabletop with chalkboard paint for notes, menus, or kids’ drawings. It’s playful, practical, and easy to refresh.
Materials
- 1 pallet
- Chalkboard paint, 8 oz
- Foam roller, 4" (for smooth finish)
- Painter’s tape
- Sandpaper, 120 grit
- Chalk and eraser
Instructions
- Sand the top lightly and clean.
- Apply two coats of chalkboard paint with a foam roller; 2 hours between coats.
- Cure for 24 hours, then season by rubbing the entire surface with chalk and erasing.
How to Display or Gift It
- Great for kitchen islands or family rooms.
- Bundle with a jar of chalk tied to the table for gifting.
- Store extra paint in a sealed can for touch-ups.
- Pallet Coffee Table with Stenciled Pattern (Cottagecore Accent)
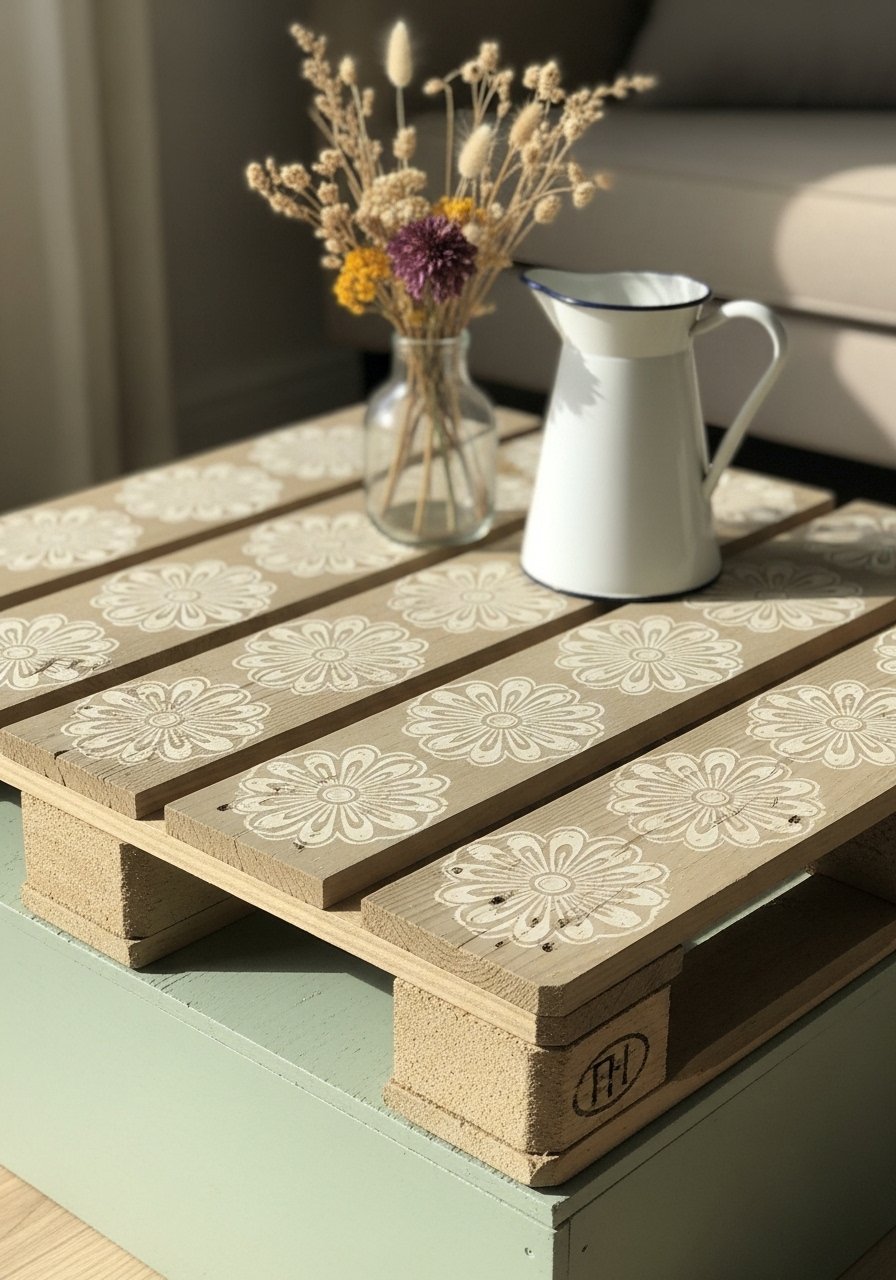
Apply a repeating stencil to the tabletop for cottagecore charm. Stenciling gives a crisp, handmade pattern without complicated cuts.
Materials
- 1 pallet
- Stencil, floral or geometric (12" x 12")
- Chalk paint, small jar (2 colors)
- Stencil brush or sponge
- Painter’s tape
- Foam roller for base coat
- Wax or matte topcoat, 4 oz
Instructions
- Paint base coat and let dry 2 hours.
- Secure stencil with painter’s tape and pounce paint with a stencil brush in thin layers. Dry 30 minutes between passes.
- After full dry, apply wax or topcoat; cure 24 hours.
How to Display or Gift It
- Pair with vintage tea tins and dried florals.
- For gifting, include a small stencil and sample paint jar.
- Store extra stencils flat in a craft organizer.
- Kid-Friendly Low Pallet Coffee Table with Chalkboard Tray
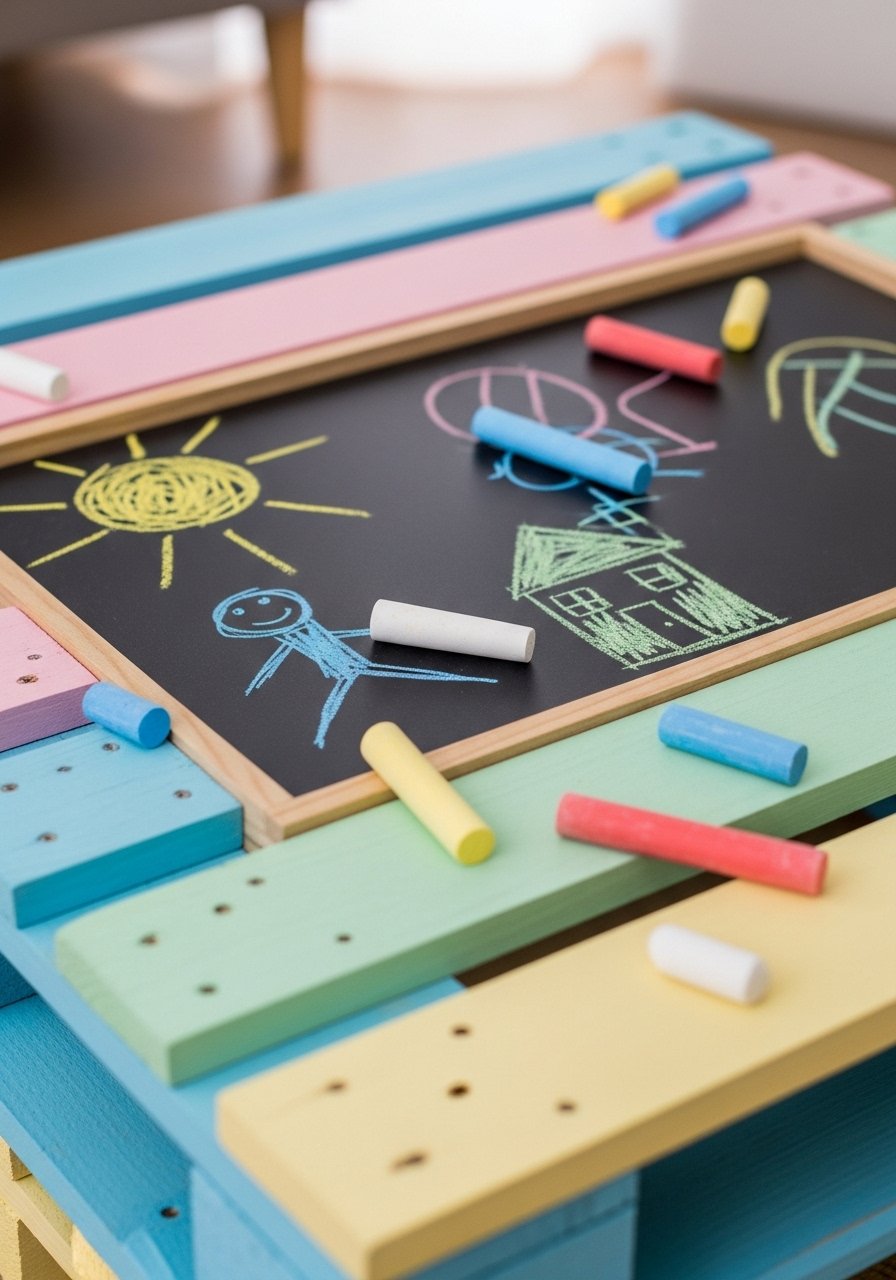
Design a low pallet table sized for kids with a removable chalkboard tray. Durable finish and rounded edges keep playtime safe.
Materials
- 1 pallet, cut down to 30" x 18"
- Chalkboard tray, removable (18" x 12")
- Child-safe paint, 8 oz (non-toxic)
- Corner rounder or sanded edges
- Clear topcoat, water-based (non-toxic)
- Soft corner bumpers
Instructions
- Cut and round edges for safety. Sand thoroughly.
- Paint with child-safe paints; 2 coats with 1–2 hours dry between.
- Fit a removable chalkboard tray into a routed recess; ensure tray lifts out easily.
- Apply a clear water-based topcoat; full cure 48 hours.
How to Display or Gift It
- Great as a birthday gift—add a set of chunky chalks.
- Store chalk supply in a small tin under the table.
- Use soft corner bumpers during transport.
You made it through 20 rustic, sustainable, and easy-to-build pallet coffee table designs — from simple hairpin legs to epoxy rivers and playful kid tables. Which one are you pinning to build this month? Try one small project this weekend to get comfortable with sanding and finishing; those two skills make most builds go smoothly. Save this post to your DIY board so you can return to measurements and materials later, and share your finished table with a friend who’s always looking for budget decor ideas.
Trust me, picking up a quality hot glue gun with temperature control changed how every single one of these projects turned out — less stringing, cleaner edges, and faster assembly. Which style will you try first?


