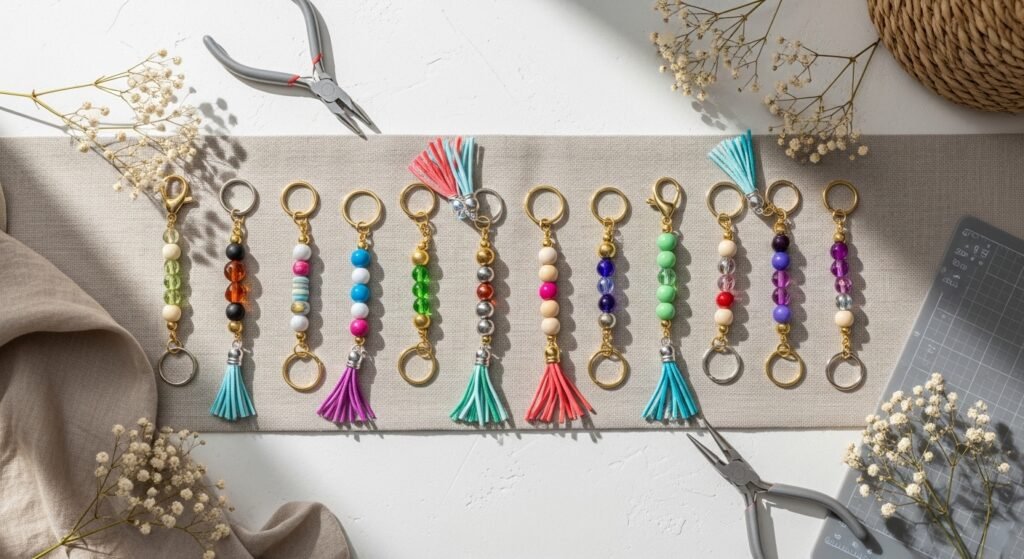
Bright, small, and totally addictive to make — these DIY beaded keychain ideas are exactly what your crafting basket has been missing. Whether you want colorful backpacks for kids, low-key chic keys, or quick handmade gifts, this list has 22 fresh projects that span boho, cottagecore, japandi, and playful statement styles. You’ll find projects made with wooden beads, seed beads, polymer clay, resin, and macramé cord — all beginner-friendly and satisfying to stitch, string, or sculpt.
I start plenty of bead-heavy projects using a reliable set of round-nose and chain-nose pliers; they make opening jump rings painless. If you like cutting multiples quickly, my Cricut Joy speeds up intricate cardstock or felt shapes, but simple scissors work too. Dive into these 22 colorful ideas, and you’ll be pinning your favorites, pulling supplies, and making a stack of keychains in no time. DIY beaded keychain ideas show up throughout the list so you can skim for the vibe you love and get started.
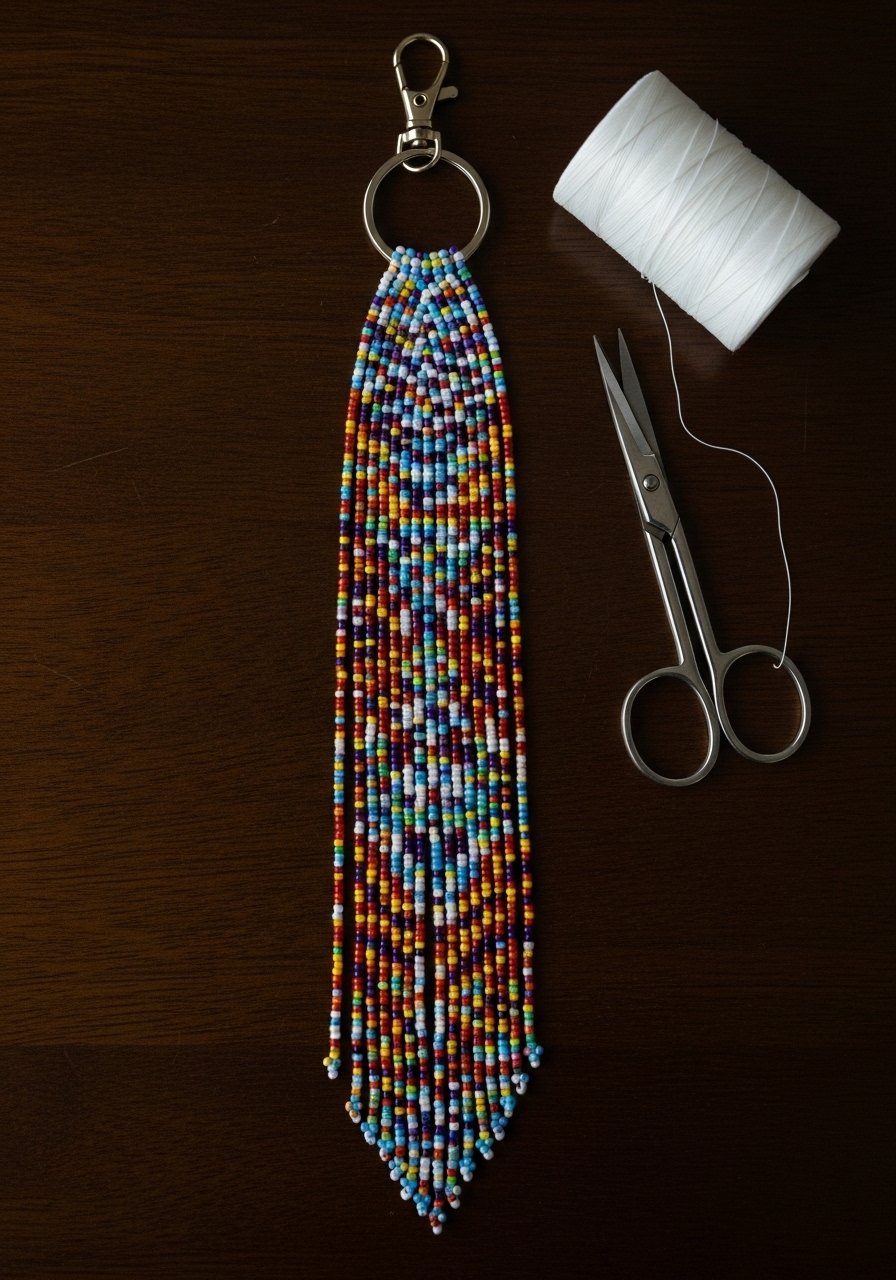
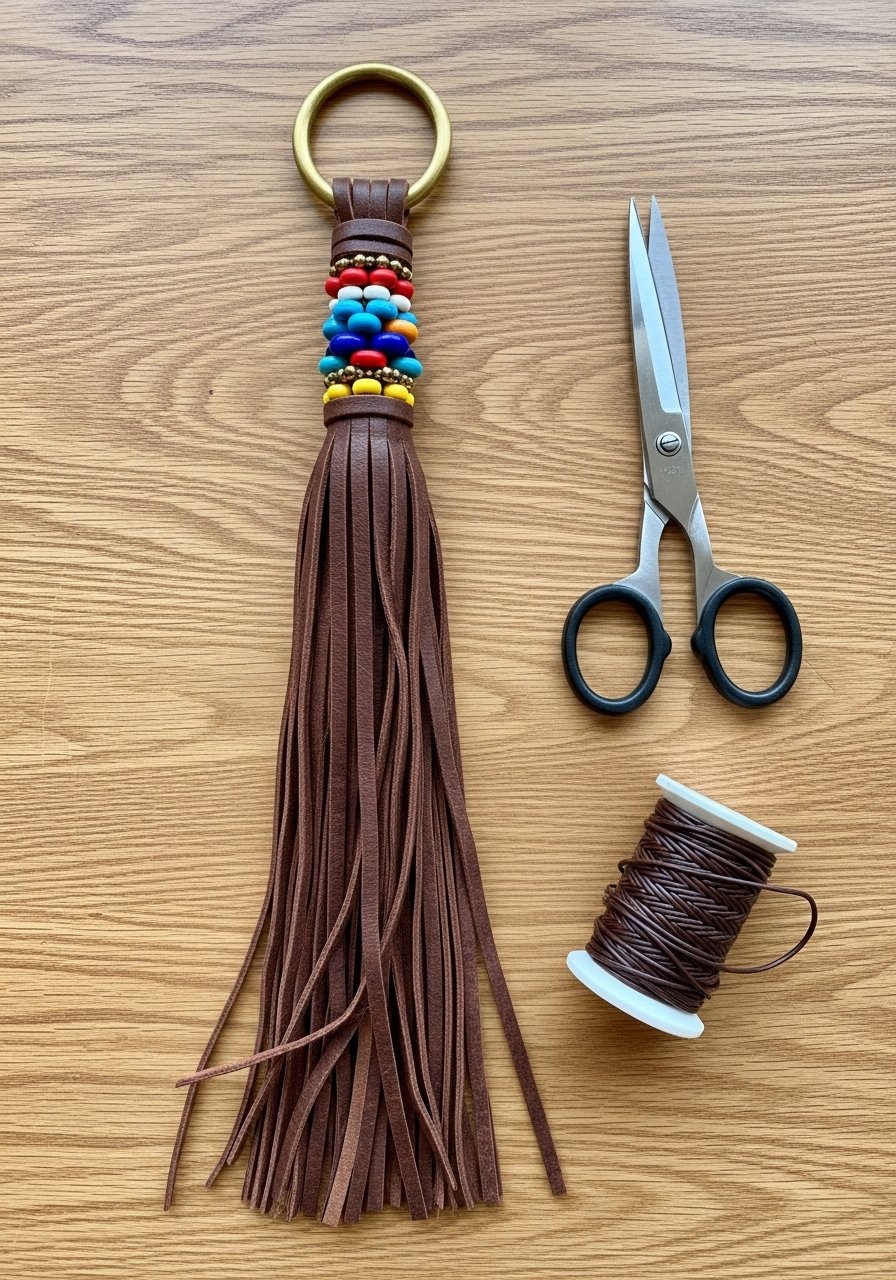
1. Rainbow Seed-Bead Tassel Keychain
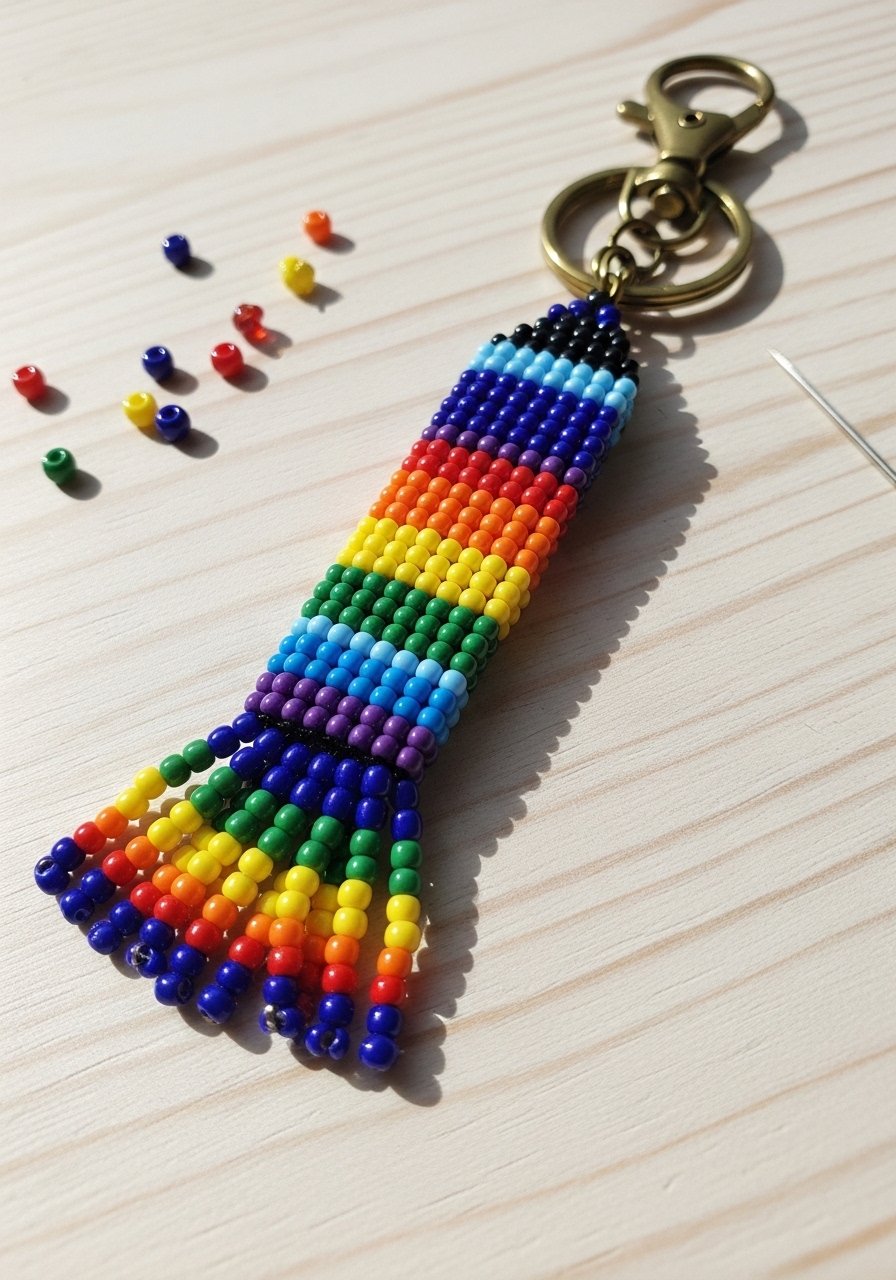
This playful seed-bead tassel feels like a little confetti party for your keys. It’s lightweight, loops easily onto backpacks, and kids love choosing color bands. The finished piece looks glossy and bouncy in hand, with the beads catching light like tiny gems. Great for beginners and anyone who finds repetitive stringing oddly calming.
Materials
- 1 brass split ring, 25 mm
- 6–8 colors of glass seed beads (Miyuki or Toho), ~1g each
- 1 nylon bead thread spool, 0.15 mm (10 yards)
- 1 beading needle (size 12)
- 1 small tassel cap or crimp bead
- 1 pair chain-nose pliers
Instructions
- Cut a 20 cm length of thread and thread the needle.
- Fold thread in half and attach loop to split ring by threading the fold through and pulling ends through the loop (lark’s head style).
- String seed beads in color blocks until bead length reaches 6–7 cm.
- Slide a crimp bead or tassel cap over the bead bundle and squeeze with pliers to secure.
- Trim thread ends close and dab a tiny bit of clear craft glue inside the cap; let set 30 minutes.
- Fluff the tassel strands and trim to an even edge.
How to Display or Gift It
- Attach to a gift bag handle for a colorful accent.
- Pair with a small enamel pin on a corkboard display.
- Store flat in a clear craft tray to avoid crushing tassels.
- Wrap in tissue and tuck into a kraft box with a ribbon for a cute party favor.
2. Ombre Wooden-Bead Macramé Keychain (DIY beaded keychain ideas)
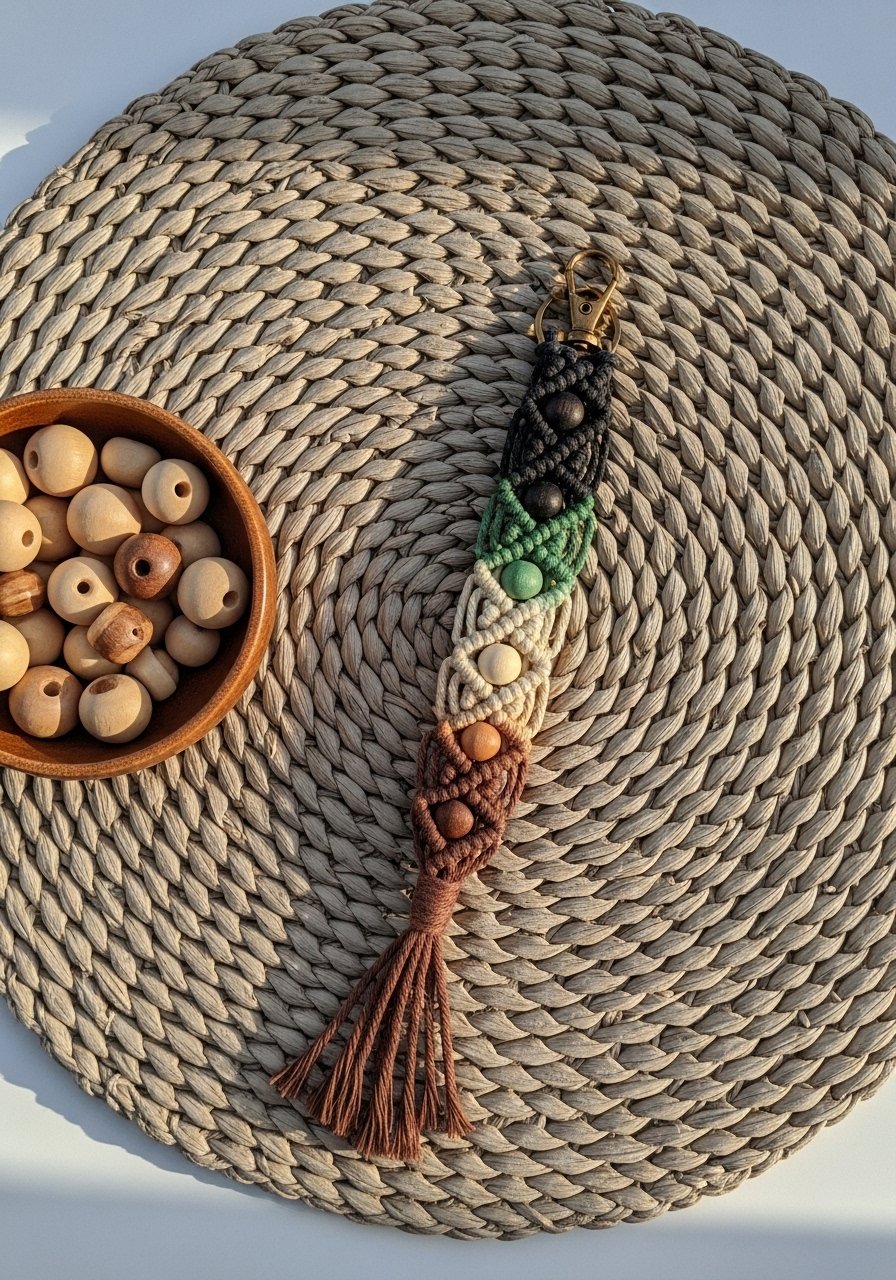
This macramé keychain mixes tactile macramé knots with wooden beads for natural, Japandi-friendly style. It feels soothing in hand and looks curated clipped to a tote. Beginners who like knotting and wood grain textures will love making a small collection in different ombre palettes.
Materials
- 1 large split ring, 30 mm
- 3 m 3 mm single-strand macramé cord (cut into 4 x 75 cm strands)
- 12 wooden beads, 10–12 mm diameter (ombre shades)
- 1 pair sharp scissors
- 1 small comb for fringe finishing
- 1 flat foam brush (optional for buffing)
Instructions
- Fold cords in half and loop through the split ring; secure with a tight overhand knot.
- Slide wooden beads onto the paired cords in ombre order, leaving 3 cm of cord tail at the end.
- Create square knots beneath each bead set, spacing knots 5–8 mm apart.
- Finish with a wrapped knot to hold beads; trim ends to 2–3 cm for a tidy fringe.
- Lightly comb the fringe and shape; tuck or burnish ends against a countertop for neatness.
- Press knots with a cool iron through a cloth if you want flatter cords.
How to Display or Gift It
- Hang on a small wooden peg strip near an entryway.
- Tie a kraft-tag and give as a bridesmaid favor in neutral palettes.
- Store finished keychains in a stackable craft organizer to keep cords tidy.
- For extra longevity, coat wooden beads with a thin layer of clear craft sealer.
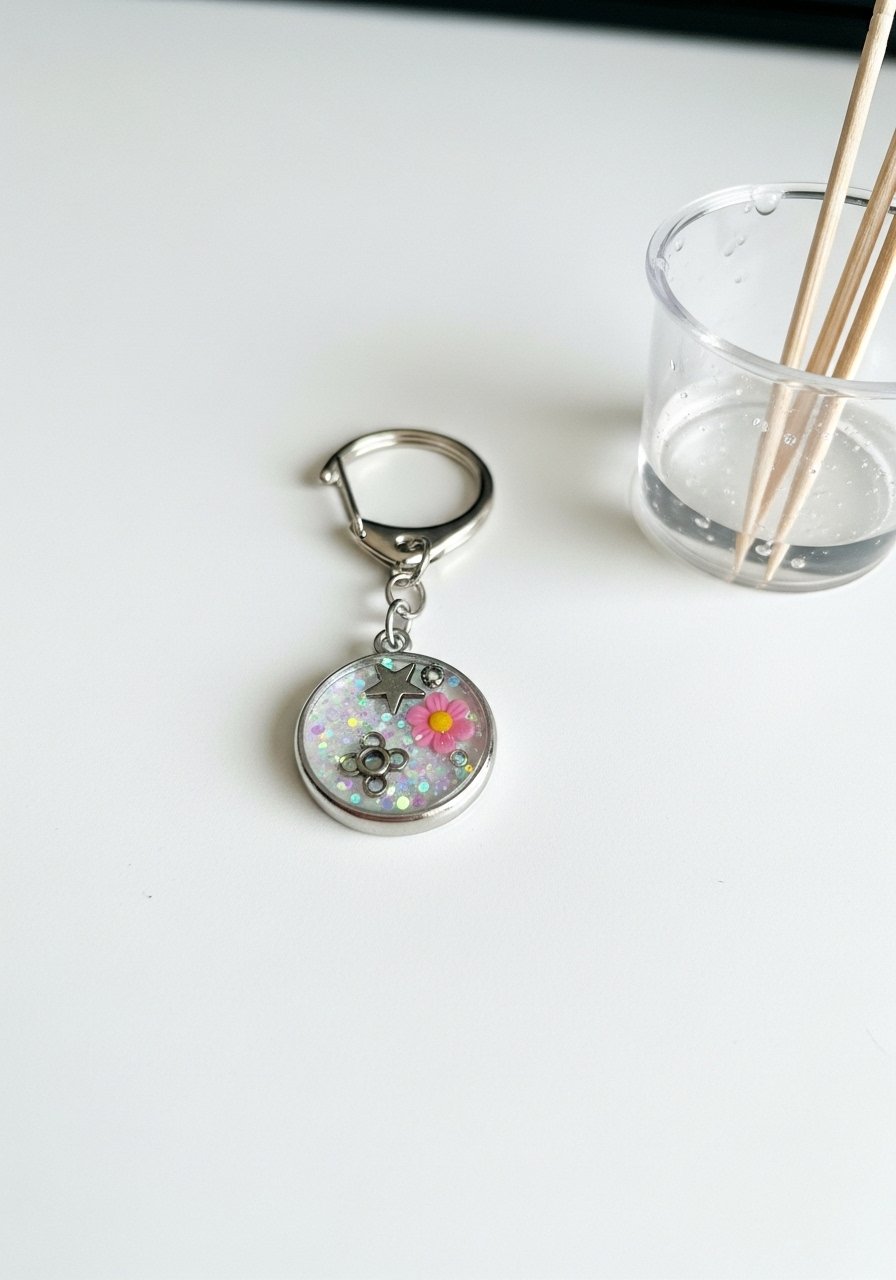
3. Resin Flower Bead Charm
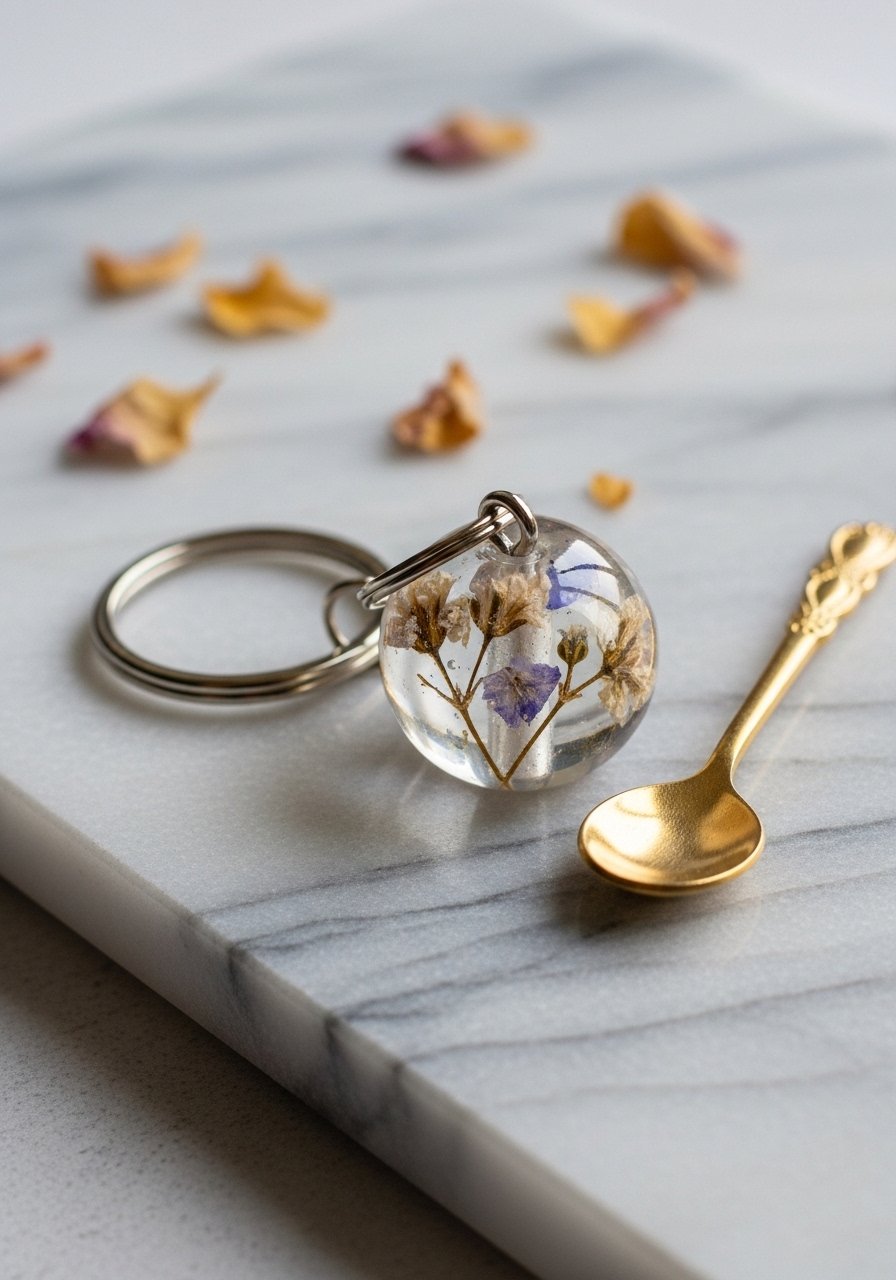
Tiny pressed flowers suspended in clear resin make a delicate, cottagecore-inspired bead charm. These feel slightly cool in hand and shimmer when they turn. If you like miniature worlds and careful layering, resin is a satisfying medium for making one-of-a-kind beads.
Materials
- 1 silicone bead mold (small round cavities, 10–12mm)
- 1 UV resin bottle, 30 ml
- Pressed flower petals, very dry (micro size)
- 1 UV lamp (2–6W) or sunlight for curing
- 1 sanding block or fine sandpaper (400–600 grit)
- 1 split ring and eye pin (20 mm)
- 1 pair needle-nose pliers
Instructions
- Make sure flowers are bone-dry. Set up a dust-free surface.
- Pour a thin first layer of UV resin into a mold cavity (fill ~30%). Cure 2–3 minutes under a UV lamp.
- Place a tiny pressed petal on the cured layer with a toothpick.
- Fill mold to top with UV resin and gently remove bubbles with a heat gun for 1–2 seconds, then cure 2–3 minutes.
- Pop beads from mold and sand any flash for a smooth finish.
- Insert an eye pin while resin is still tacky or glue with a drop of E6000 and let cure 24 hours.
How to Display or Gift It
- Thread the bead onto a slim leather strap and clip to a handbag.
- Present in a small organza bag for event favors.
- Keep extras in a little craft organizer tray while glue cures.
- For a display, clip to a mini wooden easel on a shelf or nightstand.
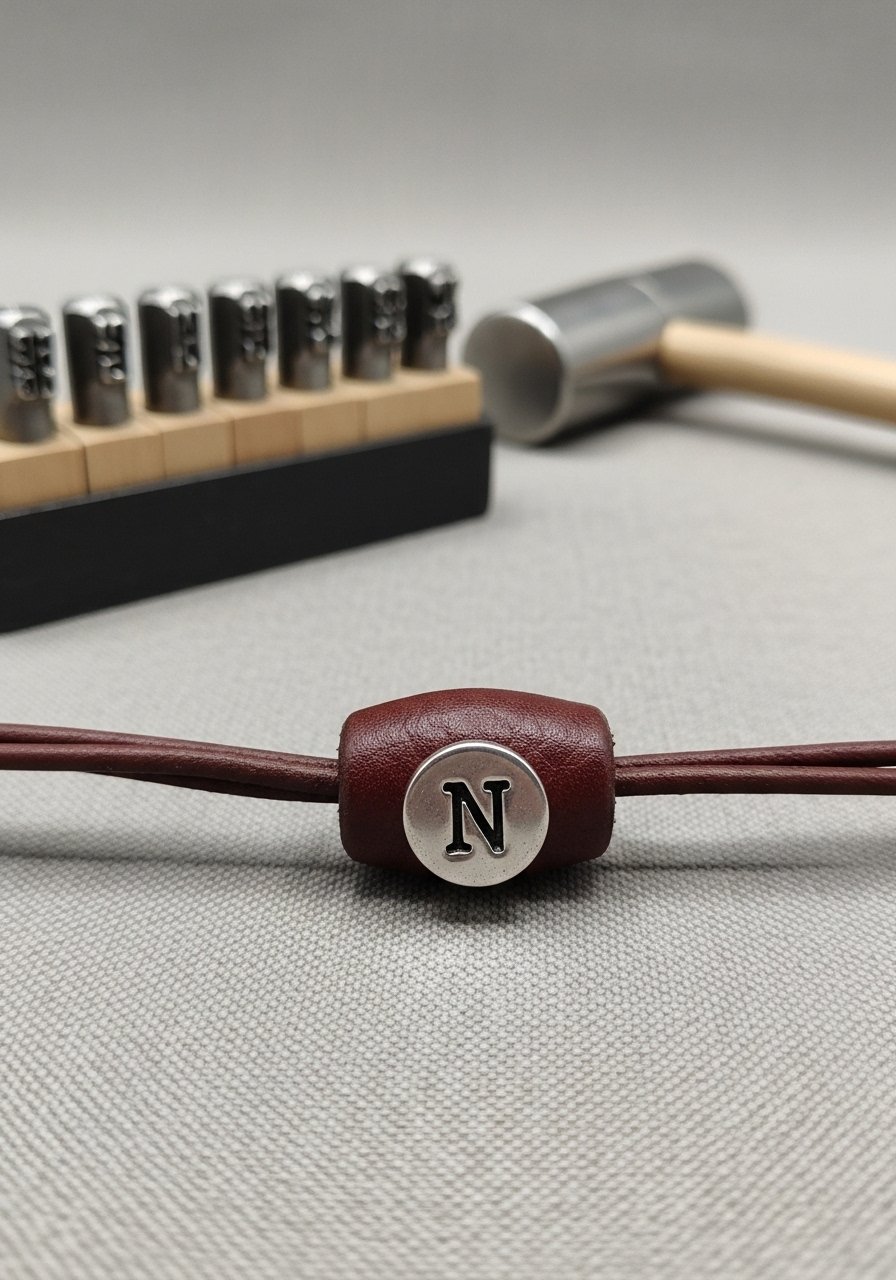
4. Polymer Clay Alphabet Bead Name Keychain
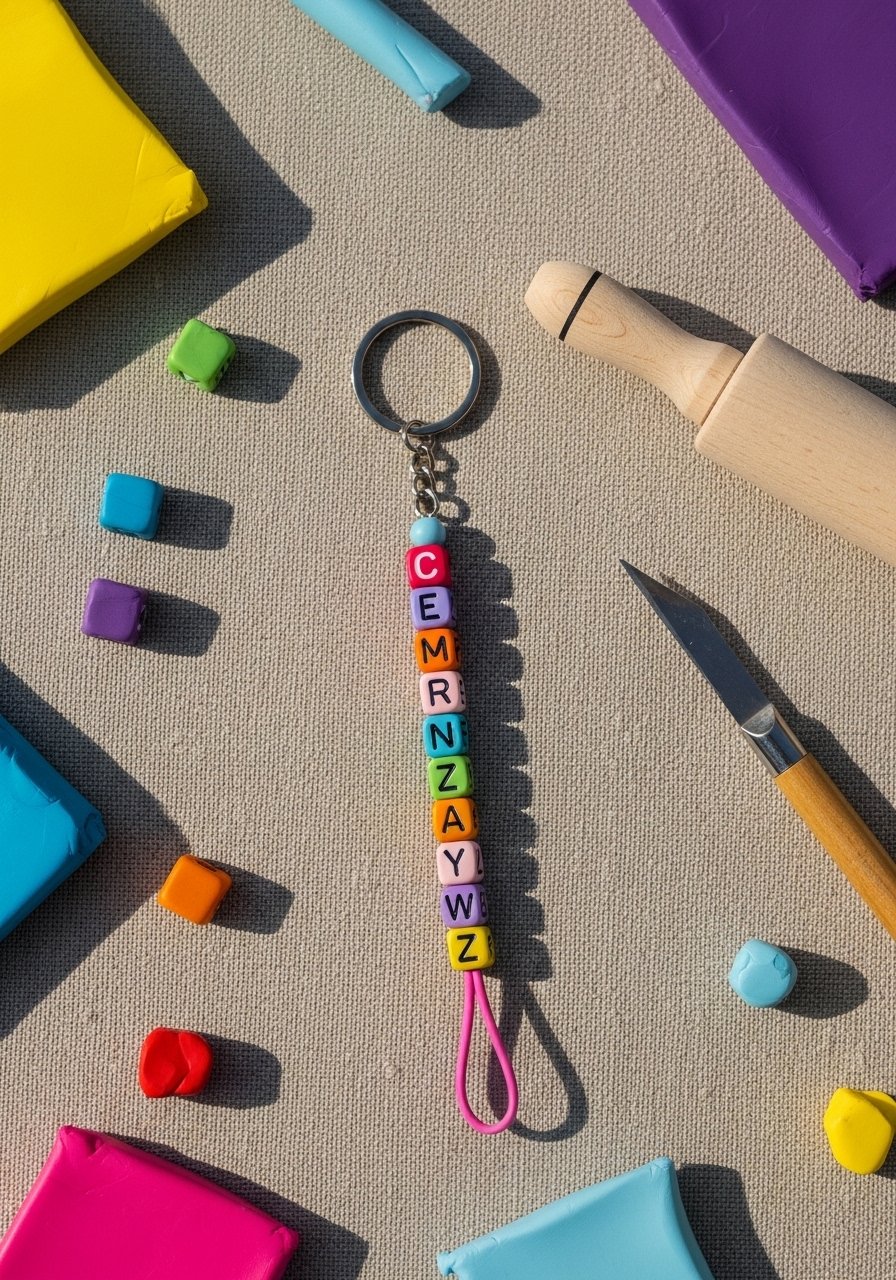
Personalized alphabet bead keychains are instant favorites. Using polymer clay lets you pick custom colors and create chunky beads that stand up to daily use. They feel smooth and slightly warm in your hands and are the perfect quick gift for kids or friends.
Materials
- Polymer clay blocks, mixed colors, 20 g each
- Alphabet letter stamp set (small)
- 1 2 mm metal eye pin or skewers for bead holes
- 1 oven (bake clay at 110°C / 230°F — follow package)
- 1 split ring and lobster clasp
- 1 craft knife
- 1 baking sheet and parchment paper
Instructions
- Condition clay by kneading until soft. Roll into 10–12 mm beads.
- Stamp letters into each bead with even pressure.
- Pierce bead holes with a metal skewer; arrange on parchment.
- Bake according to clay brand instructions (usually 15–30 minutes at 110°C / 230°F). Cool completely.
- Sand any rough edges lightly and string onto eye pin or cord.
- Attach to split ring and add a clasp. Seal with a thin glaze if desired; dry 24 hours.
How to Display or Gift It
- Package in a kraft box with confetti for a handcrafted reveal.
- Add a ribbon loop and attach a gift tag.
- Store baked clay beads flat in a small plastic craft organizer to avoid scuffs.
- Make a set spelling different nicknames as party favors.
5. Boho Leather & Wood Bead Fringe Keychain
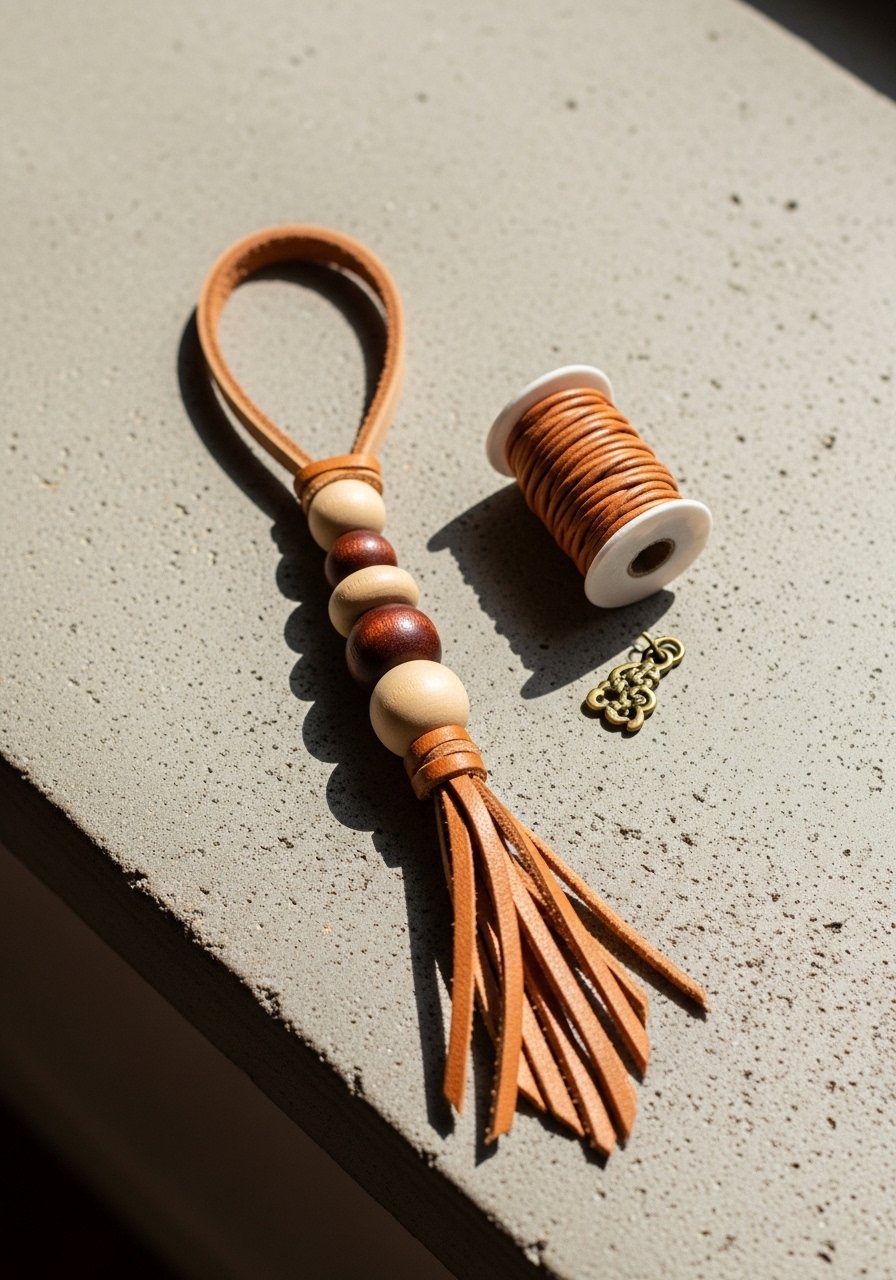
This boho fringe fob pairs soft leather with warm wooden beads for a farmhouse-meets-boho look. It has pleasant texture contrast — the smooth beads against suede fringe — and clips easily onto bags. Great for makers who enjoy simple leatherwork and quick assembly.
Materials
- 1 leather strip, 4 x 10 cm
- 6–8 wooden beads, 12 mm
- 1 swivel lobster clasp, 30 mm
- 1 leather hole punch or awl
- 1 super glue (E6000 for leather)
- 1 key ring or jump ring
- 1 pair scissors
Instructions
- Cut leather into a 4 x 10 cm strip and fringe one side into 0.5 cm cuts, stopping 1.5 cm from edge.
- Fold unfringed end around the clasp and glue with a thin line; clamp 10–15 minutes.
- Thread wooden beads onto a cord or wire and nestle across the folded area before gluing.
- Secure with an extra dot of glue; let cure 24 hours.
- Trim fringe evenly and burnish edges if desired.
- Attach to key ring and test the clasp for smooth operation.
How to Display or Gift It
- Hang on a craft pegboard to show different leather finishes.
- Tuck into a kraft-wrapped gift as an accent.
- Store in a shallow tray to keep fringe from flattening.
- Pair with a small leather care sachet for longer-lasting soft fringe.
6. Minimal Japandi Neutral Beaded Key Fob (DIY beaded keychain ideas)
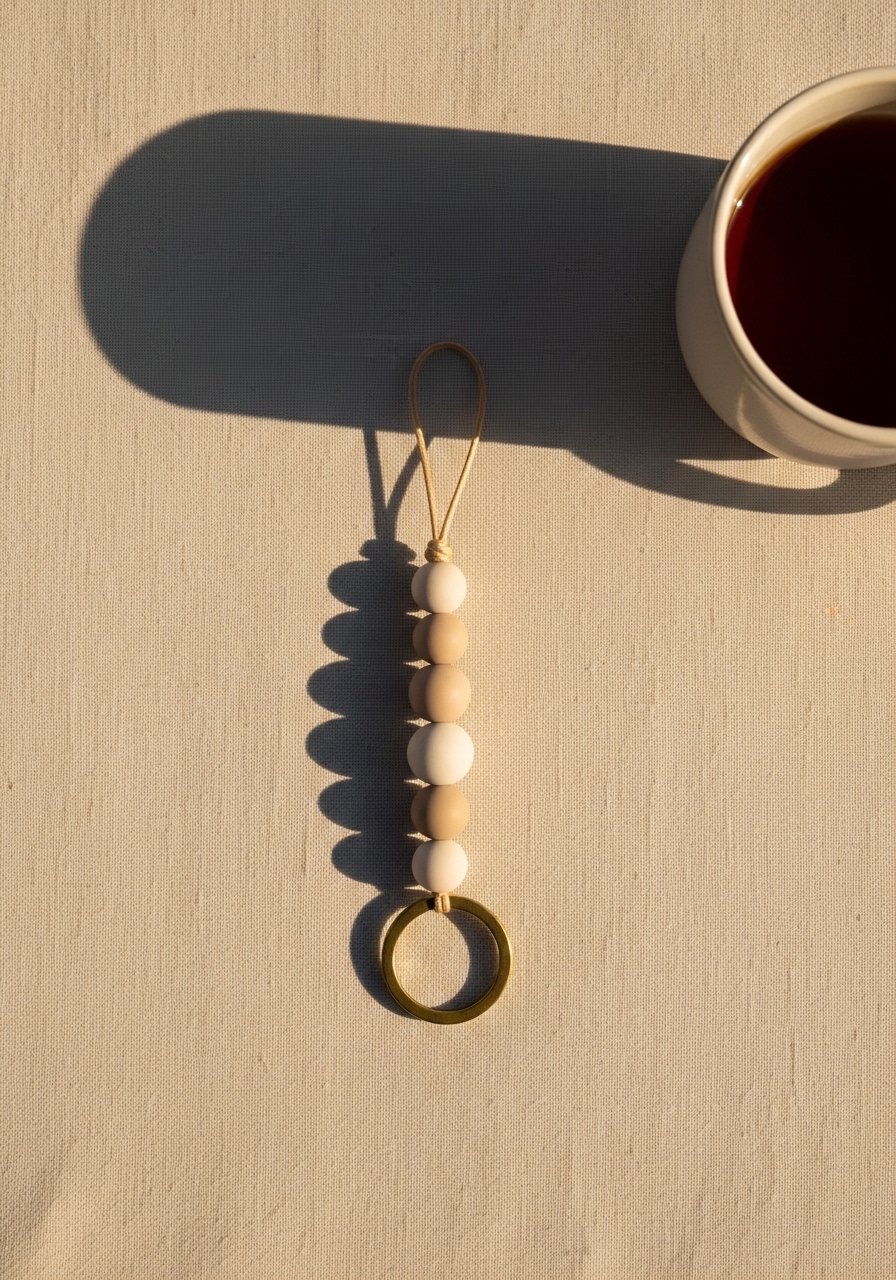
Clean lines, matte wooden beads, and simple knots create a subtle, Japandi-friendly key fob. It’s lightweight and pairs beautifully with neutral-toned leather accessories. This suits lovers of minimalist decor and sophisticated simplicity.
Materials
- 1 brass flat key ring, 25 mm
- 8–10 matte wooden beads, 8–10 mm
- 1 cotton cord, 3 mm x 60 cm
- 1 drop of clear craft glue
- 1 pair scissors
- 1 ruler
Instructions
- Fold cord in half and loop through the key ring.
- Slide beads onto cords in alternating patterns until length is 6–7 cm.
- Tie a tight square knot beneath the beads to secure.
- Add a tiny dot of glue to knot and trim ends to 1 cm.
- Smooth beads with light rubbing to remove loose fibers.
- Clip and test ring attachment.
How to Display or Gift It
- Clip onto a minimalist wall hook by your entryway.
- Gift with a small linen pouch for a polished look.
- Keep extras in a labeled compartment of a craft organizer for quick assembly.
- Make a set in varying neutral palettes for hostess gifts.
7. Miyuki Delica Geometric Keychain
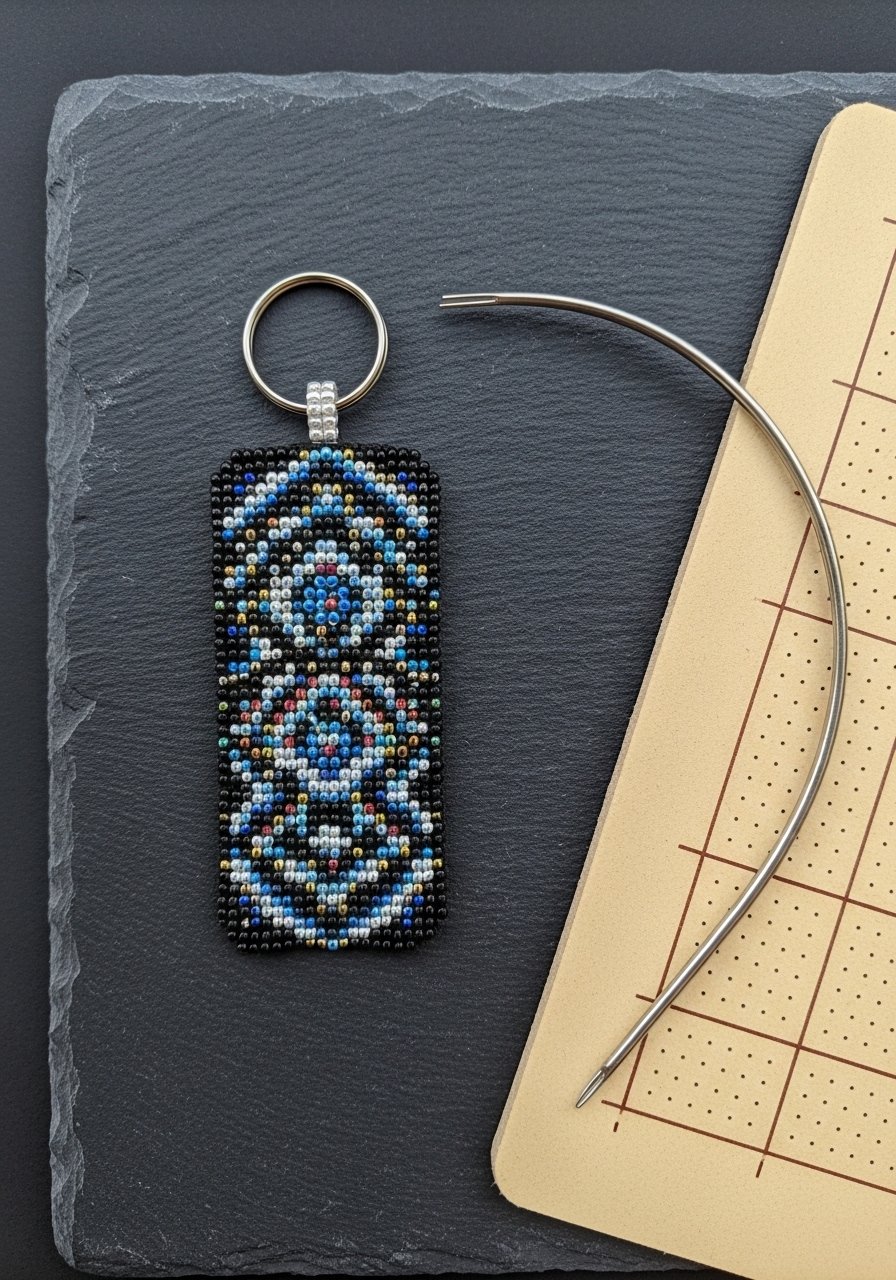
Peyote stitching with Miyuki Delica beads produces a flat, gem-like charm that feels almost textile in texture. It lays flat against bags and is perfect if you like pixel-like geometric designs. Intermediate beaders will find this method rewarding.
Materials
- Miyuki Delica beads (11/0), 10 g total in 3 colors
- FireLine beading thread, 0.006 inch, 5 yards
- Beading needle, size 10 or 12
- Small jump ring and split ring
- Scissors and a bead mat
- Peyote pattern printed or sketched
Instructions
- Thread needle with 1.2 m of FireLine; secure a stop bead and leave a 15 cm tail.
- Pick up beads following a small peyote chart until the piece measures 3 x 5 cm.
- Finish edges with two rows of even peyote to stabilize.
- Stitch through top edge to create a small loop; add jump ring.
- Weave thread back and burn and bury the tail or weave it into beads.
- Attach to split ring and press shape flat with a light finger roll.
How to Display or Gift It
- Attach to a fabric wallet for a coordinated set.
- Present pinned to a small card inside a craft box.
- Store flat in a padded jewelry organizer to avoid bead shifting.
- Make matching zipper pulls for pouches.
8. Tiny Felt Pom + Bead Charm
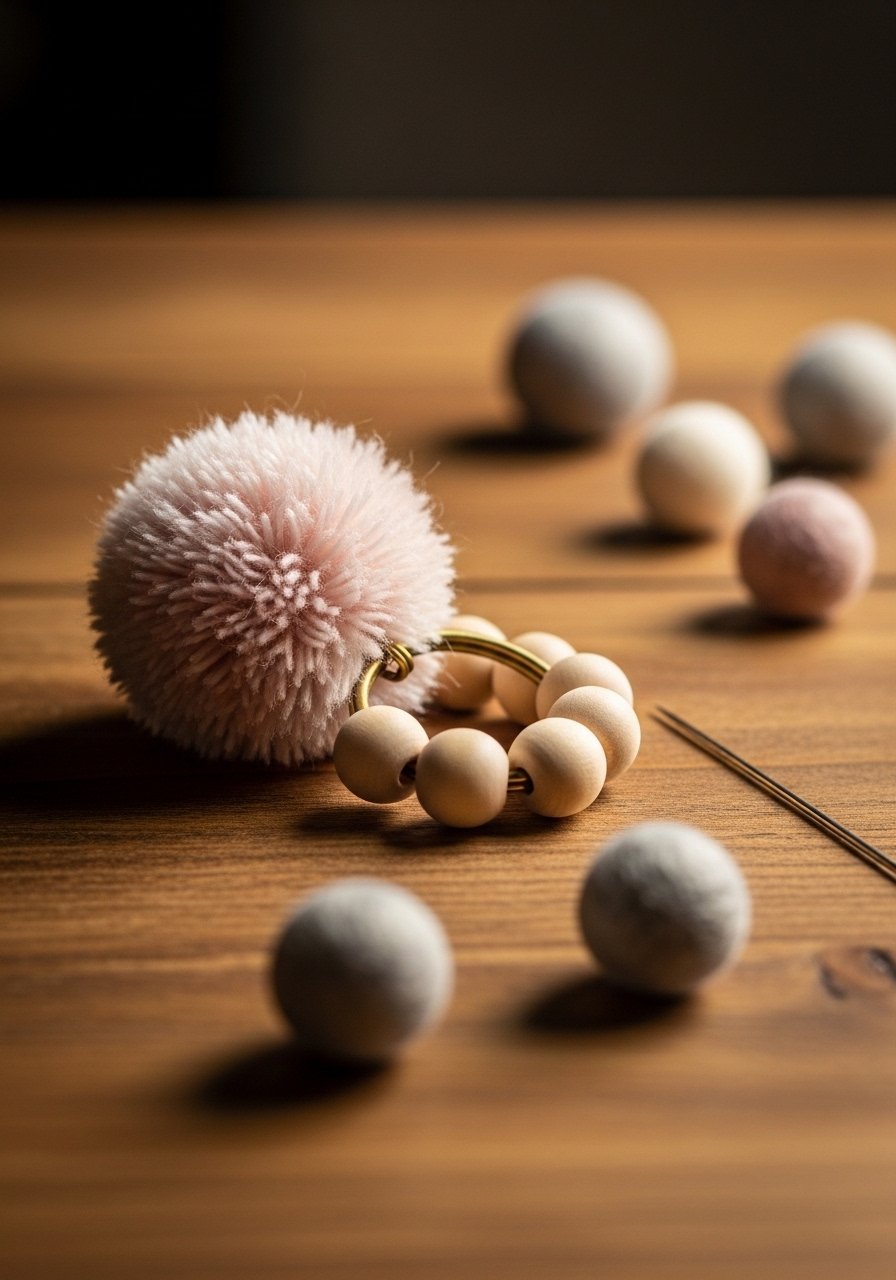
Felted poms add a tactile, cozy touch to beaded keychains — perfect for cottagecore or wintery styles. They feel fluffy and warm in hand and are forgiving to make. Kids can help assemble the final beads onto the ring.
Materials
- Wool roving, small color pieces, 10 g
- Felting needle and foam pad
- Wooden bead, 15 mm
- Small key ring (20–25 mm)
- Hot glue gun (low temp) for attaching beads if needed
- Scissors
Instructions
- Roll a small piece of wool roving into a ball and stab repeatedly with felting needle until firm (~5–8 minutes).
- Make a smaller felt ball for the pom tail and join by stabbing lightly.
- Thread the wooden bead onto a short loop of thin cord and knot.
- Glue or stitch the felt ball to the bead assembly; let glue set 10–15 minutes.
- Attach to key ring and fluff the pom.
- Trim stray fibers to shape.
How to Display or Gift It
- Tie onto a seasonal scarf or make a set for holiday stockings.
- Store finished poms in a breathable fabric bag to prevent flattening.
- Gift pairings: pom + tiny sachet of dried lavender in a small box.
- For long-term fluff, gently steam and reshape if flattened.
9. Wire-Wrapped Stone Bead Keychain
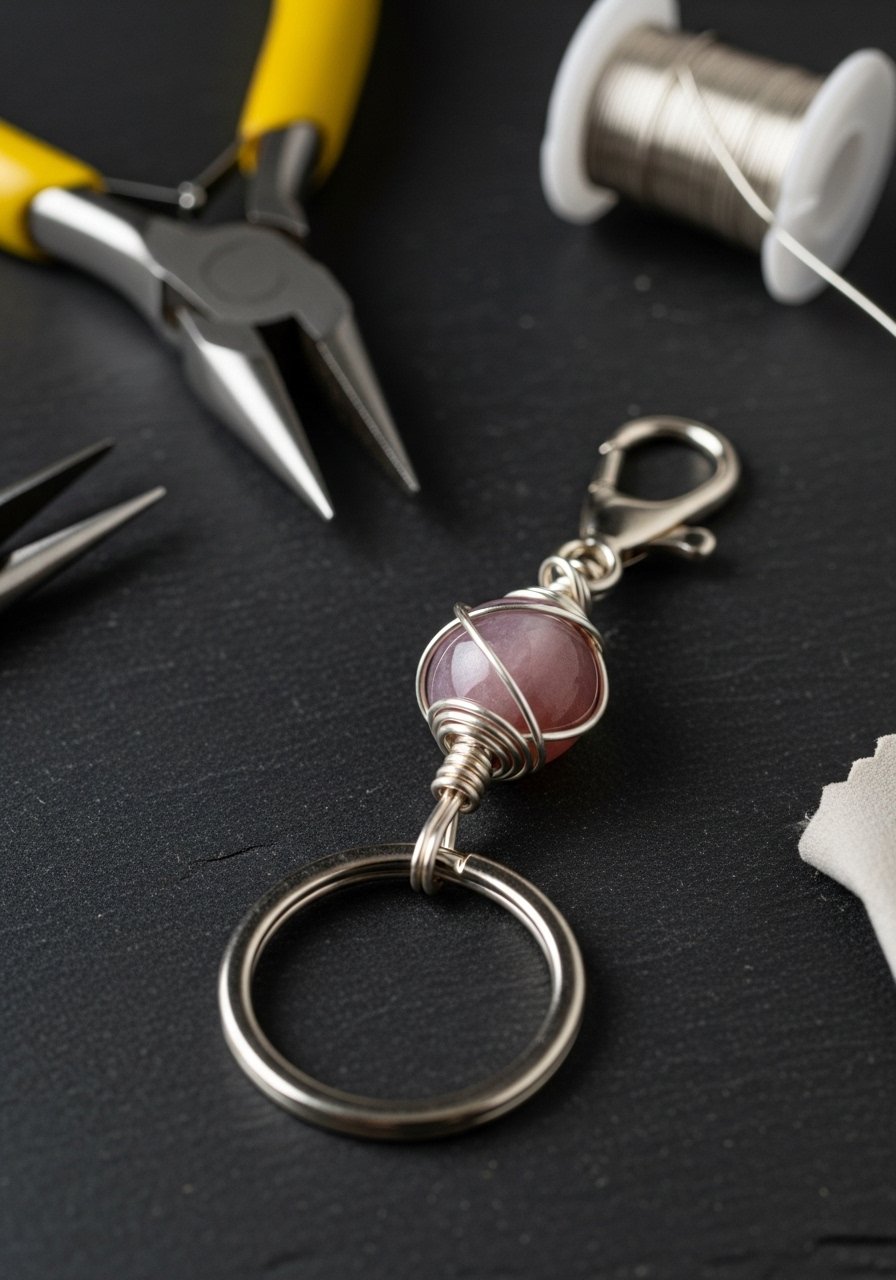
A wire-wrapped stone bead gives an earthy, artisanal look — perfect for boho or nature-lovers. The smooth stone feels grounding in hand. This project uses basic wirework that elevates a single bead into a talisman-like charm.
Materials
- 1 semi-precious stone bead (agate/jasper), 12–15 mm
- 20–24 gauge jewelry wire, 30 cm
- 1 split ring or lobster clasp
- Chain-nose and round-nose pliers
- Small file for smoothing wire ends
- Jewelry polishing cloth
Instructions
- Cut 30 cm wire and fold in half. Center bead and bring ends up around bead.
- Cross wire ends and wrap tight coils around the bead neck 5–7 turns.
- Form a small loop at top with round-nose pliers for attaching to ring.
- Tuck wire ends and file any sharp bits smooth.
- Polish bead gently with a cloth.
- Attach to split ring and inspect loop for security.
How to Display or Gift It
- Pair with a small card describing the stone’s “theme.”
- Display on a wooden tray with other gemstone keychains.
- Store in a divided jewelry organizer to avoid wire snags.
- For gifting, wrap in kraft paper and tie with twine.
10. Painted Wooden Heart Keychain (farmhouse vibes)
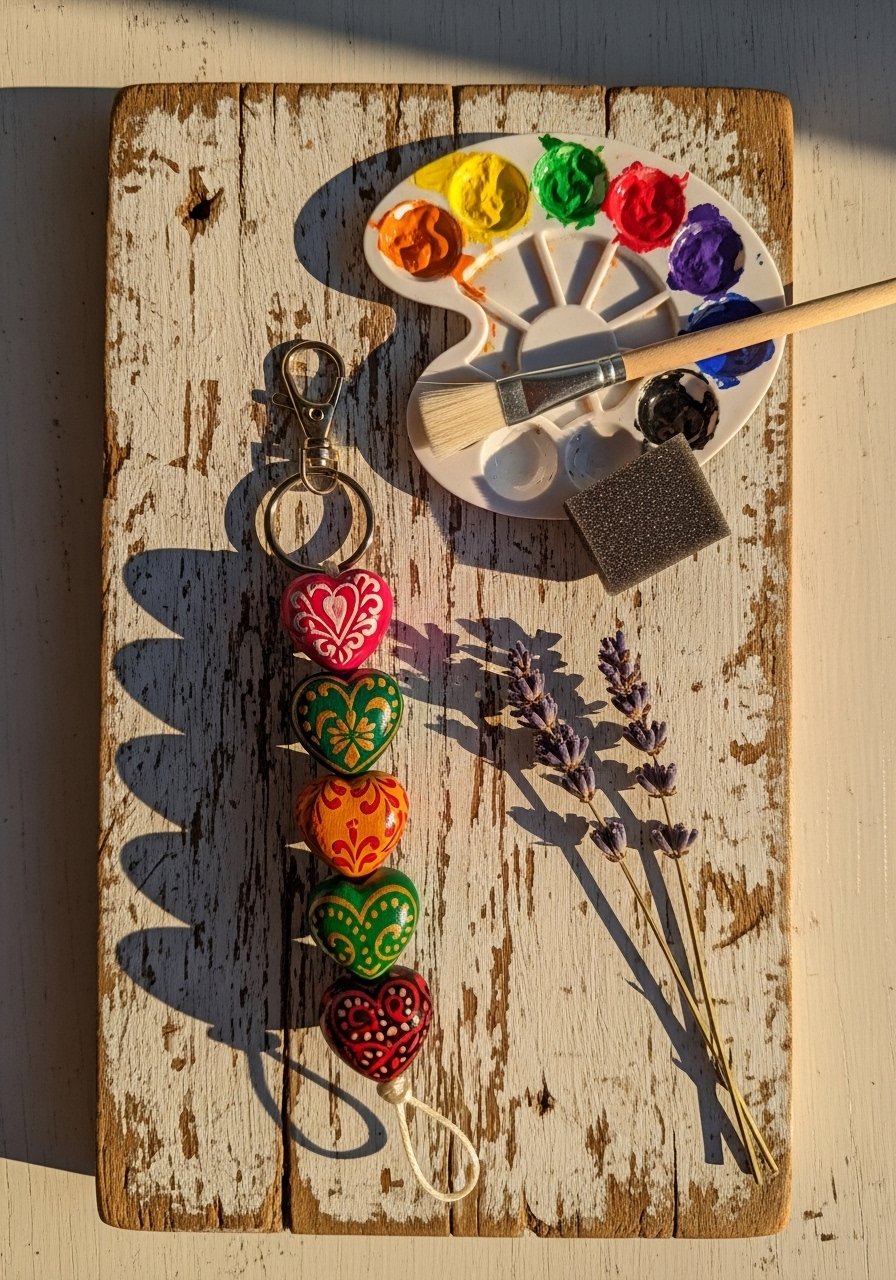
Hand-painted wooden hearts bring a cozy farmhouse charm to everyday items. With a couple of paint coats and a matte sealer, these hold up well. The tactile grain of the wood shows through just enough to feel handmade.
Materials
- Wooden heart blanks, 20 mm, pack of 10
- Acrylic craft paint (chalky matte finishes), small tubes
- Flat foam brush for smooth coats
- Matte Mod Podge sealer, 2 coats
- 1 split ring and eye pin
- Sandpaper, 220 grit
Instructions
- Lightly sand blanks and wipe clean.
- Paint two thin coats of acrylic paint, drying 15–20 minutes between coats.
- Drill or pierce a small hole for eye pin if not pre-drilled.
- Insert eye pin, add a dab of glue, and let set 24 hours.
- Seal with two thin coats of Mod Podge, allowing 20 minutes dry between coats.
- Attach to split ring and add a leather tassel if desired.
How to Display or Gift It
- Tie to a mason jar for a hostess gift presentation.
- Store flat in a shallow craft bin while sealer cures.
- Make matching sets for housewarming presents in subtle palettes.
- Add washi tape accents to packaging for a boutique look.
11. Beaded Daisy Charm Keychain
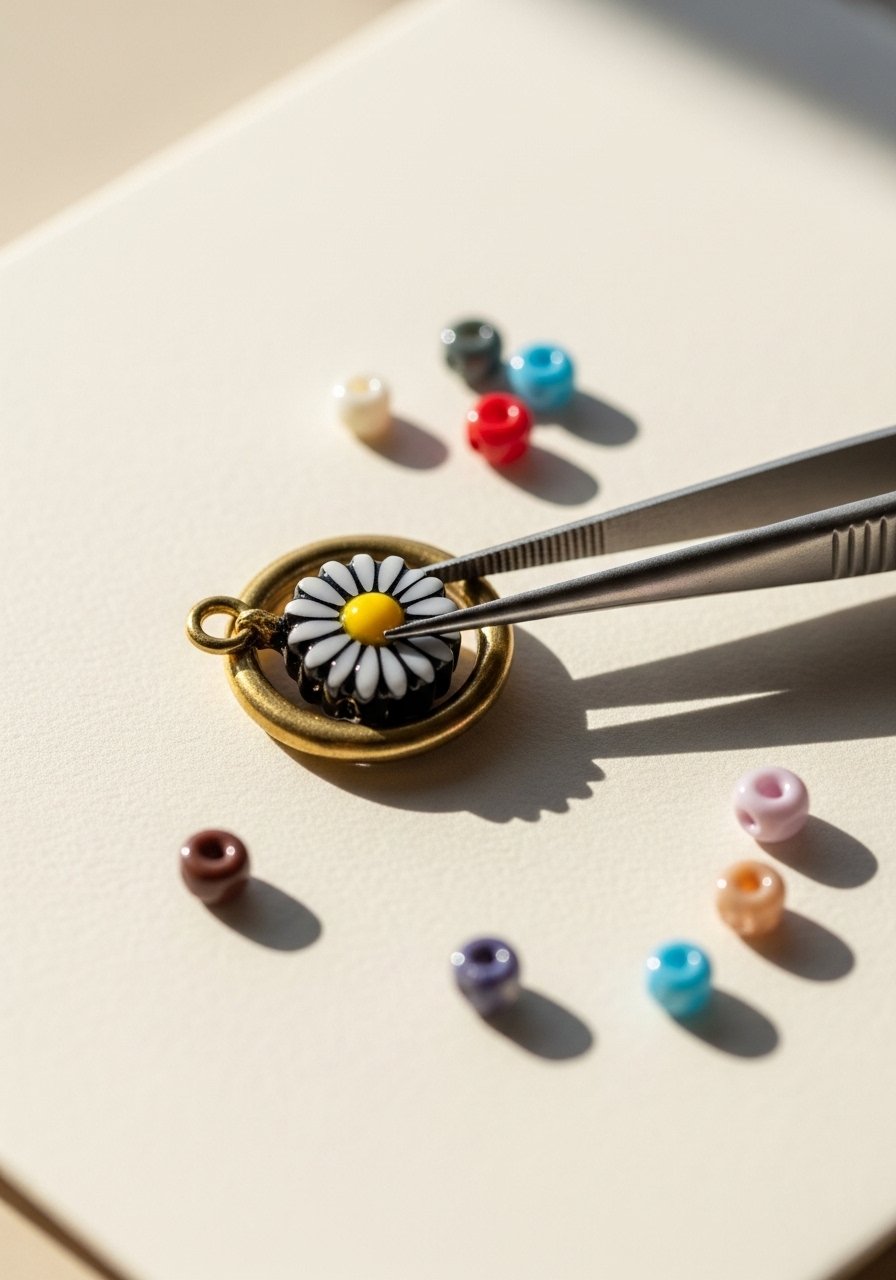
This tiny daisy made from seed beads is so charming it’s almost nostalgic. It’s lightweight and flat for easy clipping to zippers. The finished piece has a pixelated floral look that’s fresh and spring-ready.
Materials
- Seed beads (white and yellow), 5 g
- Beading thread (Nymo or FireLine), 2 m
- Beading needle
- Small jump ring and split ring
- Bead mat to keep beads from rolling
- Scissors
Instructions
- Thread needle and pick up a sequence of beads to form a small daisy following a simple circular bead pattern (center + petals).
- Weave back and reinforce the circle by stitching through beads twice.
- Add a couple of extra beads at the top to create a loop; attach a jump ring.
- Tie off thread with multiple half-hitches and burn the tail if using FireLine.
- Attach to split ring.
- Press finished flower gently flat with fingers.
How to Display or Gift It
- Clip to a floral-themed stationery bundle.
- Store in a clear jewelry compartment box to prevent color transfer.
- Make a garland of small daisy charms for party favors.
- Package in a tiny organza pouch for gifting.
12. Leather-Wrapped Bead Monogram Fob
Wrap a single large wooden bead with leather and add a stamped metal initial — polished and personal. The leather wrap feels rich and tactile, and the metal initial adds heirloom personality.
Materials
- 1 wooden bead, 18–20 mm
- Leather lacing, 1.5 mm x 40 cm
- Metal initial charm
- Small super glue for leather ends
- 1 split ring and clasp
- Leather needle or awl
Instructions
- Thread leather through bead and wrap around bead snugly until covered.
- Tuck the end and secure with a tiny drop of glue; press for 30 seconds.
- Attach metal initial charm to a small jump ring and loop around leather.
- Add split ring and test leather wrap for slippage.
- Trim excess leather and burnish edges with finger oil for sheen.
- Clip onto keys and admire the compact, personalized weight.
How to Display or Gift It
- Present in a small kraft box with shredded paper.
- Store extras on a leather tool roll to prevent tangling.
- Make matching monogram sets for bridal party gifts.
- Pair with a small polishing cloth for upkeep.
13. Rainbow Clay Sprinkle Beads
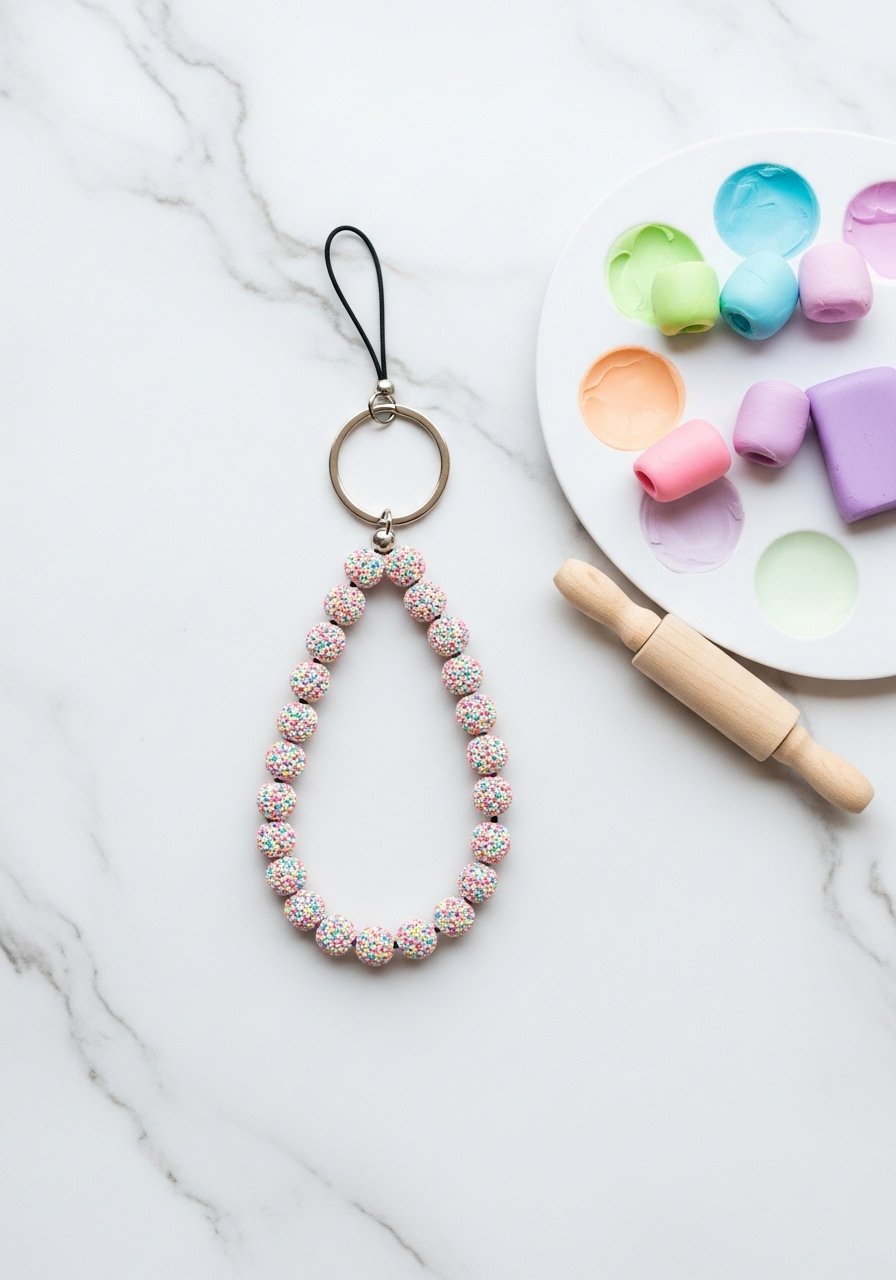
These playful sprinkle beads are tiny bursts of color strung together for a joyful, retro feel. They’re tactile and slightly matte after baking, perfect as a cheerful everyday accessory.
Materials
- Polymer clay in pastel colors, small amounts
- Tiny round bead mold or hand-rolled beads, 6–10 mm
- Toothpick for holes
- Oven for baking per clay instructions
- Split ring and clear craft glue
- Fine sandpaper, 400 grit
Instructions
- Roll micro beads by hand or press into a small mold.
- Pierce holes with a toothpick and bake per polymer clay directions (usually 15–20 minutes at 110°C/230°F).
- Allow to cool fully; sand any rough bits.
- String in a random rainbow order onto thin nylon cord.
- Tie secure knot and add a split ring.
- Seal lightly with matte varnish for durability; dry 24 hours.
How to Display or Gift It
- Attach to kid-friendly lunchbox zippers.
- Store baked beads flat in a small organizer while varnish cures.
- Make sets in school colors for team spirit.
- Wrap in tissue and tuck into a pencil case as a sweet gift.
14. Epoxy Resin Encapsulated Charm
Epoxy resin lets you encase glitter, tiny charms, or confetti in a glossy, glass-like bead. The final result is smooth, heavy in a comforting way, and very durable. This project gives a sleek, jewel-like finish to your keychain.
Materials
- Two-part epoxy resin, small kit (10–20 ml)
- Tiny metal bezels or silicone mold for beads
- Micro glitter, charms, or confetti
- Mixing sticks and disposable cups
- Protective gloves and a well-ventilated space
- Split ring and eye pin
Instructions
- Mix epoxy per instructions (usually 1:1 by volume) and stir for 2 minutes.
- Pour a thin base into bezel or mold, add embellishments, then top up.
- Tap gently to release bubbles, or use a heat gun for 2–3 seconds.
- Allow to cure 24–48 hours depending on product.
- Pop from mold, sand edges if necessary, and attach eye pin.
- Secure to split ring and test cure for tack-free finish.
How to Display or Gift It
- Store in foam-lined boxes to prevent scratches.
- Attach to a mini display card and hang at craft shows.
- For gifting, nestle in a small velvet pouch.
- Keep unused resin sealed and stored upright per manufacturer instructions.
15. Braided Cord & Bead Sporty Keychain
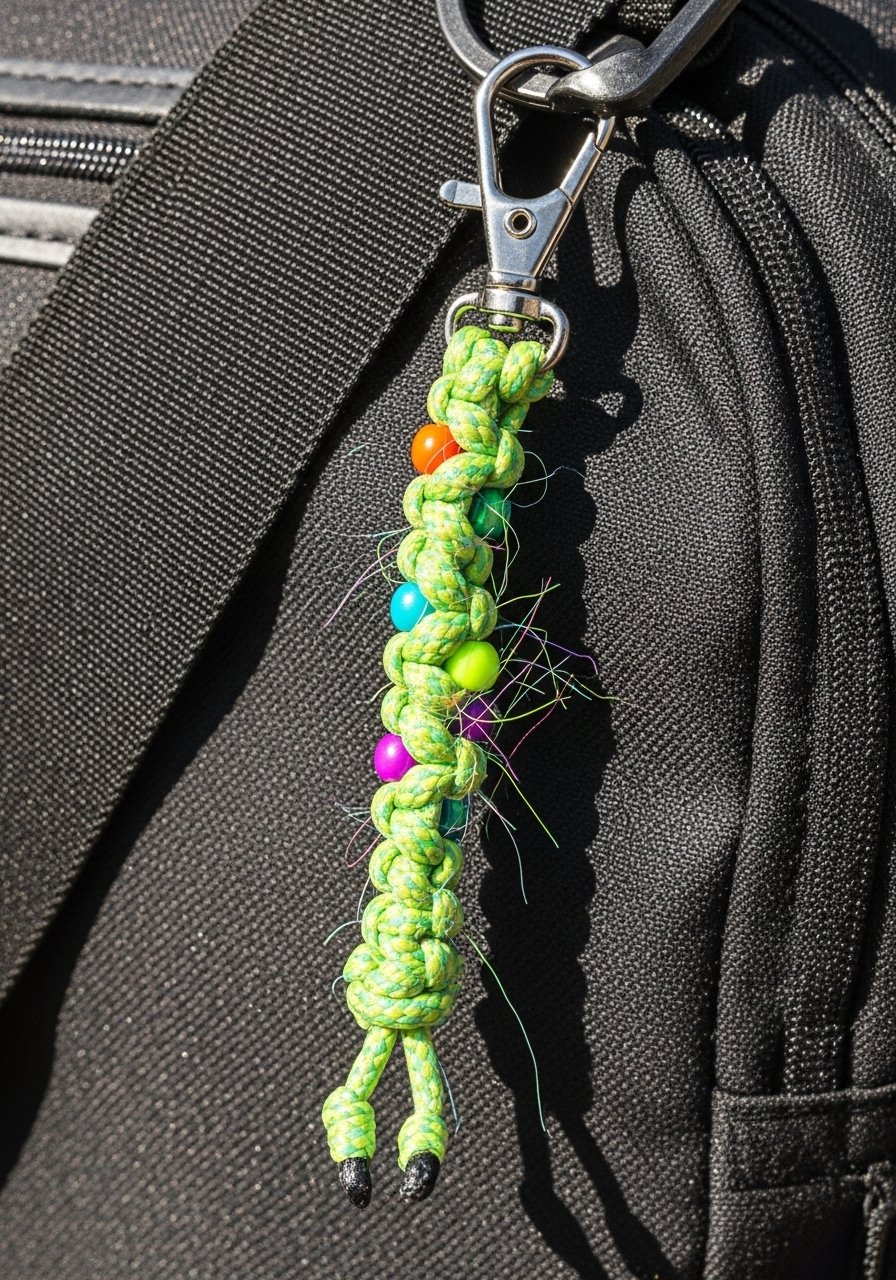
Tough nylon cord braided around a few beads gives a sporty vibe, great for gym bags or outdoor gear. This keychain is durable, feels grippy, and stands up to moisture and rough use.
Materials
- 550 paracord, 2 x 30 cm strands
- 3 plastic or wooden beads, 10 mm
- 1 heavy-duty split ring
- Lighter to melt cord ends safely
- Scissors and tape
- 1 small ruler
Instructions
- Melt cord ends slightly with a lighter to prevent fray; tape ends if needed.
- Attach cords to split ring using a cow hitch.
- Braid cords (simple three-strand or fishtail) until length 6–8 cm.
- Slip beads onto braids intermittently.
- Finish with a tight knot and melt ends; press to flatten.
- Clip onto bag and test for firm hold.
How to Display or Gift It
- Loop on a carabiner near outdoor gear.
- Wrap in a small mesh bag for active-lifestyle gifts.
- Store extra paracord in a labeled bag for future crafts.
- Make coordinated sets in team colors for group outings.
16. Seed Bead Fringe Fob
Long seed bead fringe makes a boho tassel that swings beautifully from a bag. It’s tactile and shimmery, with a pleasing weight and movement. Ideal if you like repetitive beadwork and tiny color shifts.
Materials
- Seed beads (multiple colors), 10–15 g
- Beading thread, 2–3 m
- Beading needle
- Small leather or fabric strip to bind fringe
- Scissors and jump ring
- Bead stopper or clip
Instructions
- Cut multiple lengths of thread (10–12 cm each) and secure them together at the top with a binding stitch.
- Thread beads onto each strand to desired length (4–6 cm).
- Fold strands in half and stitch the tops onto a leather strip to secure.
- Wrap leather strip around base and glue; let cure 30 minutes.
- Attach leather-wrapped base to split ring.
- Trim fringe ends evenly.
How to Display or Gift It
- Clip to summer tote bags for festival looks.
- Store flat under tissue to keep fringe straight.
- Wrap in kraft paper and tie with twine for a rustic gift.
- Make multiple short fringes for a layered effect.
17. Puffy Resin Initial Keychain
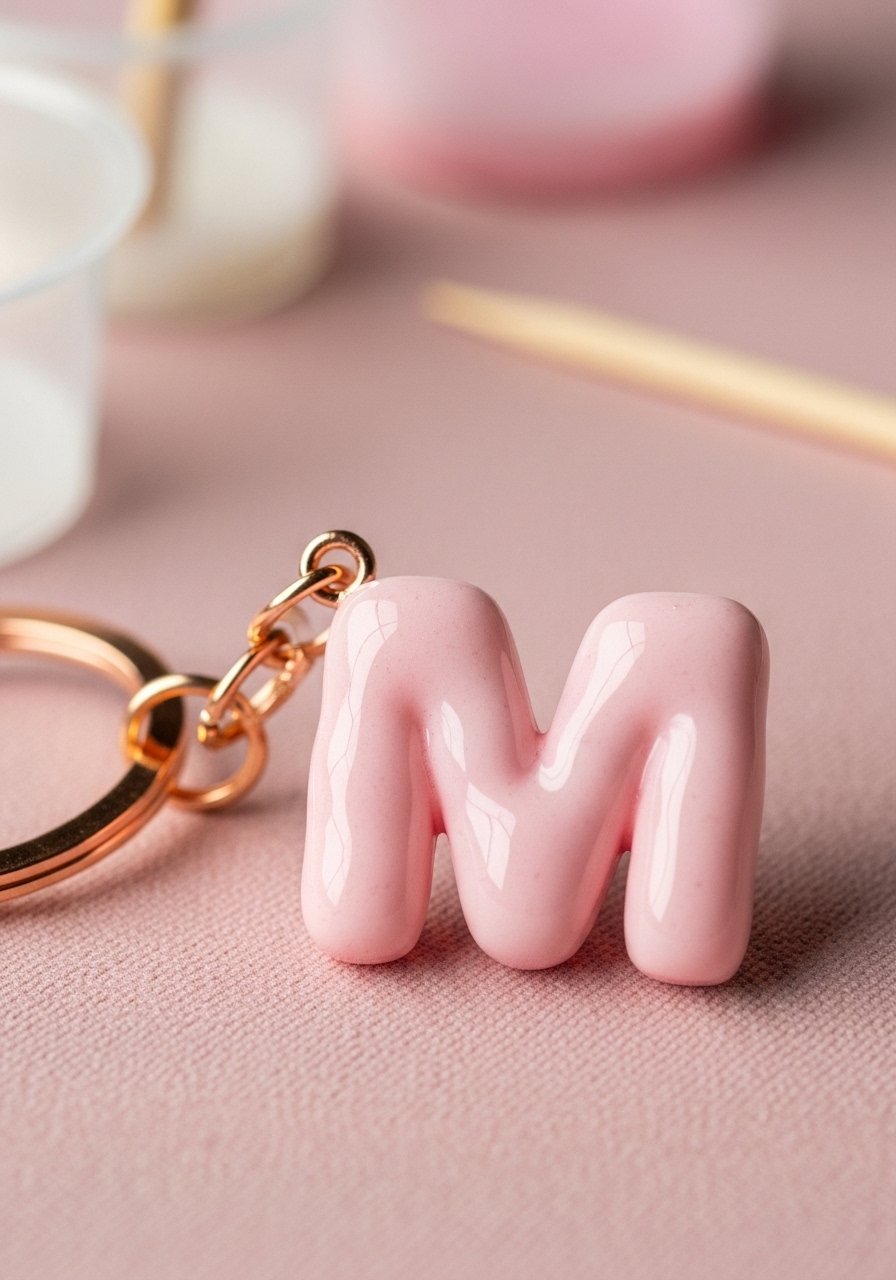
Puffy resin initials are slightly domed, glossy, and custom. They feel substantial in hand and make thoughtful personalized gifts. This project is great if you want a bold, modern monogram piece.
Materials
- Silicone alphabet molds
- Resin (small amount) or UV resin
- Pigment or mica powder
- Mixing cups and stir sticks
- Jump ring and split ring
- Sanding sponge, fine
Instructions
- Mix resin per instructions and add pigment for color.
- Pour into silicone initial mold, remove bubbles, and cure per product (UV resin: 2–3 min; epoxy: 24–48 hr).
- De-mold and sand edges smooth.
- Drill tiny hole or insert eye pin into still-tacky resin.
- Attach jump ring and split ring.
- Let cure fully until firm to the touch (no tackiness) before handling.
How to Display or Gift It
- Attach to a small lanyard for office badges.
- Present inside a little velvet pouch for a luxe feel.
- Store cured pieces on a padded tray until all are finished.
- Make matching pairs for couple gifts.
18. Friendship-Bracelet-Style Beaded Keychain
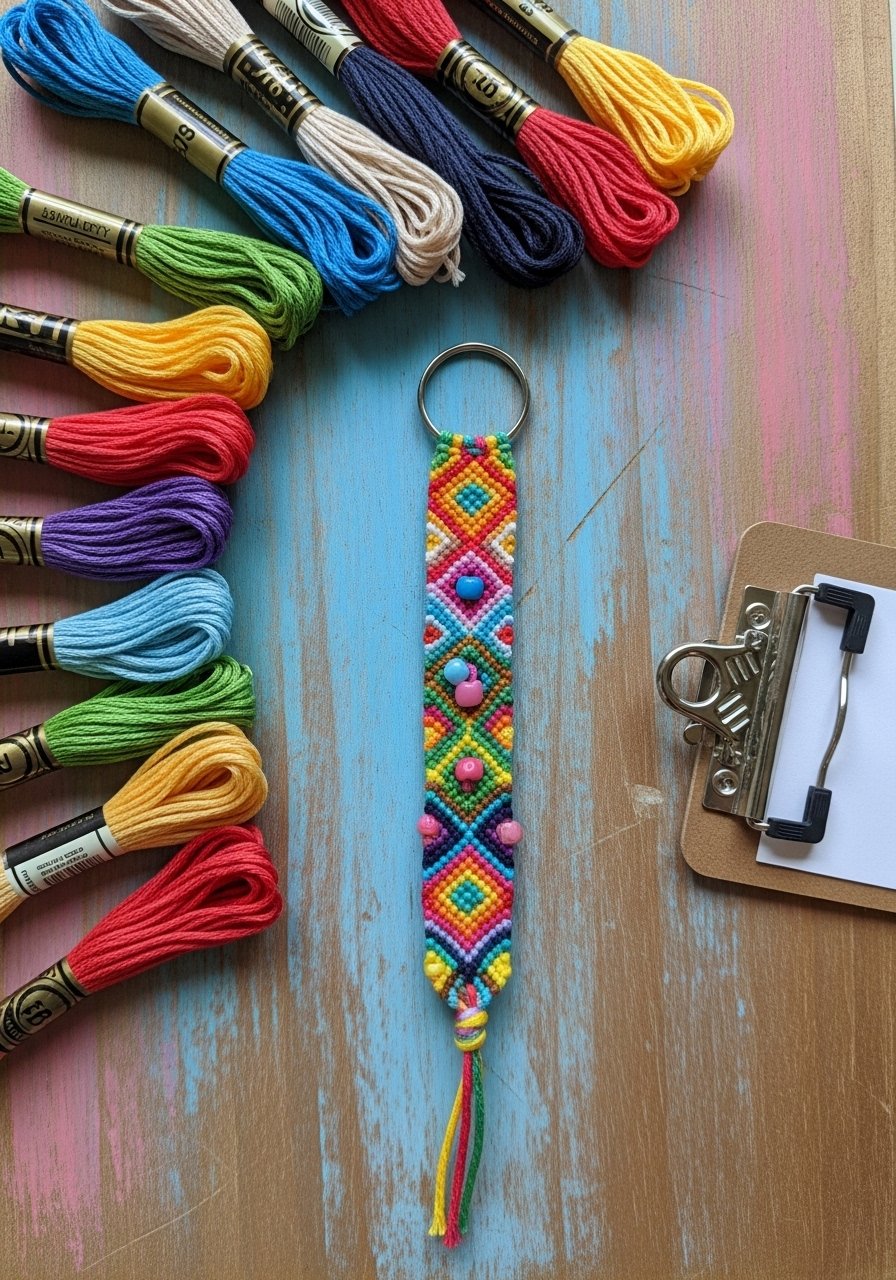
Combine classic friendship bracelet weaving with beads for a nostalgic, wearable keychain. It’s slightly fabric-y, with a soft texture and bright color combinations. Perfect for teens or friends exchanging small handmade tokens.
Materials
- Embroidery floss, multiple colors (20–30 cm each)
- Small seed beads, 2–3 g
- Mini clipboard or tape to secure while working
- Scissors and a lighter to neaten ends
- Split ring and small jump ring
- Needle (optional) for threading beads
Instructions
- Secure floss on a mini clipboard and start a basic forward-backward knot pattern.
- Add seed beads on selected knots by threading bead onto thread before knotting.
- Continue until bracelet length is 6–7 cm.
- Finish with a tight knot and trim ends to 2 cm; melt ends gently if desired.
- Loop through a split ring and secure with a stitched loop.
- Press pattern flat with fingers.
How to Display or Gift It
- Tie onto a friendship card for a sweet handwritten note.
- Store in a fabric pouch to avoid snagging.
- Make matching sets for a sleepover activity.
- For gifting, fold into a small box lined with tissue.
19. Tiny Dreamcatcher Bead Charm
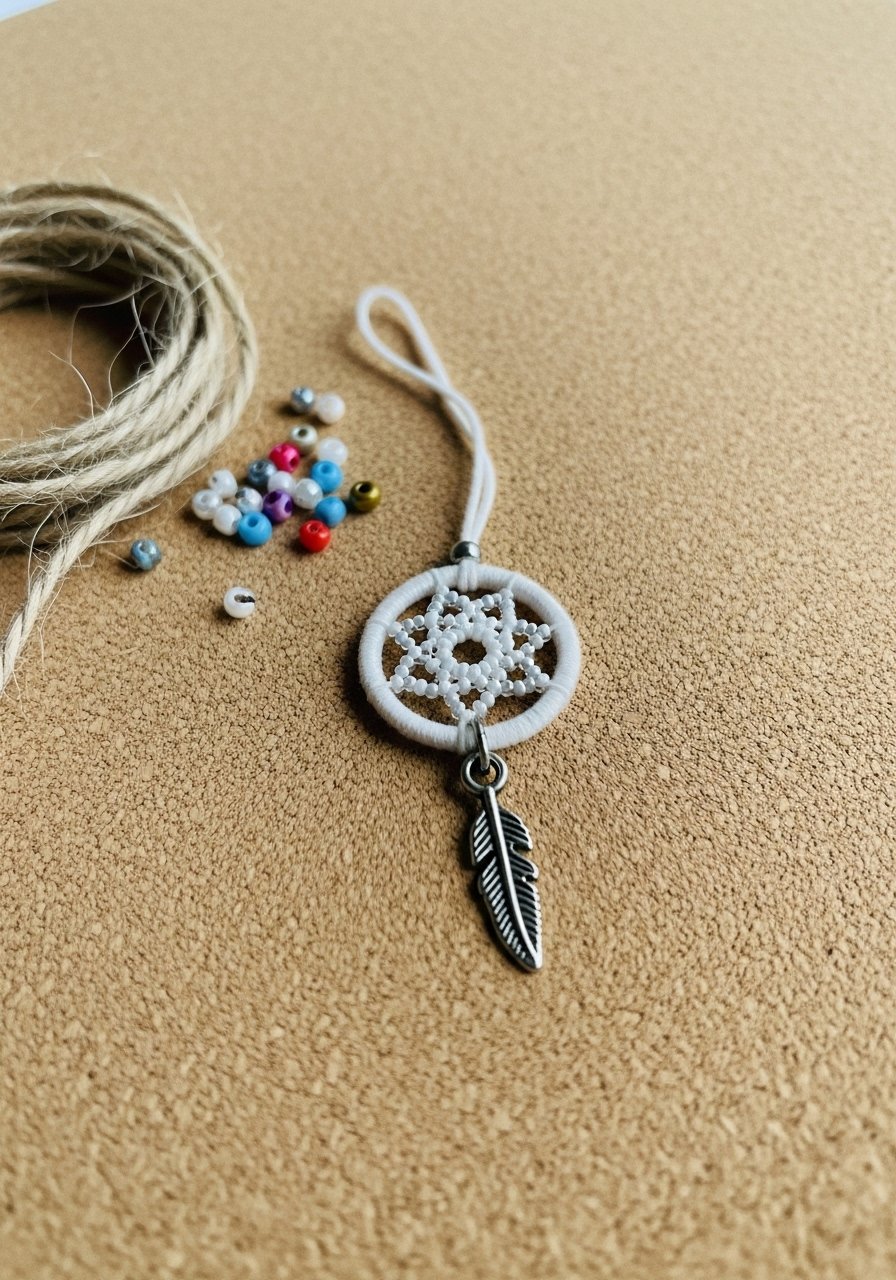
A miniature dreamcatcher bead charm captures boho spirit in a tiny, whimsical circle. It’s delicate, with tiny beads along the web that sparkle. Great for dreamers and those who love layered bag charms.
Materials
- Metal hoop, 20–25 mm
- Waxed thread or fine embroidery floss
- Tiny seed beads, assorted
- Feather charm or craft feather
- Small jump ring and split ring
- Needle for threading beads
Instructions
- Wrap hoop with thread and knot securely.
- Weave a tiny web inside the hoop, adding seed beads as desired.
- Finish web with a central knot and secure thread tails.
- Attach a feather charm to the bottom with a loop.
- Add a jump ring to the top and attach to split ring.
- Test for secure knots before daily use.
How to Display or Gift It
- Hang from a rearview mirror or handbag zipper.
- Store flat in a shallow tray to avoid crushing webbing.
- Bundle with a small sleep mask for a bedtime-themed gift.
- Make a set in pastel shades for baby shower favors.
20. Beaded Leather Tassel Keychain
Leather tassels accented with a bead string give a luxe, textured look. They’re longer and statement-making, yet feel soft and swing nicely on a bag.
Materials
- Leather strip, 4 x 15 cm
- Small wooden or glass beads, 6–8
- Waxed cord, 30 cm
- Split ring and clasp
- Scissors and glue
- Ruler
Instructions
- Cut fringe into leather strip, leaving 2.5 cm uncut for the top.
- Roll and glue the top to form a tassel head; clamp 10–15 minutes.
- String beads onto waxed cord and wrap around tassel neck for decoration.
- Tie cord securely and trim ends.
- Attach split ring and test for secure hold.
- Smooth tassel edge if needed.
How to Display or Gift It
- Clip to a tote for a shop-ready aesthetic.
- Store in a drawer organizer to keep shape.
- Gift with a small leather conditioner sachet.
- Make a set in contrasting colors for seasonal updates.
21. Seed Bead Chevron Key Fob
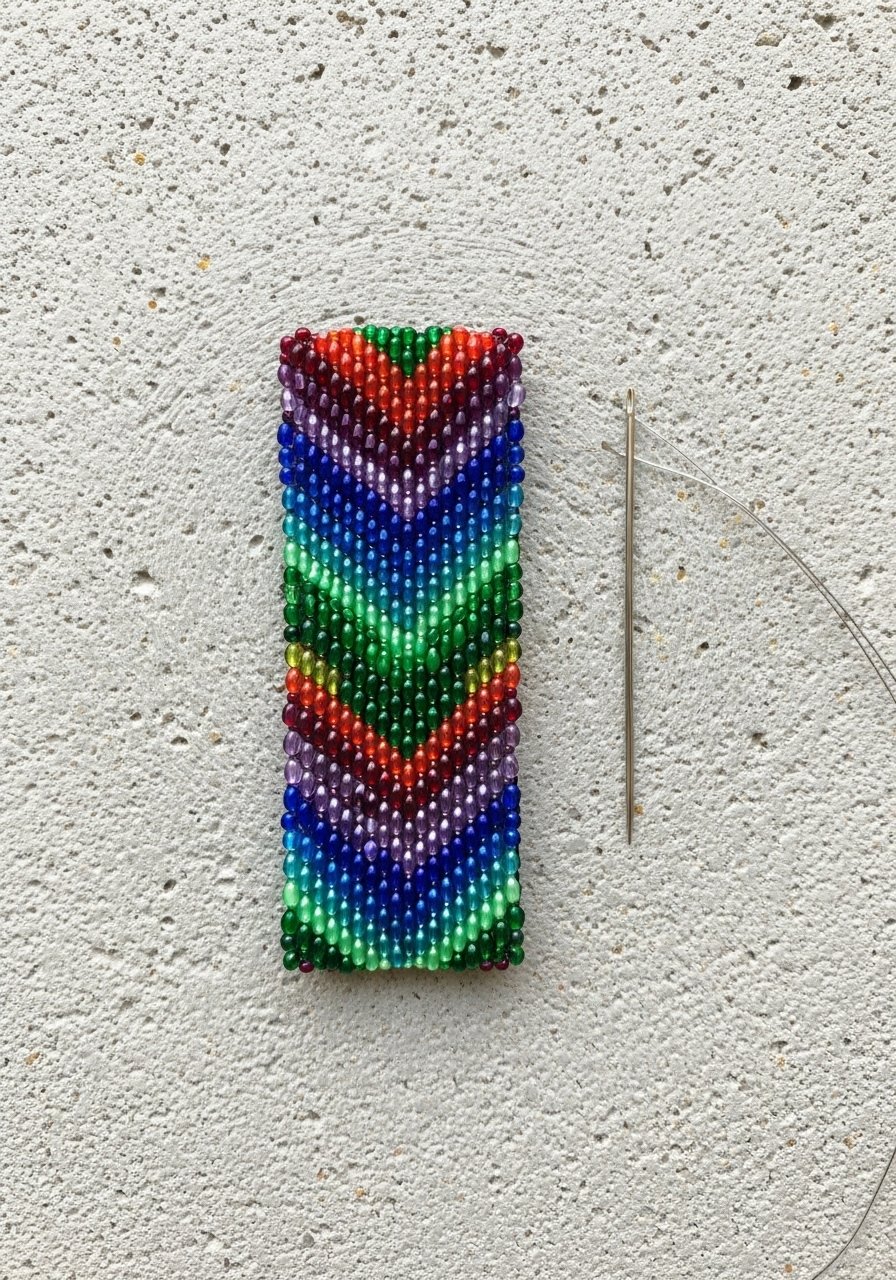
A chevron seed-bead fob is graphic and small enough to tuck into a pocket. The flat beaded texture feels polished and modern.
Materials
- Seed beads (3 colors), 10 g each
- Beading thread (FireLine), 2 m
- Beading needle
- Small backing fabric or felt rectangle
- Split ring and small jump ring
- Scissors
Instructions
- Stitch a narrow chevron pattern using brick stitch or loom technique until fob measures 3 x 6 cm.
- Back the piece with felt using a thin dab of fabric glue.
- Attach a small stitched loop at top for a jump ring.
- Weave in thread ends and trim.
- Attach jump ring and split ring.
- Press flat and store in a padded tray.
How to Display or Gift It
- Clip to key hooks for an organized entryway.
- Gift with a handcrafted key label.
- Keep extras in a bead storage box to maintain pattern sets.
- Add a small leather tag for personalization.
22. Mini Macramé Heart with Bead Accent (DIY beaded keychain ideas)
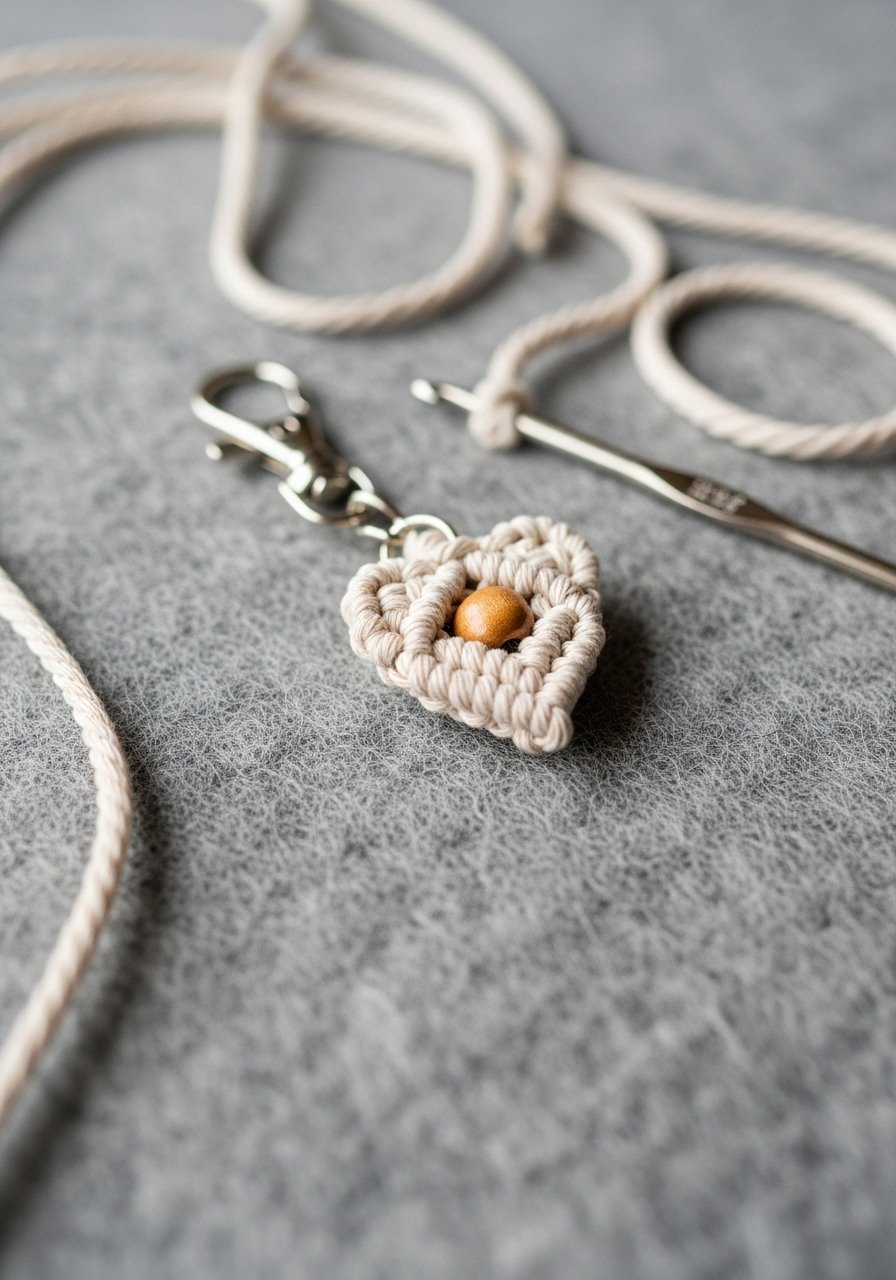
This tiny macramé heart blends knotting and a single bead for a sweet, tactile charm. It’s soft, cozy, and perfect as a tiny token for friends or as a romantic gift.
Materials
- 3 mm macramé cord, 1 m
- 1 wooden bead, 8 mm
- Split ring, 20 mm
- Small crochet hook or tapestry needle
- Scissors and a ruler
- Glue (optional)
Instructions
- Cut cord into 4 x 25 cm lengths and fold in half to attach to ring.
- Use alternating square knots to shape a small heart, adding bead near the top.
- Tighten knots carefully to form a defined heart shape.
- Finish with a wrapped knot at the base and trim ends to 1–2 cm.
- Add a tiny dot of glue if needed to secure knot; dry 30 minutes.
- Attach to split ring and test for durability.
How to Display or Gift It
- Add to a bouquet wrap as a keepsake accent.
- Store in a breathable fabric envelope to protect fibers.
- Make a set in seasonal cord colors for holidays.
- Gift with a handwritten note tucked under the ring.
Thanks for getting this far — I hope these 22 DIY beaded keychain ideas sparked a dozen new projects you want to try. There’s something here for every style: seed-bead daisy charms, resin initials, macramé hearts, and more. Pin this list so you can come back when you’re ready to craft a batch of favors, create a gift set, or just keep a handful of handmade keychains on rotation.
Which one will you make first? Share your favorite (or a photo) and tag a friend who’d love a craft-night plan. Trust me, picking up a quality hot glue gun with temperature control changed how every single one of these projects turned out — cleaner joins and fewer drips makes crafting way more fun.


