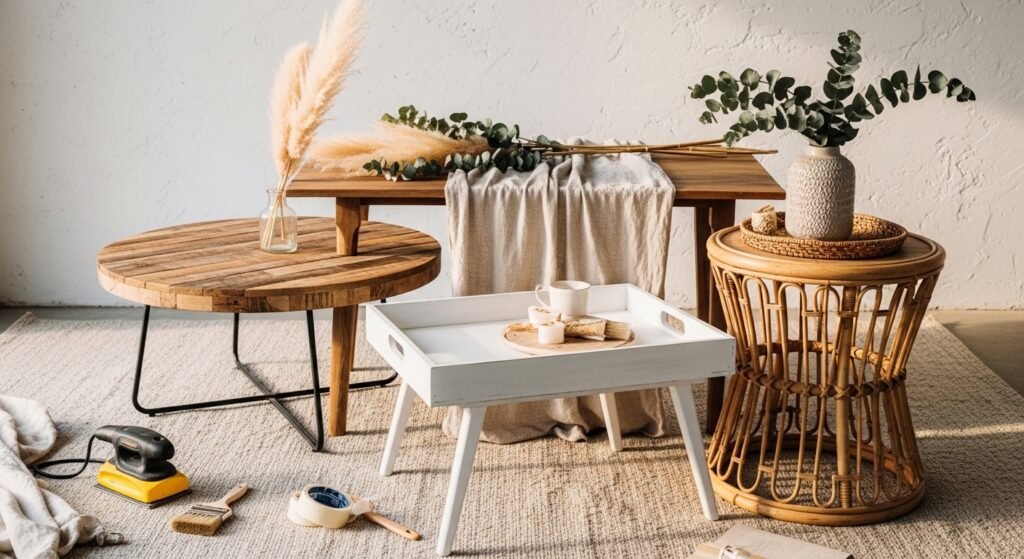
You’ve got the urge to refresh your living room without calling a carpenter—and good news: you can. These easy DIY coffee table ideas were chosen so you can build something pretty and practical with basic tools and minimal woodworking experience. Whether you like cozy cottagecore, clean japandi lines, or relaxed boho, there’s a simple plan here that’ll fit your style and your skill level.
I’ll walk you through 27 different tables with exact materials, measurements, drying times, and step-by-step instructions. Keep a foam brush handy for paint and a sanding block for smooth edges. If you don’t own a hot glue gun yet, it’s worth grabbing one for gluing trims and quick fixes—my go-to is the hot glue gun. Press painter’s tape along edges before painting for perfect lines—this painter's tape saves so much time and stress.
Ready to build? Pick a project, gather materials, and let’s make something you’ll actually use every day.
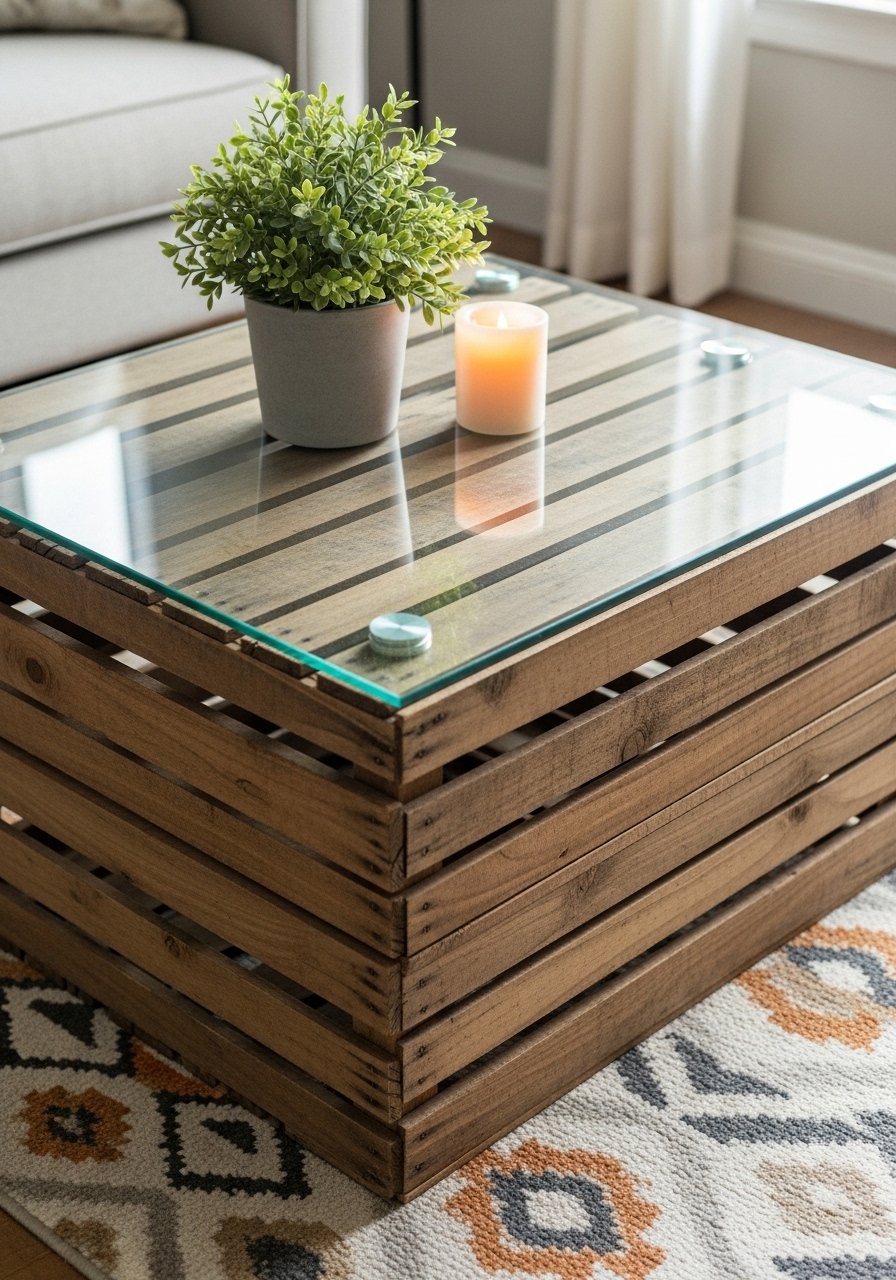
- Rustic Pallet Top Coffee Table
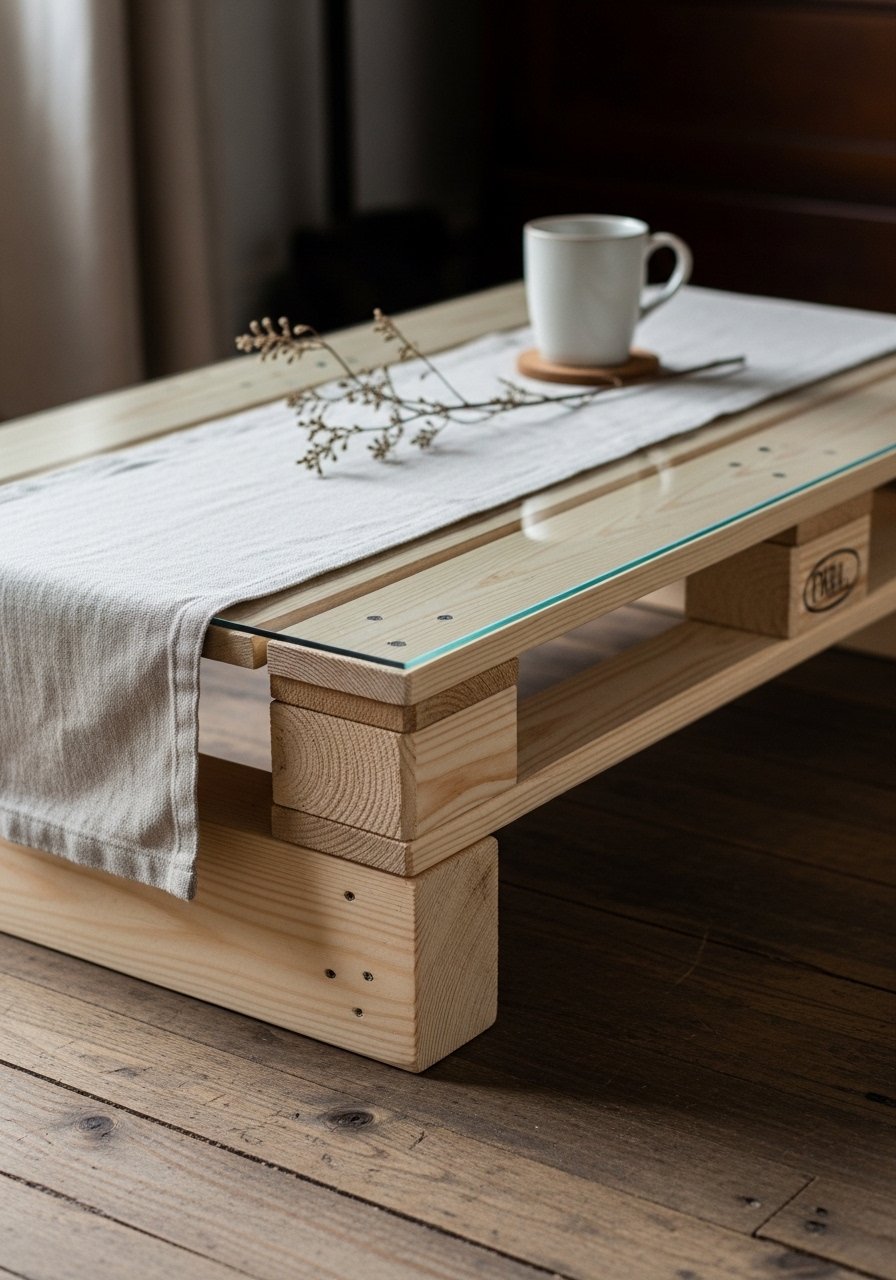
This pallet top table is rough-hewn and full of character. It’s basically pallet boards reassembled on a simple frame, so the texture stays raw and tactile. Perfect if you like farmhouse or rustic looks and want a low-cost weekend build. A cordless drill makes assembly fly. Consider a compact cordless drill driver for pilot holes and screws.
Materials
- Two reclaimed pallet boards, 48" x 6" each (or one 48" x 12" if available)
- Two 2x4s, 48" long (frame rails)
- Two 2x4s, 22" long (frame ends)
- Four hairpin legs, 16" height (or 4 pre-made legs)
- 12 #8 x 1-1/4" wood screws
- Sandpaper: 120 and 220 grit
- Clear matte polyurethane, 1 pint (1 coat + touch-ups)
- Wood glue, 3 oz bottle
- Painter’s tape for temporary bracing
Instructions
- Disassemble pallets and pick the straightest boards; cut to 48" length if needed.
- Build a rectangular frame from 2x4s: glue and screw the rails to ends (48" x 22"). Pre-drill pilot holes.
- Lay pallet boards across the frame, spacing boards evenly (gap ~1/8"). Clamp.
- Glue the underside seams with wood glue, then countersink and screw each board into the frame every 8".
- Sand top with 120 grit then finish with 220 for smoothness. Remove dust with tack cloth.
- Apply one thin coat of polyurethane with a foam brush; dry 4–6 hours. Lightly sand with 220 then apply a second coat. Fully cure 24–48 hours.
- Attach hairpin legs with screws. Check level and floor protection pads.
How to Display or Gift It
- Style with a woven tray and a stack of coffee-table books for a cottagecore vibe.
- Add felt pads under legs to protect floors.
- Wrap a finished table in recycled kraft and twine for gifting to a friend who loves low-key wood pieces.
- Store extra finishes in a stackable craft organizer so touch-ups are easy.
- Simple Crate Coffee Table (Storage-Friendly)
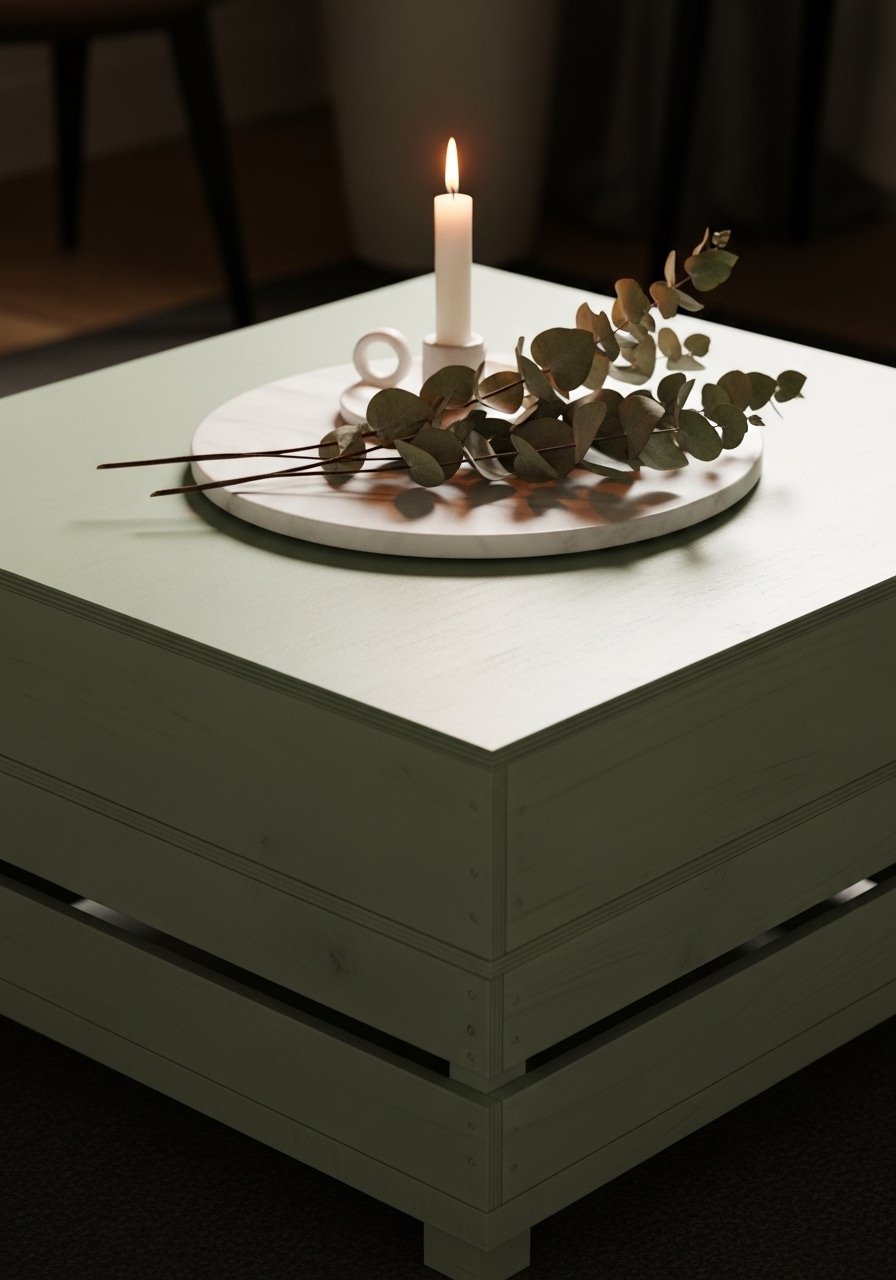
This crate table combines function and style—stack two wooden crates for storage under the tabletop. It’s lightweight, kid-friendly, and works in boho or farmhouse rooms. A power sander makes smoothing fast; I like using a compact orbital sander for crate edges.
Materials
- Two wooden storage crates (each roughly 24" x 16" x 12")
- 3/4" plywood top cut to 24" x 24" (or round 24" diameter)
- Wood screws: 8 #8 x 1-1/4"
- Sandpaper: 120 and 220 grit
- Chalk paint, 8 oz (your color choice)
- Clear wax or matte sealer, 8 oz
- Felt pads, pack of 4
Instructions
- Lightly sand crates with 120 grit to remove splinters, then wipe dust.
- Paint crates with one thin coat of chalk paint; dry 1–2 hours, then a second coat.
- Seal with clear wax or matte sealer. Dry 2 hours to handle, cure 24 hours.
- Place plywood on top of stacked crates; center and mark screw locations through plywood into crate slats.
- Pre-drill and countersink 4 screws into each crate to secure the top.
- Add felt pads under the bottom crate corners to protect your floor.
- Let everything settle for 2 hours before loading heavy items.
How to Display or Gift It
- Fill the bottom crate with blankets or board games for cozy movie nights.
- Top with a ceramic tray and small plant.
- Wrap as a practical housewarming gift—include a jar of drawer sachets tucked inside.
- Store small seasonal styling props in the open space for rotating decor.
- Mid-Century Hairpin Coffee Table
Clean lines and tapered proportions make this a timeless option. You’ll stain a plywood or solid-wood round and pair it with hairpin legs. Using a stain applicator pad or foam brush gets an even finish—grab a set of foam brushes for smooth coats.
Materials
- 3/4" birch plywood round, 30" diameter (or solid wood round)
- Wood stain (walnut), 8 oz
- Polyurethane satin, 1 pint
- 3 hairpin legs, 14" height (or 4 if preferred)
- Sandpaper: 120, 180, 220 grit
- Stain applicator pad or foam brush, pack of 5
Instructions
- Sand the top with 120 grit, then 180 for a smooth grain. Wipe dust.
- Apply one thin coat of stain with an applicator pad; let penetrate 5–10 minutes then wipe off. Reapply if deeper color desired; dry 6–8 hours.
- Lightly sand with 220 grit between stain and finish.
- Apply two coats of satin polyurethane with a foam brush. Dry 4–6 hours between coats, cure 48 hours.
- Attach hairpin legs with provided screws; pre-drill holes to avoid splitting.
- Check for wobble; tighten as needed.
How to Display or Gift It
- Pair with a slim vase and a stack of design books.
- Add rubber leg caps to protect floors.
- This table ships well for gifting—wrap top in bubble and secure legs separately.
- Store spare stain in a cool, dry drawer.
- Painted Plank Coffee Table (Cottagecore Charm)
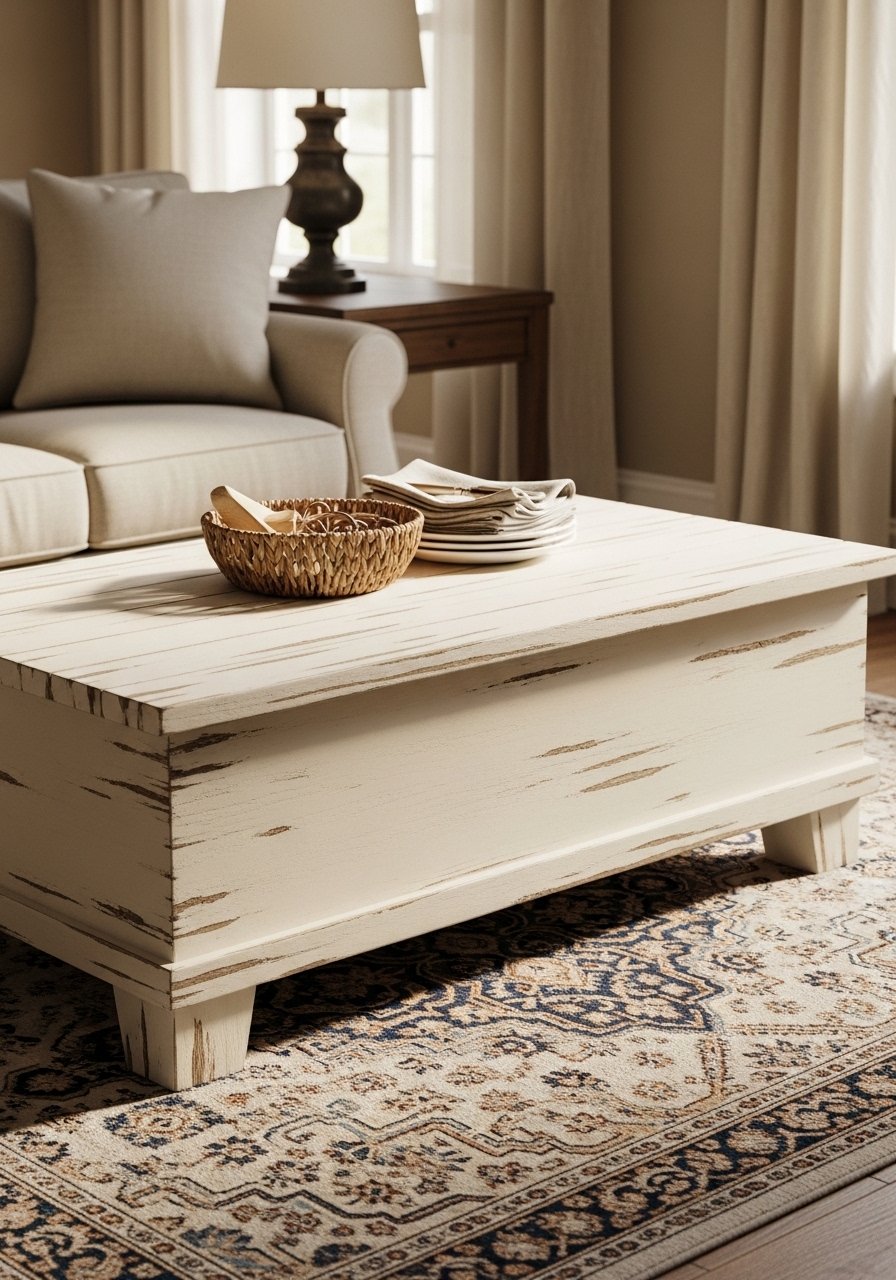
The painted plank look gives cozy cottagecore vibes. Distress edges for character. A set of foam brushes and painter’s tape helps you get crisp painted lines and smooth coats.
Materials
- Three pine boards, 1" x 6" x 48" (cut to 40" final length)
- Two 1"x3"x40" for under-frame cross supports
- Wood screws: 12 #8 x 1-1/4"
- Chalk paint, 8–12 oz (cream)
- Light sanding block and 220 grit sandpaper
- Clear wax or matte sealer, 8 oz
- Painter’s tape
Instructions
- Cut three pine boards to 40" length. Sand edges with 120 then 220.
- Attach boards side-by-side to the underside cross supports with glue and screws every 6–8". Pre-drill.
- Tape off any spots you want to remain raw before painting.
- Paint two thin coats of chalk paint, drying 1–2 hours between coats.
- Lightly distress edges with 220 sandpaper where natural wear would happen.
- Seal with wax; apply thin coat and buff after 30 minutes.
- Attach legs (wood blocks or metal legs) with screws. Let cure 2 hours before use.
How to Display or Gift It
- Add a tied bunch of dried lavender for that cottage feel.
- Use as a staging table for seasonal décor—easy to repaint.
- Store small tools in a labeled craft organizer for touch-ups later.
- Wrap in kraft paper and tie with twine for gifting.
- Industrial Pipe Frame Coffee Table
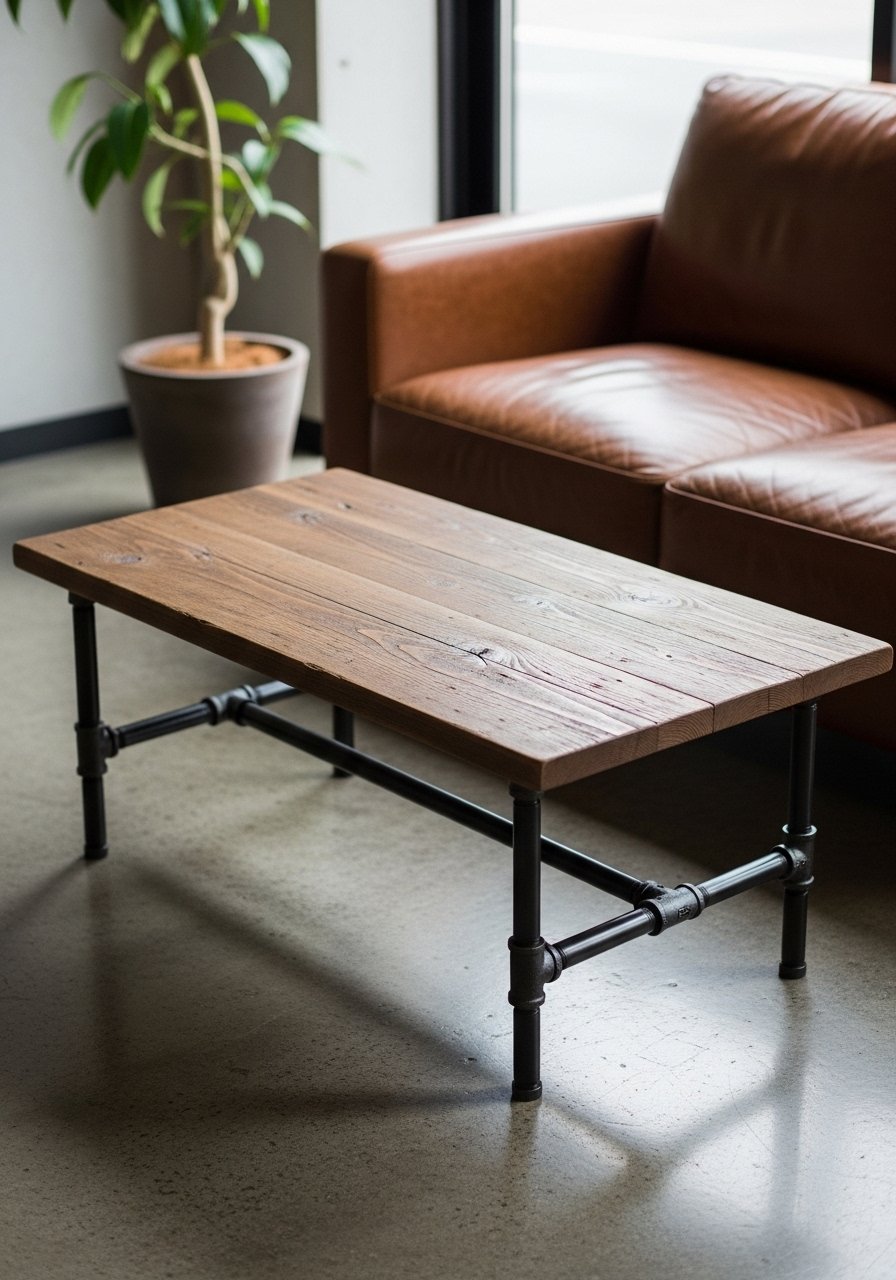
For urban loft or modern farmhouse looks, match a thick wood top with black steel pipe legs. Pipes add sturdy industrial flair and are simple to assemble with threaded fittings. A pipe wrench will help tighten fittings.
Materials
- Solid pine top, 40" x 22" x 1.25" (or laminated boards)
- Black iron pipe kit: 4 legs at 16" finished height with flanges and fittings (or individual pipes to assemble)
- Wood screws: 8 #10 x 1-1/2"
- Sandpaper: 120, 220 grit
- Oil-rubbed finish or satin poly, 1 pint
- Pipe wrench (for tightening)
Instructions
- Sand and finish the top: sand 120 then 220, wipe clean.
- Apply oil-rubbed finish with a clean cloth or foam brush. Dry 6–8 hours.
- Assemble pipe legs and flanges, tighten securely with a pipe wrench.
- Position table top upside down and mark flange locations near corners (1.5" inset).
- Pre-drill and screw flanges to the top with wood screws.
- Flip table and check stability; add felt pads to flanges to protect floor.
How to Display or Gift It
- Place a metal tray for remote controls and candles.
- Pair with industrial lighting or a leather-bound book for a masculine look.
- For gifting, include care instructions and a small bottle of wood oil.
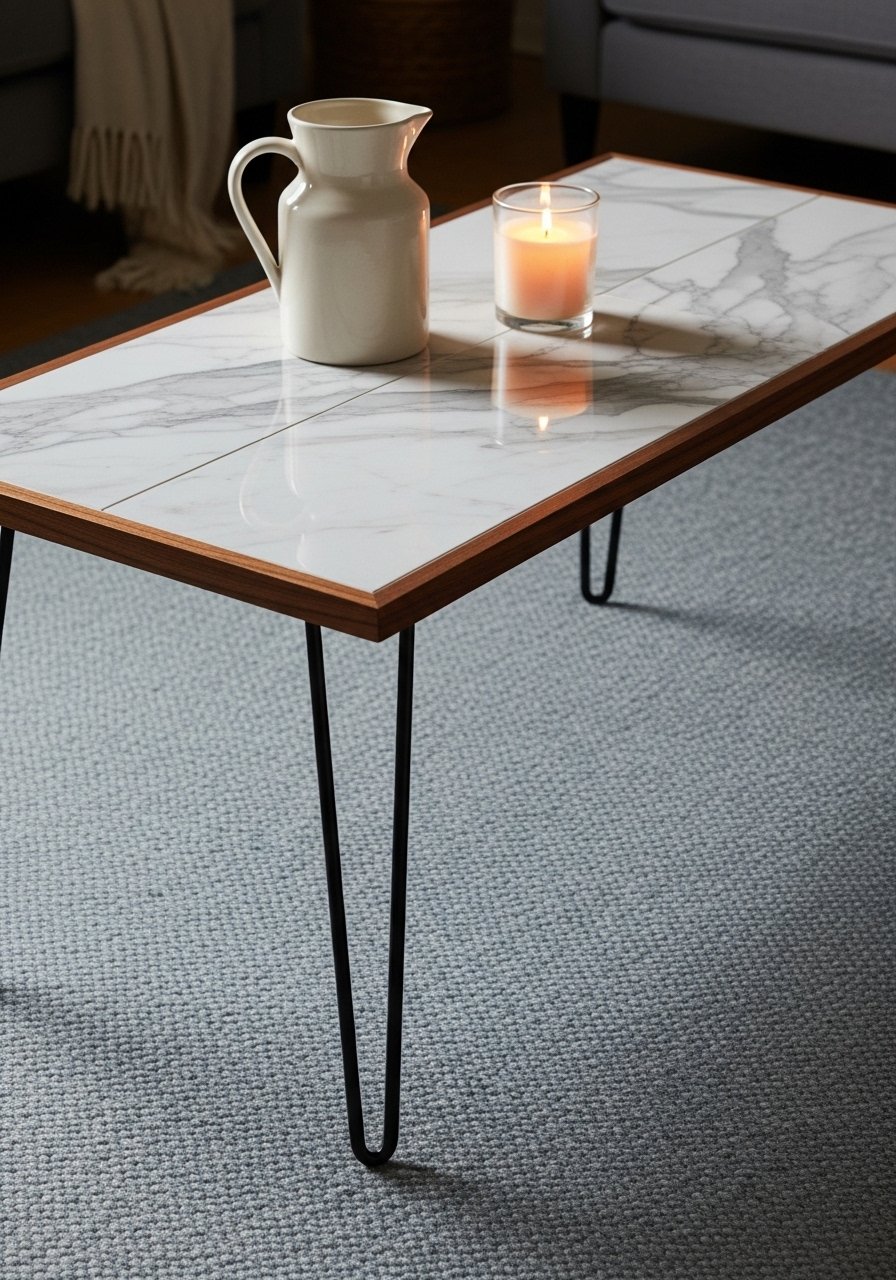
- Tile Inlay Coffee Table (Minimal Skill, Big Impact)
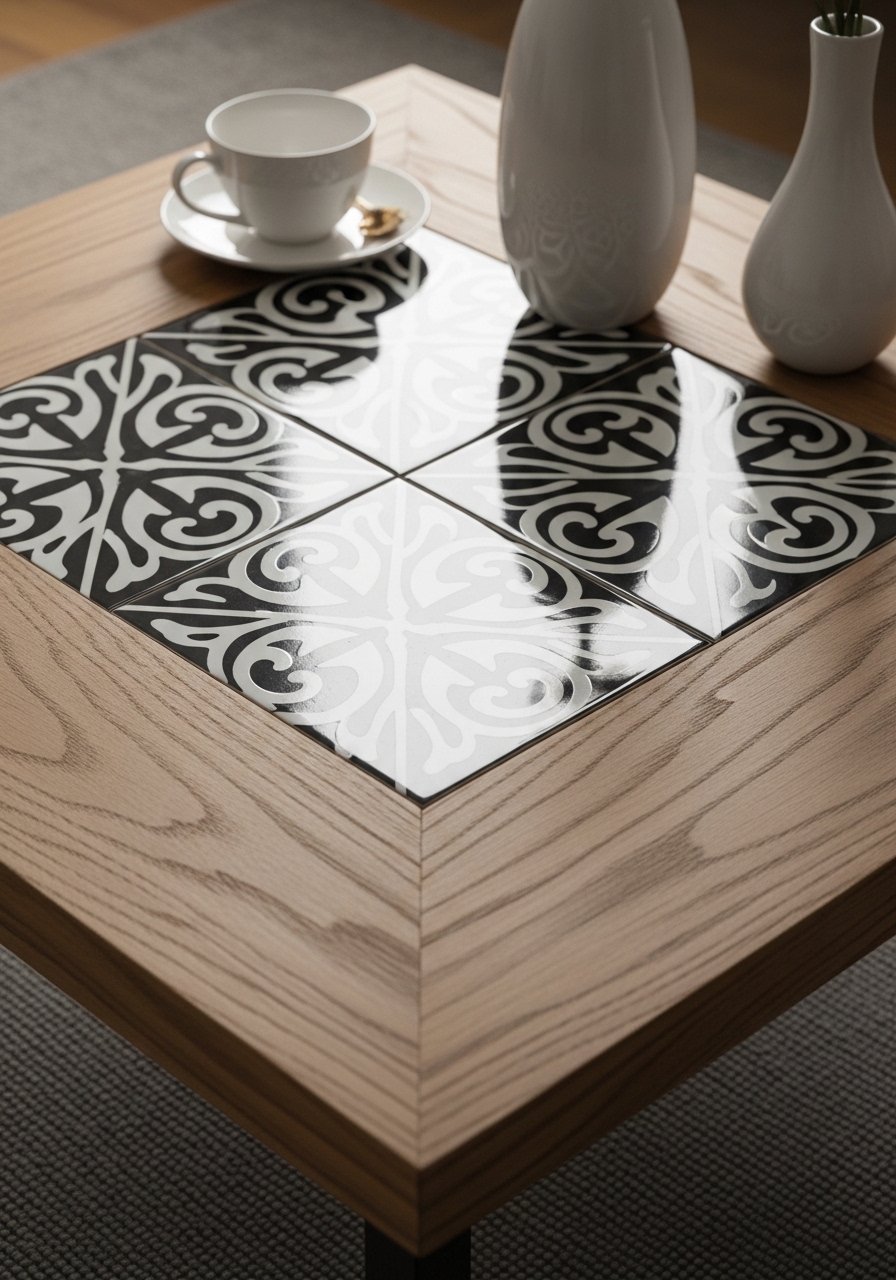
A tile inlay gives artisan detail with little carpentry. You cut a recessed opening in plywood, set tiles with thinset, and grout. A small grout float and tile spacers are handy—grab a grout float for smooth grout lines.
Materials
- Plywood top, 3/4" x 30" square
- Porcelain tile sheet, 12" x 12" (decorative focal)
- Thinset mortar, 1 lb (small bag)
- Sanded grout, 1 lb
- Tile spacers (2 mm) pack
- Foam brush and grout float
- Sealer for grout, 4 oz
Instructions
- Mark the center of your plywood and trace the tile sheet size.
- Cut a recess 3/8" deep using a router or jigsaw, leaving a 3/4" wood border. Sand edges.
- Mix thinset per manufacturer directions. Spread thinset into recess with a notched trowel.
- Press tile sheet into thinset using spacers for even joints; remove spacers after set.
- Let thinset cure 24 hours.
- Grout joints with sanded grout using a grout float; remove excess with damp sponge. Dry 24 hours.
- Seal grout with grout sealer; dry 2–4 hours.
How to Display or Gift It
- Use a small felt coaster set to protect tile from scratches.
- Place a decorative bowl or succulent in the tile center for contrast.
- Wrap in bubble and kraft for safe transport as a housewarming gift.
- Store leftover grout in a resealable container for future touch-ups.
- Live-Edge Slab Coffee Table (Beginner-Friendly Top Prep)
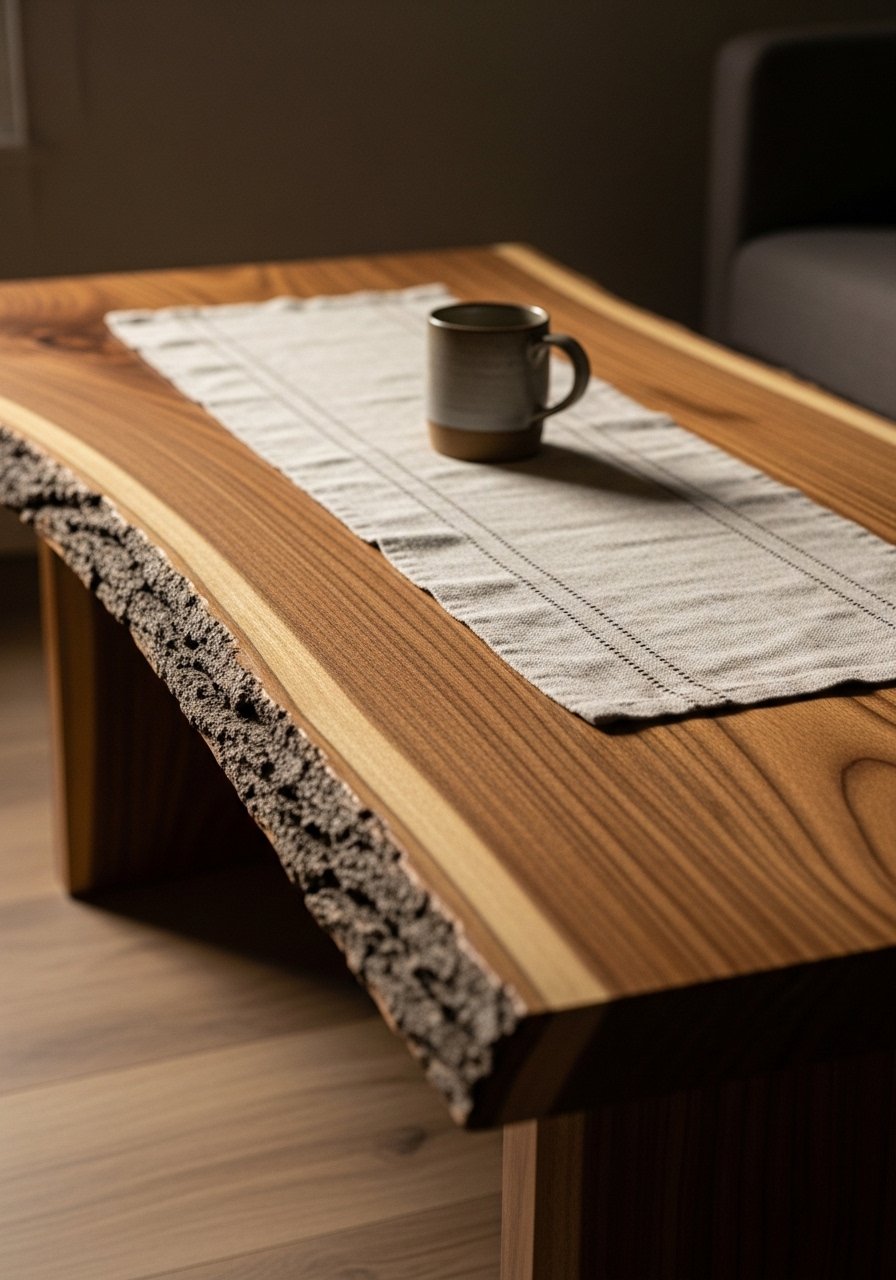
A live-edge slab gives organic character. Finish with tung oil or a wipe-on poly for a hand-rubbed look. A random orbital sander speeds finishing.
Materials
- Live-edge hardwood slab, 36"–42" long, 18"–22" wide, 1.5" thick
- Tung oil or wipe-on satin polyurethane, 8 oz
- Sandpaper: 80, 120, 180, 220 grit
- 3 steel hairpin legs, 12–14" height
- Wood filler for any cracks, 2 oz
Instructions
- Flatten and sand slab starting with 80 grit, progressing to 220 for a smooth top. Remove dust thoroughly.
- Fill any small checks or cracks with wood filler; sand smooth after curing 30–60 minutes.
- Apply two thin coats of tung oil or wipe-on polyurethane. Allow 8–12 hours between coats; cure 48 hours.
- Attach hairpin legs with pre-drilled holes and countersunk screws.
- Add rubber leg pads to protect floors and reduce slips.
- Let the finish fully cure 48 hours before placing heavy objects.
How to Display or Gift It
- Place a low tray on the slab to keep items grouped.
- Pairs well with ceramic or stone accents.
- For gifting, include a small bottle of oil and care card.
- Store slab horizontally on foam blocks if you need to hold before finishing.
- Crisscross X-Base Coffee Table (Simple Joinery)
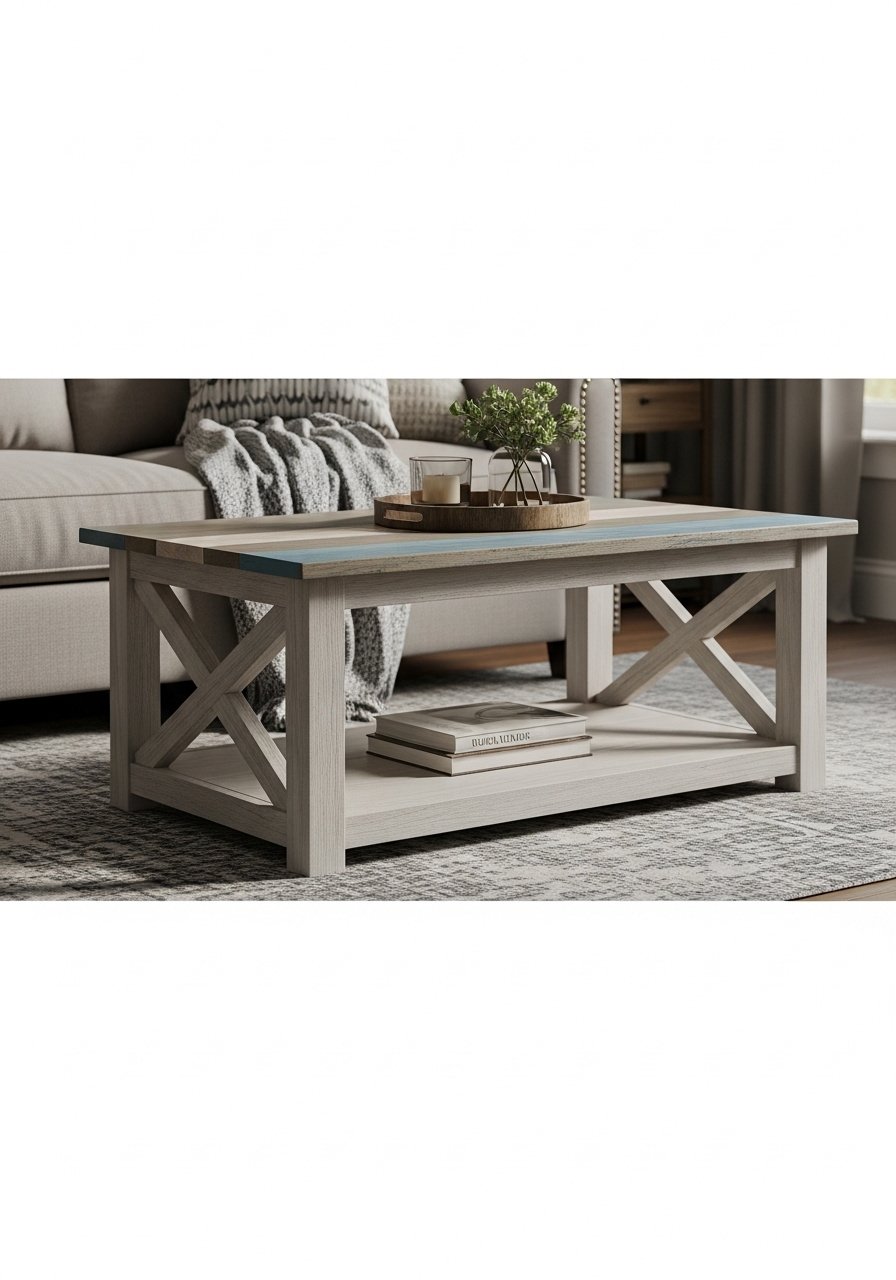
X-bases add visual interest while using simple cross-cut joinery. You’ll cut the Xs from 1x4s and bolt the top on. A pocket-hole jig helps for clean hidden fasteners—consider this pocket-hole jig if you prefer concealed joins.
Materials
- Tabletop plywood, 3/4" x 36" x 18"
- Four 1×4 boards, 30" long for X-bases (cut angles as needed)
- 2 carriage bolts per X, 1/4" x 3" with nylock nuts and washers
- Wood screws: 6 #8 x 1-1/4"
- Paint or stain, 8 oz
- Pocket-hole jig (optional)
Instructions
- Cut 1x4s to size and cut 45° or desired angle for X intersection. Dry-fit legs.
- Drill bolt holes through the crossing point; assemble X with bolts and washers. Tighten until snug.
- Sand tabletop with 120 then 220 grit. Paint or stain as desired. Dry times depend on finish (paint 1–2 hours between coats).
- Attach assembled X-bases to underside of tabletop with screws or pocket screws; center bases 6" in from each end.
- Flip table and check alignment and tightness.
- Let paint cure 24 hours before heavy use.
How to Display or Gift It
- Tuck a woven basket under one X for extra storage.
- Top with a shallow tray and candle cluster for styling.
- For gifting, pack hardware separately and include assembly notes.
- Keep small bolt bag in a labeled craft organizer.
- Midcentury Tapered Legs Table (Refined Lines)
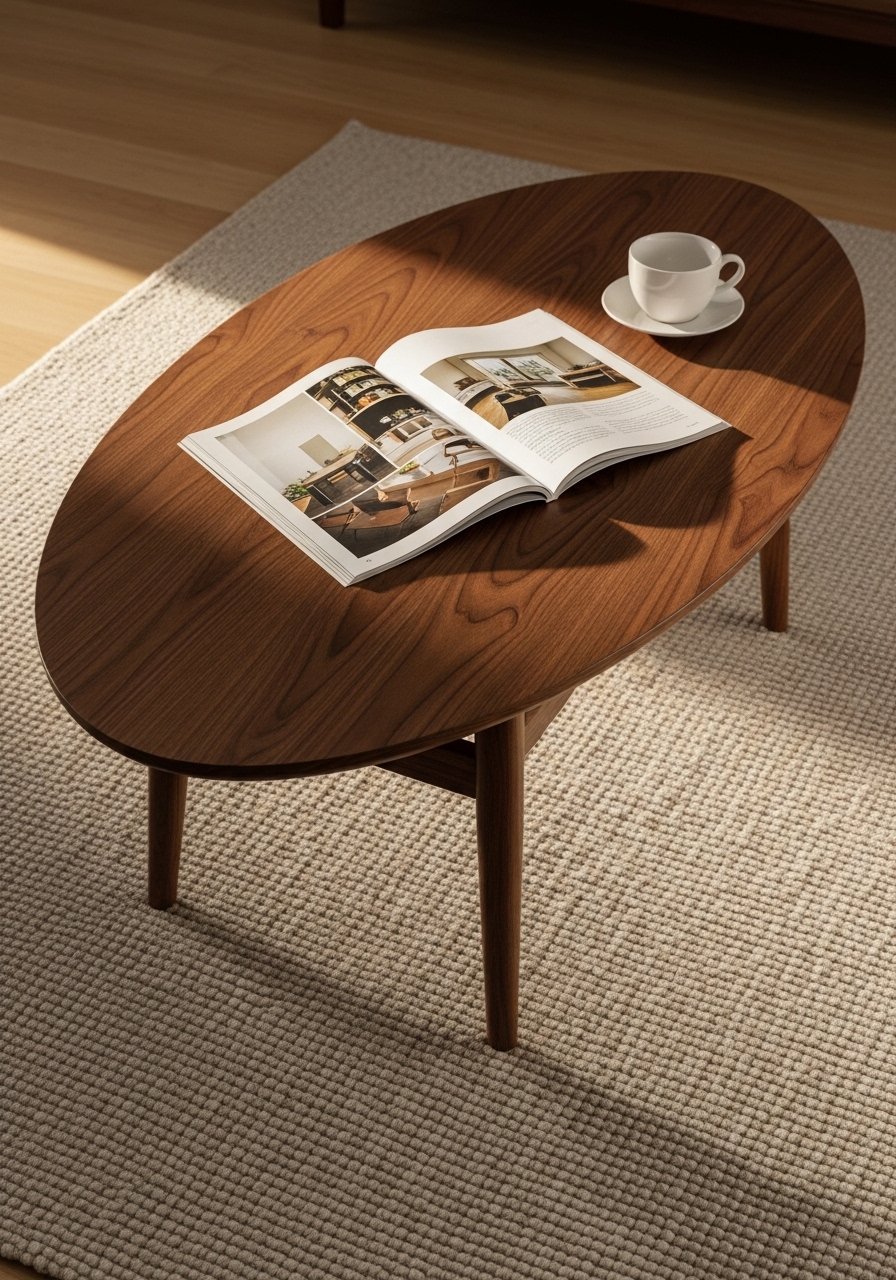
Tapered legs give a refined midcentury feel. You can buy pre-tapered legs or cut them from 2x2s with a taper jig. An electric miter saw helps make clean cuts.
Materials
- Plywood oval top, 3/4" x 36" x 24" (or solid wood)
- 4 tapered legs, 15" height (pre-made or cut)
- Leg brackets and screws, 4 sets
- Walnut stain, 4 oz
- Polyurethane satin, 1 pint
- Sandpaper: 120, 220 grit
Instructions
- Sand top and stain with walnut; wipe excess and let dry 6–8 hours.
- Apply two coats of satin polyurethane, 4–6 hours drying between coats.
- Attach leg brackets to underside of top using the bracket screws.
- Mount tapered legs to brackets and hand-tighten.
- Check level and tighten after 1 hour as wood settles.
- Let cure 24 hours before heavy use.
How to Display or Gift It
- Pair with brass or ceramic tabletop accents.
- Use as a statement piece in a light-filled room.
- Include a small can of finish for future touch-ups when gifting.
- Floating Tray Coffee Table (Minimalist)
This tray-style table looks light and modern. The recessed leg creates a floating effect and hides the supports. Use a jigsaw to cut the recess and a staple gun or wood glue for the lip.
Materials
- Plywood top, 3/4" x 36" x 18"
- Edge boards (1/2" x 1") cut to form raised lip, 2 long + 2 short
- 4 recessed block supports, 2" x 3" x 2" (attach underside)
- Wood glue, wood screws 8 #8 x 1"
- Paint or stain, 8 oz
- Foam brush
Instructions
- Cut plywood to 36" x 18" and sand edges.
- Glue and nail edge boards to create a raised lip of 1/2" height.
- Paint or stain finish; allow 1–2 hours dry between coats.
- Attach 4 recessed blocks 2" inset from corners under the top so table appears to float. Pre-drill and screw through top into blocks.
- Sand and touch up paint or stain as needed.
- Let cure 12–24 hours before styling.
How to Display or Gift It
- Use as a low coffee table or tray for serving.
- Add a ribbon and attach a small recipe card if gifting for a housewarming.
- Store paint leftover in a small resealable jar for touch-ups.
- Retro Vinyl Record Coffee Table (Upcycled)
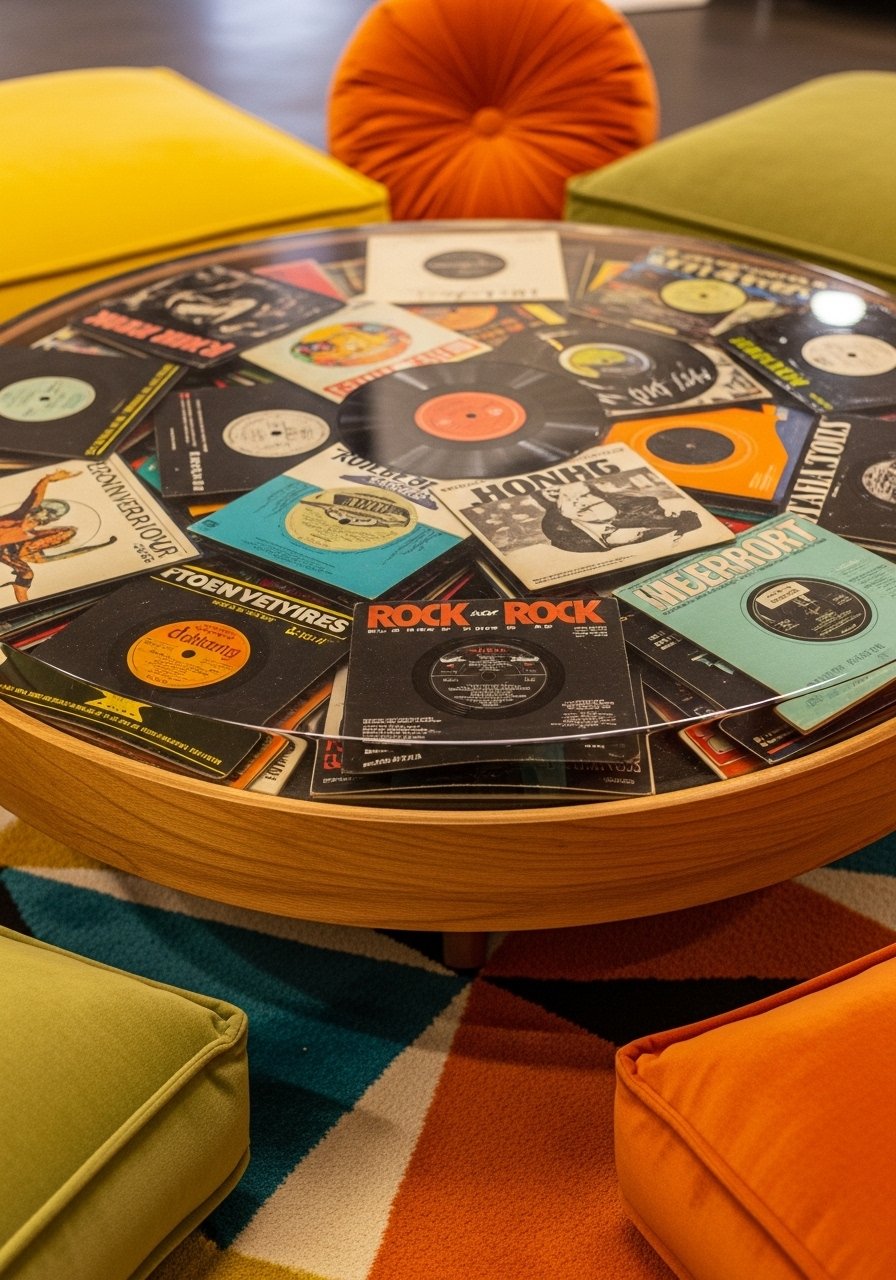
This upcycle gives music-lovers a nostalgic piece. Records are sealed under epoxy resin over a round wood base. A resin kit with slow cure works best to avoid bubbles—use an epoxy resin kit designed for tabletops.
Materials
- Plywood round base, 3/4" x 30" diameter
- 10–15 used vinyl records (flat, not warped)
- Epoxy resin kit, 16 oz (low-bubble, tabletop grade)
- Foam brush and mixing cups, wooden stir sticks
- Wood rim strip 1" x 2" for edge, cut to circumference
- Hairpin legs or metal base
Instructions
- Arrange vinyl records on the plywood, making a pleasing pattern. Attach with small dots of hot glue to keep them flat.
- Install wooden rim around the circumference and caulk any gaps to form resin dam. Let caulk cure 1–2 hours.
- Mix epoxy per kit instructions. Pour slowly from the center, letting resin self-level. Use a heat gun quickly and briefly to remove bubbles.
- Let resin cure 24–48 hours depending on kit; check tackiness—fully cured may take 72 hours.
- Sand any rough rim edges and attach legs.
- Allow final cure time before placing heavy objects.
How to Display or Gift It
- Use as a conversation piece in a music-themed room.
- Wrap in bubble and corrugated boxes for shipping.
- Include care notes—avoid placing hot items directly on the surface.
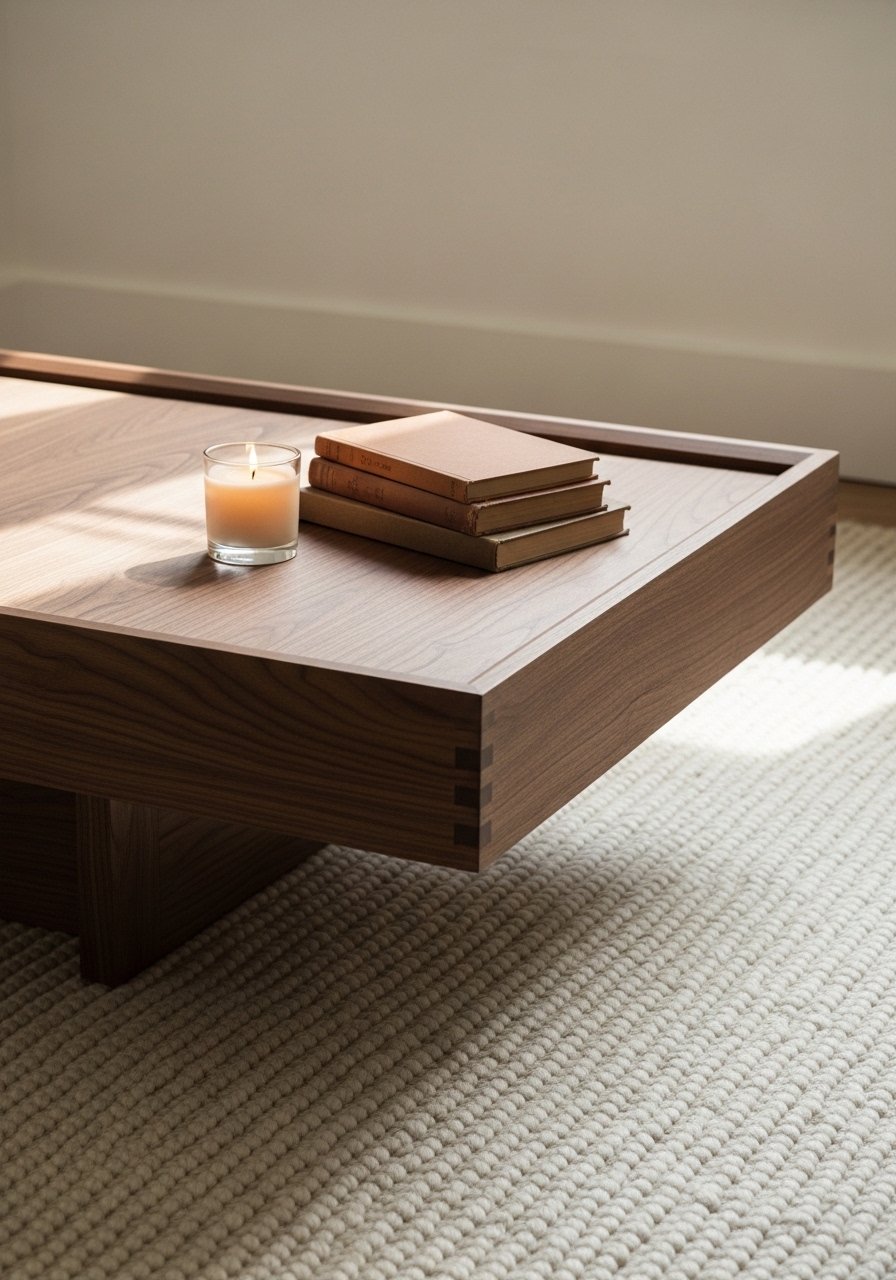
- Reclaimed Beam Coffee Table (Chunky & Honest)
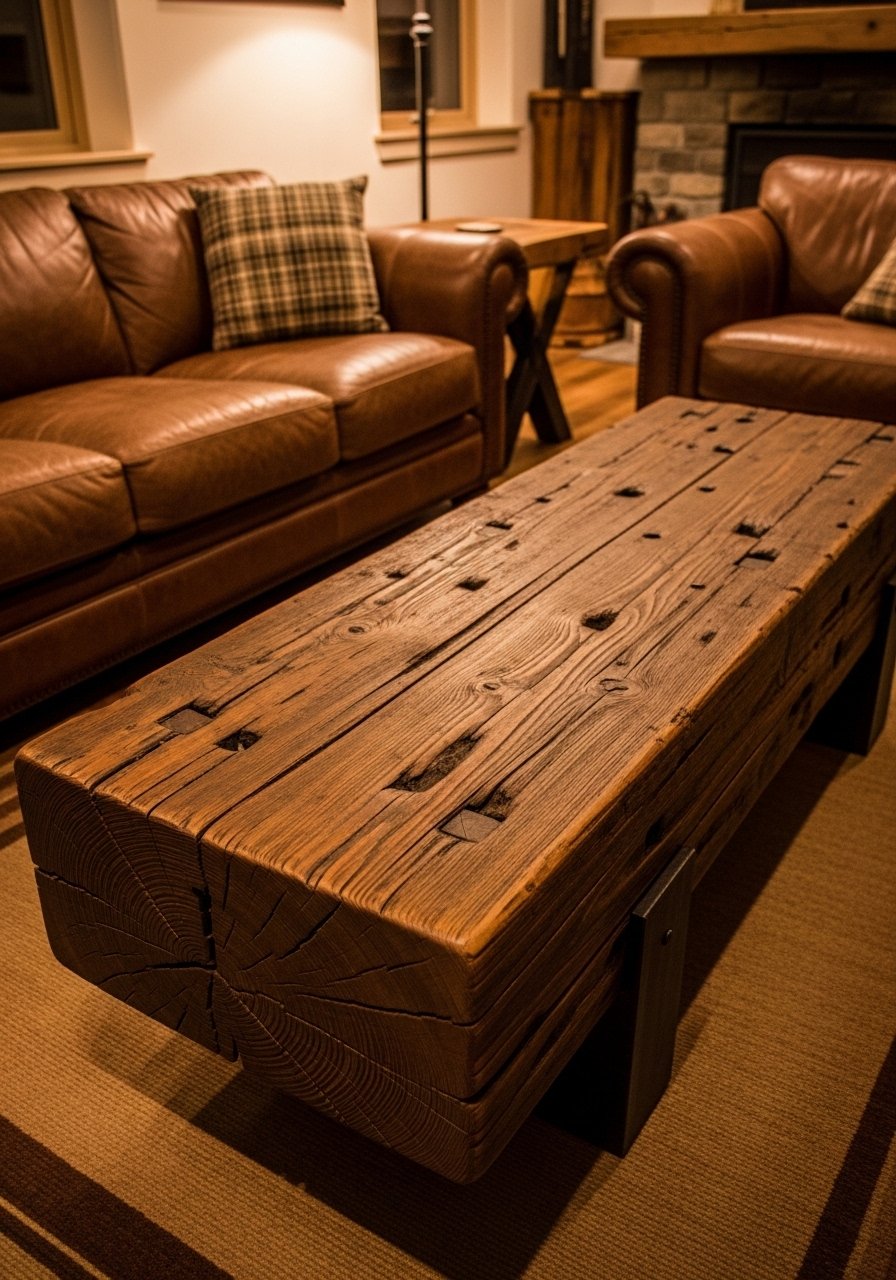
A reclaimed beam is dramatic and simple—finish with oil and attach low-profile legs. Make sure the beam is dry and flattened before finishing.
Materials
- Reclaimed beam, 48" long, 10" wide, 2–3" thick (approx)
- Tung oil or Danish oil, 8 oz
- Sandpaper: 80, 120, 220 grit
- 4 short steel legs, 4–6" height or celebration blocks
- Wood filler for large checks, 4 oz
Instructions
- Flatten one face of the beam if needed with a planer or sander. Start 80 grit, move to 220.
- Fill large checks with suitable wood filler and sand after curing 30–60 minutes.
- Apply two coats of tung or Danish oil, wiping on and off per directions; allow 8 hours between coats.
- Attach short steel legs or blocks with bolted plates.
- Let oil cure 48 hours before use.
How to Display or Gift It
- Style with raw linen coasters and ceramics.
- The piece makes a meaningful gift if you include provenance or a short story about the wood.
- Store oiled rags flat in a sealed container until safe disposal.
- Folding Tray Coffee Table (Compact & Portable)
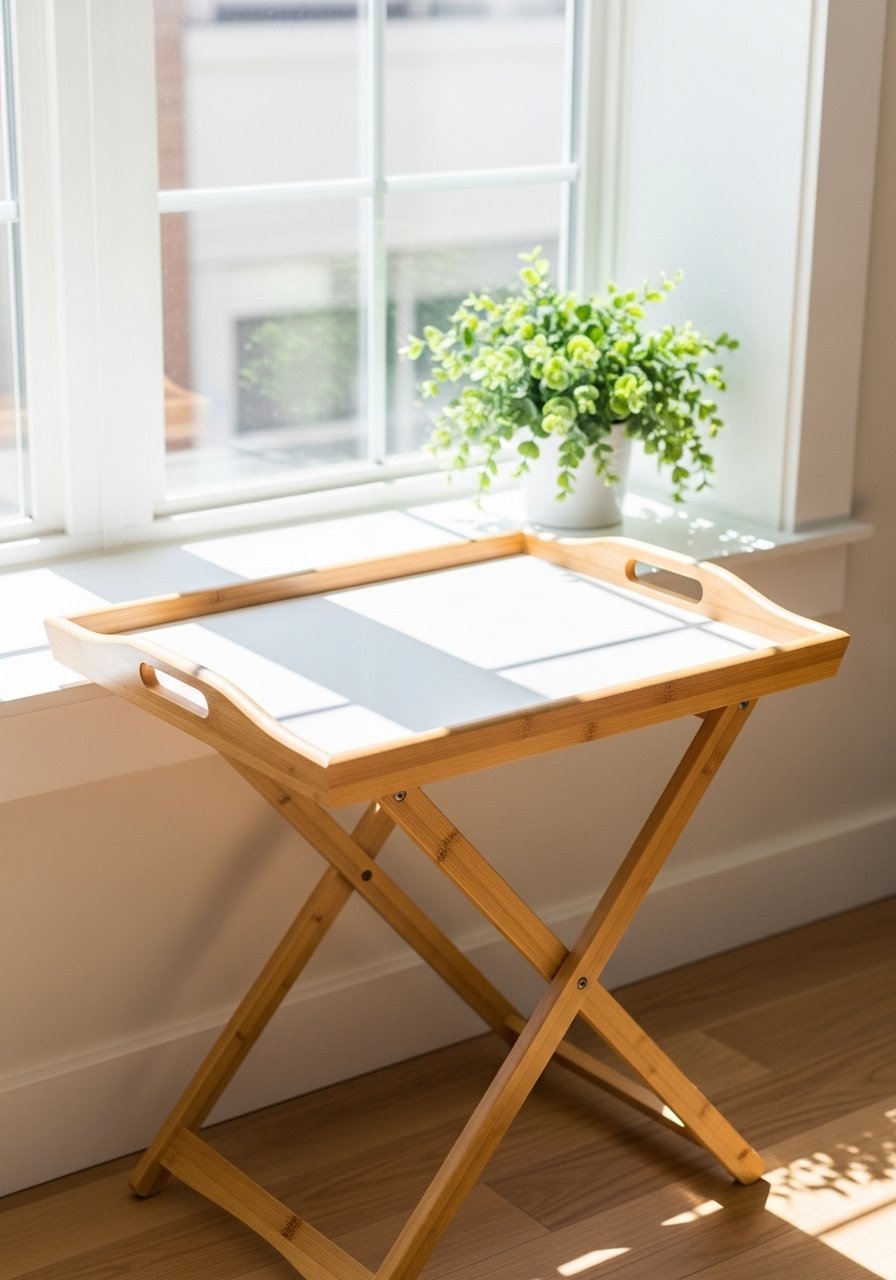
Great for small spaces, this tray table folds down and stores easily. Use brass hinges and folding legs for neat operation.
Materials
- Plywood tray top, 3/4" x 22" x 16"
- Rounded wooden rim strips to match tray perimeter
- 4 folding table legs (hinged), 14" height when extended
- Brass hinges and screws, small pack
- Paint or finish, 8 oz
Instructions
- Glue and staple rim strips to plywood perimeter to form a lip. Sand smooth.
- Paint or finish and let dry 2–4 hours between coats.
- Attach folding legs with hinges so they fold under the tray. Use spacer blocks to ensure legs sit flush.
- Test fold and deploy several times to confirm alignment. Tighten screws as needed.
- Store folded in a closet or under a bed.
How to Display or Gift It
- Perfect as a morning coffee tray or TV snack surface.
- Tie with a ribbon and include a pair of cloth napkins for gifting.
- Store packaged flat in a craft storage crate.
- Geometric Inlay Coffee Table (Painter’s Tape Stencil)
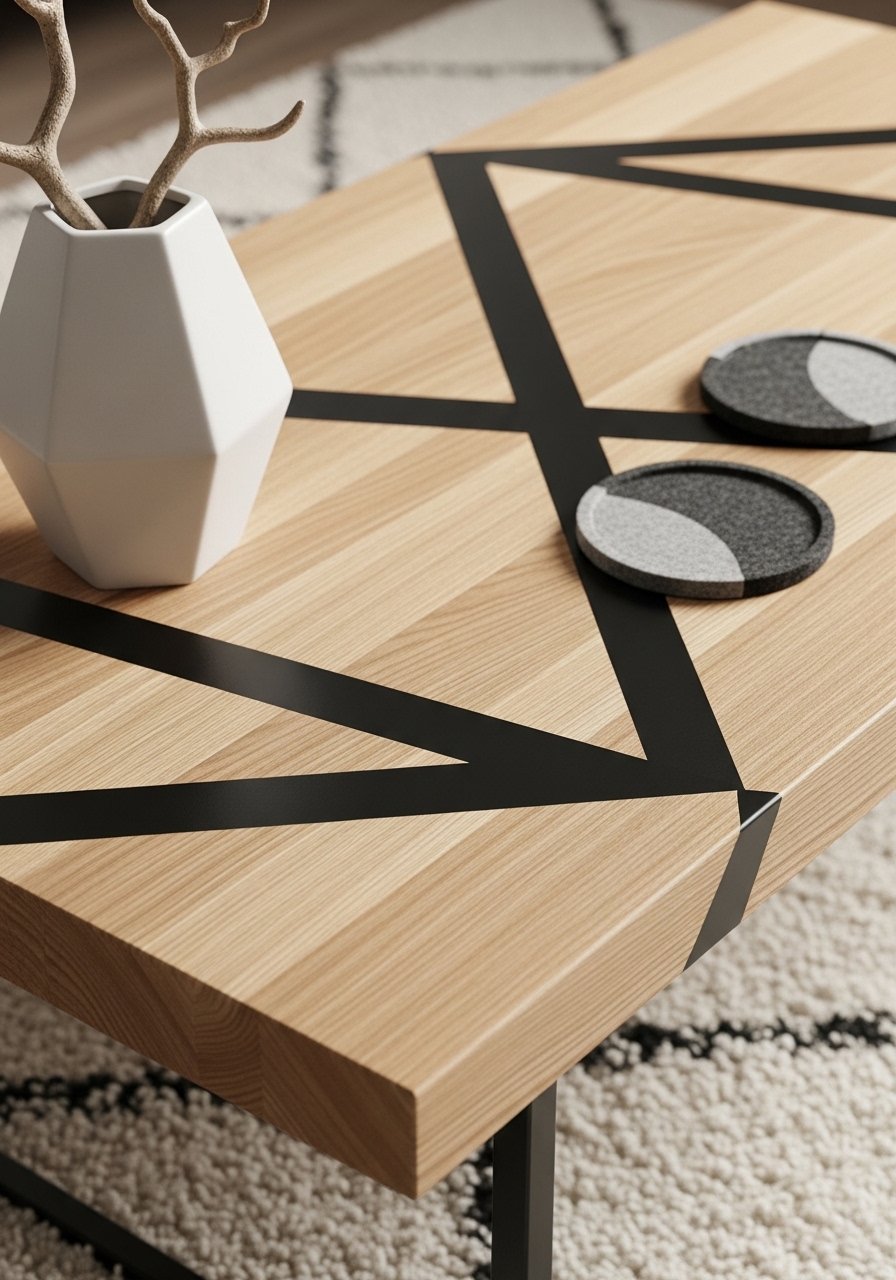
You can achieve a designer look using painter’s tape and acrylic paint to create crisp geometric inlays. A brayer roller helps press tape for sharp lines.
Materials
- Plywood top, 3/4" x 36" x 18"
- Painter’s tape (1/4" and 1" widths)
- Acrylic craft paint (black and white), 2 oz each
- Foam roller/brayer and foam brush
- Polyurethane satin, 1 pint
Instructions
- Sand the top smooth; apply a clear sealer and let dry 2 hours.
- Use painter’s tape to map out geometric shapes precisely. Press tape firmly using a brayer.
- Paint with acrylic paint using a foam roller in thin coats. Dry 30–45 minutes between coats; apply 2 coats for opacity.
- Remove tape carefully after the final coat is dry to the touch (not fully cured) to avoid peeling paint.
- Seal with two coats of satin polyurethane; dry 4–6 hours between coats, cure 48 hours.
How to Display or Gift It
- This table works great in modern or minimalist rooms.
- Include a small packet of extra painter’s tape and a note on care if gifting.
- Keep leftover paint stored in airtight jars for touch-ups.
- Mid-Air Glass Top Coffee Table (Elegant & Easy)
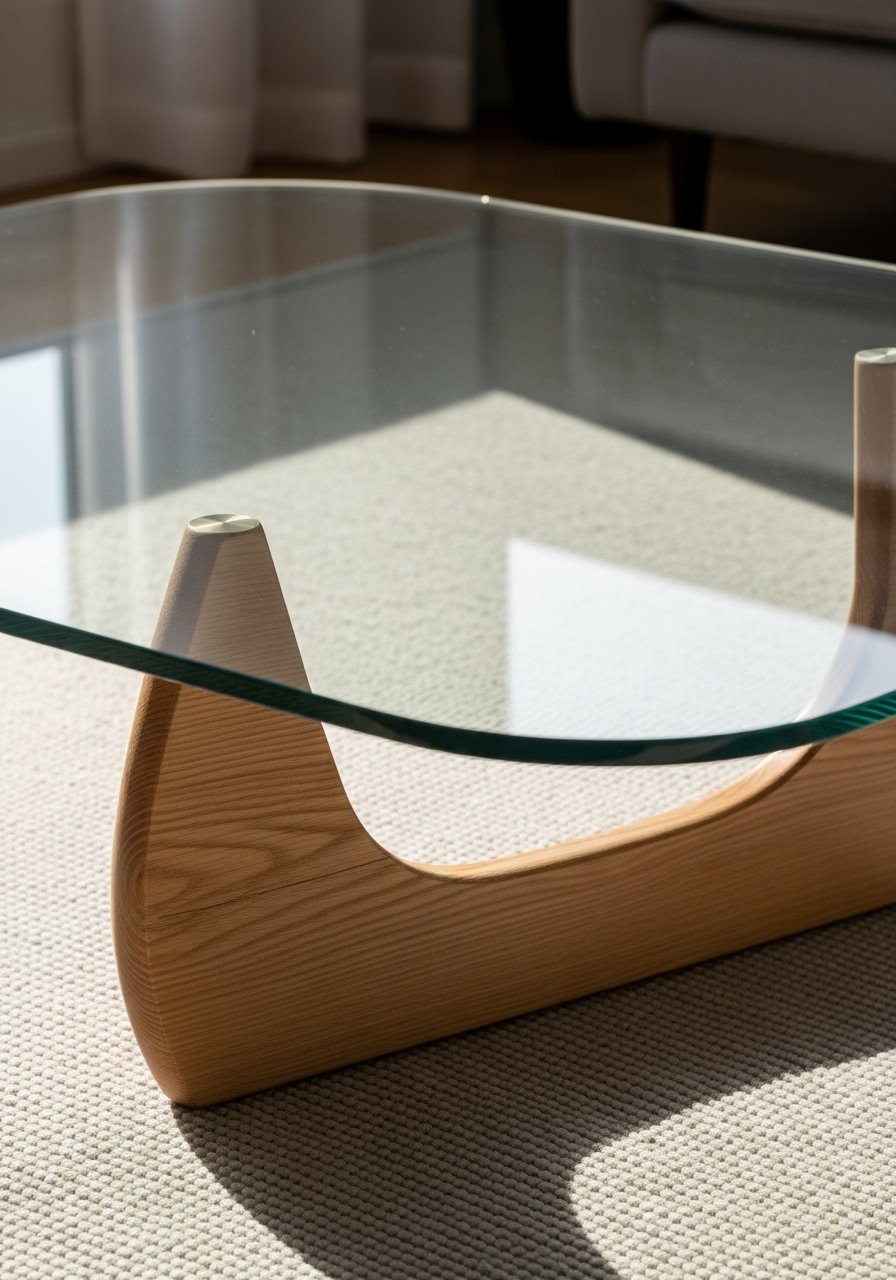
A glass top gives a light and airy feel while showcasing a sculptural base. Use tempered glass cut to size and rubber suction pads to protect wood and hold glass.
Materials
- Tempered glass top, 40" x 22" x 1/4" rounded edges (order cut-to-size)
- Wooden sculptural base (pre-made or DIY), 36" x 18" footprint
- Silicone rubber glass pads, pack of 8
- Wood finish or stain, 8 oz
Instructions
- Build or prepare the base and finish with stain or paint; dry 6–8 hours.
- Place silicone rubber pads on the base where the glass will sit—four near corners, four mid-edges.
- Carefully lift glass onto pads with two people. Check for evenness.
- Avoid heavy concentrated loads; tempered glass typically supports typical tabletop use but avoid standing on it.
How to Display or Gift It
- Style with transparent or reflective objects to play off the glass.
- For gifting, include care instructions—don’t use abrasive cleaners on tempered glass.
- Store glass upright and wrapped in moving blankets if transporting.
- Ottoman Coffee Table (Padded Top)
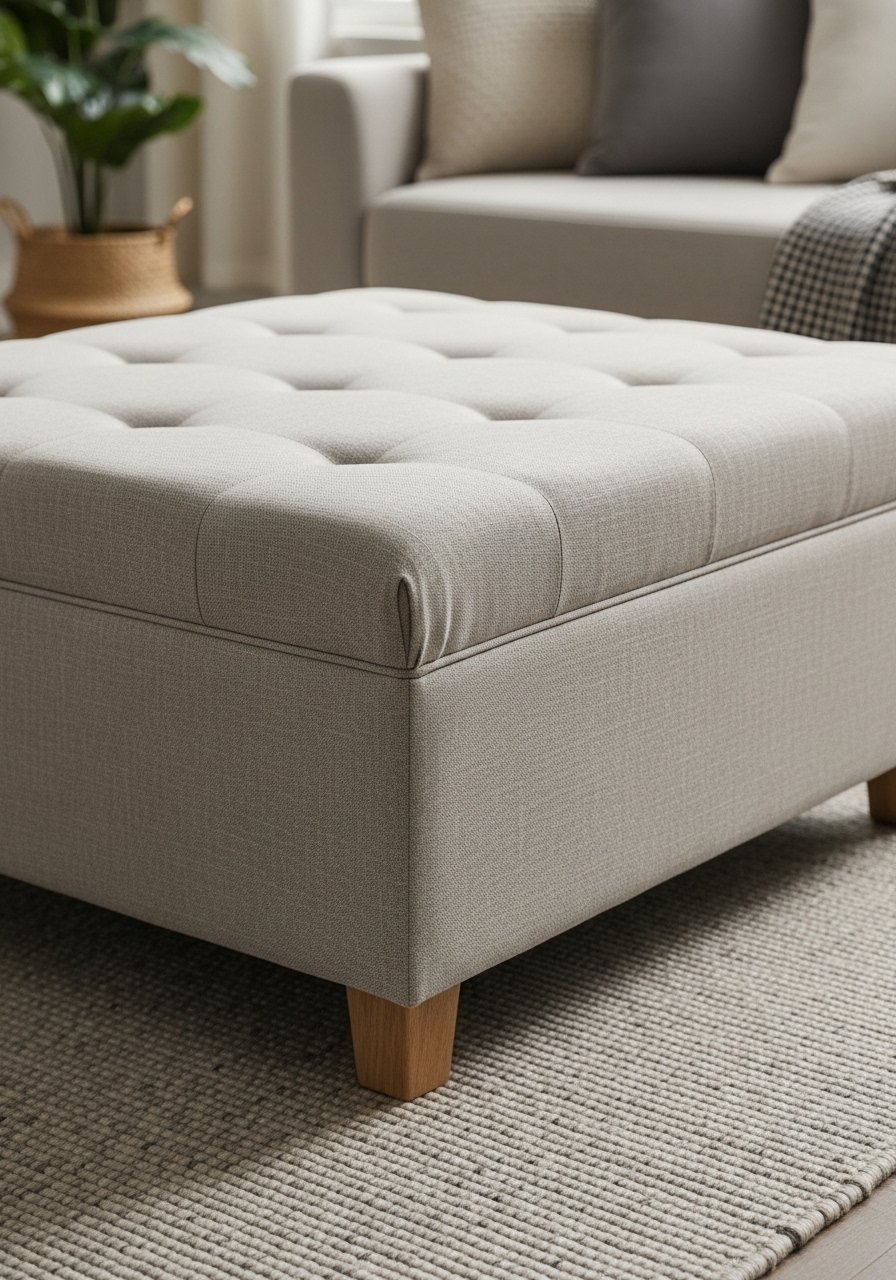
A padded top doubles as a footrest and coffee surface with a tray. Upholstery foam and fabric make it soft but stable. A staple gun makes attaching fabric easy.
Materials
- Plywood base, 3/4" x 36" x 36"
- High-density foam pad, 2" thickness, 36" x 36"
- Upholstery fabric, 1.5 yards heavy-duty linen or cotton
- Batting, 1 yard
- Staple gun and staples, upholstery needle (optional)
- 4 wooden legs, 4" height
Instructions
- Cut plywood to 36" square, sand edges.
- Glue foam to plywood and cover with batting. Smooth fabric over batting and staple to underside of plywood, keeping fabric taut.
- Attach legs via corner plates screwed into plywood.
- Trim excess fabric and tuck neatly.
- Let fabric settle 24 hours before heavy use.
How to Display or Gift It
- Top with a removable tray for drinks.
- Use for extra seating when guests arrive.
- For gifting, add a matching throw pillow wrapped in ribbon.
- Round Stenciled Coffee Table (Beginner-Friendly Patterning)
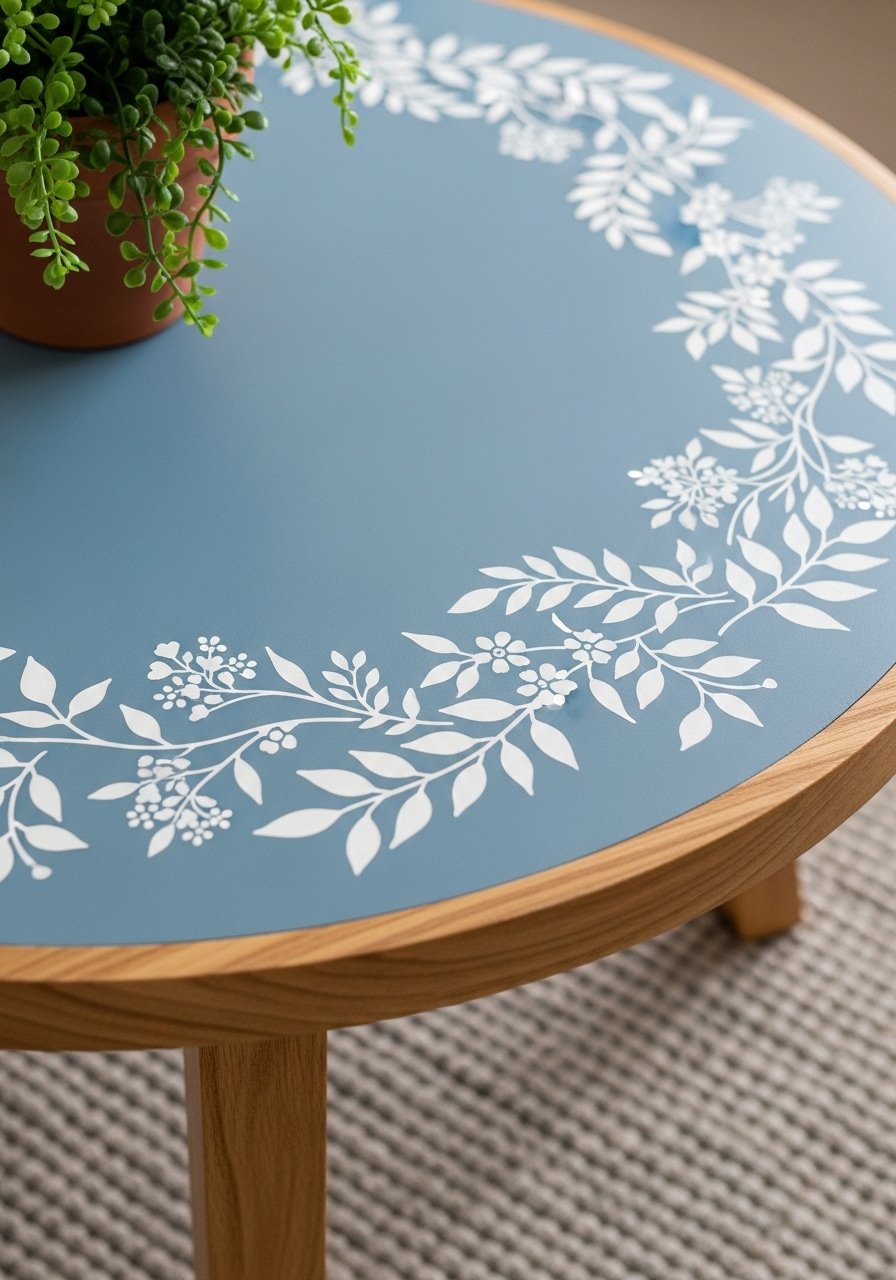
Stenciling is a forgiving way to add pattern. Use a stencil and stencil brush or sponge for crisp edges. A low-tack stencil adhesive helps prevent bleed.
Materials
- Plywood round top, 3/4" x 30" diameter
- Chalk paint, 8 oz (base color)
- Tabletop stencil (botanical motif)
- Stencil brush or small foam pouncer set
- Stencil adhesive spray (low-tack)
- Polyurethane satin, 1 pint
Instructions
- Paint base color with two thin coats; dry 1–2 hours between coats.
- Position stencil and spray low-tack adhesive to hold.
- Use minimal paint on the brush, dab excess on paper towel, and pounce gently over the stencil. Multiple light passes avoid bleed.
- Remove stencil carefully while paint is still tacky to avoid lifting.
- Seal with two coats of satin polyurethane, dry 4–6 hours between coats.
- Attach legs after final dry time 24 hours.
How to Display or Gift It
- Pair with a potted fern or glass vase to echo stencil motif.
- Include stencil and a small jar of paint if gifting to a crafty friend.
- Store stencil flat in a craft organizer to reuse.
- Hairpin + Marble Tile Accent Table (Budget Luxe)
You can get a luxe marble look for less by using marble-look tiles. Tile sheets are easier to set, and grout adds a polished touch. A small grout float and sponge are all you need.
Materials
- Plywood top, 3/4" x 30" x 20"
- Marble-look tile sheet, 12" x 12" (use two to cover surface)
- Thinset mortar, 1 lb
- Sanded grout, 1 lb
- 4 hairpin legs, 14" height
- Grout float and sponge
Instructions
- Cut plywood to desired size. Sand and prepare edge with thin wooden rim.
- Apply thinset in sections and press tile sheets into place with tile spacers.
- Allow thinset to cure 24 hours.
- Grout with sanded grout and clean excess with a sponge; dry 24 hours.
- Attach hairpin legs and add felt pads.
- Allow grout to fully cure 48 hours before heavy use.
How to Display or Gift It
- Use as an occasional coffee table or accent piece.
- Pair with brass coasters for a luxe touch.
- Include grout sealant in a small container if gifting.
- Folded Metal Base with Wooden Top (Contemporary)
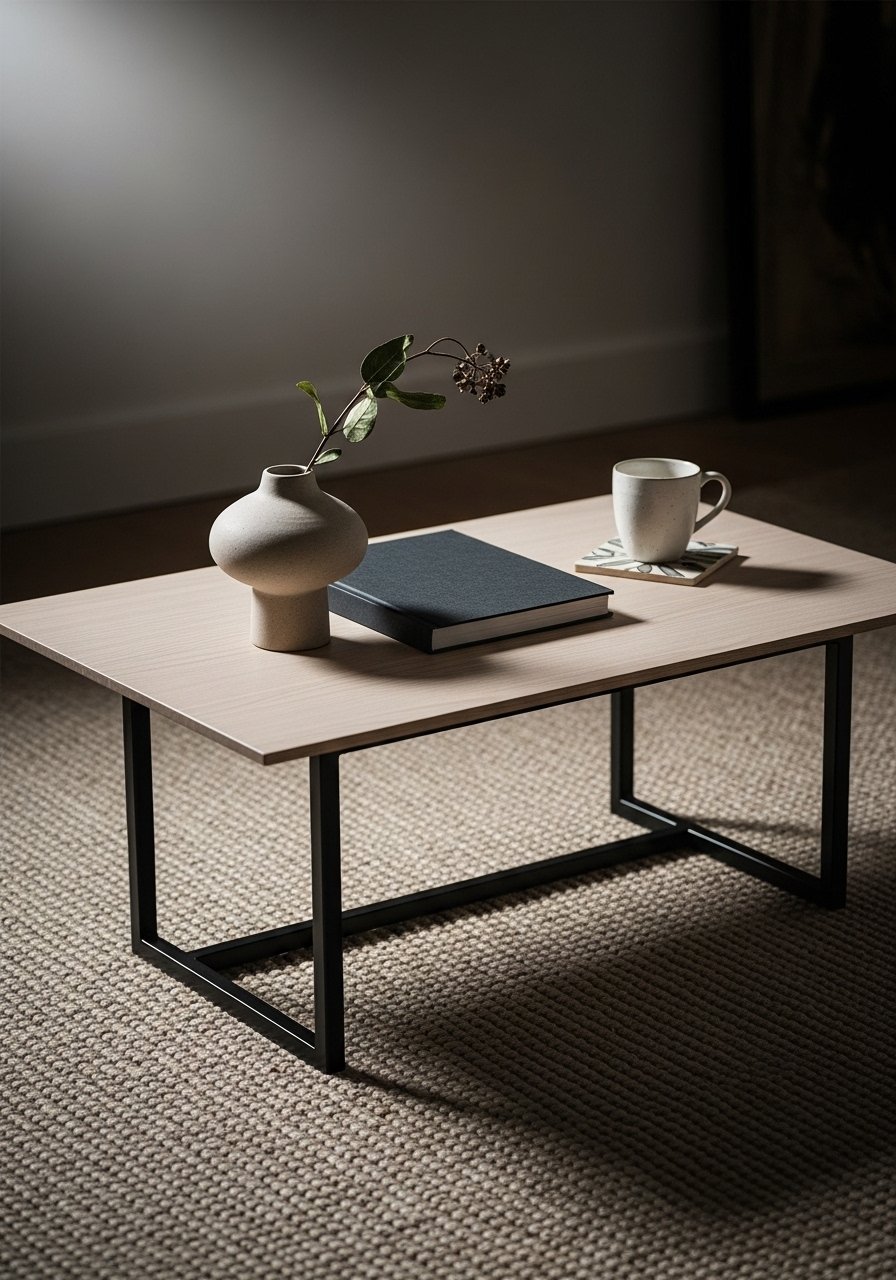
Metal bases can be bought pre-made or welded—pair them with a simple wood top for a strong contemporary look. If you don’t weld, a metal base supplier or pre-made bases are handy.
Materials
- Plywood top, 3/4" x 36" x 18"
- Powder-coated steel base (pre-made) 36" width
- Wood stain or paint, 8 oz
- Polyurethane, 1 pint
- Rubber bumpers to protect base
Instructions
- Prepare and finish the top with stain and two coats of poly; dry 4–6 hours between coats.
- Place base centered under top and mark attachment points.
- Pre-drill and use appropriate fasteners to attach top to the base following base manufacturer recommendations.
- Add rubber bumpers to bar corners to protect surfaces.
- Allow 24 hours before heavy use.
How to Display or Gift It
- Pair with minimalist ceramics and a small stack of design books.
- For gifting, include a small maintenance kit with microfibre cloth and finish wipes.
- Rope-Wrapped Coffee Table (Coastal Boho)
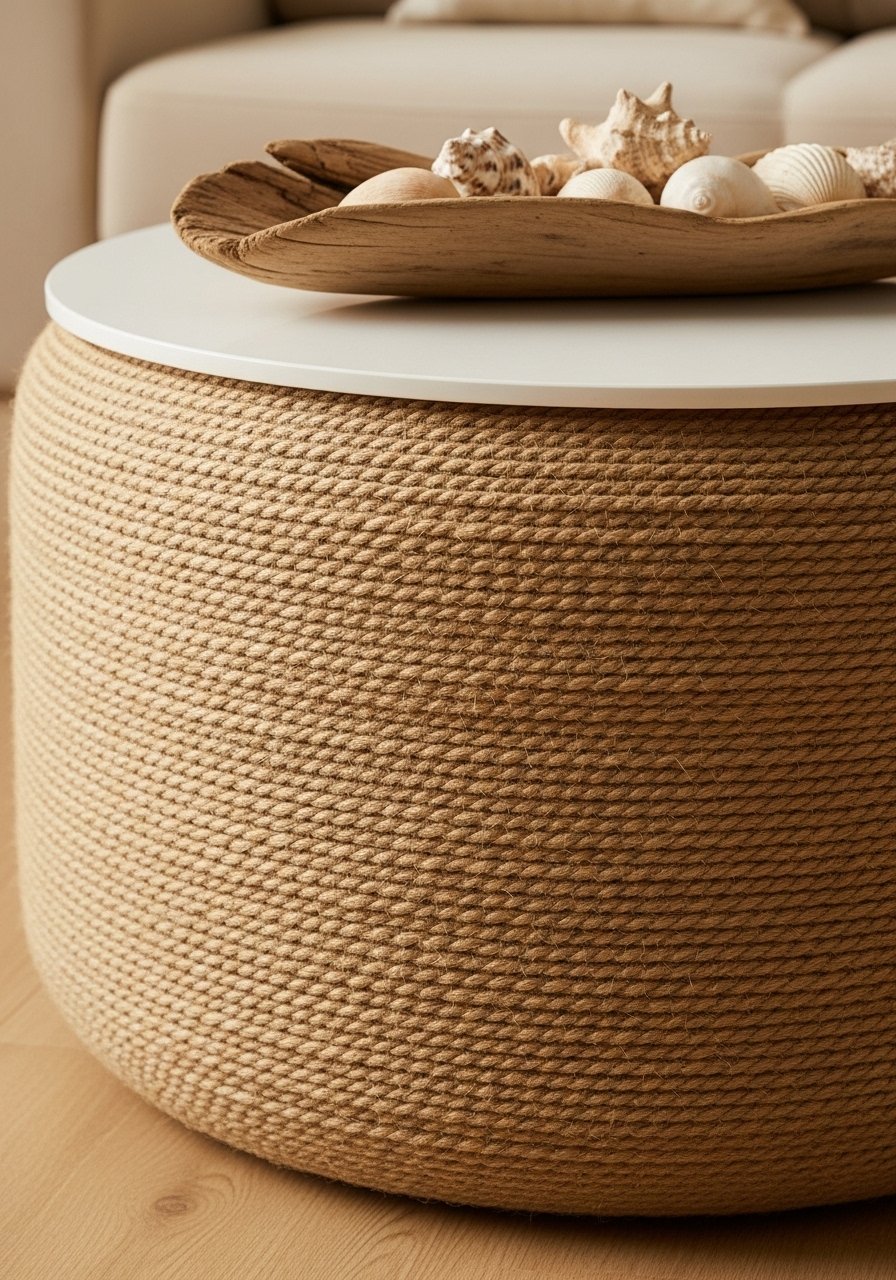
Wrapping a base with jute rope gives a coastal feel. Use hot glue to secure rope; a low-temperature glue gun reduces stringy bits.
Materials
- Plywood round top, 3/4" x 30" diameter
- Jute rope, 50 ft (3/8" thick)
- Hot glue sticks, pack of 50
- Hairpin legs or low wooden base, 12–14" height
- Foam brush and stain (optional)
Instructions
- Prepare and finish top as desired.
- Attach rope to underside or base with dots of hot glue, wrapping tightly and keeping rows snug.
- Continue wrapping until the base is covered. Trim and glue the end securely.
- Reattach top to base and check for stability.
- Let glue cool and set 30 minutes before moving.
How to Display or Gift It
- Style with coastal accents—coral, shells, blue ceramics.
- Include a small bundle of extra rope and glue sticks if gifting.
- Store wrapped in a cool dry place if transporting.
- Crate and Glass Top Coffee Table (Layered Look)
Combine storage crates with a tempered glass top for an airy layered look. Rubber bumpers protect the wood and hold the glass in place.
Materials
- Two wooden crates, each 24" x 16" x 12"
- Tempered glass top, cut to 30" x 20"
- Rubber glass bumpers, pack of 8
- Sandpaper and finish
Instructions
- Sand and finish crates; let dry 2–4 hours.
- Stack crates securely and place glass top using rubber bumpers to prevent slipping.
- Add felt pads at crate feet to protect flooring.
- Let finish cure 24 hours before heavy styling.
How to Display or Gift It
- Store throws or magazines in the crates for easy access.
- Include a small set of coasters when gifting.
- Wrap glass carefully in moving blankets if transporting.
- Folding X-Leg Coffee Table (Outdoor-Friendly)
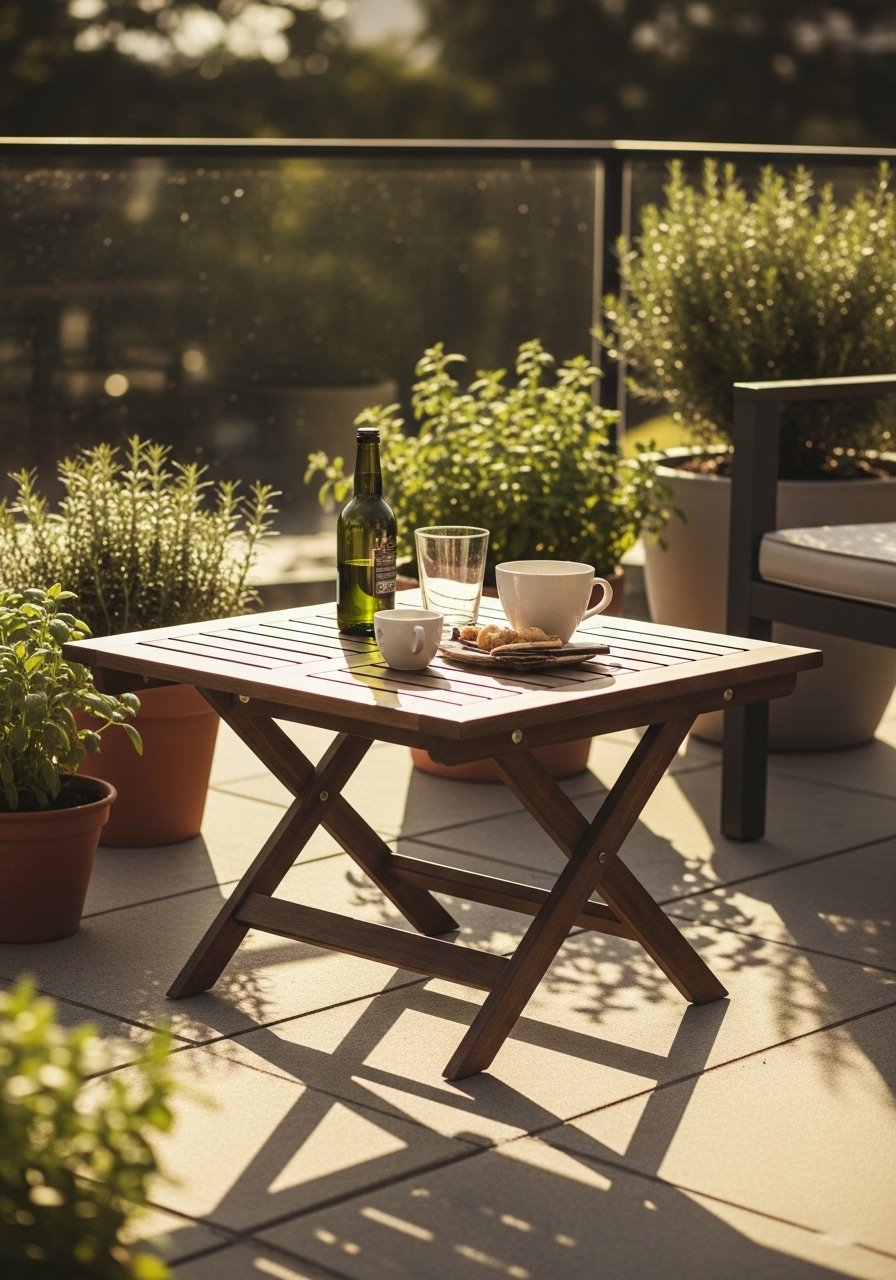
A folding X-leg table works great outdoors when made from treated wood or cedar and sealed with outdoor-grade finish. Hinges and carriage bolts let it fold flat.
Materials
- Slatted top boards, 1" x 3" x 36" (5 pieces)
- Two X-leg assemblies made from 1x3s with pivot bolt 1/4"
- Outdoor wood stain or sealer, 1 pint
- Stainless steel carriage bolts and washers, 4 sets
Instructions
- Assemble slatted top by screwing boards to two cross supports underneath. Pre-drill holes.
- Build X-leg assemblies and install pivot bolts so legs fold smoothly.
- Attach legs to underside of top with carriage bolts and washers.
- Seal entire table with outdoor sealer; dry 6–8 hours between coats.
- Test fold and stability before use.
How to Display or Gift It
- Great for balcony or patio use—fold away for storage.
- Pair with a small fabric cover for rainy seasons.
- Include a can of outdoor sealer if gifting for durability.
- Rope Shelf Coffee Table (Open Display)
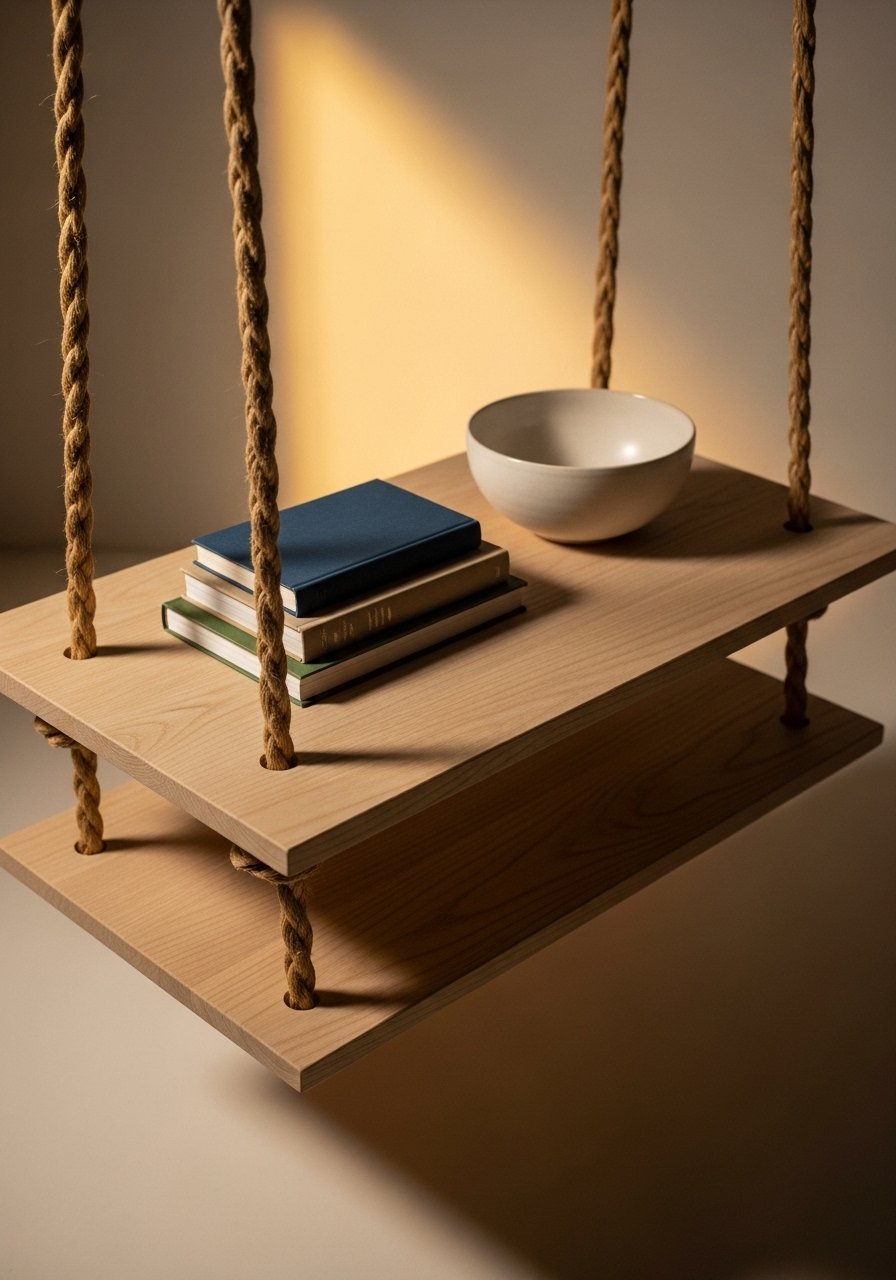
Suspended shelves add visual airiness. Thick cotton rope and secure eye bolts keep the shelf stable.
Materials
- Plywood top, 3/4" x 36" x 16"
- Lower shelf plywood, 3/4" x 30" x 12"
- Cotton rope, 30 ft (1/2" diameter)
- Eye bolts with washers and nuts, 4 sets
- Sandpaper and finish
Instructions
- Drill four evenly spaced holes near top corners and install eye bolts through underside of top. Secure washers and nuts.
- Thread rope through eye bolts and tie secure knots under the top to hold shelf at desired height.
- Slide lower shelf onto rope and tie knots under shelf to support weight. Trim and fuse rope ends or secure with glue.
- Finish wood surfaces and allow 24 hours cure before load testing.
How to Display or Gift It
- Display magazines and small baskets on the lower shelf.
- Include a small packet of spare rope if gifting.
- For transport, remove rope and pack separately.
- Painted Ombre Coffee Table (Simple Gradient)
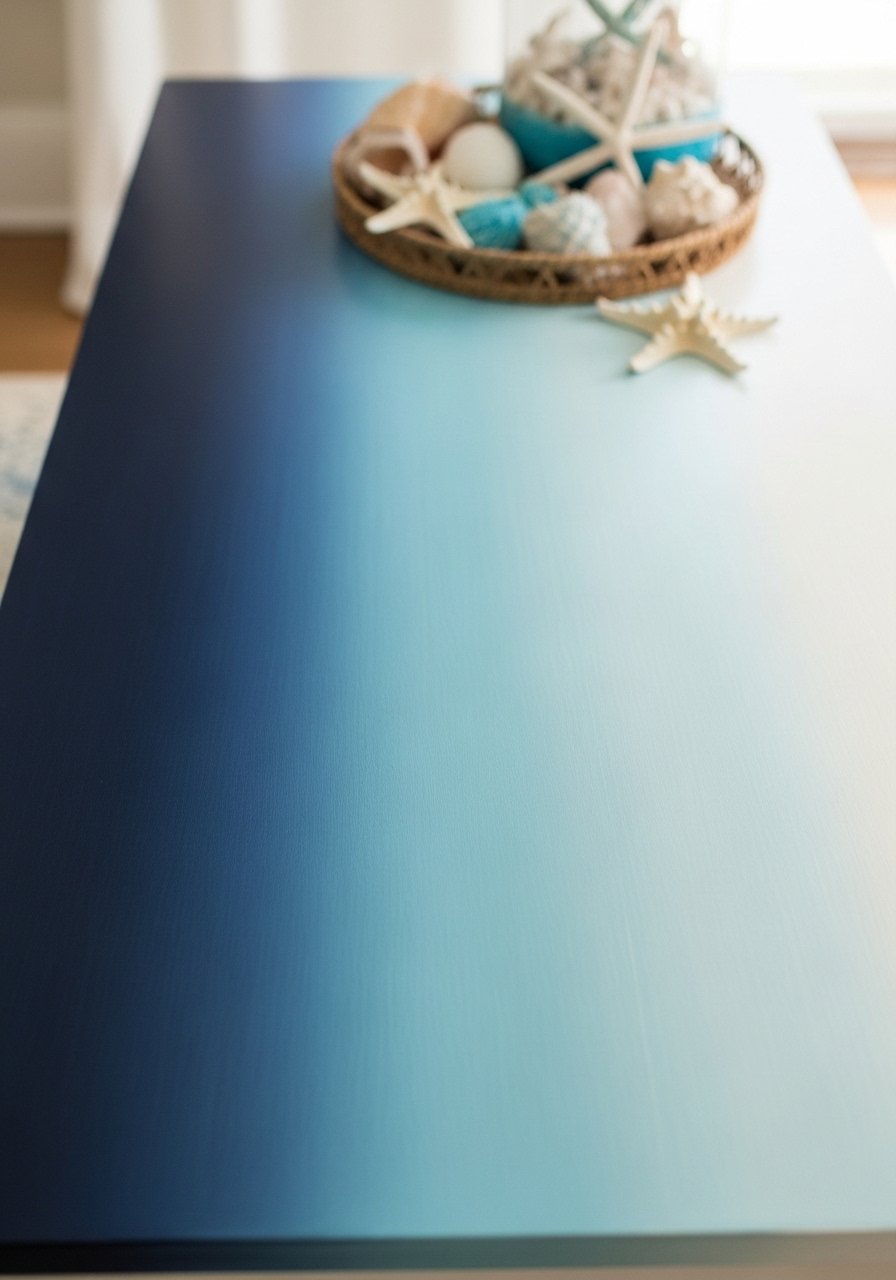
Ombre painting creates a custom gradient with little skill—blend with foam rollers and work wet-to-wet. A brayer roller helps smooth transitions.
Materials
- Plywood top, 3/4" x 36" x 18"
- Chalk paint in three gradient shades (dark, medium, light), 4 oz each
- Foam roller or brayer, small
- Clear wax or matte sealer, 8 oz
Instructions
- Sand and prime if needed. Paint base with the lightest shade and let dry 1 hour.
- Load foam roller with medium shade and roll from center toward darker area, blending slightly into the light stage while still wet.
- Repeat with dark shade, blending edges for a smooth gradient. Work quickly for smooth transitions.
- Let paint dry 2–4 hours and seal with wax or matte sealer. Cure 24 hours before use.
How to Display or Gift It
- Match room accents to the ombre color palette.
- Include a small sample pot of each paint if gifting.
- Store in a flat, dry spot while paint cures fully.
- Pegboard Coffee Table (Modular & Playful)
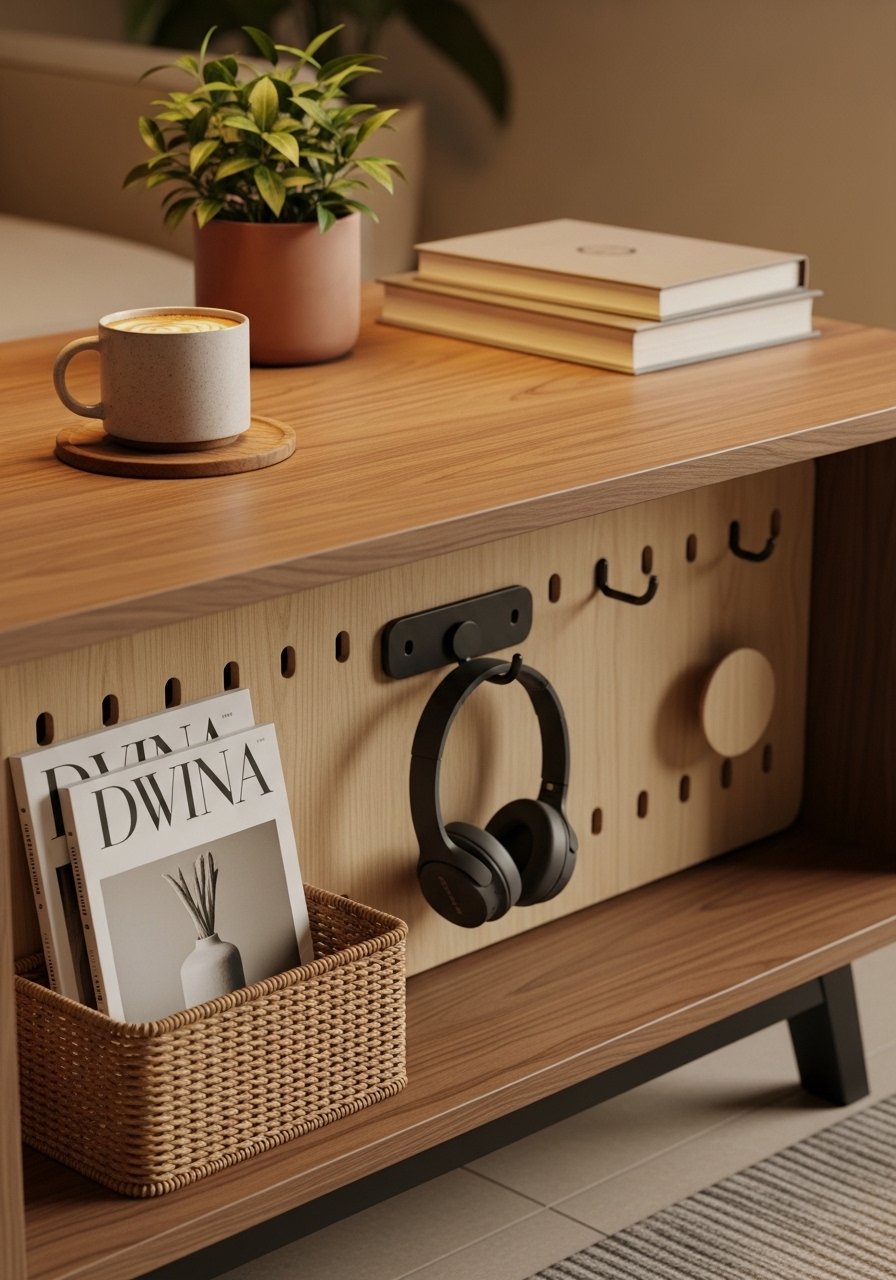
A pegboard shelf adds flexible storage: move baskets and hooks around as needed. Use standard pegboard and accessory kits.
Materials
- Plywood top, 3/4" x 36" x 18"
- Pegboard panel cut to 30" x 12" for lower shelf
- Pegboard hooks and baskets, set of 10
- Wooden supports and screws
- Paint and finish
Instructions
- Build a simple frame to hold the pegboard shelf under the top. Paint and finish.
- Install pegboard and test hooks and baskets.
- Attach top to frame and check alignment.
- Let finishes dry 24 hours before organizing.
How to Display or Gift It
- Use baskets for remotes, chargers, and small toys.
- Include a starter set of pegboard hooks when gifting.
- Store extra hooks and baskets in a craft organizer.
- Mosaic Tile Coffee Table (Colorful Accent)
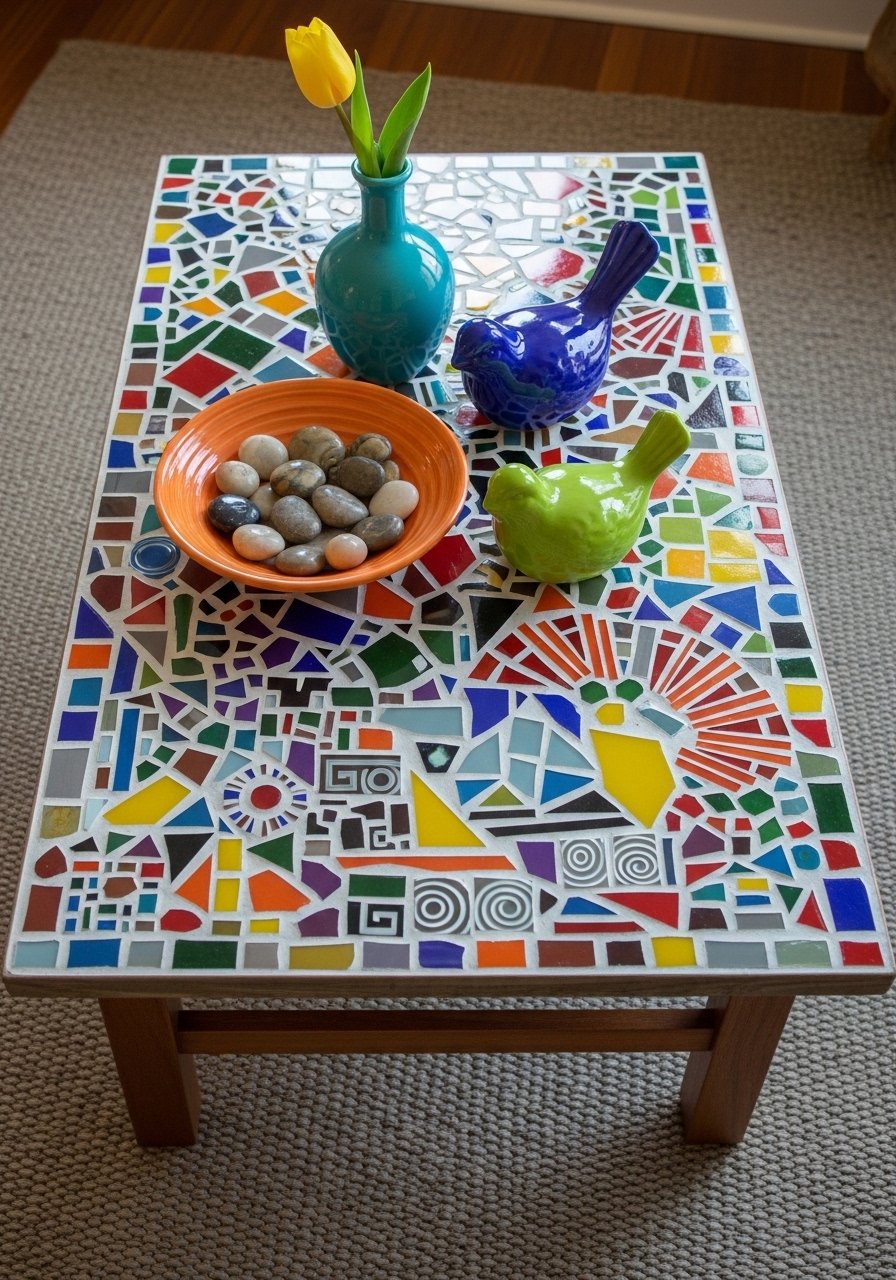
Mosaics let you play with color and texture. Use small tile nippers if cutting pieces. Grout requires 24 hours to fully set.
Materials
- Plywood top, 3/4" x 30" x 20"
- Assorted mosaic glass tiles, 2–3 lbs
- Thinset mortar, 1 lb
- Grout, 1 lb
- Tile nippers, small bag of spacers
- Sealer for grout, 4 oz
Instructions
- Apply thinset to the top in small sections and press mosaic pieces into place. Let thinset cure 24 hours.
- Grout the mosaic with sanded grout; remove excess with a damp sponge. Dry 24 hours.
- Seal grout and allow 2–4 hours dry.
- Attach base or legs and allow the table to set 24 hours before use.
How to Display or Gift It
- Use as a colorful focal point in a neutral room.
- Wrap carefully with bubble for gifting and include care instructions—avoid abrasive cleaners.
- Low Platform Coffee Table with Storage Drawer
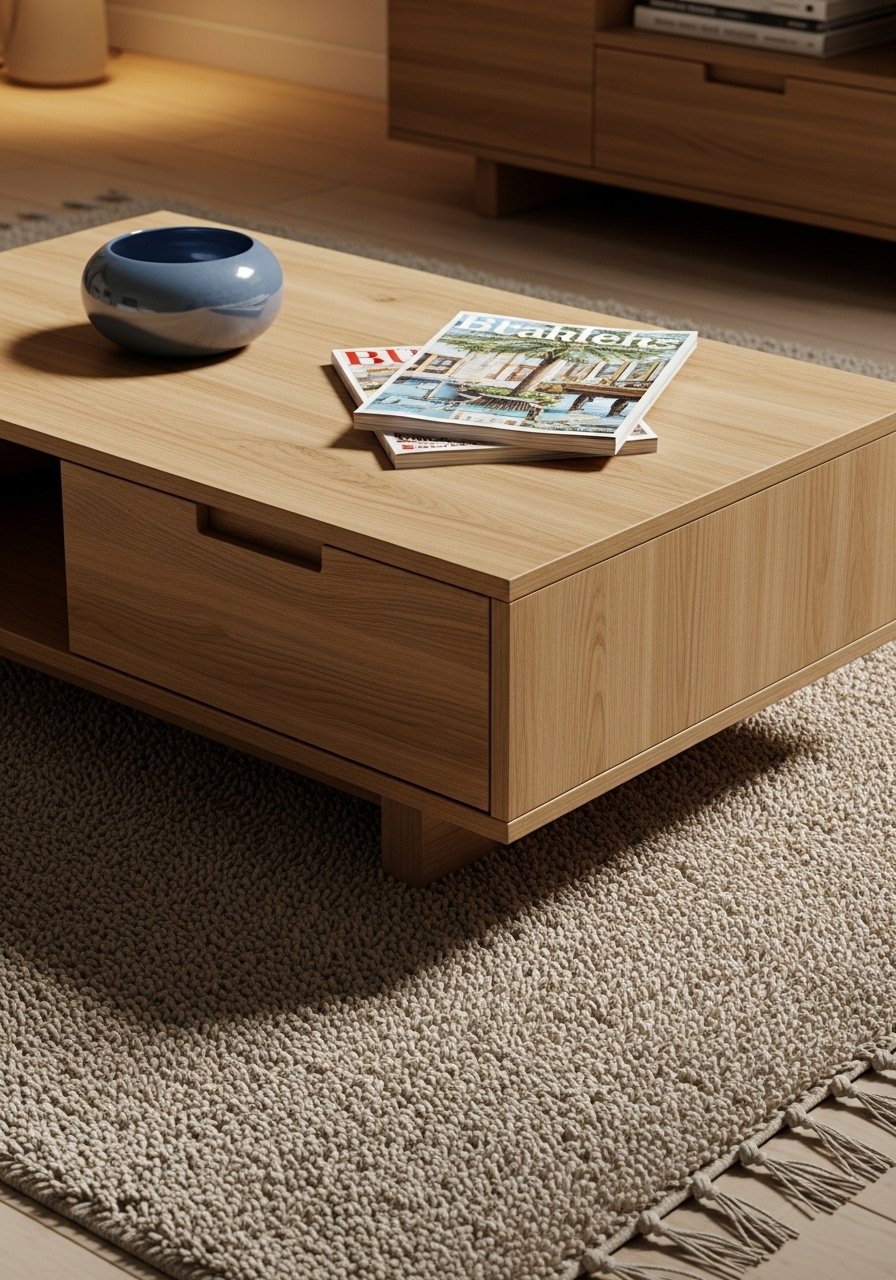
A low platform with a shallow drawer gives hidden storage for remotes and coasters. Drawer slides make smooth operation easy.
Materials
- Plywood top and platform, 3/4" x 40" x 20"
- Drawer box materials: 1/4" plywood for sides and bottom, cut to 18" x 10" x 3" finished drawer
- Drawer slides, 18" soft-close pair
- Wood glue and screws
- Stain or paint, 8 oz
- Sandpaper
Instructions
- Build platform box and finish surfaces. Allow stain to dry 6–8 hours.
- Assemble drawer box and sand smooth. Install drawer slides per manufacturer instructions.
- Fit drawer into the platform and check for smoothness; adjust as needed.
- Seal with polyurethane and allow 24 hours cure before loading the drawer.
How to Display or Gift It
- Great for living rooms needing hidden storage.
- Include a small felt-lined drawer organizer if gifting.
- Keep spare screws and slide parts in a small labeled bag.
You made it to the end—27 simple, approachable projects that let you pick a style, gather a handful of supplies, and build a functional centerpiece with basic tools. From pallet rustic to sleek mid-century and everything in between, these easy DIY coffee table ideas cover material choices, exact measurements, drying times, and finish tips so you won’t get stuck mid-project.
Which design are you trying first? Pin this list for later reference and share it with a friend who’d love a weekend build. Trust me, picking up a quality hot glue gun with temperature control changed how every single one of these projects turned out — no more stringy mess, no more burns.


