Keeping a small pantry tidy shouldn't feel like a weekend of chaos. If you’ve got narrow shelves, weird heights, or a jumble of loose bags, these DIY small pantry ideas will help you reclaim space without costly builds. You'll find 25 practical projects here — all weekend-friendly, budget-conscious, and designed for real-life pantry problems like wobbly jars and wasted vertical space.
Start with a cutting tool or a hot glue gun and you’ll breeze through many of these. I often use my Cricut Joy cutting machine for precise labels, but a craft knife works just as well. For quick assembly, grab a temperature-controlled hot glue gun — it keeps glue neat and strong.
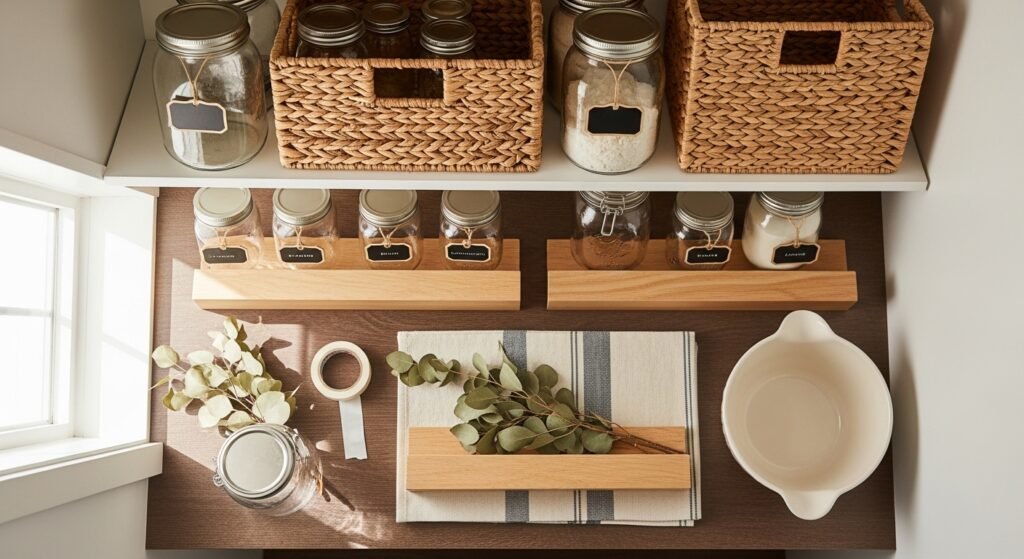
Each project includes a photo prompt, a short intro, a materials list with exact quantities, step-by-step instructions with drying times, and styling or gifting notes. Use them alone or combine a few for a full pantry makeover. Pin the ideas you love and prep a shopping list — let’s make that small pantry sing.
- Magnetic Spice Tin Strip for Door Storage
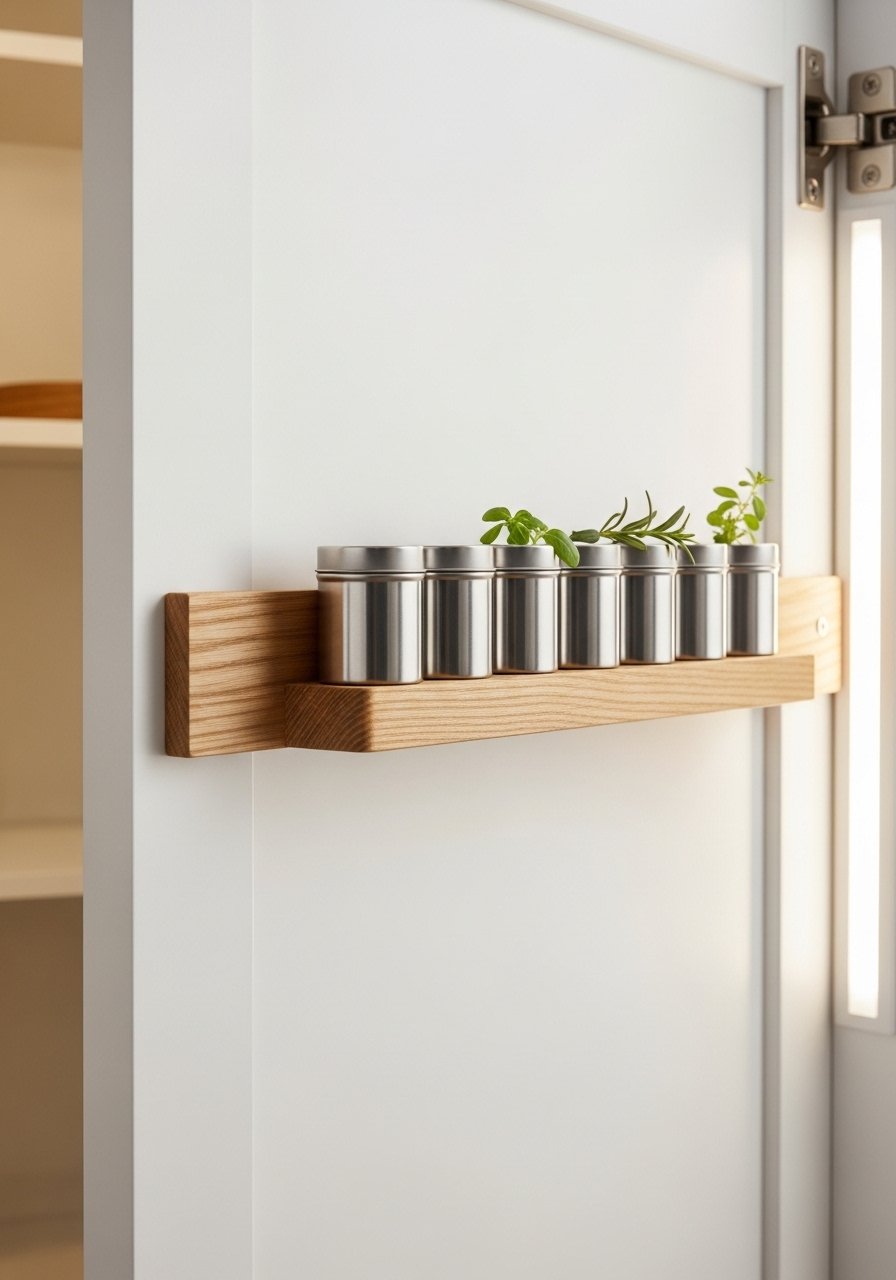
A narrow magnetic spice tin strip turns wasted door space into an organized spice wall. Finished look is sleek and modern with tins lined up like tiny moons. This project is excellent for renters, beginners, and anyone who wants spices within arm’s reach. The tins feel cool and metallic against the strip and add a clean, uniform pattern to your pantry door. I use a magnetic strip and small neodymium magnets for a secure hold.
Materials
- 1 pine board 24" x 2.5" x 3/4", sanded
- 12 stainless steel magnetic spice tins (1.5" diameter)
- 12 neodymium disc magnets (6mm x 1.5mm)
- 1 tube wood glue (3 oz)
- 1 small can of matte white spray paint (8 oz)
- 2 flat-head screws + wall anchors for mounting
- Painter’s tape (1" width)
- Sandpaper 120 & 220 grit
Instructions
- Sand the pine board with 120 grit then finish with 220 until smooth.
- Tape off the back edge, then spray with one thin coat of matte spray paint. Let dry 30 minutes, then a second light coat. Dry 1 hour.
- Mark tins spacing: every 1.75" center-to-center across the board.
- Glue a magnet to the center back of each tin with a small dab of glue. Let cure 24 hours for full bond.
- Apply wood glue along the board back edge for mounting reinforcement. Screw into the pantry door studs or use anchors.
- Arrange tins on the strip; magnets will hold them in place. Test each tin for firm contact.
How to Display or Gift It
Mount on the inside of the pantry door for instant visible spice access. Add vinyl labels cut with a Cricut for a uniform look. Gift this to a friend who loves to cook — wrap in kraft paper with a dried herb sprig tucked under twine. For storage, keep extra tins stacked in a small caddy on a shelf.
- Tiered Acrylic Risers to Increase Sightlines

Tiered acrylic risers make tiny shelves feel like a boutique grocery shelf. The clear material keeps the eye moving and reveals items tucked behind. This project is great if you want to see labels at a glance. The finished riser has a glossy feel and is surprisingly stable when clamped and glued.
Materials
- 2 clear acrylic sheets 10" x 6" x 1/8"
- 2 clear acrylic sheets 6" x 4" x 1/8"
- Plastic cement for acrylic (tube, 2 oz)
- 4 small acrylic L-brackets
- Clamps (small bar clamps)
- Fine sandpaper 400 grit
- Ruler and masking tape
Instructions
- Clean acrylic with a lint-free cloth and isopropyl alcohol.
- Sand edges lightly with 400 grit for less jagged cuts.
- Use plastic cement sparingly along edge seams. Clamp and hold for 3 minutes, then leave 30 minutes to set.
- Attach L-brackets underneath for extra support. Let cure 24 hours for full adhesive strength.
- Place larger sheet as base and smaller sheet on top, spaced back 1.5" for depth.
- Test with light cans first, then load progressively heavier items.
How to Display or Gift It
Place on a mid-level shelf for canned goods, spreads, or boxed mixes. Pair with clear acrylic organizers for a cohesive look. If gifting, pack in a sturdy box with tissue and a care card; acrylic risers ship well with corner protectors.
- Pull-Out Pantry Baskets on Smooth Runner Slides
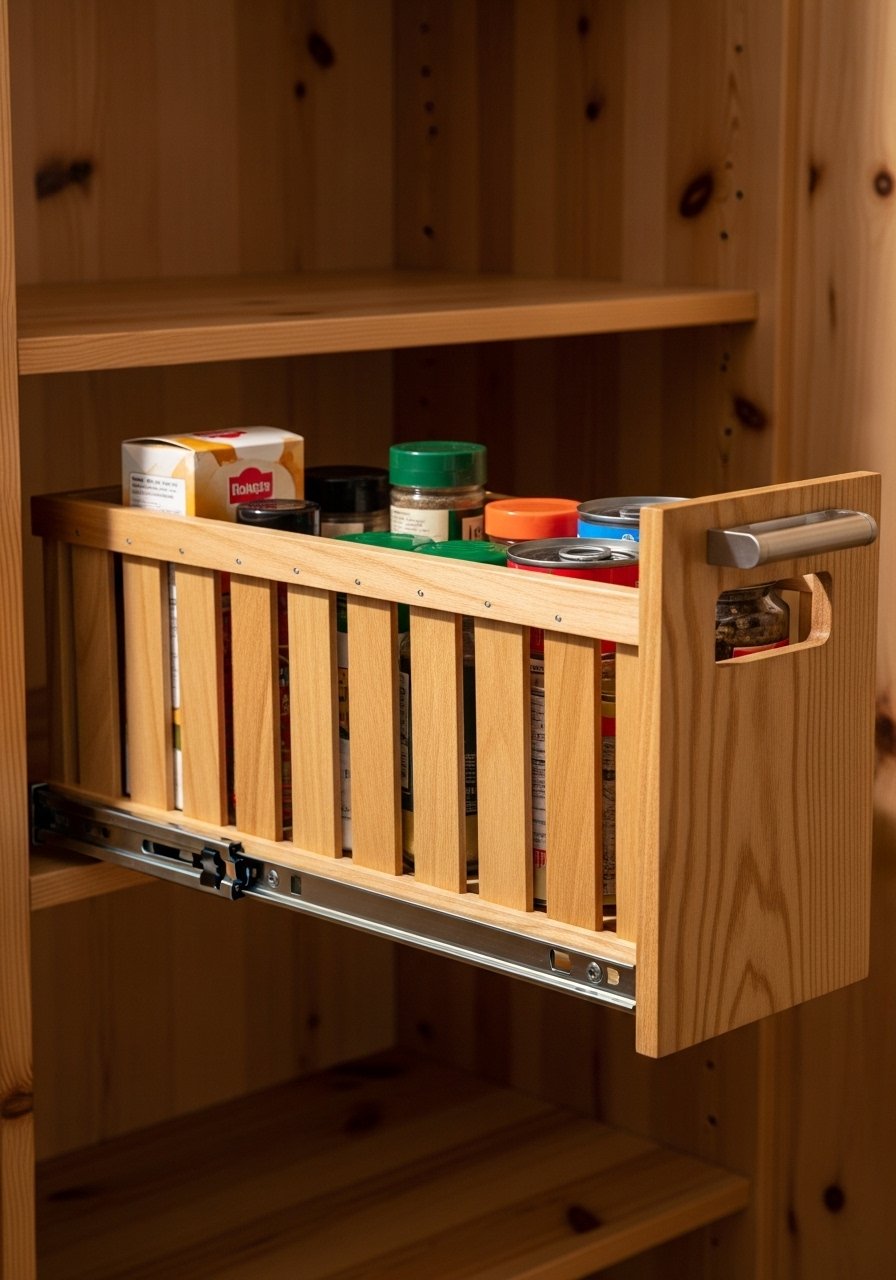
Pull-out baskets make the back of shelves accessible and keep small items corralled. The basket glides smoothly and feels satisfying to pull. Ideal for snack zones or baking mixes, this project uses basic woodworking and common hardware. I recommend ball-bearing drawer slides for a quiet glide.
Materials
- 2 ball-bearing drawer slides 12"
- 1 wooden crate or pine board cut to 12" x 10" x 6" (assembled)
- Wood screws #8 x 1"
- Wood stain (Walnut, 2 oz)
- Clear water-based polyurethane (1 coat, 4 oz)
- Drill with 1/8" pilot bit
- Foam brush for stain
Instructions
- Assemble or size crate to fit shelf depth (leave 1/2" clearance).
- Measure and mark slide positions on shelf and crate — both at same height.
- Install slides to crate first using pilot holes. Then screw slide counterpart to shelf.
- Test fit and adjust. Sand any rubbing points.
- Stain crate with a thin coat. Dry 2 hours. Apply clear polyurethane; dry 2 hours.
- Slide crate in and test weight capacity before loading.
How to Display or Gift It
Use for chips, snack packs, or tall baking supplies. Label front with a chalkboard-painted strip for rotating contents. Store unused hardware pieces in a small parts organizer inside the pantry.
- Mason Jar Lids with Magnets for Small-Item Storage
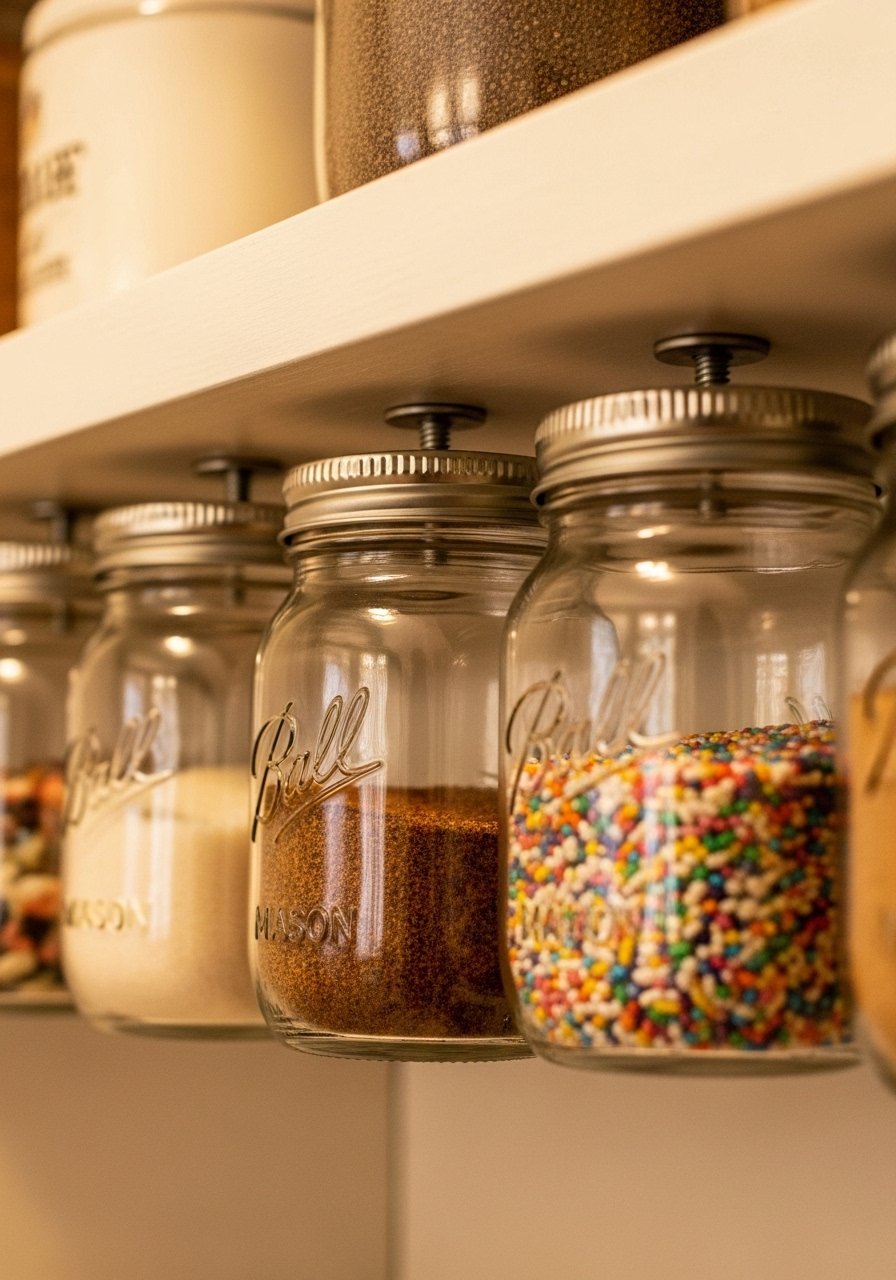
Magnetic mason jar lids use under-shelf space to store small dry goods. They free up shelf fronts and feel tactile when unscrewed. This is a beginner-friendly craft — quick, tidy, and budget-friendly. I stick neodymium magnets to lids and pair them with matching jars for airtight storage.
Materials
- 6 wide-mouth Ball mason jars (8 oz)
- 6 mason jar lids, metal
- 6 neodymium disc magnets (8mm x 2mm)
- E6000 industrial adhesive (small tube)
- Rubbing alcohol and cloth
- Measuring tape and pencil
Instructions
- Clean lids with rubbing alcohol and let dry.
- Center magnet on interior center of lid and apply a tiny bead of E6000. Press and hold 30 seconds.
- Let adhesive cure 24 hours before hanging.
- Screw jars into lids and twist securely.
- Mount jars to under-shelf wood by aligning lids to flat surface — magnets will attract to metal strip or you can glue a small metal washer to shelf underside.
- Test with 1/3 cup of contents before filling fully.
How to Display or Gift It
Fill jars with seeds, sprinkles, or loose tea. Display in a line under a shelf for a charming workbench look. Use a small parts organizer to store extra lids and magnets.
- Adjustable Pegboard for Flexible Pantry Tools
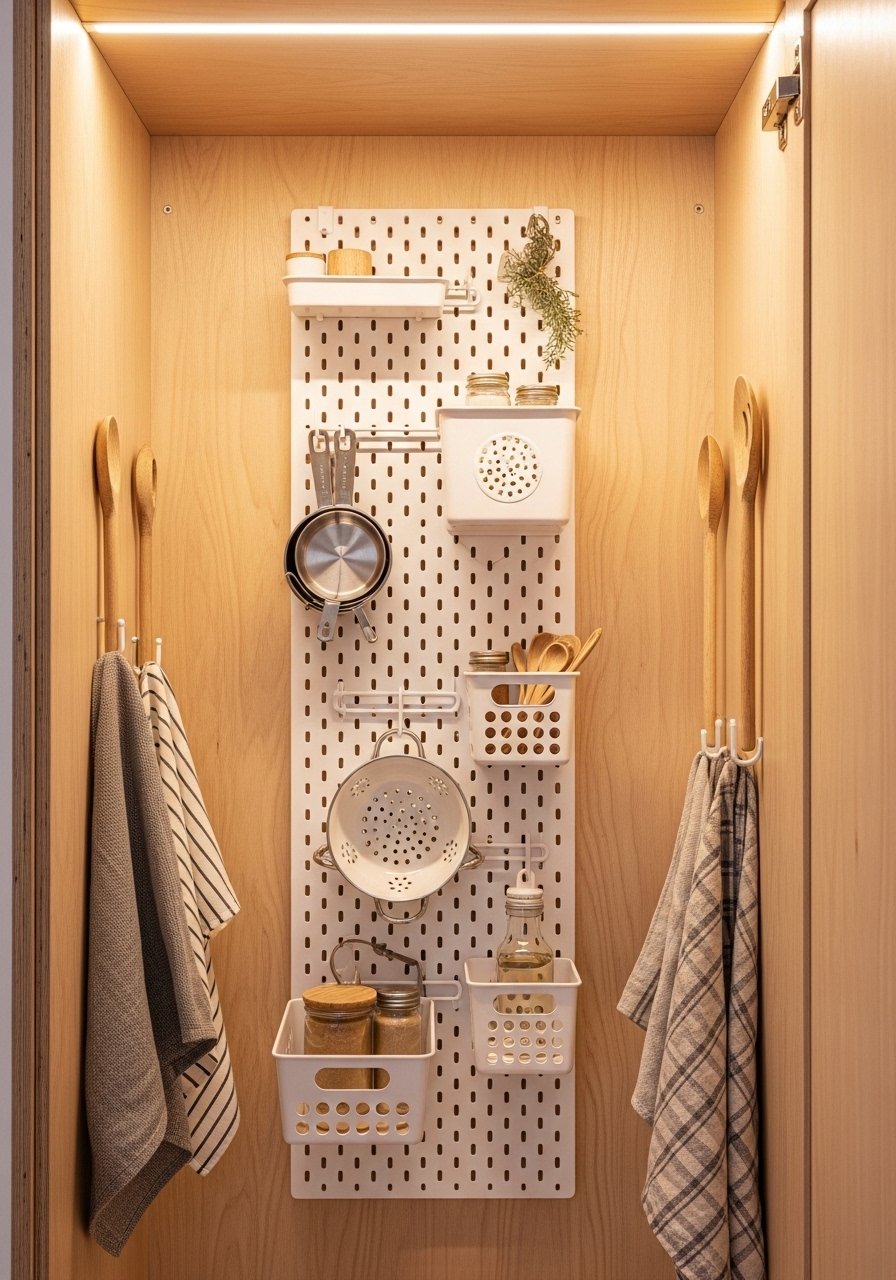
An adjustable pegboard gives you a system that adapts as your pantry needs change. It handles ladles, cups, baskets, and even produce. The texture is utilitarian but neat, and reconfiguring hooks feels satisfying. Use a basic pegboard kit and a set of heavy-duty hooks.
Materials
- 1 pegboard 24" x 16" (3/8")
- 8 metal pegboard hooks (various lengths)
- 3 small hanging baskets
- 4 1.5" wood screws + anchors
- Paint (chalk paint or Rust-Oleum, 8 oz)
- Drop cloth and roller brush
Instructions
- Mark studs and mount screws for the pegboard; leave 1/4" gap for hooks to sit.
- Paint pegboard with two thin coats — dry 1 hour between coats.
- Let fully cure 24 hours before hanging heavy items.
- Add hooks and baskets where you need vertical storage.
- Test with measuring cups and lightweight pans; adjust spacing as needed.
- Reconfigure monthly to match your pantry rotation.
How to Display or Gift It
Mount on the inside wall or back of pantry for top-to-toe usefulness. Add labeled baskets for snacks and baking tools. For gifting, include a set of colorful hooks and a printed layout guide.
- PVC Bag Dispenser for Plastic & Paper Bags
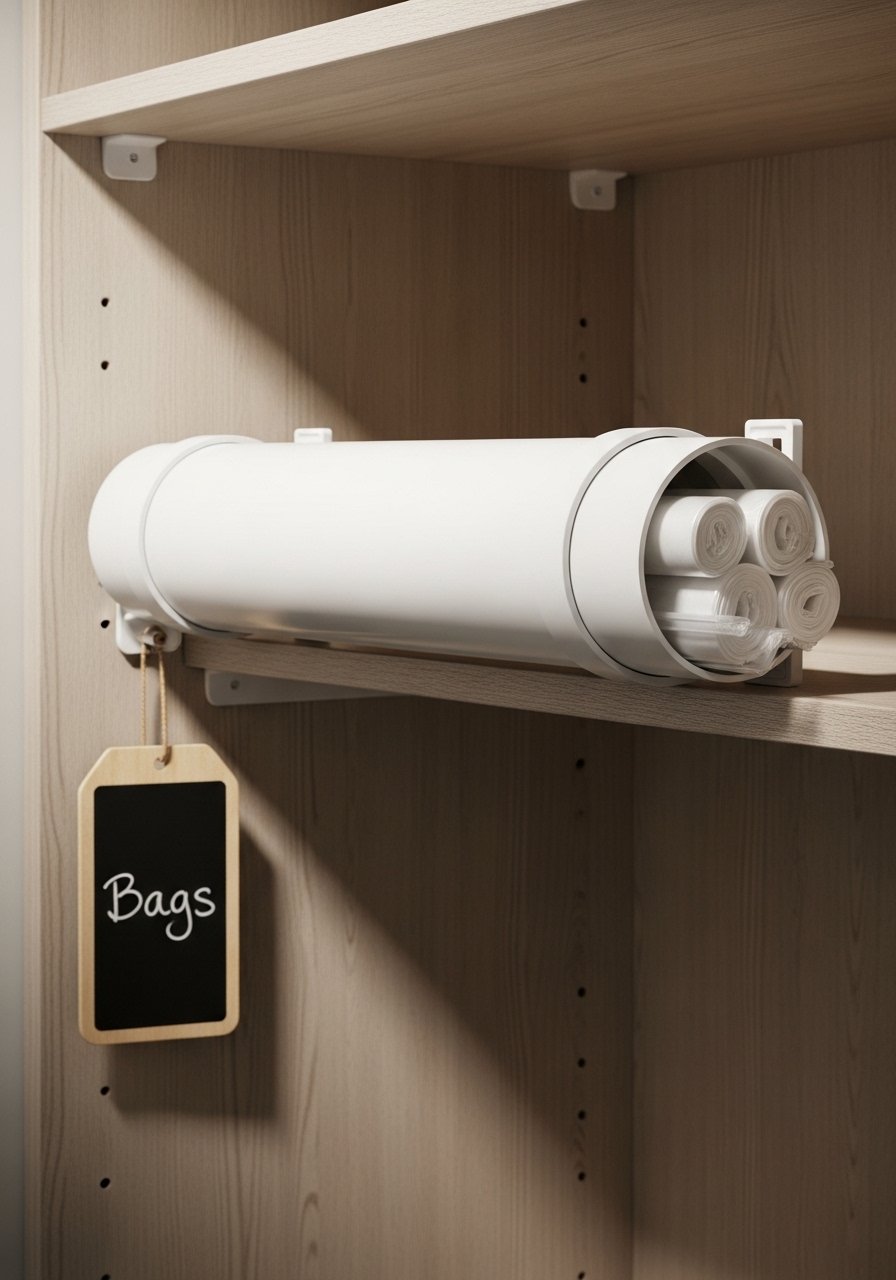
A PVC bag dispenser makes use of narrow vertical space to store rolled plastic and paper bags. The finished dispenser is simple, quiet, and slightly industrial. This is a weekend build that requires minor cutting and sanding. Use PVC primer and cement for a long-lasting seam.
Materials
- 1 PVC pipe 3" diameter x 24" length
- 1 PVC end cap (3")
- PVC primer & cement (2 oz)
- Sandpaper 120 grit and 220 grit
- Measuring tape and marker
- Two small metal mounting brackets
- Hacksaw or PVC cutter
Instructions
- Cut pipe to 20" for dispenser length. Sand cut edge smooth.
- Dry-fit end cap to one end, then use PVC primer and cement to glue cap. Let set 15 minutes and cure 24 hours.
- Mark wall/shelf位置 and mount brackets spaced 10" apart.
- Slide pipe into brackets and test rotation.
- Roll bags tightly and insert into open end of pipe. Pull from bottom.
- If mounted inside pantry, label with a small chalk tag.
How to Display or Gift It
Mount on the pantry sidewall near the door for quick bag access. Pair with a small recycling bin below. For gifting, include a roll of reusable grocery bags and a painted tag.
- Clear Can Dispenser with Tilted Shelf
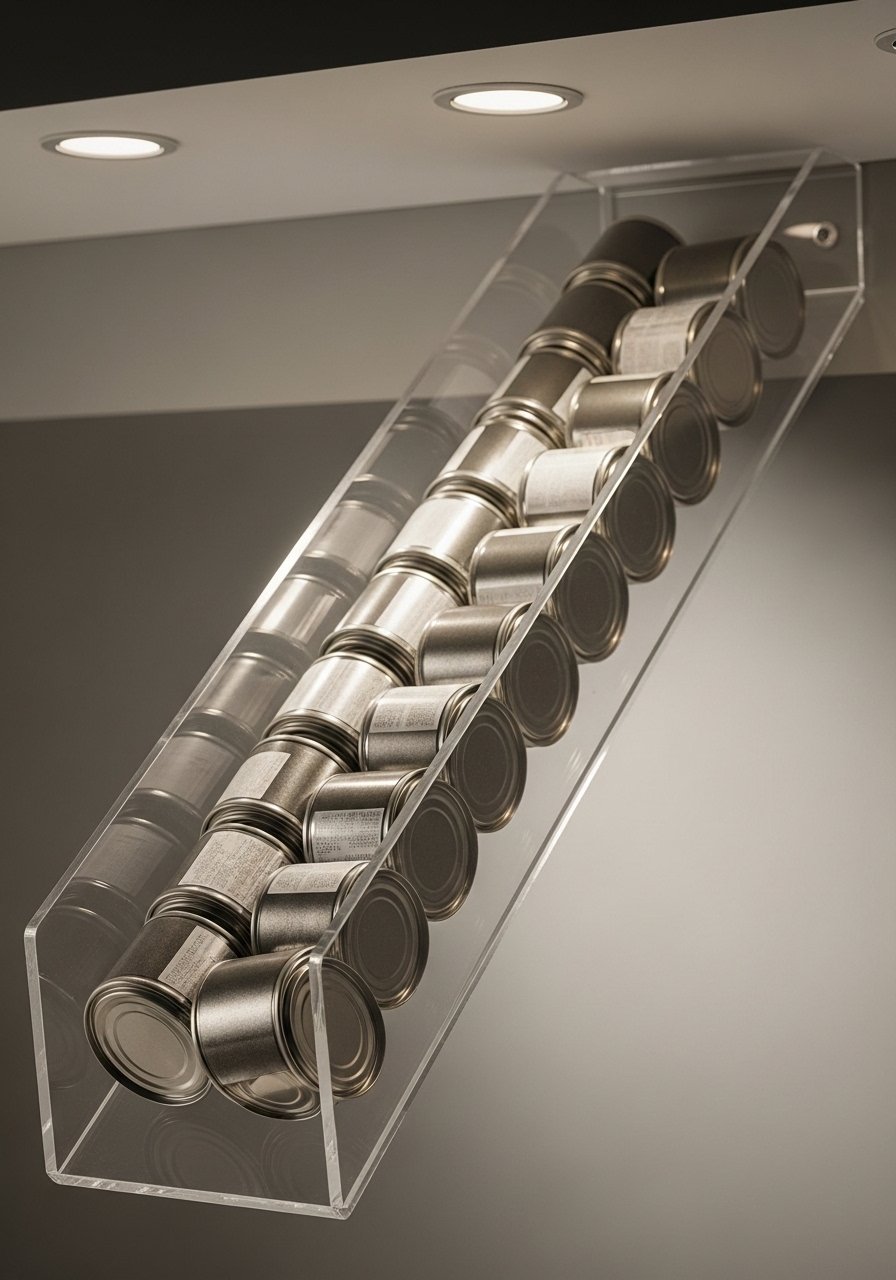
A tilted can dispenser turns pantry depth into an automatic first-in, first-out system. Items roll gently forward and present themselves — no more digging for older cans. The clear chute keeps things visible and pairs well with modern or farmhouse styles.
Materials
- 1 acrylic sheet 18" x 8" x 1/8"
- 2 acrylic side panels 8" x 3" x 1/8"
- Plastic cement for acrylic (2 oz)
- Foam brush for small glue application
- Rubber bumper pads (4)
- Ruler and pencil
Instructions
- Cut the main acrylic sheet to 18" x 8" and side panels to 8" x 3".
- Sand edges gently with 400 grit.
- Bond side panels to main sheet at a 10° angle using plastic cement. Clamp gently and let set 30 minutes.
- Attach rubber bumper pads on the back to prevent sliding.
- Place on a shelf with front edge lower than back (about 1" drop).
- Load one row of cans and give a test push to confirm smooth movement.
How to Display or Gift It
Use for soup, beans, or soda cans on a pantry lower shelf. Pair with a clear label strip across the front. Wrap in kraft paper and include a pantry inventory printable for gifting.
- DIY Chalkboard Labeled Bins with Sliding Lids

Chalkboard-labeled bins with sliding lids combine rustic charm and function. The tactile slide feels satisfying, and the chalkboard fronts make relabeling easy. Perfect for bulk goods like flour or oats, this project uses basic woodworking and chalk paint.
Materials
- 3 small wooden crates 12" x 6" x 6"
- 3 black chalkboard paint cans (sample size, 2 oz each)
- 3 thin plywood lids cut to 12" x 6"
- Wood glue and small finishing nails
- Sandpaper 120 & 220 grit
- Chalk and small sponge eraser
- Painter’s tape
Instructions
- Sand crate fronts and plywood lids smooth.
- Tape edges and paint the front panels with 2 coats of chalkboard paint. Dry 1 hour between coats. Cure 24 hours before writing.
- Assemble lids and sand edges for smooth sliding.
- Attach small felt strips to underside of lids to keep them quiet.
- Fill bins with bulk goods and slide lids on.
- Label with chalk, and refresh writing as needed.
How to Display or Gift It
Group three bins on a lower pantry shelf for baking staples. Add a small wooden scoop tied with twine for a boutique touch. Store extras flat in a stackable craft organizer until needed.
- Lazy Susan Corner Carousel with Non-Slip Mat
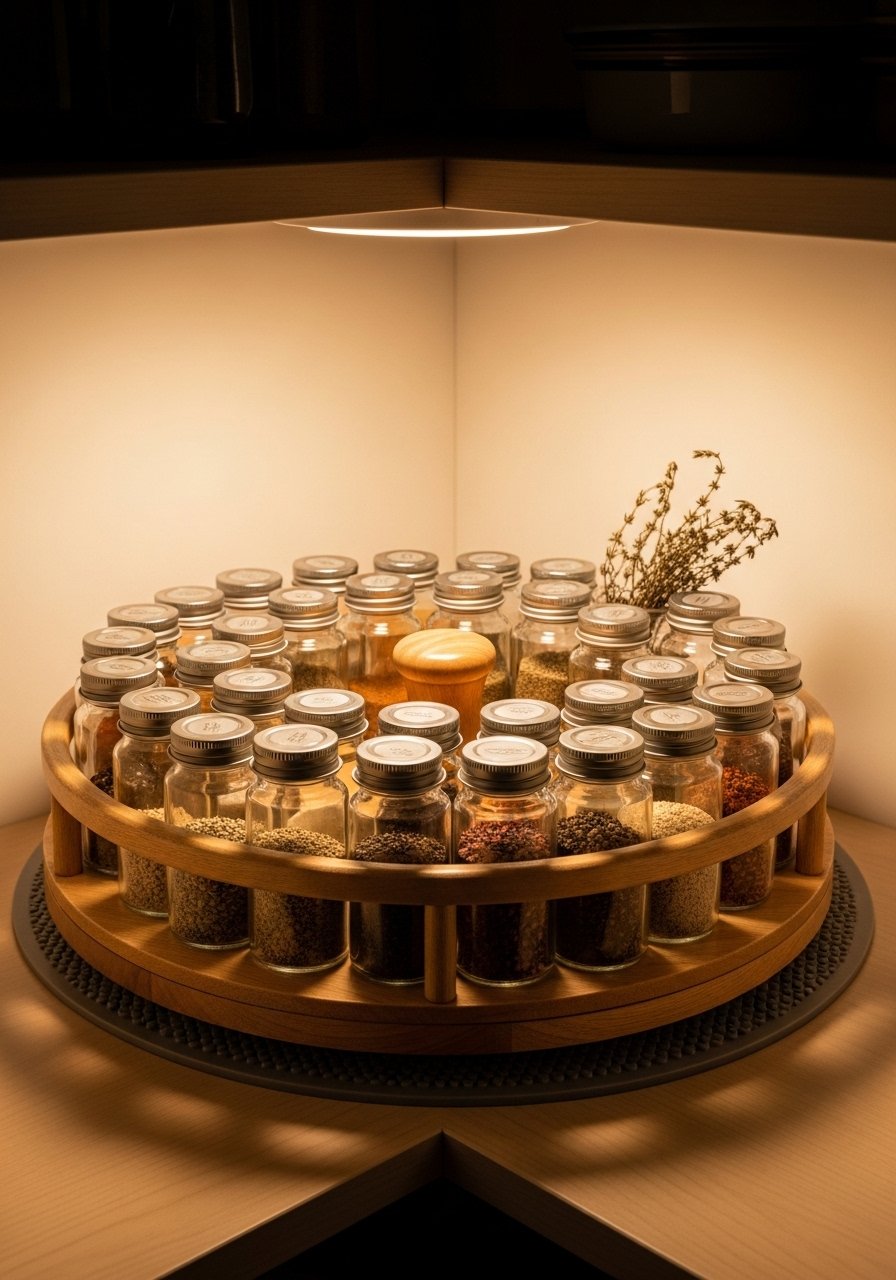
A Lazy Susan converts awkward corners into fully usable storage. Add a non-slip mat for quiet rotation and a steady feel. The finished carousel has a smooth spin and fits charmingly in cottagecore or farmhouse pantries.
Materials
- 1 12" round wooden plaque (1/2" thick)
- 1 12" turntable bearing (ball-bearing)
- Non-slip mat cut to 12"
- Wood stain (1 oz) and clear coat (1 oz)
- Foam brush and lint-free cloth
Instructions
- Stain the wooden plaque, wipe off excess, and let 2 hours to dry.
- Attach the turntable bearing per package instructions; center carefully.
- Place non-slip mat on top to keep jars steady.
- Load with spice jars or condiments and spin to test balance.
- Adjust jar arrangement to prevent tipping.
- Refinish yearly with a light coat of polyurethane.
How to Display or Gift It
Great for oils, vinegars, or frequently used condiments. Use a small wooden easel for display when not in use. For gifting, pair with a set of mini glass jars and a tiny wooden scoop.
- Clear Label System with Printable Inserts
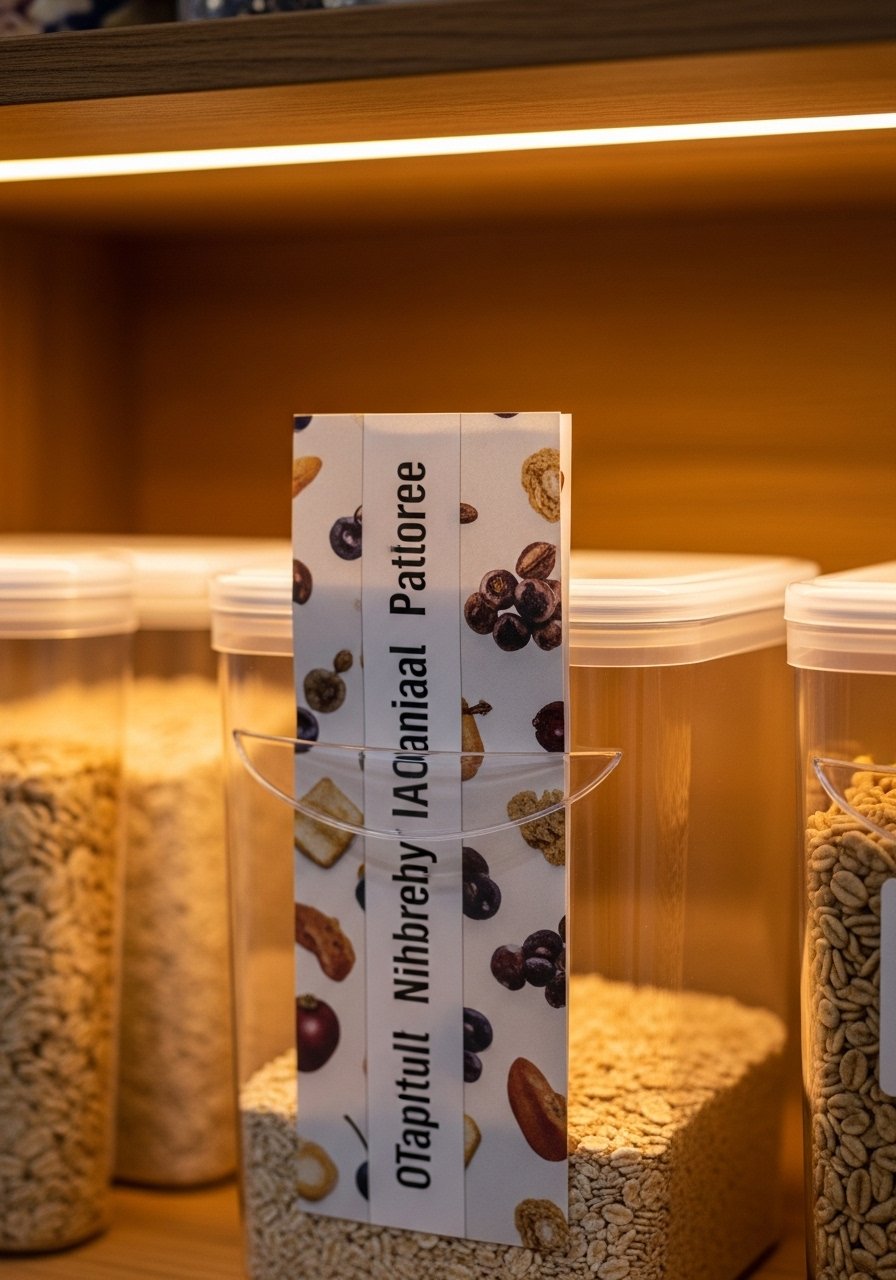
Clear label pockets with printable inserts make swapping contents painless. You can reprint labels for seasonal ingredients or swap languages for guests. The final look is tidy and very scannable. I trim inserts precisely with a self-healing mat and craft knife for crisp edges.
Materials
- 10 clear label pockets (2" x 3")
- Printable cardstock (8.5" x 11", heavy weight, 50 sheets)
- Self-healing cutting mat 12" x 18"
- Precision craft knife (1)
- Double-sided tape (1/4" roll)
- Ruler and computer to print labels
Instructions
- Design labels and print on cardstock. Trim to 2" x 3" using craft knife on mat.
- Slide inserts into clear pockets.
- Attach pockets to containers using a small piece of double-sided tape.
- Swap inserts as needed; laminate if you want waterproof labels.
- Use high-contrast fonts for readability.
- Refresh every 6–12 months to keep labels looking fresh.
How to Display or Gift It
Use on clear pantry bins for flour, sugar, and snacks. Bundle a set of pre-printed labels in a small gift box for a housewarming present. Store extra label pockets in a little organizer drawer.
- Rope Shelf Liner to Protect Wood Surfaces
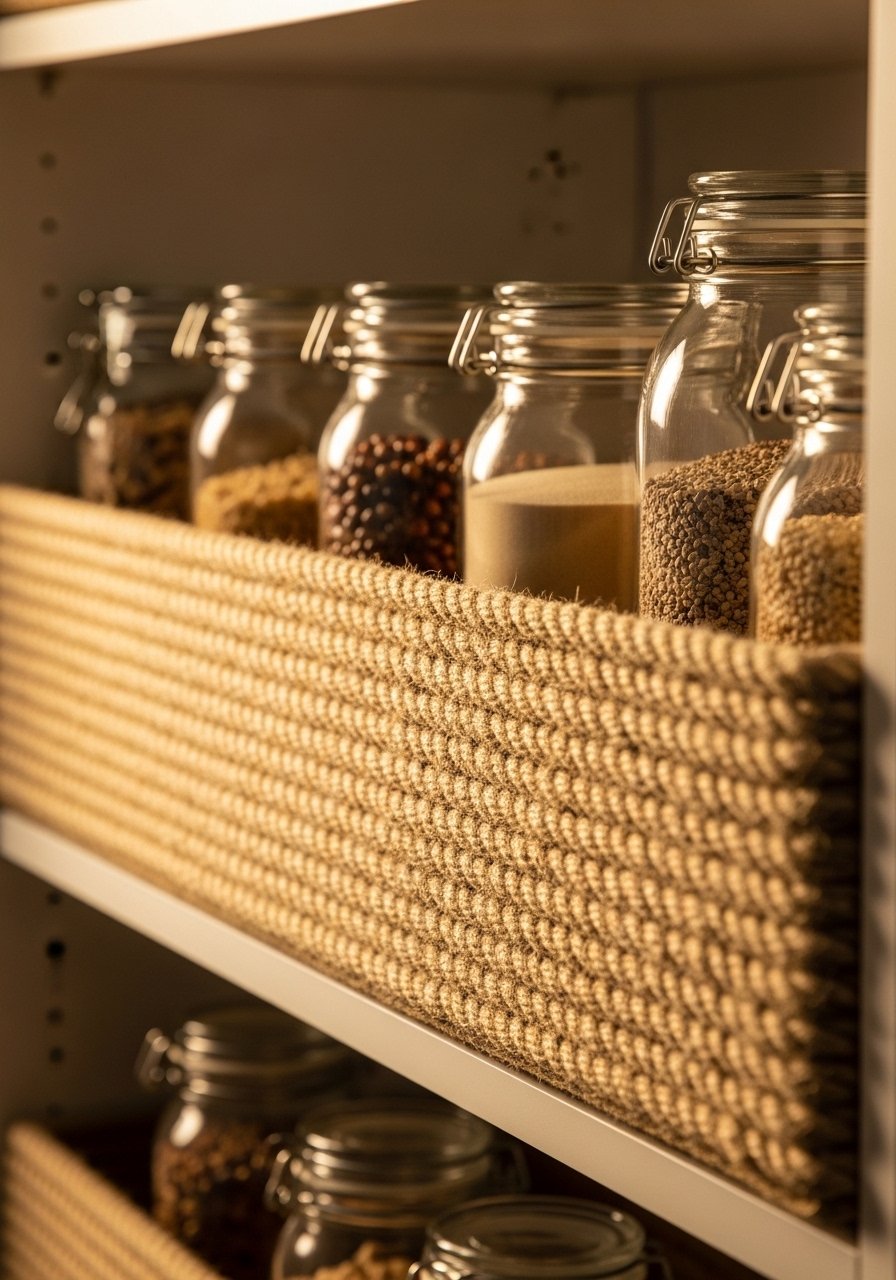
A rope shelf liner adds texture and protects wood from scratches and spills. The finished shelf looks cozy and slightly coastal. This is a simple weekend glue-and-coil job that results in a soft, grippy surface for jars.
Materials
- 30 ft jute rope (3/8" diameter)
- Hot glue sticks (50 count)
- Temperature-controlled hot glue gun
- Scissors and lighter (to melt ends)
- Measuring tape
Instructions
- Clean shelf surface.
- Heat glue gun and start coiling rope from back corner, applying a bead of glue every 1" as you press rope down.
- Continue coiling until shelf is covered. Trim rope and seal ends with lighter.
- Let set 30 minutes before placing glass jars.
- For a softer finish, add a thin layer of clear sealer; dry 2 hours.
- Spot clean with damp cloth.
How to Display or Gift It
This liner is great under heavy jars or cutting boards. Pair with woven baskets for a consistent look. Roll up extra liner and gift with a jar of homemade pantry seasoning.
- Wine Crate Stack with Label Cutouts
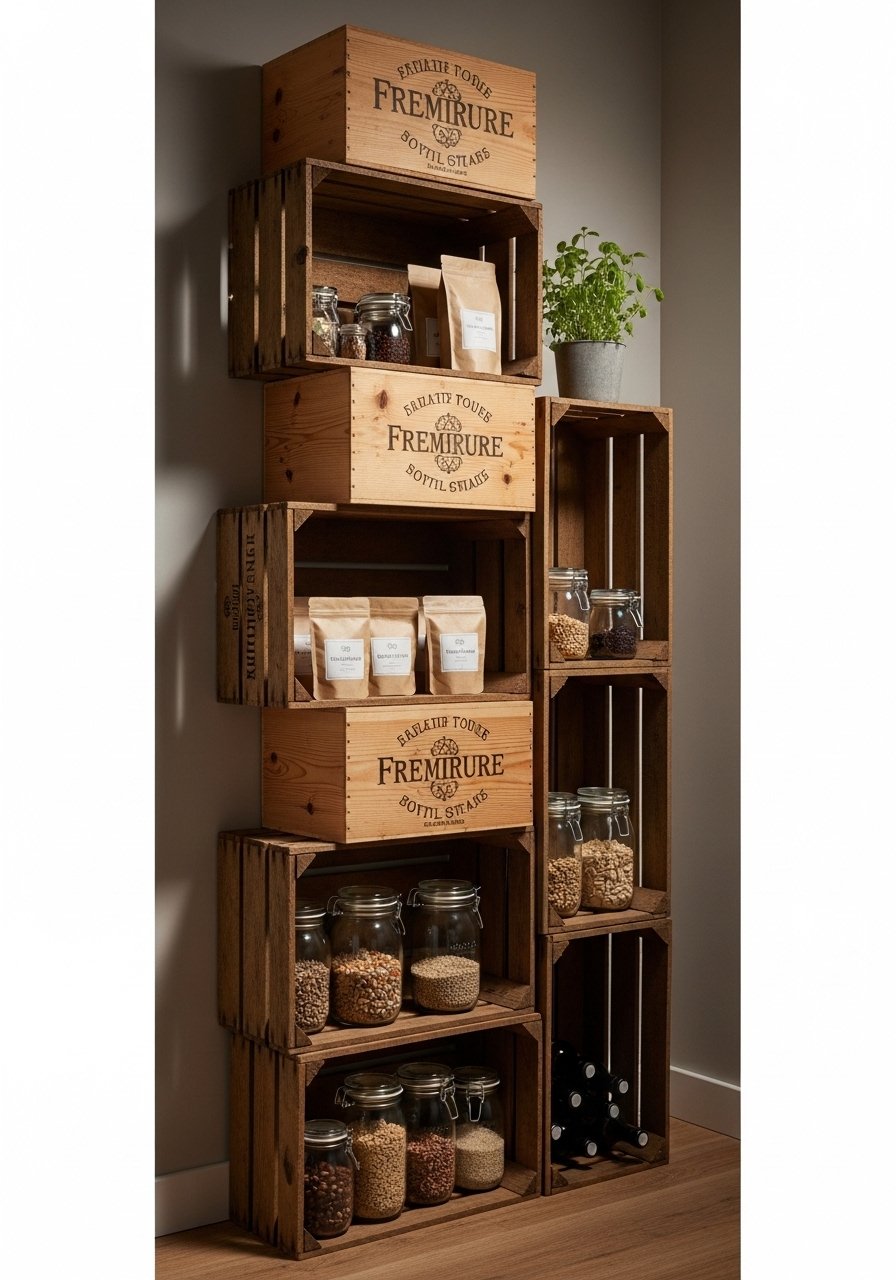
Stacking wine crates creates instant rustic-style shelving. The open slats keep airflow and provide visual interest. This project is ideal for renters who want temporary but sturdy solutions. Use a drill and wood screws to secure crates together.
Materials
- 4 small wine crates (12" x 9" x 6")
- Wood screws #8 x 1.25" (16)
- Sandpaper 120 grit
- Small wood stain sample (Walnut, 2 oz)
- Felt pads for bottom (8)
- Drill and screwdriver bit
Instructions
- Sand rough edges and test-fit crates in desired stack pattern.
- Pre-drill pilot holes and screw crates together from inside corners.
- Lightly stain outer faces and wipe off excess. Dry 2 hours.
- Add felt pads to bottom crate to protect pantry floor.
- Fill each crate with like items: baking, snacks, cans, breakfast.
- Re-stack or expand as pantry needs change.
How to Display or Gift It
Use crates to separate snack types or meal kits. For gifting, stencil a family name on the front and include a small bundle of pantry basics.
- Stackable Clear Bins with Click Lids
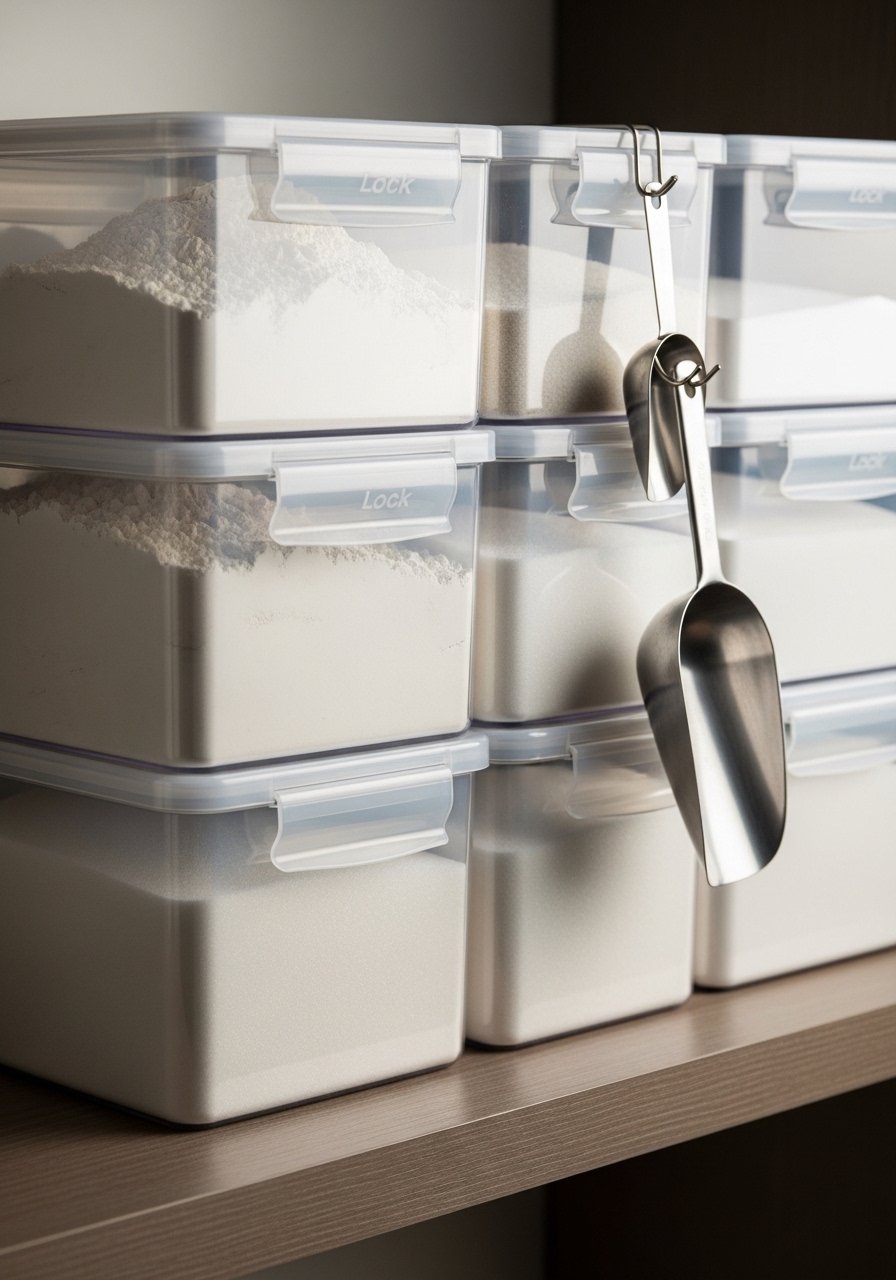
Stackable clear bins with click lids maximize vertical space and keep humidity out. The lock lids feel secure and the clear sides make contents instantly readable. Use airtight cereal containers sized to your shelf height.
Materials
- 3 clear stackable bins (6L capacity)
- 3 measuring scoops (stainless, 1/2 cup)
- Labels (waterproof)
- Soft cloth for wiping
Instructions
- Clean bins and lids before first use.
- Fill each bin with measured quantities (e.g., 5 cups flour per bin for freshness).
- Lock lids until they snap — expect a firm click.
- Stack bins and label front with content and purchase date.
- Rotate older contents forward for use.
- Wash bins every 3 months to remove flour dust.
How to Display or Gift It
Perfect for baking zones or cereal storage. Include a small scoop and printed instructions for measuring. Store empty bins nested to save space.
- Pasta Dispenser with Gravity Feed
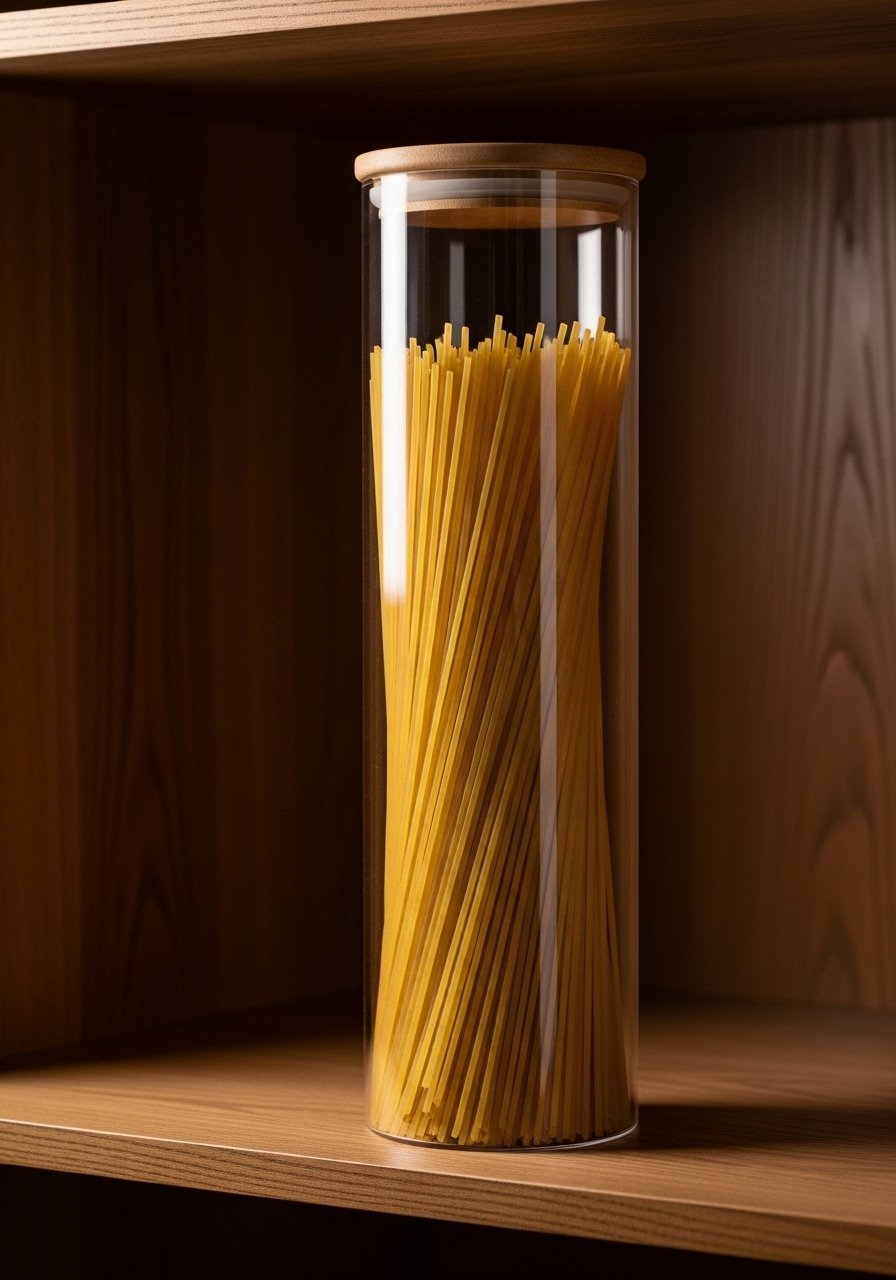
A gravity-fed pasta dispenser keeps long shapes tidy and controlled. The finished dispenser looks streamlined and saves space compared to bulky boxes. This is a quick assemble with basic clear acrylic and a simple feed mechanism.
Materials
- 1 acrylic tube 24" x 3" diameter
- 1 acrylic cap for bottom
- 1 clamp-style dispenser lid
- Plastic cement (2 oz)
- Silicone gasket ring
- Small wooden base 6" x 6"
Instructions
- Glue cap to bottom with plastic cement; let set 30 minutes, cure 24 hours.
- Attach dispenser lid at top; ensure gasket creates airtight seal.
- Mount tube to wooden base using two clamps for stability.
- Fill with long pasta and test feeding; adjust clamp tension if needed.
- Clean with dry cloth only to avoid fogging.
- Refill as needed.
How to Display or Gift It
Use near a cooking station for quick pasta access. Tie a handwritten recipe card to the base for gifting.
- DIY Baking Sheet Organizer Vertical Divider
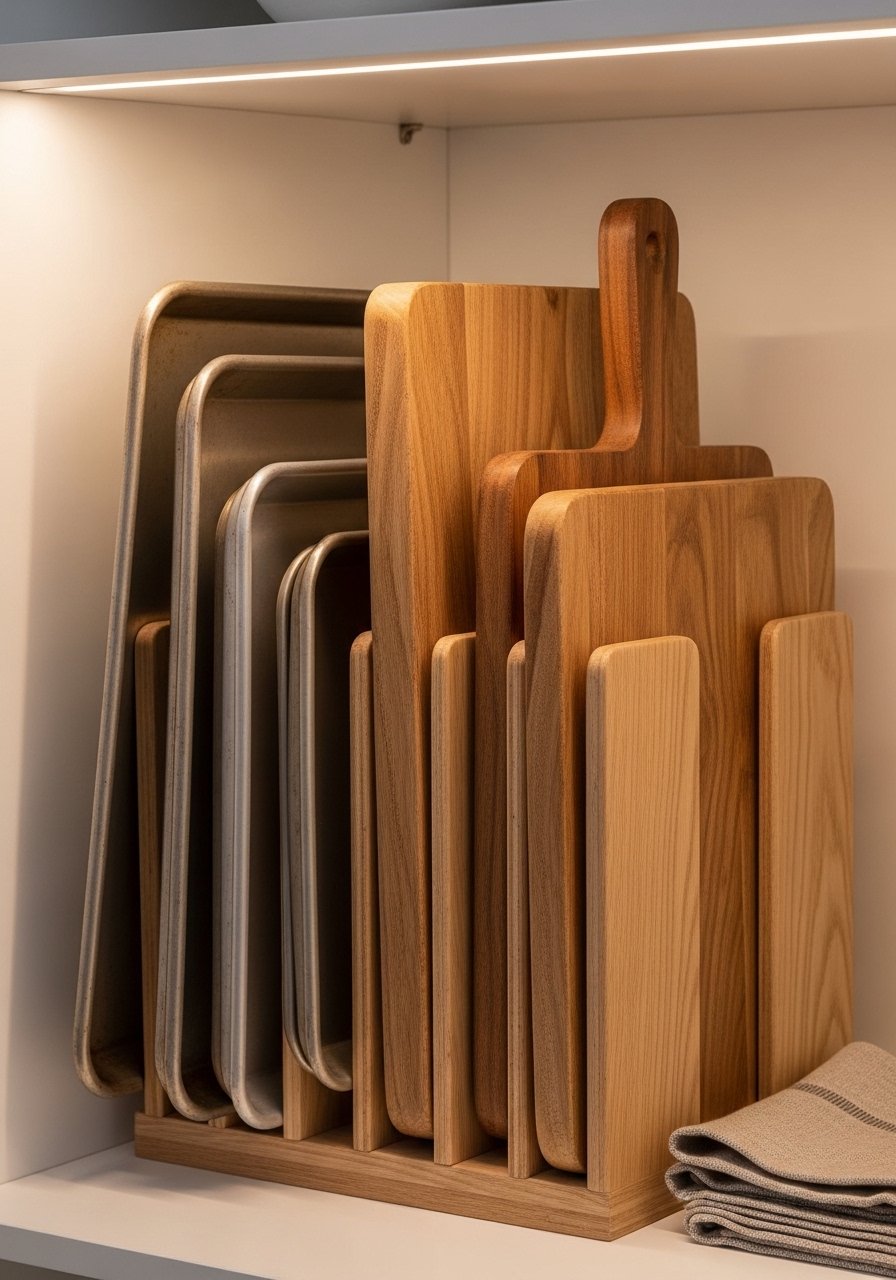
Vertical dividers make baking sheets and cutting boards easy to grab without leaning stacks. The finished organizer is tidy and helps prevent tipping. This is a short woodworking build that suits weekend tool use.
Materials
- 1 plywood base 12" x 8"
- 5 divider boards 11.5" x 1" x 3/8"
- Wood glue and brad nails
- Sandpaper 120 grit
- Wood stain (sample) and wipe-on polyurethane
Instructions
- Lay divider boards upright on base spaced 1.25" apart.
- Glue and nail each divider into place. Let glue set 30 minutes.
- Sand and stain entire piece; dry 2 hours and apply one coat polyurethane; dry 2 hours.
- Place on pantry shelf and load with sheets.
- If wobbly, add felt pads beneath base.
- Clean every few months to remove crumbs.
How to Display or Gift It
Place beside baking area for easy transfer to oven. Gift with a set of silicone baking mats and recipe cards.
- Hanging Produce Baskets on a Tension Rod
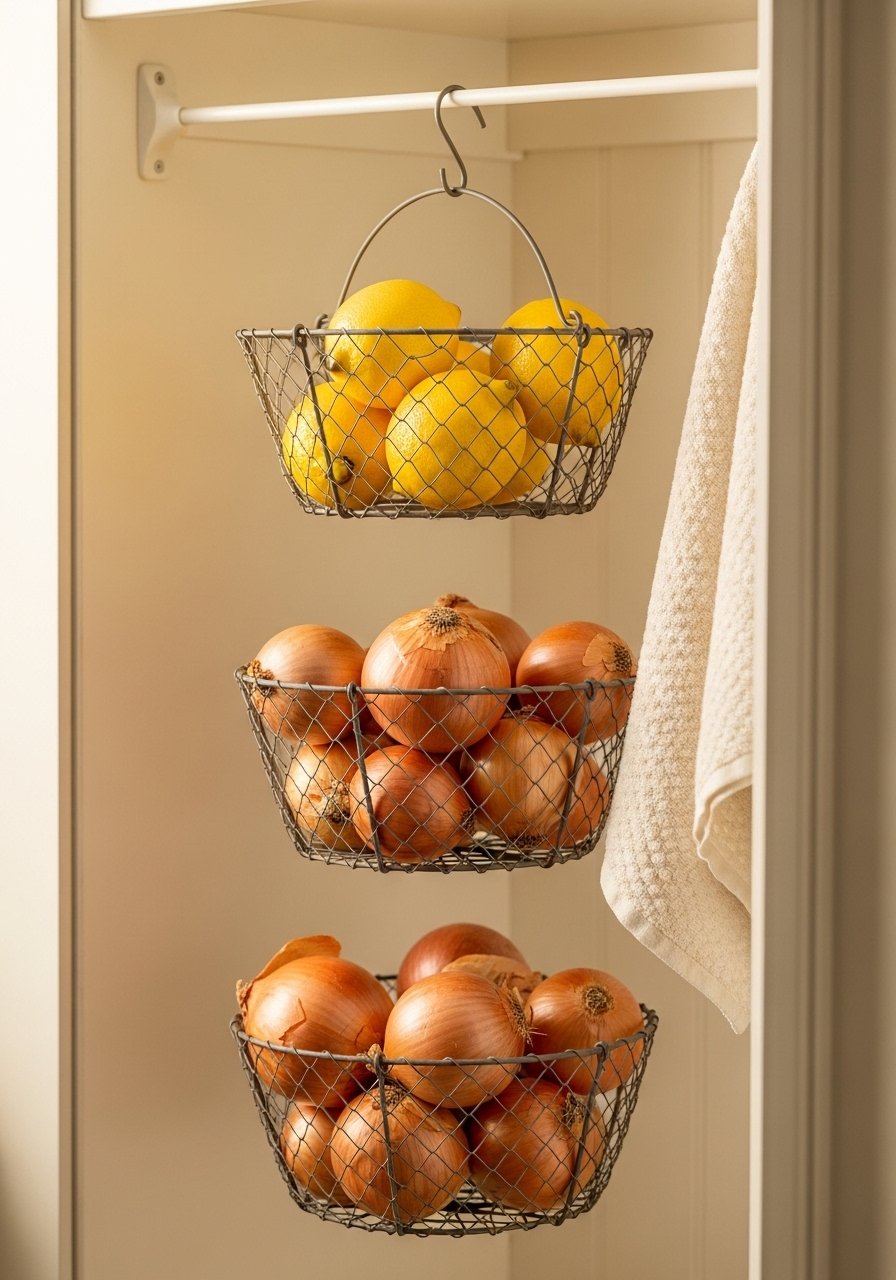
Hanging wire baskets on a tension rod free up shelf space and keep produce ventilated. The finished look is airy and flexible. Use a tension rod with S-hooks for tool-free install.
Materials
- 1 tension rod 24" adjustable
- 3 wire hanging baskets (8" diameter)
- 6 stainless steel S-hooks
- Small labels for each basket
Instructions
- Adjust tension rod to fit pantry width and lock in place per package directions.
- Hang baskets with S-hooks and space evenly.
- Add produce and rotate regularly.
- Wipe baskets biweekly to remove dust.
- Replace tension rod if it slips; tighten as needed.
- For added security, use small command strips on ends.
How to Display or Gift It
Great for potatoes, onions, and citrus. Pair with reusable produce bags to reduce waste. Gift with a small kitchen timer and recipe card.
- DIY Pull-Out Tray for Small Appliances
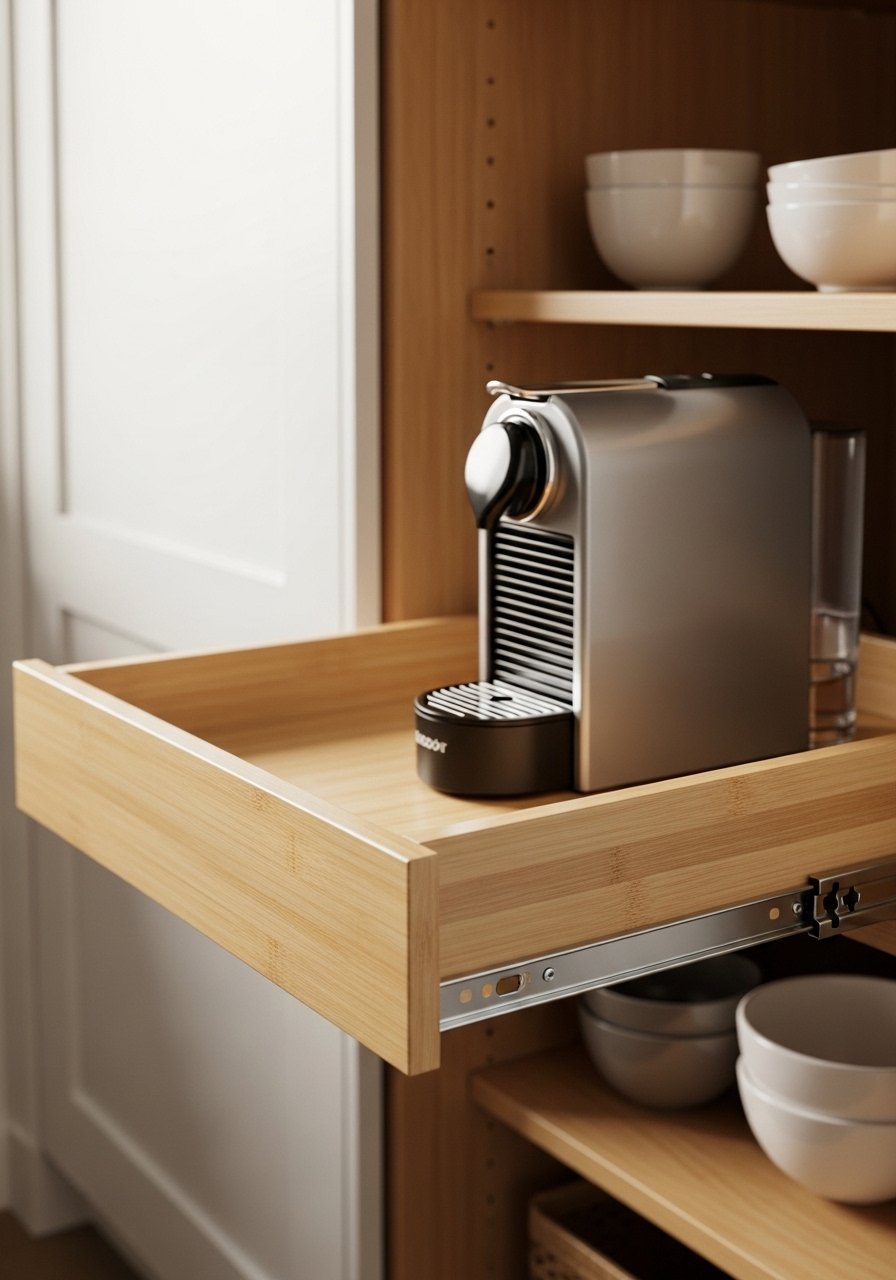
A pull-out tray makes using small appliances in a pantry simple. The finish is smooth and the tray glides like a tiny appliance station. Use heavy-duty slides for weight support.
Materials
- 1 plywood tray 15" x 12" x 3/4"
- 2 heavy-duty drawer slides 14"
- 4 small rubber bumpers
- Wood stain (1 oz) and polyurethane (1 oz)
- Drill and screws
Instructions
- Attach slides to tray per manufacturer instructions.
- Install the slide pair to pantry shelf; leave 1/2" clearance for the tray.
- Finish tray with stain and one coat polyurethane; dry 2 hours.
- Slide tray in and place appliance on top; test glide.
- Add bumpers to prevent hitting back wall.
- Unplug appliance when not in use and store cord neatly.
How to Display or Gift It
Perfect for a coffee station or toaster oven. Gift with a bag of single-origin coffee and a small ceramic scoop.
- DIY Pantry Inventory Clipboard and Chalkboard Combo
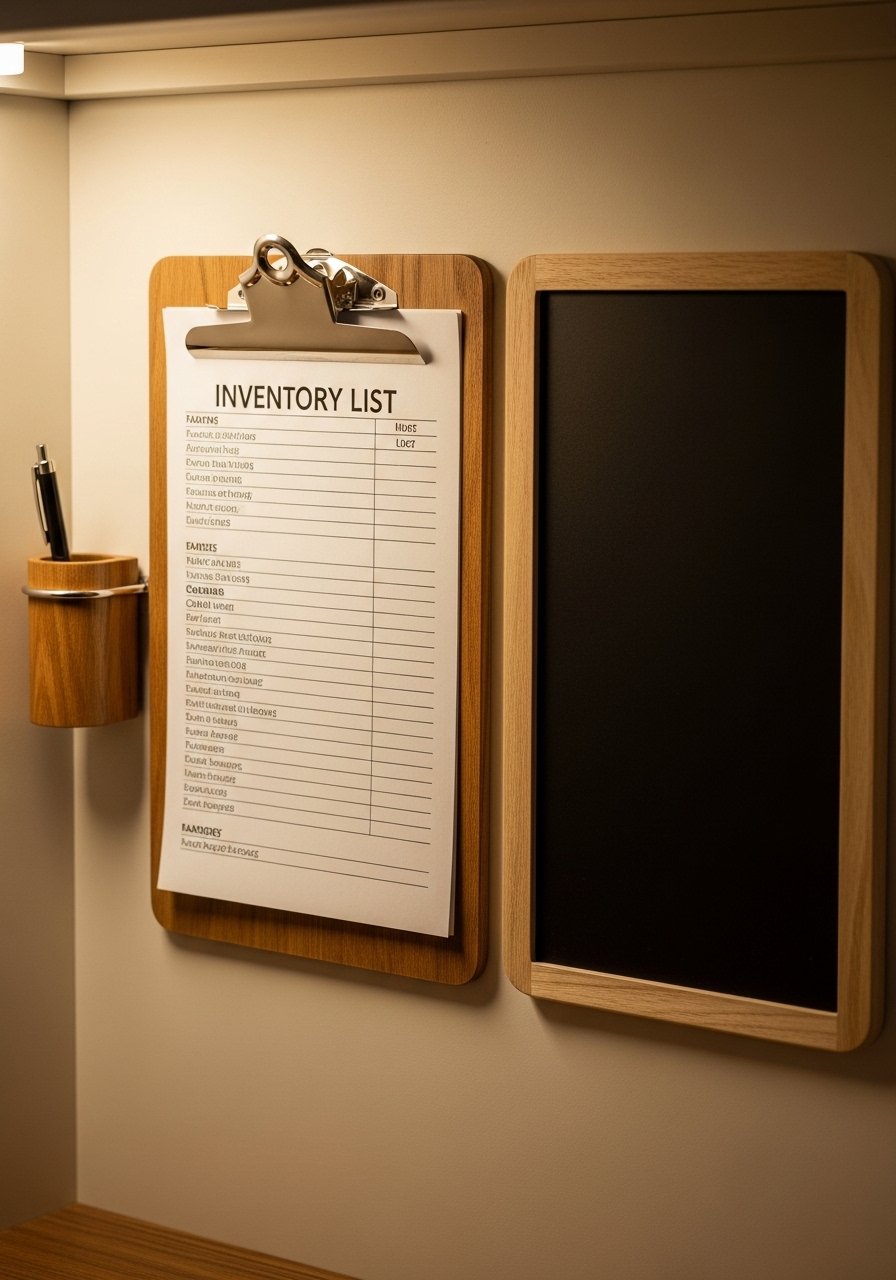
A clipboard-plus-chalkboard combo helps you track staples at a glance. The clipboard holds printed inventory sheets and the chalkboard is great for quick notes. This organizational duo has a tactile mix of paper and chalk.
Materials
- 1 small wooden clipboard 9" x 6"
- 1 chalkboard panel 9" x 6"
- Small screws and anchors
- Chalk and a fine-tip black marker
- Hook for hanging pen
Instructions
- Mount chalkboard and clipboard side-by-side using anchors.
- Create a printable inventory sheet and clip it on.
- Use chalk to record needs and marker to tick off purchases.
- Update weekly and file old sheets for reference.
- Replace chalkboard surface every 12–18 months if it ghosts.
- Keep a spare chalk stick in a small pen holder.
How to Display or Gift It
Install at eye level on pantry door interior. Gift with a pack of colorful chalk and a mini clipboard for a friend who meal-preps.
- DIY Door-Mounted Shoe Organizer for Snacks
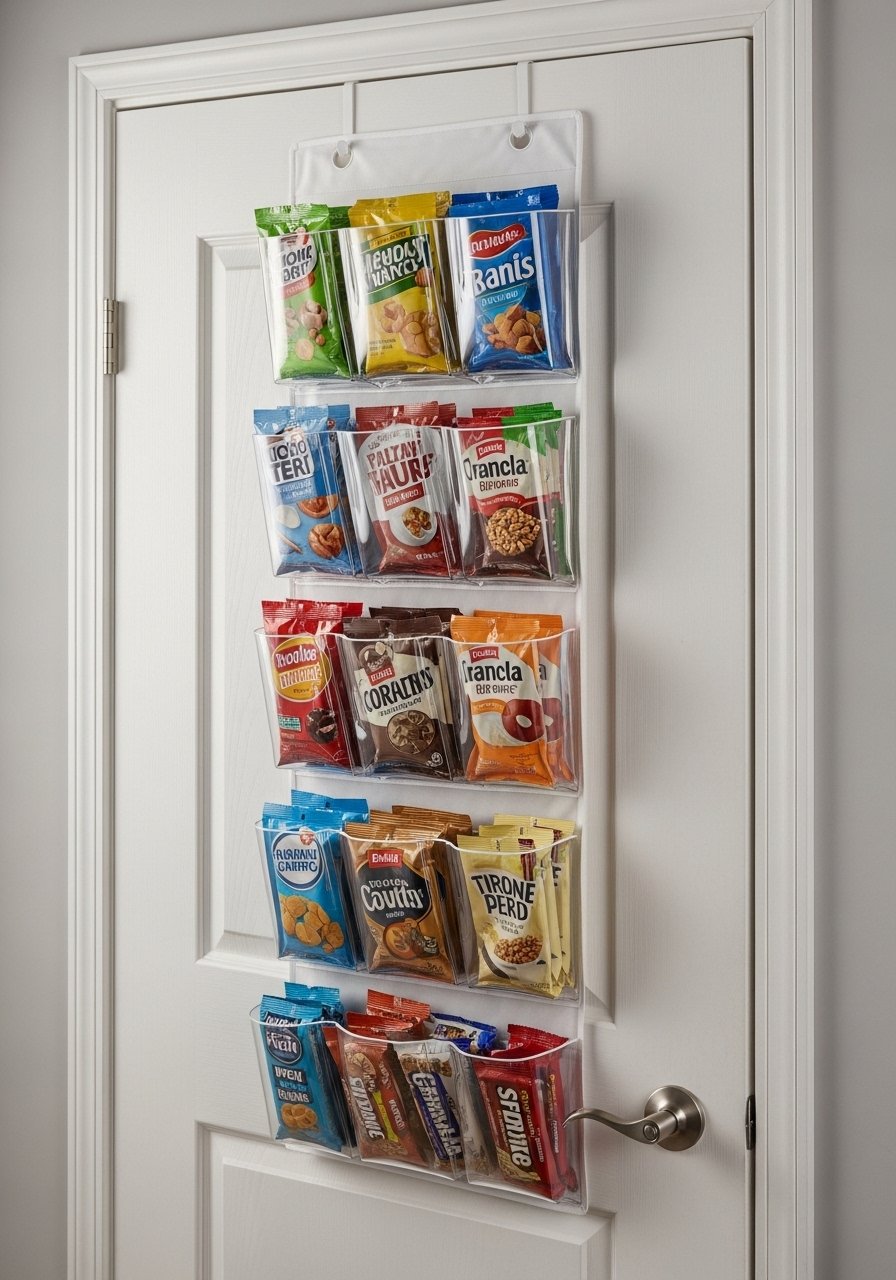
Repurposing a clear over-the-door shoe organizer for snacks keeps small packets visible and accessible. The clear pockets add a bathroom-like clarity but work perfectly for ripe snack organization.
Materials
- 1 over-the-door clear pocket organizer (32 pockets)
- Small cardstock labels (32)
- Scissors and a hole punch
- Small binder rings (for grouping)
Instructions
- Hang organizer on pantry door and arrange pockets by category.
- Label each pocket with content and expiration date.
- Group small items with binder rings to prevent loss.
- Rotate items forward and clean pockets monthly.
- Replace clear organizer every 2–3 years if cloudy.
- Use binder rings to make on-the-go snack kits.
How to Display or Gift It
Ideal for school snack organization or lunchbox prep. For gifting, fill pockets with single-serving treats and tie a ribbon around the door hooks.
- DIY Spice Drawer with Foam Insert
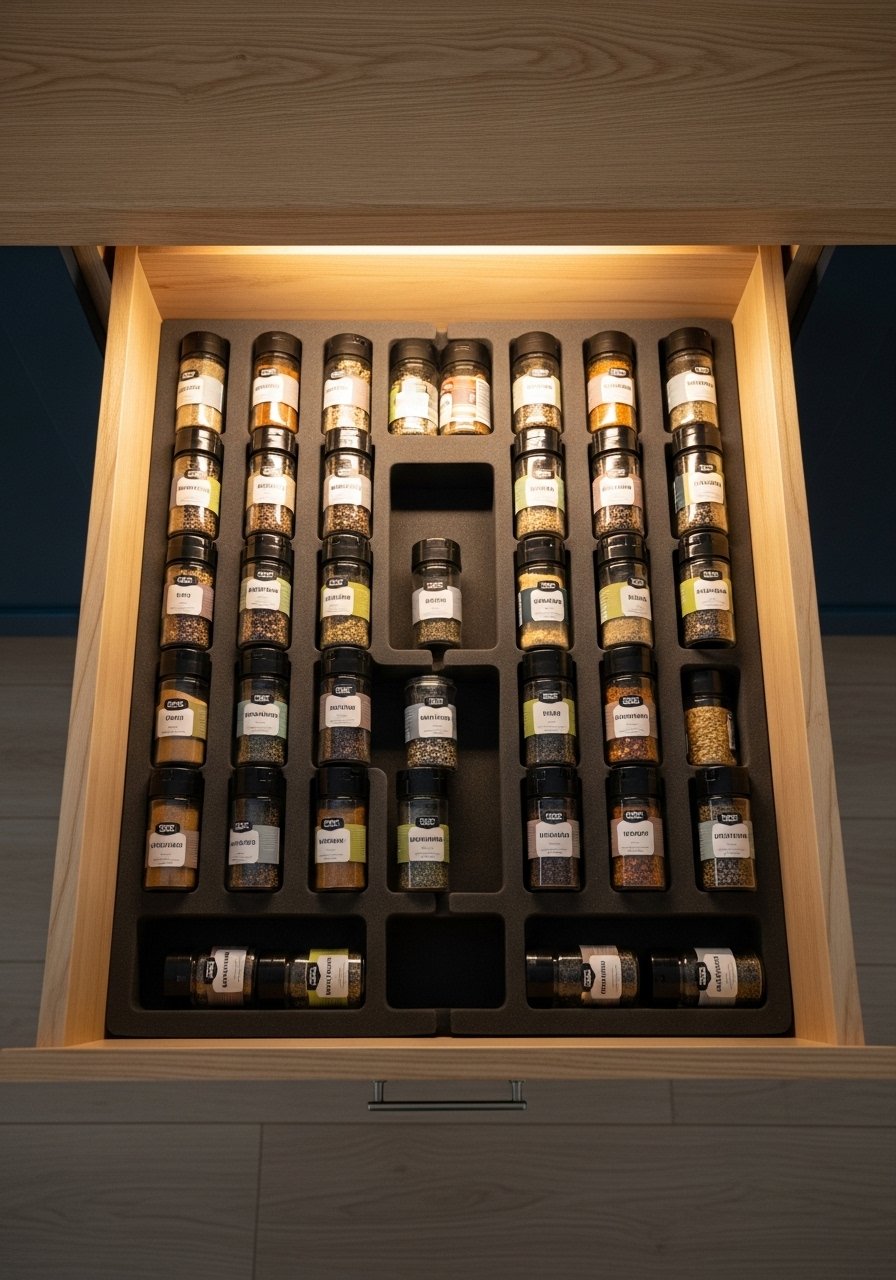
A spice drawer with a foam insert displays labels toward the user for fast readings. The angled view feels professional and saves vertical shelf space. Cutting foam to angle takes a steady hand, but results are worth it.
Materials
- 1 shallow drawer liner foam 12" x 10" x 1"
- 24 small round spice jars (1 oz)
- Self-adhesive label set
- Precision craft knife
- Ruler and marker
Instructions
- Measure drawer interior and mark foam for slanted rows.
- Cut foam strips at 15° angle to form a stepped insert.
- Fit strips into drawer and trim to size.
- Place jars with labels facing up and slightly tilted.
- Secure with thin double-sided tape if the drawer moves.
- Update labels every 6 months.
How to Display or Gift It
Slide the drawer below eye level for quick access. Package as a gift set with a small sample of each spice and a labeled booklet.
- Framed Pantry Door Mirror to Visually Expand Space
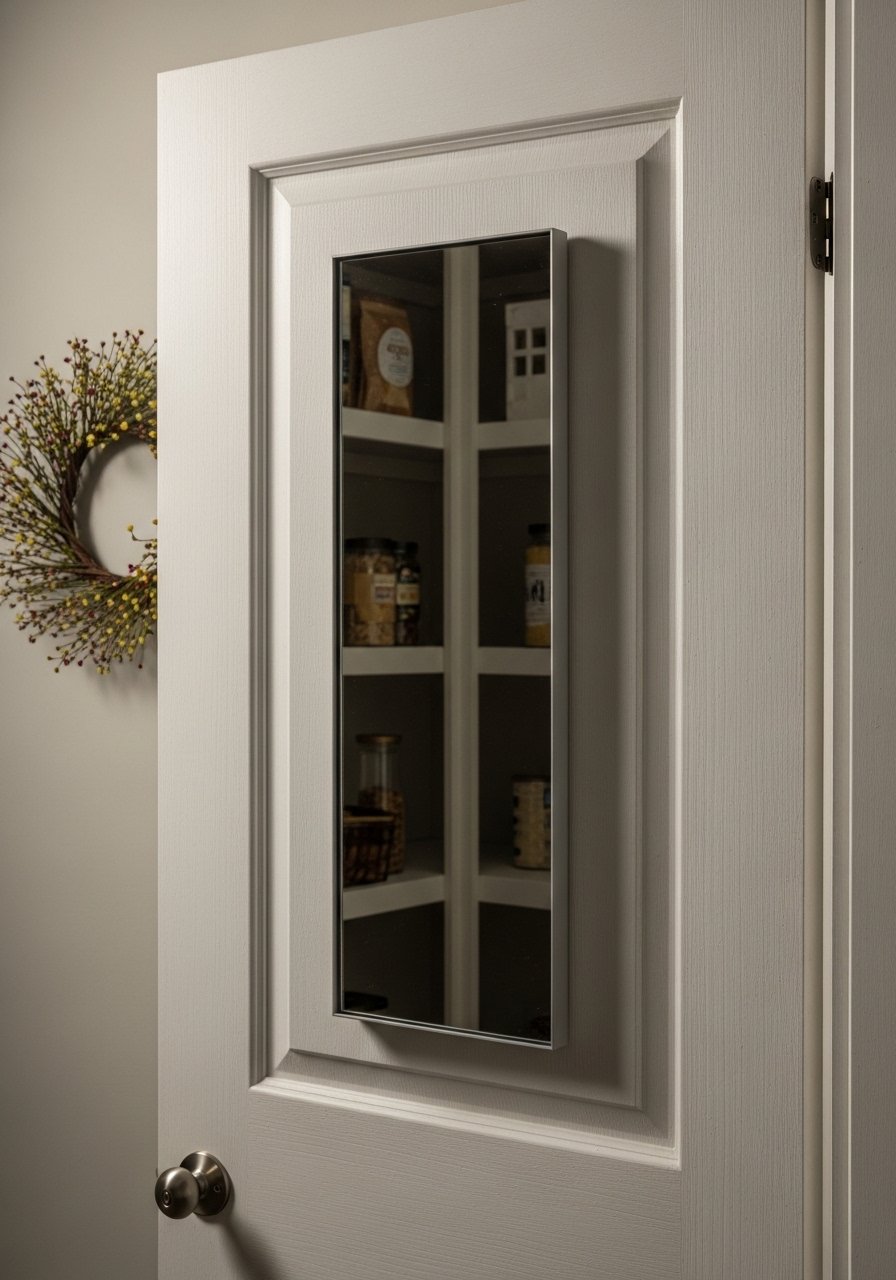
A thin mirror on the inside of a pantry door visually expands a cramped space and helps you spot hidden items faster. The reflective surface brings light into dark corners and feels surprisingly luxe.
Materials
- 1 thin framed mirror 12" x 8"
- 2 small wall-safe mirrors adhesive strips
- Soft cloth and glass cleaner
- Optional small hook for hanging
Instructions
- Clean the door surface and back of mirror.
- Apply adhesive strips per package directions.
- Mount mirror at eye level and press firmly.
- Use mirror to reflect deeper shelves for easier viewing.
- Remove residues yearly and replace adhesive strips.
- For renters, use Command-style adhesive for clean removal.
How to Display or Gift It
Place on pantry door to double-check pantry inventory as you plan meals. Gift with a small mirror cleaner kit and a polishing cloth.
- DIY Cork Board Menu & Meal Planner
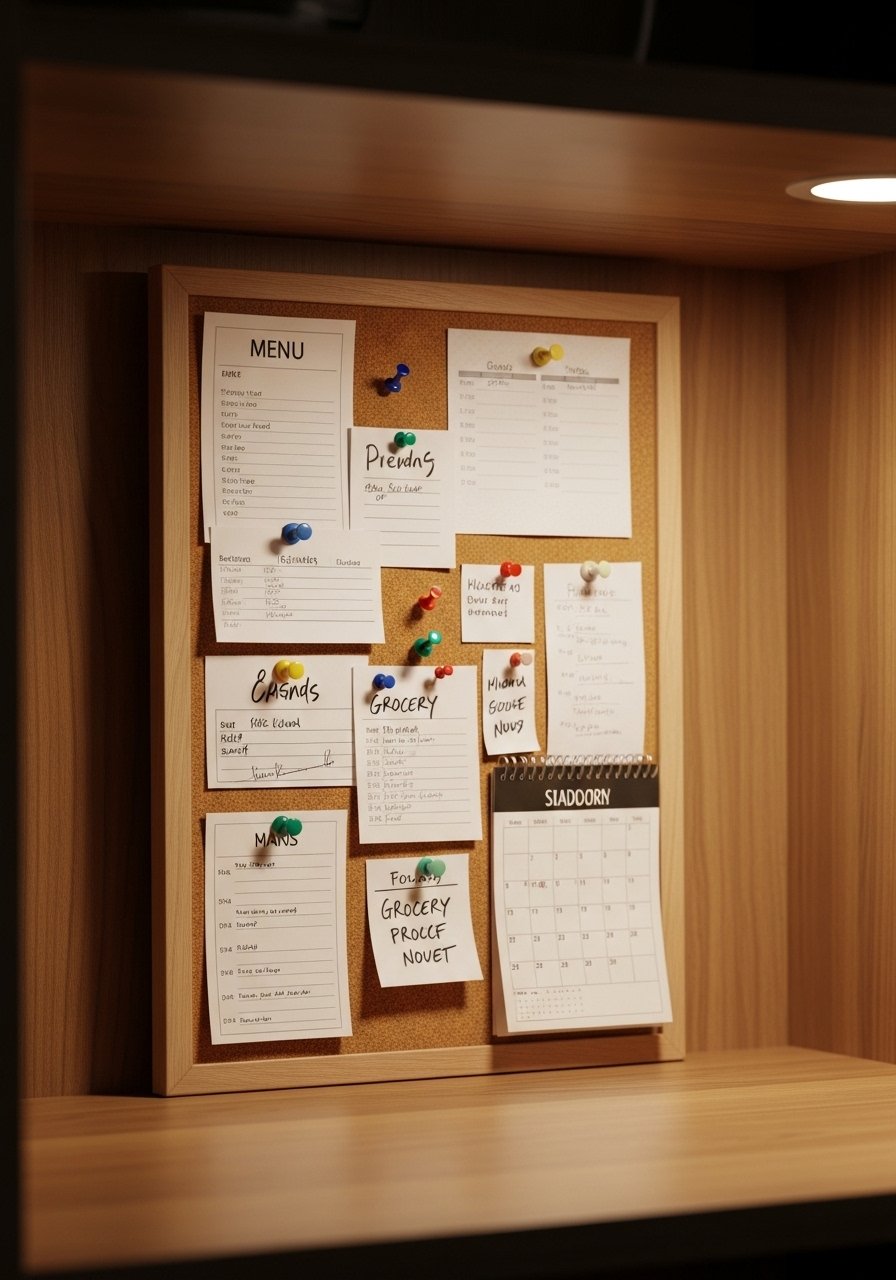
A corkboard meal planner keeps weekly menus and grocery lists in one place. The tactile push of pins makes planning feel hands-on. Pair with printed recipe cards for a functional, pretty pantry bulletin.
Materials
- 1 cork board 12" x 12"
- 20 colorful pushpins
- Printed weekly menu cards (4" x 6")
- Small clipboard or pen holder
- Double-sided mounting tape
Instructions
- Mount corkboard inside pantry at comfortable reach.
- Pin weekly menu cards and staple recipe printouts.
- Update cards weekly and move used ones to a recipe file.
- Use pins to mark pantry staples that are low.
- Replace corkboard every few years if worn.
- Keep extra cards clipped to clipboard nearby.
How to Display or Gift It
Use beside a chalkboard for a full planning station. Gift with a set of meal-planning printables and colorful pushpins.
- DIY Resin-Coated Shelf Tiles for Easy Cleaning
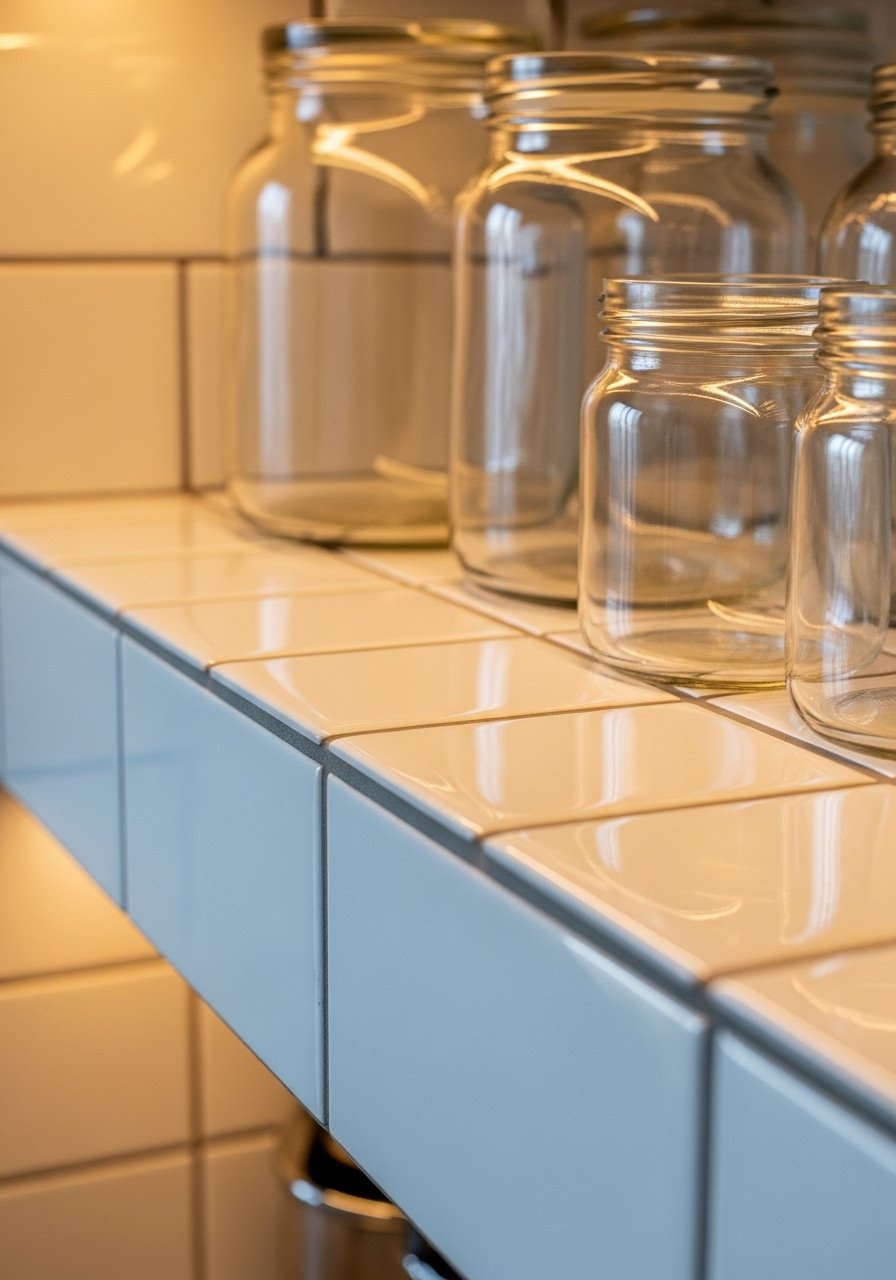
Resin-coated tiles create a wipe-clean surface that resists stains and moisture. The glossy finish reflects light and adds a clean, modern feel. This project takes longer due to resin curing but yields durable results.
Materials
- 6 thin plywood tiles 6" x 6"
- Epoxy resin kit (16 oz) with hardener
- Mixing cups and wooden stir sticks
- Foam brush and heat gun or torch (for bubbles)
- Disposable gloves and protective mat
Instructions
- Sand and seal plywood tiles; apply 1 thin coat of primer and let 2 hours dry.
- Mix resin per kit instructions (usually 2:1 ratio) and pour thin even coat across tiles.
- Use a heat gun for 5–10 seconds to remove bubbles.
- Let cure 24–72 hours depending on resin instructions; full cure 7 days.
- Place tiles on pantry shelves; wipe clean with a soft cloth.
- Replace if scratched deeply.
How to Display or Gift It
Line bottom shelves to protect from spills. Package as a gift with resin safety gloves and a small mixing set.
- DIY Label Punch Board with Magnetic Backing
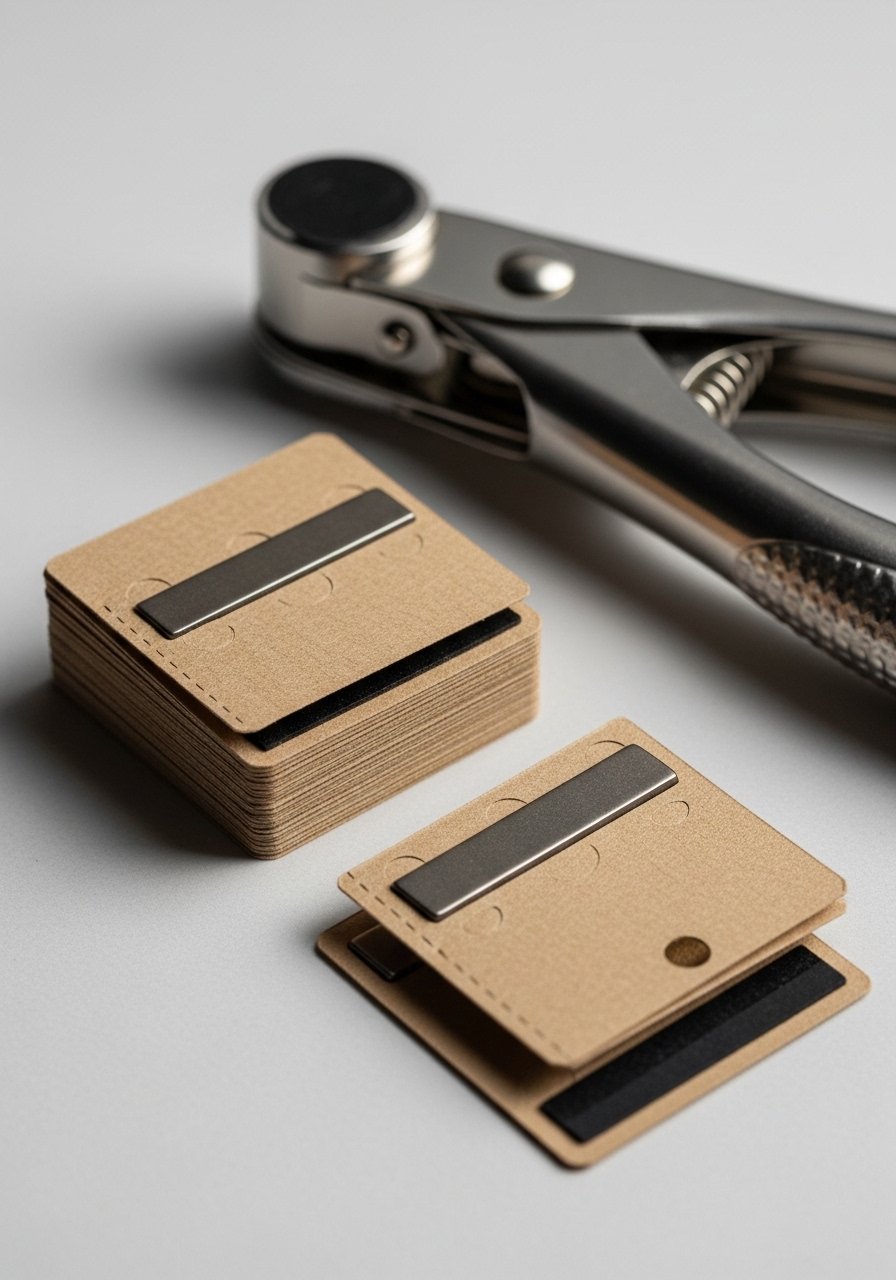
A label punch board produces uniform kraft tags that stick to metal bins with magnetic strips. The tactile punch feel makes labeling quick and consistent. Great for mixing aesthetics like farmhouse and japandi.
Materials
- Label punch tool (rectangle punch)
- Kraft cardstock 50 sheets 65 lb
- Magnetic tape roll (1/2" x 10 ft)
- Hole reinforcements and twine
Instructions
- Punch labels from kraft cardstock using punch tool.
- Cut magnetic tape to label width and adhere to the back.
- Optionally punch a hole and add reinforcements for hanging.
- Label with pen or vinyl cut from a Cricut machine.
- Attach to metal bins or magnetic strips.
- Store punched labels in a small organizer.
How to Display or Gift It
Use on metal baskets and canisters for a coordinated look. Give a bundle of pre-punched labels with a small punch tool as a housewarming gift.
- Under-Shelf Sliding Baskets for Extra Hidden Storage
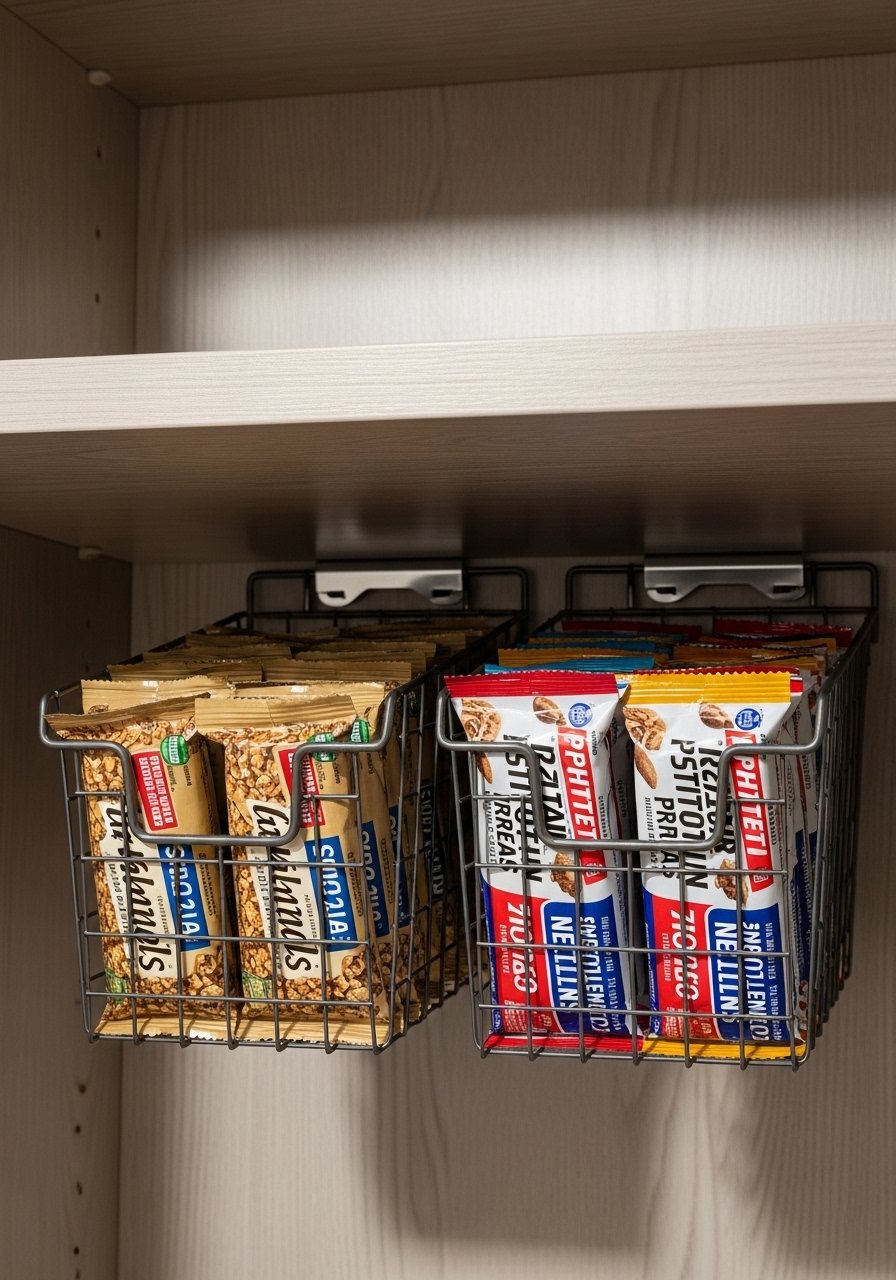
Under-shelf sliding baskets create hidden storage in the shadow of each shelf and are perfect for bars, small packets, and foil. The final effect is discreet yet highly functional. These clip-on baskets install in minutes and expand usable space.
Materials
- 2 under-shelf slide baskets (12" width)
- Small screwdriver
- Measuring tape
- Small labels for basket fronts
Instructions
- Measure shelf thickness to ensure clamp fit.
- Clip baskets onto shelf underside at desired locations.
- Load lightweight items first and test sliding action.
- Adjust spacing so baskets don’t collide when extended.
- Check clamps weekly and tighten if they loosen.
- Replace baskets every 3–5 years if worn.
How to Display or Gift It
Stow granola bars, foil packets, and stir sticks in these baskets for quick reach. For gifting, include a sample set of reusable snack bags and a small gift tag.
You made it through 25 weekend-friendly DIY small pantry ideas that each solve a common clutter problem. From magnetic spice tins to resin-coated shelf tiles, there’s a mix of quick fixes and slightly more hands-on projects for every skill level. Pin your favorites and try one this weekend — you might be surprised how much space a few smart organizers reclaim.
If you’re building more than one project, a good temperature-controlled hot glue gun saved me time across dozens of steps. Which idea will you try first? Share a photo when you do, and pass this list along to a friend who could use a pantry pick-me-up.


