
You open the pantry and wish it felt less cluttered and more like a curated shop corner. That’s exactly the kind of calm these small pantry ideas with baskets are built for—practical, rustic, and pretty enough to display on open shelving. Each idea below uses baskets as the anchoring element so your bins, snacks, and baking supplies stay organized and visually pleasing.
I’ll show you 22 hands-on projects that range from lined wicker bins to labeled wire baskets to hanging macramé basket stations. You’ll find projects that fit cottagecore, farmhouse, boho, and japandi vibes. Grab your hot glue gun and a small foam brush—those two tools make a huge difference—then scroll to the project that matches your pantry’s personality.
I often cut labels with my Cricut Explore cutting machine when I want crisp vinyl lettering. Ready? Let’s make your pantry both organized and lovely.
- Painted Wicker Breakfast Baskets
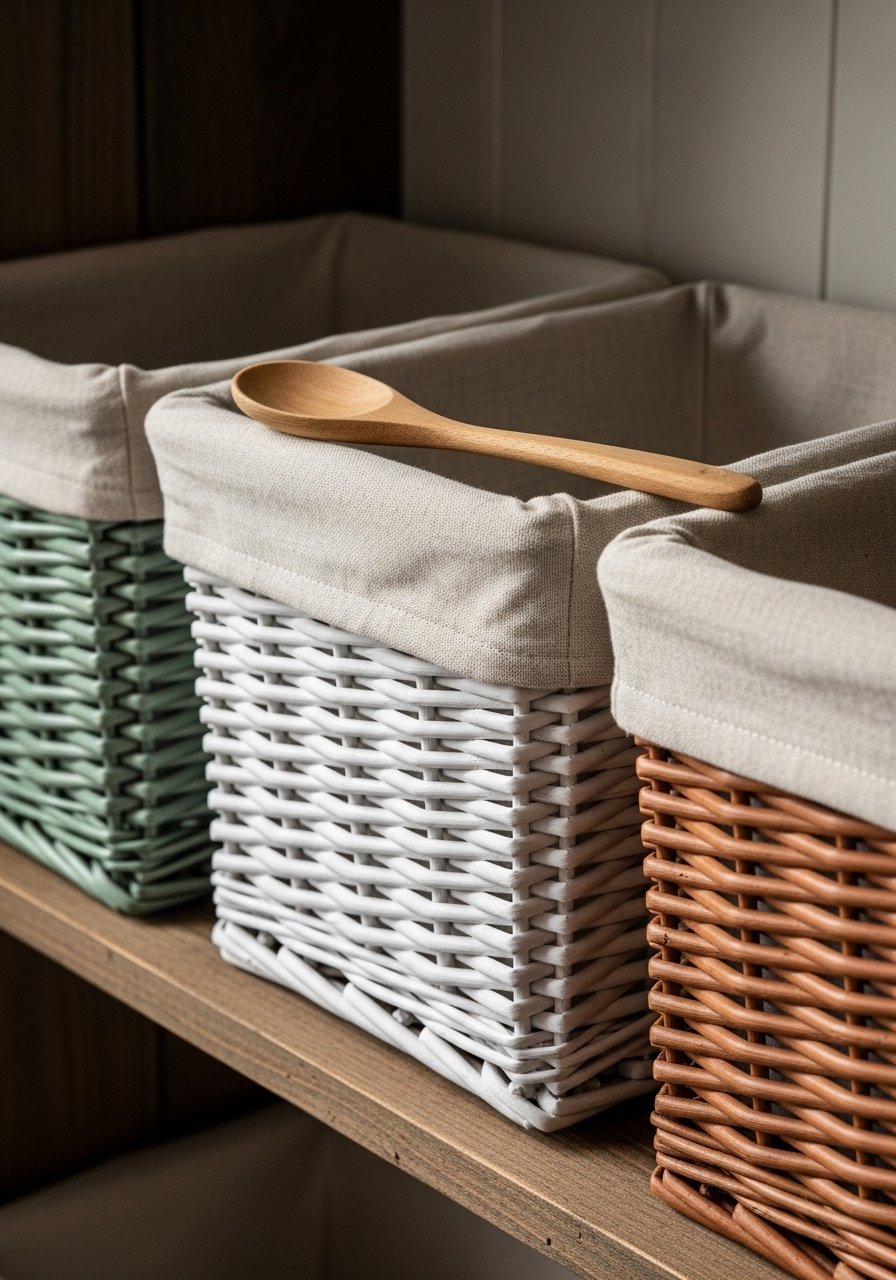
This simple refresh gives old wicker a fresh, coordinated look that instantly ties pantry shelves together. The texture stays tactile and homey, while paint gives a cleaned-up finish that hides scuffs. Beginners love this because brush strokes add charm.
Materials
- 3 small wicker baskets (10–12" wide each)
- 1 can matte chalk paint, 8 oz (choose 2–3 colors)
- 1 bottle acrylic matte sealer, 4 oz
- 2 linen basket liners, cut to fit (12" x 18")
- 1 foam brush, 1"
- 1 fine-grit sandpaper, 220 grit
- Painter’s tape, small amounts
Instructions
- Wipe baskets clean and remove dust with a dry cloth.
- Lightly sand high spots or fraying edges with 220 grit sandpaper.
- Use painter’s tape to mask any rim you want raw.
- Apply one thin coat of chalk paint with the foam brush. Let dry 1 hour.
- Add second coat for full coverage. Dry 1–2 hours.
- Once opaque and dry to touch, spray or brush on one coat of matte sealer. Allow sealer to cure 24 hours for full water resistance.
- Insert linen liners and style pantry items.
How to Display or Gift It
- Stack baskets on open shelves grouped by color for a cohesive vignette.
- Add wooden scoop labels on each front with twine.
- Wrap a painted basket in kraft paper and tie with baker’s twine for housewarming gifts.
- Store liners flat in a shallow craft organizer while sealer cures.
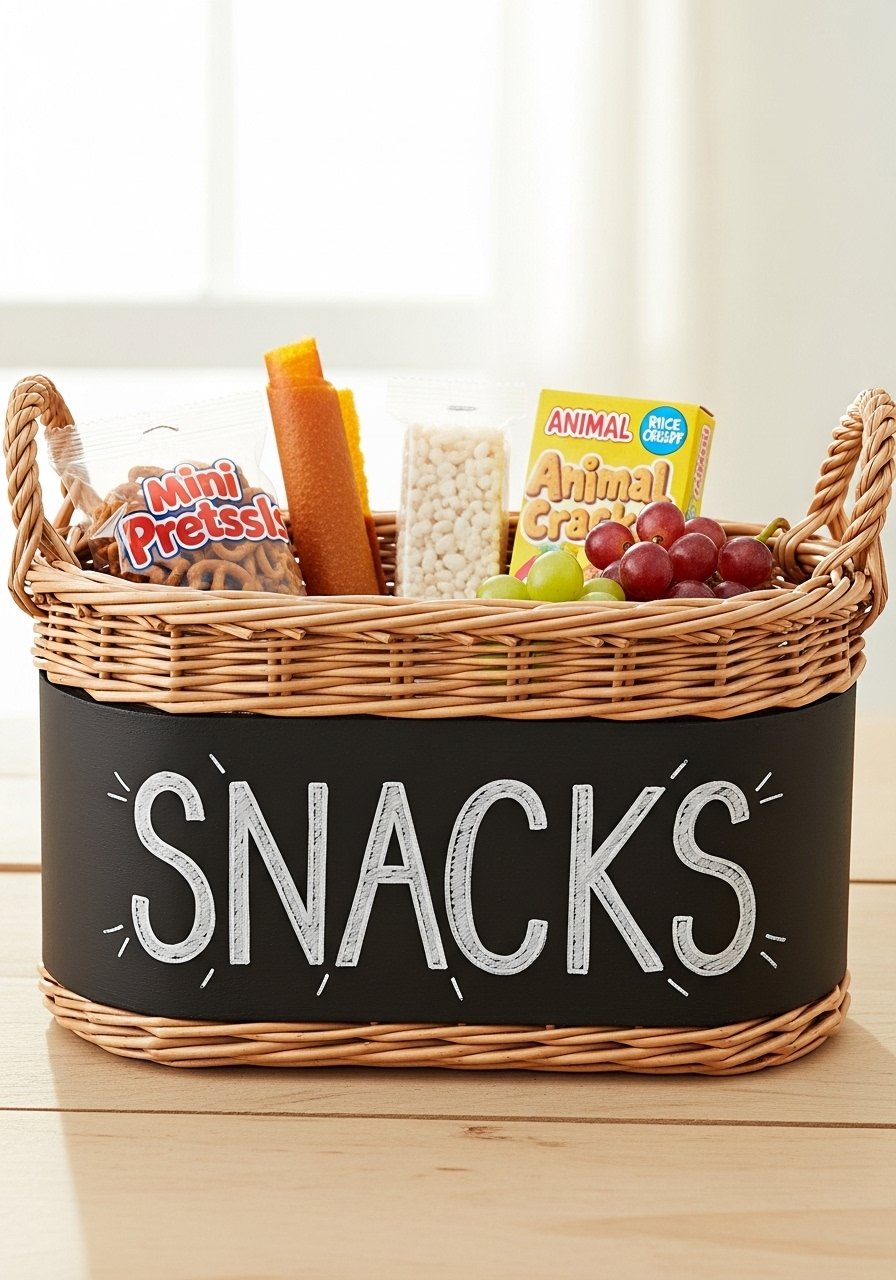
- Chalkboard Labeled Pantry Baskets

Labels are everything when you want pantry functionality. Chalkboard labels are flexible for rotating contents—cereal today, baking supplies tomorrow. Wire baskets plus chalk tags create a crisp, farmhouse look whoever’s grabbing snacks can read.
Materials
- 4 medium wire baskets, 12" x 8" x 6"
- 4 round chalkboard tags (2.5" diameter) with twine
- 1 chalk marker, white
- 1 set of small clothespins (for holding recipe cards)
- 1 roll of washi tape, neutral
- 1 package of small craft hooks (for tag attachment)
- Gloves for handling wire
Instructions
- Clean wire baskets and remove packaging.
- Attach chalkboard tags to the front lip using twine or craft hooks.
- Write labels with a chalk marker. Let ink dry 30 seconds.
- Use washi tape on the rim for a neat edge if desired.
- Clip small recipe cards to the side with clothespins for quick notes.
How to Display or Gift It
- Line baskets with parchment paper for baked goods display.
- Use a small wooden easel to hold a weekly pantry list nearby.
- Wrap a chalkboard-labeled basket in clear cellophane for gifting with homemade granola.
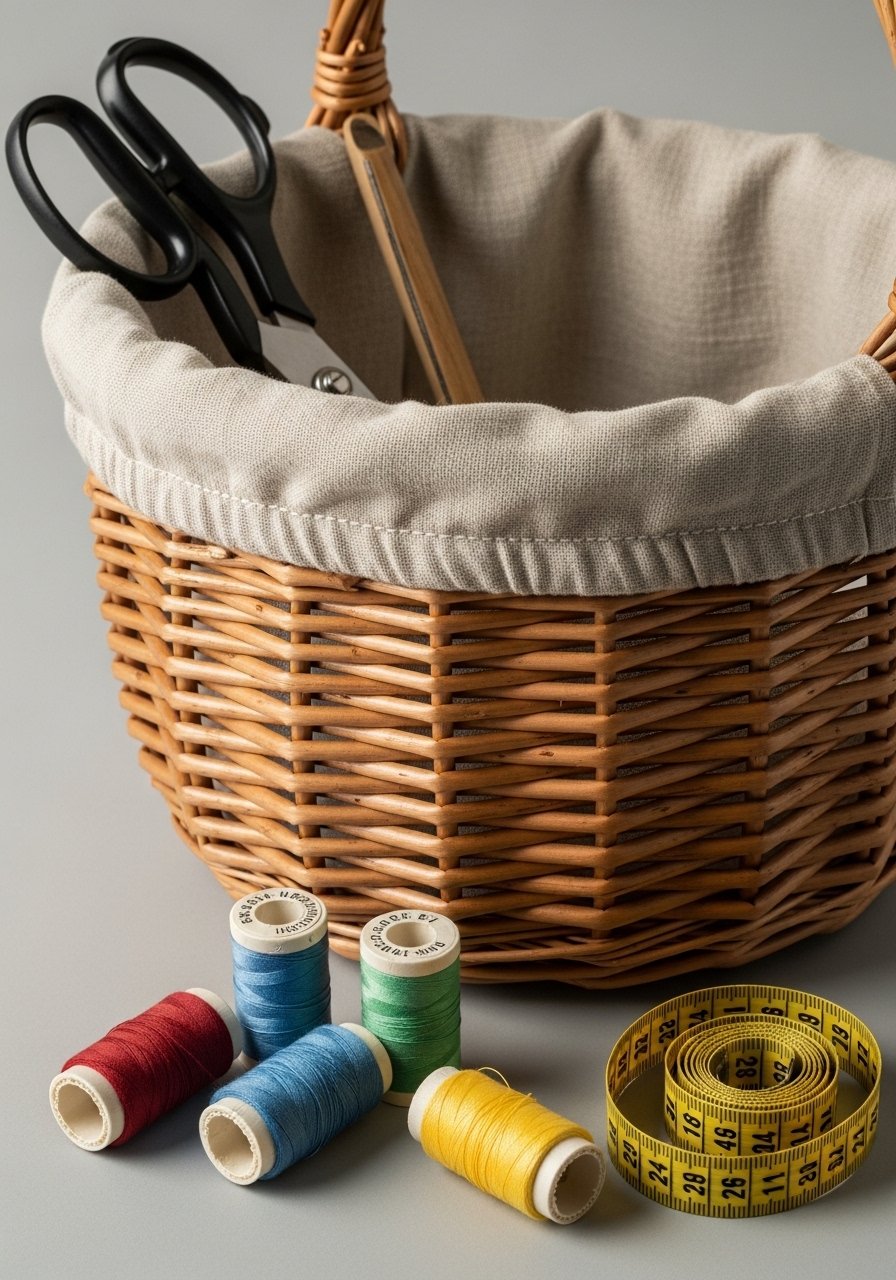
- Lined Linen Baskets for Bulk Bins (small pantry ideas with baskets)
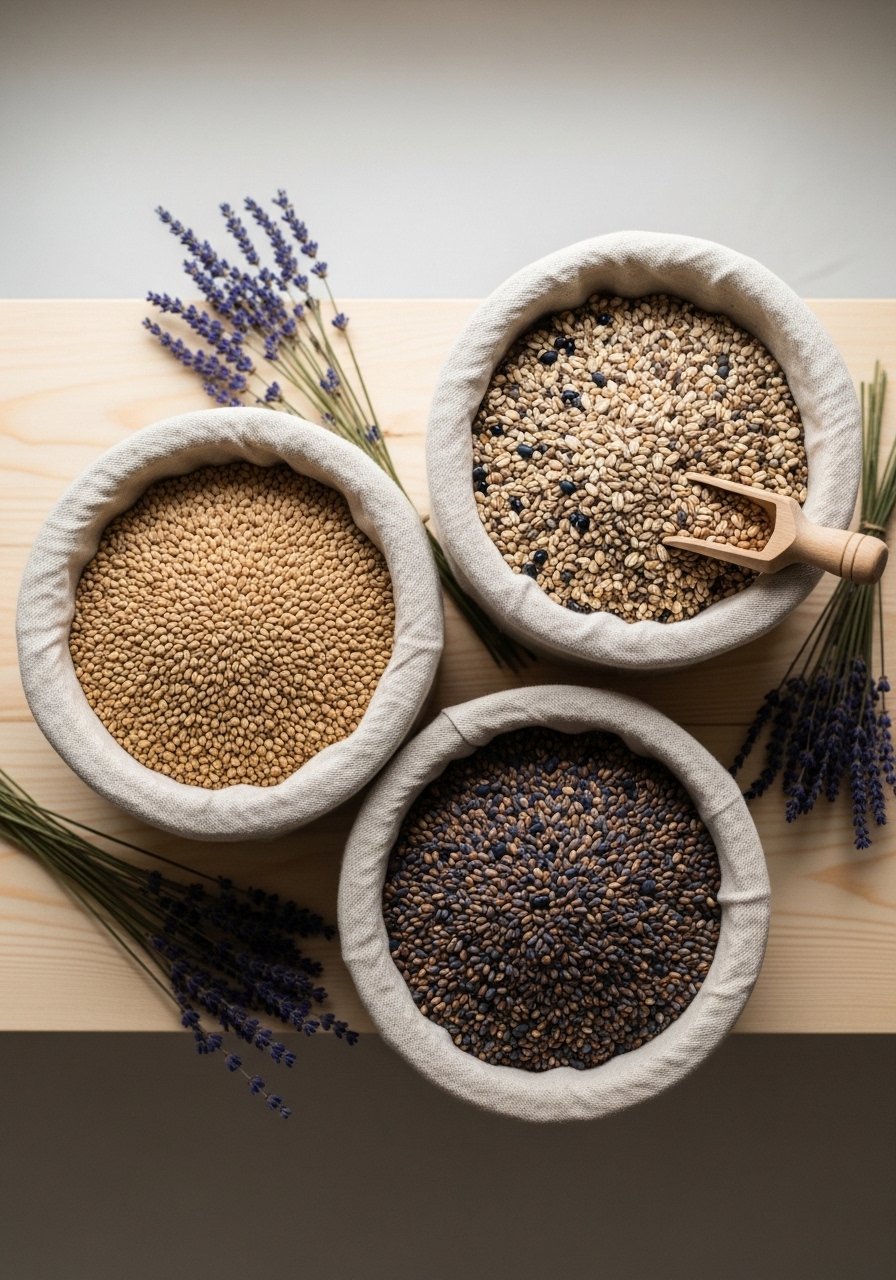
Linen liners protect basket interiors from spills and give a soft, neutral look. These are perfect for storing flours, oats, and snacks in a tidy but tactile way and they fit a calm japandi or cottagecore color palette.
Materials
- 3 medium seagrass baskets (11" x 9")
- 1.5 yards natural linen fabric
- 1 spool cotton thread, matching
- 1 sewing needle or sewing machine
- 1 package of fabric glue, 2 oz (optional)
- 3 wooden scoop spoons
- 1 measuring tape
Instructions
- Measure the basket interior and add 1" seam allowance to pattern pieces.
- Cut linen to size: each liner 12" x 10" with a 2" depth for folding.
- Fold and hem edges, stitching with a straight stitch. If you don't sew, use fabric glue and allow 24 hours to cure.
- Insert liners into baskets and press down so seams sit along sides.
- Place wooden scoops in each basket for easy portioning.
How to Display or Gift It
- Stack bulk baskets with labels made on cardstock and clipped to the rim.
- Store liners flat in a craft organizer labeled by size.
- Gift pre-lined baskets filled with baking mixes wrapped in parchment and twine.
- Rope-Wrapped Basket Handles (small pantry ideas with baskets)
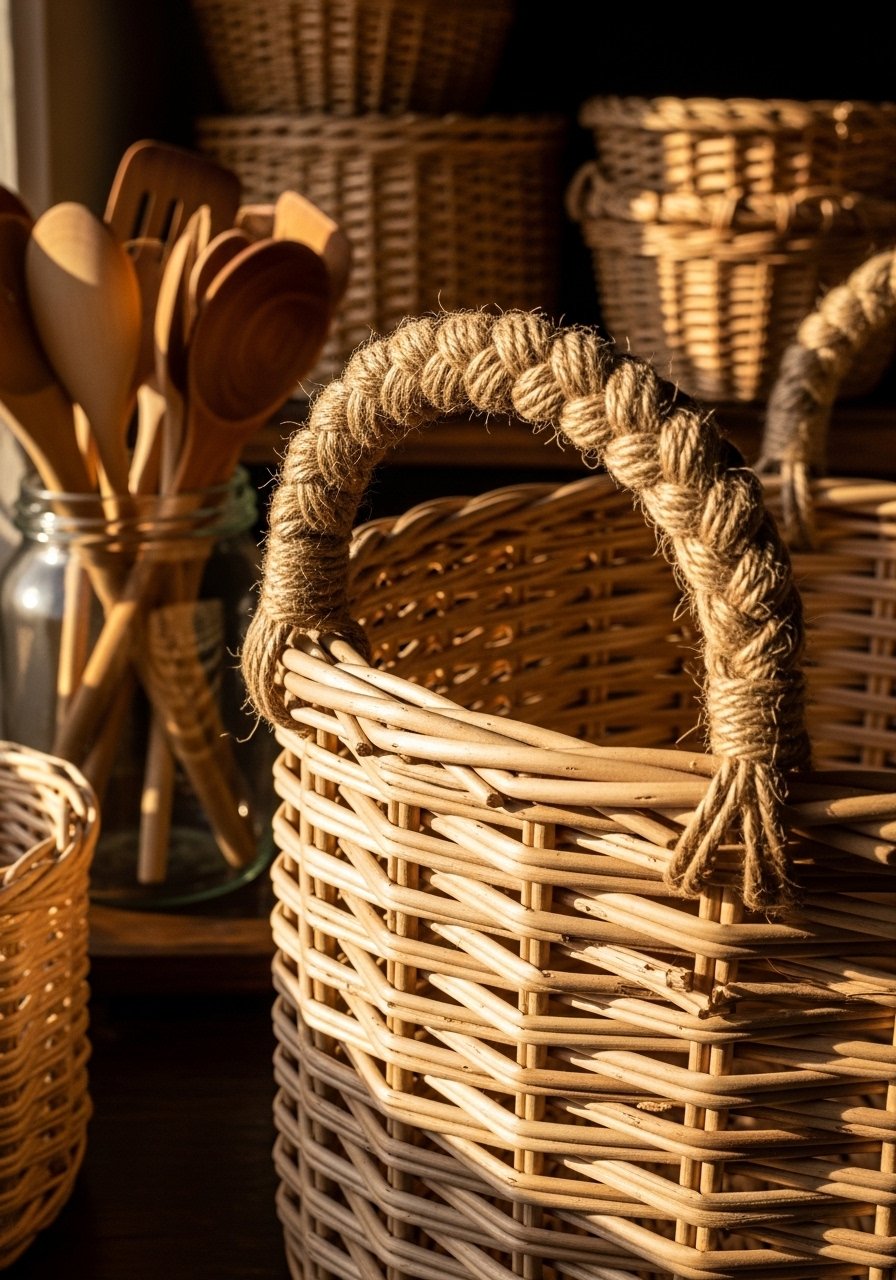
Wrapping handles with jute cord gives a durable, farmhouse feel and protects your hands when you grab a heavy basket. It’s a quick upgrade that feels handmade.
Materials
- 2 baskets with handles (10" width)
- 30 ft natural jute twine (3mm)
- 1 hot glue gun with low-temp glue sticks
- 1 pair scissors
- 1 lighter or end-sealer (to finish jute ends)
- 1 roll painter’s tape
Instructions
- Secure the handle with painter’s tape where you’ll start wrapping.
- Heat your glue gun; apply a dot of glue at the start point and press the jute down.
- Wrap jute tightly around the handle, adding a dab of glue every 1–2 inches.
- When finished, cut the jute and melt the tip slightly to prevent fray, pressing it into the wrapped area.
- Remove painter’s tape and repeat on the other handle. Let glue cool 5–10 minutes.
How to Display or Gift It
- Pair with linen liners for a soft/rustic combo.
- Tie a small sprig of dried lavender to the handle as a finishing touch.
- Use a craft organizer to keep extra jute neat for future repairs.
- Vinyl-Labeled Baskets with Cricut Cut Letters
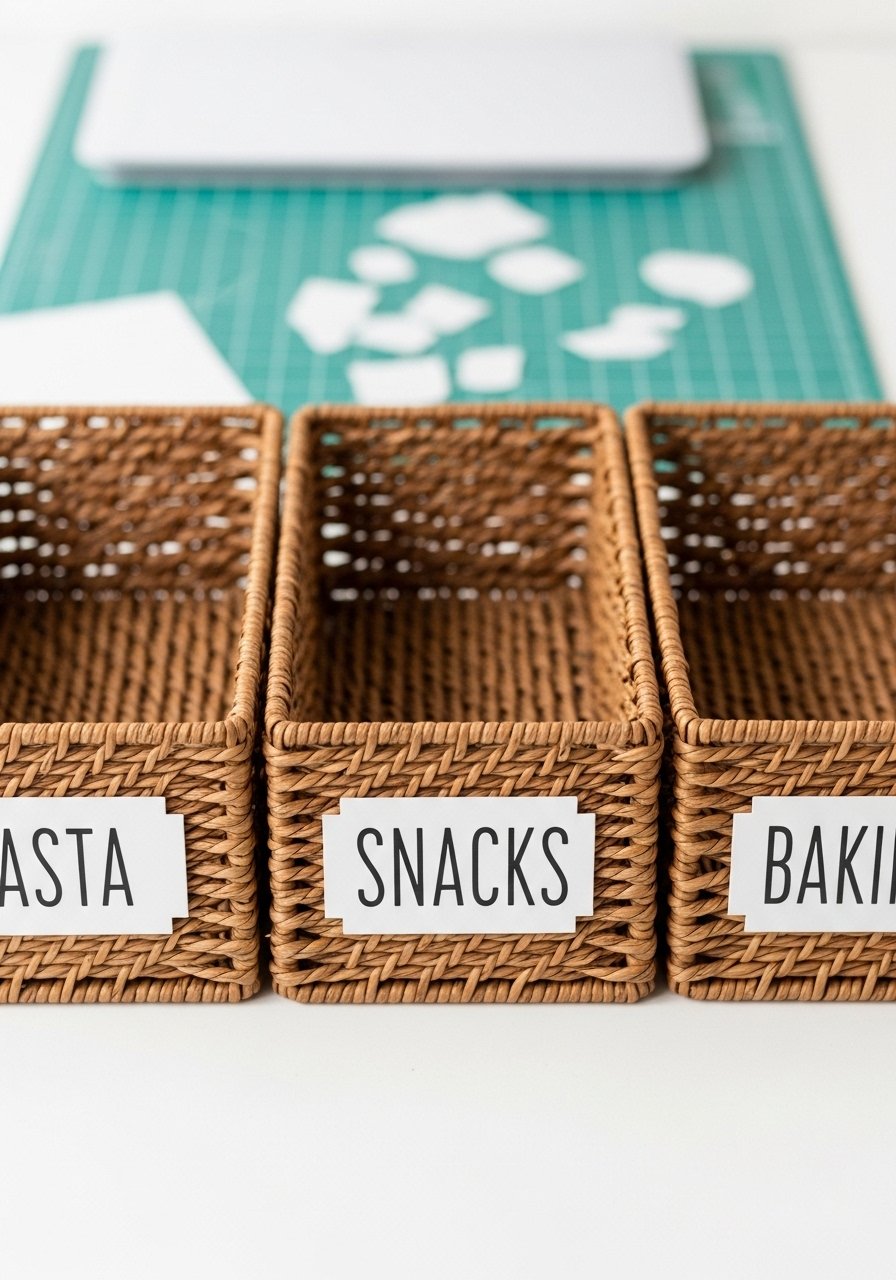
Vinyl labels are durable and look professional. If you have a cutting machine, this project is fast and exact. Use removable vinyl for rental-friendly changes.
Materials
- 4 small wicker baskets
- 1 roll removable adhesive vinyl, black or white (6" width)
- 1 transfer tape sheet
- 1 weeding tool
- 1 Cricut Explore cutting machine (or similar)
- 1 lint-free cloth and rubbing alcohol
- 1 ruler for centering
Instructions
- Clean the basket front with rubbing alcohol and let dry 10 minutes.
- Design labels using your cutting machine software; mirror if needed.
- Cut vinyl with the Cricut Explore cutting machine, weed the design, and apply transfer tape.
- Position label on the basket, burnish with a scraper, then peel transfer tape.
- Press edges by hand and check adhesion. Wait 24 hours before heavy use for best bond.
How to Display or Gift It
- Line baskets with kraft paper and tuck in a small gift tag for presents.
- Use a local shelf label holder if you want rotating signs.
- Store leftover vinyl on a magnetic roll rack.
- Hanging Macramé Mini Basket Station
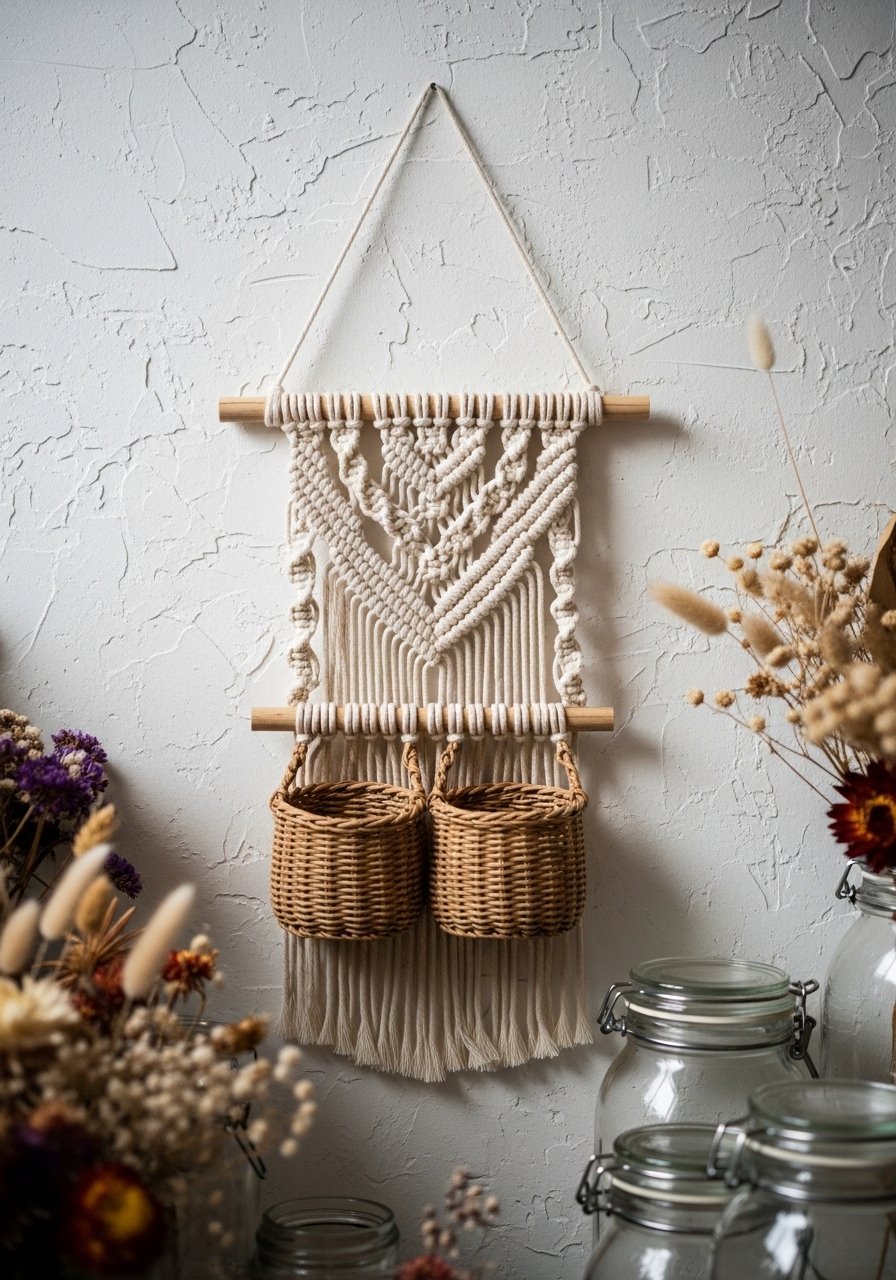
Hanging macramé baskets free up shelf space and add a boho touch. They’re great for herbs, small snacks, or decorative fillers. This project merges fiber craft with pantry storage.
Materials
- 5 yards 3mm macramé cord (brown or natural)
- 1 wooden dowel, 18" length
- 2 mini woven baskets (6" diameter)
- 1 measuring tape
- 1 pair sharp scissors
- 1 small comb for fringe
- 1 macramé pattern or basic knot guide
Instructions
- Cut 10 cords at 2.5 yards each; fold over the dowel and secure with lark’s head knots.
- Create a square knot netting pattern to form basket hangers—about 6–8 rows until you can support the small basket.
- Tie a gathering knot beneath each basket for security.
- Trim fringe at the bottom and comb it for a neat finish.
- Hang on a wall hook rated for at least 10 lbs.
How to Display or Gift It
- Use it to hold tea tins or small packets.
- Pair with potted dried herbs for a kitchen-friendly display.
- Wrap for gifting in a kraft box and include care instructions.
- Painted Wire Baskets with Rust-Proof Primer
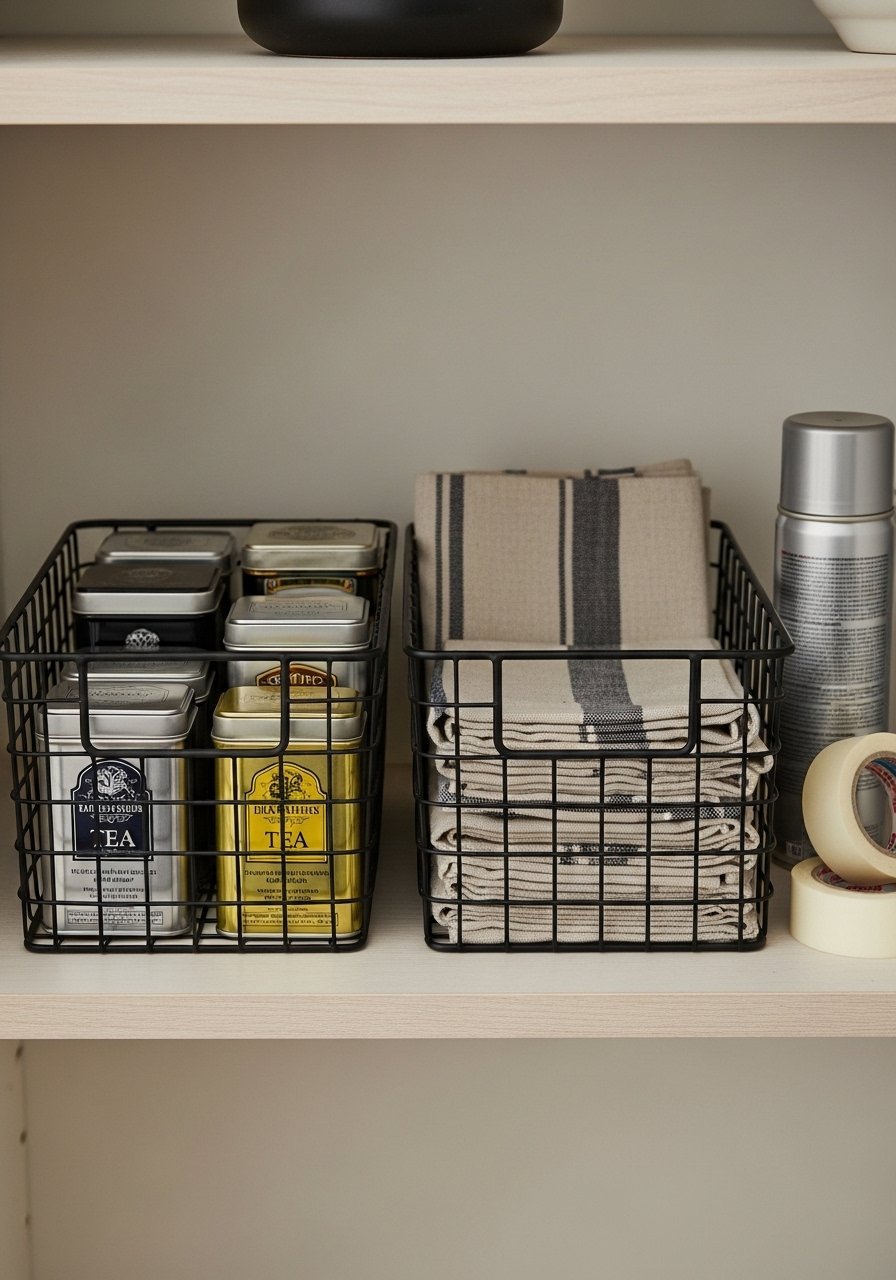
Wire baskets can look sleek with a spray matte finish—perfect for a japandi or modern farmhouse pantry. Primer prevents future rust and keeps the finish smooth.
Materials
- 2 medium wire baskets (12" x 9")
- 1 can rust-preventing primer, 12 oz
- 1 can matte spray paint, 12 oz (black or charcoal)
- 1 respirator mask
- 1 painter’s tape
- 1 drop cloth
Instructions
- Clean baskets and remove labels. Work outside or in a ventilated area.
- Mask any areas you don’t want painted.
- Apply one light coat of rust-preventing primer; dry 30–45 minutes.
- Apply two light coats of matte spray paint, waiting 15 minutes between coats.
- Let cure 24 hours before placing food items inside.
How to Display or Gift It
- Pair with glass jars for a minimalist pantry shelf.
- Use small craft organizers to store extra spray caps.
- Gift painted basket set with gourmet tea bags tucked inside.
- DIY Basket Liners with Elastic Edge
Elastic-lined liners keep fabric snug and easy to remove for washing. They work well for snack bins and produce baskets.
Materials
- 1 yard cotton-linen blend fabric
- 1 yard 1/4" elastic
- 1 sewing machine or needle and thread
- 1 safety pin
- 1 measuring tape
- 1 fabric marker
Instructions
- Measure basket rim circumference and height. Add 1" seam and 1" hem.
- Cut fabric accordingly and hem the top edge 1/2".
- Fold bottom seam and stitch sides to form a sleeve.
- Create elastic casing by folding bottom hem over 1/2", stitch leaving a 2" opening.
- Thread elastic with a safety pin, try on basket, adjust for snugness, then sew ends and close casing.
- Wash liner on gentle cycle before first use; air dry.
How to Display or Gift It
- Store liners folded in stackable craft boxes.
- Gift liners with a small instruction tag for care.
- Alternate liners seasonally to change the pantry look.
- Resin-Sealed Label Tags for Baskets
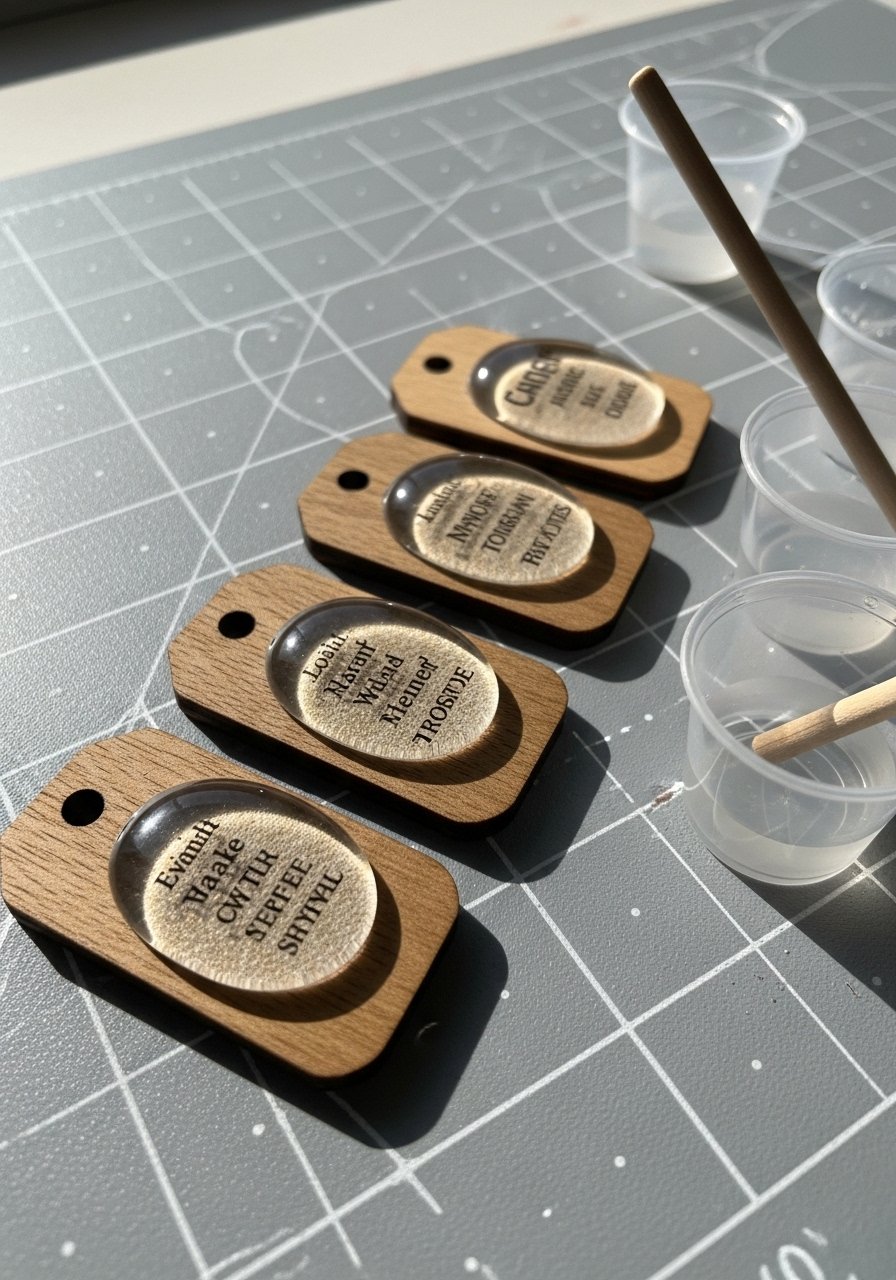
Resin gives wooden labels a glassy finish that survives kitchen humidity. This is great for frequently handled labels or wet areas.
Materials
- 8 wooden tags, 2" x 1.25"
- 1 small epoxy resin kit (2 oz total)
- 1 mixing cup and stir sticks
- 1 printed label sheet (inkjet compatible)
- 1 drill for small hole
- 1 twine for attachment
- 1 disposable gloves
Instructions
- Print and trim labels to fit wooden tags.
- Drill a small hole and sand the tag surface.
- Mix epoxy resin per kit instructions. Pour a thin dome on each tag.
- Place printed label onto tag and press gently. Add a second resin layer if needed.
- Let cure 24–48 hours until firm and tack-free.
- Attach tags with twine to basket handles.
How to Display or Gift It
- Pair with a small wooden easel to display a rotating pantry menu card.
- Store unused tags flat until resin fully cures.
- Gift a tagged basket with loose-leaf teas or spices.
- Chalk-Painted Crate Baskets for Rustic Display
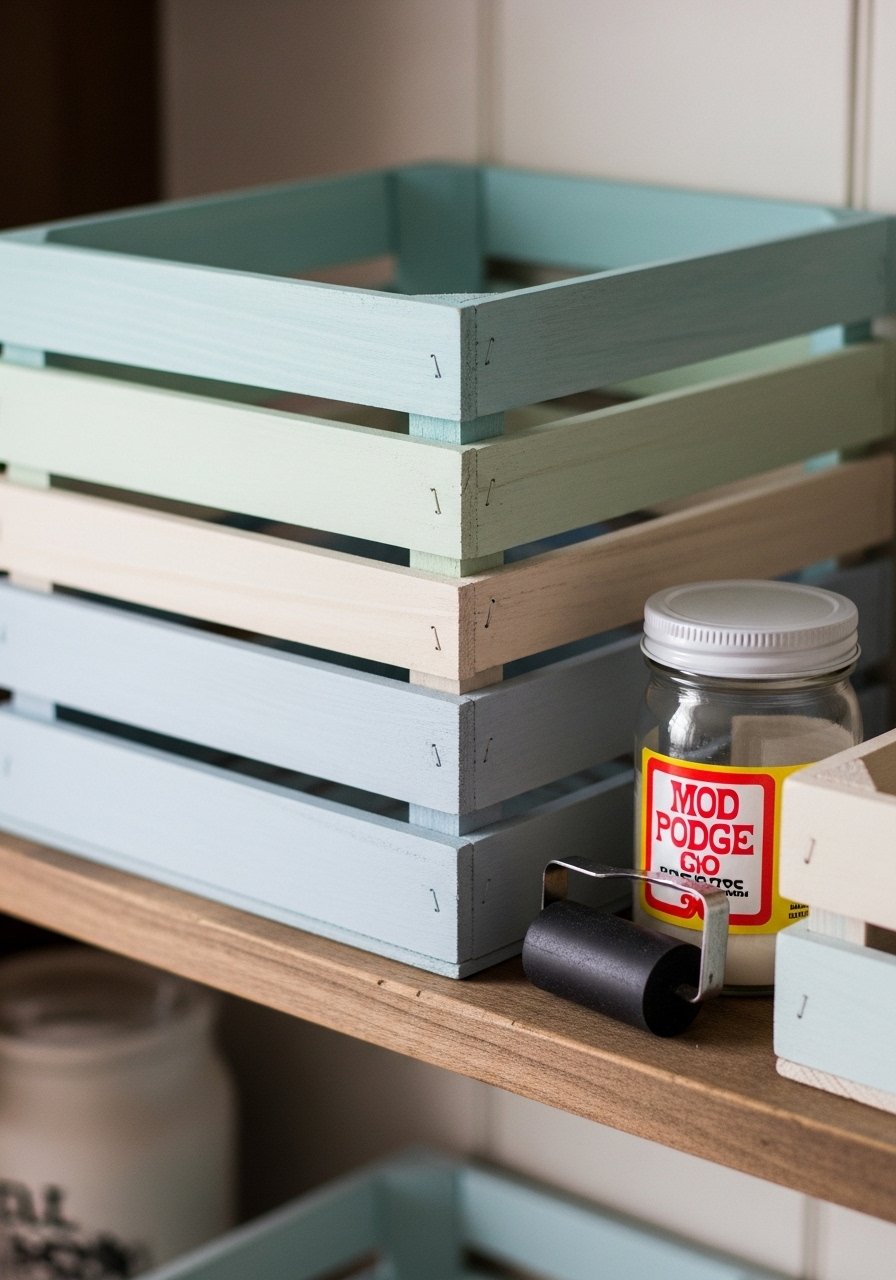
Shallow wooden crates act like large baskets for sacks of potatoes or bulk items. Chalk paint gives them a soft, vintage feel that fits rustic pantries.
Materials
- 2 shallow wooden crates (14" x 10" x 5")
- 1 8 oz jar chalk paint (neutral)
- 1 flat foam brush, 1"
- 1 jar matte Mod Podge, 8 oz
- 1 soft sanding block, 220 grit
- 1 small wax stick (optional)
Instructions
- Sand crate lightly to remove splinters.
- Apply one thin coat of chalk paint. Dry 1 hour.
- Add a second coat for uniform coverage. Dry 1–2 hours.
- Seal with a coat of matte Mod Podge for durability. Dry 24 hours.
- If desired, use the wax stick on edges for an aged look.
How to Display or Gift It
- Use crates to corral snack pouches or root vegetables.
- Stack crates for a ladder-style pantry display.
- Gift with a small sachet of dried herbs tucked inside.
- Tiered Basket Organizer with Tension Rods
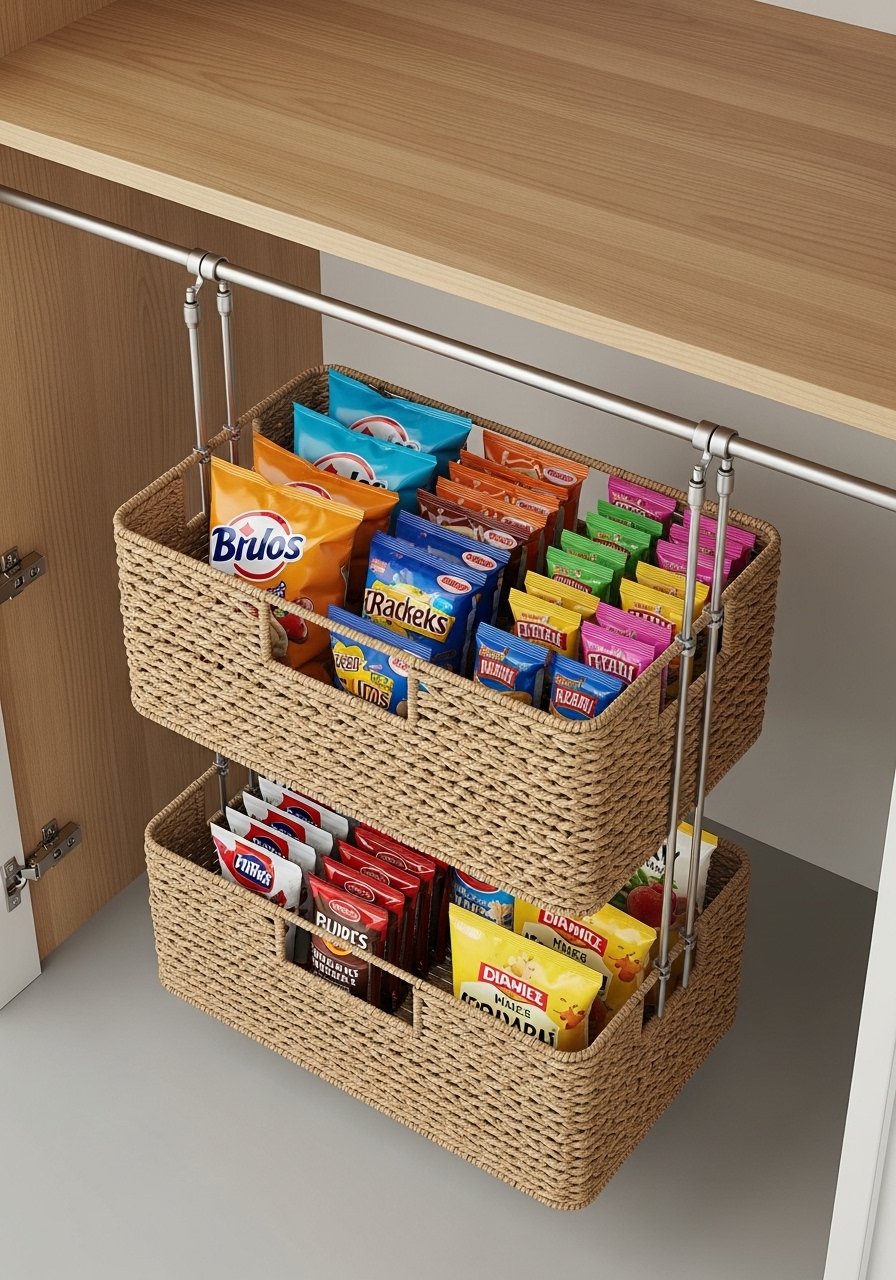
This vertical idea uses baskets on tension rods to create tiers—you get more visible storage without drilling. Great for narrow pantries.
Materials
- 3 shallow baskets (12" x 8")
- 2 short tension rods (12" each)
- 6 small S-hooks
- 1 measuring tape
- 1 pencil for marking placement
Instructions
- Measure interior pantry width and choose tension rods accordingly.
- Slide rods through basket openings or attach S-hooks.
- Place the top rod near the shelf above, then the lower rod spaced 6–8 inches below.
- Hang baskets on S-hooks and test weight capacity; distribute items evenly.
- Adjust spacing by moving the lower rod up or down as needed.
How to Display or Gift It
- Use for packets, small boxes, or fresh produce.
- Store tension rods in a kitchen tool drawer when not in use.
- Gift the kit assembled with a note on weight limits.
- Boho Painted Pattern Baskets with Stencils

Stenciled patterns add personality to plain baskets. The boho motifs fit casual farmhouse or cottagecore pantries.
Materials
- 3 natural woven baskets
- 1 small stencil set (geometric shapes)
- 1 acrylic paint set (6 colors)
- 1 stencil brush set
- 1 painter’s tape
- 1 palette for mixing
Instructions
- Clean basket surface and test stencil placement.
- Secure stencil with painter’s tape.
- Load stencil brush with paint, offload excess on a paper towel.
- Stipple paint through stencil in thin layers. Let dry 30 minutes between colors.
- Repeat for additional motifs. Allow 2 hours for full dry.
- Seal with a thin brush coat of matte sealer if desired. Cure 24 hours.
How to Display or Gift It
- Pair with neutral liners to make patterns pop.
- Stack painted baskets for a colorful pantry corner.
- Gift with a set of mini stencils and a note on care.
- Recycled Tea Towel Basket Liners
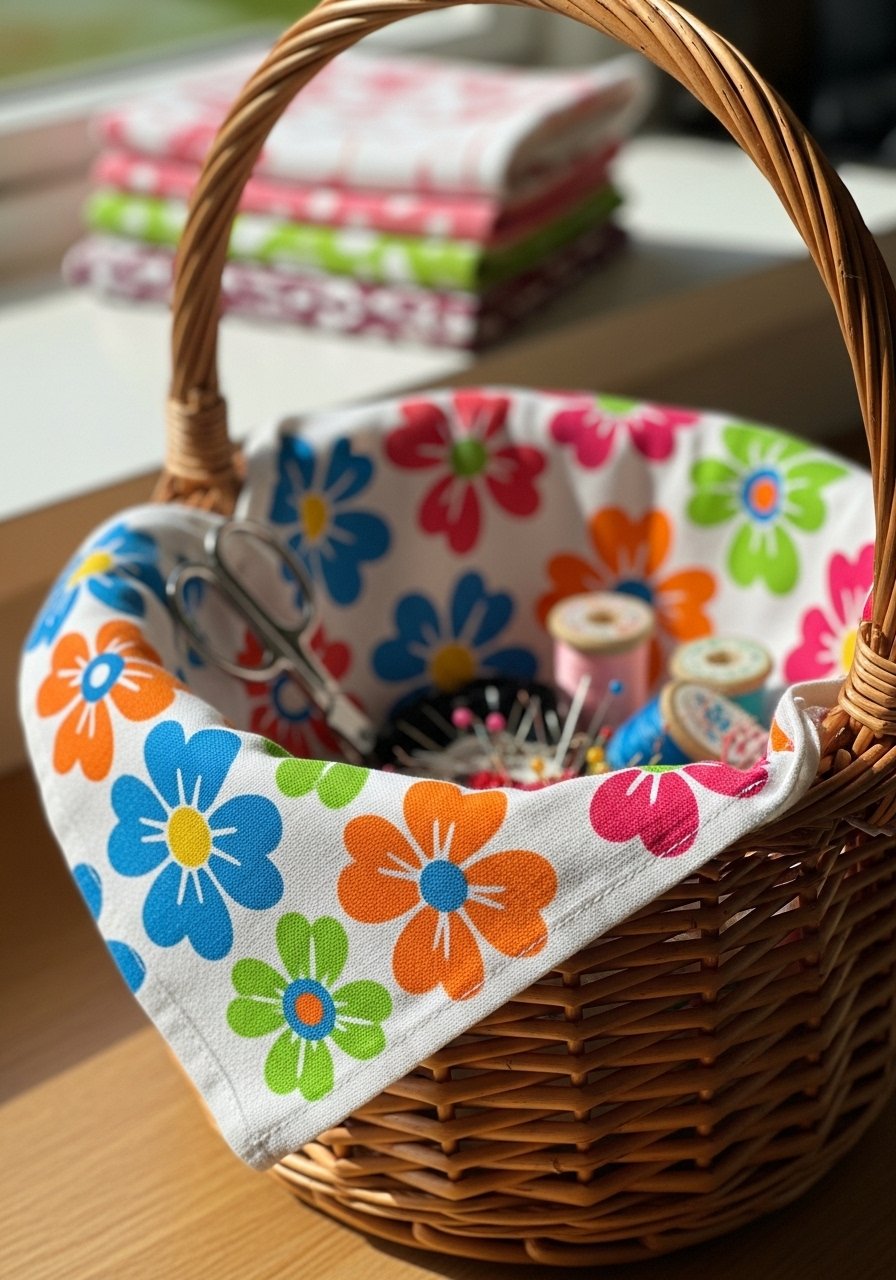
Repurpose tea towels as liners for a cheerful, budget-friendly option. It’s a zero-waste approach that also adds color.
Materials
- 1 vintage tea towel
- 1 basket (any size)
- 1 fabric scissors
- 1 safety pin (temporary)
- 1 fabric glue (optional)
Instructions
- Fold tea towel in half and tuck corners into the basket.
- Secure with a safety pin underneath if you want it semi-permanent.
- For a more finished look, stitch quick corner seams and hem edges.
- Machine wash towels before first use.
How to Display or Gift It
- Rotate towels seasonally—floral for spring, plaid for winter.
- Store extras folded in a slim craft drawer.
- Gift a lined basket filled with tea and cookies.
- Stackable Clear Bins with Basket Fronts
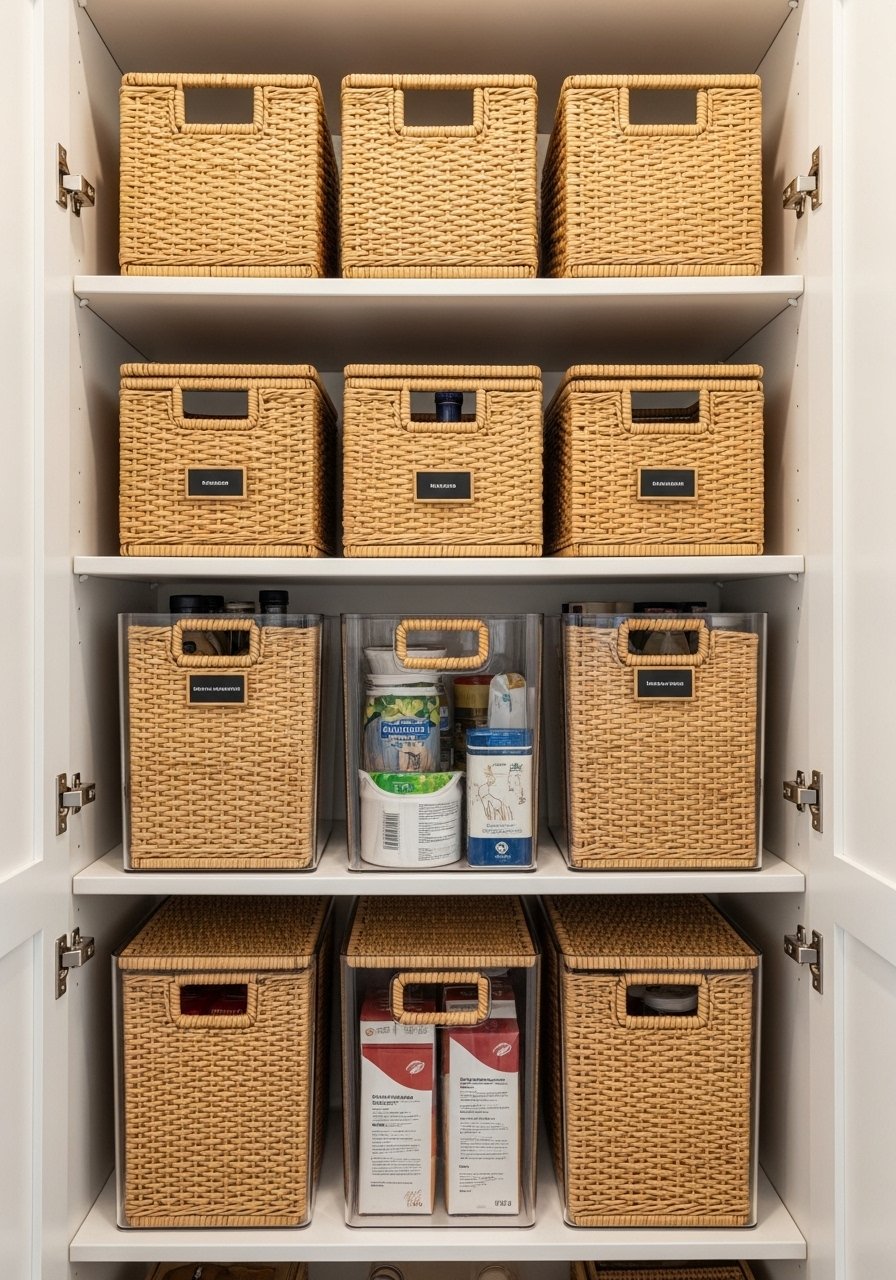
Combine visibility with aesthetic: clear bins show contents, woven fronts hide edges and add warmth.
Materials
- 4 clear stackable bins (12" x 9")
- 4 woven basket fronts trimmed to size
- 1 strong craft glue (E6000)
- 1 box cutter
- 1 measuring tape
- 1 small clamp set
Instructions
- Measure the face of the clear bin and trim basket front accordingly.
- Apply a thin bead of E6000 adhesive around the bin face.
- Press woven front onto the bin and clamp gently 30 minutes.
- Allow glue to cure 24 hours before filling.
How to Display or Gift It
- Use for snacks and individually wrapped items.
- Keep empty bins nested inside each other to save space.
- Gift one assembled bin with a set of pantry labels.
- Baskets with Magnetic Spice Lids
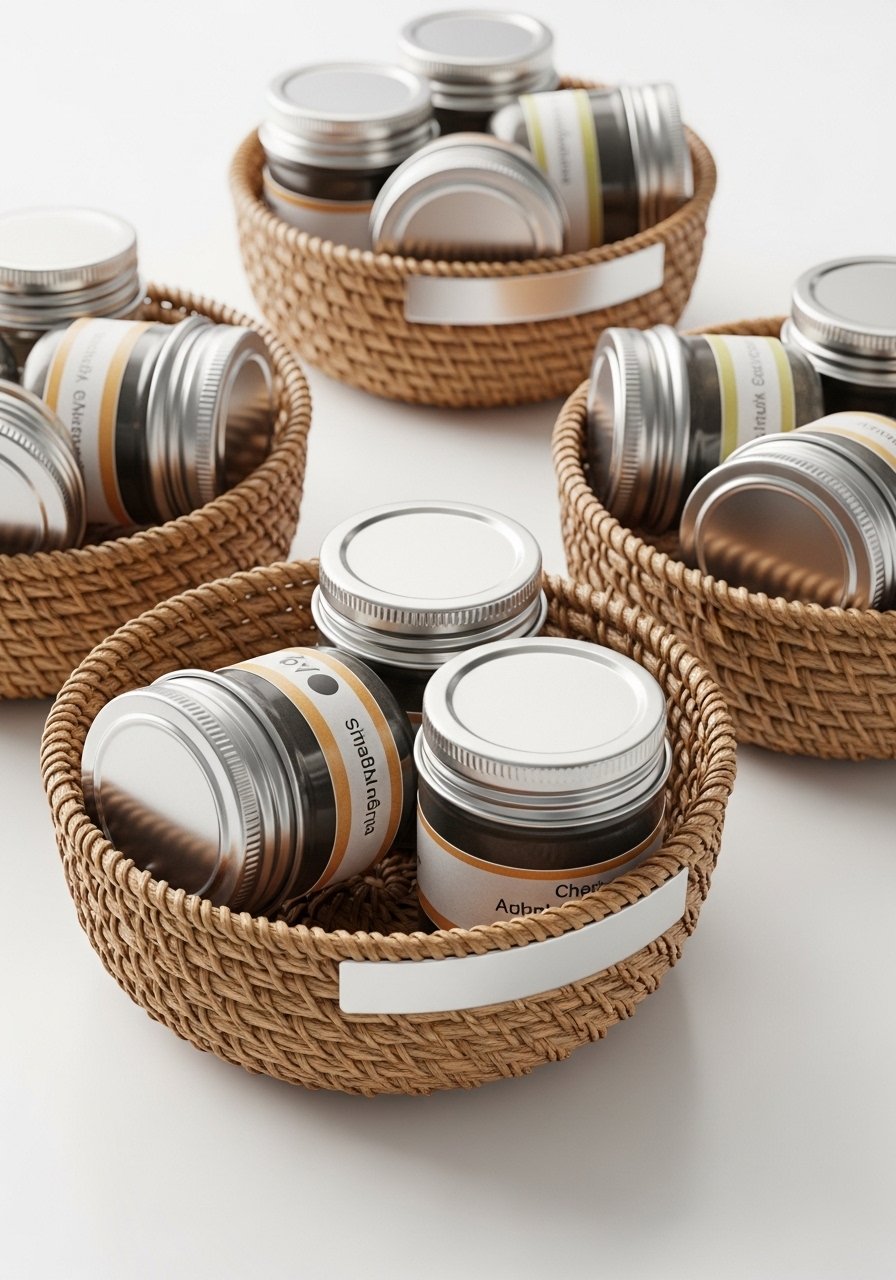
Attach a magnetic strip to the underside of a basket rim so spice tins can stick in place—perfect for quickly finding frequently used flavors.
Materials
- 4 small round baskets (6" diameter)
- 12 small metal spice tins (1.5" diameter)
- 1 magnetic strip with adhesive backing, 12"
- 1 super glue or E6000
- 1 circle label set
- 1 ruler
Instructions
- Clean the basket rim and measure strip length.
- Apply glue to the magnetic strip and adhere to underside of rim.
- Press firmly and let glue cure 24 hours.
- Label spice tins and test adhesion. Replace magnets if weak.
How to Display or Gift It
- Mount baskets on a pegboard near the stove for a cooking station.
- Store extra tins in a small wooden crate.
- Gift a set assembled with a recipe card.
- Fabric-Covered Wire Baskets (small pantry ideas with baskets)
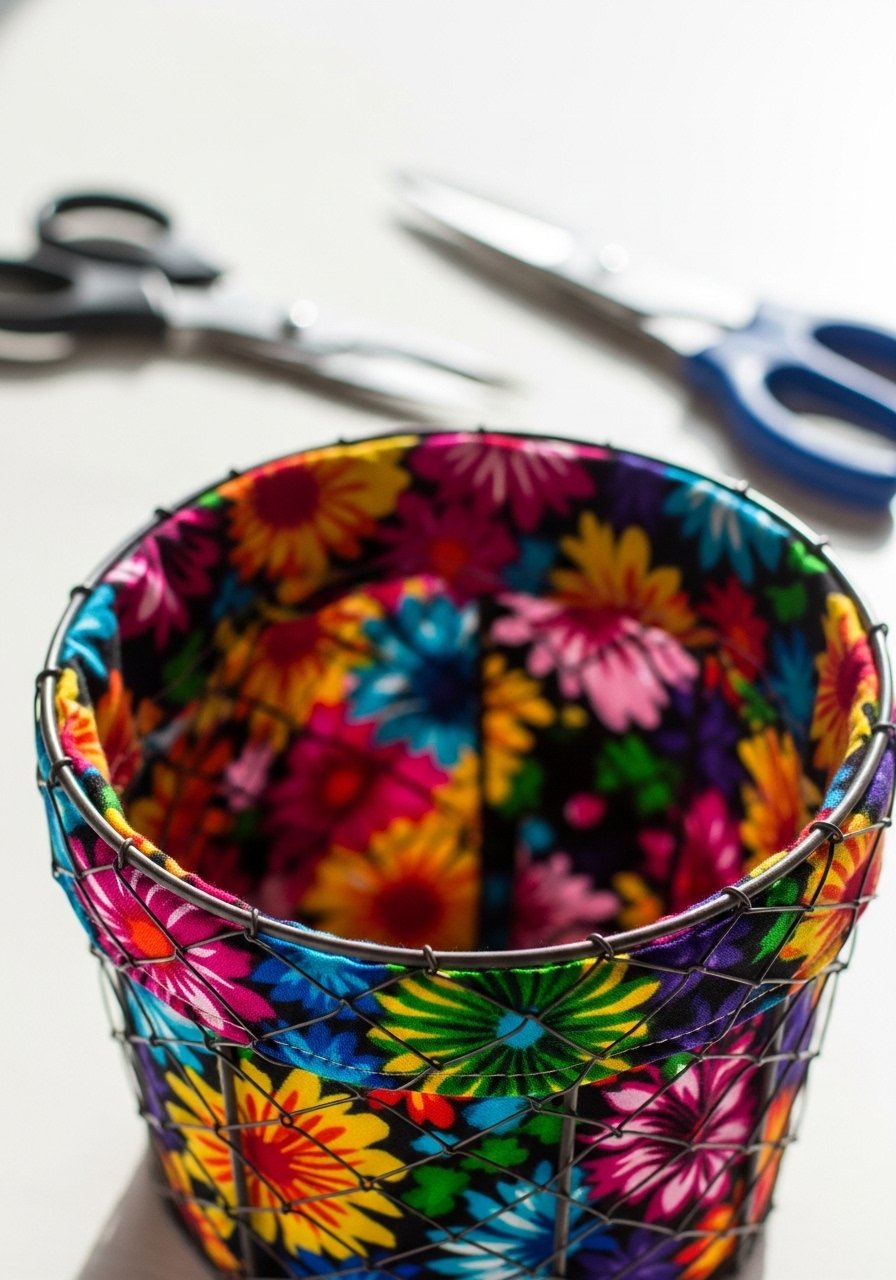
A full fabric sleeve gives wire baskets a cozy, textile look and protects food from direct contact with metal.
Materials
- 1 yard cotton fabric
- 1 wire basket (14" x 10")
- 1 elastic 1/4", 1 yard
- 1 sewing machine or needle/thread
- 1 fabric marker
- 1 scissors
Instructions
- Measure basket interior and cut fabric adding 1" seam allowance.
- Sew fabric into a sleeve with a hem at the top to insert elastic.
- Thread elastic through casing and adjust for snugness.
- Slip sleeve over the basket and tuck the elastic under the rim.
How to Display or Gift It
- Switch sleeves for seasonal color updates.
- Store spare sleeves folded flat in labeled craft boxes.
- Gift a set with matching tea towels.
- Rope-Handled Chalk Baskets for Kids’ Snacks
Make snack time kid-friendly with low baskets labeled in chalk. Rope handles are soft for small hands.
Materials
- 2 small wicker baskets (9" x 6")
- 1 chalkboard paint, 4 oz
- 1 small foam brush
- 1 5mm jute rope, 10 ft
- 1 hot glue gun
- 1 chalk marker
Instructions
- Paint a rectangle on the basket front with chalkboard paint; dry 1 hour.
- Wrap rope around handles using glue every 2 inches; let cool 10 minutes.
- Label with a chalk marker and allow ink to dry 30 seconds.
- Fill with child-friendly snack packs.
How to Display or Gift It
- Lower on a bottom shelf for easy access.
- Pair with a small caddy of kid-size spoons or cups.
- Gift as a snack starter kit for new parents.
- Upcycled Cheese Box to Pantry Basket
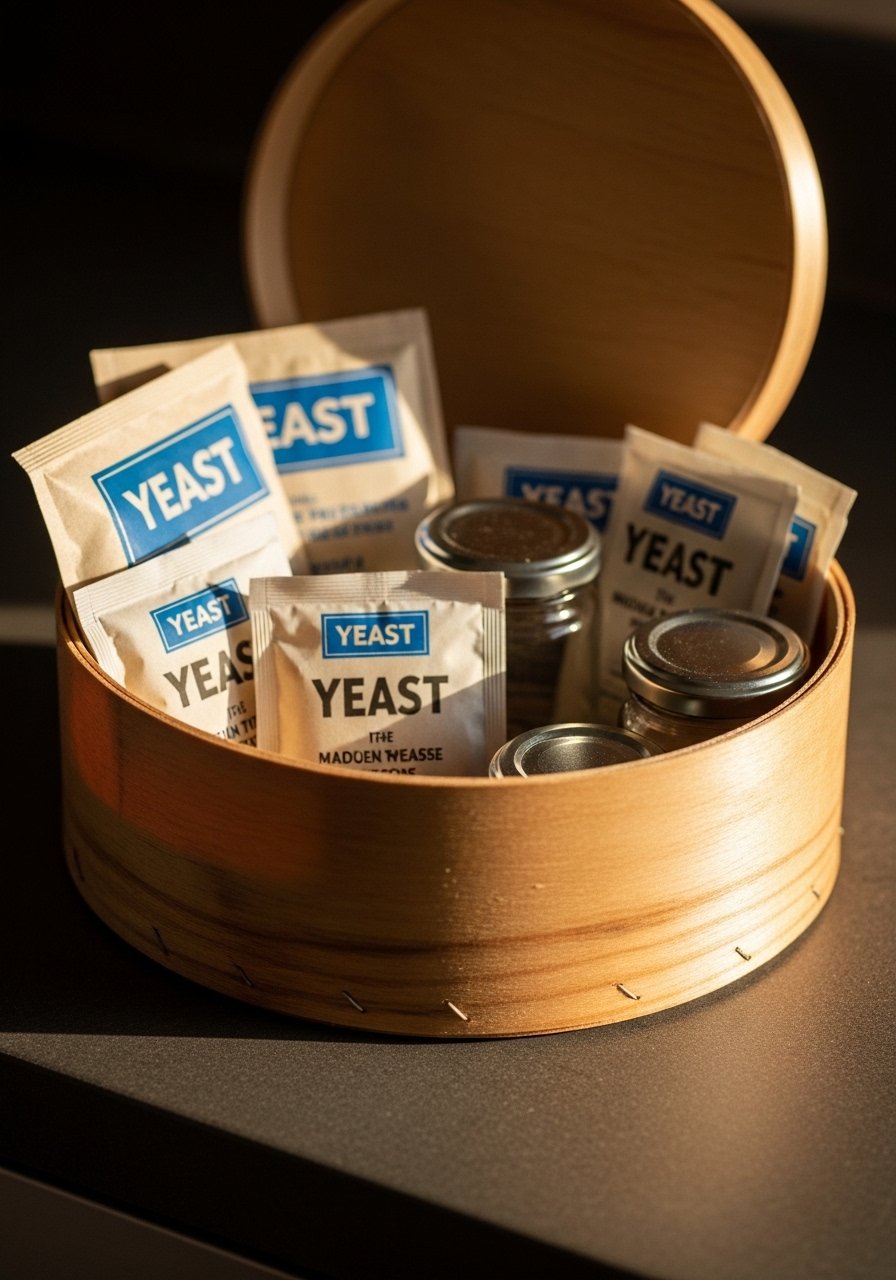
Cheese boxes have built-in charm and shape. With a quick sand and coat, they work as shallow display baskets.
Materials
- 1 small wooden cheese box (8" diameter)
- 1 sandpaper, 120 grit
- 1 4 oz jar of beeswax or food-safe finish
- 1 lint-free cloth
- 1 printed label
- 1 glue stick (for label)
Instructions
- Sand the box lightly to remove brand marks.
- Rub beeswax into the wood and buff for a soft sheen.
- Glue label to the front and let set 30 minutes.
- Use for crackers, packets, or small jars.
How to Display or Gift It
- Place on a cheese board or open shelf for a bodega feel.
- Store extras nested in a craft drawer.
- Gift filled with specialty crackers and jam.
- Pegboard Basket Wall for Small Items
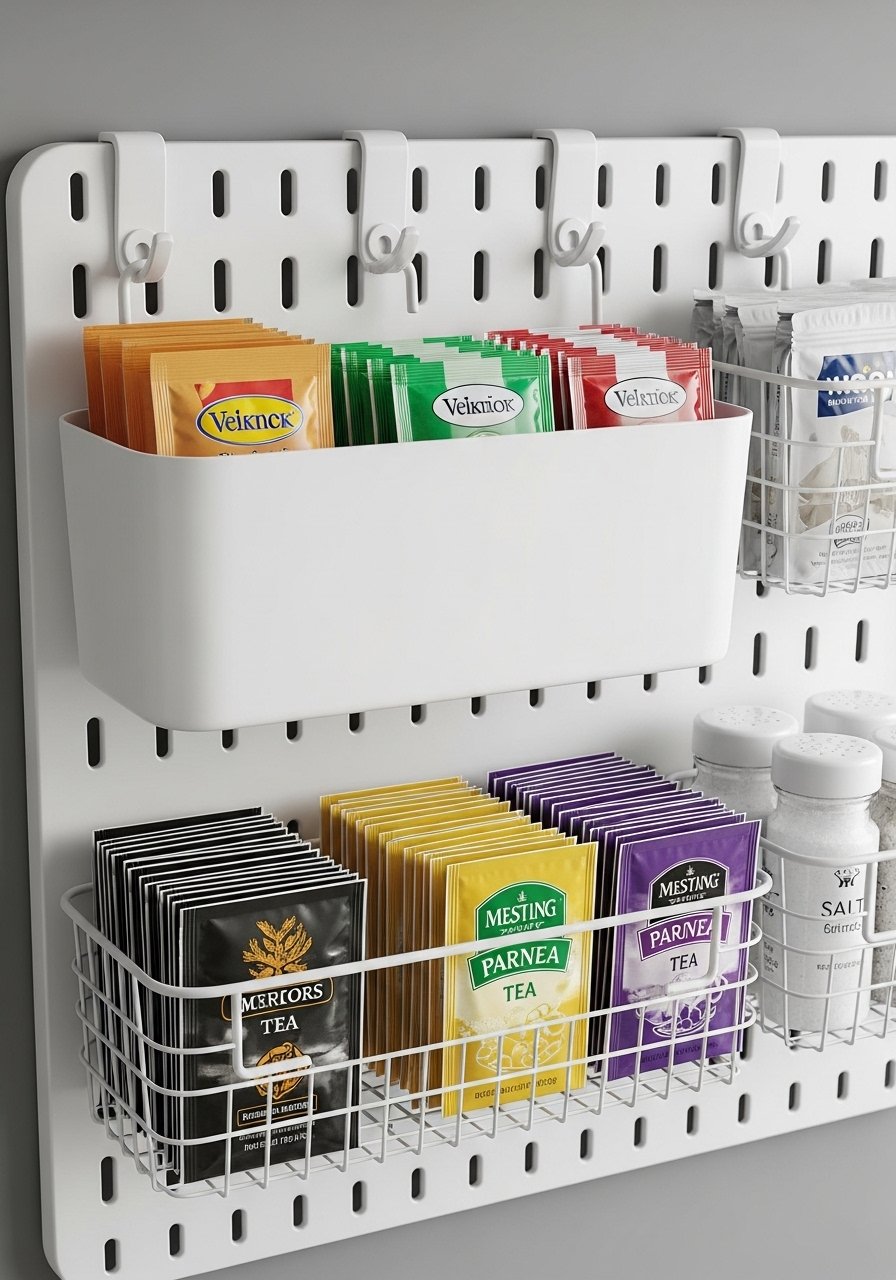
A pegboard wall turns baskets into movable storage zones. It’s flexible when pantry needs shift.
Materials
- 1 pegboard panel (24" x 16")
- 6 pegboard hooks
- 4 small hanging baskets
- 1 set of screws and anchors
- 1 level
- 1 drill
Instructions
- Mount pegboard on wall using anchors and screws per weight spec.
- Arrange hooks and hang baskets where convenient.
- Test with light loads first; avoid overloading any single hook.
How to Display or Gift It
- Keep frequently used spices and packets at eye level.
- Use small craft boxes to hold spare hooks and hardware.
- Gift as an organizational kit with a set of baskets.
- Tiered Corner Basket Ladder
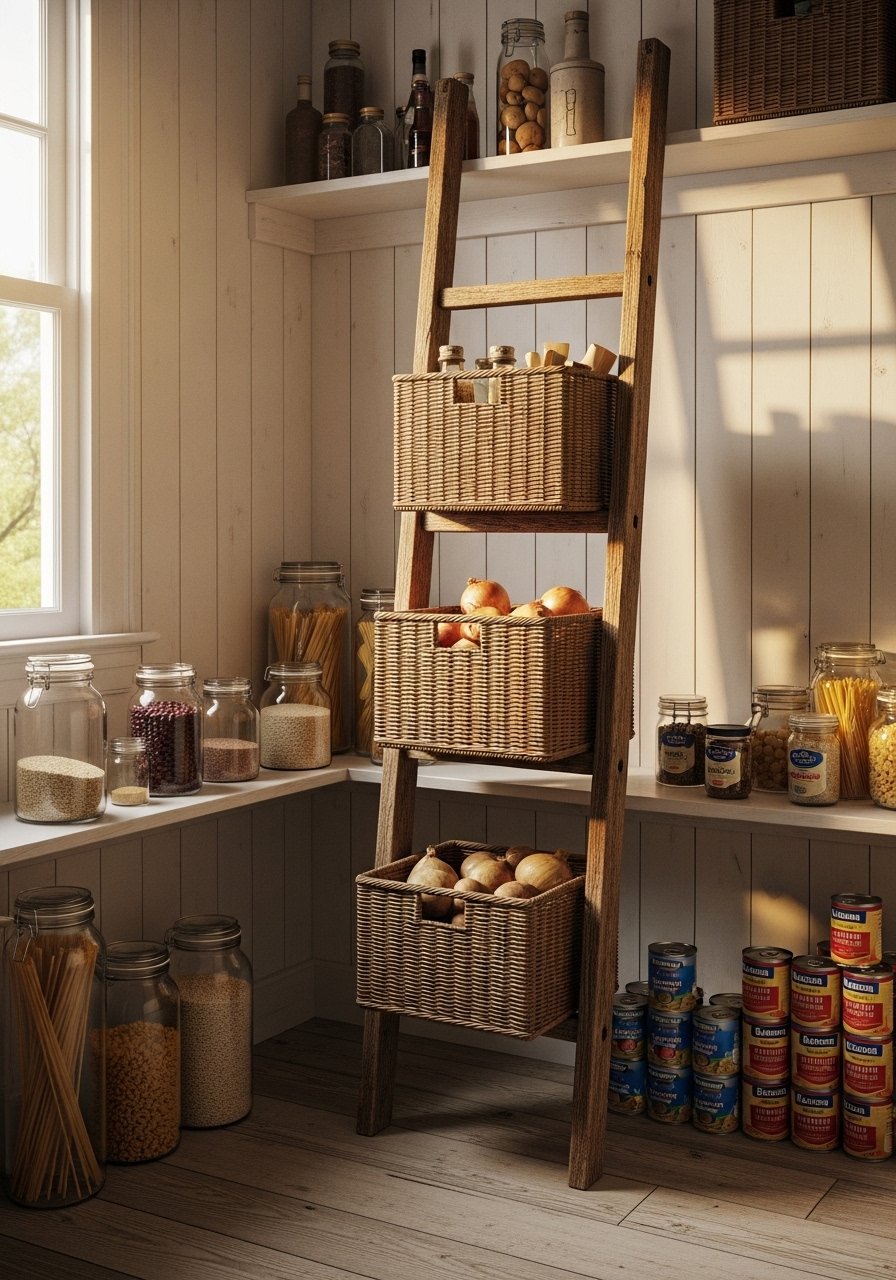
A corner ladder uses vertical space and keeps items accessible in tight pantries.
Materials
- 1 small wooden ladder shelf (36" tall)
- 3 baskets that fit ladder tiers
- 1 wood stain (optional)
- 1 foam brush
- 1 sandpaper, 220 grit
Instructions
- Stain and sand ladder per manufacturer instructions; dry 24 hours.
- Place baskets on tiers and arrange contents by frequency of use.
- Anchor ladder to wall for safety if needed.
How to Display or Gift It
- Place near the pantry entrance for grab-and-go items.
- Store extra stain and brushes in a craft bin.
- Gift the ladder with a set of baskets included.
- Basket Shelf Divider Boards
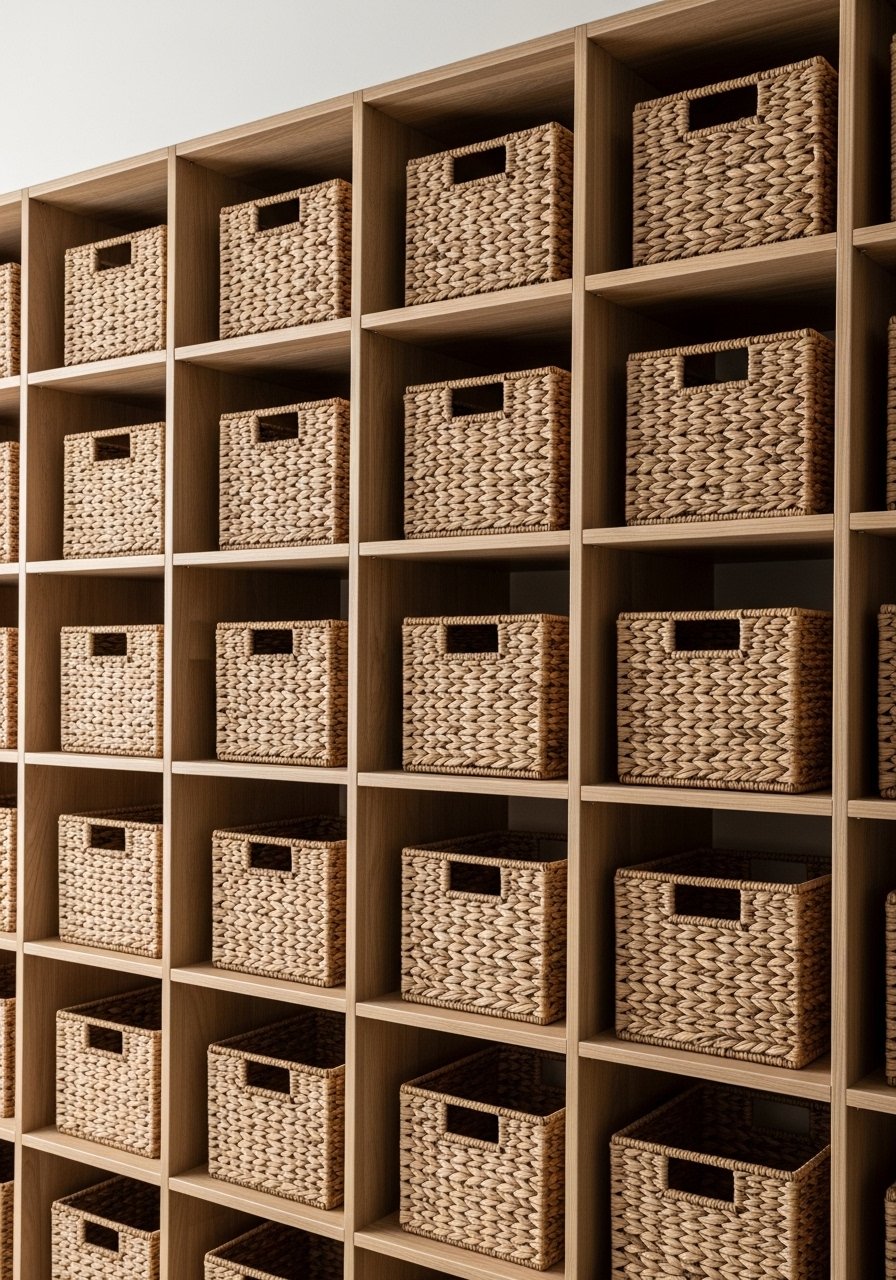
Divider boards keep baskets from sliding and create neat columns for specific categories.
Materials
- 3 thin plywood divider boards (18" x 6" x 1/4")
- 1 wood glue
- 1 measuring tape
- 1 clamps
- 1 paint or stain (optional)
Instructions
- Measure shelf length and mark equal spacing.
- Glue divider boards to shelf and clamp 30 minutes.
- Allow glue to cure 24 hours before placing baskets.
How to Display or Gift It
- Use for baking, snacks, breakfast foods in separate columns.
- Label each cubby with small wooden tags.
- Gift assembled shelf dividers with a set of matching baskets.
- Seasonal Swap Basket System
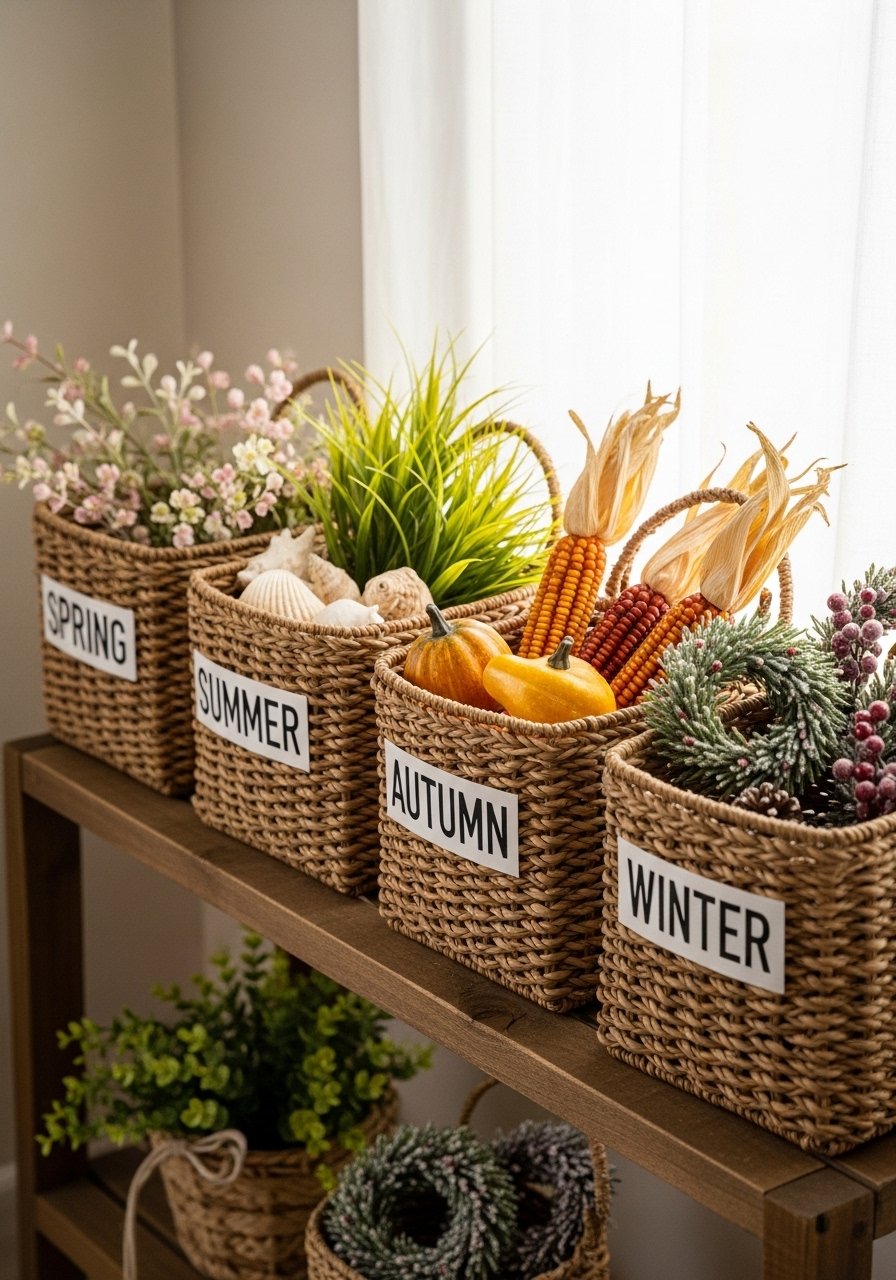
A seasonal swap system rotates decorations and specialty foods. Keep one basket per season ready to swap contents quickly.
Materials
- 4 labeled baskets (spring, summer, fall, winter)
- 4 small seasonal accent packs (dried flowers, mini wreath)
- 1 set of wooden seasonal labels
- 1 storage box for off-season items
- 1 small vacuum-seal bag (for storing delicate accents)
Instructions
- Label each basket with the season.
- Fill with themed items—spices for winter, lemon candies for summer.
- Store off-season extras in the storage box, vacuum-sealing delicate items.
- Swap baskets at the start of each season; rotate pantry items accordingly.
How to Display or Gift It
- Keep seasonal baskets at eye level for display.
- Store spare accents in a craft organizer labeled by season.
- Gift a seasonal basket to friends with a recipe or themed treats.
Your pantry just got a whole lot friendlier. From simple painted wicker to hanging macramé stations, these 22 small pantry ideas with baskets cover a wide range of aesthetics—farmhouse, boho, japandi, and cottagecore—and practical problems like label durability and spill protection. Try one project or mix several for layered storage that looks intentional.
Save this pin so you can pull up whichever idea matches the basket you already own. Which project will you try first? I’d love to hear which style fits your kitchen best. And if you’re gathering tools, a temperature-controlled hot glue gun will honestly make several of these projects faster and cleaner—no stringy mess and safer handling.
Happy organizing and crafting—share a photo when you’re done so I can celebrate your pantry glow-up with you.


