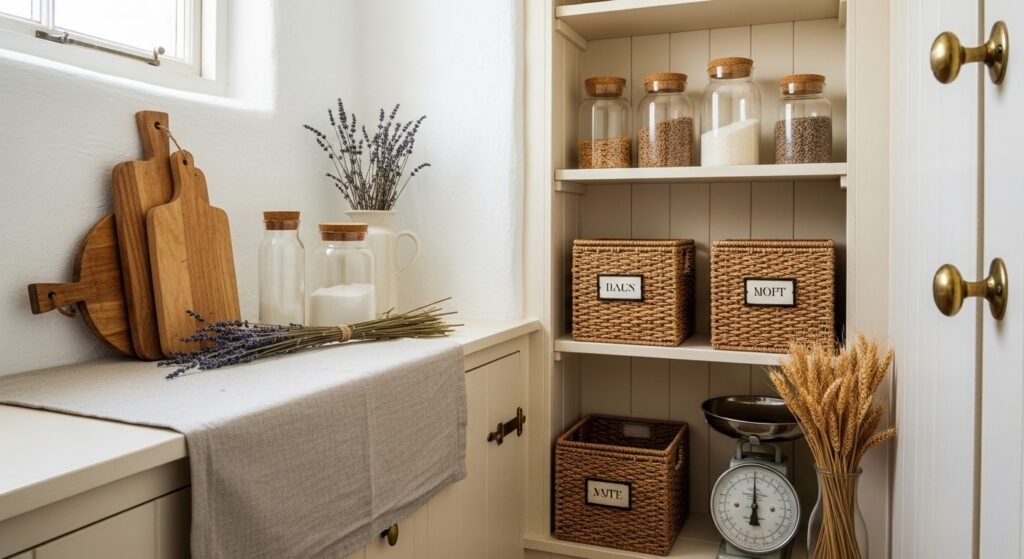
You probably love the original charm of your older home: the narrow nooks, the little built-ins, the worn wood trim. But when it comes to organizing food, those vintage pantries can feel like a puzzle. These small pantry ideas for older homes balance that classic character with smart modern storage so every jar, tin, and tea towel has a thoughtful place.
Inside you'll find 29 bite-size projects that fit tight shelves, odd corners, and shallow depth without fighting the house's personality. Projects include DIY shelf risers, jar label systems, slim spice pull-outs, and vintage-style crate conversions. I mention tools you’ll actually reach for, like a precision craft knife and a good hot glue gun, and link to helpful gear so you can shop faster: I often cut small labels with my Cricut Joy cutting machine, but a craft knife works fine for straight lines. Grab a reliable temperature-control hot glue gun for secure bonds without the mess.
Ready to make the most of every inch? These projects suit beginners and seasoned crafters alike and use widely available supplies so you can start today.
- Slim Vintage Crate Shelves
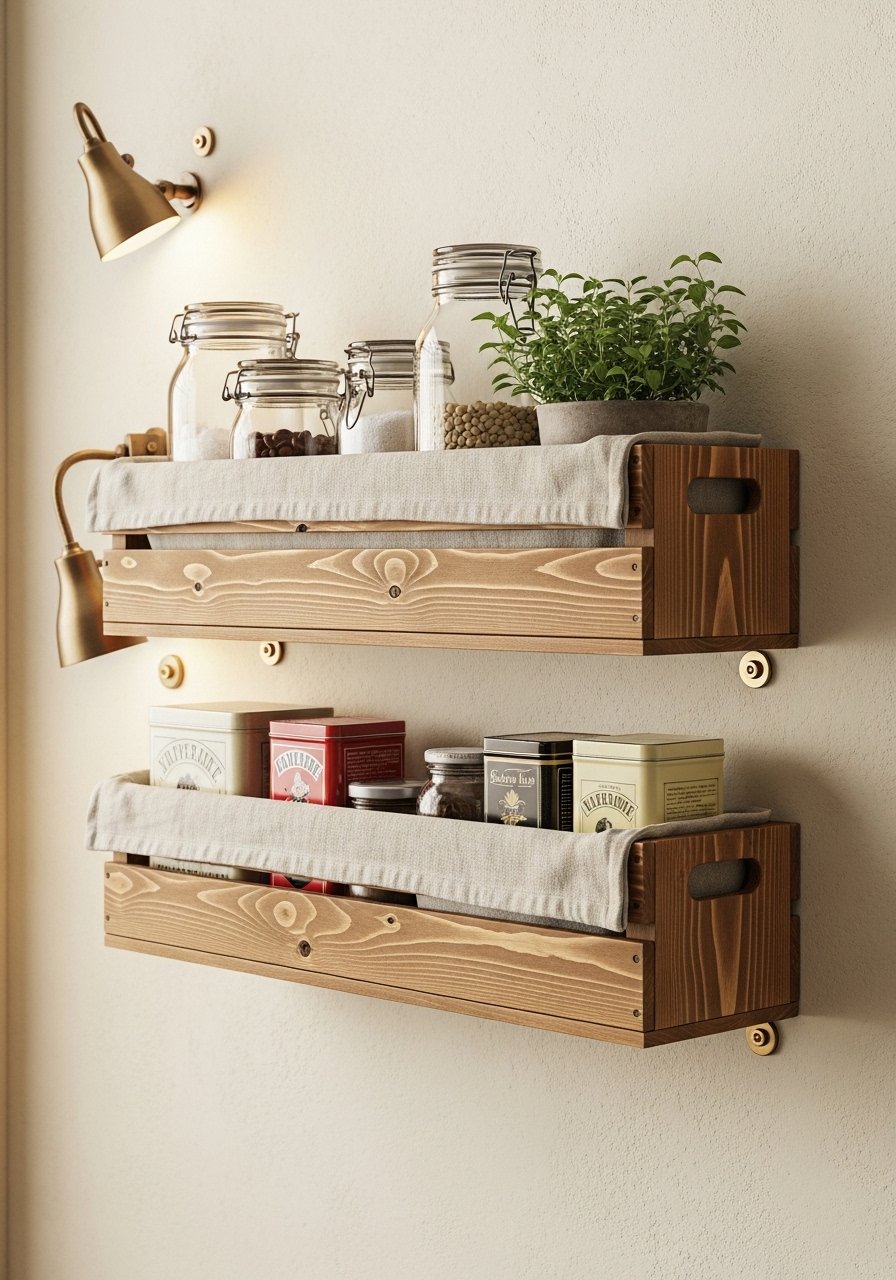
This project turns narrow vertical space into shallow shelving using slim vintage-style crates. The warm wood grain keeps the look classic, while the linen liners and removable dowels make the shelf both pretty and practical. Beginners will find the build simple and satisfying.
Materials
- 2 pine crates, 12" x 8" x 6" each (pre-cut or kit)
- 4 3/4" wood screws
- 4 wall anchors rated for 30 lb
- 1/4" dowel rod, 12" length (per crate)
- 1/2 yard natural linen fabric
- Wood stain (1 coat) and wipe-on polyurethane (1 coat)
- Sandpaper set (120 & 220 grit)
- Wood glue (PVA)
- Felt pads for bottom
Instructions
- Sand crate edges with 120 grit, then finish with 220 grit for smoothness.
- Apply one coat of stain; wipe excess after 5 minutes. Let dry 4 hours.
- Brush a thin coat of wipe-on polyurethane; allow to cure 6 hours to be firm to the touch.
- Line crate interiors with linen fabric, stapling to the inside top edge. Trim flush.
- Drill 1/4" holes for dowel placement centered 1" from the front edge. Press-fit dowel with a dab of wood glue and wipe clean.
- Mark studs or use anchors; mount crates with 3/4" screws through the back into wall anchors.
- Add felt pads where crate meets wall to prevent scuffing.
How to Display or Gift It
Mount a pair at staggered heights to fit spice jars or small mason jars. Tie a small dried lavender bundle to the front with jute twine for a cottagecore vibe. If gifting, package with a small jar of local honey in kraft paper. Store extra crates flat in a craft storage bin until needed.
- Narrow Pull-Out Spice Tray (Small Pantry Ideas for Older Homes)
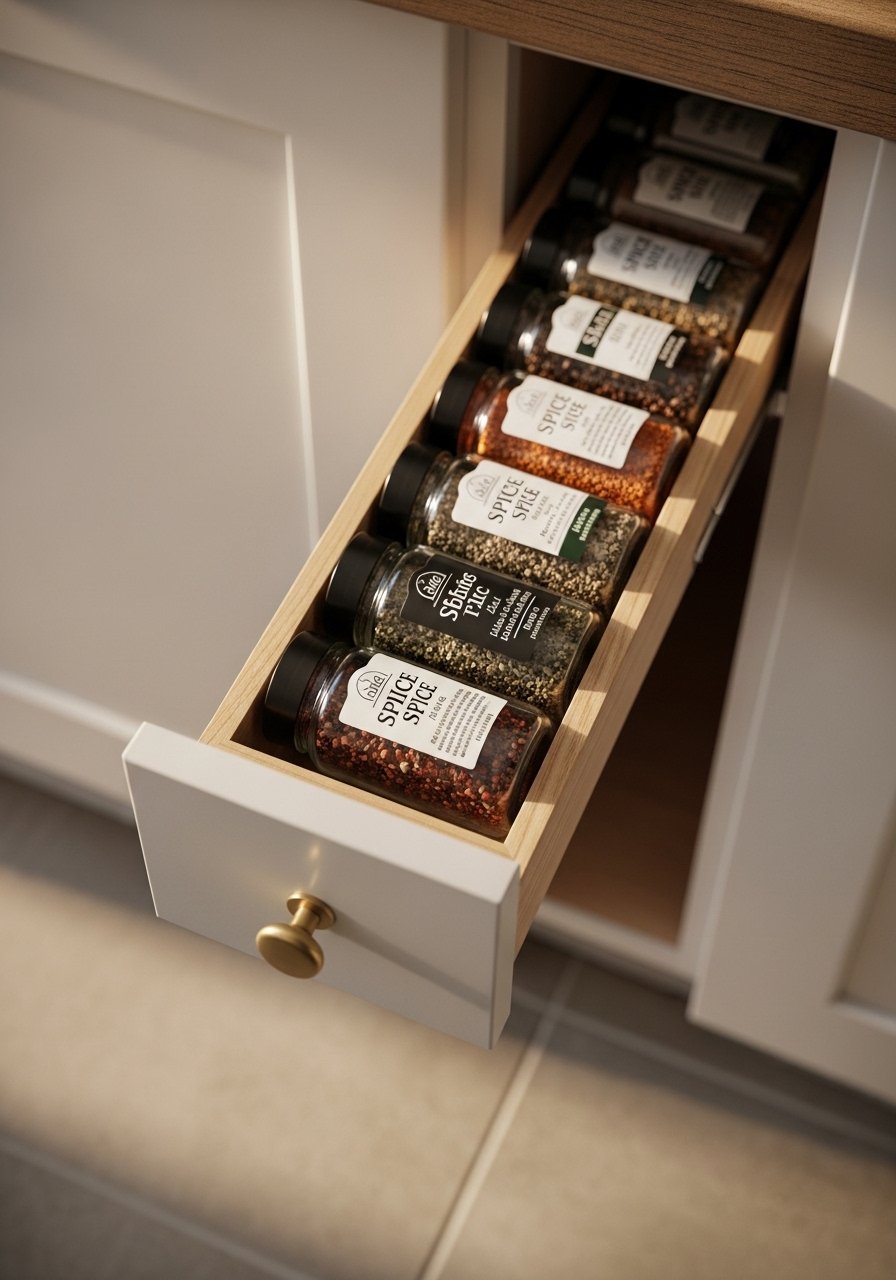
A slim pull-out spice tray uses an unused 3–4" gap beside an older pantry to keep spices accessible and neat. The tray glides smoothly and keeps small bottles visible. Use a small set of shallow slides for best fit.
Materials
- Baltic birch board, 12" x 4" x 1/2"
- Drawer slides, 10" shallow ball-bearing
- 10 clear 2 oz glass spice jars with lids
- Label paper (matte)
- Small brass knob
- Wood glue and 1" brad nails
- Sandpaper (220 grit)
- Mineral oil finish (1 coat)
Instructions
- Cut birch board to 12" x 4" for tray base; rip two side strips 1/2" x 12".
- Sand edges smooth. Assemble tray with wood glue and 1" brads; allow glue to set 30 minutes.
- Mount drawer slides on tray and inside cabinet gap per manufacturer directions.
- Apply one light coat of mineral oil; wipe after 2 minutes. Let dry 2 hours.
- Fill with spice jars and label using a precision cutter or a Fiskars circle punch set for uniform tags.
How to Display or Gift It
Install at a comfortable reach height near your prep station. Pair with a small wooden spoon set and store the matching gift items in a flat craft organizer for delivery.
- Glass Jar Lid Chalkboard Labels
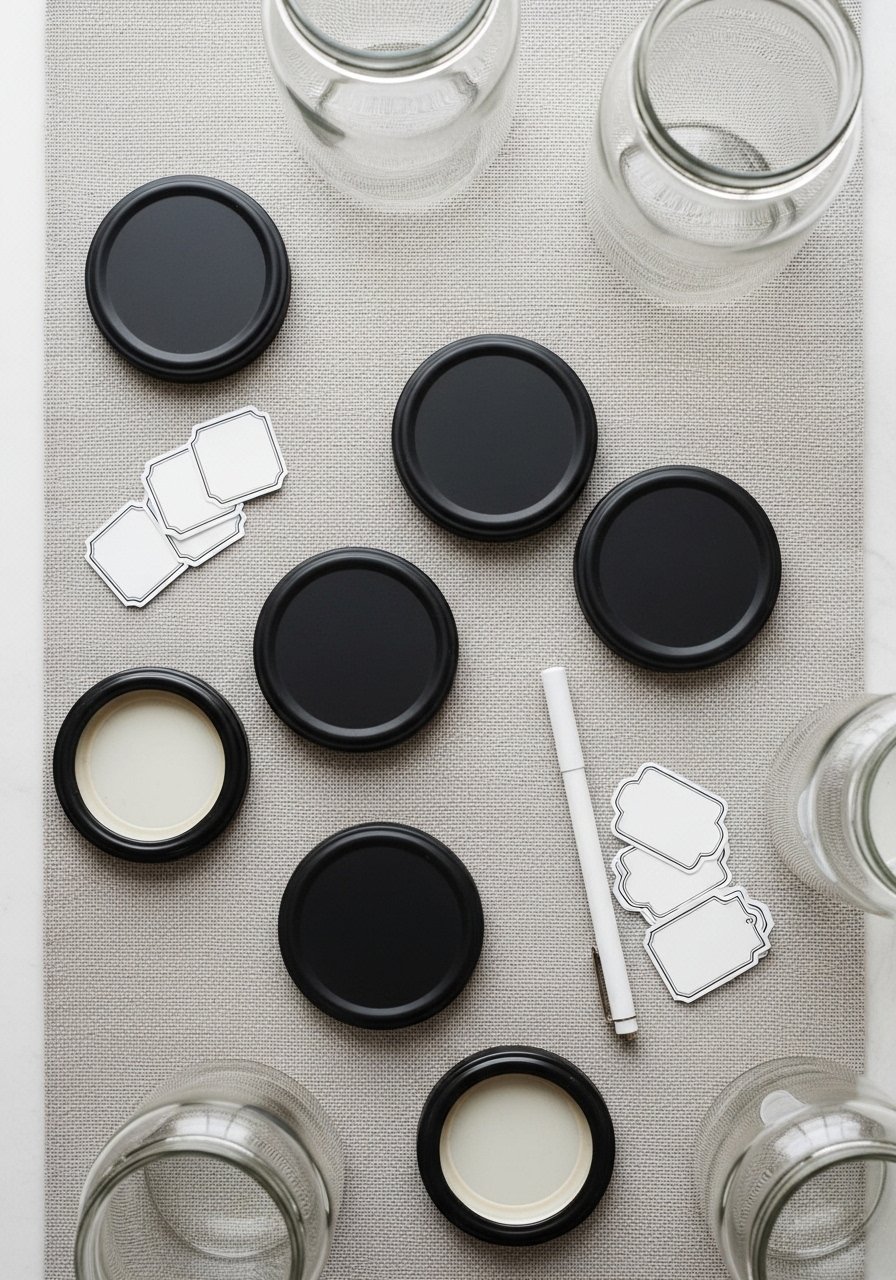
Turn mismatched jar lids into coordinated storage with chalkboard-painted tops. These reusable labels let you change contents as seasons shift. A foam brush gives the smoothest paint layer.
Materials
- 12 recycled metal jar lids
- Chalkboard paint (matte), 2 coats
- Foam brush (1/2" wide)
- Fine-grit sandpaper (220)
- Chalk marker (white)
- Painter's tape
- Microfiber cloth
Instructions
- Clean lids with rubbing alcohol and dry.
- Sand lightly with 220 grit to degloss.
- Tape edges if you want a crisp rim. Apply first thin coat of chalkboard paint with a foam brush; dry 30 minutes.
- Sand very lightly between coats. Apply second coat; dry 1 hour.
- Cure paint 24 hours before writing. Condition by rubbing chalk and wiping off.
How to Display or Gift It
Write contents directly on lids for pantry jars. For a gift set, nest lids in kraft tissue and include a mini chalk marker. Store extra lids flat in a shallow craft organizer.
- Slim Rolling Cart with Vintage Wire Baskets
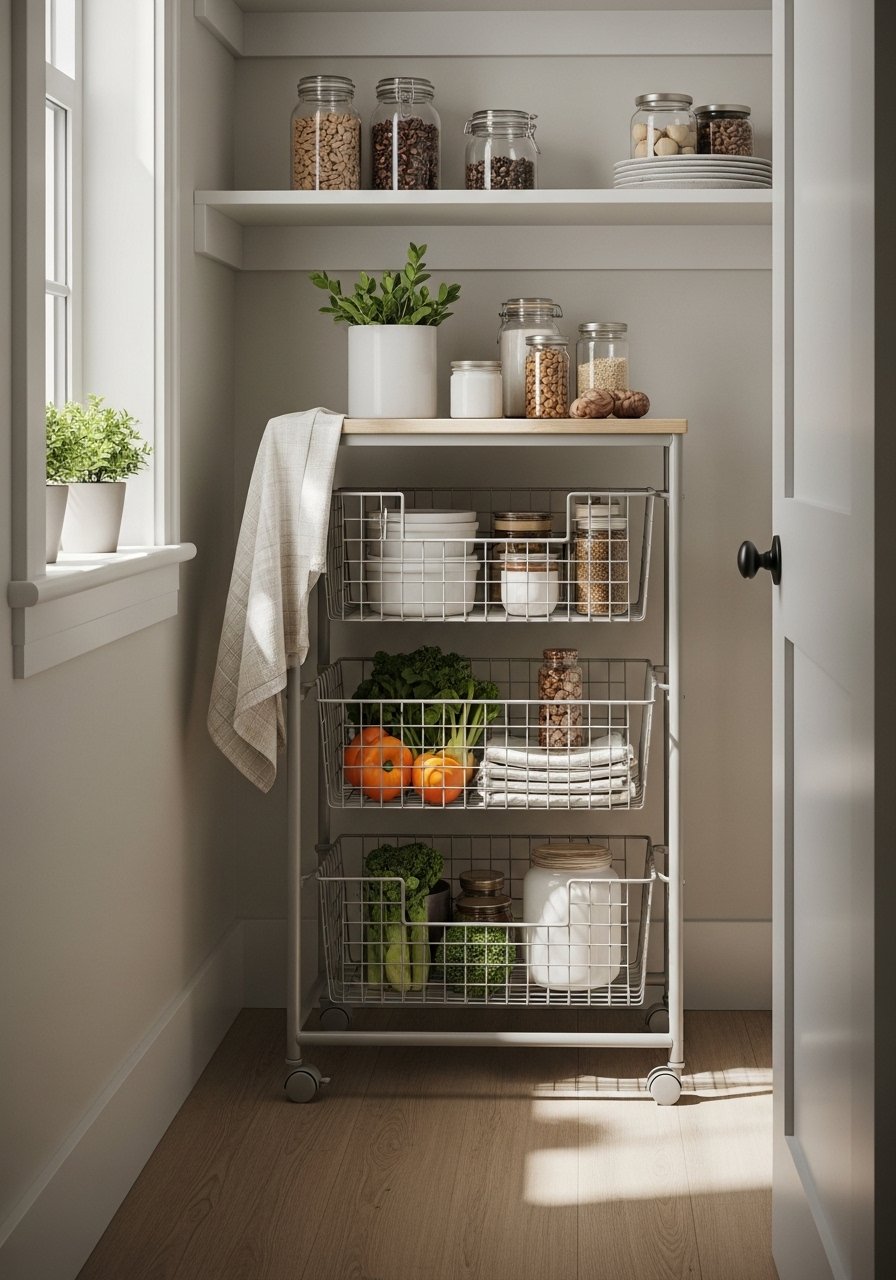
A narrow rolling cart fits where fixed shelving can't. Wire baskets give a vintage feel while letting air circulate for onions or potatoes. Casters make it easy to pull out for restocking.
Materials
- 3 wire baskets, 12" x 6" x 4"
- Pine slats for frame, 32" x 4" x 3/4"
- 4 locking casters (1.5")
- Wood screws (1.25")
- Chalk paint (1 cup) in sage
- Wax finish (1 coat)
- Drill and countersink bit
- Wood glue
Instructions
- Assemble a slim frame with pine slats into a 12" wide by 32" tall rectangle. Glue and screw.
- Attach baskets using screws through the back into slat edges. Space evenly.
- Paint frame with one coat of chalk paint; let dry 2 hours. Wax for protection and buff.
- Attach casters to bottom with screws; test locking function.
- Load with pantry staples and roll into place.
How to Display or Gift It
Tuck under a hanging rail or keep beside pantry. Add a small linen bag for produce and label each basket with a chalkboard tag. For gifting, fill with artisanal onions and wrap with cellophane.
- Pegboard Tea & Coffee Station
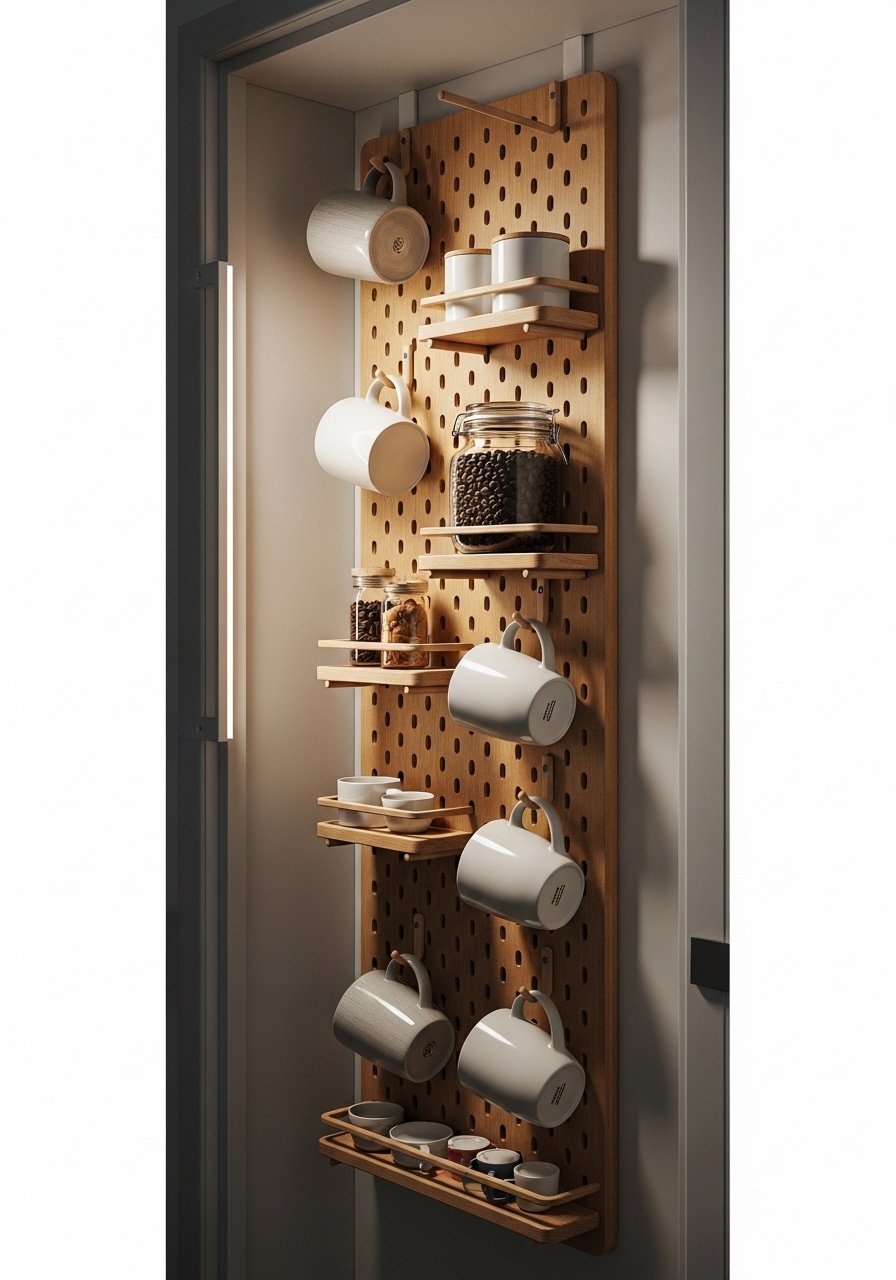
Use a pegboard inside a pantry door to corral mugs, scoops, and coffee supplies. Pegboards adapt as your collection grows. A small level and drill make installation quick.
Materials
- 1 pegboard panel, 12" x 24"
- Assorted pegboard hooks and shelves (set)
- 6 small S-hooks
- Screws and wall anchors
- Small shelf, 12" x 4"
- Chalk pen for mug labels
- Tea tins or jars (6)
- Small level
Instructions
- Measure door interior and cut pegboard to fit. Sand edges.
- Mount using screws and anchors, keeping 1/8" gap behind board for hooks to hang.
- Place pegs, hooks, and a small shelf to hold tins and jars.
- Hang mugs from S-hooks. Label tins with chalk pen.
- Adjust placement as your collection changes.
How to Display or Gift It
Mount on the pantry door for a compact drink station. Gift with a set of specialty teas in a kraft box. Store spare hooks in a small hardware box in the pantry.
- Narrow Wine Rack from Reclaimed Molding
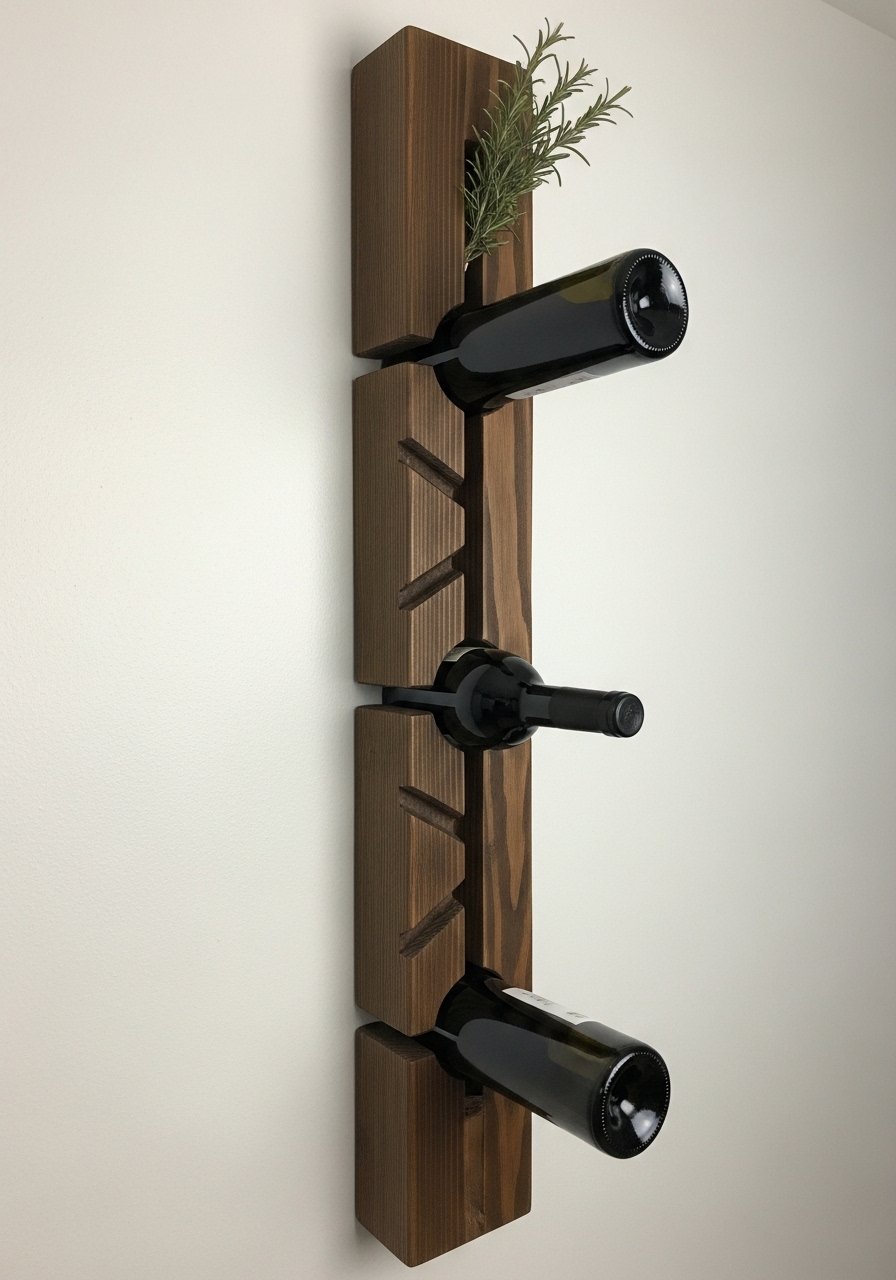
If your older home has narrow wall space, this reclaimed molding wine rack keeps two or three bottles handy and looks right at home with original trim. A coping saw helps cut clean notches.
Materials
- Reclaimed molding, 36" x 4" x 1"
- 3 half-moon bottle notches cut 1.5" deep
- Wood screws and anchors
- Clear coat (1 thin coat)
- Sandpaper (150 & 220)
- Tape measure and coping saw
- Felt bottle rests
Instructions
- Cut notches with a coping saw spaced 6" apart. Sand edges smooth.
- Sand and apply one thin coat of clear coat; dry 4 hours.
- Mount on wall using anchors and screws. Use a level.
- Add felt rests in notches to protect bottle glass.
How to Display or Gift It
Mount near your prep zone or coffee station for quick access to cooking wines. Wrap as a hostess gift with a small bottle of favorite white.
- Labeled Airtight Jar System with Magnetic Lids
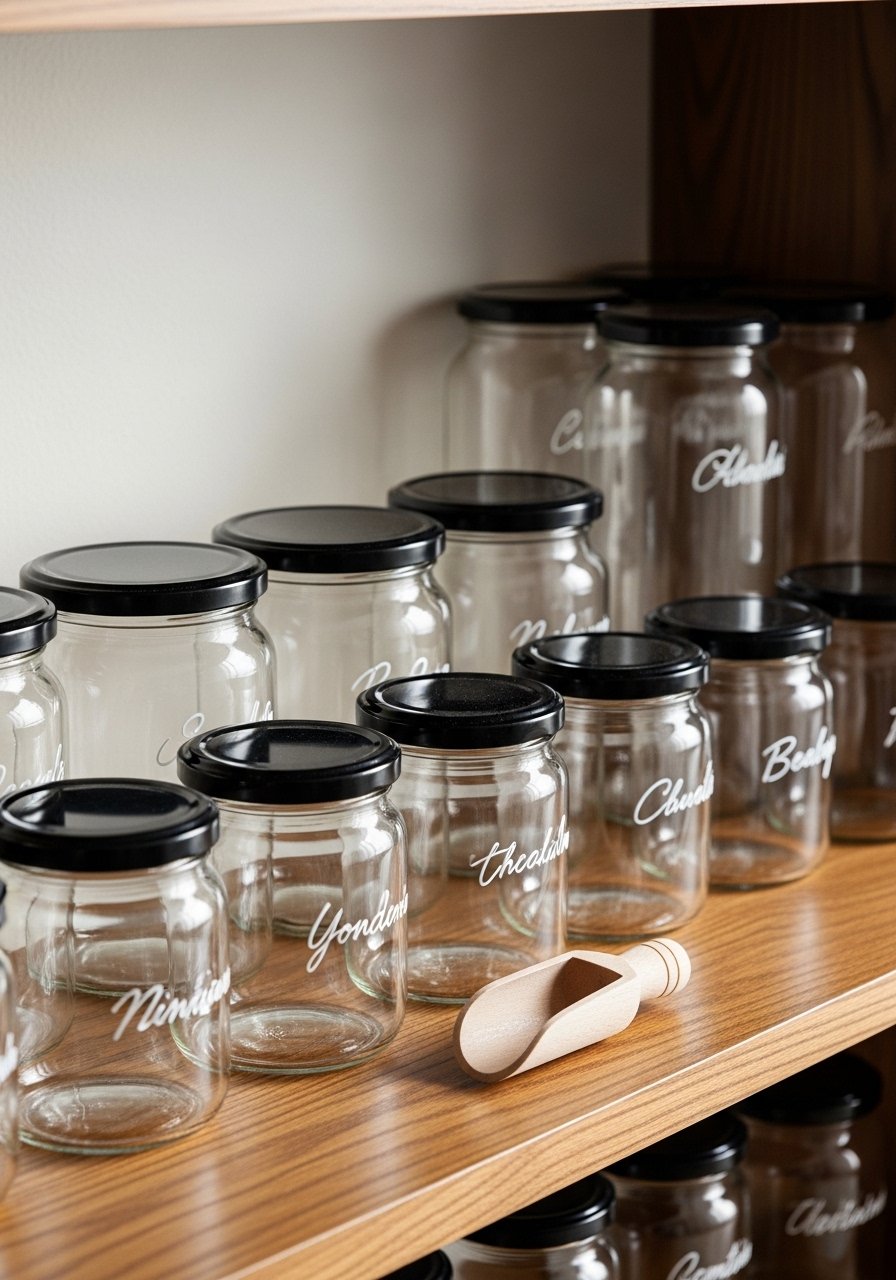
Magnetic lids make changing labels easy, and airtight jars keep staples fresh on old, shallow shelves. Use a label maker or printable label sheets for uniform results.
Materials
- 12 glass jars, assorted sizes (4 oz–32 oz)
- Magnetic lid inserts (12)
- Airtight rubber seals (for jars)
- White paint pen or chalk marker
- Funnel for filling
- Fine mesh labels (pre-cut)
- Mason jar brush
Instructions
- Clean and dry jars thoroughly.
- Fit magnetic lid inserts and rubber seals. Test suction by pressing lids.
- Fill jars using a funnel. Wipe rims clean.
- Label lids with a paint pen or stick on printed labels.
- Rotate contents and clean lids monthly to prevent residue.
How to Display or Gift It
Arrange jars by category (baking, grains, legumes). For gifts, fill a jar with homemade granola and include a small scooper tied with twine.
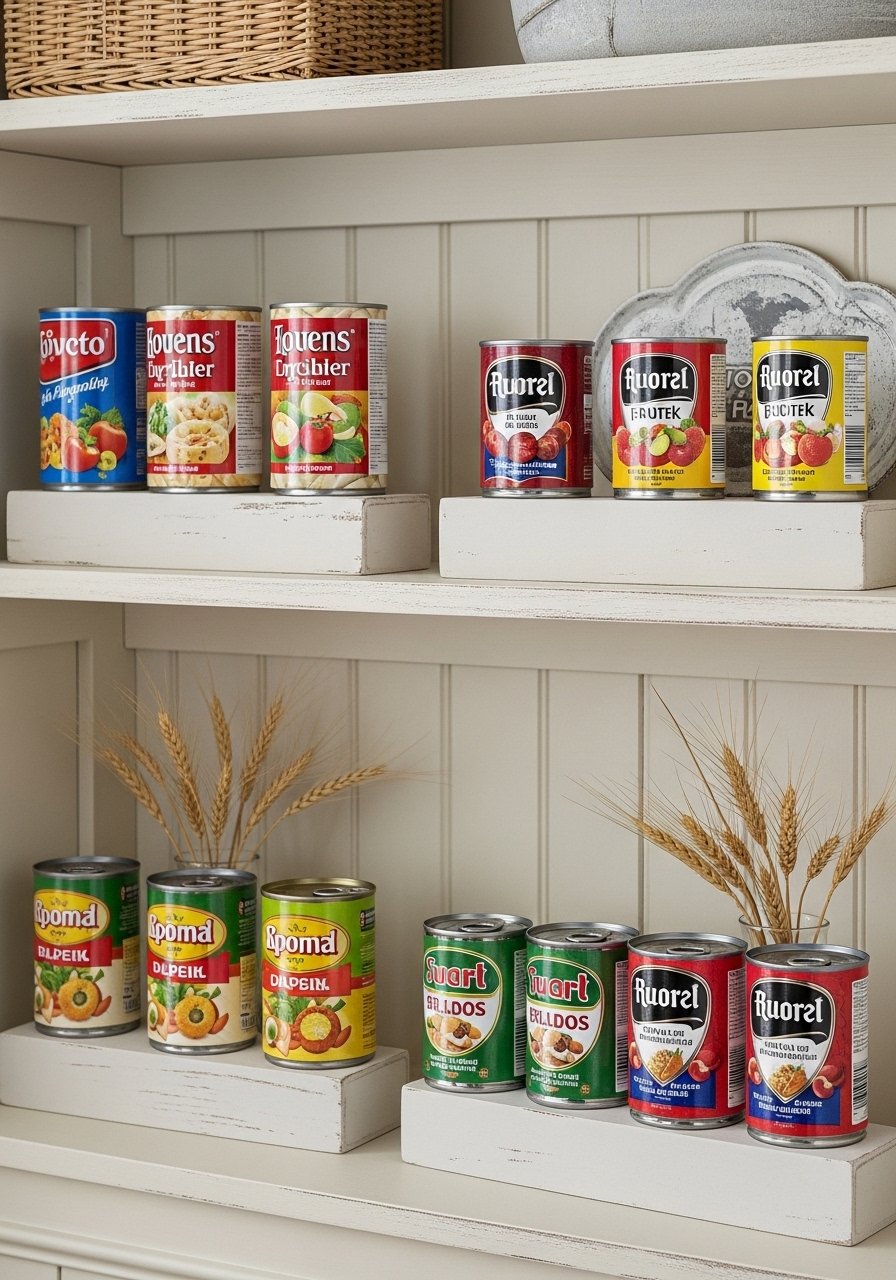
- Built-In Can Organizer with Tilted Shelves
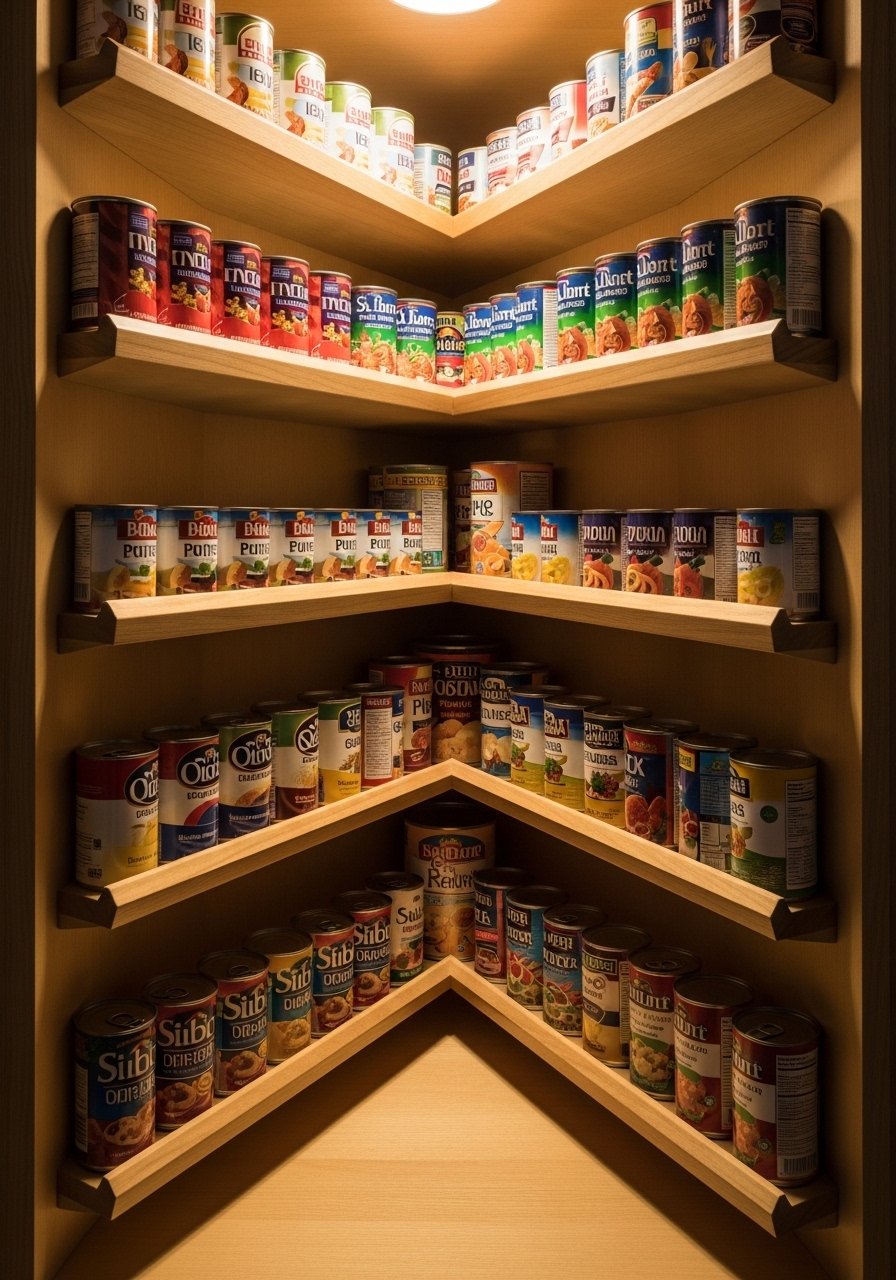
Tilted shelves show labels and keep cans from rolling. A small lip keeps items in place and looks period-appropriate in older homes.
Materials
- Pine boards for shelves, 12" x 6" per shelf
- Small lip strips, 1/2" x 12"
- Finish nails and wood glue
- Paint in farmhouse white (1 coat)
- Sandpaper (120)
- Small brad nailer or hammer
Instructions
- Cut shelves to fit pantry width. Add a front lip strip glued and nailed.
- Sand and paint one coat; dry 2 hours.
- Mount shelves at a 5–8° tilt using shims while screwing into side supports.
- Place cans with labels forward for easy reading.
How to Display or Gift It
Use tilted shelves for breakfast cereals in small boxes or canned goods. For gifting, include a curated set of pantry staples in a small crate.
- Slim Pull-Down Pantry Rod for Hanging Bags
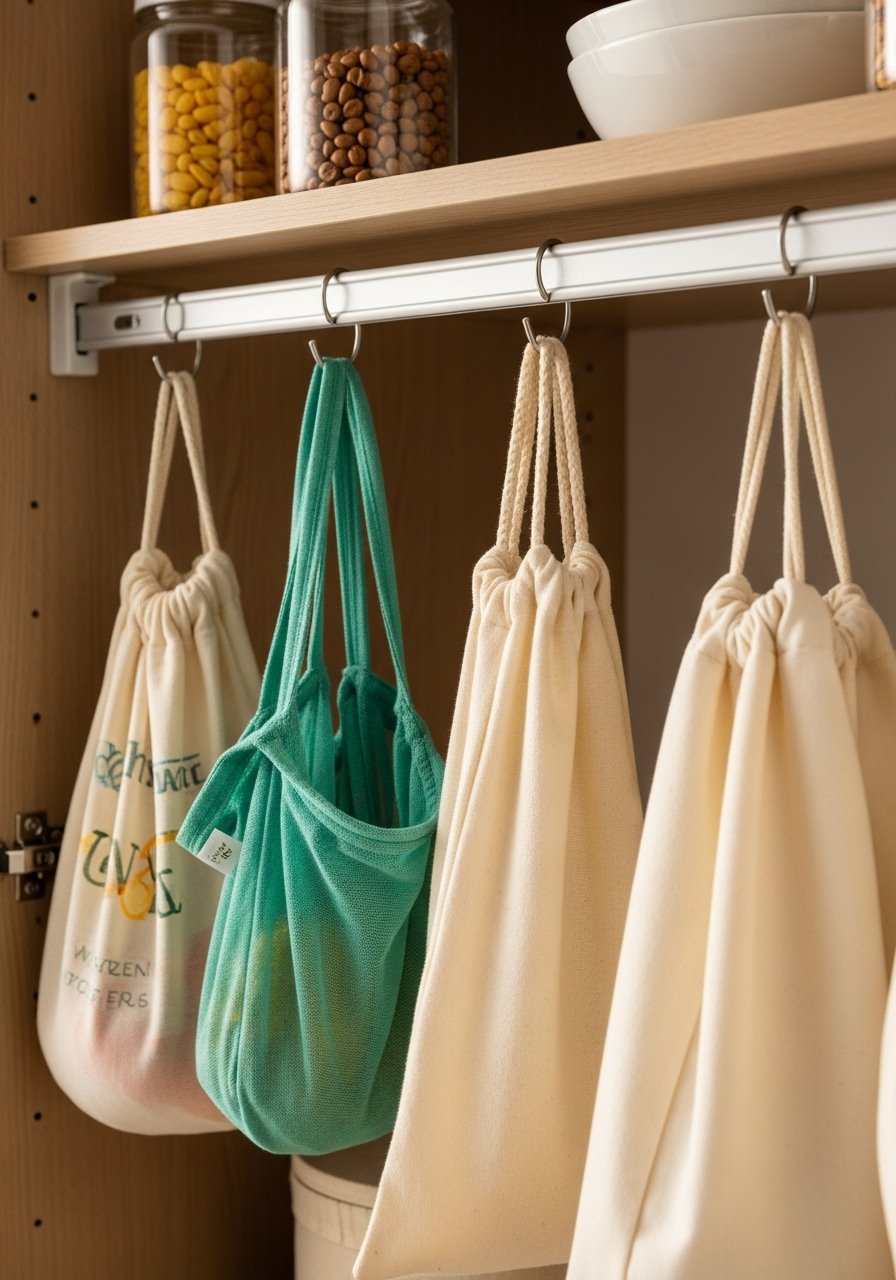
A pull-down rod converts high, unused vertical space into hanging storage for bags and aprons. A soft-close mechanism prevents slamming.
Materials
- Pull-down closet rod kit (slim)
- 6 small S-hooks
- Screws and anchors
- Sanded wooden dowel (fit kit)
- Fabric grocery bags (set of 4)
Instructions
- Install rod kit per instructions at top of pantry interior.
- Hang S-hooks and attach fabric bags and aprons.
- Test pull-down and return function; adjust tension if kit allows.
How to Display or Gift It
Hang near the pantry door for quick bag access. Fold spare bags flat in a stackable organizer on a low shelf.
- Tiered Tea Tin Ladder Shelf (small pantry ideas for older homes)
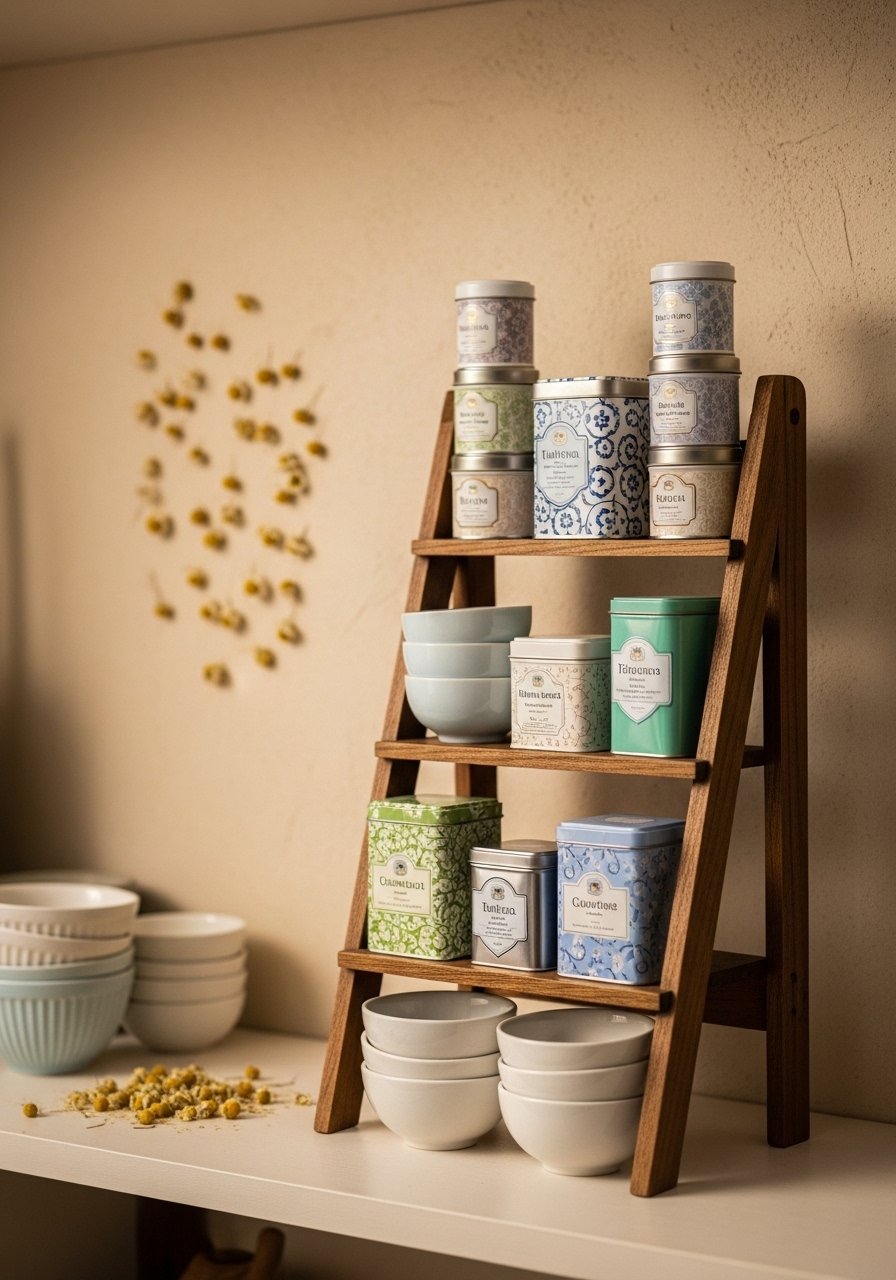
A tiered ladder shelf adds vertical display on a deep shelf, making small tins visible and reachable. It has a cozy, vintage kitchen look.
Materials
- Pre-made tiered ladder shelf, 10" wide x 8" deep
- 8 tea tins
- Painter's tape for painting edges
- Chalk paint (1/2 cup)
- Wax finish (thin coat)
Instructions
- Paint ladder shelf with chalk paint; dry 1 hour between coats. Two coats recommended.
- Wax for protection and buff.
- Arrange tea tins by flavor and label tops with a chalk marker.
How to Display or Gift It
Place on a pantry shelf at eye level for easy selection. Wrap for gifting with a ribbon and a small sample tin tucked into the top tier.
- Sliding Tin Shelf for Flatware & Linens
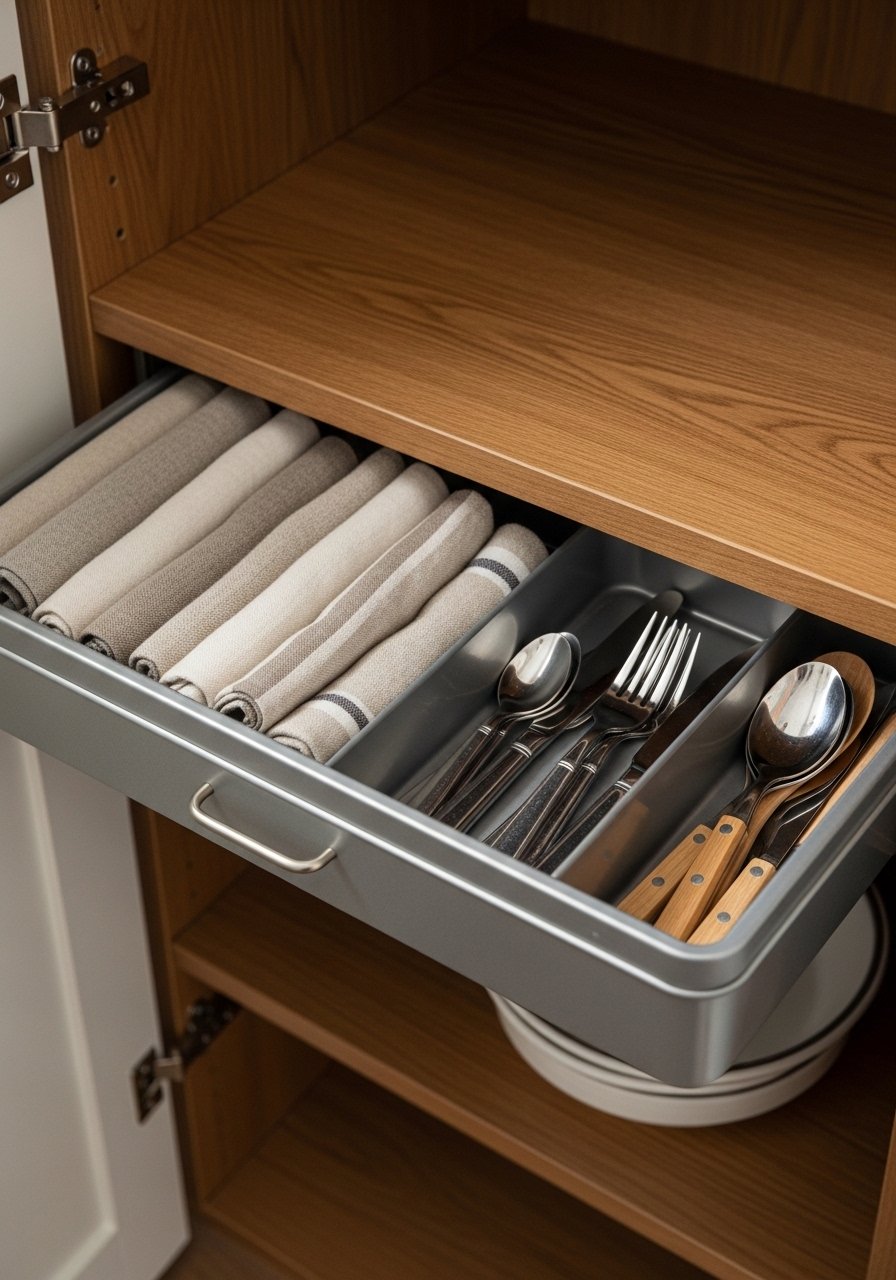
A sliding tin tray keeps linens and small utensils organized and out of sight. Metal sides protect fabric from pantry dust.
Materials
- Slotted metal tray, 14" x 8"
- Shallow drawer slides, 12"
- Linen napkins (4)
- Wooden spoons (set of 3)
- Mounting screws
Instructions
- Attach drawer slides to tray and shelf base; make sure tray glides freely.
- Fold linens into thirds for consistent sizing.
- Store flatware in a small caddy inside the tray.
How to Display or Gift It
Slide out the tray when preparing a table and slide back to hide clutter. For a gift, pair with embroidered napkins and place in a kraft box.
- Open-Weave Baskets for Root Veggies
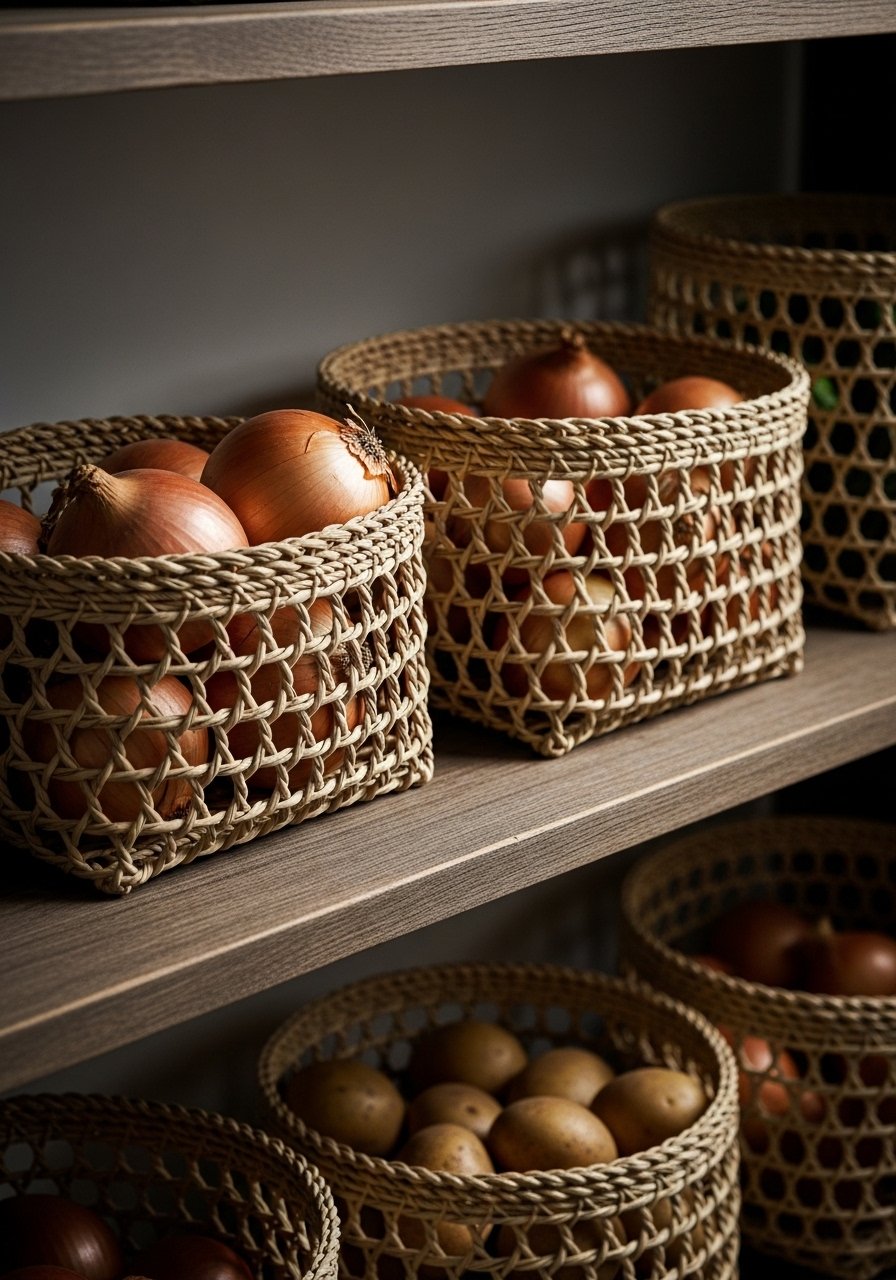
Open-weave baskets let air circulate around root vegetables. The natural texture blends well with older homes.
Materials
- 3 seagrass baskets, 10" diameter
- Paper liner circles (optional)
- Small labels with twine
- Linen produce bags (3)
Instructions
- Line baskets with paper circles if you prefer cleaner storage.
- Store potatoes in one basket, onions in another. Keep in cool, dry pantry area.
- Replace liners monthly and inspect for sprouting.
How to Display or Gift It
Group baskets on a lower shelf for easy access. Gift a basket filled with artisanal potatoes and garlic bulbs.
- Vintage Scale Display with Hidden Storage
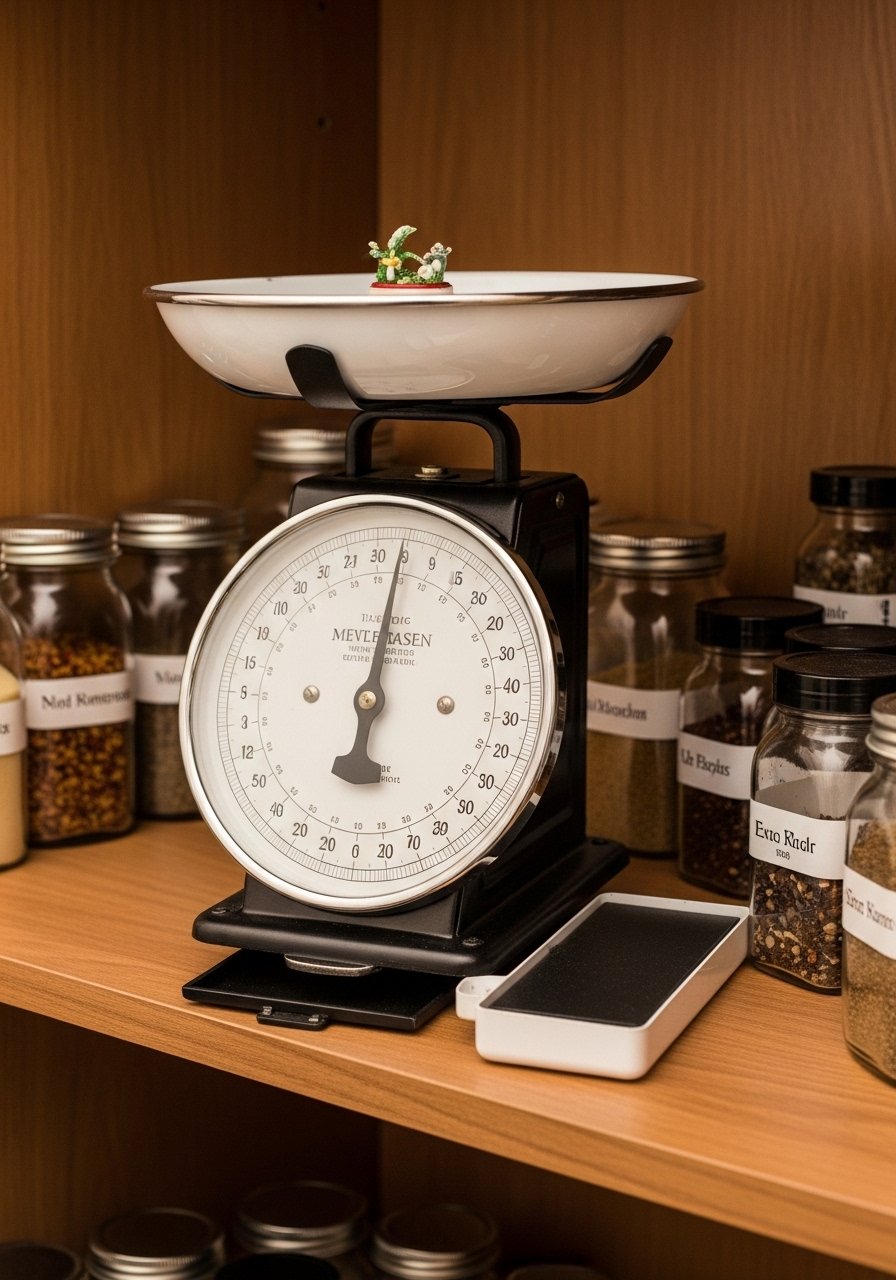
A vintage scale adds character and doubles as a small hideaway for frequently used seasoning packets.
Materials
- Decorative vintage-style scale
- Small shallow wooden box to fit under scale
- Clear lacquer (1 coat)
- Felt pads
Instructions
- Fit the wooden box under the scale platform. Seal with lacquer; dry 3 hours.
- Place scale on pantry shelf and use box for instant-access packets.
- Dust and wipe periodically.
How to Display or Gift It
Keep near a meal prep station. For gifting, tuck in a few specialty spice blends.
- Slim Pull-Out Tray for Baking Sheets
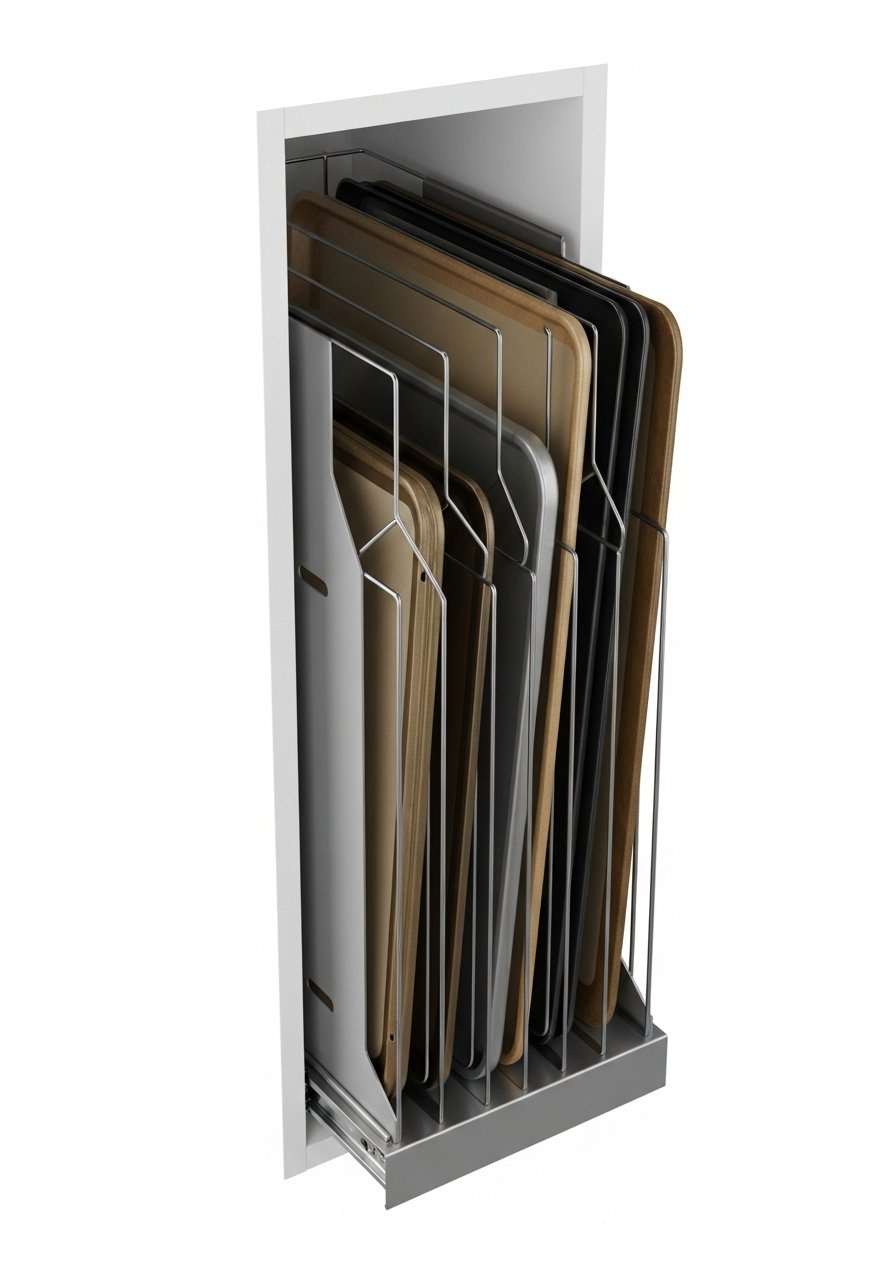
Old houses often have thin vertical gaps perfect for baking sheet storage. This pull-out keeps trays upright and easy to slide.
Materials
- Plywood back, 24" x 6" x 1/2"
- Metal dividers (4)
- 12" full-extension drawer slides
- Wood screws and glue
- Sanding block
Instructions
- Build a 24" tall narrow frame and mount slides.
- Attach metal dividers spaced 1"–1.5" apart.
- Mount in vertical gap and slide in baking sheets.
How to Display or Gift It
Place near oven; pair with a silicone mat set in a small gift box.
- Pull-Down Label Organizer (small pantry ideas for older homes)
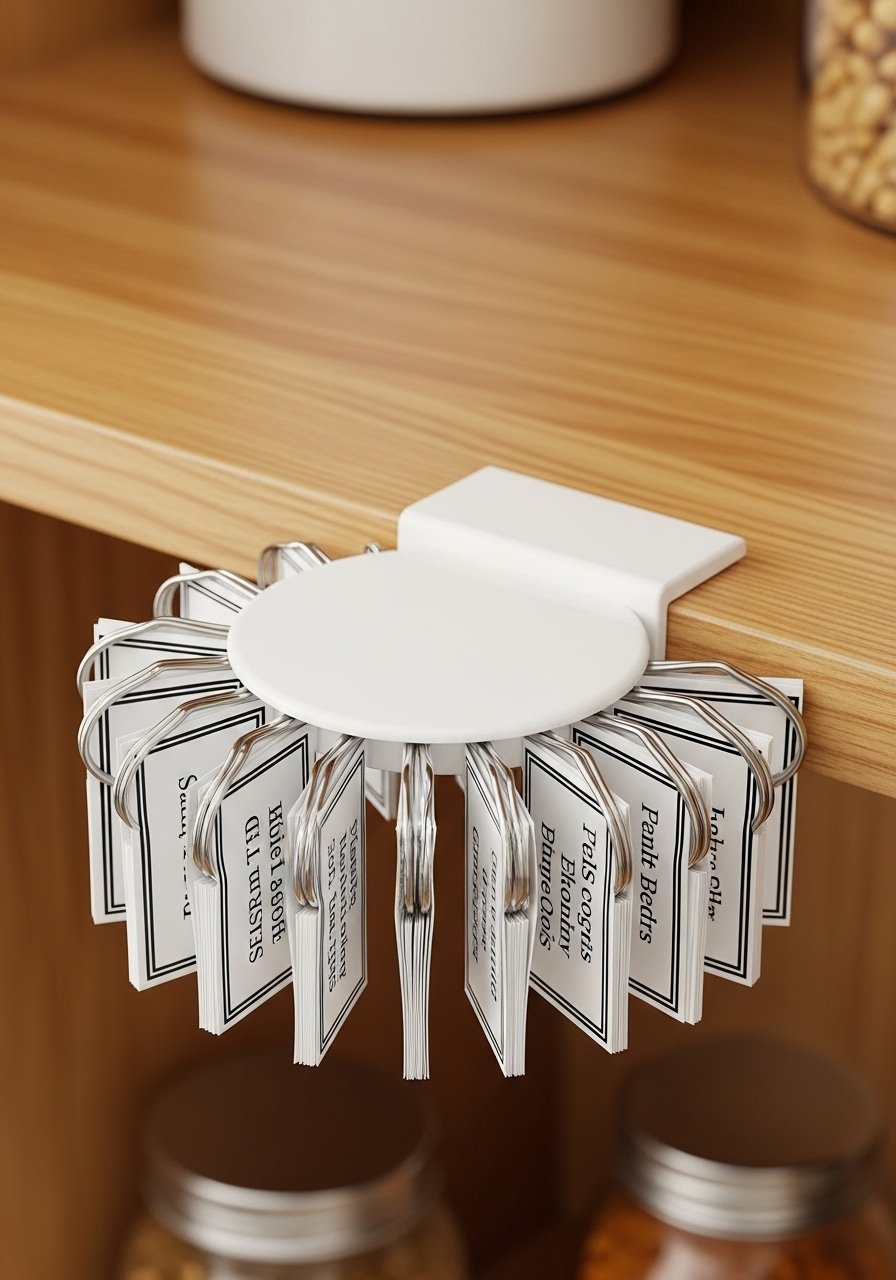
A pull-down ring with printed labels organizes categories like "baking," "canned," and "snacks" for quick visual sorting.
Materials
- Small metal ring clip
- Printed label set (laminated)
- Mini hook and eye screw
- Hole punch
Instructions
- Punch holes in laminated labels and thread onto ring.
- Attach hook under shelf edge.
- Pull down ring to check category and rehang.
How to Display or Gift It
Keep near the pantry door for quick item checks. Gift with an extra set of blank labels and a laminating pouch.
- Slim Corner Lazy Susan
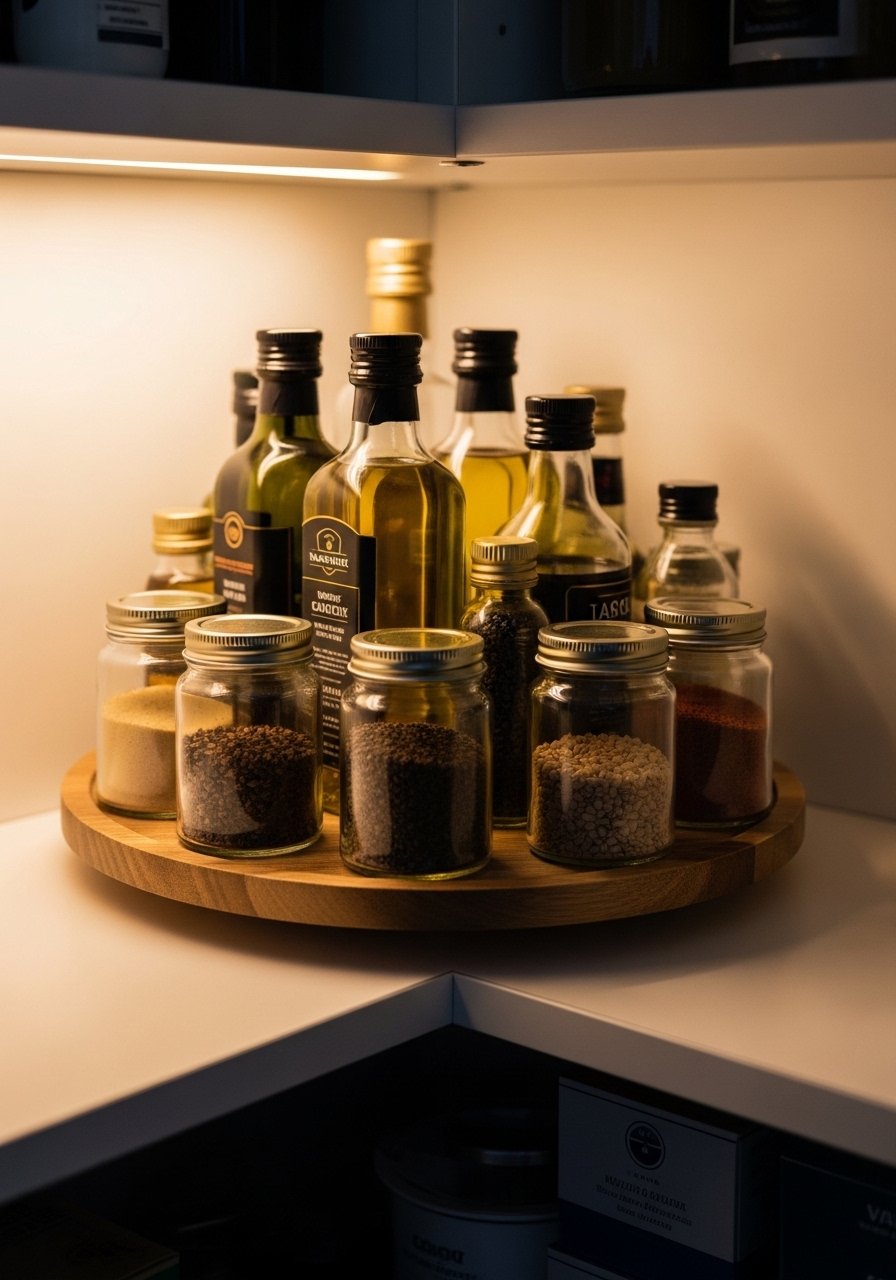
A small lazy Susan makes hard-to-reach corner items turn toward you. Choose a low-profile, non-slip base.
Materials
- 10" rotating lazy Susan
- Non-slip pads
- 6 small oil bottles
- Stain or paint to match shelf (optional)
Instructions
- Place non-slip pads under lazy Susan.
- Arrange oils and small jars by frequency of use.
- Rotate to access items quickly.
How to Display or Gift It
Use for oils, vinegars, and frequently used condiments. For gifting, pair with infused olive oil in a gift box.
- Slim Magnetic Knife Rail on Inside Door
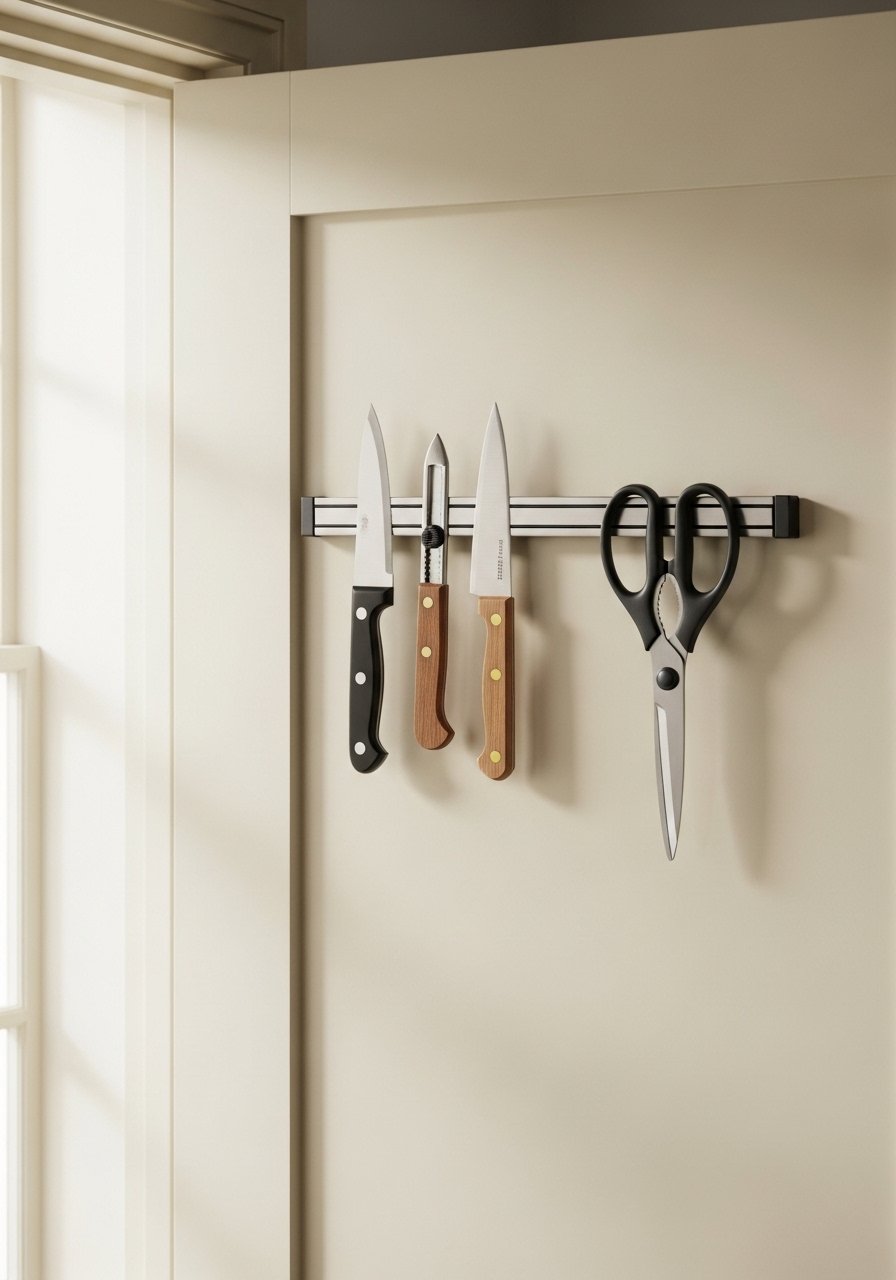
A magnetic knife rail keeps knives out of drawers and safe. Use a shallow rail designed for small knives to fit inside narrow doors.
Materials
- Magnetic knife strip, 12"
- Screws and anchors
- Small paring knives (3)
- Silicone edge guards (optional)
Instructions
- Mount rail centered at a comfortable reach height.
- Place knives with blades away for safety.
- Test magnet strength to ensure secure hold.
How to Display or Gift It
Perfect near a prep station. Gift with a pair of quality paring knives and a small wooden knife block for transport.
- Painted Shelf Risers for Double-Stacking
Shelf risers add usable height without bulky hardware. Painted risers can match trim for a cohesive vintage look.
Materials
- 2 plywood shelf risers, 12" x 6" x 4"
- Chalk paint (1/2 cup)
- Wax finish (thin coat)
- Sandpaper (220)
Instructions
- Sand, paint two coats, and wax for protection. Dry 1 hour between coats.
- Place on shelves and load cans or jars on both levels.
How to Display or Gift It
Use to display matching jar sets. For gifting, include a small bottle of paint and a sanding block.
- Pegboard Utensil Caddy
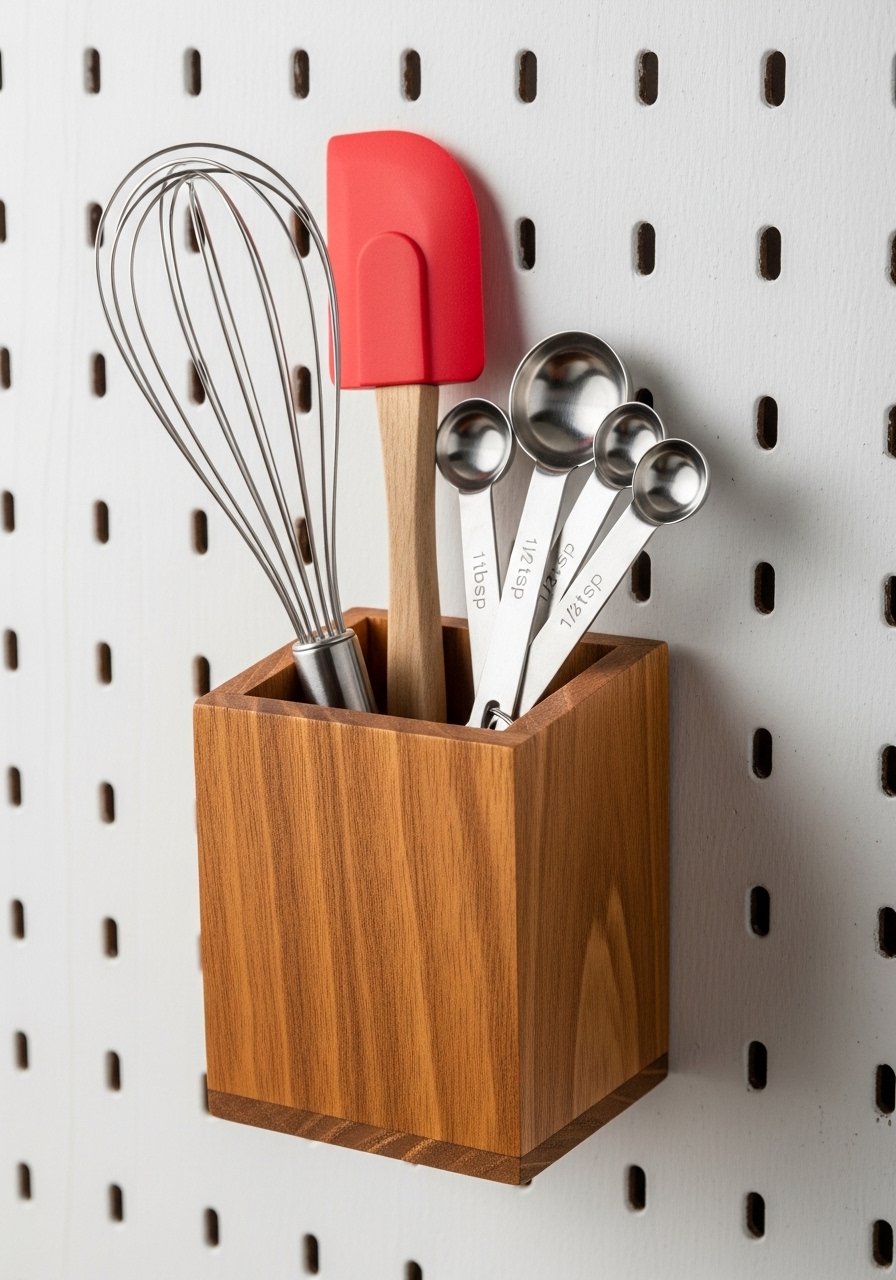
A pegboard caddy keeps utensils upright and visible. Reconfigure pegs as your tools change.
Materials
- Small pegboard piece, 10" x 12"
- Wooden caddy box, 8" x 3" x 3"
- Pegboard hooks
- Screws and anchors
Instructions
- Mount pegboard; hang caddy via hooks.
- Insert utensils and adjust spacing as needed.
How to Display or Gift It
Install near the prep zone. Gift with a set of wooden spoons tucked in the caddy and wrapped in kraft paper.
- Shallow Drawer with Divided Sections
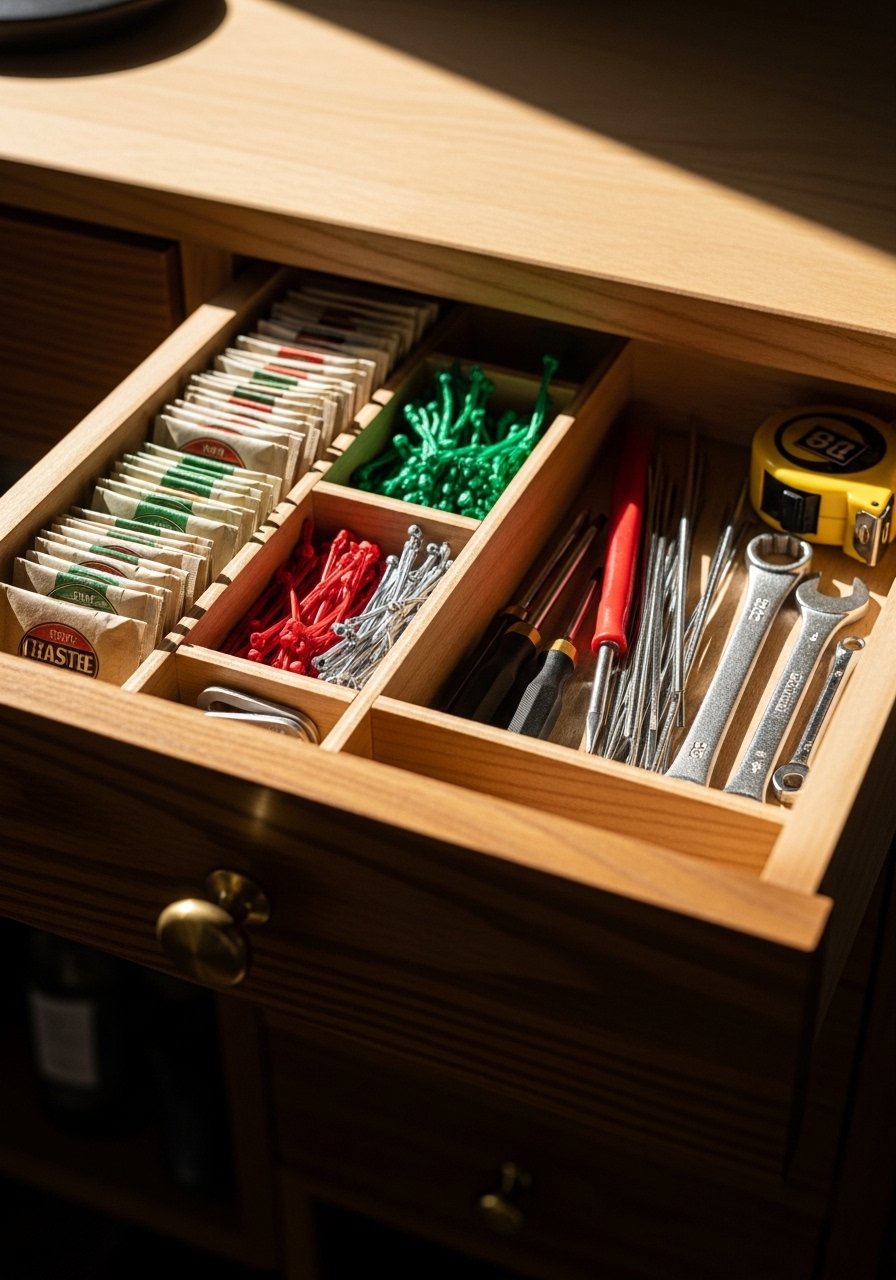
A shallow drawer with dividers tames small loose items that otherwise clutter shelves. Use thin plywood for tight fits.
Materials
- Drawer box, 14" x 12" x 2.5"
- Plywood strips for dividers, 1/8"
- Wood glue and small nails
- Drawer liner mat
Instructions
- Cut dividers to fit snugly inside the drawer.
- Glue and nail into place. Let glue set 30 minutes.
- Line with drawer mat and populate with small items.
How to Display or Gift It
Keep near the pantry entrance for packets and twist ties. Gift with a selection of herb sachets.
- Paneled Door Spice Rack (small pantry ideas for older homes)
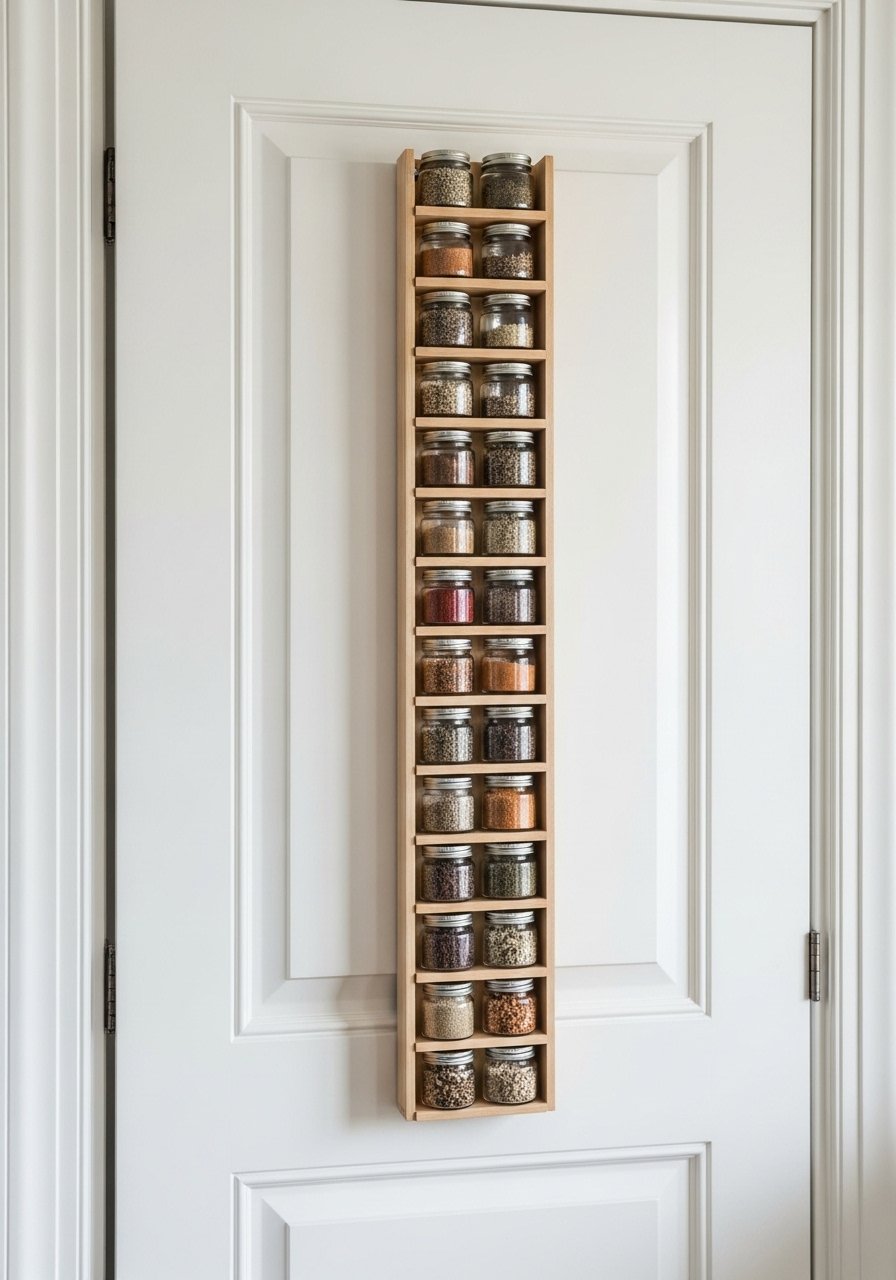
Older homes often have thick paneled doors—perfect for thin spice racks mounted inside. This keeps counter space free and lends a built-in feel.
Materials
- Slim spice rack kit, 24" height
- Small spice jars (12)
- Screws and anchors
- Label set
Instructions
- Mount kit per instructions centered on a panel.
- Fill jars and label tops.
- Reorganize seasonally as needed.
How to Display or Gift It
Install inside the door for an instant organization upgrade. For gifting, include a sampler of gourmet spices.
- Mason Jar Lid Herb Drying Rack
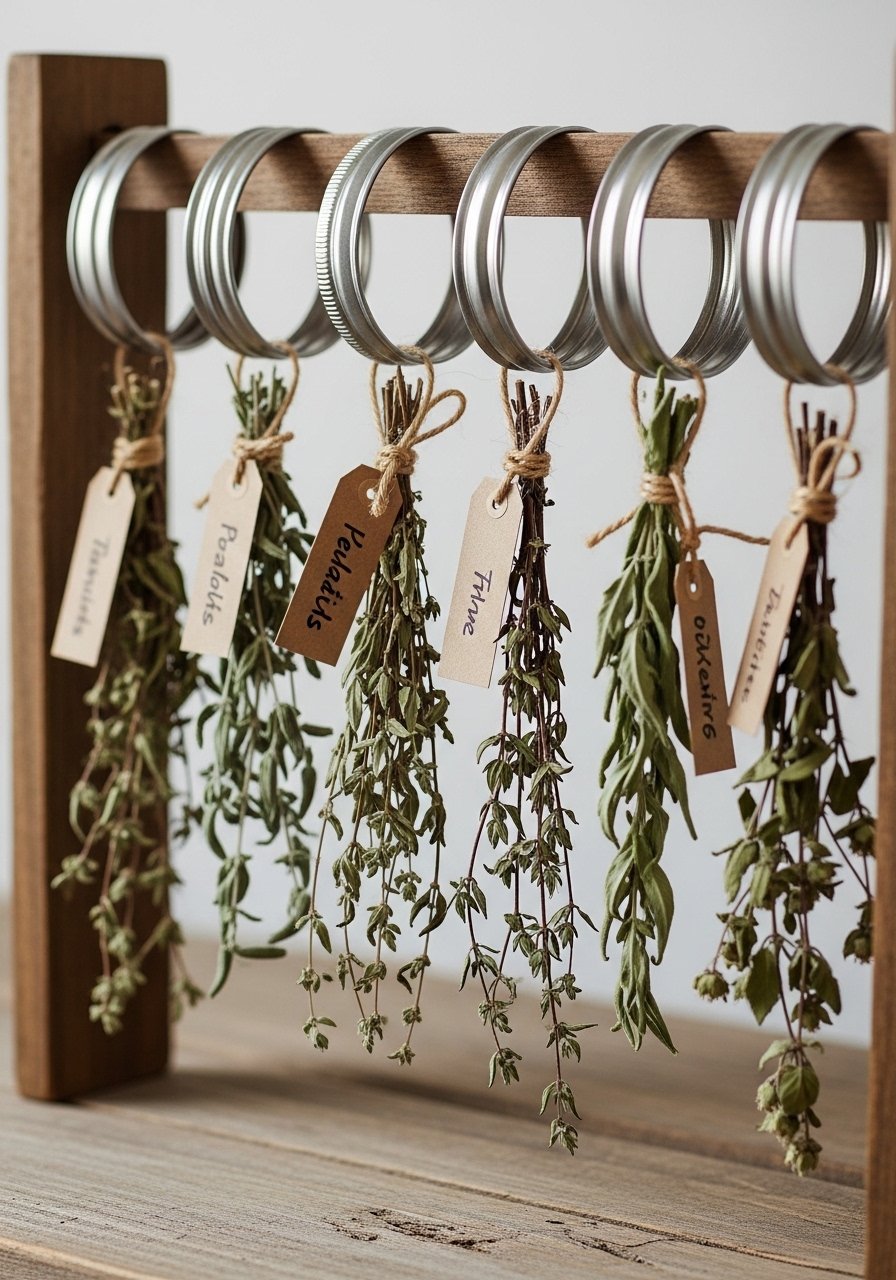
Use mason jar bands as tiny drying rings for herbs. The rack keeps sprigs separated and accessible.
Materials
- Wooden board, 12" x 4"
- Screws to attach bands
- 6 mason jar bands
- Twine and kraft tags
Instructions
- Attach jar bands to the board spaced 2" apart.
- Thread herb stems through bands and tie with twine.
- Hang rack in a cool, dry area to dry herbs for 7–14 days.
How to Display or Gift It
Hang near a window for a rustic display. Dried herbs make lovely little gifts bundled in kraft paper.
- Slim Vertical Baking Supply Cubbies
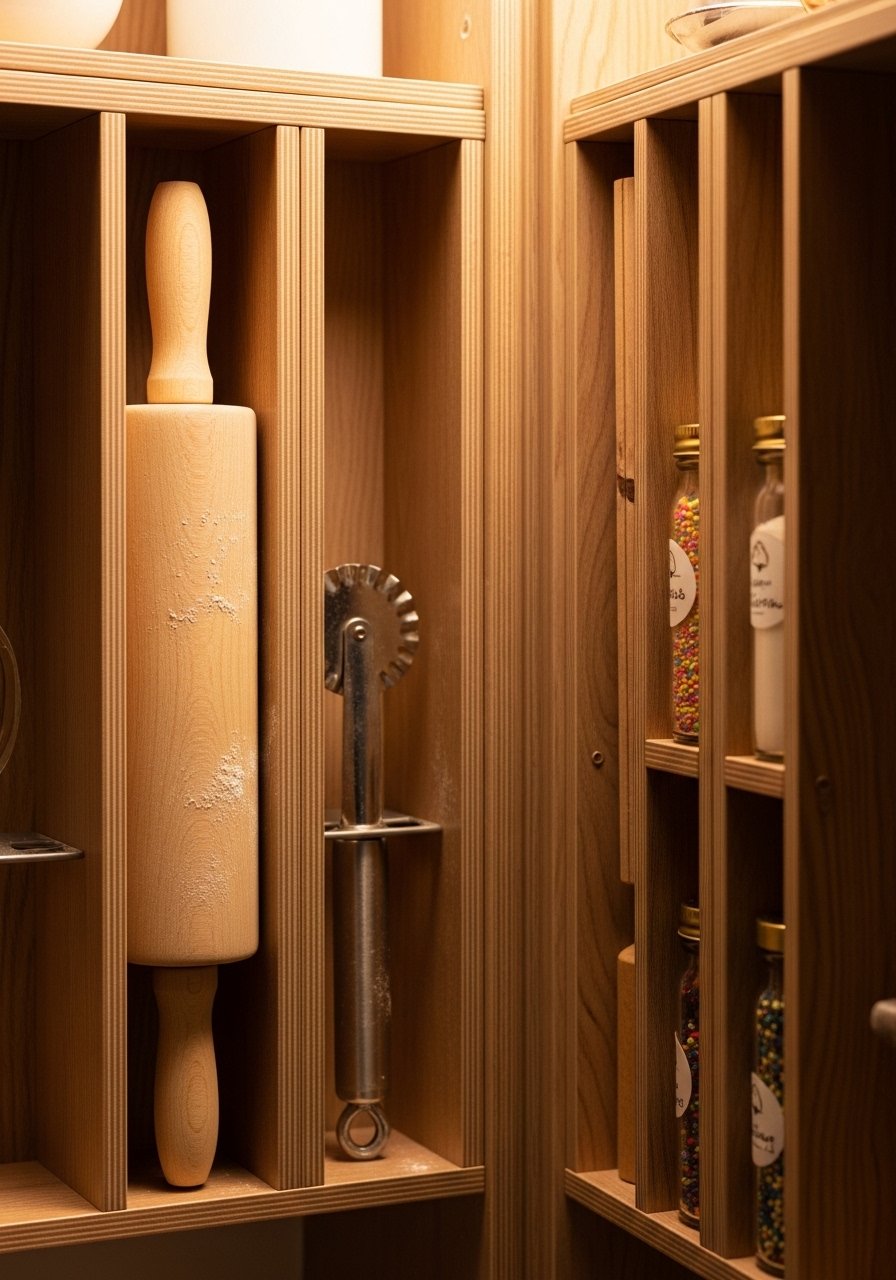
Vertical cubbies are great for tall, thin tools that otherwise get lost. The narrow format suits older pantry dimensions.
Materials
- Plywood divider sheet, 24" x 6"
- Small hooks and pins
- Sanding sponge
- Linen wrap for rolling pin
Instructions
- Cut and mount divider to create slim cubbies.
- Add hooks for small tools and store long items vertically.
How to Display or Gift It
Store rolling pin with a linen wrap to prevent dust. Gift with a recipe card tucked into a cubby.
- DIY Chalkboard Pantry Door Panel
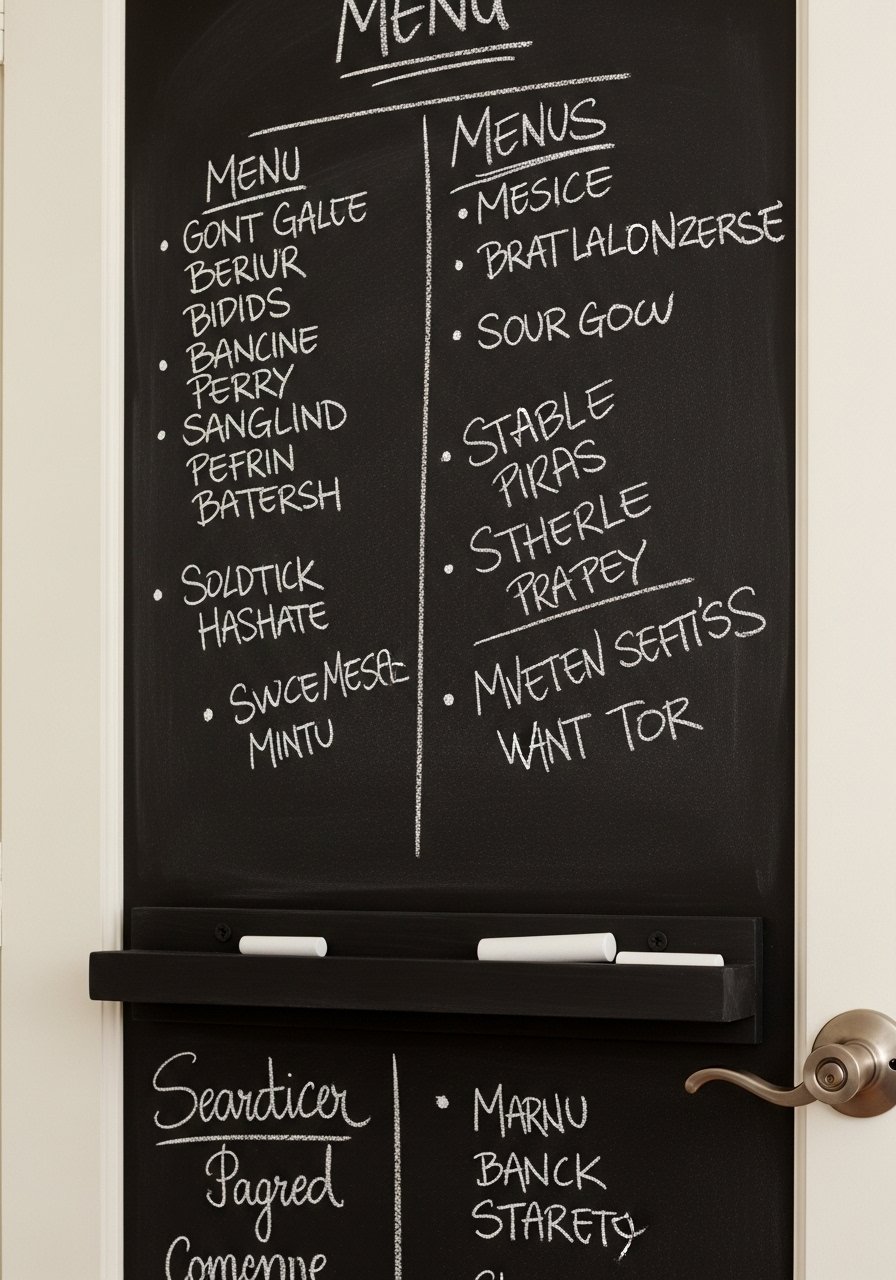
A chalkboard panel keeps menus, shopping lists, and pantry inventories front and center. Use painter's tape for crisp edges.
Materials
- Chalkboard paint (1 small can)
- Foam roller
- Painter's tape
- Chalk and eraser
Instructions
- Tape off panel edges. Apply two thin coats with a foam roller; dry 1 hour between coats.
- Let cure 48 hours before heavy use.
- Condition by rubbing chalk over the surface and wiping.
How to Display or Gift It
Use to track staples you’re low on. For gifting, include a small chalk set and eraser.
- Stackable Glass Canister Columns
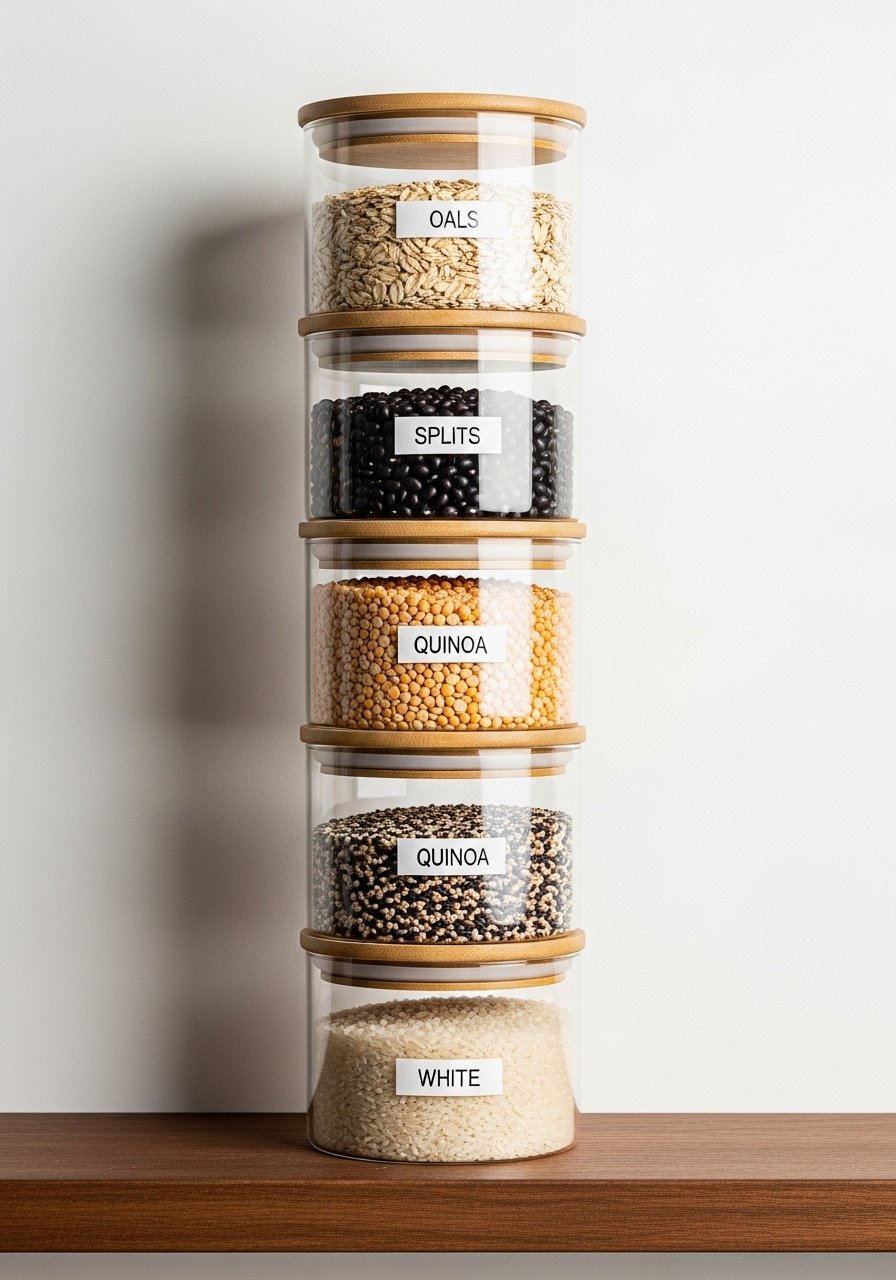
Stackable canisters make the most of vertical space and look tidy on shallow shelves. Bamboo lids add a warm, classic touch.
Materials
- 4 stackable glass canisters, varying heights
- Bamboo lids with silicone seals
- Small wooden scoops
- Labels (waterproof)
Instructions
- Clean canisters and dry thoroughly.
- Fit lids with silicone seals. Stack gently.
- Label each lid and fill using a funnel.
How to Display or Gift It
Group columns by use (baking vs. grains). Gift with a set of small scoops in a muslin bag.
- Slim Basket Under-Shelf Hooks
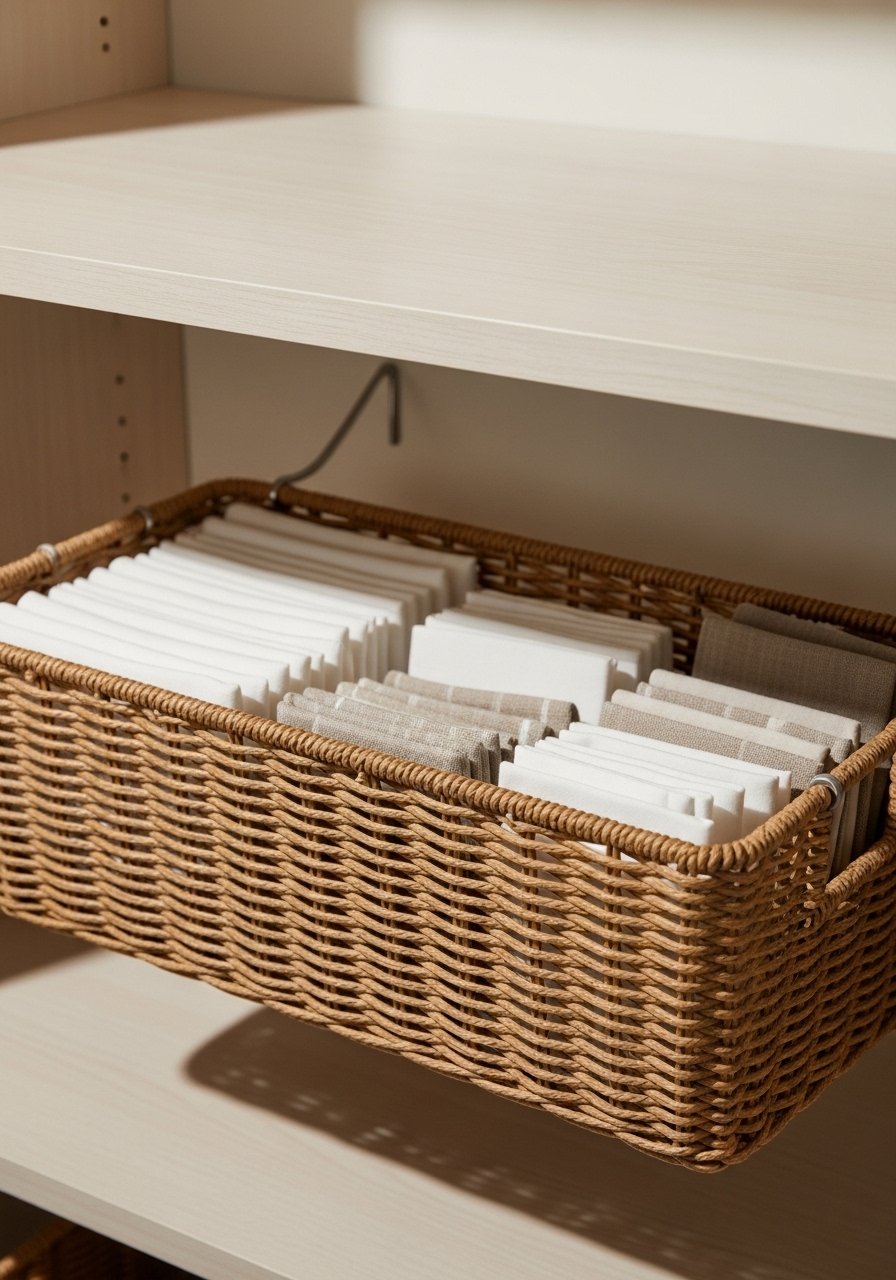
Under-shelf baskets add hidden storage without complicated builds. They slip onto shelves and create an extra tier.
Materials
- Under-shelf wire basket, 12" x 8"
- Shelf hooks (if needed)
- Small folded linens or tea towels
Instructions
- Slide basket onto shelf edge or attach with hooks.
- Fill with linens or lightweight pantry items.
- Check weight limits to avoid sagging.
How to Display or Gift It
Keep napkins handy near snack items. For gifting, tuck in an embroidered towel.
- Narrow Label Rail with Sliding Tags
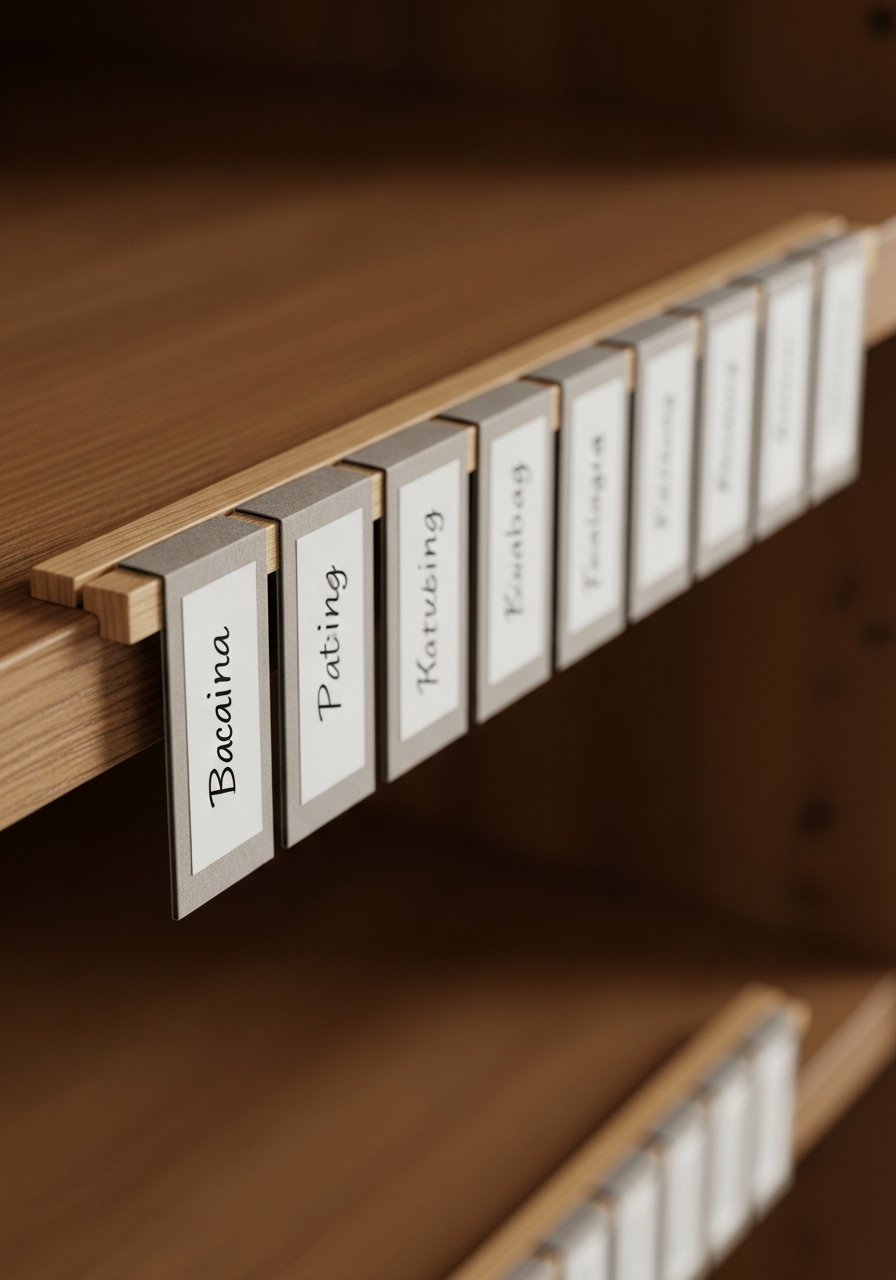
A label rail helps you reconfigure zones quickly. Slide tags to match seasonal swaps or inventory changes.
Materials
- Wooden label rail, 12"
- Sliding tag set (10)
- Small pencil or pen
Instructions
- Attach label rail to shelf edge with small screws.
- Insert sliding tags and write categories.
- Swap as your pantry changes.
How to Display or Gift It
Use along the front of a shelf for quick visual cues. For gifting, include a blank tag set and a fine-tip pen.
- Rustic Cookbook Nook with Tablet Slot
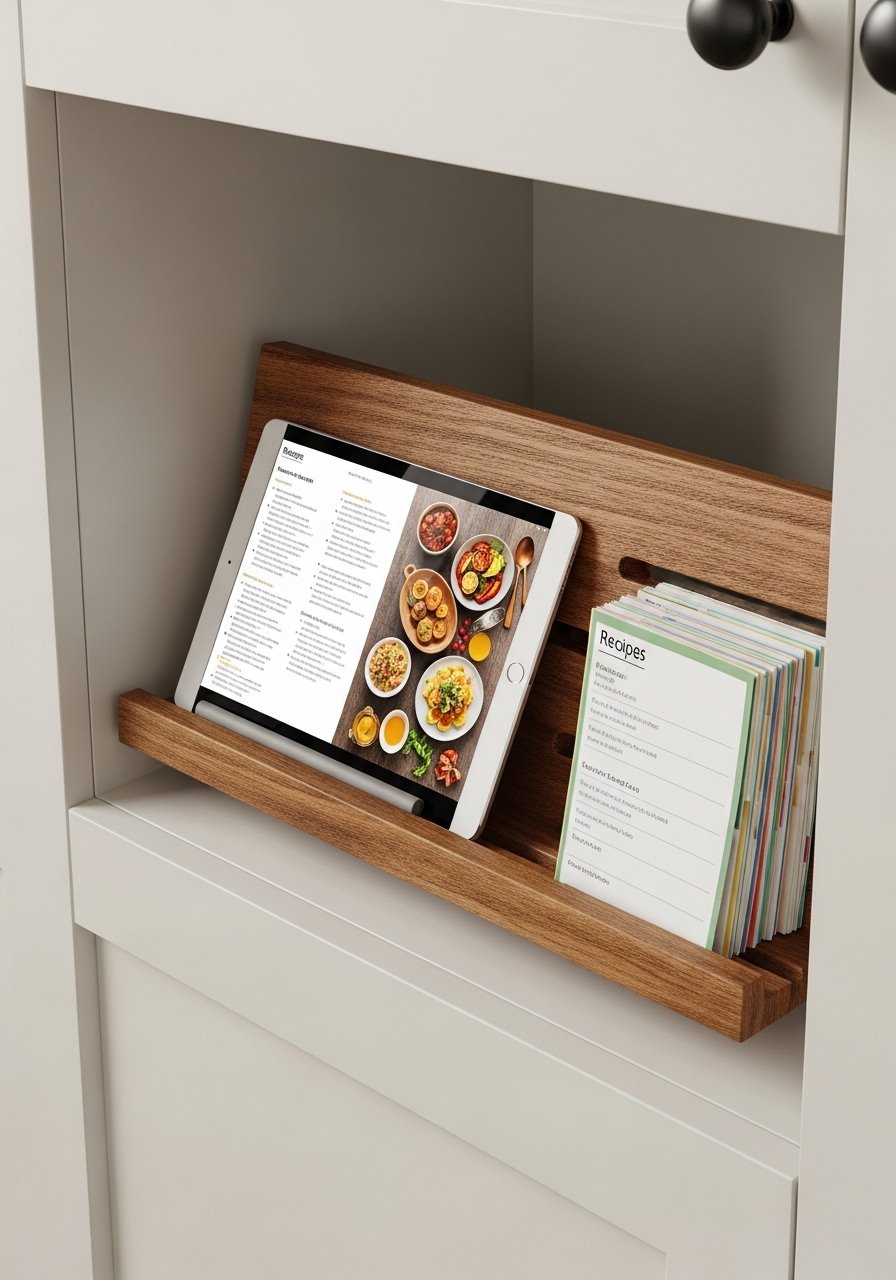
A mini cookbook nook keeps favorite recipes at the ready without taking counter space. Add a slot sized for tablets or recipe cards.
Materials
- Small wooden stand, 10" x 8"
- Felt pads
- Tablet stopper strip
- Sand and finish (1 coat)
Instructions
- Build or buy a small stand with a slotted ledge.
- Finish and add felt pads to prevent sliding.
- Place at a comfortable eye level in the pantry.
How to Display or Gift It
Store recipe cards in a small box beside the stand. Gift with a printed family recipe and a ribbon.
- Layered Glass Basket with Removable Liners
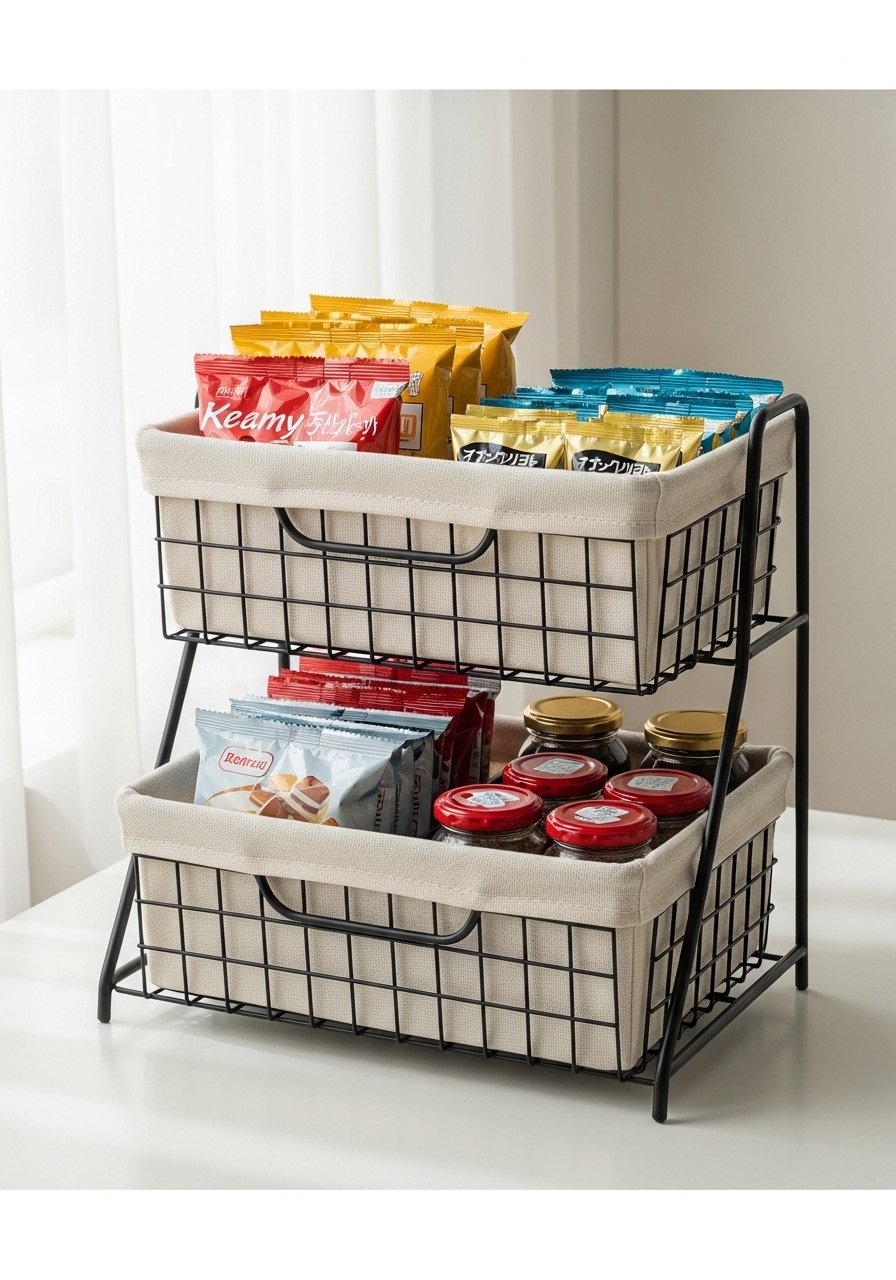
This layered basket keeps snacks segregated and liners make cleanup simple. The glass top tier preserves a light, airy look suited to classic homes.
Materials
- 2-tier glass basket with wire frame, 12" x 8"
- Cotton liners (2), washable
- Small wooden tongs
- Fabric dye for custom color (optional)
Instructions
- Fit liners into each tier and secure with small ties.
- Fill with snacks and light items. Swap liners to wash as needed.
- For deep stains, soak liners in warm water and gentle detergent for 30 minutes.
How to Display or Gift It
Place on an accessible lower shelf for kids' snacks. For gifting, fill tiers with an assortment of treats and wrap with cellophane.
You made it to the end — and have 29 practical ways to honor original features while taming clutter in small pantry spaces. From simple labels and slim pull-outs to vintage-style displays and clever vertical solutions, there's an approach here for every shelf depth and taste. Try one project at a time and pin your favorites for later. Which small pantry idea for older homes will you try first — a pull-out spice tray, a chalkboard door, or a tiered canister column? Share your wins with friends, and if you want one tool that helps across many projects, a temperature-control hot glue gun changed how neatly I finish small builds — no stringy mess and cleaner joins.


