You love cozy rooms, but your square footage is tiny. What if your coffee table could be both stylish and smart about space? These DIY coffee table ideas for small spaces are all about compact footprints, hidden storage, and looks that fit cottagecore, Japandi, boho, and modern minimal vibes.
Inside you'll find 23 real projects that fit studio apartments and snug living rooms. Each idea includes precise materials — like 3/4" plywood tops or 16" hairpin legs — and step-by-step instructions with drying and cure times you can trust. I’ll point out where a heat gun, a hot glue gun, or a foam brush makes life easier.
Pin the ones you want to try. Grab basic supplies like a precision craft knife or a self-healing cutting mat and let’s make space-saving style that actually works.
- Mid-Century Crate Coffee Table with Storage
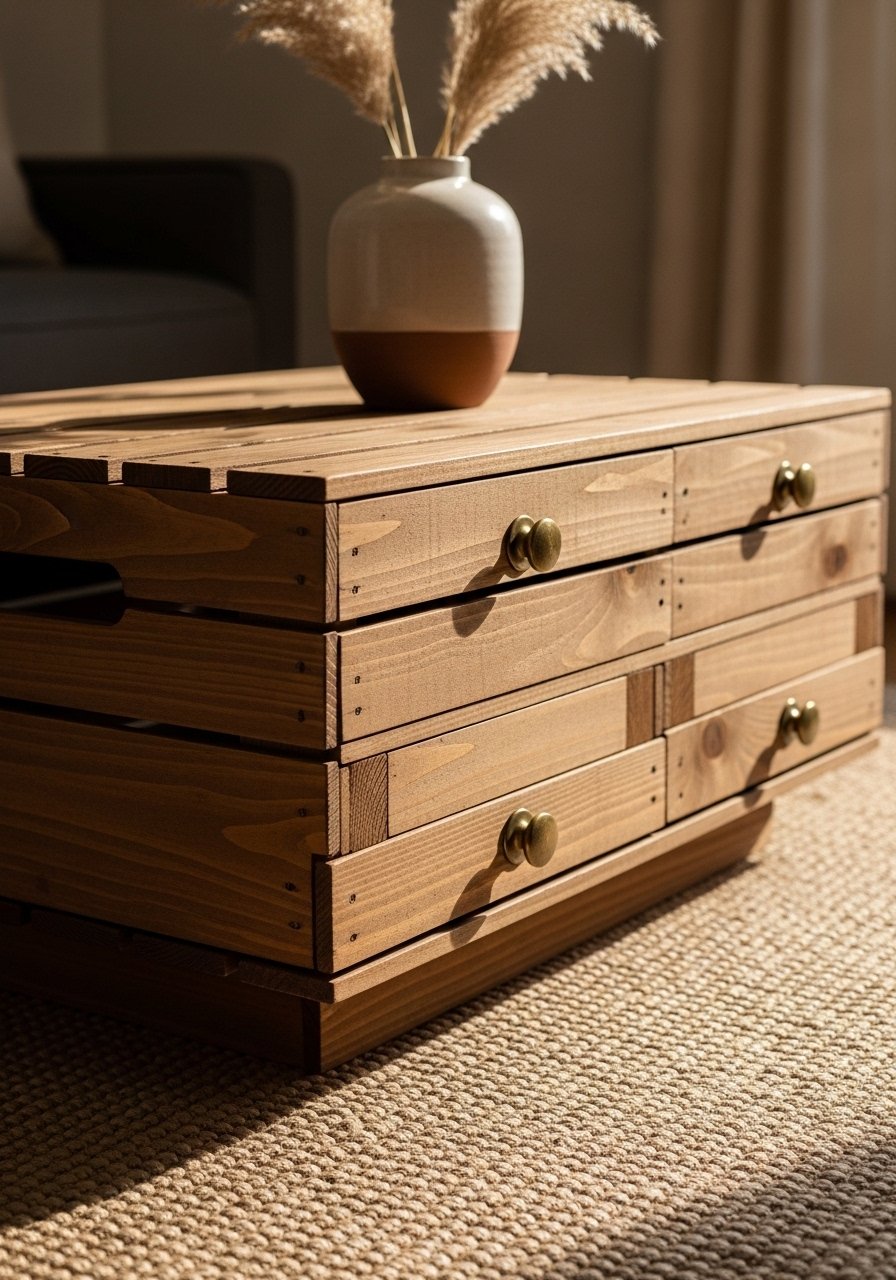
Warm, low, and practical, this crate coffee table gives instant storage without bulk. The crates slide out like drawers and the stained wood adds a cozy, retro feel. It’s ideal if you like the farmhouse or boho look. Beginners will love how forgiving the build is; sanding wood and staining are relaxing tasks.
Materials
- 3 wooden shipping crates, 18" x 12" x 8" each
- 1 sheet 3/4" plywood, 24" x 18" (top)
- 8 wood screws, 1 1/4"
- 4 felt pads
- 1/2 cup wood stain (walnut)
- 2 coats wipe-on polyurethane, 120 mL each
- Sandpaper set: 80, 120, 220 grits
- 4 small brass knobs (optional)
- Wood glue (Titebond or Loctite)
- Painter’s tape
Instructions
- Sand the crates with 80 grit to remove rough spots, then with 120 for a smoother finish.
- Wipe dust with a damp cloth. Let dry 15 minutes.
- Stain crates and plywood top with a foam brush. Apply one thin coat, wipe after 3–5 minutes.
- Let stain dry 6–8 hours. Apply a second coat if desired.
- Seal with wipe-on polyurethane, two thin coats. Let each coat dry 4–6 hours and cure overnight.
- Position crates in a row. Attach plywood top with wood glue and countersunk 1 1/4" screws through the top into crate upper rails.
- Add brass knobs to the open faces for a drawer look.
- Stick felt pads underneath to protect floors.
How to Display or Gift It
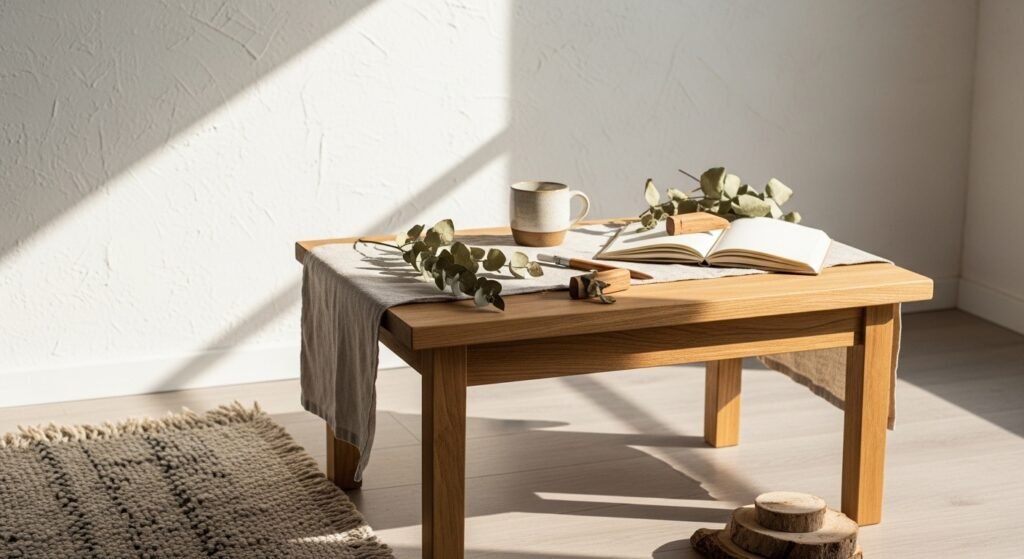
- Style with a linen runner and a small stack of books.
- Add a woven basket inside a crate for cable storage.
- Wrap as a housewarming gift by placing tea towels inside the crates and tying twine around the top.
- Store extra staining supplies in a small craft organizer like a stackable craft drawer.
- Hairpin-Leg Minimalist Coffee Table (Small Space)
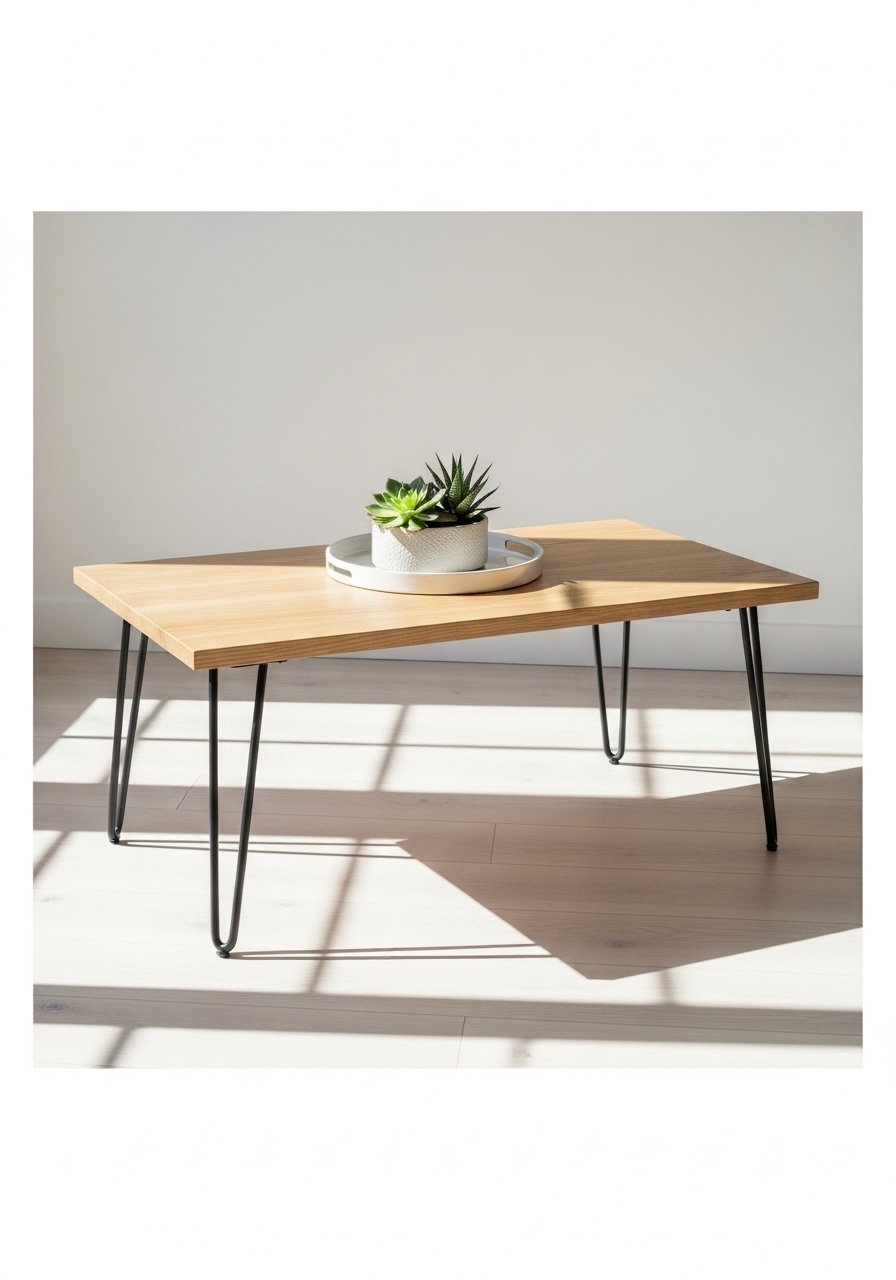
This pared-back table uses tiny 16" hairpin legs for a light profile. It feels modern but works with Japandi warmth. The table is compact and easy to move, perfect if you reconfigure seating often.
Materials
- 1 piece oak plywood, 24" x 14" x 3/4"
- 2 pairs black hairpin legs, 16" height
- 8 screws for hairpin legs (included)
- Sandpaper: 120, 220
- Water-based clear coat, satin finish (8 oz)
- Tape measure and pencil
- Drill with 3/16" bit
- Foam brush
Instructions
- Cut plywood to 24" x 14". Sand edges and surface with 120 then 220 grit.
- Mark leg positions: 2" in from each corner.
- Drill pilot holes with a 3/16" bit.
- Attach each hairpin leg with supplied screws.
- Apply two thin coats of water-based clear coat. Dry 1–2 hours between coats.
- Check leg tightness after first use and retighten if needed.
How to Display or Gift It
- Pair with a woven floor pouf for cozy seating.
- Use book stacks as risers to create tiers.
- Wrap the legs in cut-to-length felt sleeves for hardwood floors.
- Keep an extra set of screws in a small mason jar for future tightening.
- Storage Ottoman Top Coffee Table
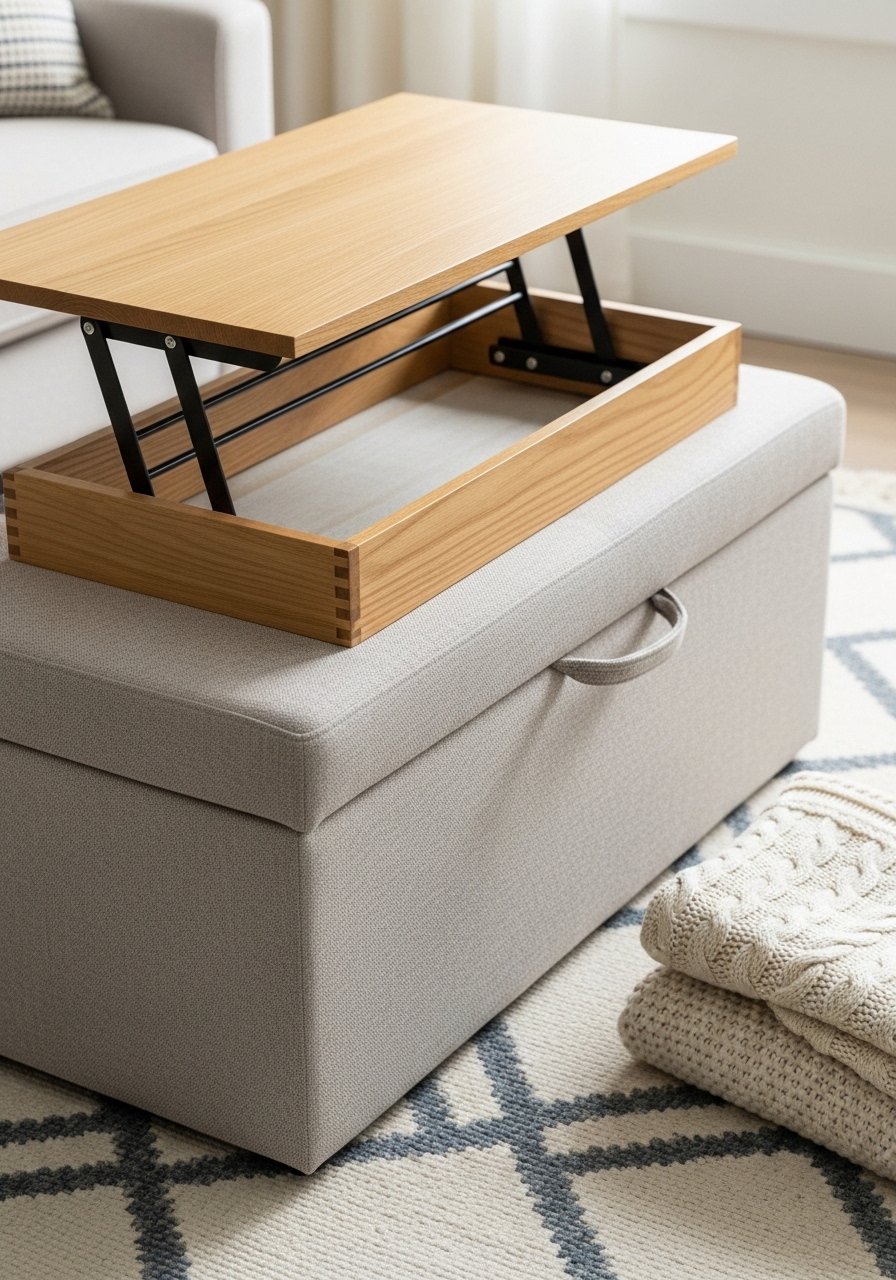
This hybrid ottoman table hides blankets and doubles as seating. The wooden lift-top tray gives a stable surface for drinks. Great for small spaces where seating matters as much as surface area.
Materials
- Small storage ottoman, 30" x 18" x 16"
- 1 plywood tray top, 30" x 18" x 1/2"
- Two piano hinges, 18" total length (split as needed)
- 4 corner brackets (optional)
- Fabric (if reupholstering) — 2 yards heavy linen
- Spray adhesive (if wrapping)
- 8 wood screws, 3/4"
- Felt pads
Instructions
- Measure the ottoman top and cut plywood tray to 30" x 18".
- If reupholstering, remove old fabric and cut new fabric with 2" extra seam allowance.
- Attach fabric to tray underside with spray adhesive and staple gun.
- Mount piano hinge to the backside top of the ottoman and to the plywood tray. Use 3/4" screws.
- Add corner brackets for extra tray stability if you’ll use the top as a work surface.
- Place felt pads under tray to protect fabric.
How to Display or Gift It
- Keep a set of coasters on the tray for drinks.
- Tuck board games inside for family nights.
- For gifting, tuck a small throw blanket and a boxed candle under the lid.
- Folding Wall-Mounted Drop Leaf Coffee Table
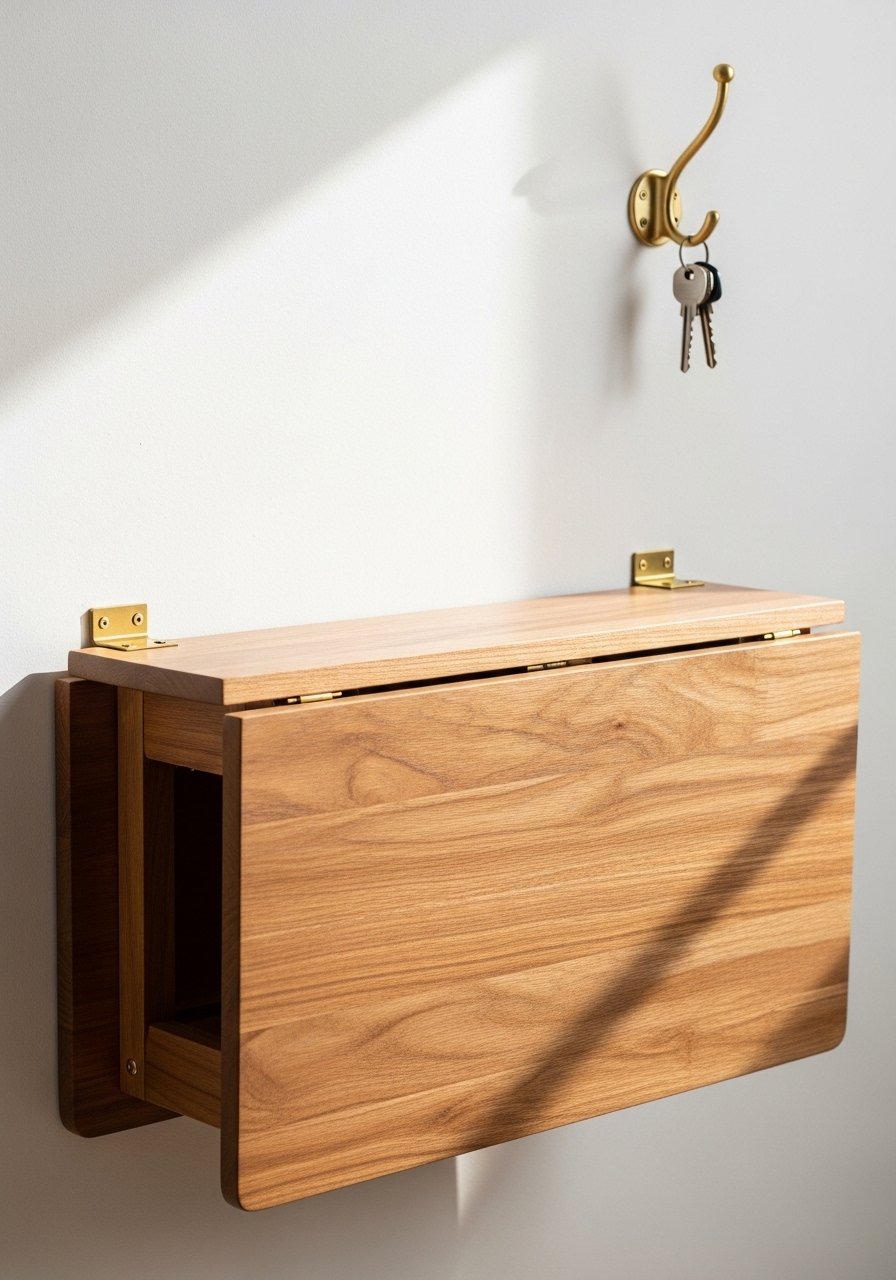
This wall-mounted drop leaf converts a hallway or tiny living room wall into a coffee table that folds away. It's clever for studio layouts and works in small dining nooks too.
Materials
- 1 solid wood panel, 36" x 16" x 1" (main top)
- 2 drop leaves, 12" x 16" each
- 2 piano hinges
- 2 swing-out folding brackets (stays)
- 1 wall cleat (for secure mounting)
- Wall anchors rated for 50 lbs
- Level and stud finder
- Drill and screwdriver
Instructions
- Cut panel and leaves to size and sand smooth.
- Attach piano hinges between main top and each drop leaf.
- Mount wall cleat securely into wall studs or anchors at desired height (18" from floor works well).
- Secure main top to cleat.
- Install folding brackets under each leaf so they lock at 90 degrees.
- Seal with one coat clear wax or paint to match decor. Dry 2 hours.
How to Display or Gift It
- Fold up during guests’ parties to widen floor space.
- Use as a laptop desk or small dining surface for two.
- Wrap as a housewarming gift with a matching set of placemats stored inside.
- Hidden Drawer Coffee Table (Lift Top)
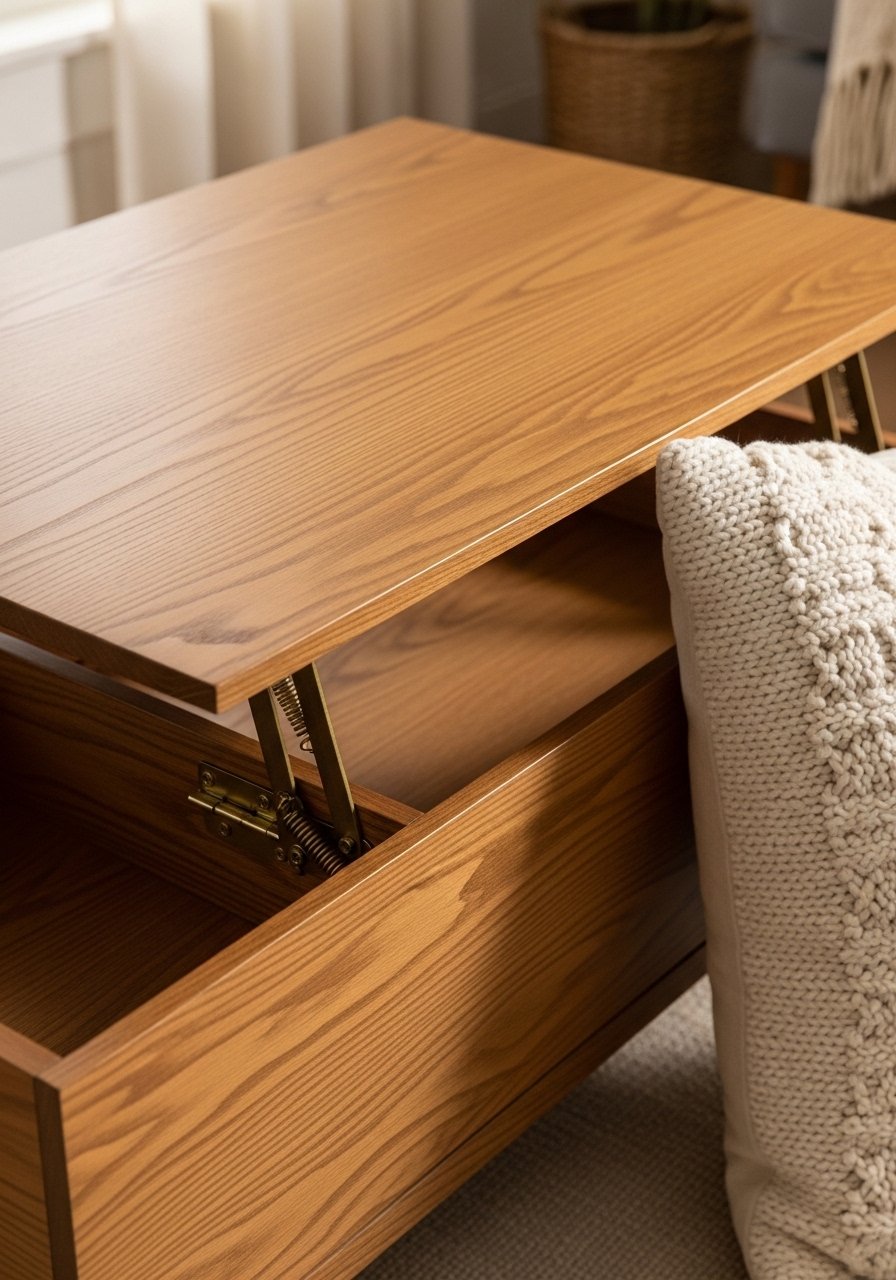
This lift-top table hides remotes, magazines, and cords. The mechanism gives easy access and raises the top to lap height for working or eating. Ideal if you need hidden storage without a large footprint.
Materials
- 1 tabletop, 36" x 20" x 3/4" plywood
- 1 lower shelf panel, 34" x 18"
- 2 side panels, 20" x 14"
- Lift-top hinges (set)
- Wood screws, 1 1/4"
- Wood glue
- Stain and two coats polyurethane
- 1 small felt-lined drawer insert (optional)
- Drill and clamps
Instructions
- Cut all panels to size and sand edges smooth.
- Assemble box frame with wood glue and screws. Clamp until dry (30–60 minutes).
- Install lower shelf 4" from the floor inside the box.
- Attach lift-top hinges per manufacturer instructions to the underside of the tabletop and inside front edge of the box.
- Stain and seal with two coats polyurethane. Dry 4–6 hours between coats.
- Place felt-lined insert for fragile items.
How to Display or Gift It
- Use a small tray on the tabletop to corral keys and candles.
- Store seasonal throws in the hidden compartment.
- For gifting, tuck a book and a ceramic mug inside before wrapping.
- Nesting Cube Coffee Tables (Set of 3)
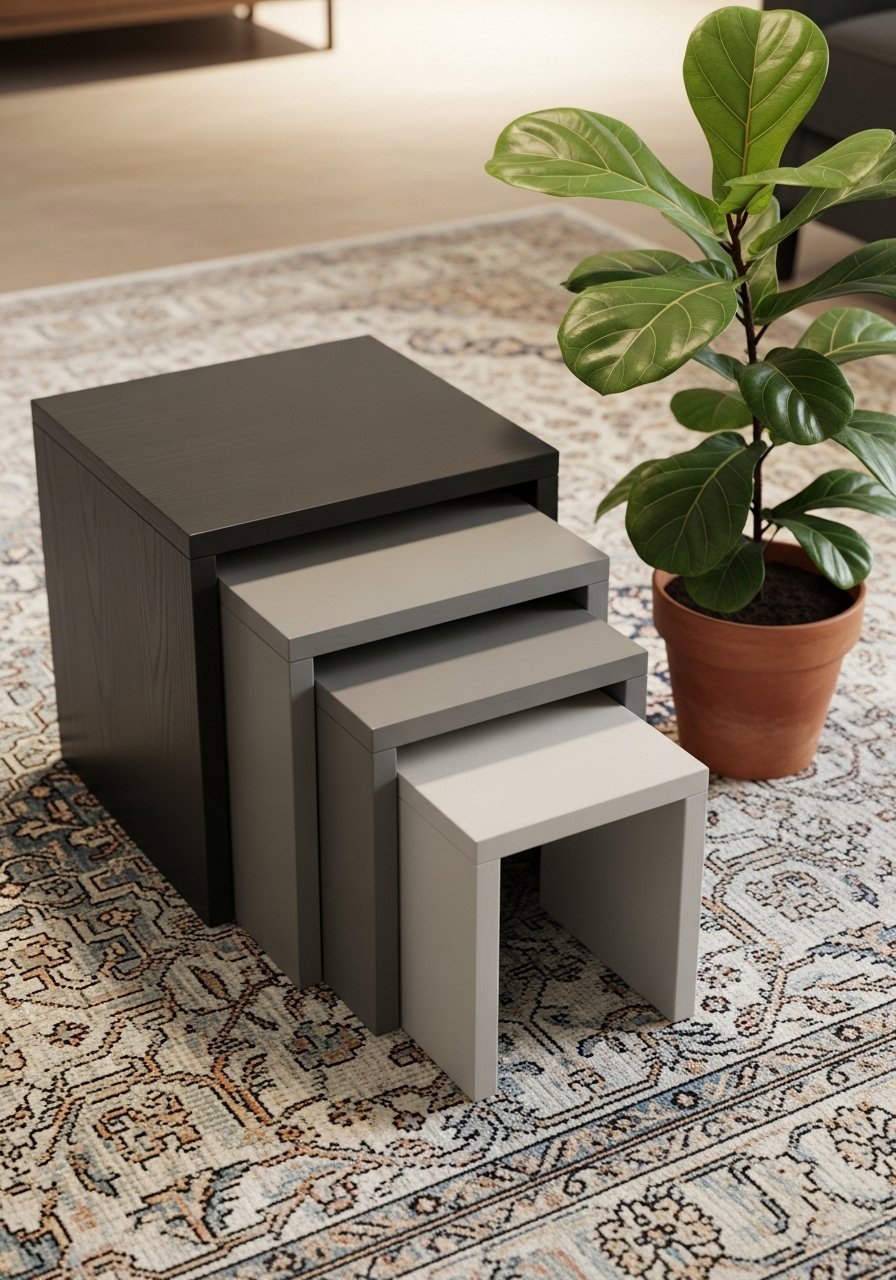
Nesting cubes give flexible surface area — push them together for entertaining or spread them for function. They’re great for modular boho and modern living rooms.
Materials
- 3 plywood cubes, each 16" x 16" x 16" (pre-cut sheets or build from 3/4" plywood)
- Wood glue
- Brad nails or 1" finishing nails
- Sandpaper: 120, 220
- Paint or stain of choice (3 tones)
- 6 felt pads
Instructions
- Build each cube by gluing and nailing edges together. Let glue set 30–60 minutes.
- Sand seams smooth with 120 then 220 grit.
- Paint or stain each cube in graduated tones. Let stain dry 6–8 hours.
- Seal painted surfaces with a clear coat. Dry 1–2 hours between coats.
- Add felt pads to the undersides.
How to Display or Gift It
- Stack one inside another when storing.
- Use as extra seating topped with cushions.
- For gifting, paint a personalized motif on the smallest cube and present nested inside the larger ones.
- Pallet Plank Coffee Table with Hidden Bins
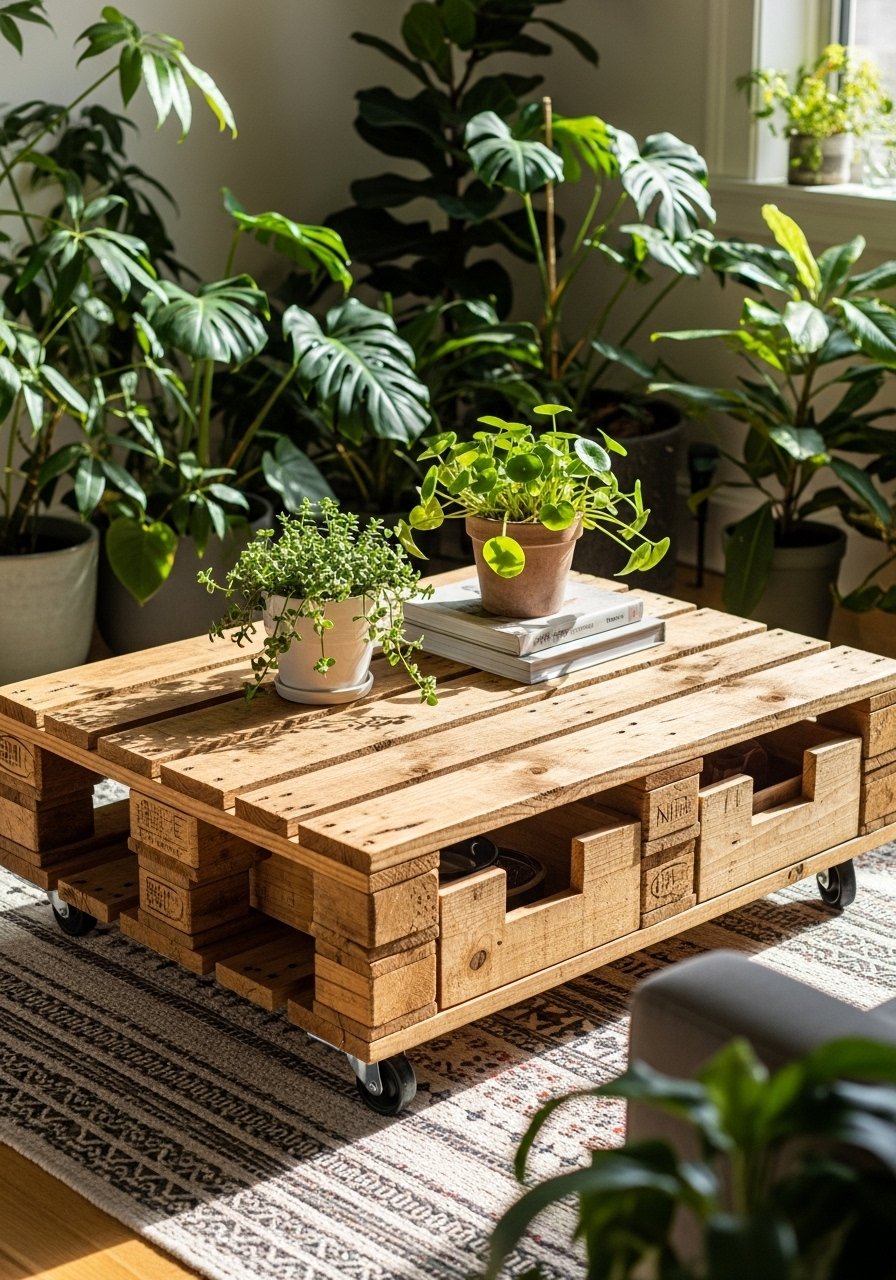
Pallet projects are eco-friendly and deliver rustic charm. This version adds hidden bins for kid toys or throws. Casters make it mobile for reconfiguring small rooms.
Materials
- 1 pallet, dismantled into planks (or pre-cut pallet wood 36" x 22")
- 2 plywood pull-out bins, 16" x 10" x 5"
- Wood screws 1 1/4"
- 4 locking casters
- Wood glue
- Sandpaper: 80, 120
- Stain (1/2 cup) and sealant (polyurethane)
- Cordless drill and pry bar
Instructions
- Break down pallet and select straight planks. Sand with 80 then 120.
- Build tabletop by gluing and screwing planks to a cross support frame.
- Construct two plywood bins sized to slide under tabletop. Sand and seal them.
- Attach drawer runners or simple wood rails under table for bins to slide on.
- Attach locking casters to underside corners.
- Stain table and bins; apply two coats polyurethane. Dry 4–6 hours between coats.
How to Display or Gift It
- Roll next to seating for easy access to games.
- Store remote controls and coasters in bins.
- Wrap in kraft paper and add a sprig of eucalyptus if gifting.
- Suitcase Coffee Table (Vintage Look)
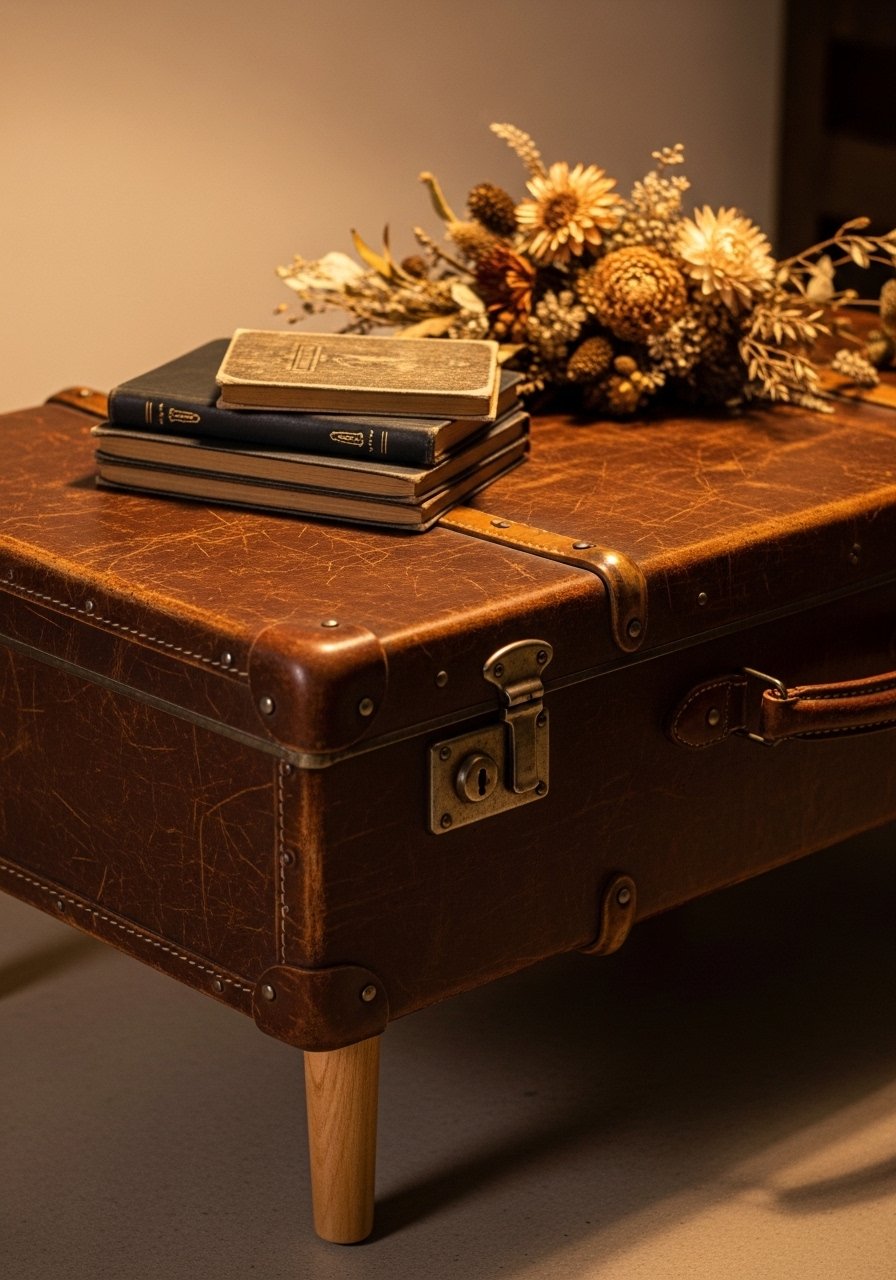
A repurposed suitcase is full of character and better than a bulky trunk. It offers internal storage and a real conversation starter for renters who can't change floors.
Materials
- Vintage suitcase (or new hard-sided case) 28" x 16"
- 4 wooden tapered legs, 8" height
- L-brackets and screws
- Foam padding (optional)
- Upholstery fabric (optional)
- Drill and screwdriver
Instructions
- Clean and repair the suitcase interior. Add foam padding and fabric if you want a softer top.
- Attach legs to the bottom with L-brackets and screws, ensuring even placement.
- Optionally seal leather with a leather conditioner.
- Check hinges and clasps; tighten if loose.
How to Display or Gift It
- Add travel-themed accessories and a stack of guidebooks.
- Store blankets or board games inside.
- Gift idea: fill with curated coffee table books and a small candle.
- Resin Inlay Mini Coffee Table (Compact Round)
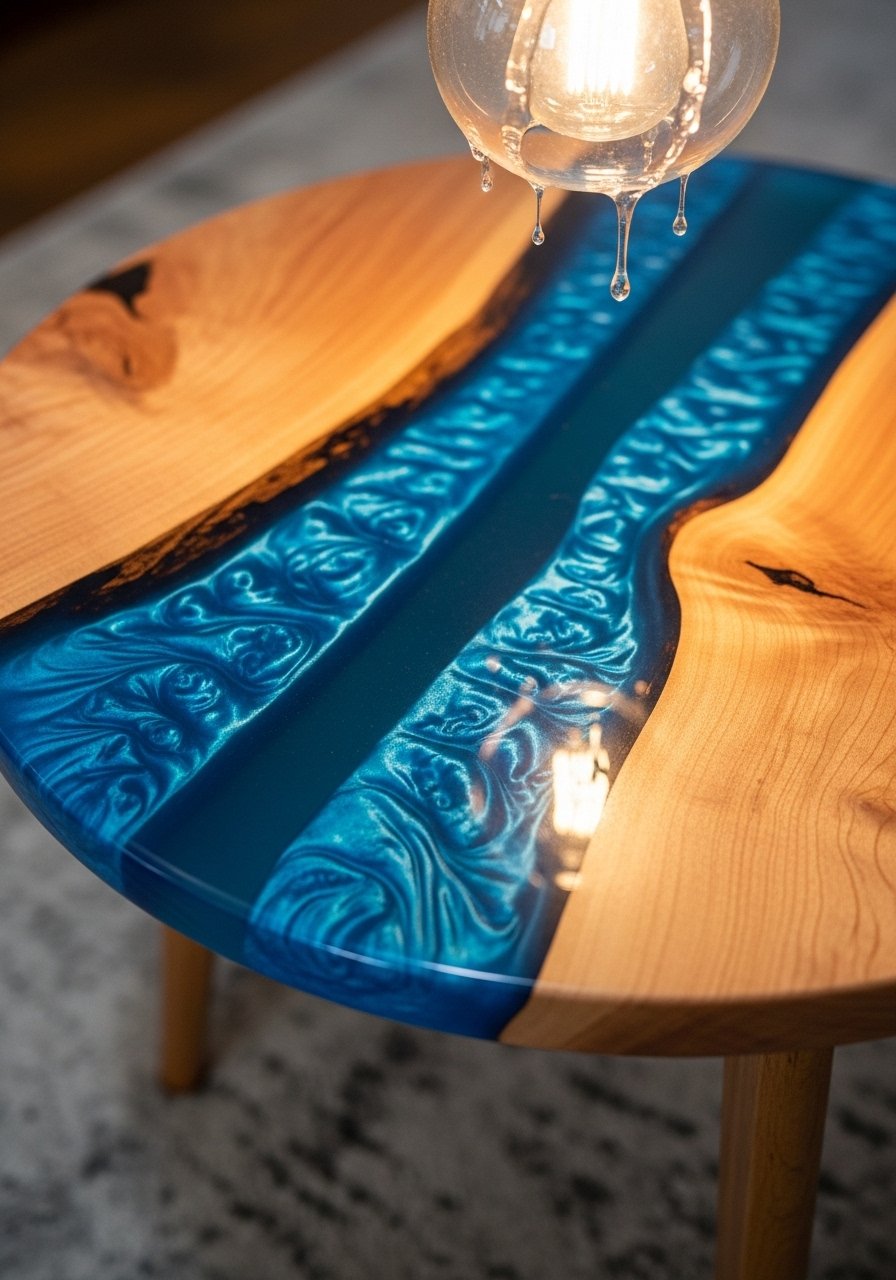
Epoxy resin gives jewel-like, glossy tops perfect for modern boho and coastal looks. This compact round table is stunning but needs careful mixing and curing.
Materials
- Round wood blank, 24" diameter x 1.5"
- 1 kit epoxy resin (ArtResin or similar), 16 oz
- Pigment powders or alcohol inks (blue and white)
- Painter’s tape and craft sticks
- Heat gun (for bubble release)
- Sandpaper: 120, 220, 400
- Disposable mixing cups and gloves
- Drop cloth and level surface
Instructions
- Seal the wood top with a thin coat of polyurethane to prevent air bubbles.
- Tape underside edges with painter’s tape to create a contained pour area if making a river.
- Mix epoxy according to kit instructions (usually 1:1). Stir slowly 3 minutes.
- Add pigments and pour in layers. Use heat gun for 5–10 seconds to pop bubbles after each pour.
- Let cure 24–72 hours depending on product. Handle gently after 24 hours; full cure 7 days for ArtResin.
- Sand edges smooth with 400 before final polish if needed.
How to Display or Gift It
- Place on a round jute rug for contrast.
- Pair with brass accent pieces for a coastal-meets-modern look.
- For gifting, include care instructions and a gentle polish cloth.
- Convertible Coffee-to-Dining Table (Lift-and-Extend)
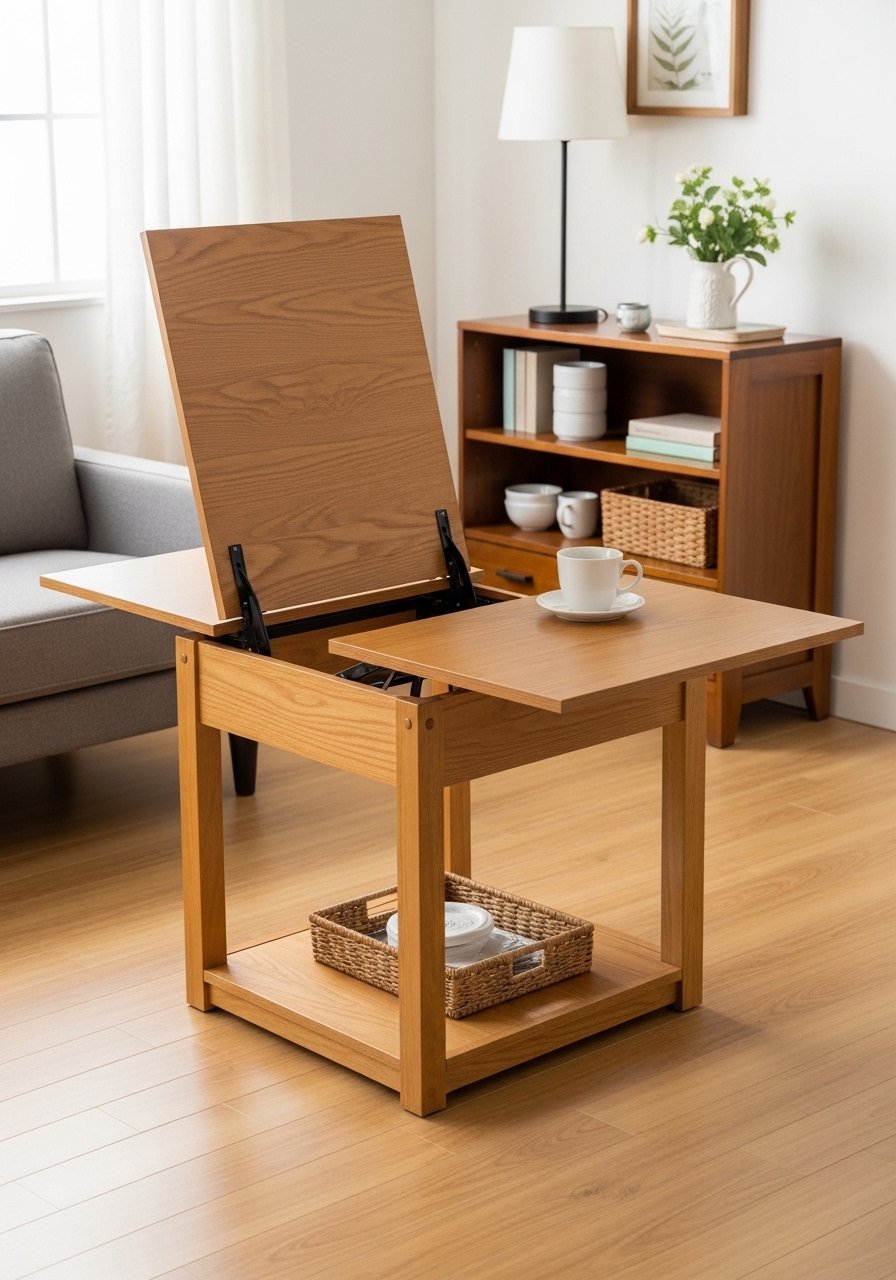
This multi-height table lifts to dining height when guests come over. It’s brilliant for micro-apartments that need one surface to do double duty.
Materials
- Tabletop, 36" x 22" x 3/4"
- Lift-and-extend hardware kit (scissor lift)
- 4 sturdy legs
- Mounting bolts (hardware kit)
- Cordless drill and wrench
- Finish of choice (stain or paint)
Instructions
- Attach lift hardware per kit instructions to underside of tabletop.
- Secure legs to the lift platform ensuring balance.
- Test lift and locking mechanism several times.
- Finish tabletop and hardware covers. Let paint or stain cure 24 hours before heavy use.
- Tighten all bolts after initial uses.
How to Display or Gift It
- Use as a coffee table daily and raise it for dinner dates.
- Store placemats inside a woven bin under the table when not in use.
- Gift with a set of compact foldable dining chairs.
- Mosaic Tile Top Coffee Table (Small Round)

A mosaic top adds texture and pattern while a small diameter keeps the table from crowding your seating. Tiles are forgiving; grout hides small layout imperfections.
Materials
- Round plywood top, 20" diameter
- 1 box mosaic tiles (mix of sizes) 1–2 sq ft
- Tile adhesive
- Grout (sandless for indoor) 1/2 lb
- Grout float and sponge
- 3/4" plywood base and legs
- Sealant (suitable for grout)
Instructions
- Cut round plywood and mount on a stable base.
- Lay tiles with adhesive, leaving 1/8" gaps for grout.
- Let adhesive set 24 hours.
- Apply grout, wiping excess with a damp sponge.
- Let grout cure 24–48 hours, then seal grout per product directions.
- Attach legs and add felt pads.
How to Display or Gift It
- Style with a terracotta planter and a small watering can.
- Keep grout sealant for touch-ups stored in a craft organizer.
- Gift idea: pair with a small tile care kit.
- Folding Tray Table with Rope Legs
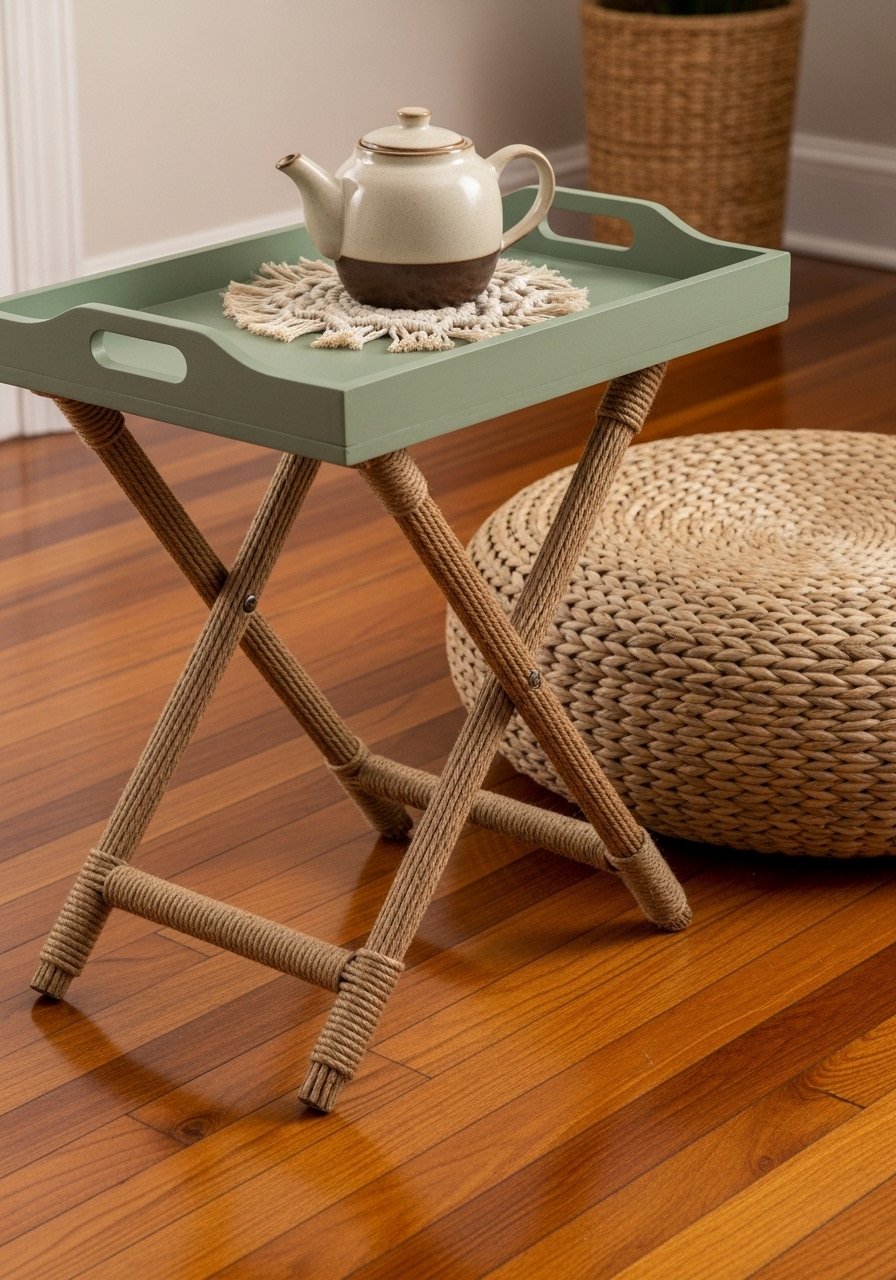
Lightweight and portable, this tray table is great for afternoon tea outdoors or as a movable surface in cramped living rooms. Rope-wrapped legs give it coastal cottage flair.
Materials
- Wooden serving tray top, 22" x 14"
- 3 dowel legs, 18" each (cut to fold length)
- Natural jute rope, 10 yards
- Hinges for folding legs
- E6000 adhesive
- Clear sealer spray
Instructions
- Attach hinges to connect legs so they fold flat under tray.
- Wrap rope around each leg tightly; secure ends with E6000.
- Attach legs to tray base with hinges.
- Seal rope ends with a drop of sealer to prevent fraying.
- Spray tray with one coat clear sealer. Dry 1–2 hours.
How to Display or Gift It
- Carry outside for sunny mornings.
- Store flat between cushion stacks when not in use.
- For gifting, tuck a small packet of specialty tea in the tray.
- Ladder Shelf Coffee Table (Slim)
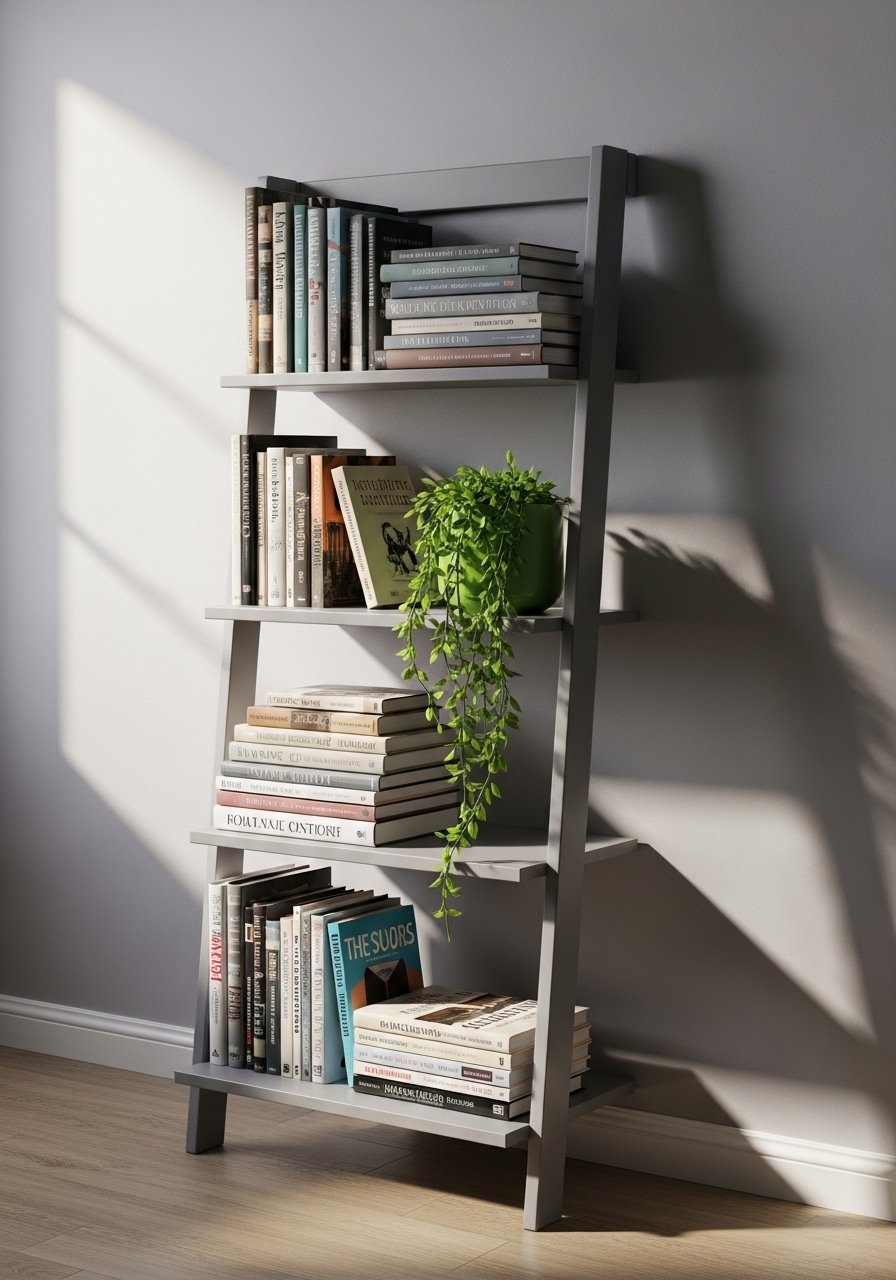
A ladder shelf offers vertical storage without taking floor area. This slim coffee table doubles as a display and keeps essentials organized.
Materials
- 2 ladder side rails, 36" x 10"
- 3 shelves, 30" x 8"
- Wood screws and dowels
- Wood glue
- Paint or stain
- Sandpaper
Instructions
- Assemble ladder frame with dowels and glue. Clamp overnight.
- Slide shelves into place and secure with screws from the underside.
- Sand and finish as desired. Dry 2–4 hours.
- Check stability and add corner braces if wobbly.
How to Display or Gift It
- Use lower shelf for baskets and top for decor.
- Place slim storage boxes for remotes and chargers.
- Gift by adding a small potted plant and a decorative book.
- Acrylic Clear Coffee Table (Illusion of Space)
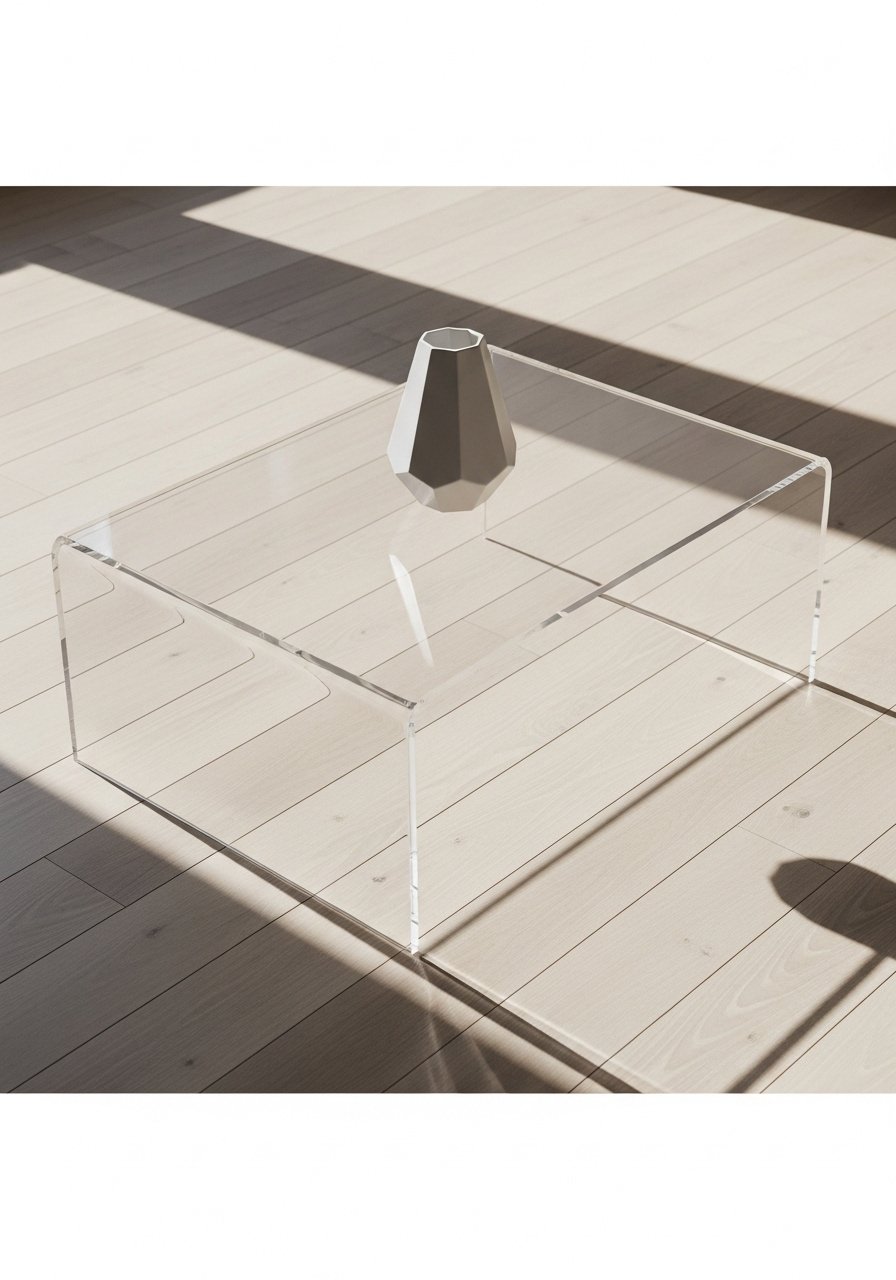
Transparent furniture visually takes up less space. An acrylic table gives a modern look without obstructing sightlines. It’s perfect for tiny living rooms that need openness.
Materials
- Pre-cut acrylic panel table (buy pre-made or order custom 36" x 18")
- Acrylic-safe cleaner
- Felt pads
- Protective gloves for handling
Instructions
- Order acrylic table kit or pre-cut panels and assemble per supplier instructions.
- Handle edges with gloves to avoid fingerprints.
- Clean with acrylic-safe spray and soft cloth.
- Place felt pads underneath to protect flooring.
How to Display or Gift It
- Use under a neutral vase to keep the scene minimal.
- Pair with a textured rug for contrast.
- Gift with a bottle of acrylic cleaner and microfiber cloth.
- Planter Coffee Table (Greenery Center)
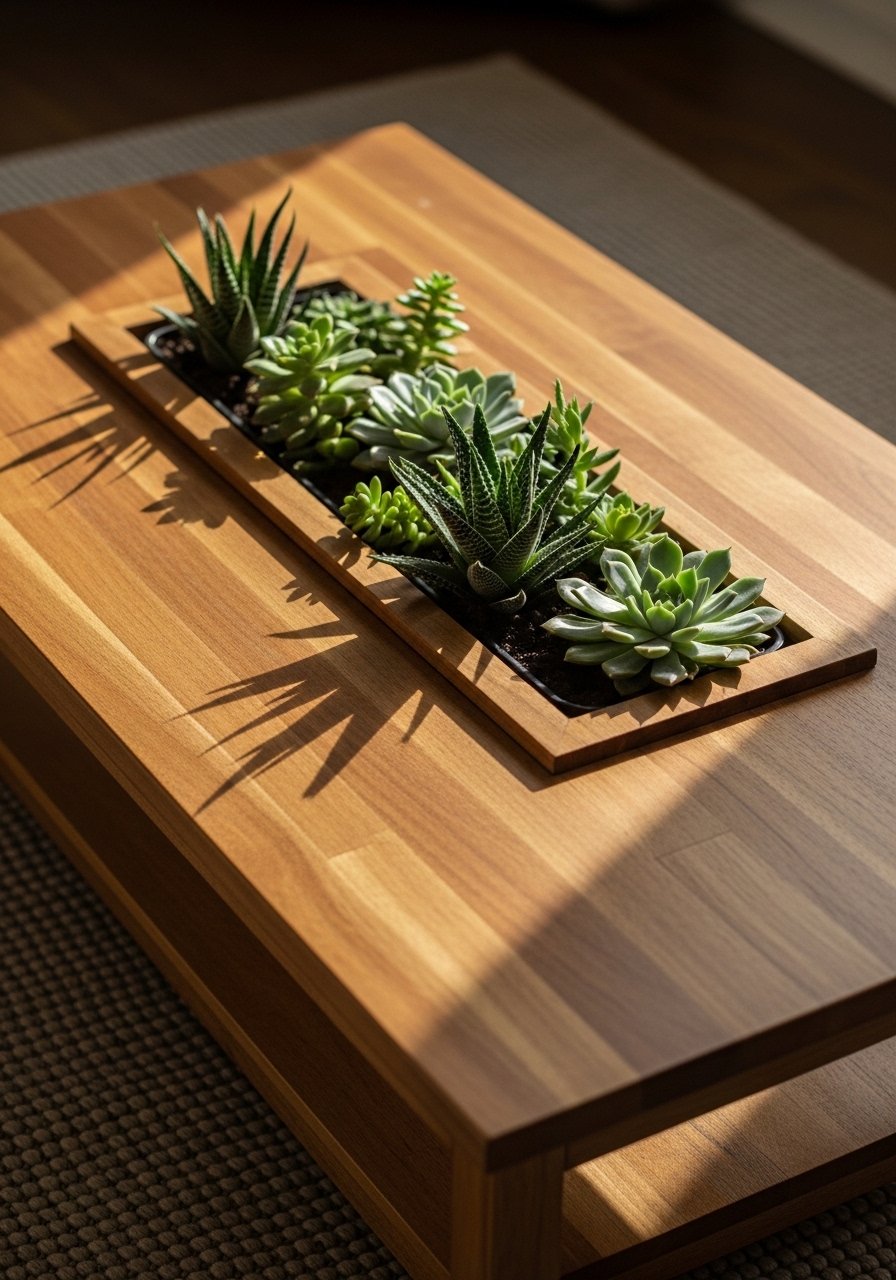
Add life to your small space with a coffee table that grows plants. Succulents and air plants are low-maintenance and breathe style into tight rooms.
Materials
- Tabletop with cutout center, 36" x 18"
- Planter box insert, 24" x 6" x 4"
- Landscape fabric and pebbles
- Succulents (6–10 small plants)
- Drill for drainage holes
- Indoor-safe sealant
Instructions
- Seal inside of planter box with waterproof sealant. Let cure 24 hours.
- Drill a few small drainage holes and place pebbles at the base.
- Line with landscape fabric, add succulent soil, and plant succulents.
- Set planter into table cutout and secure from below if needed.
- Water sparingly; succulents need light but little water.
How to Display or Gift It
- Place near a sunny window for plant health.
- Top with a removable lid for when guests prefer a flat surface.
- For gifting, include care instructions and a small watering syringe.
- Boho Macramé Fringe Coffee Table Skirt
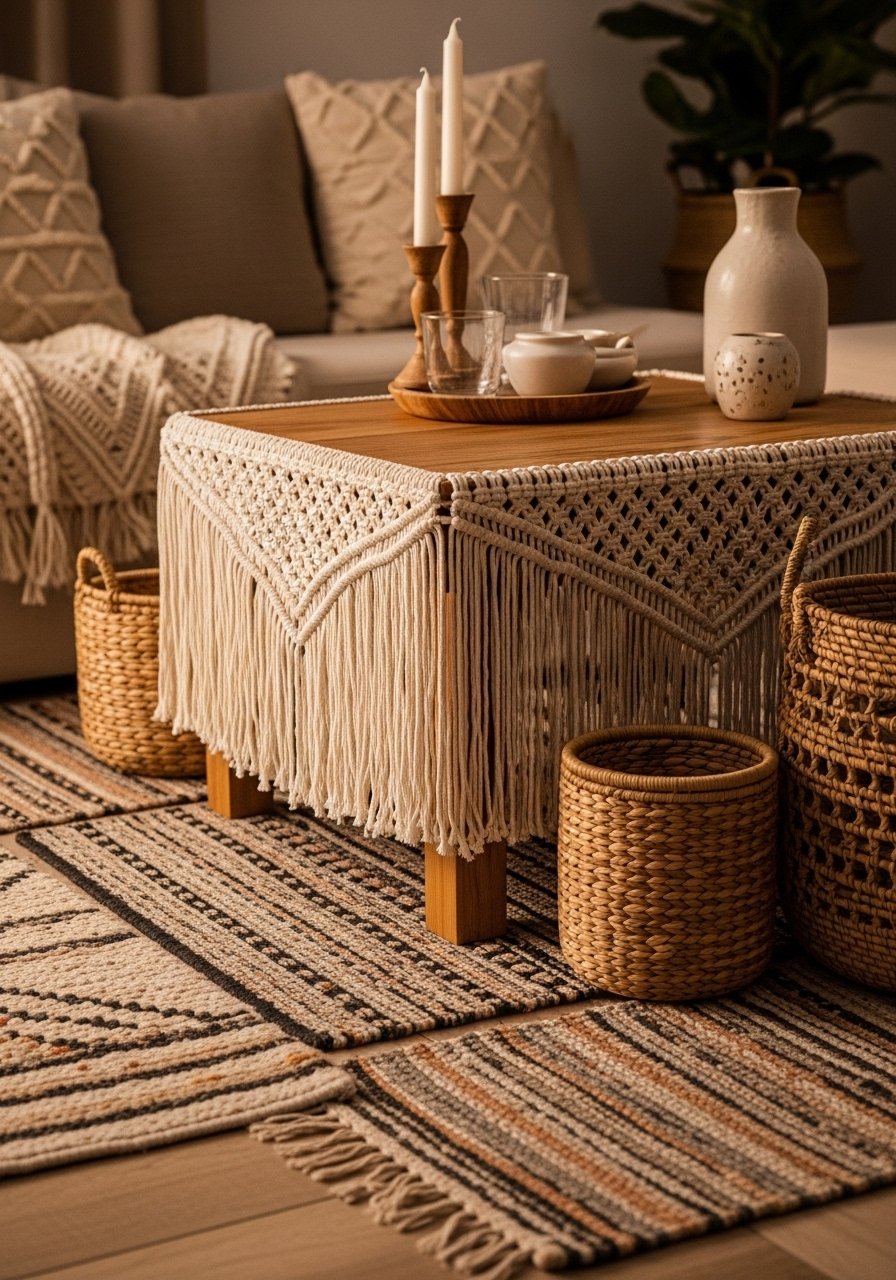
A macramé skirt softens a square table and adds boho texture without bulk. It hides storage space underneath while feeling handmade and cozy.
Materials
- Small square table, 28" x 28"
- Macramé cord, 3mm, 50 yards
- Wooden dowel strip to attach skirt (28")
- Measuring tape and scissors
- Hot glue or staple gun
Instructions
- Cut cords to desired fringe length, allowing extra for knots.
- Attach cords to dowel using lark's head knots across the length.
- Add decorative knots or beads as desired.
- Secure dowel to table underside with hot glue or staples.
- Trim fringe evenly and fluff.
How to Display or Gift It
- Tuck storage baskets underneath.
- Pair with woven coasters and a low planter.
- For gifting, tie the skirt bundle with twine and include a small macramé instruction card.
- Bifold Magazine Rack Coffee Table
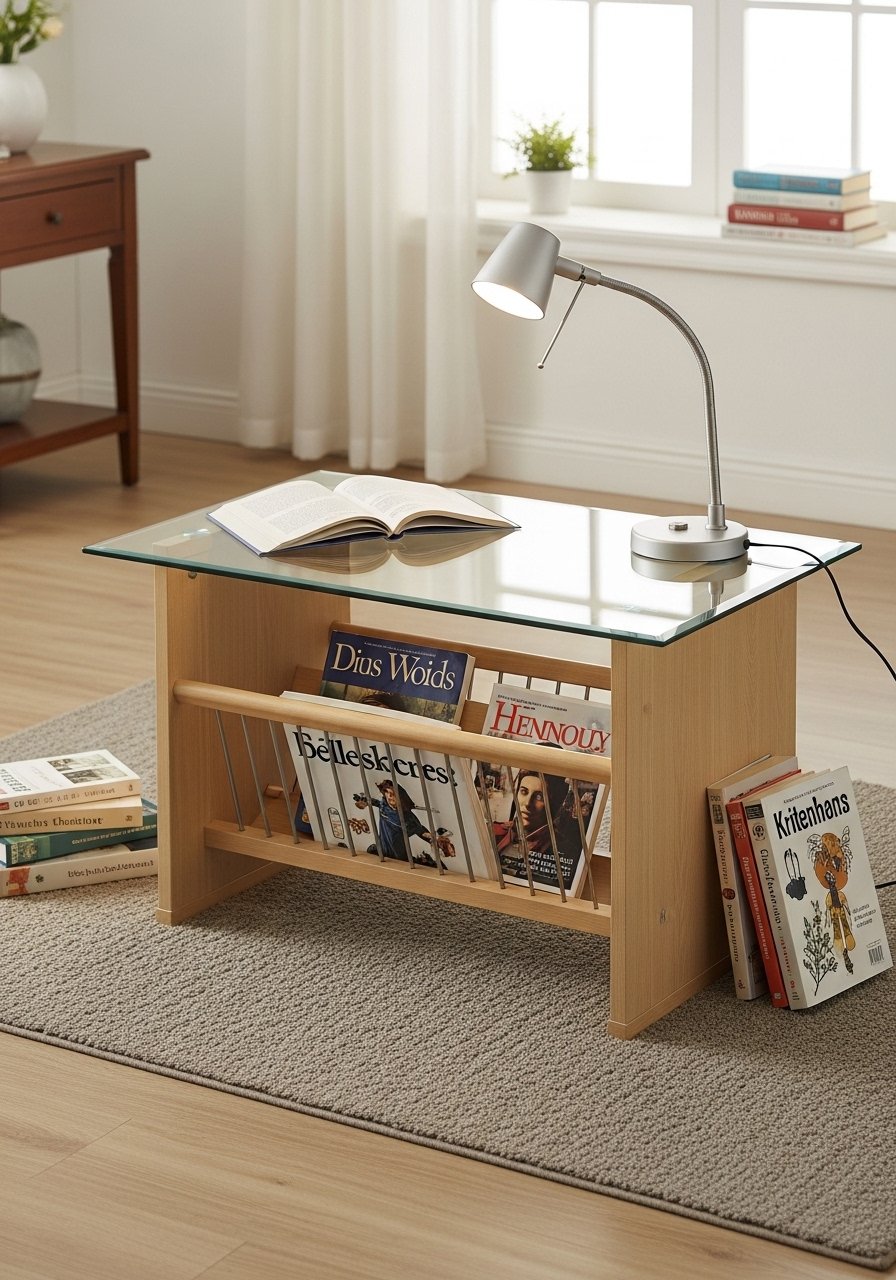
Keep reading materials tidy with a magazine rack built into the table base. This reduces clutter while keeping your current reads within reach.
Materials
- Top panel (glass or wood) 30" x 18"
- Two side panels with slotted rails
- Magazine dividers (thin plywood)
- Wood glue and clamps
- Felt pads
Instructions
- Build side panels with slots for magazines, spacing 2" apart.
- Glue dividers to create compartments.
- Secure top panel to the base with hidden fasteners.
- Let glue cure 24 hours before loading magazines.
How to Display or Gift It
- Top with a small reading lamp and a mug coaster.
- For gifting, include a curated paperback and a bookmark.
- Reclaimed Window Pane Coffee Table
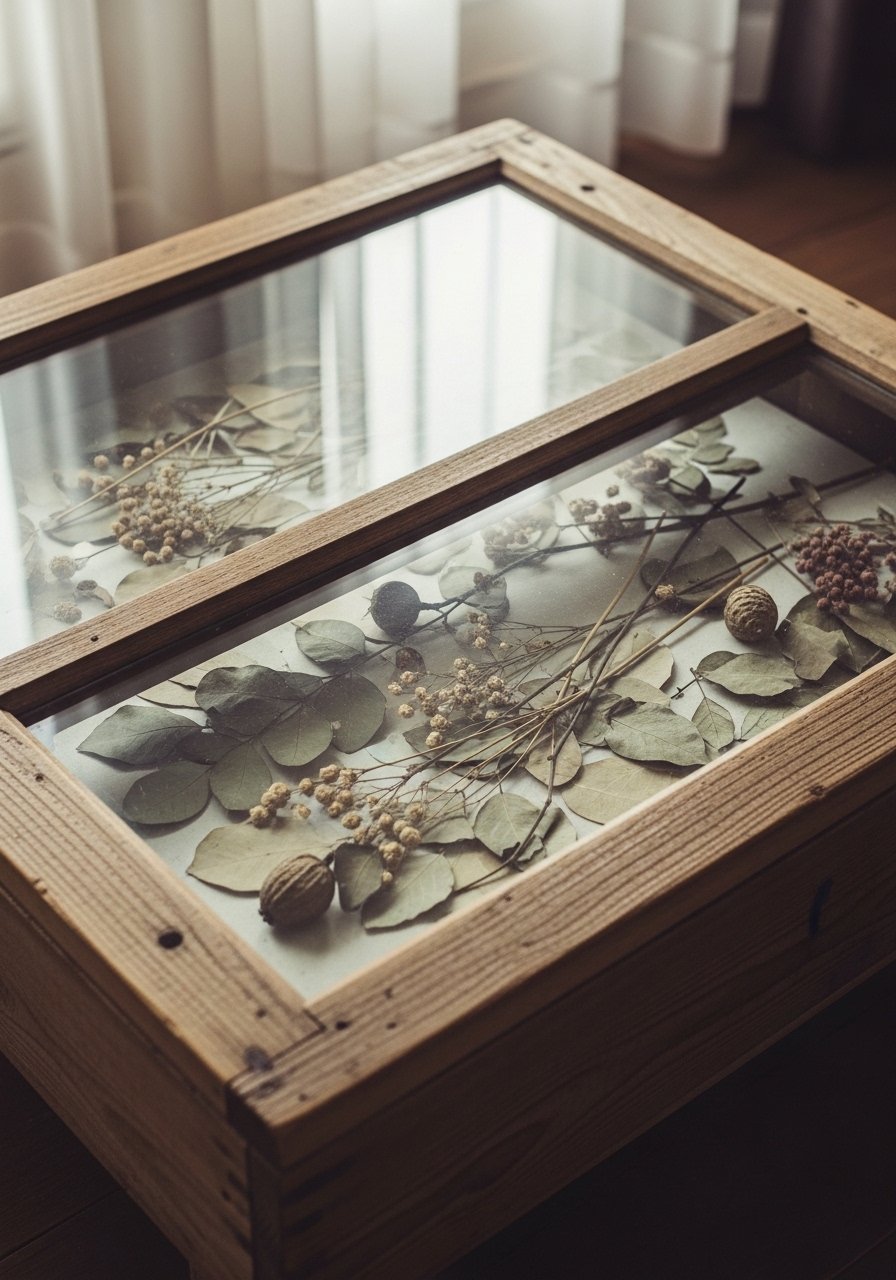
Showcase keepsakes under glass with a shallow display table. The window pane adds charm and depth while keeping the footprint small.
Materials
- Reclaimed window pane, 20" x 30"
- Wood frame with 2" deep tray
- Clear silicone adhesive
- Felt pads
- Decorative content (dried flowers, postcards)
Instructions
- Build a shallow wood tray to fit the window pane.
- Apply clear silicone along edges and set glass into tray. Let cure 24 hours.
- Arrange objects inside before sealing if you want them enclosed.
- Attach legs or a base.
How to Display or Gift It
- Rotate display items seasonally.
- Wrap cushion-lined for gifting to protect the glass.
- Fold-Down Game Board Coffee Table (Convertible)
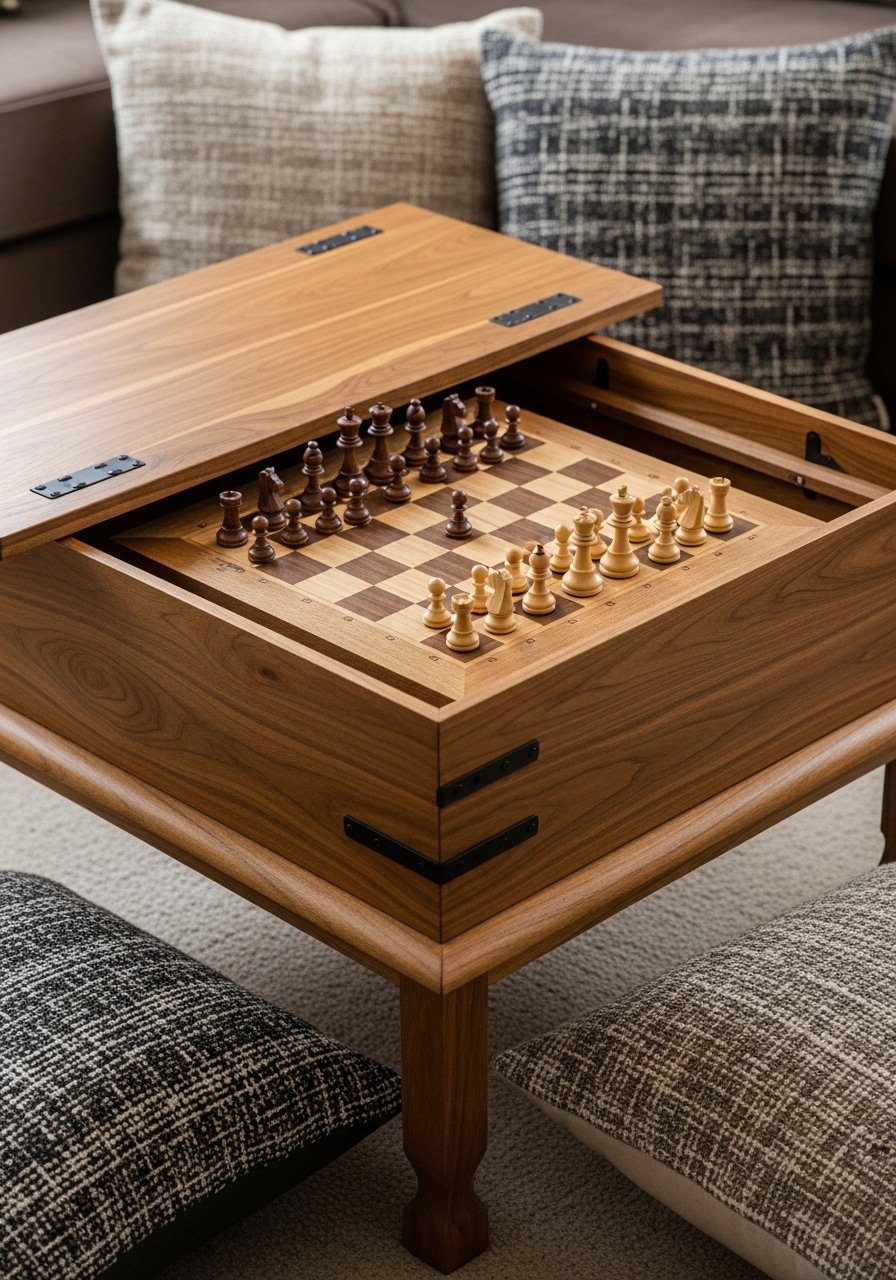
Turn your coffee table into a game hub with a flip-top lid. In cramped spaces, the dual function is pure efficiency and invites game nights.
Materials
- Table with hinged top, 30" x 18"
- Pre-made wooden chessboard inlay or decal
- Piano hinge and support stays
- Small latch
- Felt-lined storage compartment inside
Instructions
- Attach hockey-style piano hinge to connect flip top.
- Install chessboard inlay glued to underside of lid or top of internal compartment.
- Add a latch to keep top secure.
- Create a felt-lined compartment for pieces.
How to Display or Gift It
- Keep extra game pieces in a glass jar on a lower shelf.
- For gifting, include a set of wooden game pieces wrapped in muslin.
- Rustic Tree-Stump Coffee Table (Small Round)
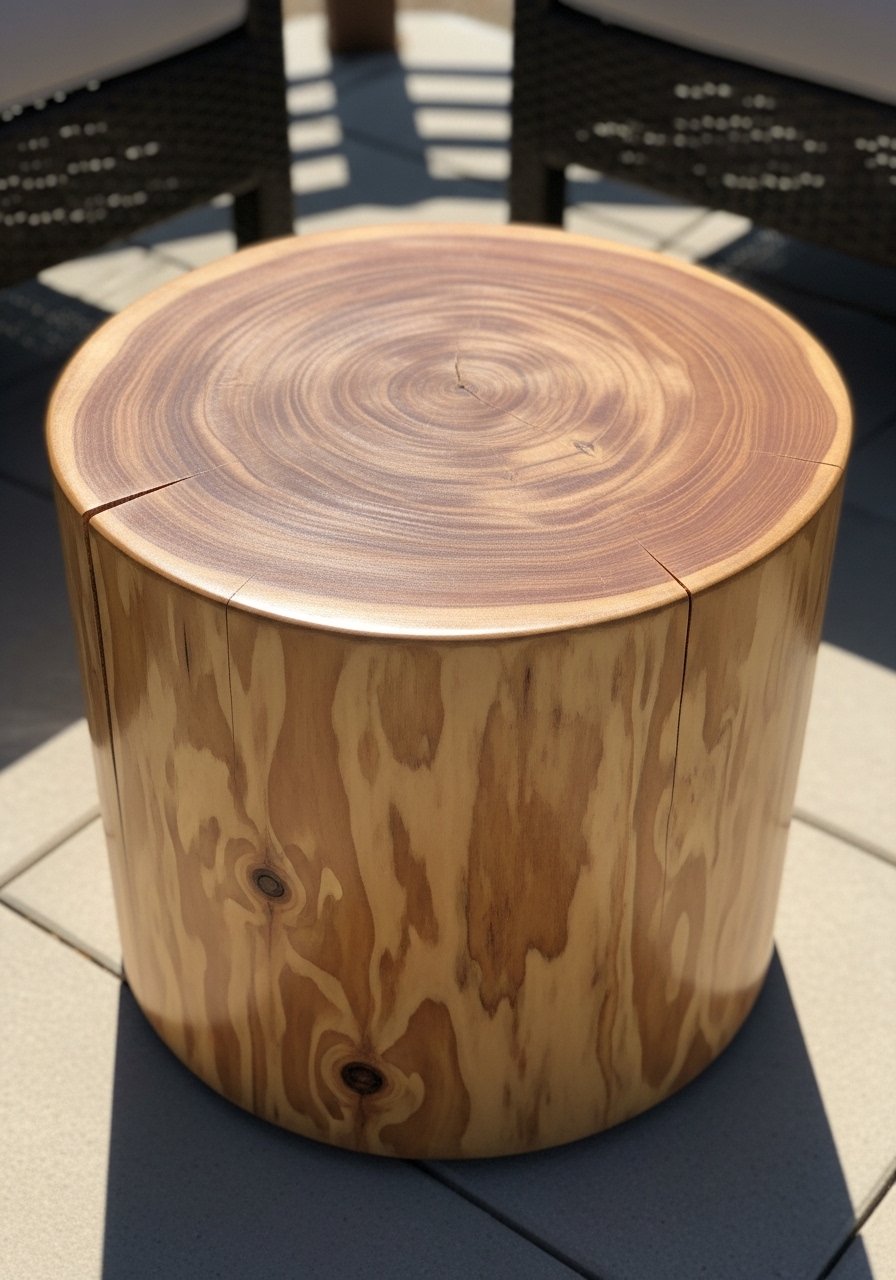
A single stump feels sculptural and compact. With a sanded top and stabilized base, it’s surprisingly practical for small living areas.
Materials
- Tree stump, 16"–18" diameter, 12" height
- Sandpaper: 60 to 400 grit
- Wood stabilizer or epoxy (if porous)
- Outdoor-safe sealant or oil
- Felt pads
Instructions
- Dry the stump for 2–6 weeks if green; kiln-dried is quicker.
- Stabilize any cracks with epoxy resin. Let cure 24 hours.
- Sand progressively to 400 grit for a silky top.
- Apply two coats of teak oil or sealant. Let dry 24 hours.
How to Display or Gift It
- Place near plants to create a nature corner.
- Add a tray for drinks to protect the wood.
- For gifting, include a bottle of wood oil and instructions.
- Suitcase-Style Coffee Table with Trays (Small Spaces)

Stacking suitcases can create a layered, storable table. The top suitcase becomes a removable tray for breakfast in bed or al fresco sipping.
Materials
- 2 vintage suitcases (one larger base, one smaller tray top)
- Small wooden tray insert 28" x 16"
- Non-slip shelf liner
- Felt bumpers
Instructions
- Line the inside of the top suitcase with non-slip liner and place wooden tray insert.
- Stack and secure base to top with small L-brackets inside the suitcases.
- Add felt bumpers on the bottom for floor protection.
How to Display or Gift It
- Use the top tray for serving and remove it to reveal storage.
- Gift with a selection of artisan teas tucked inside.
- Tiny Table with Sliding Tray (Nested Function)
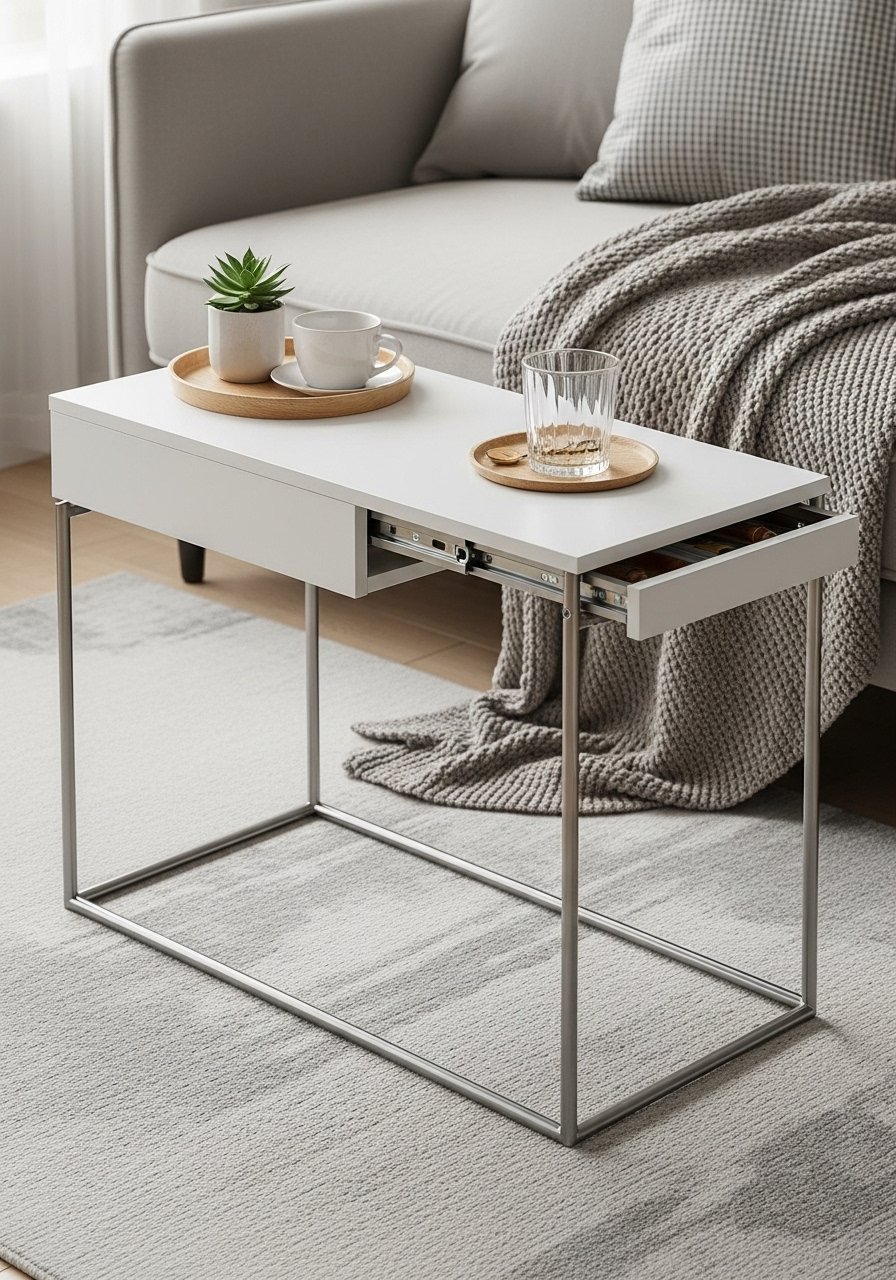
A sliding tray gives instant extra table space without needing more floor area. It’s convenient for serving snacks in compact layouts.
Materials
- Table top 30" x 14"
- Sliding tray insert 20" x 12"
- Drawer runners (soft-close optional)
- Wood glue and screws
- Finish of choice
Instructions
- Build the table frame with an open bottom area for the tray.
- Install drawer runners ensuring they’re level for smooth sliding.
- Fit tray to run easily; sand edges for clearance.
- Finish with paint or stain. Dry 2–4 hours.
How to Display or Gift It
- Keep trays stocked with napkins and coasters.
- Wrap as a gift with a small set of cocktail napkins inside the tray.
- DIY Coffee Table Idea for Small Spaces: Scandinavian Tray Table
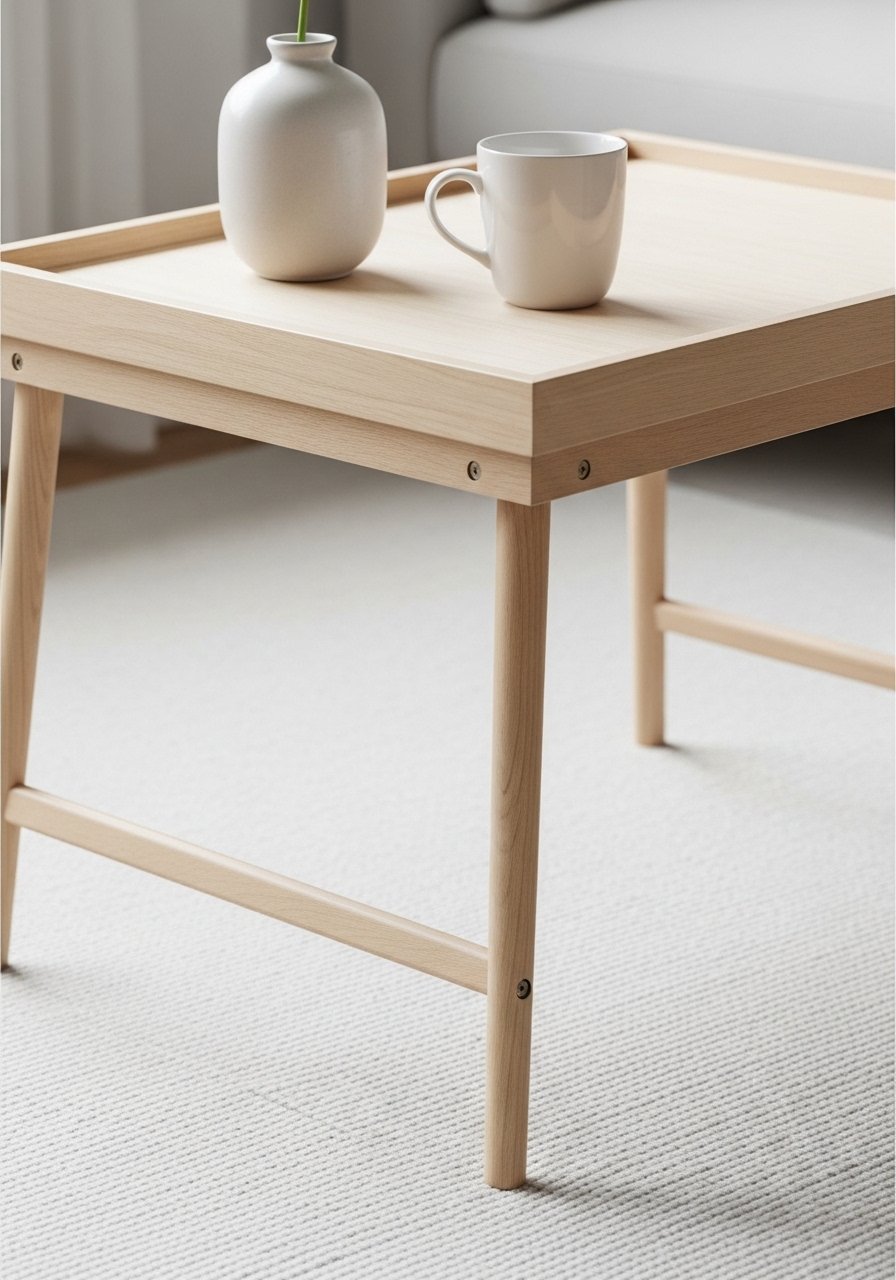
Clean lines and light wood make this Scandinavian tray table feel roomy in tiny spaces. The removable tray top adds functionality and makes it easy to clear for meals or crafts.
Materials
- Tray top, 22" x 14"
- 4 tapered legs, 12"
- Small dowel pins and glue
- Wood stain: light birch or whitewash
- Clear matte finish
Instructions
- Assemble tray and sand to smooth the edges.
- Attach legs with dowel pins and glue, ensuring tight alignment.
- Stain or whitewash for that Scandi feel. Apply two coats clear matte.
- Let finish cure 24 hours before heavy use.
How to Display or Gift It
- Remove the tray for serving breakfast in bed.
- Pair with a Scandinavian linen runner and a small vase.
- Store extra legs or spare hardware in a craft box if traveling.
You made it to the end — and now you’ve got 23 ways to make small spaces feel larger, more organized, and more stylish. These DIY coffee table ideas for small spaces cover everything from rustic pallet builds to glossy resin tops and convertible furniture that adapts when guests arrive. Pin your favorites so you can come back when you’re ready to build.
Which of these projects are you trying first? Tell me your style — boho, Japandi, farmhouse — and I’ll suggest a starter list. Trust me, picking up a quality hot glue gun and a good precision craft knife changed how many of these builds came together — fewer sticky messes, cleaner cuts, and happier finishes.


