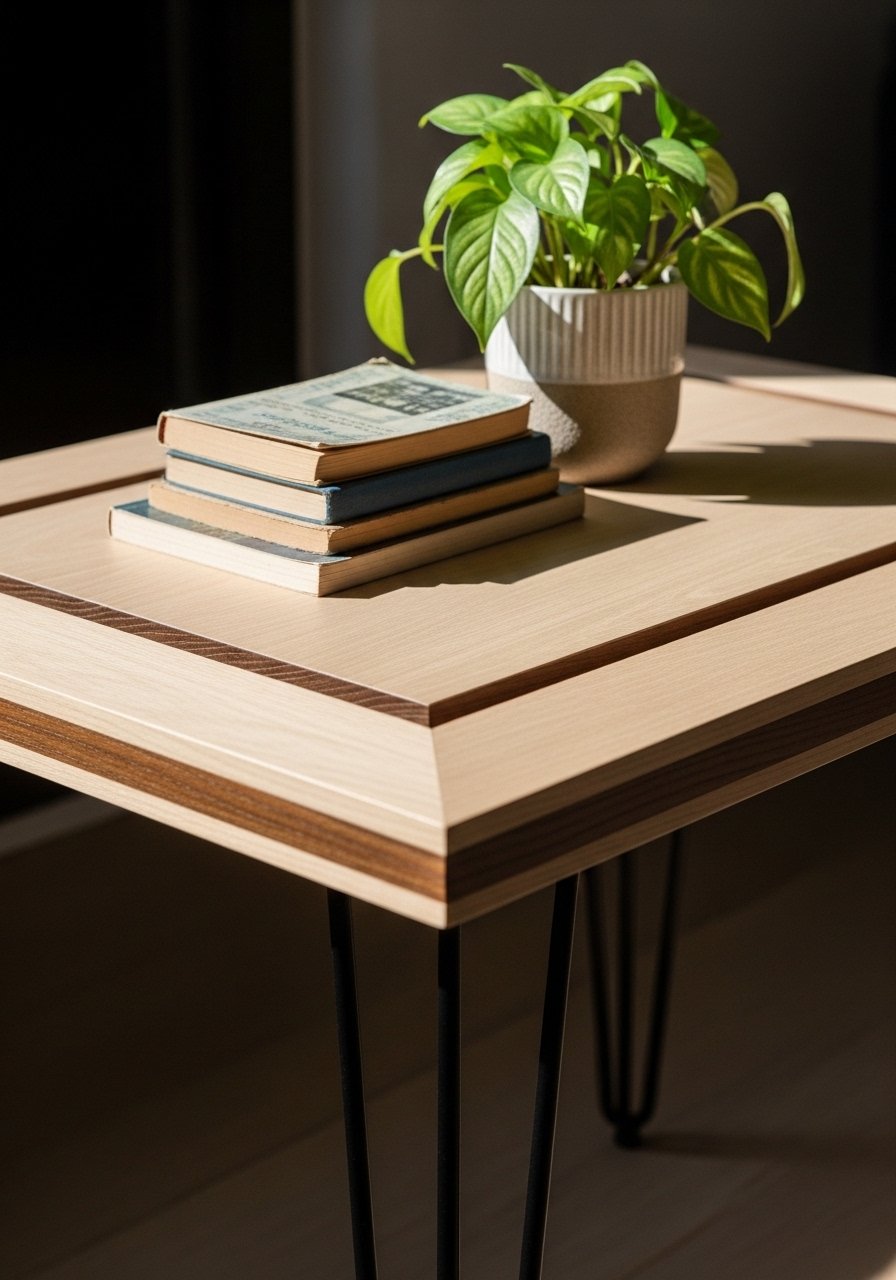
You know that moment when a room finally feels finished—almost—but the coffee table still looks like an afterthought? A modern DIY coffee table can be the statement piece that ties the whole space together. These projects focus on clean silhouettes, tactile materials, and simple details that read sleek and minimal, whether your style skews Japandi, mid-century, or boho-chic.
Inside you'll find 26 modern DIY coffee table ideas that range from quick weekend builds to bold resin and concrete tops. Each project includes exact materials, realistic measurements, step-by-step instructions, and tips to avoid common craft mishaps. Grab your hot glue gun and a foam brush and let’s make something beautiful. If you want precision cuts for veneers or vinyl stencils, try my go-to cutting machine, the Cricut Explore cutting machine for crisp results.
- Minimal Plywood Slab Coffee Table
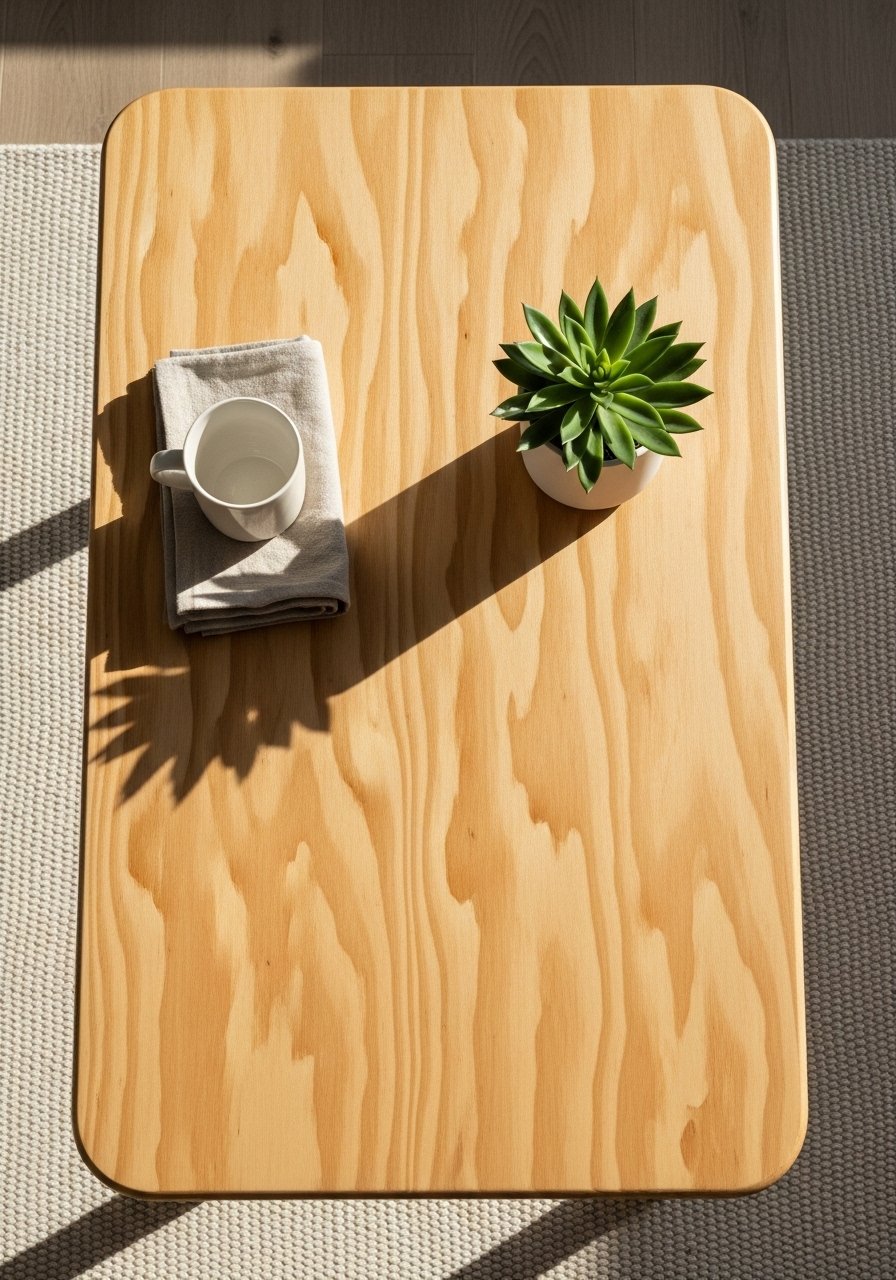
A true modern DIY coffee table idea: thin plywood, softened edges, and a satin finish. This piece feels almost weightless and fits tiny living rooms perfectly.
Materials
- 1 3/4" Birch plywood board, 36" x 20"
- Sandpaper: 120, 220 grit
- Wood glue, 4 oz
- Clamps (2)
- Clear satin polyurethane, 1 pint
- Foam brush
- Ruler and pencil
- Router with round-over bit (or sanding block for rounded corners)
- Hairpin legs, 2 sets (4 legs per set) — 16" height
Instructions
- Cut plywood to 36" x 20" (home center will cut for you). Sand edges with 120 then 220 grit.
- Mark corners with 2" radius and round using a router with a 1/4" round-over bit. Sand smooth.
- Attach hairpin legs centered 2" in from each corner using wood screws included with legs.
- Wipe surface with a tack cloth. Apply 2 thin coats of clear satin polyurethane with a foam brush. Dry 2–4 hours between coats. Lightly sand with 220 between coats for a silky finish.
- Final cure: wait 24 hours before heavy use.
How to Display or Gift It
- Pair with a woven basket beneath for storage.
- Add a small stack of coffee-table books and a ceramic tray.
- Gift wrapped in kraft paper with twine and a sprig of dried lavender.
- Store extra legs and fastening hardware in a stackable craft organizer like this craft organizer box.
- Hairpin-Leg Midcentury Rectangle (modern DIY coffee table ideas)
This mid-century modern DIY coffee table balances warm wood grain with industrial hairpin legs. Great for beginners who can sand and drill.
Materials
- Poplar or pine board 36" x 18" x 1"
- Wood stain (Walnut), 8 oz
- Pre-finished hairpin legs, 16"
- Sandpaper 120/220
- Drill and countersink bit
- Polyurethane satin 1 pint
- Painter’s tape
Instructions
- Sand the board to remove mill marks. Wipe clean.
- Apply walnut stain with a foam brush, wipe excess after 2 minutes for medium tone. Let dry 6 hours.
- Seal with 2 coats satin polyurethane, drying 2–4 hours between coats.
- Attach hairpin legs securely using screws, countersink for a flat surface.
- Wait 24 hours for cure.
How to Display or Gift It
- Pair with a woven runner and potted palm.
- Use felt pads on legs to protect floors; store hardware in a small parts organizer.
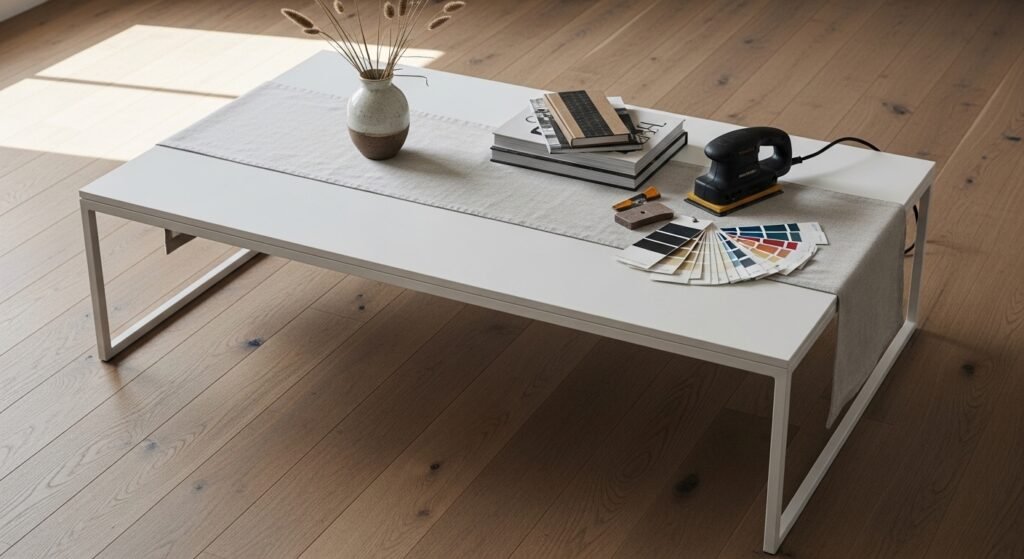
- Concrete Top Minimal Coffee Table
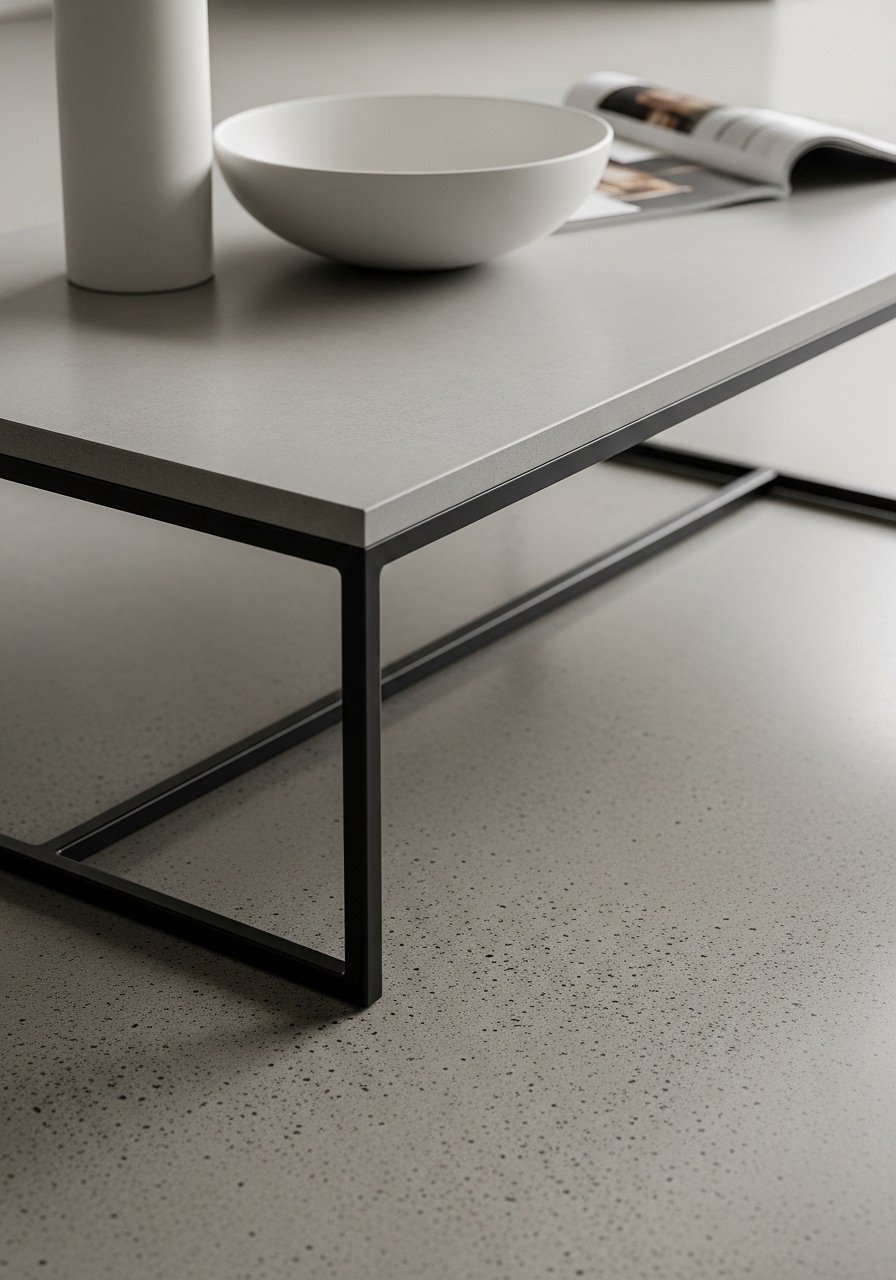
Sleek and modern, a concrete top gives that luxe look without heft. It’s surprisingly doable using a melamine mold and a quality concrete mix.
Materials
- Melamine board or DIY mold 36" x 20" x 1.5"
- Quick-setting concrete mix (countertop mix), 20 lbs
- Water for mixing
- Concrete sealer, 8 oz
- Mixing bucket, drill with mixing paddle
- Orbital sander or sanding block
- Thin black metal base (pre-made) 36" x 20"
- Release agent (cooking spray)
- Gloves and respirator
Instructions
- Build or prep melamine mold sized 36" x 20" with 1.5" sidewalls. Spray release agent.
- Mix concrete per package (aim for pancake-batter consistency). Pour into mold, tap to remove air.
- Smooth surface with trowel; let set 24 hours before demolding.
- After demold, cure 48–72 hours. Sand with 120–220 grit to smooth edges.
- Seal with concrete sealer; allow 24 hours cure, then attach metal base with bolts.
- Full strength: allow 7 days before heavy items.
Troubleshooting: Avoid overwatering mix—too runny causes cracking. Use a heat gun briefly to pop surface bubbles, or tap mold gently.
How to Display or Gift It
- Pair with a leather pouf and minimalist vase.
- For gifting, present as a "date night" kit—sandpaper and sealer separate for recipient finishing at home.
- Resin River Coffee Table (bold modern DIY coffee table ideas)
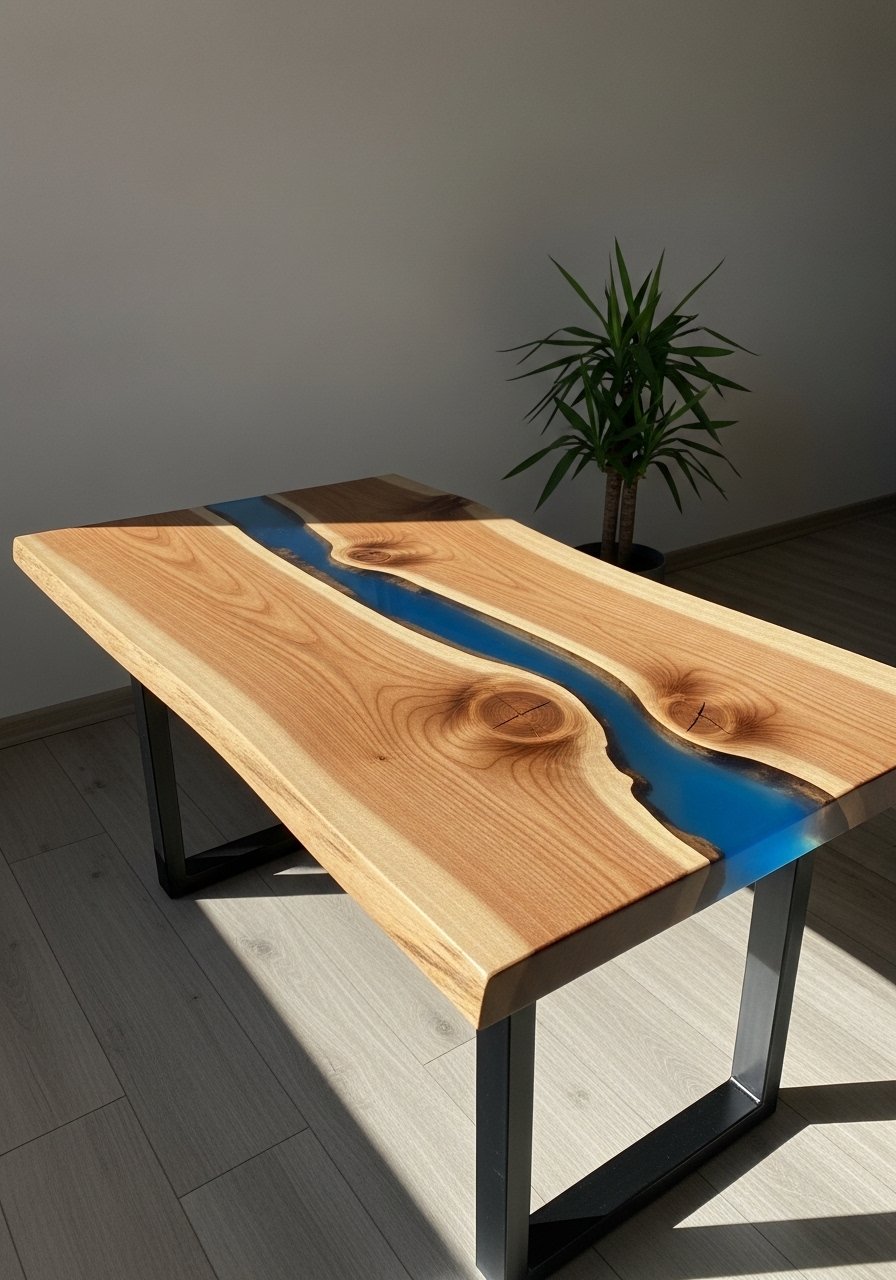
A resin river table feels high-end and modern. The trick is level pouring, bubble control, and patience while the epoxy cures.
Materials
- Two live-edge wood slabs or joined maple pieces totalling 48" x 18"
- Clear epoxy resin kit, 1–2 gallons (depend on depth)
- Blue resin pigment or alcohol ink
- Painter’s tape and foam brush
- Plastic mixing cups and mixing sticks
- Heat gun or torch to remove bubbles
- Orbital sander, 80–220 grit
- Steel base or hairpin legs
Instructions
- Join slabs or cut wood to create a central channel for the epoxy. Seal end grain with thin epoxy.
- Tape underside and create a dam with painter’s tape to hold resin.
- Mix epoxy per kit instructions; stir slowly to avoid bubbles. Add pigment.
- Pour in thin layers (max 1/4" per pour). Use heat gun after each pour to pop bubbles.
- Allow 24 hours between pours until desired depth reached. Final cure 72 hours for full hardness.
- Sand edges and top with 400 grit for gloss. Attach base.
Troubleshooting: If sticky after 72 hours, allow additional cure time; ambient temp affects curing. Use a heat gun for bubble removal.
How to Display or Gift It
- Style with coastal decor or monochrome accents.
- For gift-giving, include care instructions—avoid direct sunlight on resin tops.
- Tile Inset Minimalist Coffee Table
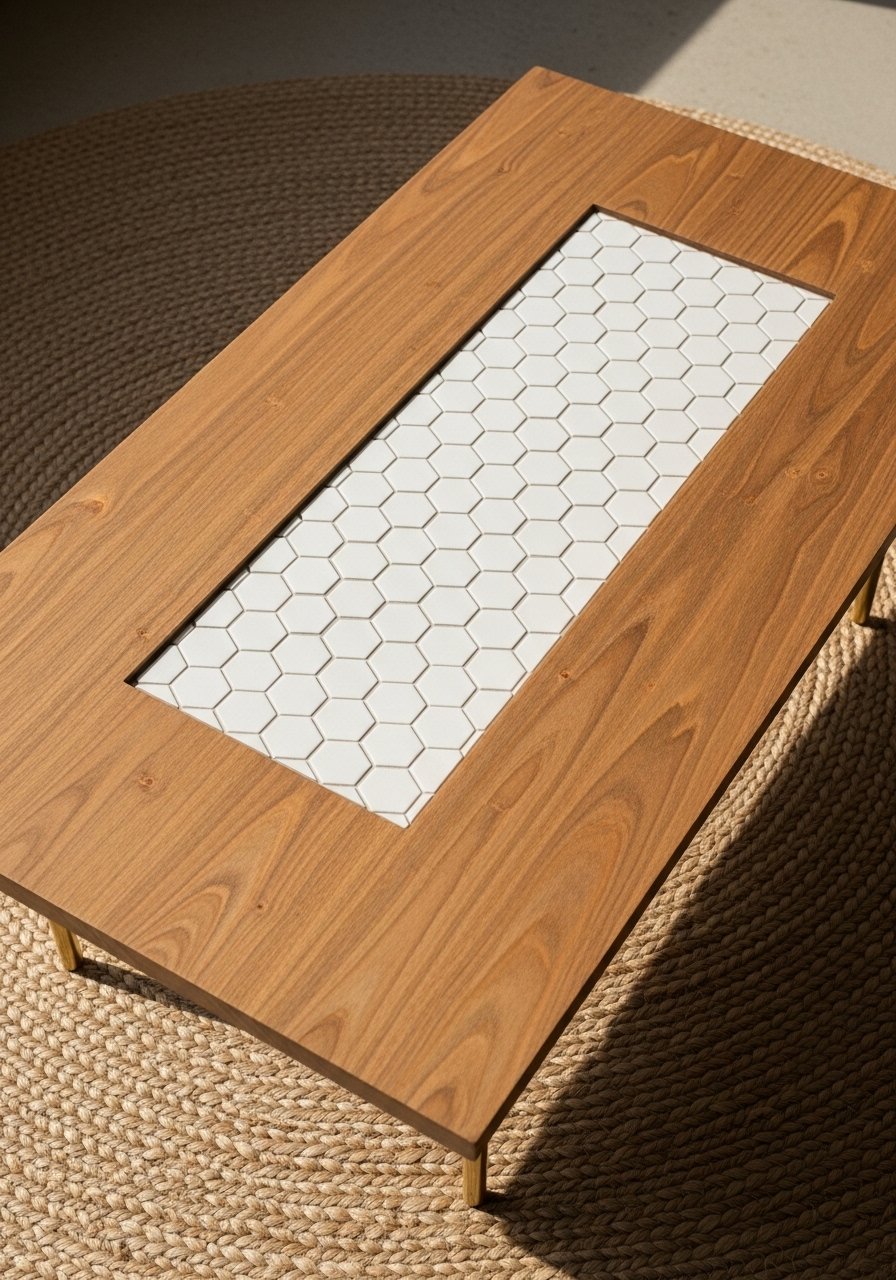
Tile gives a clean, modern surface with textural interest. Porcelain hex tiles create a chic inlay.
Materials
- Solid hardwood top 36" x 18" x 1"
- Porcelain hex tiles (peel-and-stick or thin-set), 0.5 sq ft
- Thin-set mortar or tile adhesive
- Grout (non-sanded), 8 oz
- Tile spacer set
- Wet tile saw or tile nipper
- Sealer (if porous grout)
- Table base/legs
Instructions
- Cut a central recess 28" x 12" x 1/4" in the tabletop using a router.
- Dry-fit tiles, cutting as needed for edges.
- Apply thin-set and press tiles into place with spacers. Let set 24 hours.
- Grout with non-sanded grout, wipe excess; cure 24 hours.
- Seal grout, attach legs.
Troubleshooting: For uneven tile height, use a rubber mallet to set tiles flush. Use a wet tile saw for clean cuts.
How to Display or Gift It
- Pair with brass or black accents to highlight tile tones.
- Wrap in kraft paper with a small grout care card for gifting.
- Floating Glass Top Coffee Table
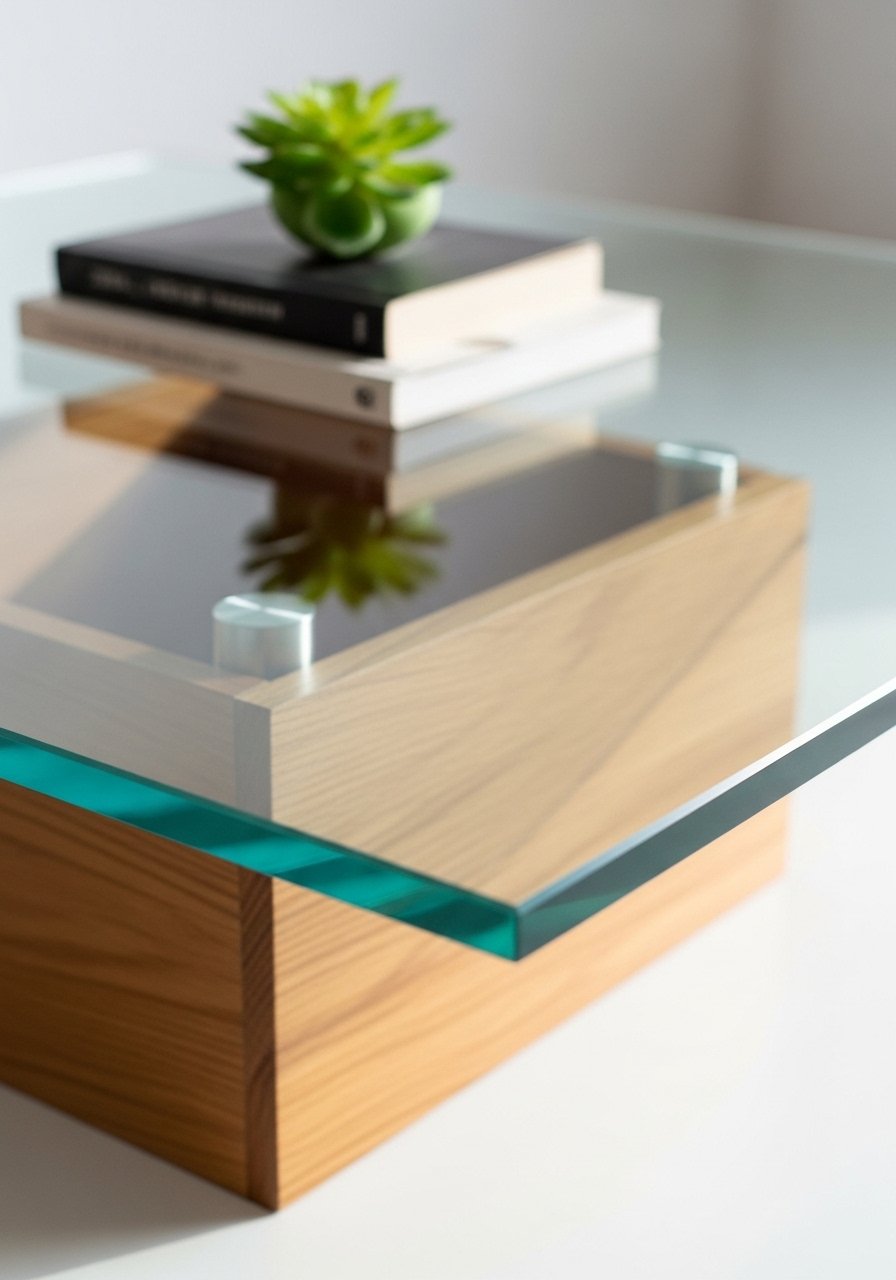
A glass top keeps the room airy while a hidden wooden base adds storage and modern lines.
Materials
- Tempered glass top 36" x 20" x 1/4"
- Plywood box base 34" x 18" x 8"
- Clear adhesive pads or bumpers
- Wood stain or paint, 8 oz
- Sandpaper, clamps
- Small hardware for hidden shelf
Instructions
- Build a plywood box base 34" x 18" x 8", sand and finish with paint or stain. Allow 6 hours dry.
- Attach anti-slip bumpers to top corners of the base.
- Place tempered glass on bumpers; check level.
- For extra security, apply small dots of clear silicone to bumpers; cure 24 hours.
How to Display or Gift It
- Store magazines inside the box. Add LED strip for ambient glow.
- Use a protective felt mat when wrapping for gifting.
- Tile-Mosaic Minimal Slab Table
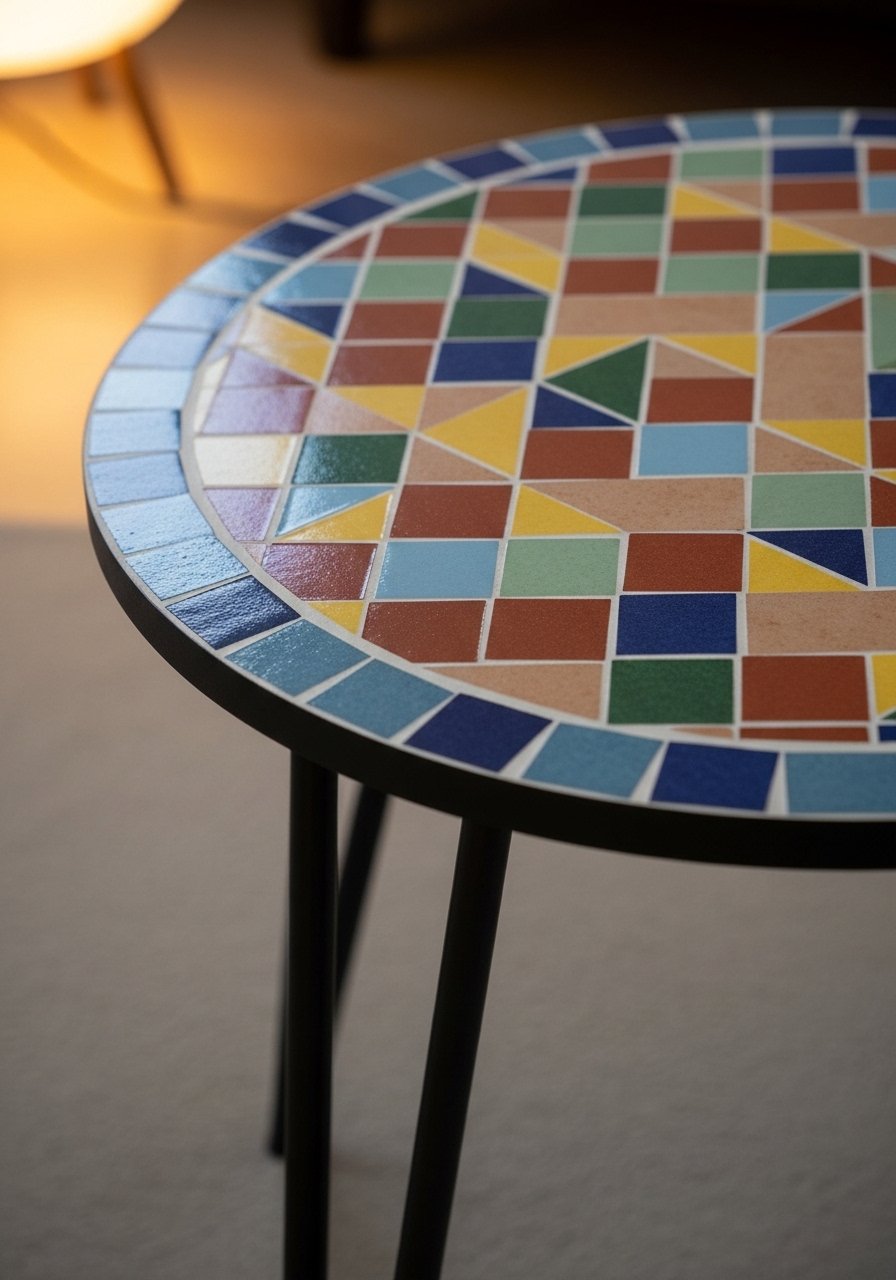
Mosaic tile offers a custom pattern that reads modern when you keep the grout color neutral.
Materials
- Round wood top 30" diameter
- Mosaic tile sheets, assorted colors, 1–2 sheets
- Thin-set mortar, grout, sealer
- Notched trowel, sponge
- Tile cutter or nippers
- Legs or pedestal base
Instructions
- Paint the wood top base color. Let dry 2–4 hours.
- Apply thin-set and press mosaic sheets. Let set 24 hours.
- Grout, clean excess with a sponge; cure 24 hours.
- Seal grout and attach base.
Troubleshooting: For lippage, use tile spacers and level often.
How to Display or Gift It
- Place near a cozy reading chair to highlight colorful tile.
- Gift with a small grout cleaning brush in a kraft bag.
- Minimalist Plywood Tray-Top Coffee Table
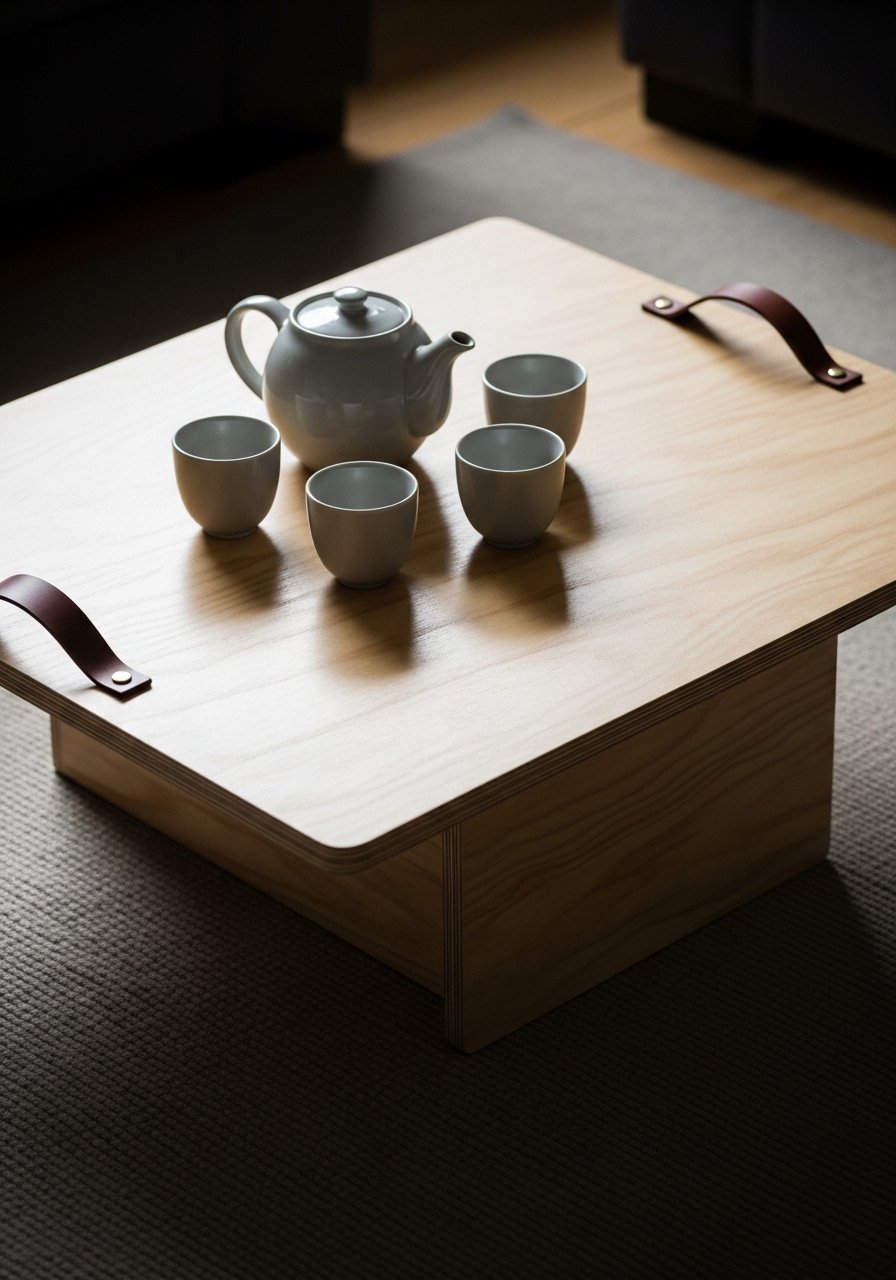
A tray-top table provides function and style—remove the tray for serving or to style different vignettes.
Materials
- Plywood top 36" x 20" with 1" lip for tray
- Leather strap handles, 2
- Stain or paint, foam brush
- Table legs (short), 16"
- Wood glue, clamps, screws
Instructions
- Build the tray top with 1" sides glued and clamped. Sand.
- Stain or paint; dry 4–6 hours.
- Attach leather handles and legs.
- Allow final cure 24 hours before use.
How to Display or Gift It
- Use as a breakfast tray or display with seasonal decor.
- Store extra leather handles in a small craft box.
- Terrazzo-Inlay Coffee Table

Terrazzo offers speckled, modern texture. Use a resin terrazzo mix for easier DIY.
Materials
- MDF or plywood top 36" x 36" x 1"
- Terrazzo epoxy mix and chips, 1 quart epoxy + 8 oz chips
- Mixing cups, stir sticks
- Orbital sander
- Metal legs
Instructions
- Create a shallow inset 30" x 30" x 1/4".
- Mix epoxy and terrazzo chips; pour and level. Use heat gun to remove bubbles.
- Cure 72 hours, sand smooth, and seal.
How to Display or Gift It
- Pair with marble coasters. For gifting, include a small polishing cloth.
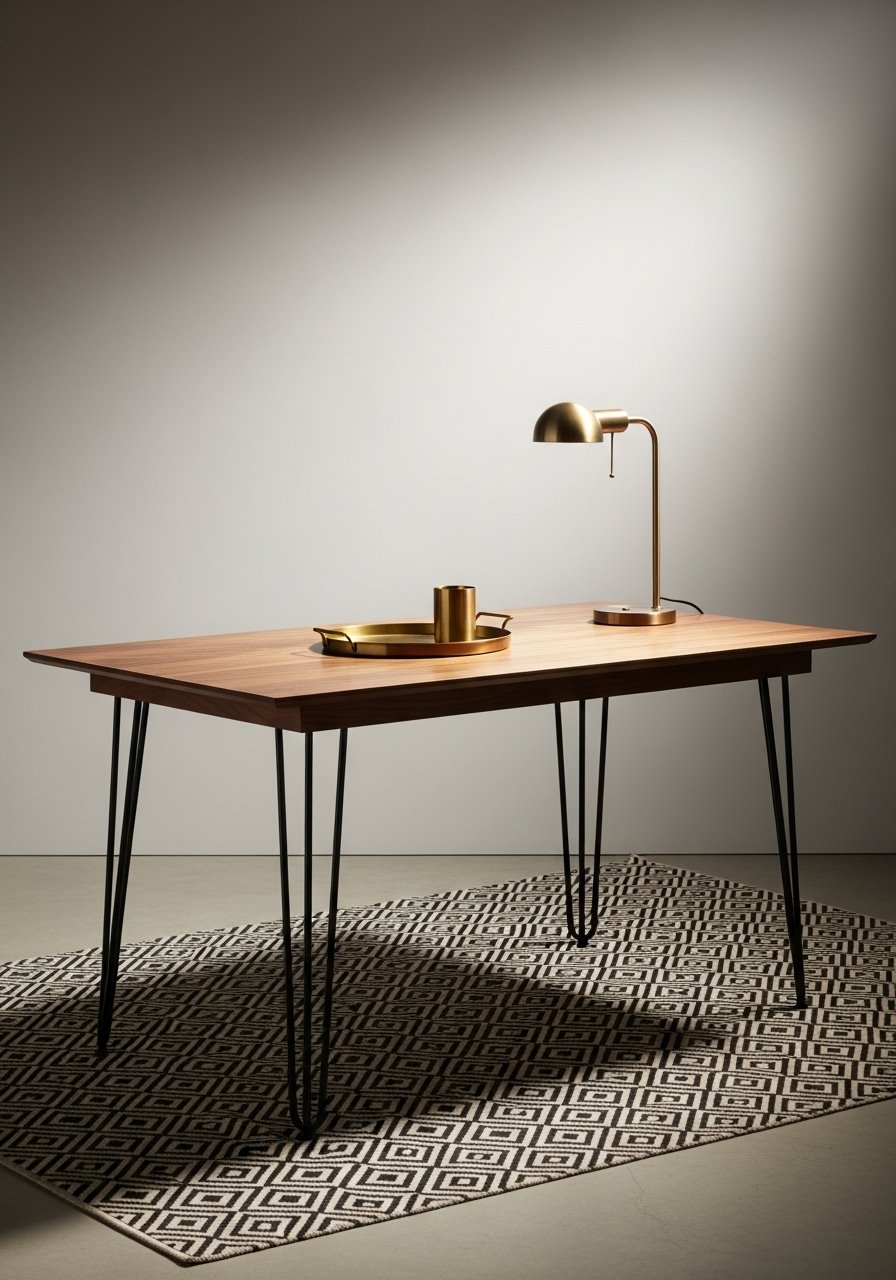
- Industrial Pipe Base Coffee Table
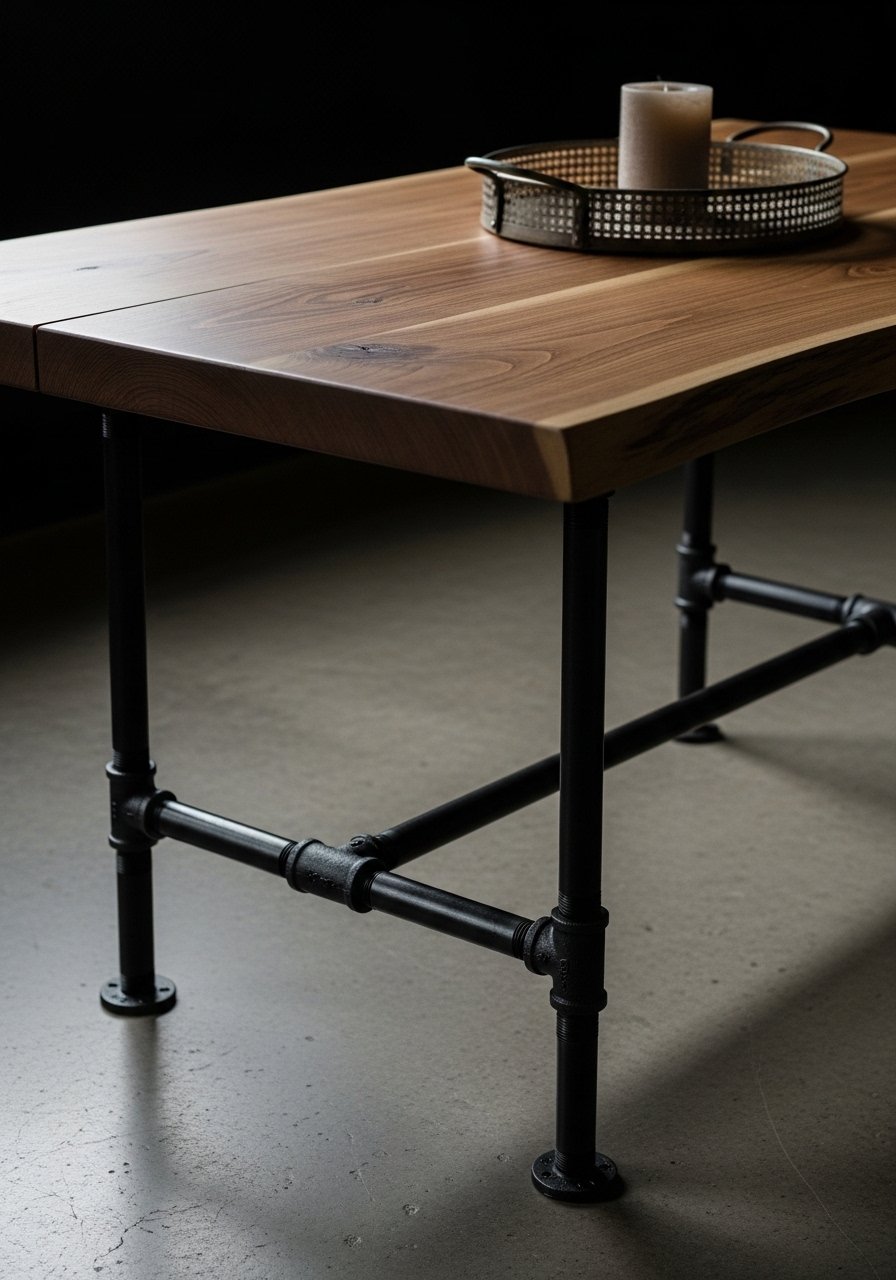
Pipe bases bring an industrial edge that balances a soft wooden top for modern contrast.
Materials
- Wooden top 42" x 20" x 1"
- Industrial pipe kit (2 legs), black finish
- Screws and flange bolts
- Sandpaper and oil-based finish
Instructions
- Finish wood top with oil-based finish; cure 24 hours.
- Attach pipe flanges to underside corners and tighten bolts.
- Check level and secure.
How to Display or Gift It
- Pair with leather accessories. For gifting, include an Allen key set in a kraft box.
- Reclaimed Door Coffee Table
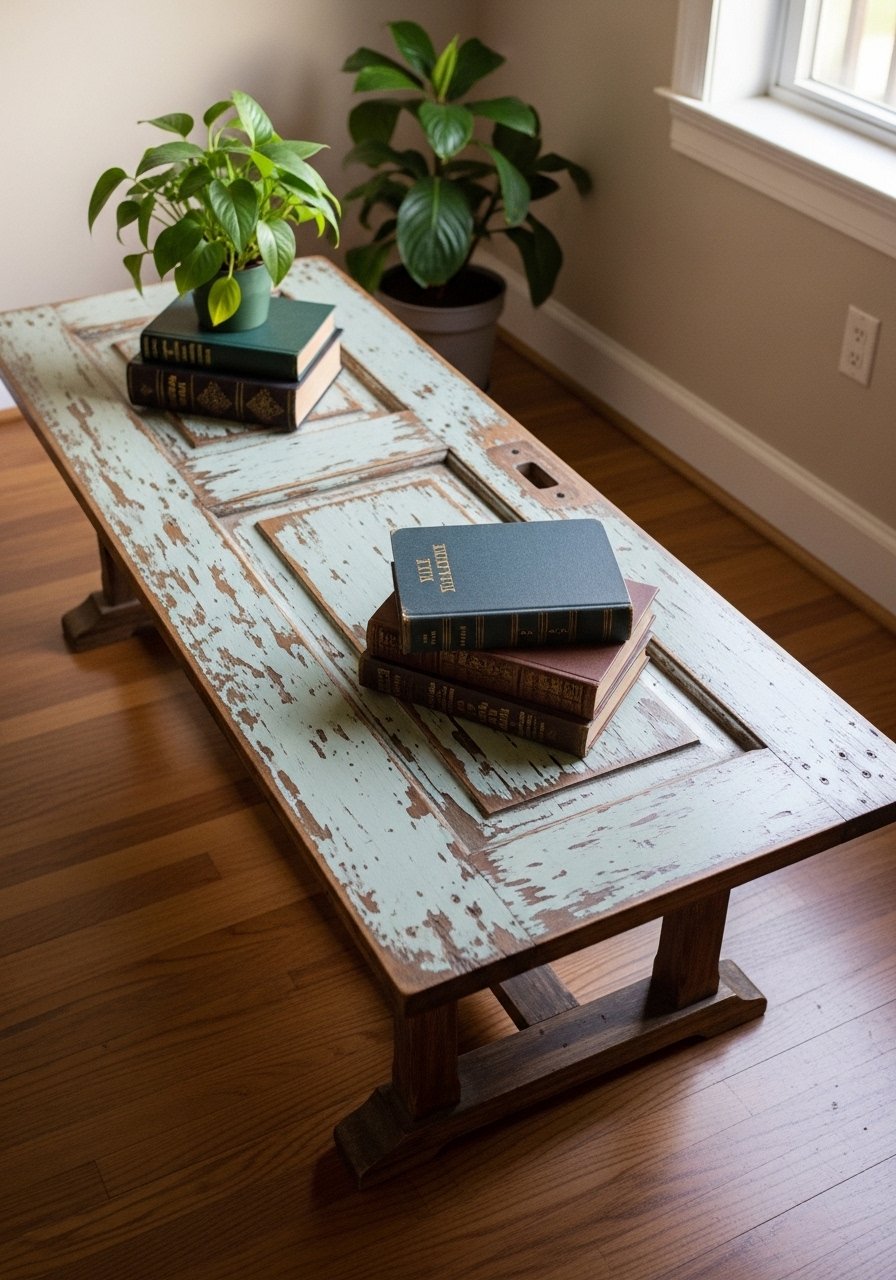
Upcycling an old door yields character and a large surface in a modern living room.
Materials
- Reclaimed door trimmed to 48" x 20"
- Table legs or base
- Sanding tools and wood filler
- Polyurethane or chalk paint
Instructions
- Trim and sand door edges. Fill holes as needed.
- Paint or seal; allow 6–8 hours between coats.
- Attach base and level.
Troubleshooting: Remove stubborn paint with heat gun, and use a respirator.
How to Display or Gift It
- Style with vintage trays and small frames. Gift as a statement piece for a new home.
- Lift-Top Coffee Table with Hidden Storage

A lift-top adds function—work or eat at the sofa without giving up sleek lines.
Materials
- Plywood box 36" x 20" x 8"
- Lift-top hardware kit (gas strut)
- Hinges and screws
- Finish of choice
Instructions
- Build or buy a plywood box and attach lift-top hardware per kit instructions.
- Finish surfaces and allow 24 hours cure.
- Fit hardware and test lift mechanism; adjust tension.
How to Display or Gift It
- Great for small apartments. Gift with a small organizer for TV remotes and coasters.
- Minimal Round Hairpin Coffee Table
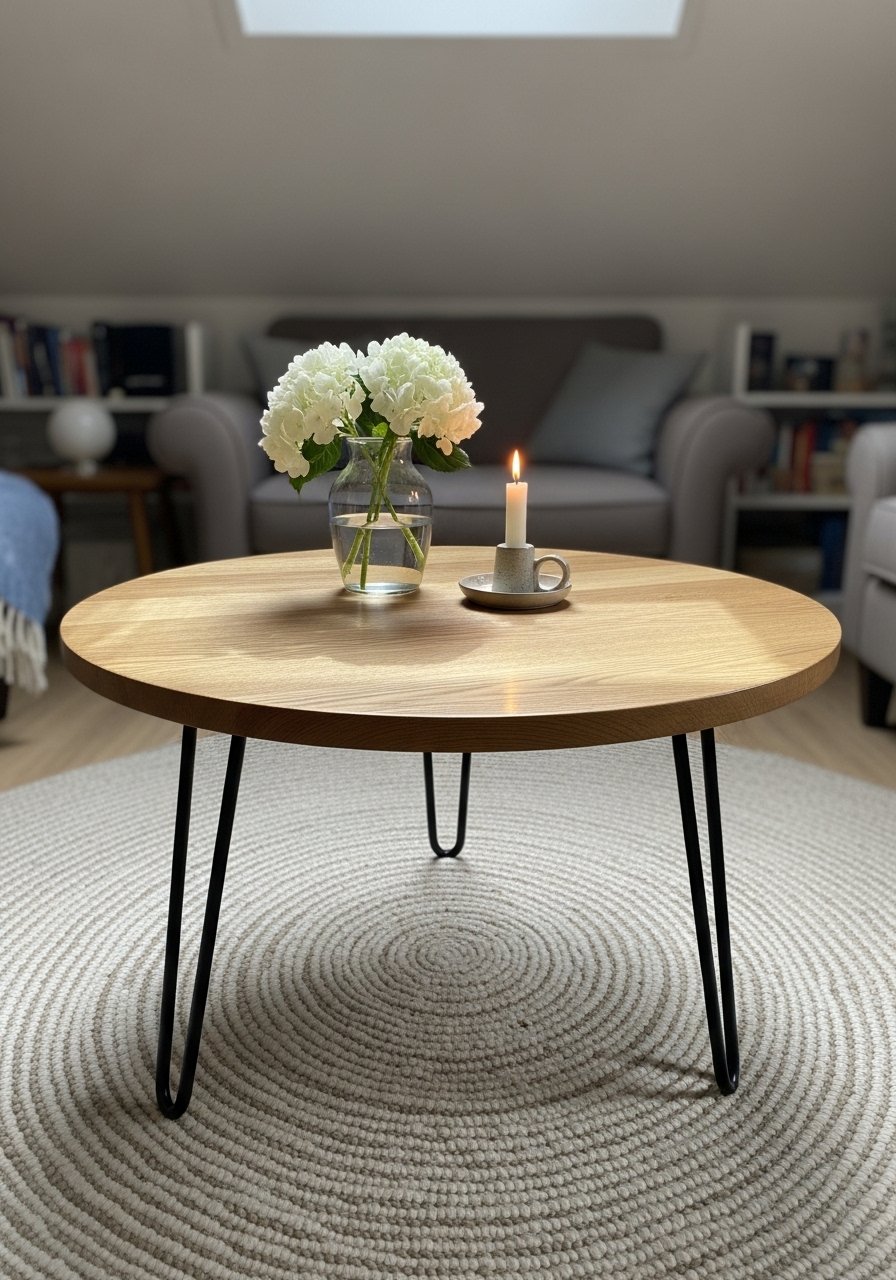
Round shapes soften modern spaces. This quick build is a weekend-friendly project.
Materials
- Oak round blank 30" diameter
- Hairpin legs 16"
- Sandpaper, stain, polyurethane
- Drill and screws
Instructions
- Sand, stain, and seal the round top (two coats). Dry 2–4 hours between coats.
- Attach hairpin legs centered, countersink screws.
- Cure 24 hours before use.
How to Display or Gift It
- Pair with a braided rug; wrap in tissue for gifting.
- Scandinavian Minimal Plinth Table
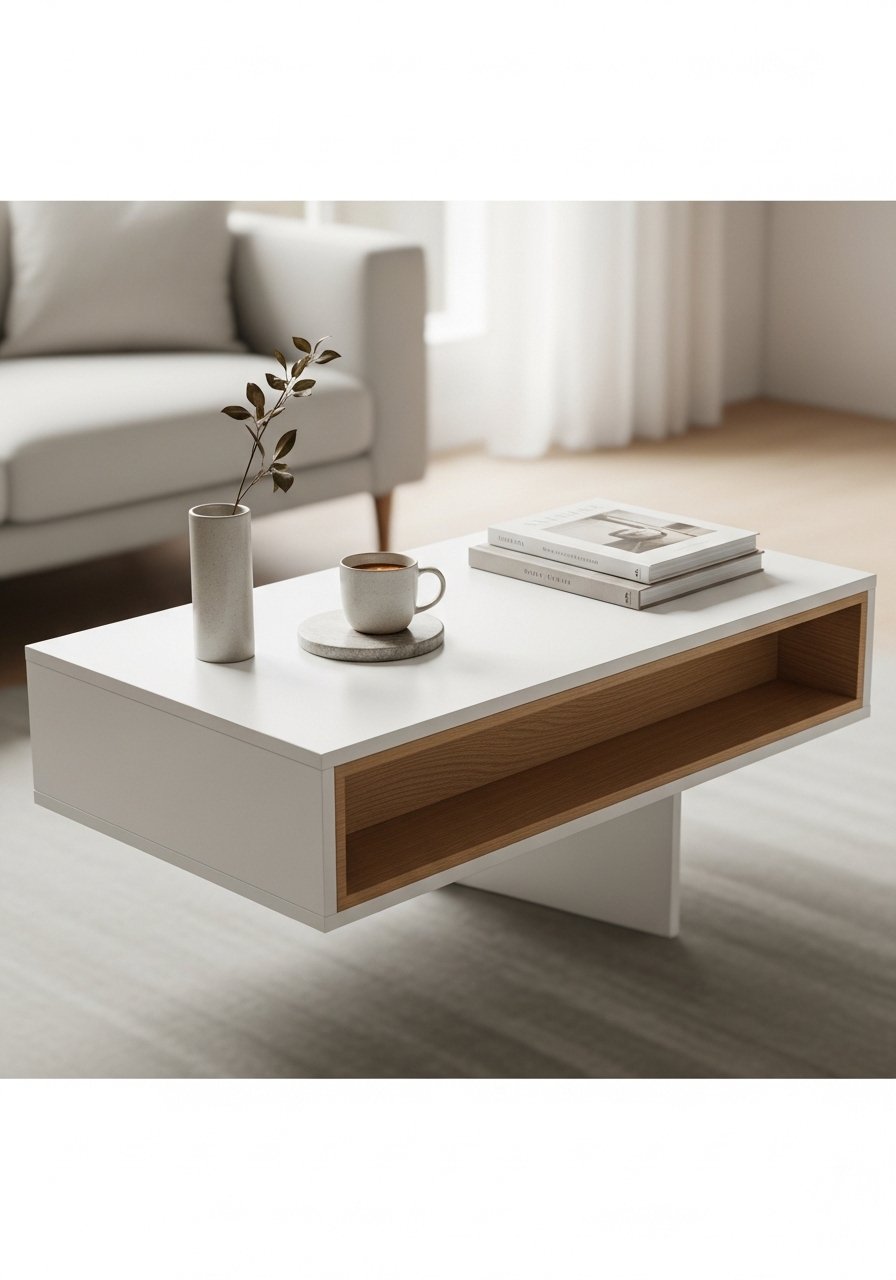
A plinth table gives that airy Scandinavian vibe with hidden storage and clean planes.
Materials
- MDF top 36" x 20" x 1"
- Oak shelf 30" x 8"
- Matte white paint, primer
- Screws and wood glue
- Sandpaper
Instructions
- Assemble plinth box; prime and paint 2 coats, drying 2–4 hours between coats.
- Install oak shelf inside the plinth with hidden brackets.
- Final cure 24 hours.
How to Display or Gift It
- Ideal for Japandi spaces; add a small bonsai or linen runner.
- Painted Geometric Coffee Table (modern DIY coffee table ideas)
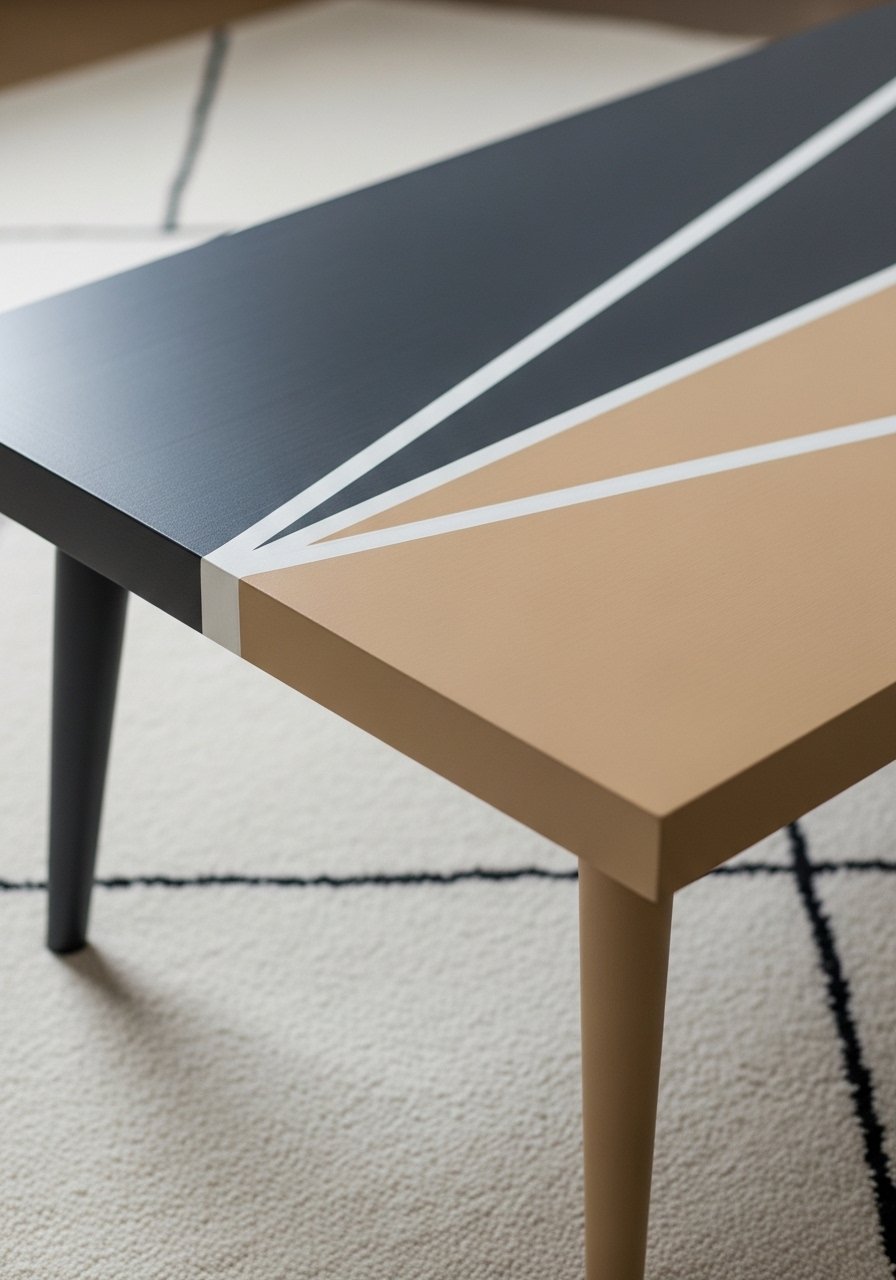
Graphic color blocking keeps things modern. Painter's tape and a steady hand are your friends here.
Materials
- Wood top 36" x 20"
- Chalk paint in two contrasting colors
- Painter’s tape (1/2")
- Foam roller and angled brush
- Clear matte topcoat
Instructions
- Sand and prime surface. Measure and mark geometric design with a ruler.
- Apply painter’s tape along lines, press firmly.
- Paint first color; allow 2–4 hours to dry. Remove tape carefully.
- Tape and paint the second color. Apply two coats total.
- Seal with a clear matte topcoat; cure 24 hours.
Troubleshooting: Press tape edges with a bone folder to prevent bleed. Use a foam roller for bubble-free paint.
How to Display or Gift It
- Pairs well with monochrome accessories. Wrap as a thoughtful housewarming gift.
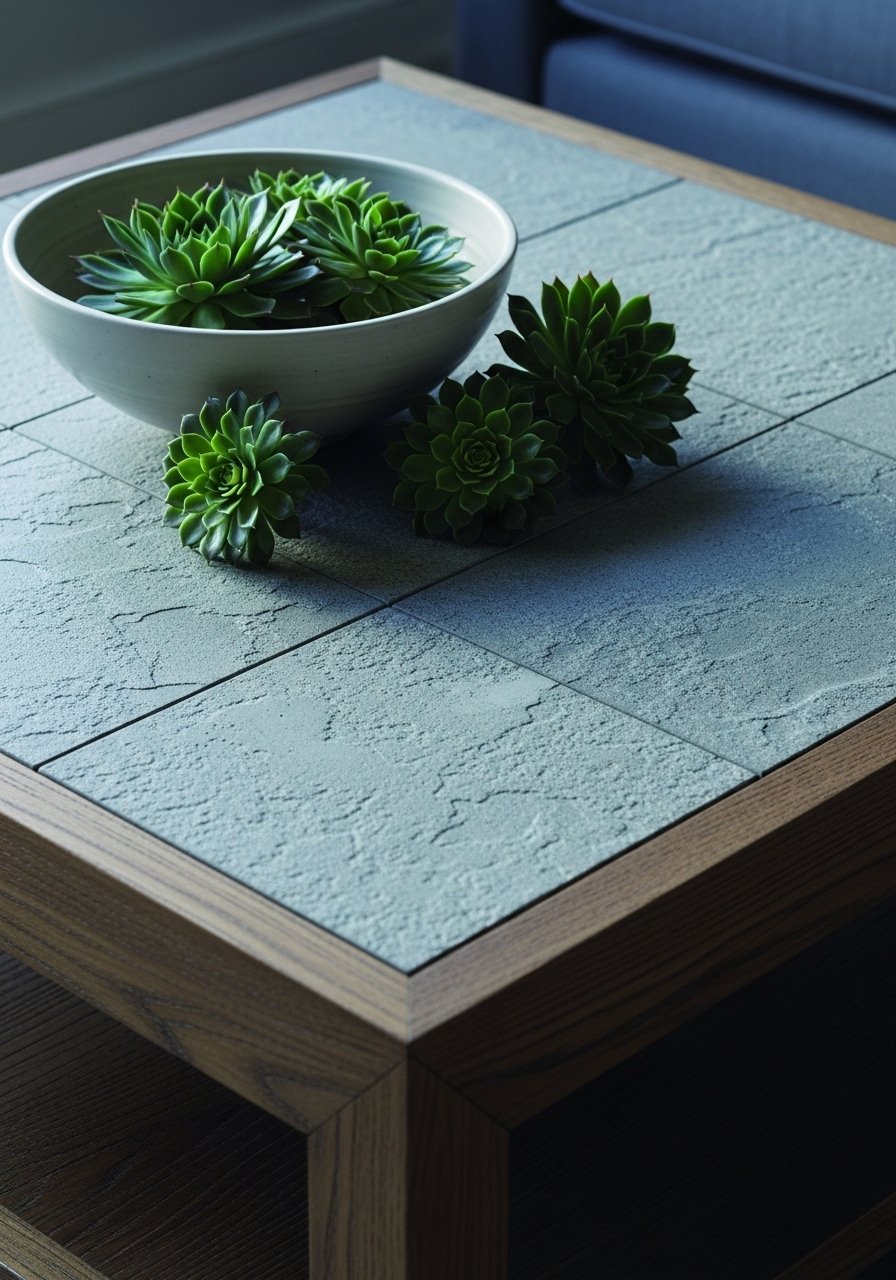
- Terrazzo Tile Top with Wooden Frame
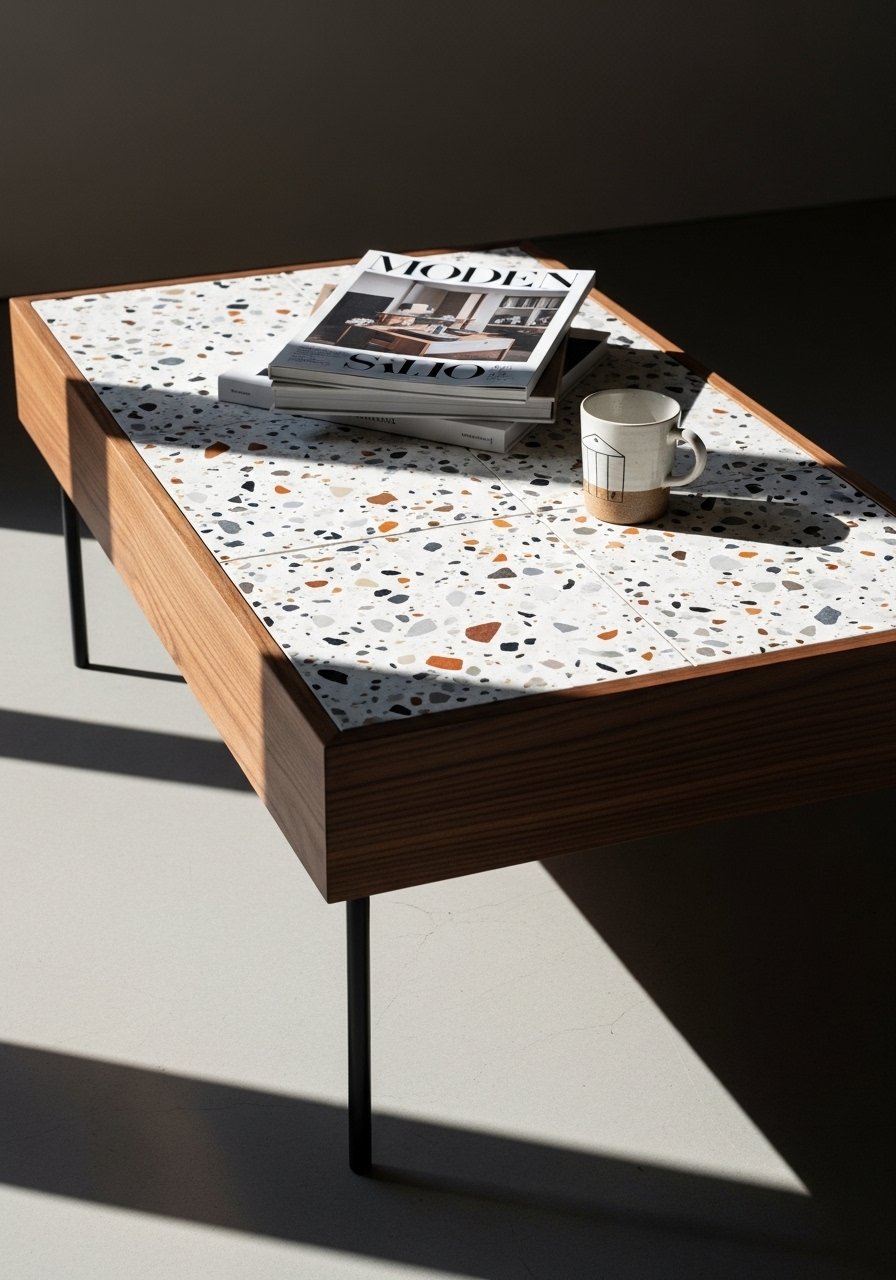
A framed terrazzo inset gives a refined, architectural feel.
Materials
- Walnut frame boards for perimeter 36" x 20"
- Terrazzo tile sheet or epoxy terrazzo mix
- Thin-set mortar, grout
- Metal legs or plinth base
Instructions
- Build frame and secure to underlying plywood. Create inset depth 1/4".
- Install tiles with thin-set; grout; cure 24 hours.
- Attach legs.
How to Display or Gift It
- Great as a styling centerpiece; include care instructions for grout.
- Live-Edge Slab Coffee Table with Steel Base
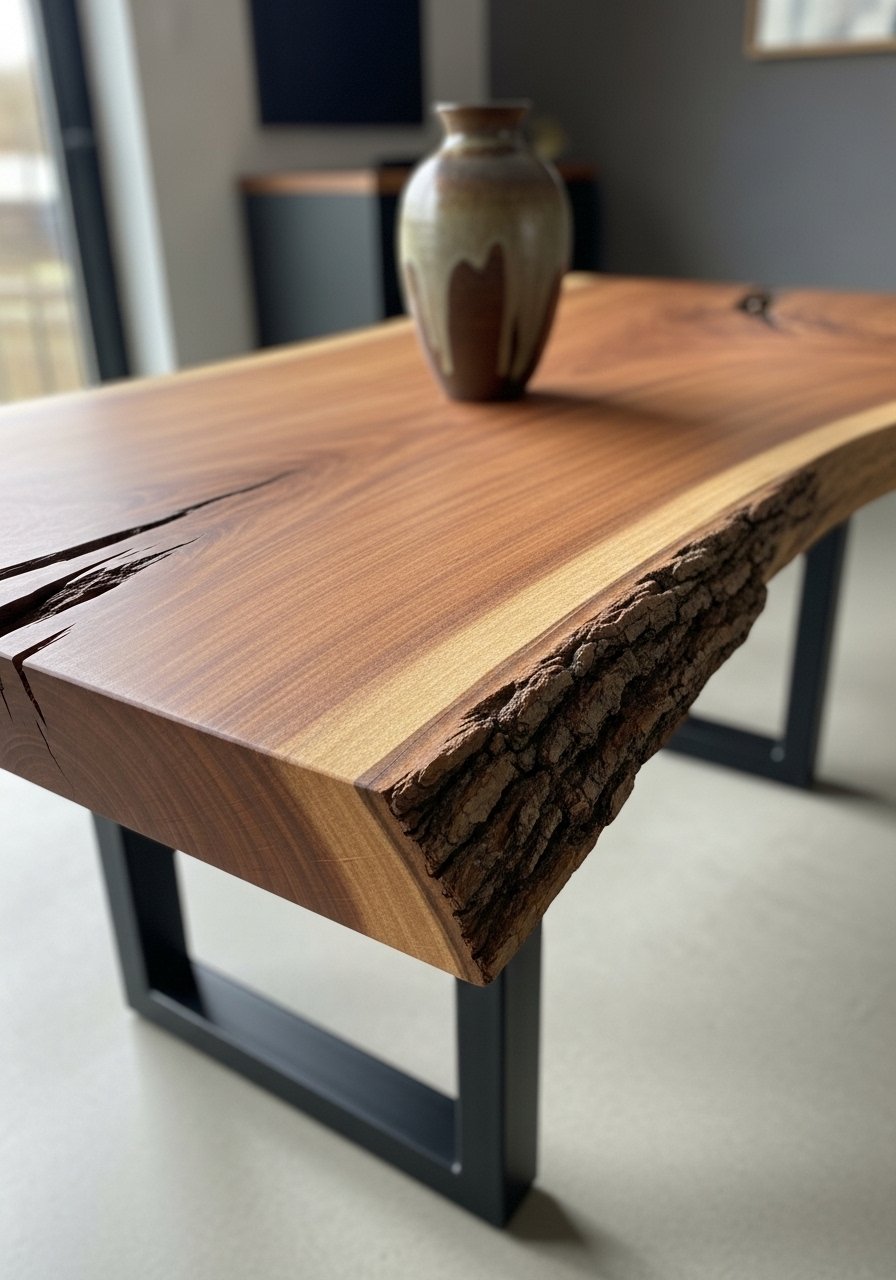
Live-edge brings organic modernism into minimalist interiors. Stabilize with epoxy or bowtie inlays for cracks.
Materials
- Live-edge slab 48" x 18" x 1.5"
- Steel base (pre-made) or DIY steel legs
- Epoxy for cracks, bowtie inlays if needed
- Sandpaper 80–220 grit
- Oil or clear finish
Instructions
- Stabilize cracks with epoxy or bowtie inlays. Sand to 220.
- Apply oil finish in thin coats; cure 24 hours.
- Bolt slab to steel base; check for wobble.
Troubleshooting: Use clamps and wax paper under epoxy inlays to prevent adhesion to clamps.
How to Display or Gift It
- Pair with neutral textiles; for gifting, include a small bottle of wood oil.
- Minimal Cork-Topped Coffee Table
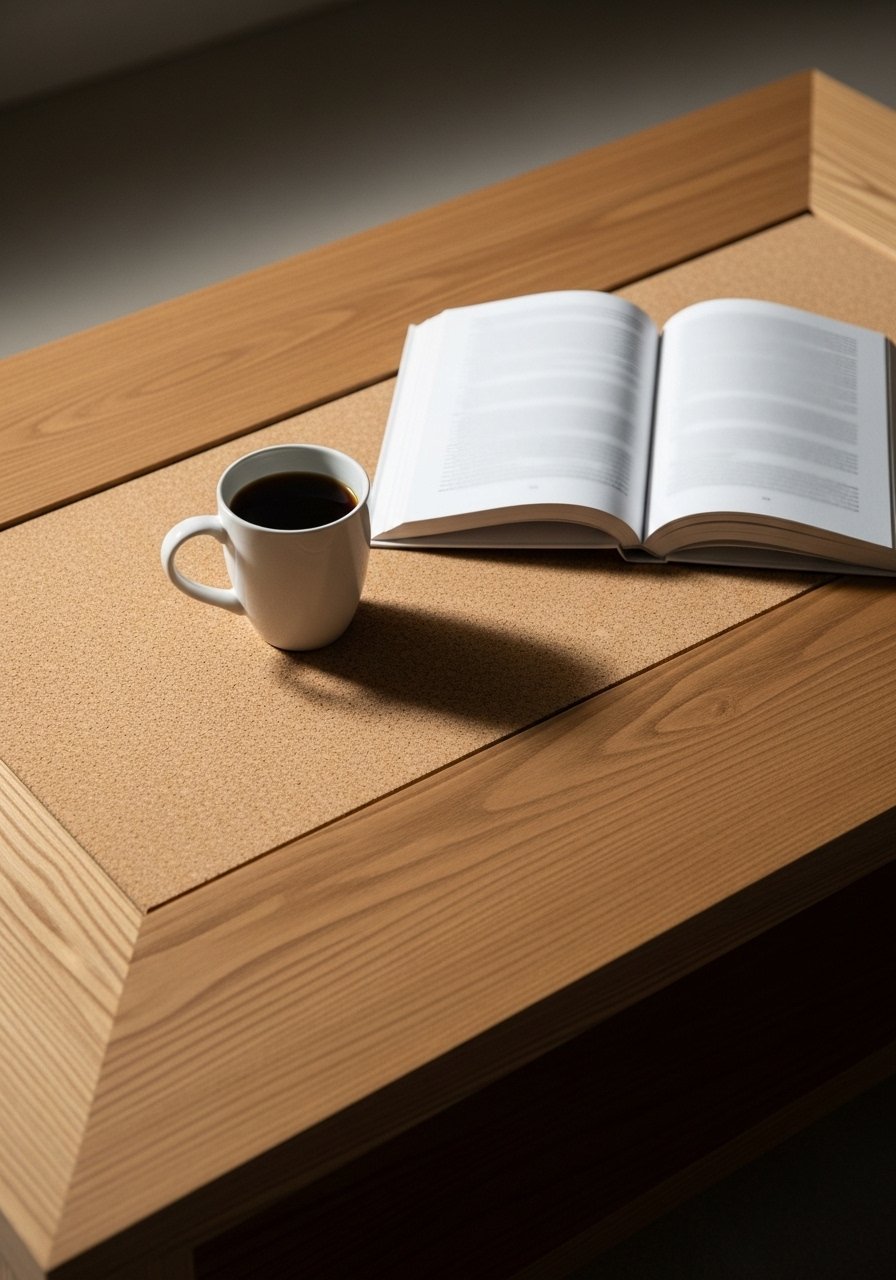
Cork is warm, tactile, and modern. It’s great for coaster-less sipping.
Materials
- MDF top 36" x 18"
- Cork sheet 36" x 18" x 1/8"
- Contact adhesive or spray adhesive
- Trim knife and straightedge
- Polyester sealer to protect cork
Instructions
- Trim cork to size and adhere to tabletop using contact adhesive.
- Seal top with 2 coats of polyester sealer; 2–4 hours dry between coats.
- Attach legs.
Troubleshooting: Work quickly with contact adhesive to avoid misalignment.
How to Display or Gift It
- Pair with natural fibers and potted plants. For gifting, tuck a small bottle of finish into the package.
- Concrete Tile Slab (thin) on Wood Base
Using thin concrete-look tiles yields industrial minimalism without weight.
Materials
- Plywood top 36" x 36"
- Thin concrete-look tiles, tile adhesive, grout
- Sealer and sponge
- Table base
Instructions
- Lay tiles on plywood using thin-set; grout after 24 hours.
- Seal grout and tile; attach base.
How to Display or Gift It
- Use with modern sofas and a steel-finish lamp.
- Nested Tray Coffee Table (convertible)
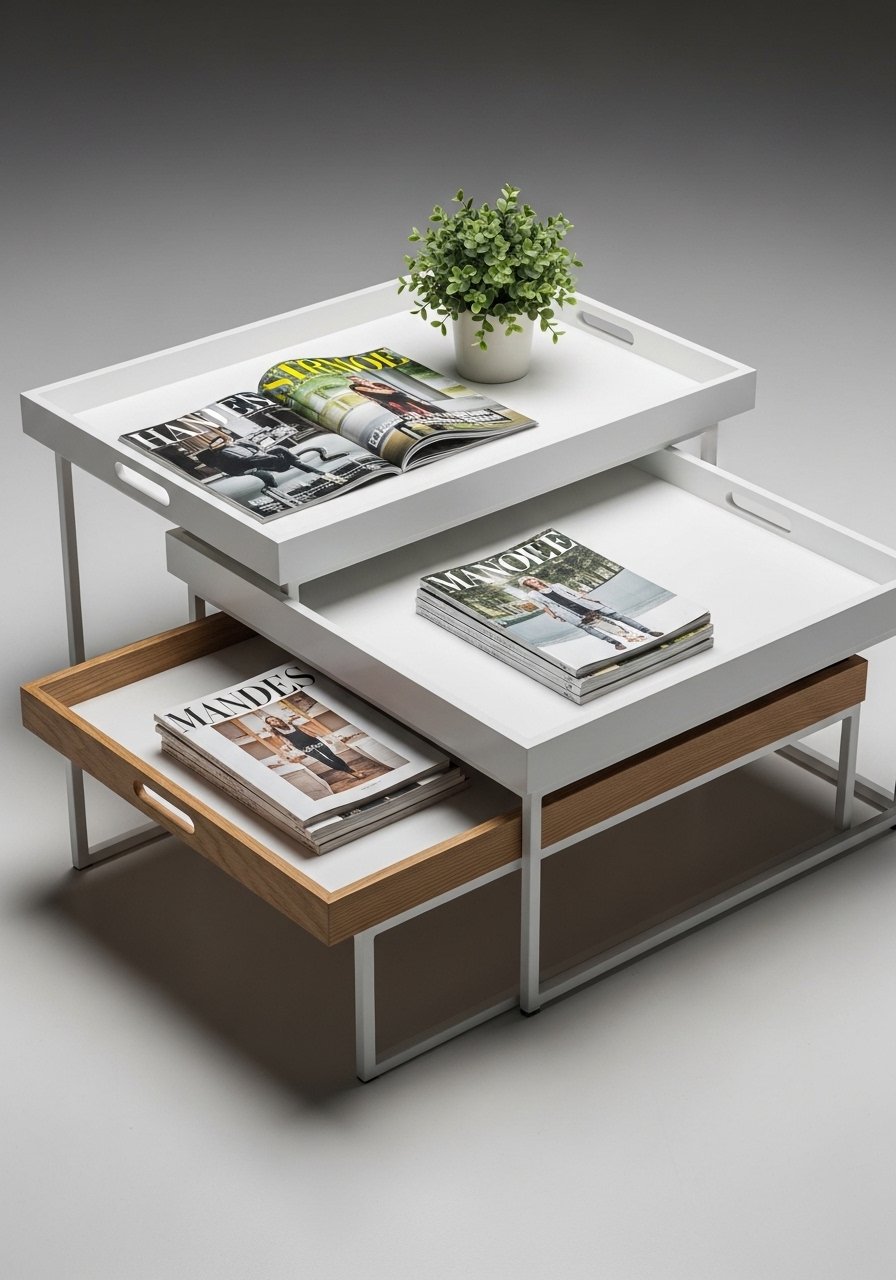
Nested trays let you reconfigure the surface for entertaining or solo lounging.
Materials
- Two plywood trays 36" x 18" and 30" x 14"
- Slide rails or notches
- Lacquer paint and brushes
- Leather pulls
Instructions
- Build trays with 1" sidewalls. Sand and paint 2 coats, drying 2–4 hours between.
- Fit smaller tray to slide under larger using rails or notches.
- Add leather pulls and finish.
How to Display or Gift It
- Great for gatherings. Package with a set of coasters for gifting.
- Marble-Look Faux Top with Contact Paper
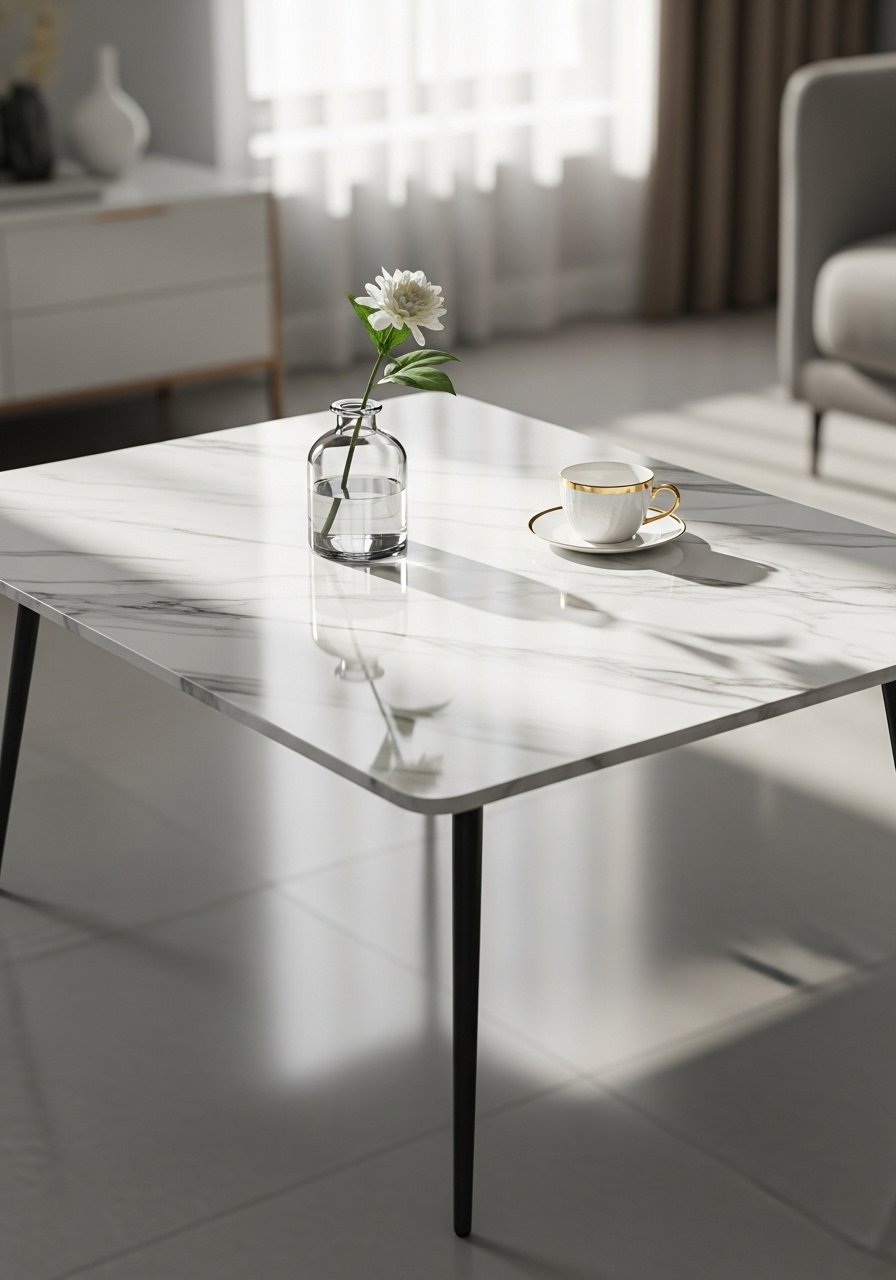
Marble contact paper gives luxe looks on a budget and reads modern when edges are crisp.
Materials
- Sanded MDF top 36" x 20"
- Marble-look adhesive contact paper (enough for top)
- Brayer roller for smooth application
- Exacto knife and ruler
- Metal legs
Instructions
- Sand and wipe tabletop. Apply contact paper carefully using a brayer to prevent bubbles.
- Trim edges with an X-Acto knife for a crisp finish.
- Seal edges with clear sealer if needed.
- Attach legs.
Troubleshooting: Warm large sheets slightly with a hair dryer to make them more pliable.
How to Display or Gift It
- Great for rental-friendly DIYers. Gift with a small care card.
- Cinderblock + Wood Slab Industrial Coffee Table
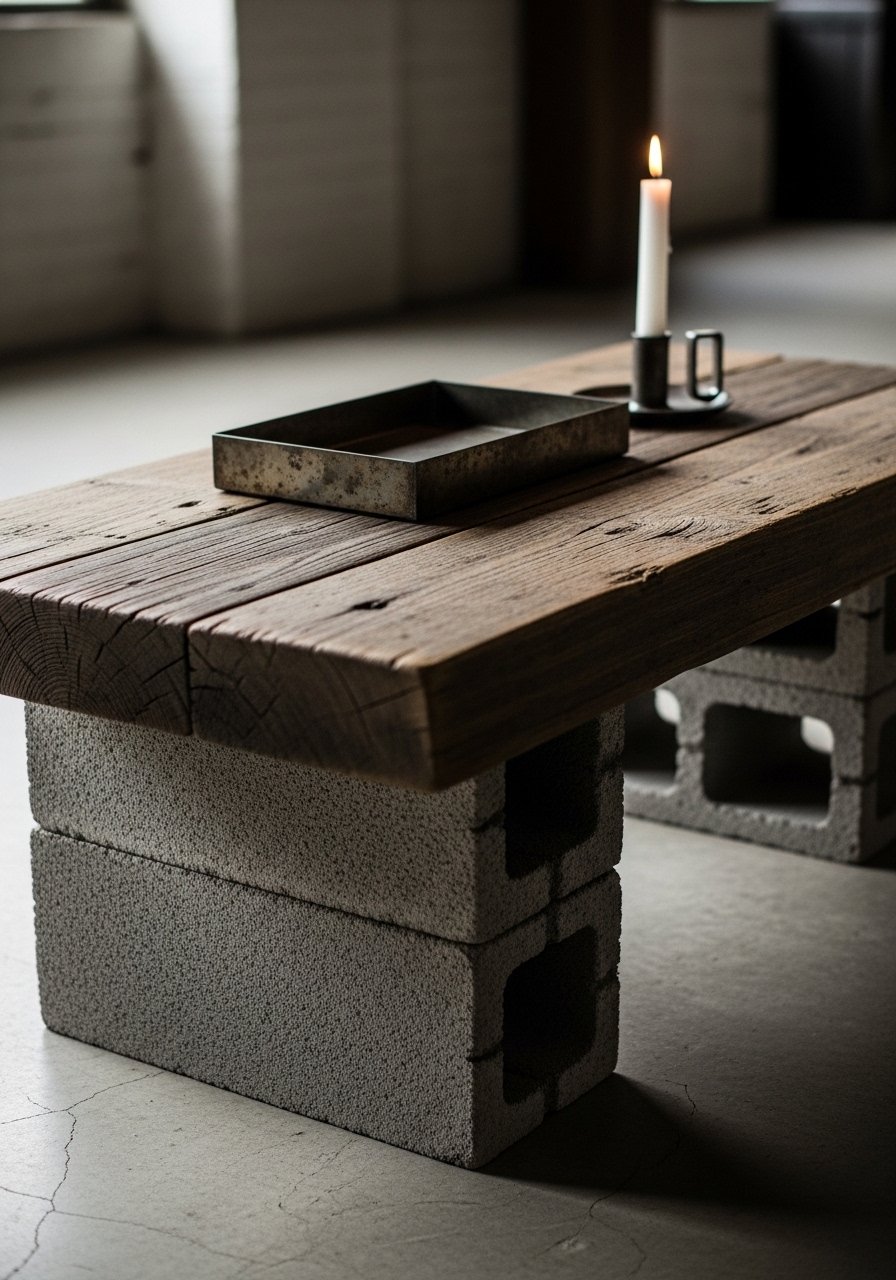
This budget-friendly option reads modern-industrial. Use sealed wood for a polished finish.
Materials
- Two decorative cinderblocks
- Wood slab 36" x 18"
- Clear sealer for wood
- Felt pads for cinderblocks
Instructions
- Sand and seal wood slab; cure 24 hours.
- Place cinderblocks at ends; set slab on top with felt pads to protect surfaces.
- For extra stability, secure with construction adhesive and allow 24 hours cure.
How to Display or Gift It
- Pair with metal accents. For gifting, include sanding tips and a small sealer bottle.
- Minimal Acrylic "Invisible" Table
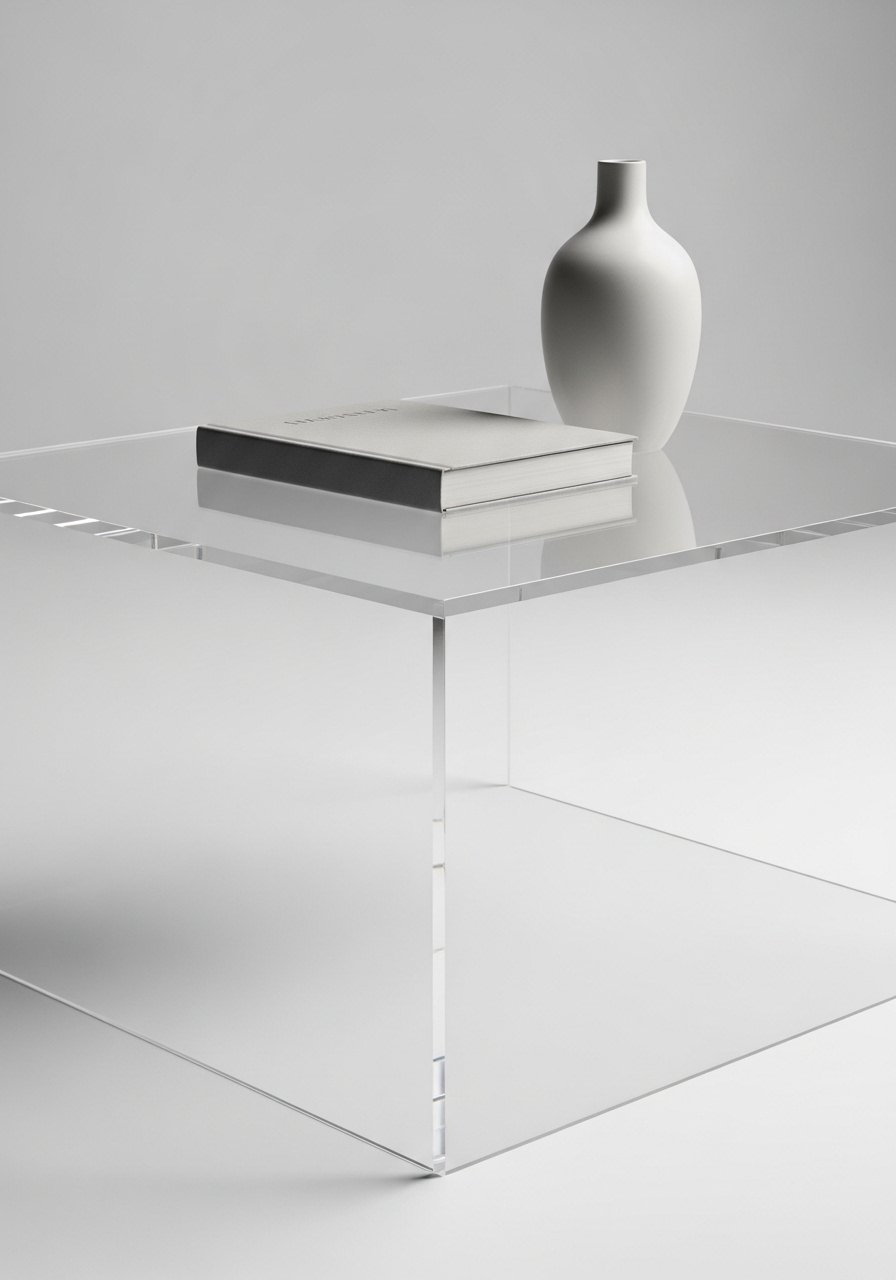
Acrylic feels modern and disappears visually, great for tiny spaces where openness is key.
Materials
- Acrylic sheet bent or joined into table shape 36" x 20" x 1/4"
- Acrylic bonding solvent
- Polishing compound for edges
Instructions
- If fabricating, have acrylic bent by a local shop, or glue panels using bonding solvent per instructions.
- Polish edges for clarity.
- Allow bond to cure 24–48 hours before use.
Troubleshooting: Work in a dust-free area; acrylic shows fingerprints.
How to Display or Gift It
- Keep styling minimal so the table shines. For gifting, include a microfiber cloth.
- Woven Rope & Wood Low Table (boho minimal)
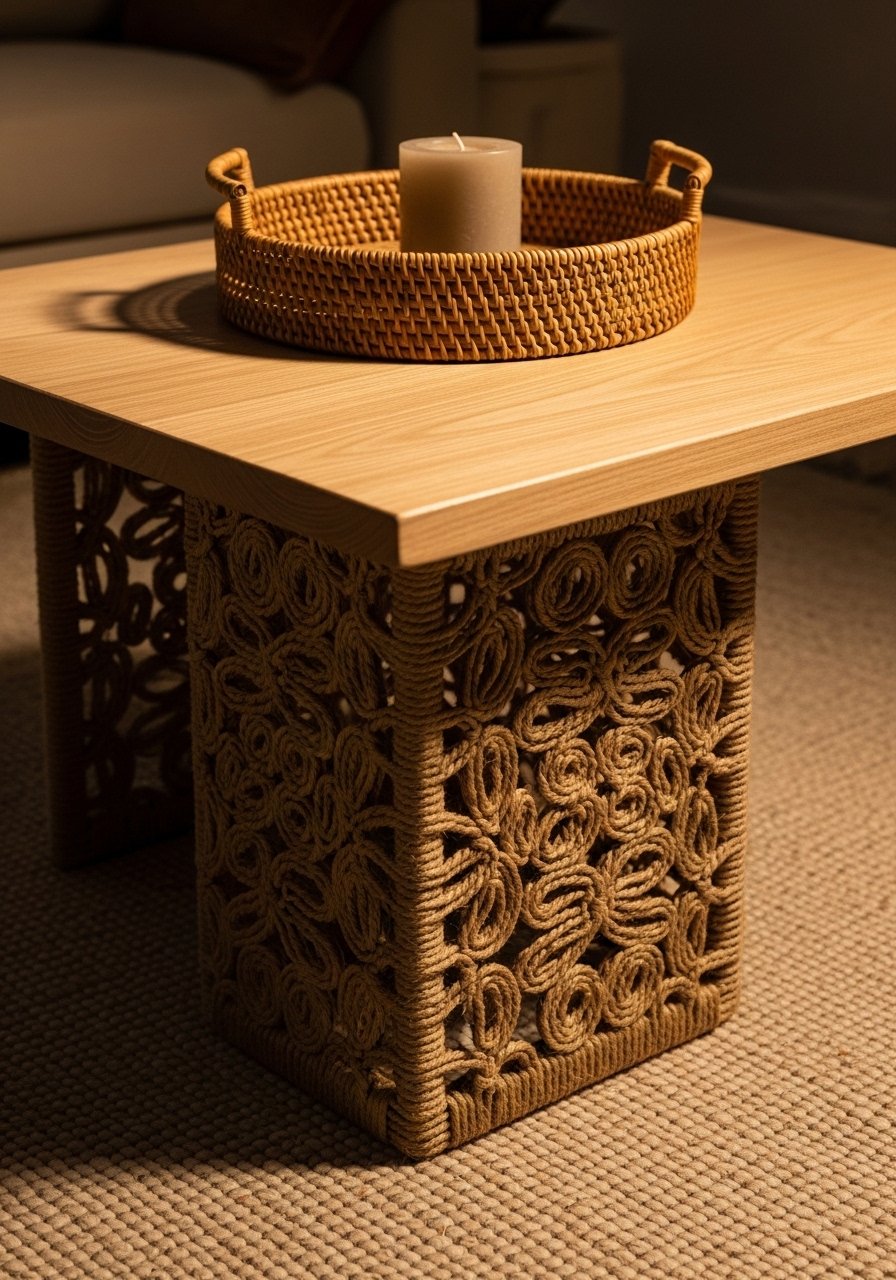
Textile textures like jute or macramé bases add warmth to a modern top.
Materials
- Wood top 36" x 20"
- 5mm jute cord, 50 yards
- Plywood or round base
- Hot glue and E6000 for secure spots
- Scissors
Instructions
- Attach one end of jute to base and wrap tightly around base forming a woven column.
- Secure every few inches with a drop of E6000. Let cure 24 hours.
- Place top and secure with small screws from underside.
How to Display or Gift It
- Pair with neutral textiles and plants. For gifting, include extra jute for maintenance.
- Stained-Edge Minimal Coffee Table
A stained-edge frame highlights clean lines for a simple modern statement.
Materials
- Plywood top 36" x 18", plus 1" frame strips
- Stain (dark walnut) and brush
- Clear satin polyurethane
- Metal legs
Instructions
- Attach frame strips to edge of plywood; sand seams.
- Stain frame strips carefully, wipe off excess.
- Seal with polyurethane; cure 24 hours.
- Attach legs.
Troubleshooting: Use painter's tape to prevent stain bleeding.
How to Display or Gift It
- Fits minimalist interiors. Wrap with a cloth for gifting.
- Painted Ombre Block Coffee Table
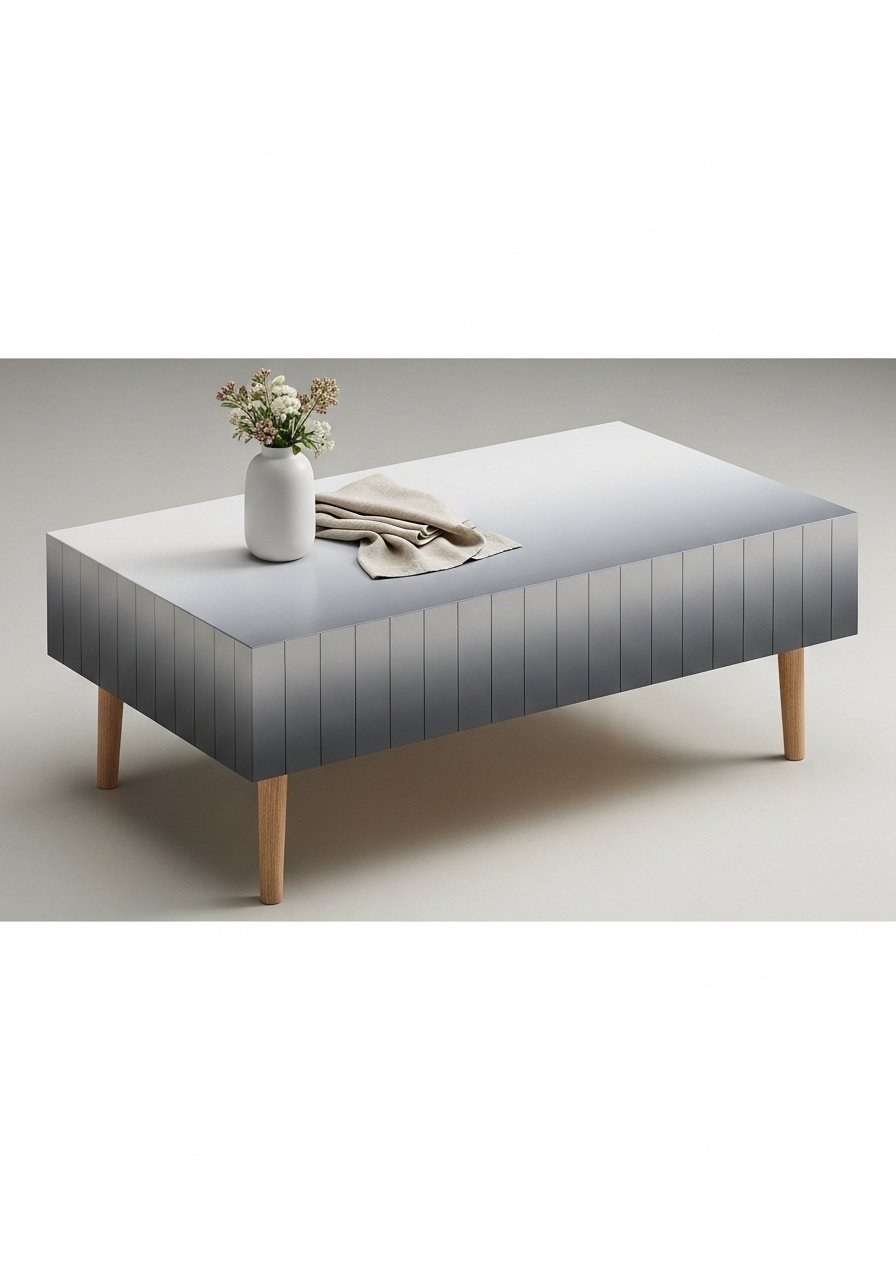
Ombre adds calm gradient interest to a minimal palette—modern and subtle.
Materials
- Wood top 36" x 20"
- Chalk paint in three shades of gray
- Foam rollers and blending brush
- Clear matte topcoat
Instructions
- Prime and apply base color. Let dry 2–4 hours.
- Blend darker shades in sections using a dry brush and horizontal strokes to create an ombre effect. Work quickly while paint is tacky.
- Apply a clear matte topcoat; cure 24 hours.
Troubleshooting: Practice on scrap wood to perfect blending.
How to Display or Gift It
- Pair with textured pillows. Gift with a small sample paint kit for touch-ups.
You made it—26 clean, modern DIY coffee table ideas that suit small apartments, bold living rooms, or serene Japandi corners. From quick painted projects to resin rivers and concrete slabs, there's a build here for every skill level and aesthetic. Pin your favorites, gather a few tools, and set aside a weekend to start one you love.
Want one tool that speeds almost every project here? A quality hot glue gun with temperature control removes stringy glue headaches and makes small assemblies faster and cleaner. Which of these modern DIY coffee table ideas are you trying first? Share a photo or save this guide for later—your perfect coffee table is waiting.


