You eye a blank corner in your living room and imagine a low, sculptural table that reads mid century modern but feels handmade. A DIY coffee table with hairpin legs is the perfect weekend project: minimal hardware, maximum style, and endless ways to personalize the top. Whether you want smooth walnut, painted geometric insets, or resin-filled seams, these ideas will guide you from blank board to beautiful centerpiece.
I use a precision cutting tool for veneer edges sometimes, but a straight-edge and a good hand plane work fine. Pair that with a reliable hot glue gun with temperature control for quick jigs and you’ll fly through assembly. Below are 28 complete projects—each with materials, step-by-step instructions, drying times, and styling tips—so you can pick the scale, finish, and vibe that fit your home.
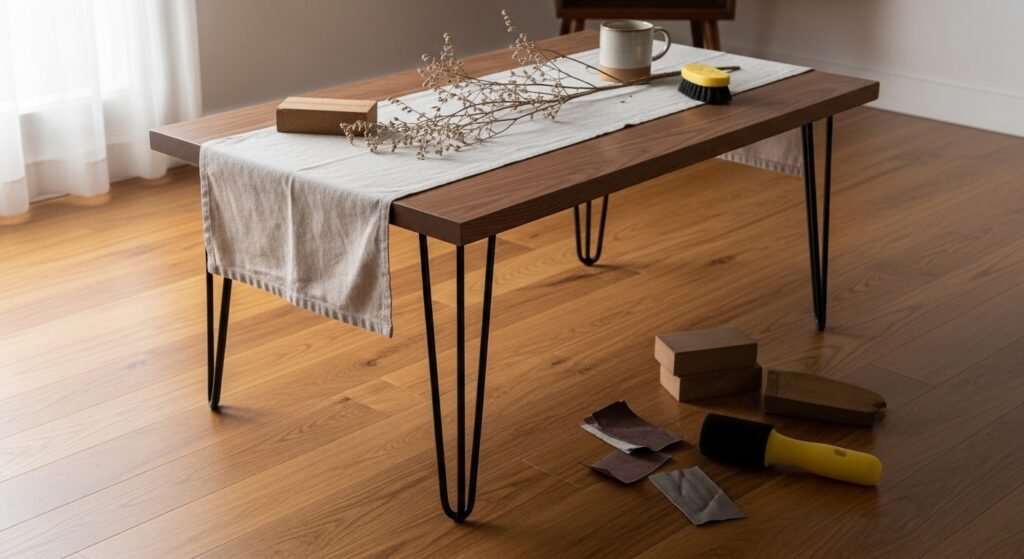
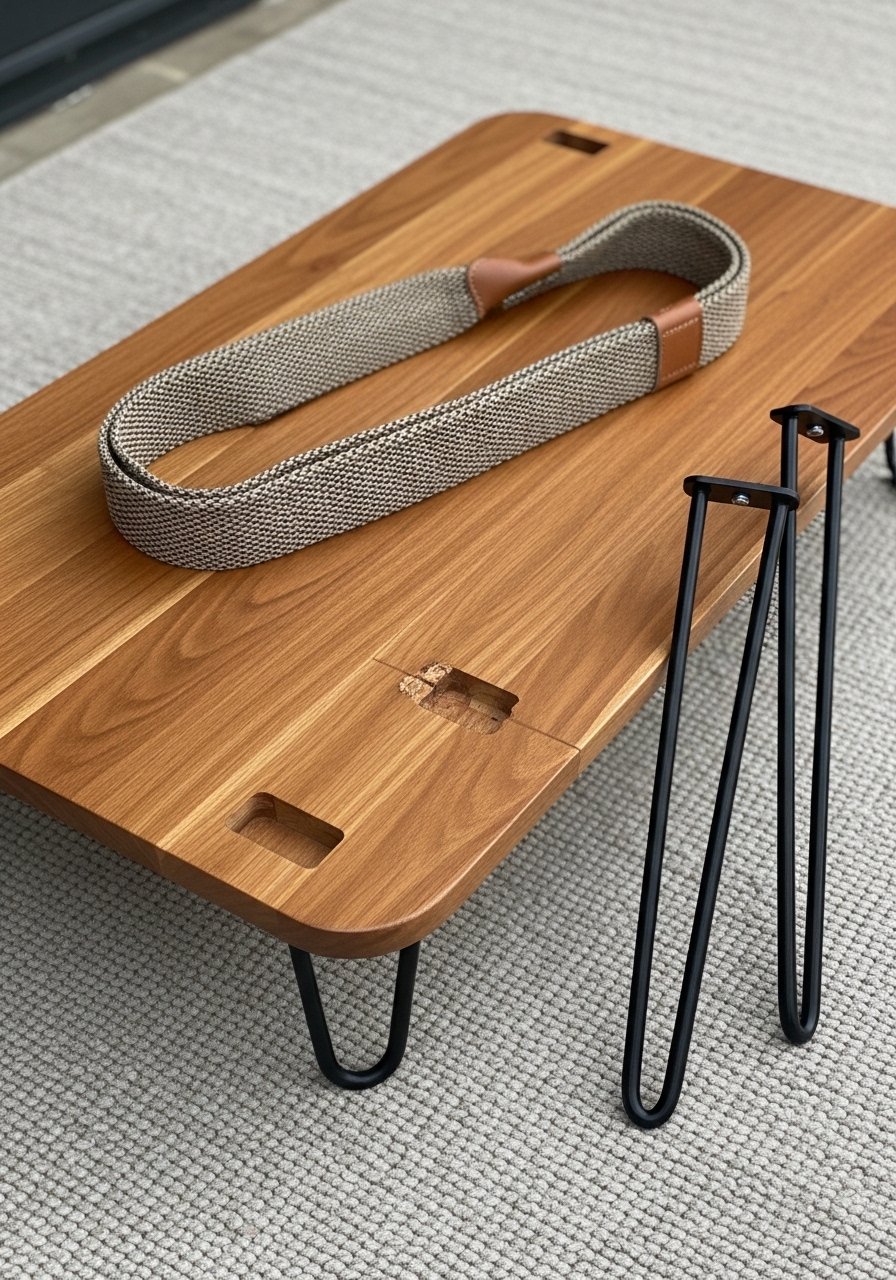
- Walnut Plank DIY coffee table with hairpin legs — Classic Mid Century
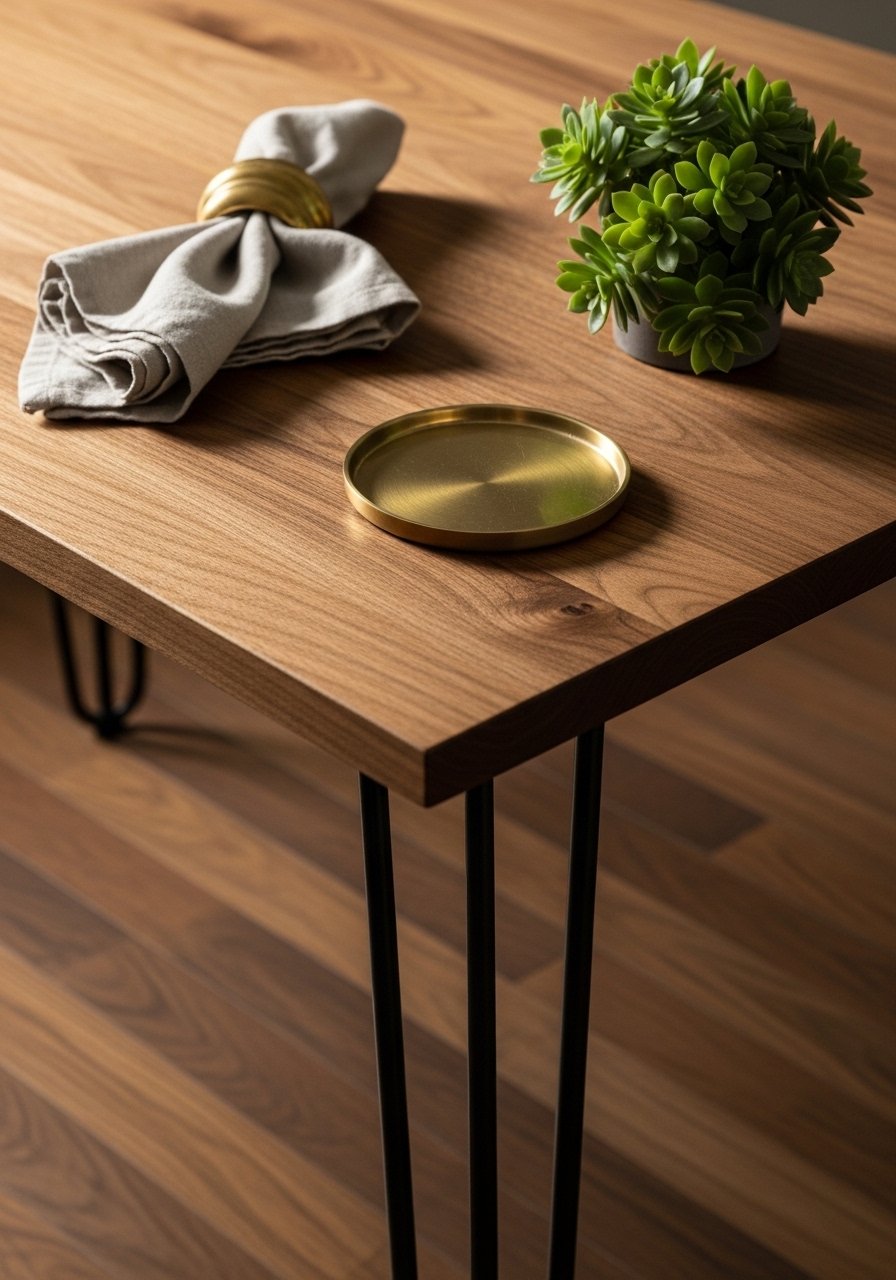
This is the clean, warm silhouette people picture when they think mid century. A single walnut plank keeps the grain continuous and the look elegant. Perfect if you like organic wood tones and tactile grain under your hands.
Materials
- 1 walnut board, 36" x 18" x 1" (cut to size)
- 4 black steel hairpin legs, 16" height
- 1/2 cup wood glue (Titebond)
- 8 wood screws, 1-1/4"
- 120 & 220 grit sandpaper
- Minwax wipe-on oil, 4 oz
- Microfiber cloth, lint-free
- Clamps (2)
Instructions
- Cut the walnut board to 36" x 18" and plane the faces flat if needed.
- Sand with 120 grit, then finish with 220 grit until smooth; wipe with a microfiber cloth.
- Mark leg positions 3" in from each short edge and centered along width.
- Pre-drill pocket holes or pilot holes for the 1-1/4" screws to avoid splitting.
- Attach each hairpin leg using screws and a cordless drill; tighten until snug.
- Apply a thin coat of Minwax wipe-on oil with a microfiber cloth; let soak 2–4 hours, repeat for 2 coats until finish is even.
- Buff lightly with a clean cloth after final cure (24 hours).
How to Display or Gift It
- Float the table in front of a low sofa; add a woven tray and a stack of design books.
- For gifting, wrap in kraft paper and tuck in a small wood care card.
- Store flat if making ahead; keep sealed in a dry area.
- A small stackable craft organizer is handy for keeping screws and hardware labeled.
- Two-Tone Painted Top with Hairpin Legs — Graphic Minimalist
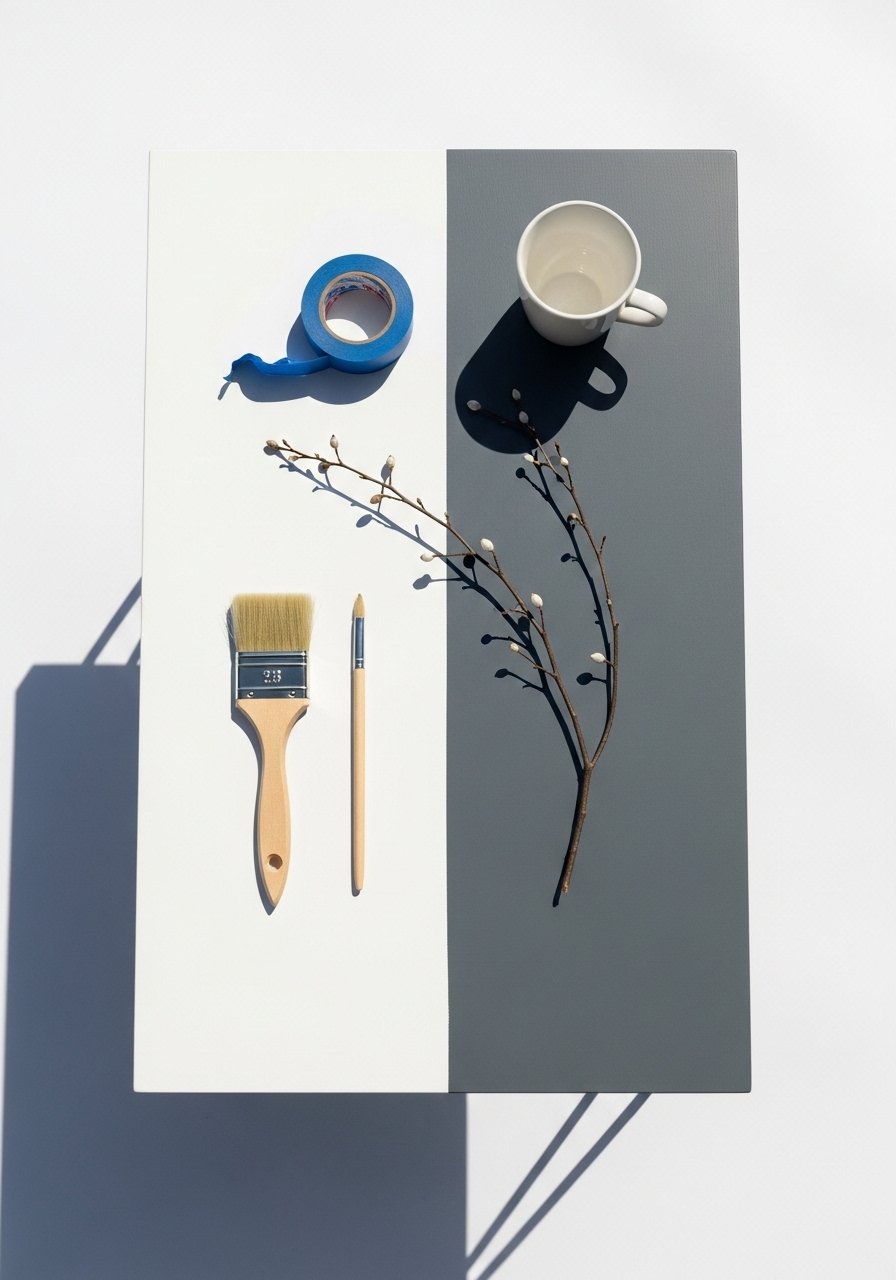
Sharp two-tone paint emphasizes mid century geometry. Painter’s tape gives that crisp division line, which is why this project is great for those who love pop but prefer tidy edges.
Materials
- 1 pine tabletop, 36" x 18" x 3/4"
- 4 hairpin legs, 16"
- Painter's tape, 1.5"
- Chalk paint in white and charcoal, 8 oz each
- Foam brush, 2"
- 120 grit sandpaper
- Water-based polyurethane, satin, 8 oz
- Dust cloth
Instructions
- Sand the tabletop with 120 grit and wipe clean.
- Apply two strips of painter’s tape down the center to block off area.
- Paint one side white with a foam brush, let dry 1–2 hours, then apply a second coat.
- Remove tape carefully and re-tape to paint the other side charcoal; allow 1–2 hours drying between coats.
- After paint cures 24 hours, sand lightly with 220 grit and wipe.
- Coat with two thin coats of water-based polyurethane, 2–4 hours drying between coats; cure 24 hours before use.
- Attach legs with screws.
How to Display or Gift It
- Place on a jute rug for a Scandinavian-meets-mid-century look.
- Add a small stack of monochrome coasters.
- Wrap in tissue and a ribbon for gifting; include touch-up paint sample.
- Store painted tops flat in a protected space until legs are ready.
- Reclaimed Pallet Top with Hairpin Legs — Rustic Boho
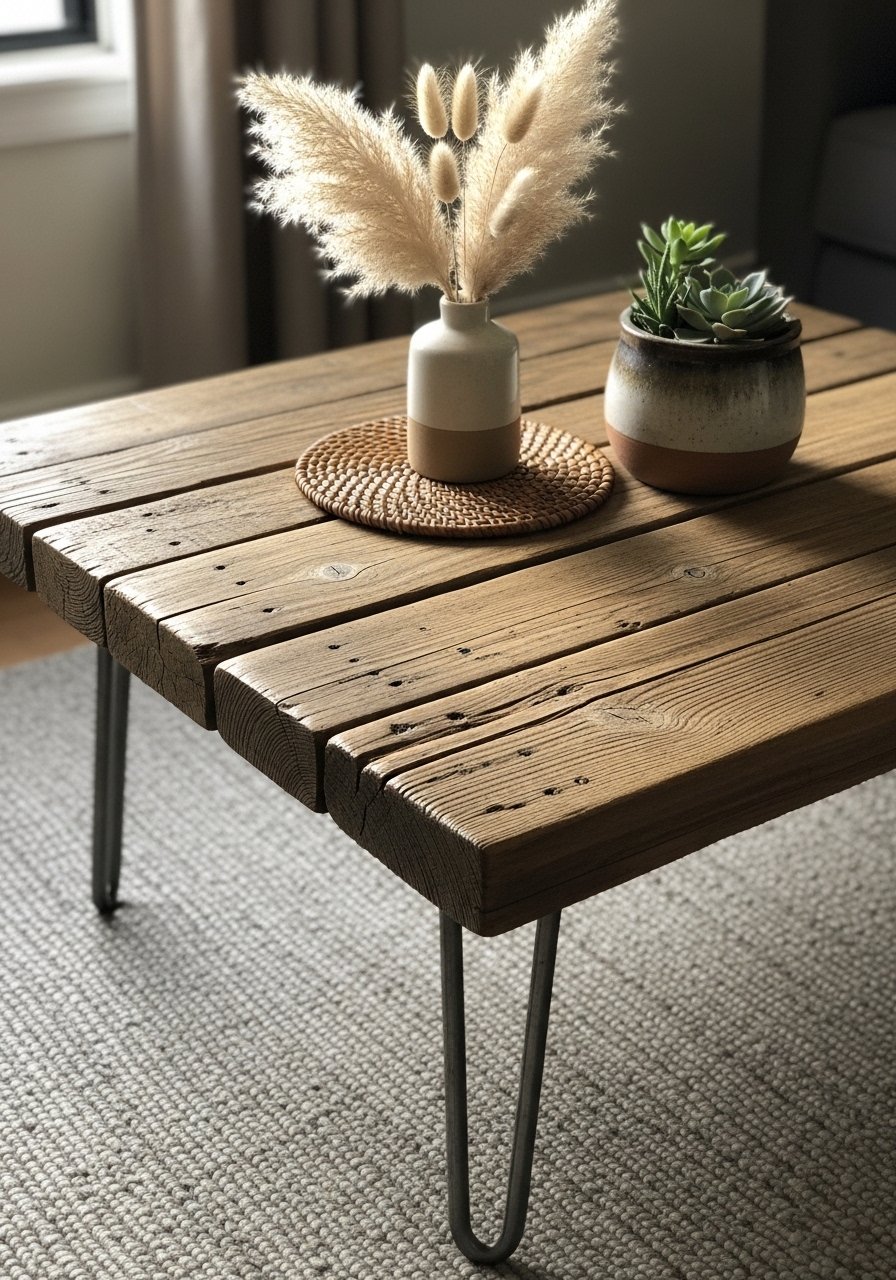
Reclaimed boards give a cozy, lived-in texture. This project yields a chunky, lower coffee table that meshes beautifully with boho and cottagecore aesthetics.
Materials
- 4–5 reclaimed pallet boards, total 36" x 18"
- 2 1"x2" boards for battens
- Wood glue, Titebond
- Finishing nails, 1"
- Hammer or nail gun
- Orbital sander or sanding block
- Stain (optional) Minwax, 4 oz
- 12" hairpin legs (raw steel)
- Clear matte polyurethane, 8 oz
Instructions
- Rip pallet boards to height and arrange to get a tight seam; glue edges and clamp.
- Add battens across underside with finishing nails for reinforcement.
- Sand entire top starting with 80 grit, finishing with 150 grit.
- If staining, apply one coat, wipe after 5–10 minutes, let dry 2–4 hours.
- Apply two coats of matte polyurethane, 2–4 hours between coats; cure 24 hours.
- Attach 12" hairpin legs with screws, pre-drilling pilot holes to prevent splitting.
How to Display or Gift It
- Pair with textured cushions and a woven throw.
- Add a small ceramic bowl for remotes.
- For gifting, tuck a sachet of dried lavender under kraft wrap.
- Keep extra finish in labeled jars in a stackable craft organizer for touch-ups.
- Live Edge Slab with Hairpin Legs — Organic Modern
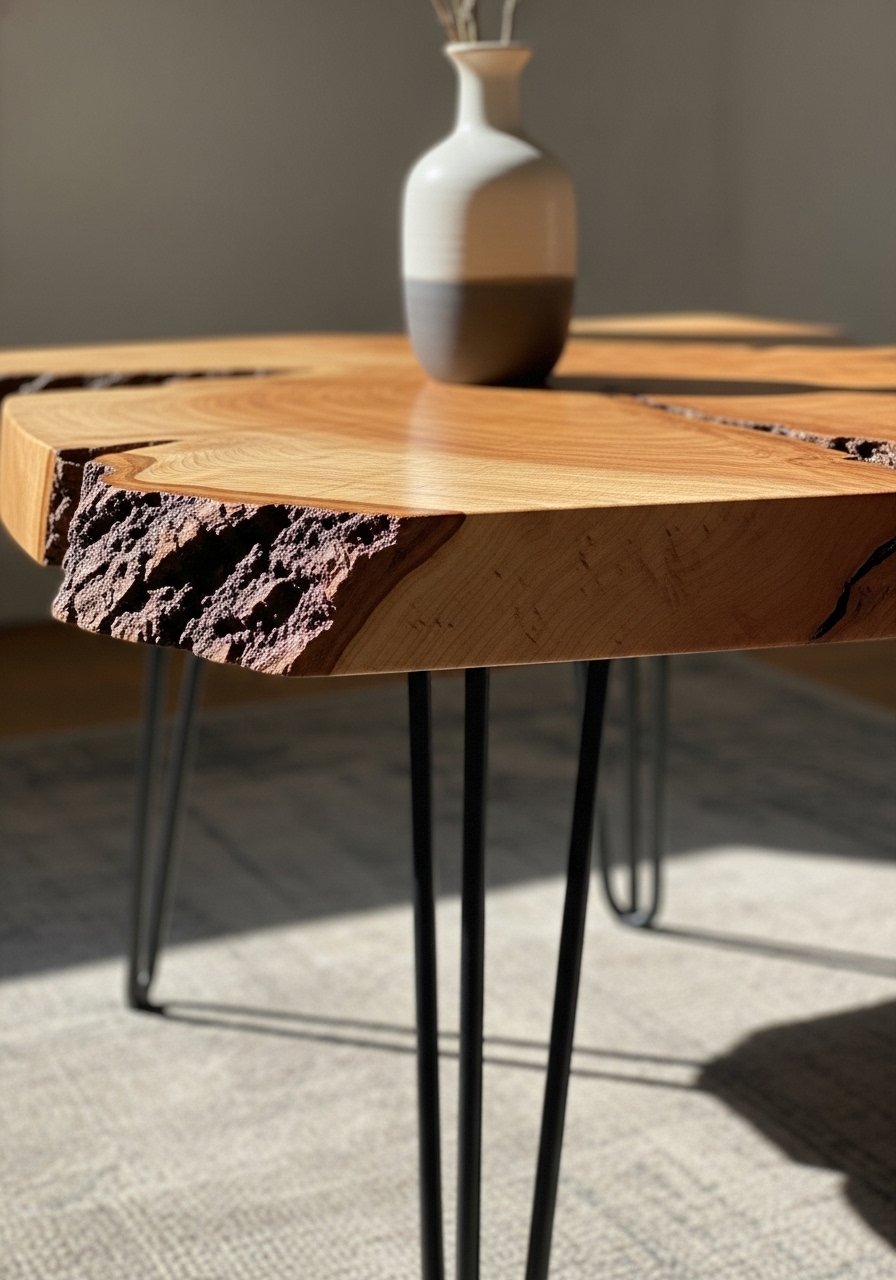
The live edge keeps the tree’s character intact. This design is for lovers of tactile surfaces and one-of-a-kind shapes—each slab is different and rich with texture.
Materials
- 1 live edge slab, approx 36" x 16–20" x 1.25"
- 4 hairpin legs, 16"
- Orbital sander
- 80, 120, 220 grit sandpaper
- Tung oil or wipe-on polyurethane, 8 oz
- Rags for wiping oil
- Clamps as needed
Instructions
- Flatten the slab if necessary with a planer or wide belt sander.
- Sand progressing 80 → 120 → 220 grit until silky.
- Remove dust carefully; apply tung oil with a rag following wood direction.
- Let oil soak 4–6 hours, wipe off excess. Repeat 2–3 coats spaced 24 hours.
- If using polyurethane, allow 2–4 hours between coats and cure 48 hours.
- Attach hairpin legs at marked points using pre-drilled holes.
How to Display or Gift It
- Let it breathe with minimal decor to highlight the edge.
- Add felt pads under legs to protect floors.
- For gifting, include a small jar of care oil and instructions.
- Store slabs flat in a dry, temperature-stable area.
- Mid Century Walnut Slatted Top with Hairpin Legs — Textured Linear

Thin slats add dimensional shadow lines. This style nods to classic mid century cabinetry while staying airy and light.
Materials
- 8 walnut slats, 36" x 2" x 3/4"
- 2 cross rails, 36" x 2"
- Wood glue, Titebond, 1/2 cup
- Clamps
- 120 & 220 grit sandpaper
- Walnut oil or satin varnish, 6–8 oz
- 4 hairpin legs, 16"
Instructions
- Butt the slats against cross rails and glue in place; clamp and allow 2–4 hours for glue to set.
- Sand the assembled top smooth with 120 → 220 grit.
- Apply walnut oil one thin coat; let soak 2–4 hours; repeat once.
- Apply a thin varnish coat if extra protection is desired; dry 2–4 hours.
- Attach hairpin legs with screws into reinforced rail areas.
- Let finish cure 24 hours before use.
How to Display or Gift It
- Works great on mid-tone wool rugs with a leather sofa.
- Add a low stack of design magazines and a concrete planter.
- Wrap slatted tops in soft cotton for safe transport.
- MDF + Veneer DIY Coffee Table with Hairpin Legs — Budget Chic
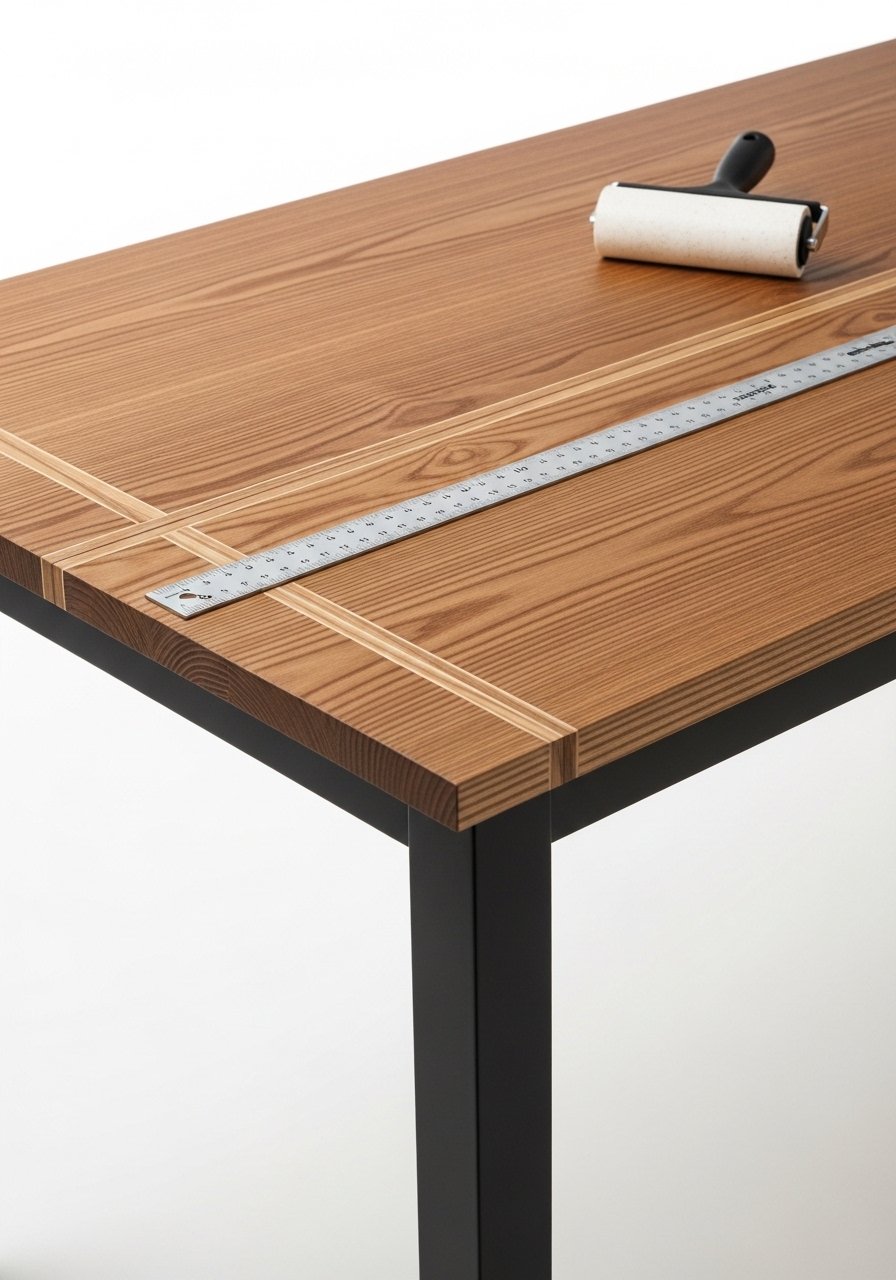
Veneer gives a high-end look without the price of solid hardwood. This is ideal when you want consistent grain and a flatter surface for geometric designs.
Materials
- 1 MDF board 36" x 18" x 3/4"
- Walnut veneer sheet, 36" x 18"
- Contact cement or veneering adhesive
- Veneer roller (brayer)
- Sharp utility knife and straight edge
- 120 grit sandpaper
- Clear satin polyurethane, 8 oz
- 4 hairpin legs, 16"
Instructions
- Sand MDF face with 120 grit; clean dust.
- Apply contact cement to both MDF and veneer per manufacturer directions; wait until tacky (typically 10–20 minutes).
- Carefully lay veneer and roll with a brayer to remove bubbles.
- Trim edges with a sharp knife and straight edge.
- Sand lightly and apply two coats of satin polyurethane; dry 2–4 hours between coats.
- Mount hairpin legs after curing 24 hours.
How to Display or Gift It
- The smooth top is perfect for serving trays.
- Gift with a small care kit and extra veneer patch for repairs.
- Store stacked flat to avoid warping.
- DIY coffee table with hairpin legs — Painted Retro Sunburst Top
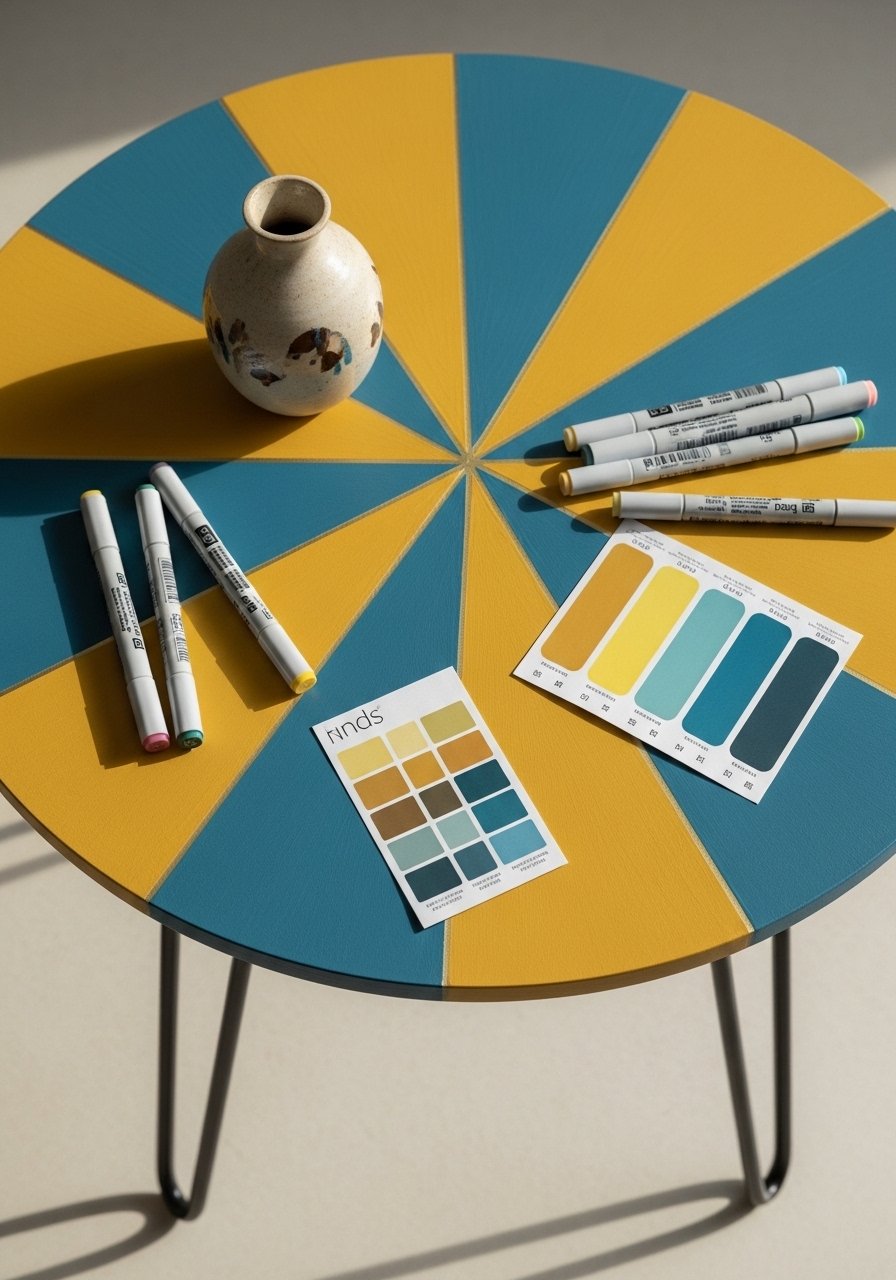
This round sunburst is playful and retro—perfect for a statement piece in a neutral room. Acrylics and a crisp stencil make the radiating design pop.
Materials
- 1 round tabletop, 30" diameter, 3/4" birch ply
- 4 hairpin legs, 14"
- Acrylic craft paints, 2–3 colors, 2 oz each
- Painter’s tape and circle stencils
- Fine and medium foam brushes
- Matte sealant spray, clear
- 120 grit sandpaper
Instructions
- Sand the top smooth and prime with a thin coat of white chalk paint if colors are thin.
- Mark center; use painter’s tape to create radial segments.
- Paint alternating segments in chosen colors; let dry 1–2 hours between coats.
- Remove tape carefully; touch up edges with a fine brush.
- Seal with 2 coats of matte spray, allowing 15–30 minutes between light coats; final cure 24 hours.
- Attach hairpin legs.
How to Display or Gift It
- Pair with a low-profile sofa in neutral fabric.
- Wrap with kraft paper and a ribbon for a retro-loving friend.
- Store flat with interleaving paper to protect paint.
- Floating Shelf Edge Coffee Table with Hairpin Legs — Minimal Japandi
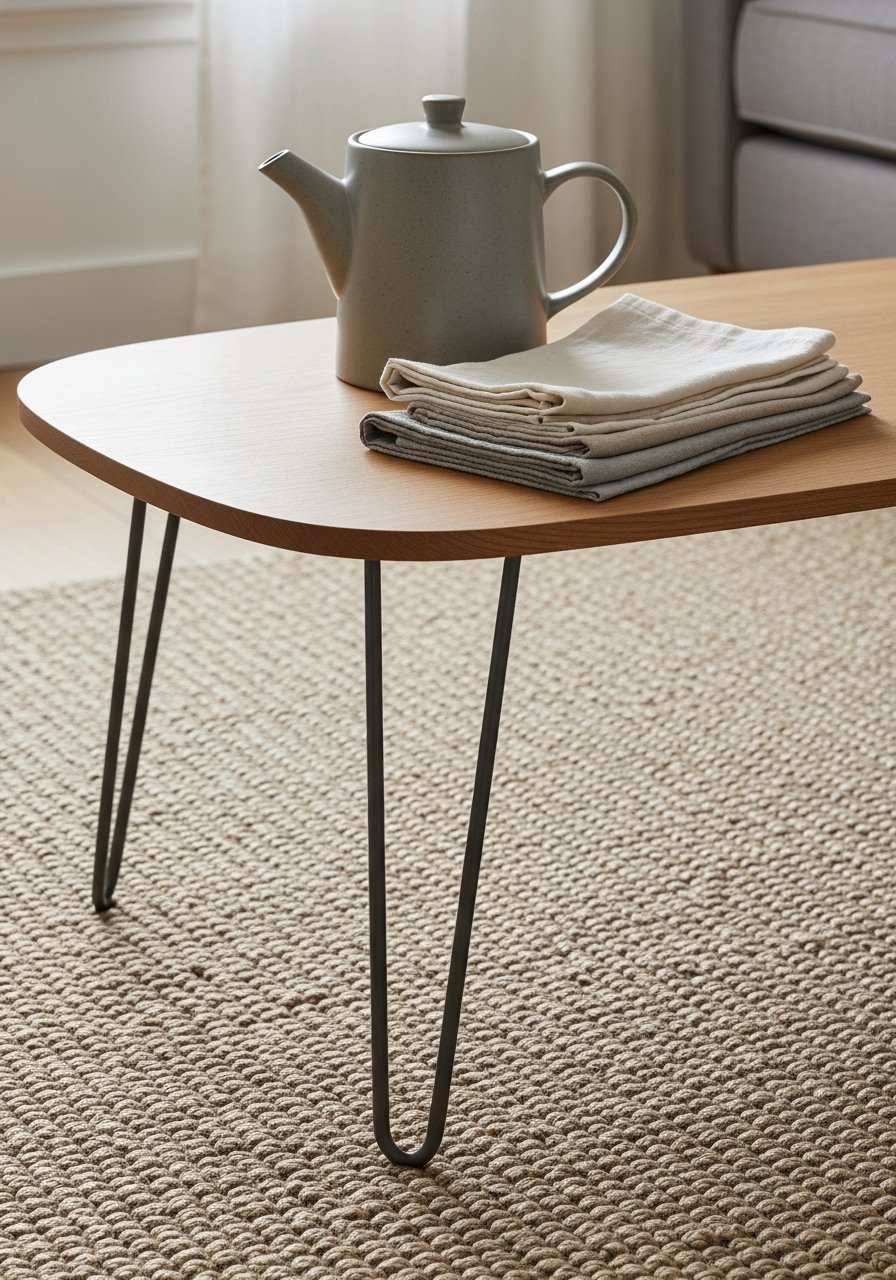
A thin, floating-edge tabletop pairs well with calm, minimal interiors. The feel is airy and low—think japandi tranquility.
Materials
- 1 hardwood top, 40" x 14" x 3/4", rounded edges
- 4 hairpin legs, 12"
- 120 & 220 grits sandpaper
- Danish oil, 6 oz
- Cloth rags
- Drill and screws
Instructions
- Route rounded edges with a round-over bit or sand by hand.
- Sand top to 220 grit and remove dust.
- Apply Danish oil with a cloth; wipe off after 10–15 minutes. Repeat 2 coats, 24 hours apart.
- Pre-drill leg holes, attach hairpin legs.
- Let oil cure 24 hours before placing items on top.
How to Display or Gift It
- Works as a sofa-side table for a minimalist living room.
- Bundle with a small tea towel and a packet of loose-leaf tea for gifting.
- Store flat and wrapped in muslin.
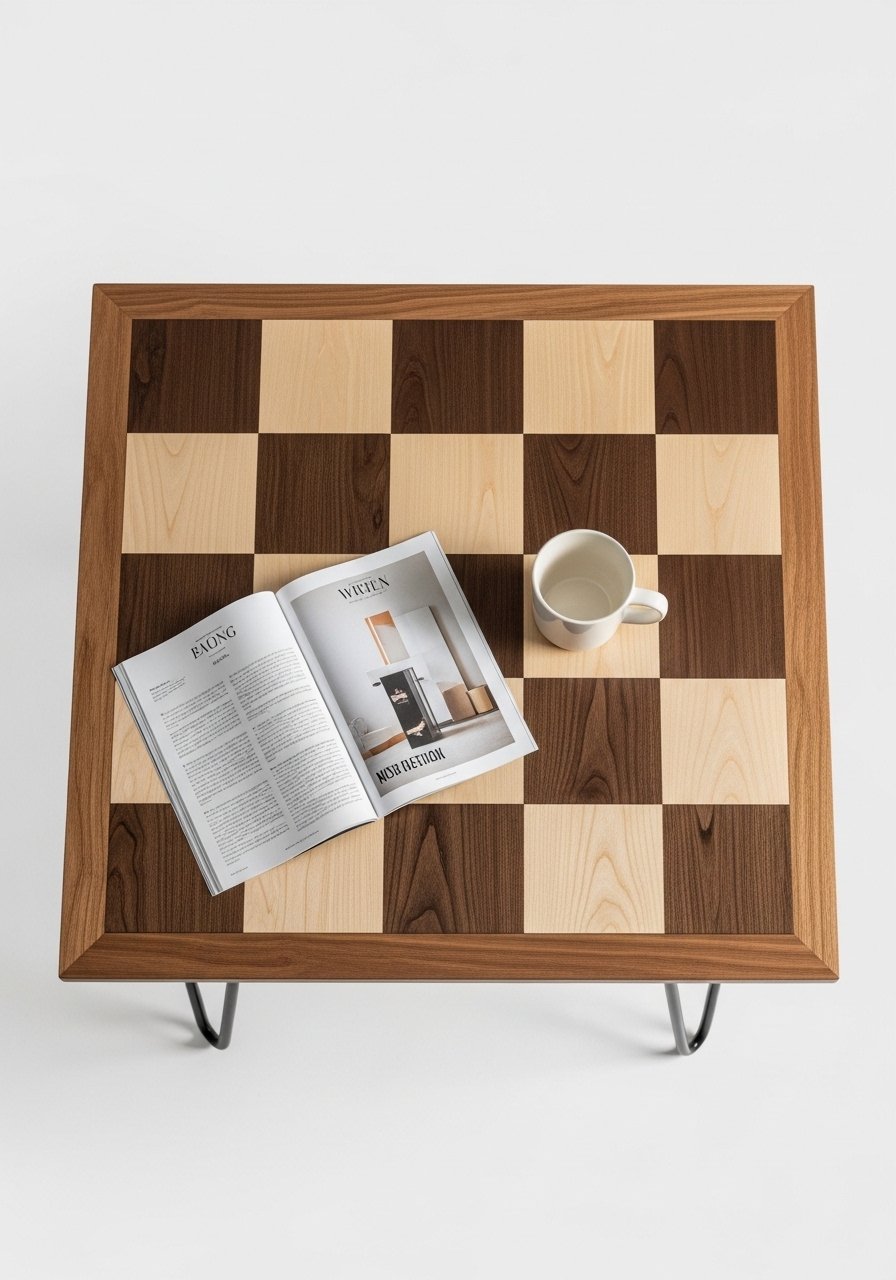
- Checkerboard Inlay Top with Hairpin Legs — Retro Craftsmanship
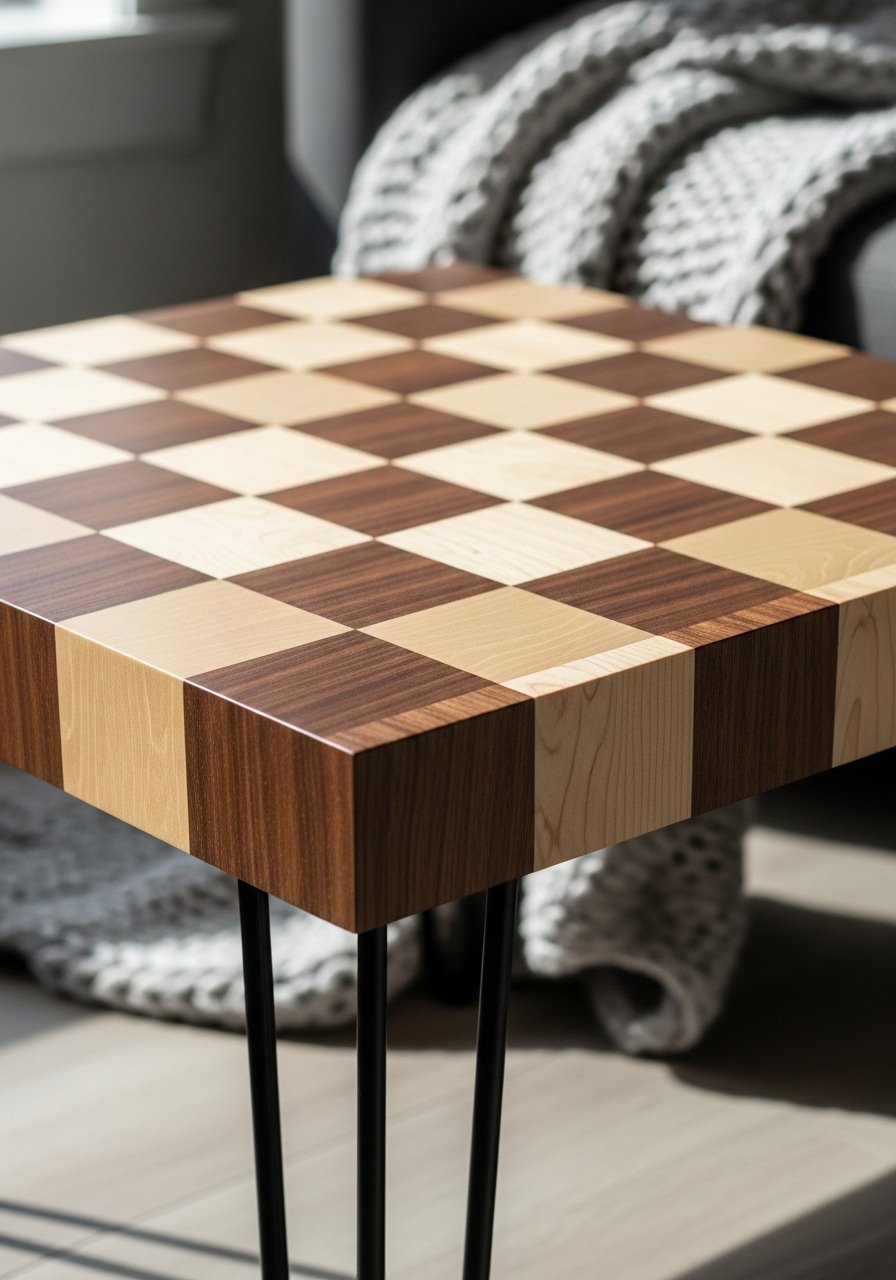
An inlay gives a tactile, handcrafted vibe—great for makers who like precision. The contrast of walnut and maple reads mid century chessboard chic.
Materials
- 1 base MDF panel, 32" x 32" x 3/4"
- Walnut & maple veneer squares, 2" x 2", ~256 pieces
- Veneer adhesive
- Brayer roller
- Utility knife
- Clear satin polyurethane, 8 oz
- 4 hairpin legs, 14"
Instructions
- Arrange veneer squares on the MDF to plan the pattern.
- Glue down sections using a roller to remove bubbles.
- Trim edges with a sharp knife for clean lines.
- Sand lightly and apply two coats of satin polyurethane; dry 2–4 hours between coats.
- Attach hairpin legs with pre-drilled holes.
- Allow full cure 24 hours before use.
How to Display or Gift It
- Center near a patterned rug for graphic layering.
- Gift with a set of coasters cut from spare veneer.
- Store flat with protective paper between surfaces.
- Epoxy River Table Top with Hairpin Legs — Luxe Mid Century
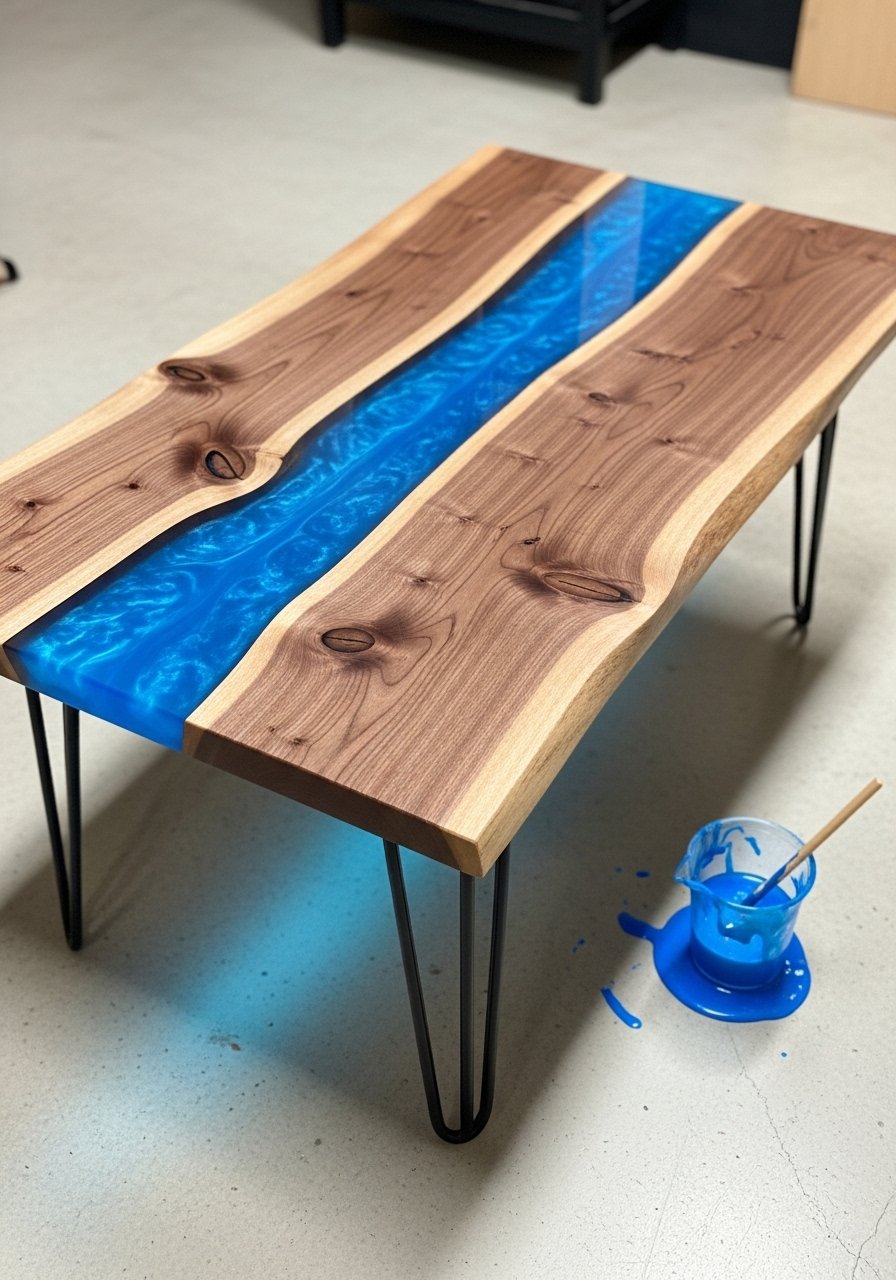
Epoxy rivers add a glossy, jewel-like vein through a tabletop. This one reads mid century when paired with clean hairpin legs.
Materials
- 2 walnut slabs, total 36" x 18"
- Epoxy resin kit, clear, 16 oz (mixed per kit instructions)
- Blue alcohol ink, a few drops
- Painter's tape
- Mixing cups and sticks
- Orbital sander, 120–220 grit
- 4 hairpin legs, 16"
- Heat gun to remove bubbles
Instructions
- Join slabs with voids for the river; seal underside with thin epoxy to stop leaks.
- Tape the pour area and mix epoxy per kit—follow exact resin ratios.
- Tint resin with blue ink and pour in layers 1/8" max per pour to avoid overheating.
- Use a heat gun to remove bubbles; allow 12–24 hours between pours; total cure 72 hours before sanding.
- Sand resin flush starting with 120 grit through 400 grit; polish if desired.
- Attach hairpin legs after full cure.
How to Display or Gift It
- Place on a neutral rug to highlight the resin’s color.
- Add minimal accents—ceramic vase and a single book.
- For gifting, include care tips and avoid placing hot items directly on resin.
- A heat gun helps with small resin bubbles.
- Distressed Painted Top with Metal Inlay — Farmhouse Mid Century
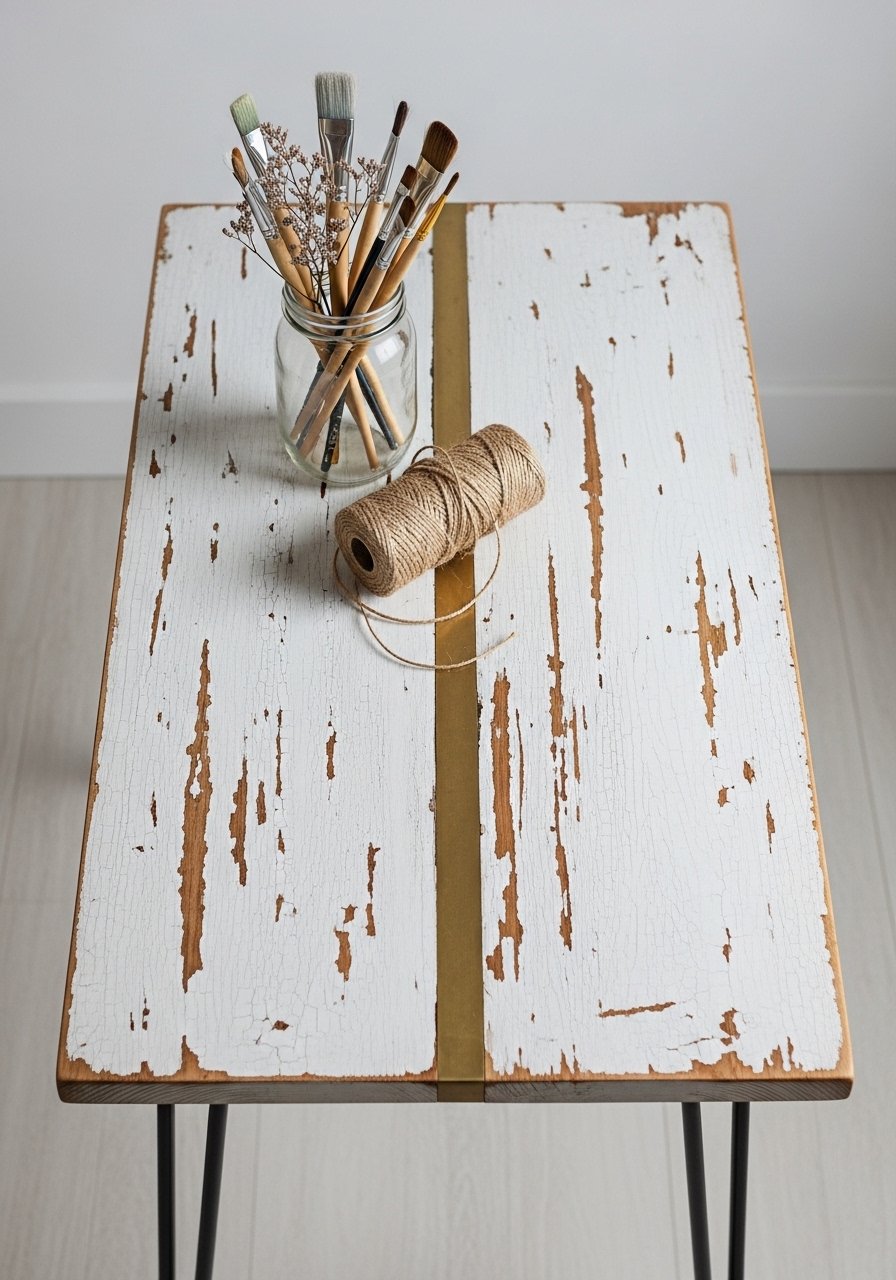
A slightly distressed finish softens mid century geometry for a farmhouse-cottage hybrid. The metal inlay adds a refined edge.
Materials
- 1 pine tabletop, 36" x 18" x 3/4"
- Chalk paint, white, 8 oz
- Steel or brass strip, 36" x 1/4"
- Wood glue and small nails
- Sandpaper 120–220 grit
- Clear wax or matte sealer, 4 oz
- 4 hairpin legs, 16"
Instructions
- Paint tabletop with two thin coats of chalk paint; dry 1–2 hours between coats.
- Sand edges and corners to distress lightly.
- Route a shallow channel for the metal strip and glue/nail into place.
- Seal with wax or matte sealer; cure 24 hours.
- Attach legs with pre-drilled holes.
How to Display or Gift It
- Pair with a linen runners and vintage books.
- For gifting, include a small wax tin and care instructions.
- Store wrapped in soft blankets to protect the paint.
- Tiled Top Coffee Table with Hairpin Legs — Mediterranean Flair
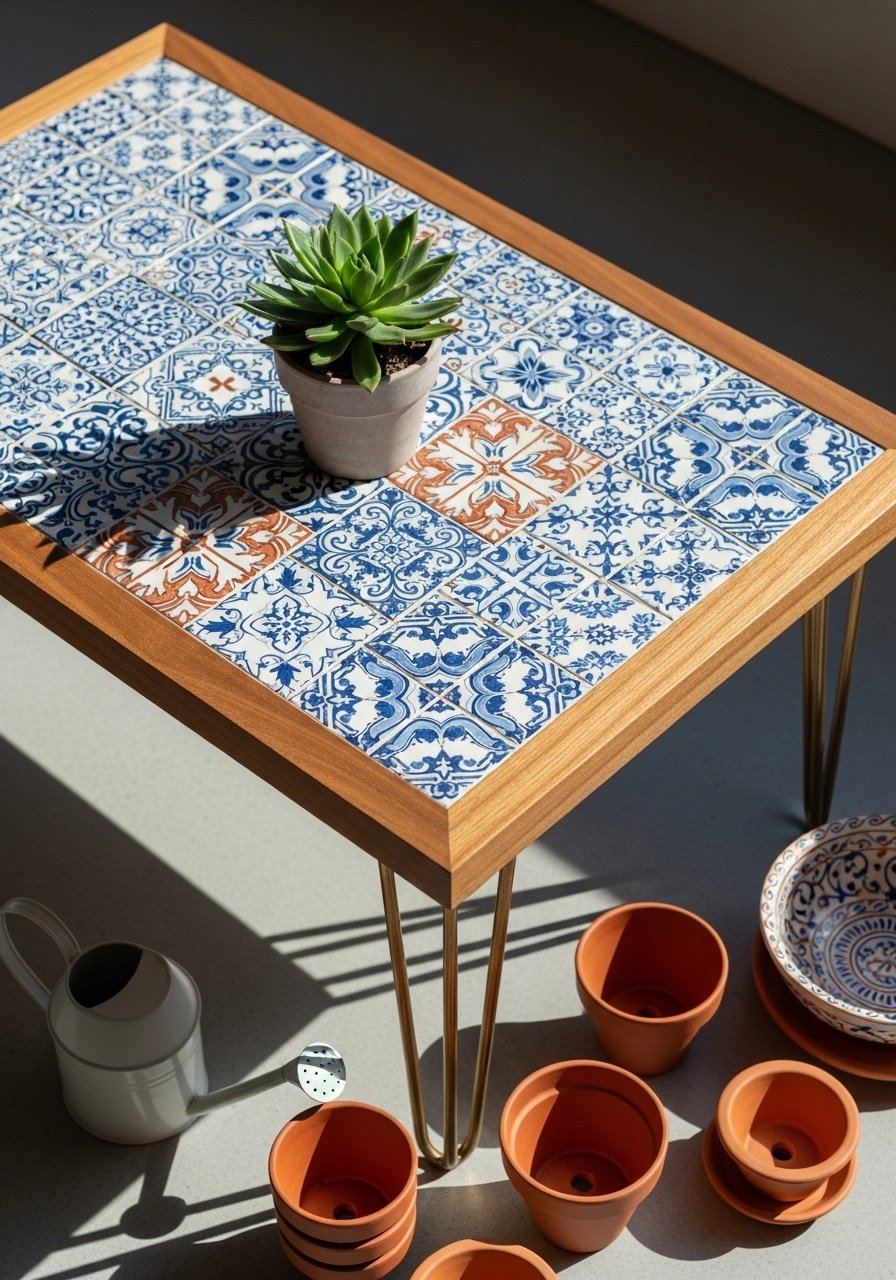
Tiles give endless pattern possibilities and are durable for surfaces. Grout choice changes the mood—light for airy, dark for moody.
Materials
- 1 wooden frame top, 36" x 18"
- Ceramic tiles, 4" x 4", arrange to fit
- Thinset adhesive
- Grout, sanded or unsanded depending on gaps
- Tile spacers
- Sealer for grout
- 4 hairpin legs, 14"
Instructions
- Dry-fit tiles to plan layout; adjust until centered.
- Spread thinset and set tiles; use spacers for uniform grout lines.
- Allow thinset to cure 24 hours.
- Grout tiles per manufacturer instructions; wipe excess and let set 24 hours.
- Seal grout and intro edges; let cure 24 hours.
- Attach hairpin legs with screws into the wooden frame.
How to Display or Gift It
- Works with terracotta pots and woven textiles.
- For gifting, pair with a matching coaster set.
- Keep spare tiles in a labeled box for repairs.
- DIY coffee table with hairpin legs — Mid Century Round Walnut with Brass Accents
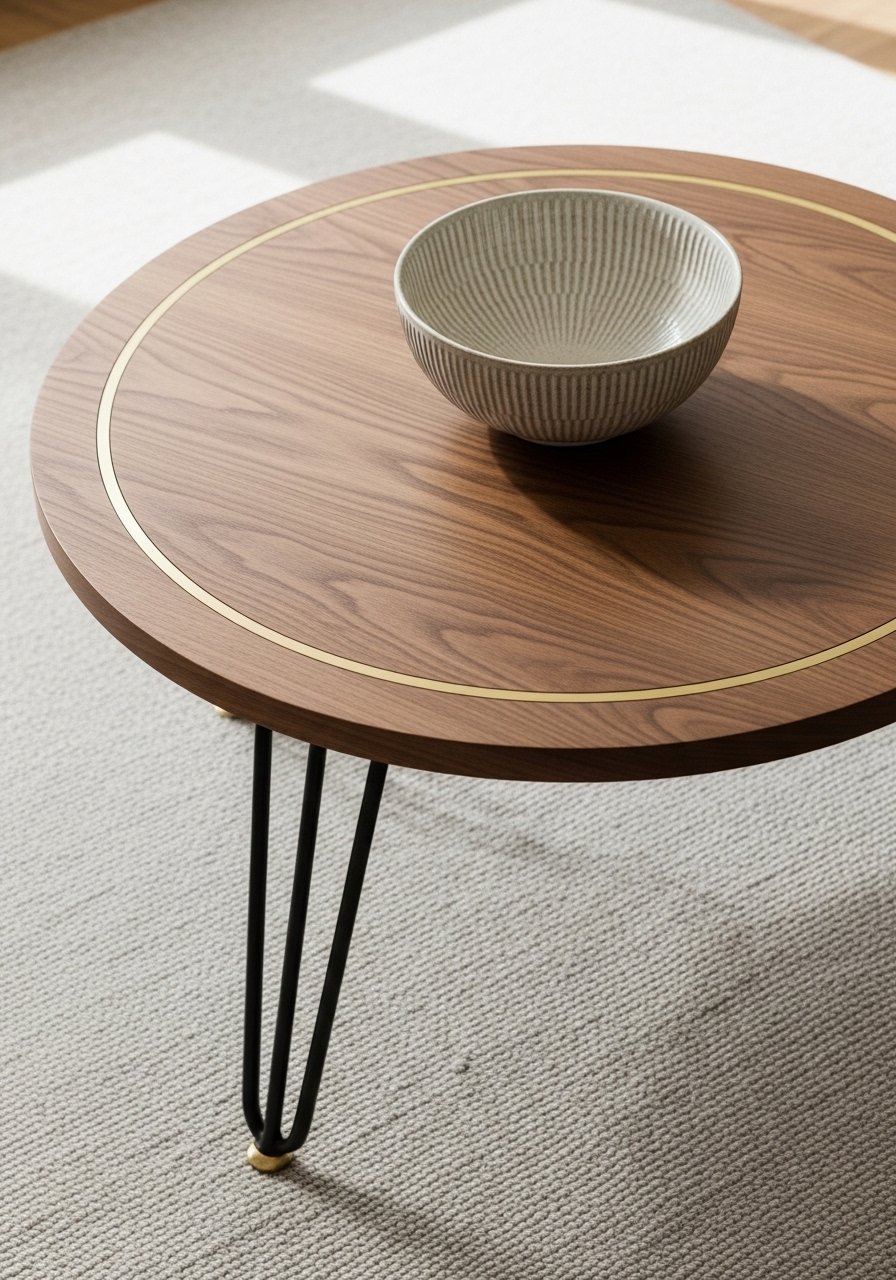
Round forms soften a living area while staying rooted in mid century proportions. A brass inlay adds a subtle, luxe detail.
Materials
- 1 round walnut top, 36" diameter
- Brass inlay strip, 1/8"
- Wood glue and inlay adhesive
- Orbital sander
- Danish oil
- 4 hairpin legs, 14"
- Sanding sponge
Instructions
- Cut or source a 36" round walnut top; sand to 220 grit.
- Router a shallow groove for the brass inlay; dry-fit the brass.
- Glue brass inlay into groove and clamp; let set 2–4 hours.
- Fill any gaps with colored epoxy if needed; cure 24 hours.
- Finish with Danish oil, two coats, 24 hours apart.
- Attach legs and allow final cure 24 hours.
How to Display or Gift It
- Center under a round pendant for a cohesive vignette.
- Wrap with kraft and ribbon for a chic housewarming present.
- Store flat and cushioned when not assembled.
- Mosaic Pebble Top with Hairpin Legs — Textured Natural
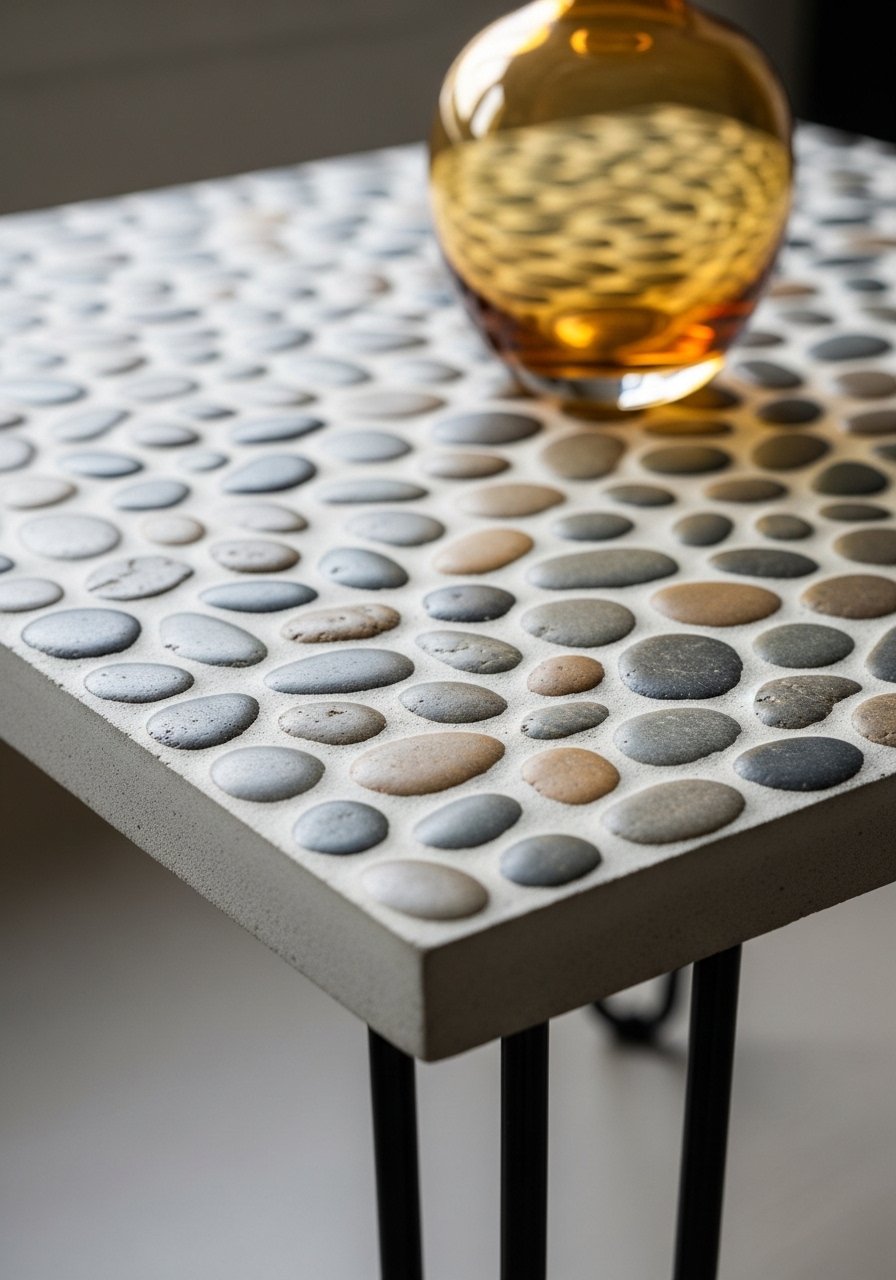
Pebble mosaics bring an earthy, tactile surface that begs to be touched. It’s a bit time-consuming but forgiving for imperfect grids.
Materials
- Plywood base, 36" x 18" x 3/4"
- River pebbles, approx 5–8 lbs
- Thinset adhesive
- Grout, neutral color
- Sealer for grout and pebbles
- 4 hairpin legs, 12"
Instructions
- Dry lay pebbles to create an even surface; trim as needed.
- Spread thinset and press pebbles in, keeping the surface level.
- Allow thinset to cure 24 hours.
- Grout between pebbles and wipe clean; cure 24 hours.
- Seal grout and pebbles; cure per sealer instructions.
- Attach hairpin legs and let cure.
How to Display or Gift It
- Works well in a sunroom or coastal cottage.
- Add low-maintenance succulents as styling accents.
- For gifting, include a small bottle of sealer for future refreshes.
- Geometric Inlay with Contrasting Woods — Sculptural Mid Century
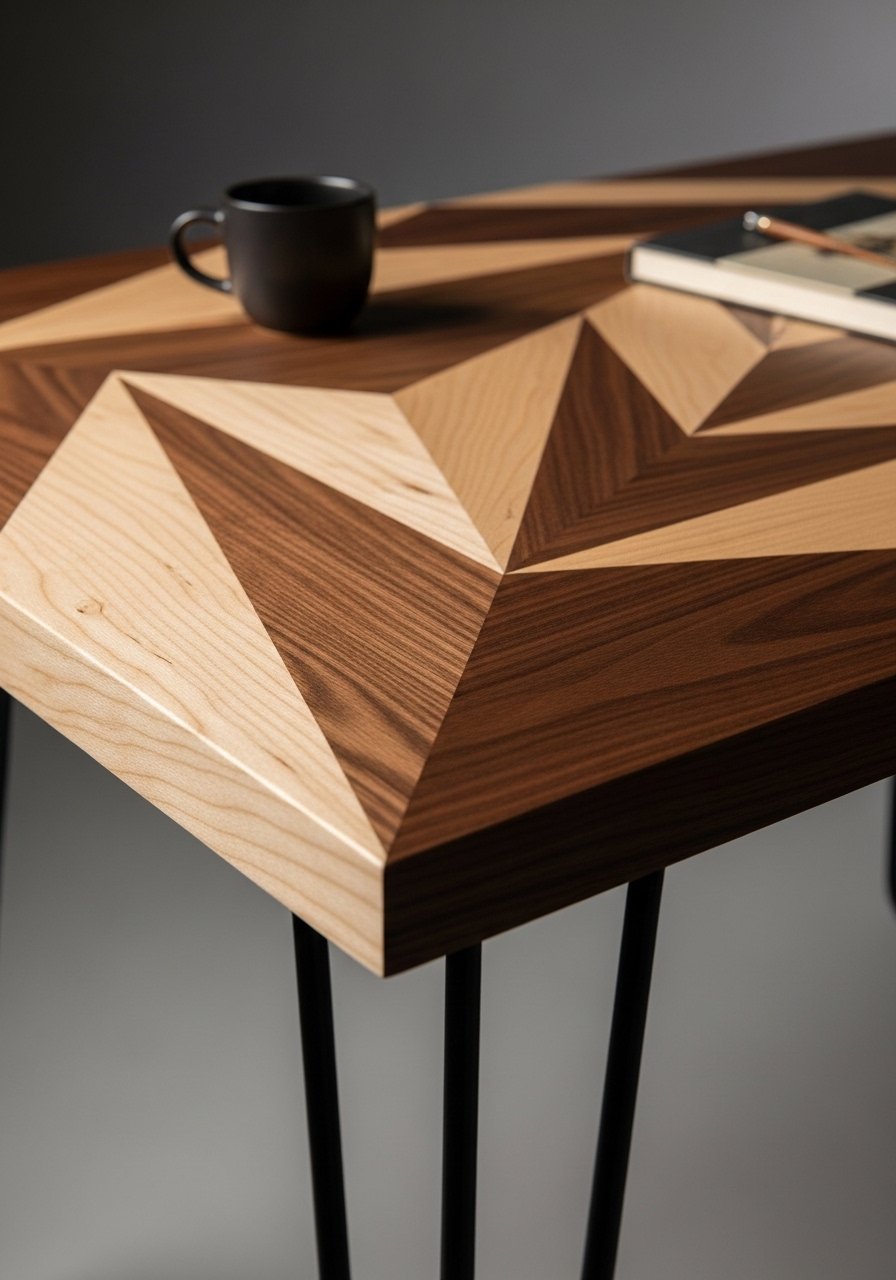
Geometric inlay shows craftsmanship and creates a bold focal point. The precision makes it rewarding for intermediate woodworkers.
Materials
- Base top, 36" x 18"
- Maple and walnut veneers cut into triangles
- Veneer adhesive
- Brayer roller
- Sharp utility knife
- Clear satin finish
- 4 hairpin legs, 16"
Instructions
- Plan and cut veneer triangles precisely.
- Lay out the pattern to ensure alignment.
- Glue veneers sequentially and roll to remove bubbles.
- Trim edges and sand lightly.
- Seal with satin finish; allow 2–4 hours between coats.
- Attach legs after final cure.
How to Display or Gift It
- Pair with a sculptural lamp to echo geometric lines.
- Gift to a design-lover with a note about woods used.
- Store flat and separated by thin paper.
- Reclaimed Window Pane Top with Resin Fill — Vintage Meets Modern
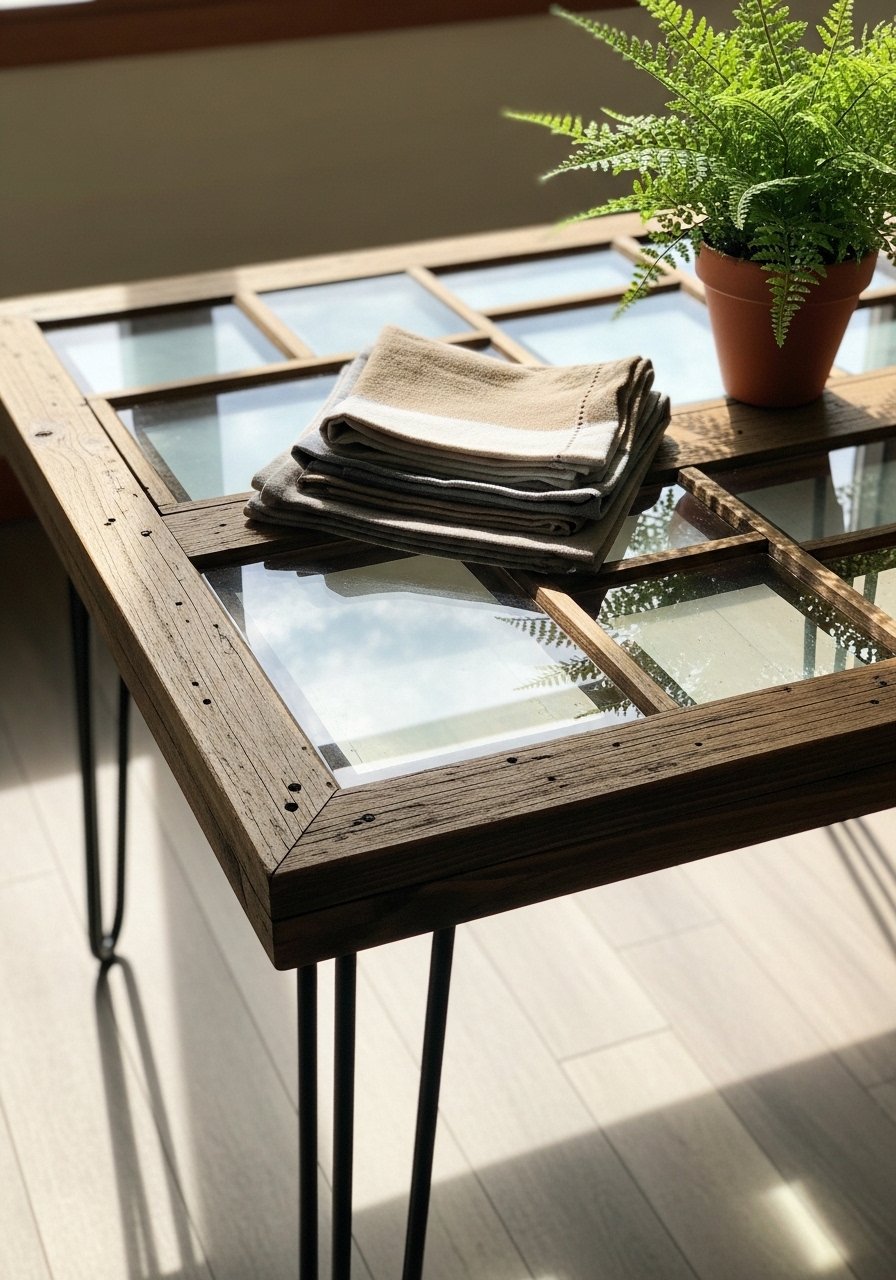
Window panes bring character—when set into a wooden frame and stabilized with resin, they become durable and full of storytelling marks.
Materials
- Reclaimed window panes trimmed to fit
- Wooden frame for top, 36" x 18"
- Epoxy resin kit, clear, 16 oz
- Silicone sealant for gaps
- Mixing cups and sticks
- 4 hairpin legs, 14"
Instructions
- Stabilize panes into frame with silicone; allow 24 hours to set.
- Tape underside and mix epoxy per kit instructions.
- Pour resin to fill gaps and level surface; remove bubbles with a heat gun.
- Allow resin to cure 72 hours before sanding lightly and polishing.
- Attach hairpin legs after full cure.
How to Display or Gift It
- Add a single vintage ceramic cup to accent the glass.
- Wrap for gifting with extra bubble wrap and a care card.
- Store flat and protected during transport.
- Industrial Steel Inset with Hairpin Legs — Masculine Mid Century
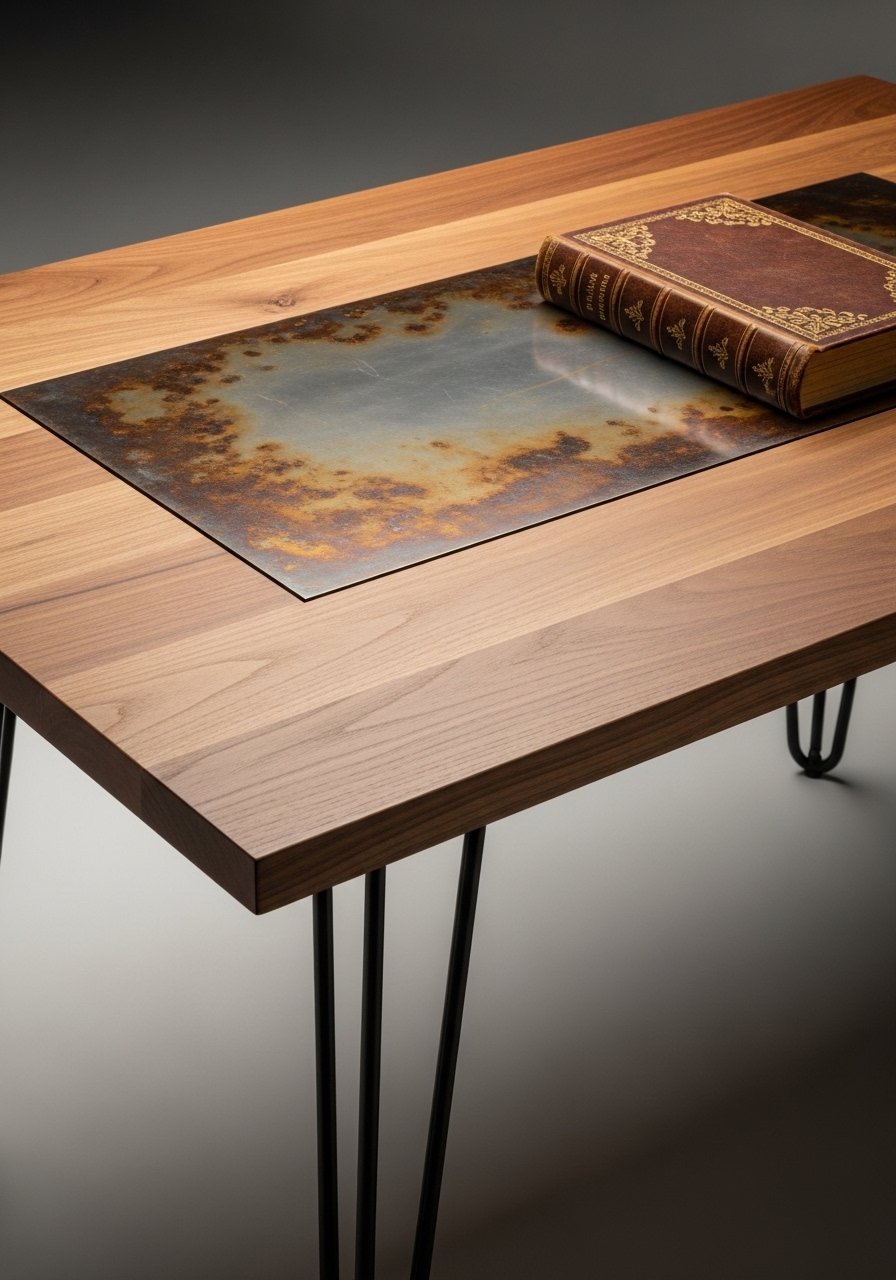
A steel inset provides an industrial contrast against warm wood. It’s tactile and great for homes with eclectic, masculine decor.
Materials
- Wooden top, 36" x 18"
- Steel plate inset, 32" x 10"
- Metal epoxy adhesive or small screws
- Angle grinder with flap disc for finishing edges
- Clear sealer for metal
- 4 hairpin legs, 16"
Instructions
- Cut a recess for the steel inset and dry-fit the plate.
- Finish metal edges with angle grinder; wipe clean.
- Secure plate with metal epoxy or countersunk screws.
- Seal metal edges and the wood seam with clear sealer; let cure 24 hours.
- Sand wood face, finish with oil, and attach legs.
How to Display or Gift It
- Use with leather furniture and warm lighting.
- Gift with a small polishing cloth for metal care.
- Store in a moisture-controlled area to avoid rust.
- Refinished Mid Century Table Top with Modern Hairpin Legs — Upcycle
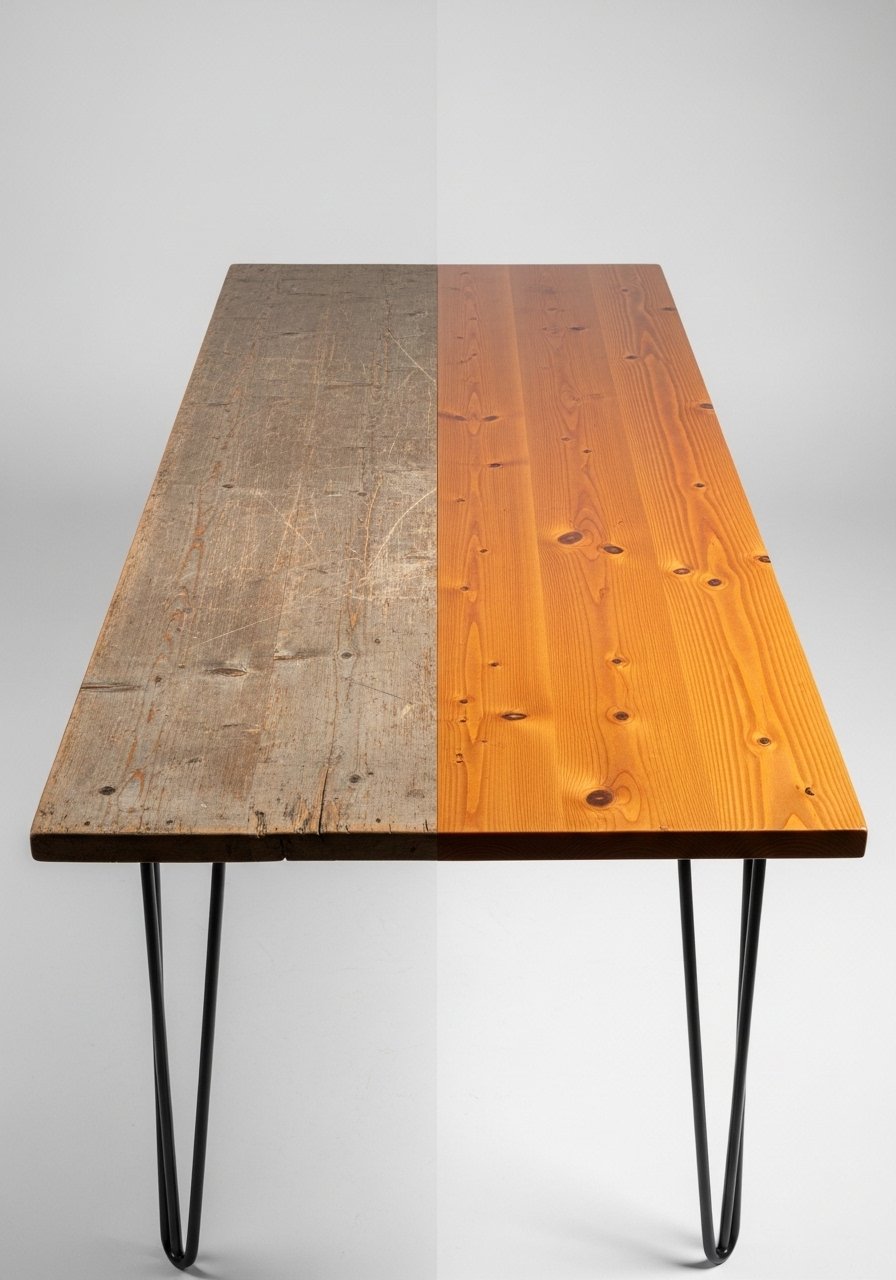
Upcycling an old top keeps character and reduces waste. This project gives an old piece a fresh mid century silhouette.
Materials
- Vintage tabletop (reclaimed)
- Orbital sander
- 80–220 grit sandpaper
- Wood filler if needed
- Clear satin polyurethane, 8 oz
- 4 hairpin legs, 16"
Instructions
- Strip old finish with a chemical stripper or sand heavily with an orbital sander.
- Fill cracks and holes with wood filler; sand smooth.
- Apply two coats of polyurethane with 2–4 hours drying between coats.
- Attach hairpin legs with pre-drilled holes.
- Let the finish cure 24 hours before styling.
How to Display or Gift It
- Keep the top as-is to showcase vintage marks.
- Gift with a small jar of finish for future touch-ups.
- Store upright in a climate-stable spot until finished.
- Tile Mosaic Top with Resin Finish and Hairpin Legs — Colorful Statement
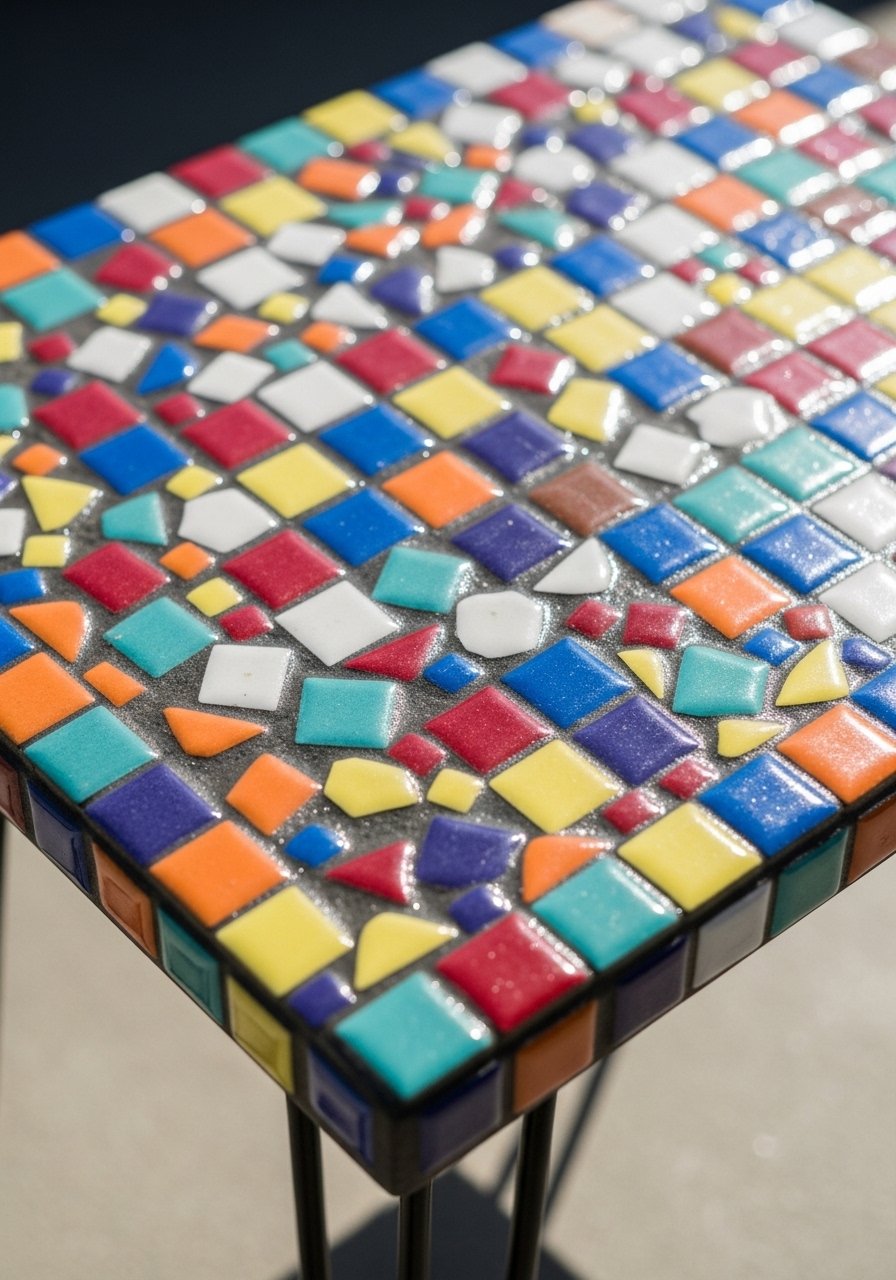
Mosaic tiles sealed with resin make a smooth, durable surface and allow bright pops of color that feel playful and retro.
Materials
- Plywood base, 30" x 20"
- Colored ceramic tile pieces
- Thinset adhesive
- Grout
- Clear epoxy topcoat, resin kit 12–16 oz
- 4 hairpin legs, 14"
Instructions
- Glue tiles to the plywood and allow thinset to cure 24 hours.
- Grout tiles; let set 24 hours and clean thoroughly.
- Pour a thin epoxy topcoat to seal and create a glossy surface; use a heat gun to remove bubbles.
- Allow full cure 72 hours before attaching legs.
- Attach hairpin legs and let final cure 24 hours.
How to Display or Gift It
- Use as a playful focal point in a bright living room.
- Gift to a friend who loves color; include a small grout cleaner.
- Store flat and protected from dust.
- Slim Lap Top with Hairpin Legs — Coffee Table for Narrow Spaces
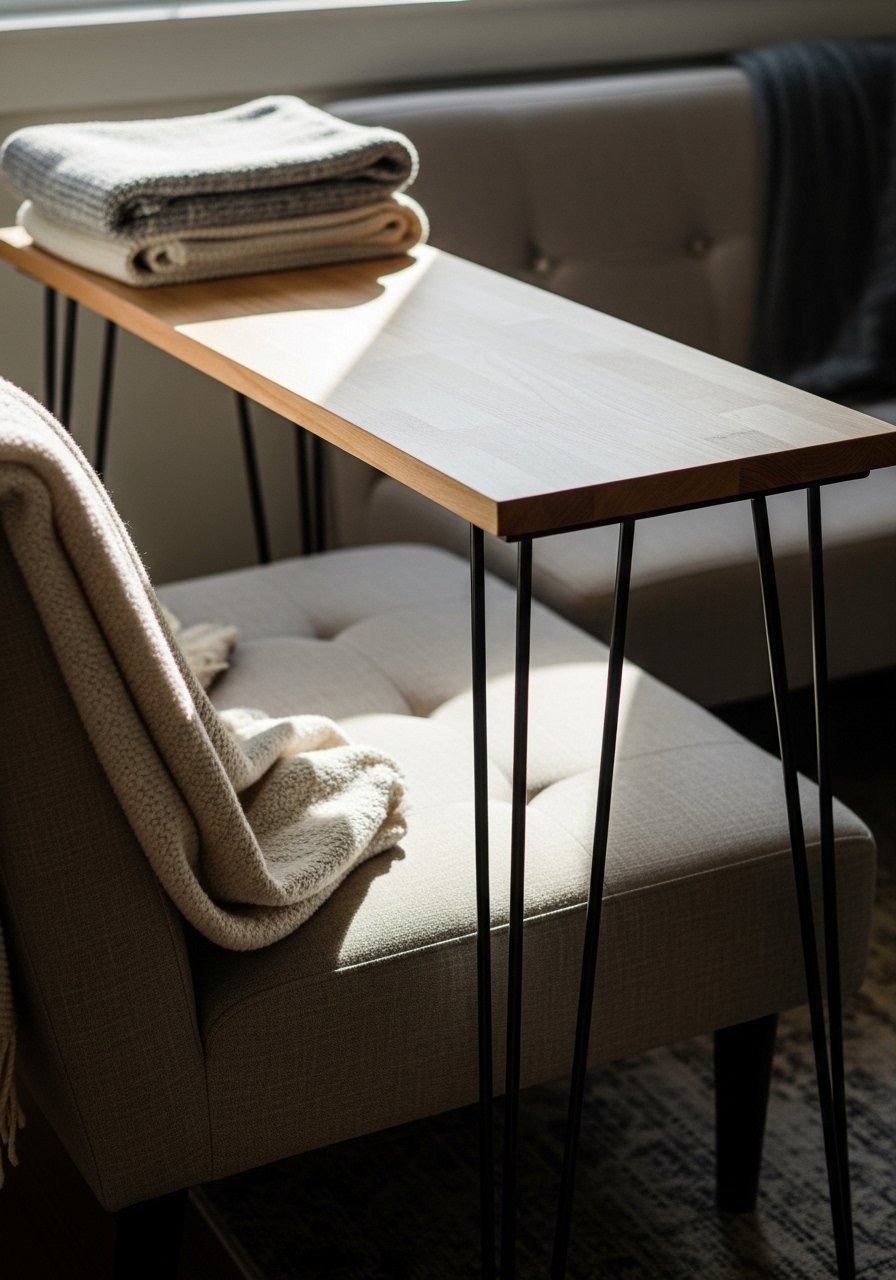
Designed for narrow layouts, this slim table gives function without crowding the space. Great for apartments and entryways.
Materials
- Top, 36" x 12" x 3/4"
- 4 hairpin legs, 12"
- Sanding sponge
- Clear satin finish or oil, 8 oz
- Wood glue (if laminating thin boards)
- Drill and screws
Instructions
- Cut top to 36" x 12" and sand to 220 grit.
- Apply finish or oil; allow 2–4 hours dry between coats.
- Pre-drill leg holes and attach hairpin legs.
- Let finish cure 24 hours before use.
How to Display or Gift It
- Ideal in front of a small sofa with minimal decor.
- Bundle as a housewarming gift with a small tray.
- Store vertically between pads to save space.
- Checkerboard Painted with Wood Trim — Retro Minimal
A bold, mid century graphic without the work of inlay—painted blocks inside a wood frame give crisp contrast.
Materials
- Base top, 32" x 32"
- Painter’s tape
- Acrylic latex paint, two colors
- Walnut trim strip for border
- Clear satin sealer
- 4 hairpin legs, 14"
Instructions
- Tape off checkerboard sections and paint two thin coats; dry 1–2 hours between.
- Remove tape; attach walnut trim with glue and small nails.
- Seal surface with satin sealer; cure 24 hours.
- Attach legs and allow final cure.
How to Display or Gift It
- Pair with mid century-style accessories.
- Gift wrapped in kraft paper for a retro-loving friend.
- Store flat with protective paper between surfaces.
- Scandinavian Light Oak Slatted Top with Hairpin Legs — Airy & Warm

Light oak and slim slats keep the table visually light. It's functional and suited for Scandinavian or Japandi rooms.
Materials
- Oak slats, 36" x 2" x 3/4", quantity to fill width
- Cross rails
- Wood glue
- 120 & 220 grit sandpaper
- Clear matte varnish, 8 oz
- 4 white hairpin legs, 16"
Instructions
- Glue slats to cross rails and clamp; allow glue to set 2–4 hours.
- Sand smooth and finish with matte varnish, two coats, 2–4 hours between.
- Attach legs and let cure 24 hours.
How to Display or Gift It
- Use with light linens and ceramics for a cohesive palette.
- Make multiples as a nesting set and gift as a pair.
- Store flat and protected from moisture.
- Leather Strap Detail Top with Hairpin Legs — Luxe Textural
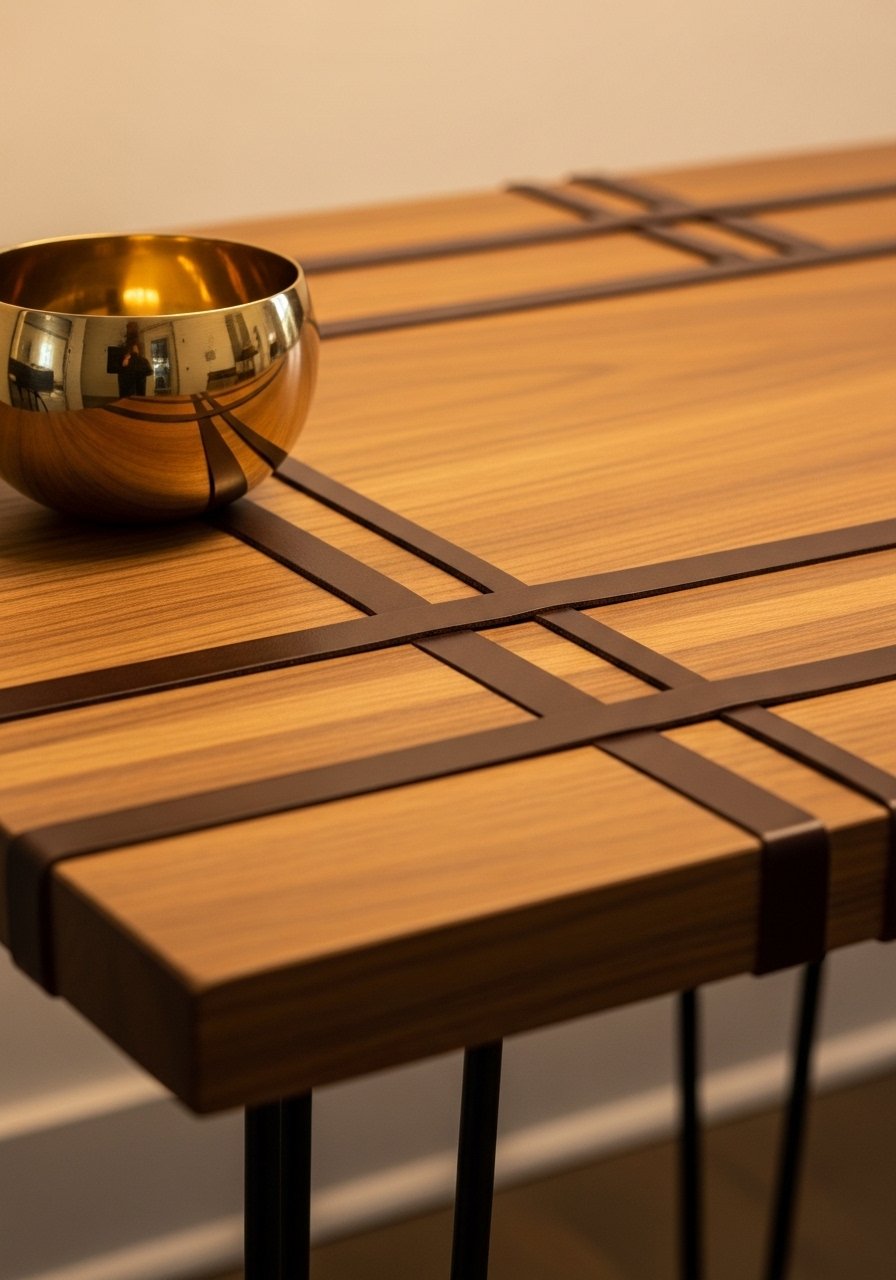
Leather straps add warmth and tactile contrast. They age beautifully and feel hand-crafted.
Materials
- Wooden top, 36" x 18"
- Vegetable-tanned leather straps, 1" wide, 4–6 strips
- Contact adhesive for leather to wood
- Clear satin sealer
- 4 hairpin legs, 16"
Instructions
- Mark strap positions and glue leather strips in place with contact adhesive.
- Allow adhesive to dry fully 24 hours.
- Trim and finish edges; seal surface lightly to protect leather edges.
- Attach hairpin legs and allow final cure.
How to Display or Gift It
- Style with brass accents and dark ceramics.
- For gifting, include a leather conditioner sample.
- Store flat and avoid heavy humidity.
- Concrete Top with Hairpin Legs — Urban Mid Century
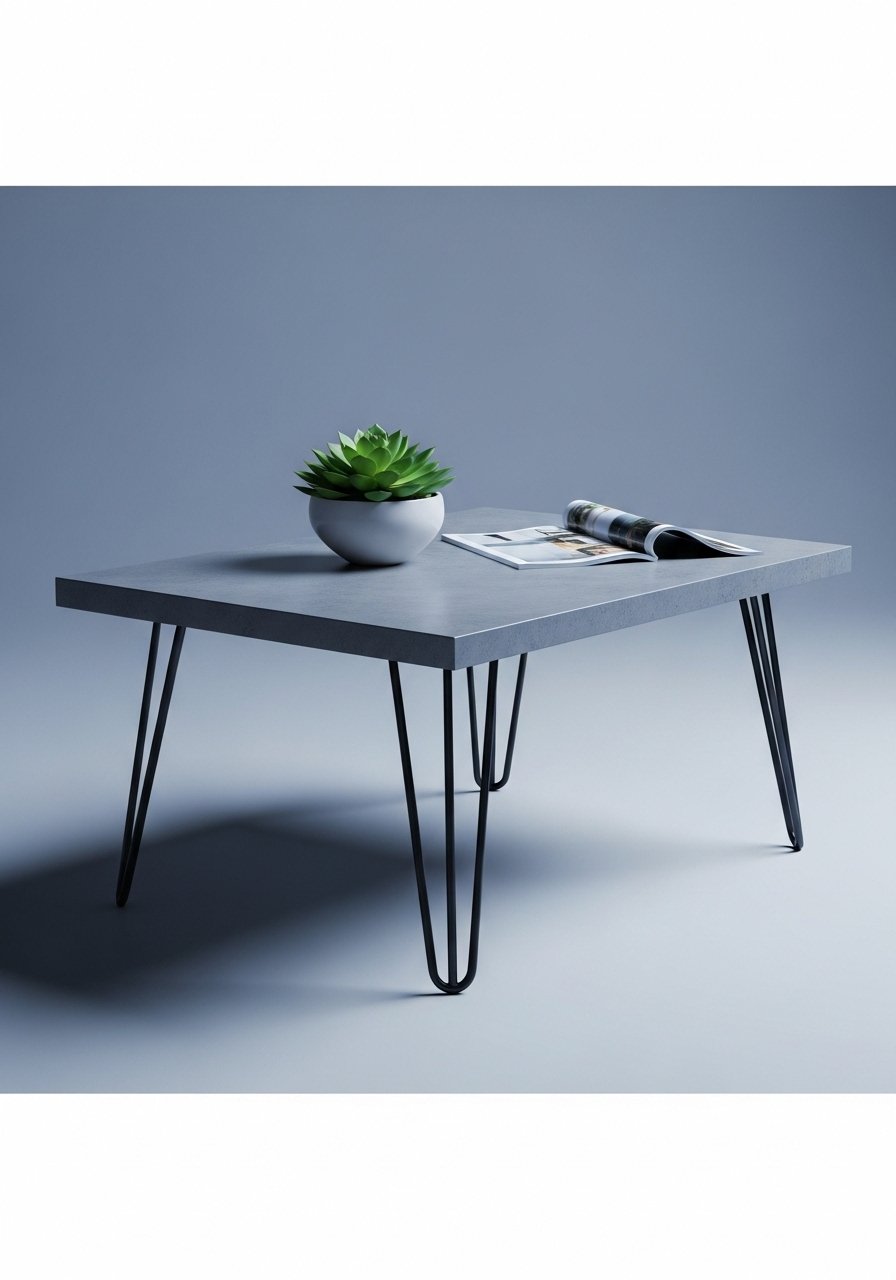
A lightweight concrete mix gives industrial weight with refined edges; pairing with hairpin legs keeps the profile mid century.
Materials
- Concrete mix for countertops, 6–8 lbs
- Mold for top, 36" x 18"
- Rebar or mesh reinforcement
- Trowel and mixing bucket
- Concrete sealer
- 4 hairpin legs, 14"
Instructions
- Prepare mold and reinforce with mesh; mix concrete per bag instructions.
- Pour into mold and tamp to remove air; smooth with trowel.
- Let set 24–48 hours; demold carefully.
- Sand edges if desired and apply sealer; curing may take 3–7 days for full strength.
- Attach hairpin legs using threaded inserts or epoxy anchors.
How to Display or Gift It
- Pair with leather or neutral textiles for contrast.
- For gifting, include a small care card about concrete's patina.
- Store carefully to avoid chipping until legs are attached.
- Floating Tray Top with Raised Edges and Hairpin Legs — Functional Elegance
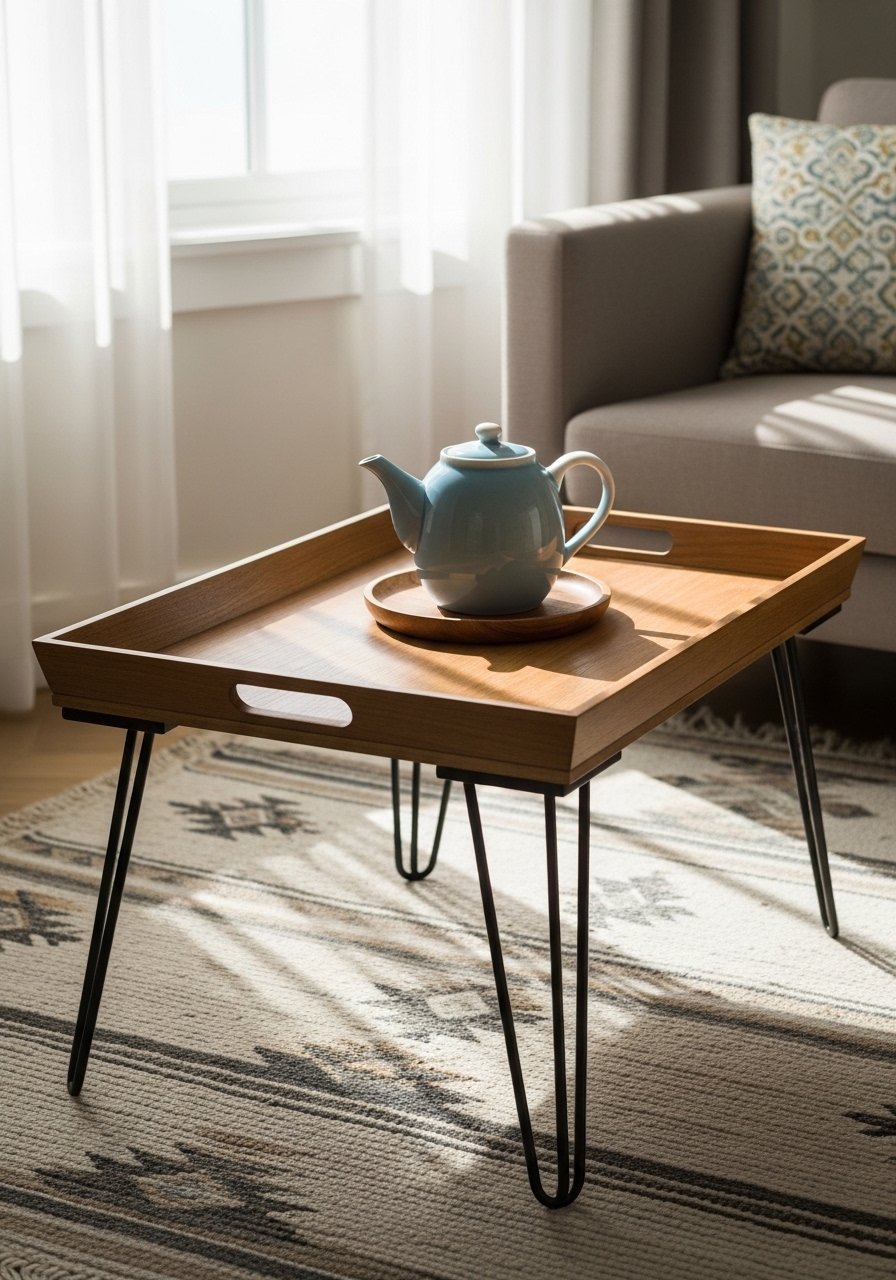
Raised edges make the top practical for serving. It reads modern but keeps the mid century low profile.
Materials
- Top board, 36" x 20"
- Edge strips, 1" x 1/2"
- Wood glue and brad nails
- 120 & 220 grit sandpaper
- Clear oil finish
- 4 hairpin legs, 12"
Instructions
- Glue and nail edge strips to create raised borders; clamp and let dry 2–4 hours.
- Sand and apply oil finish, two coats, 24 hours apart.
- Attach hairpin legs and allow finish to cure 24 hours.
How to Display or Gift It
- Use as a breakfast tray or low coffee table.
- Gift as a duo with matching coasters.
- Store stacked flat with interleaving paper.
- Folding Top with Removable Hairpin Legs — Portable Mid Century
Removable legs make the table portable for picnics or occasional use. It’s clever for small-space living.
Materials
- Top, 36" x 18"
- Threaded inserts for removable legs
- 4 hairpin legs, 16" (removable type)
- Drill and tap set
- Clear finish
- Carrying strap (optional)
Instructions
- Install threaded inserts at leg locations per manufacturer torque specs.
- Finish the tabletop and allow 24 hours cure.
- Screw in legs as needed and remove for storage or transport.
- Store legs in a labeled bag to prevent misplacement.
How to Display or Gift It
- Great for apartment dwellers and students.
- Gift with a canvas storage bag for legs and hardware.
- Store top flat and legs in a labeled organizer bin.
- Mid Century Console-Height Coffee Table with Hairpin Legs — Multi-Use
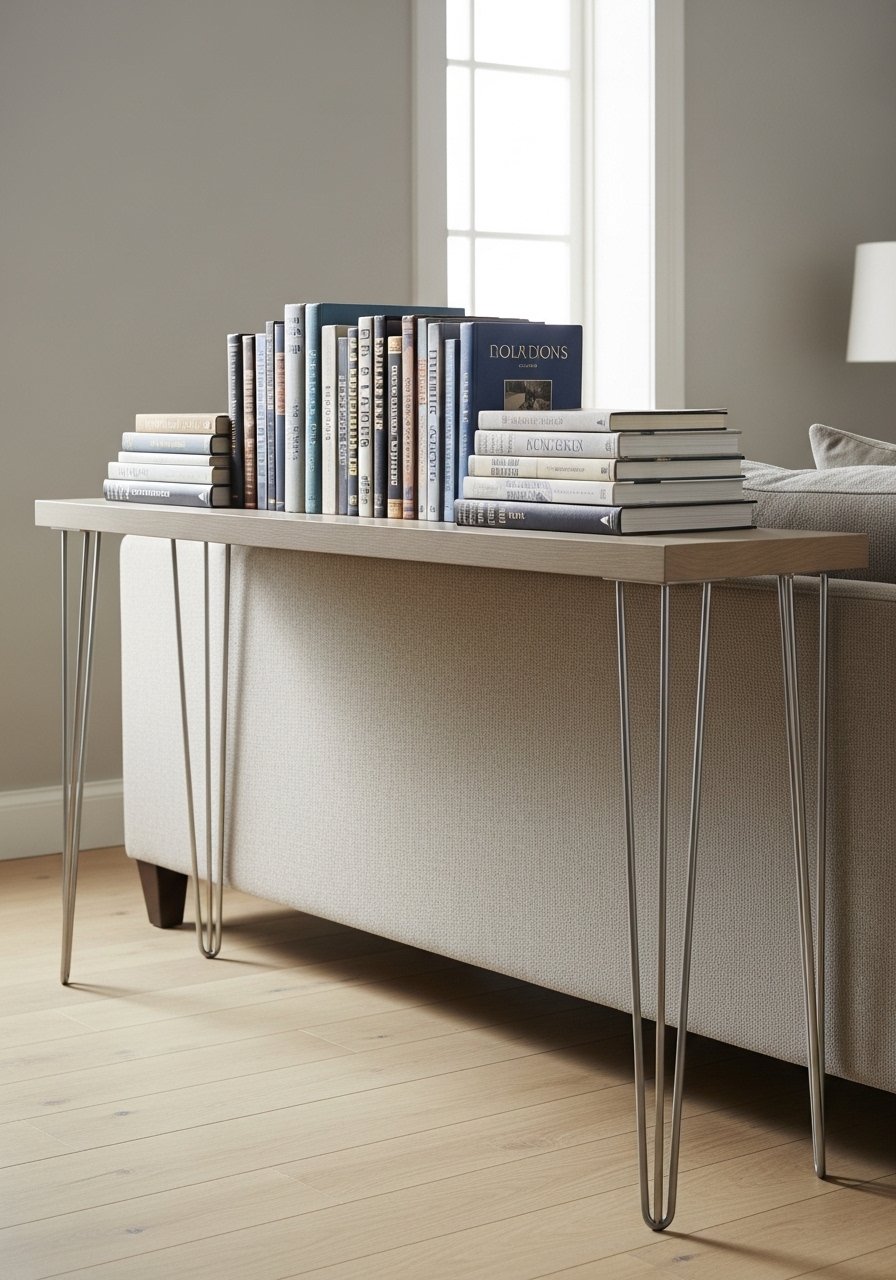
Slightly taller, this piece doubles as console or extra dining surface—useful for modern entertaining.
Materials
- Top, 48" x 14" x 1"
- 4 hairpin legs, 20"
- Orbital sander
- Danish oil or satin varnish
- 120–220 grit sandpaper
- Screws and drill
Instructions
- Cut and sand top to dimensions; finish with Danish oil, two coats.
- Pre-drill holes and attach 20" hairpin legs for console height.
- Let finish cure 24 hours before use.
How to Display or Gift It
- Place behind a sofa with lamps and art above.
- Gift as a versatile piece for small spaces.
- Store standing upright with padding.
- Low Platform Coffee Table with Hairpin Legs — Lounge-Style
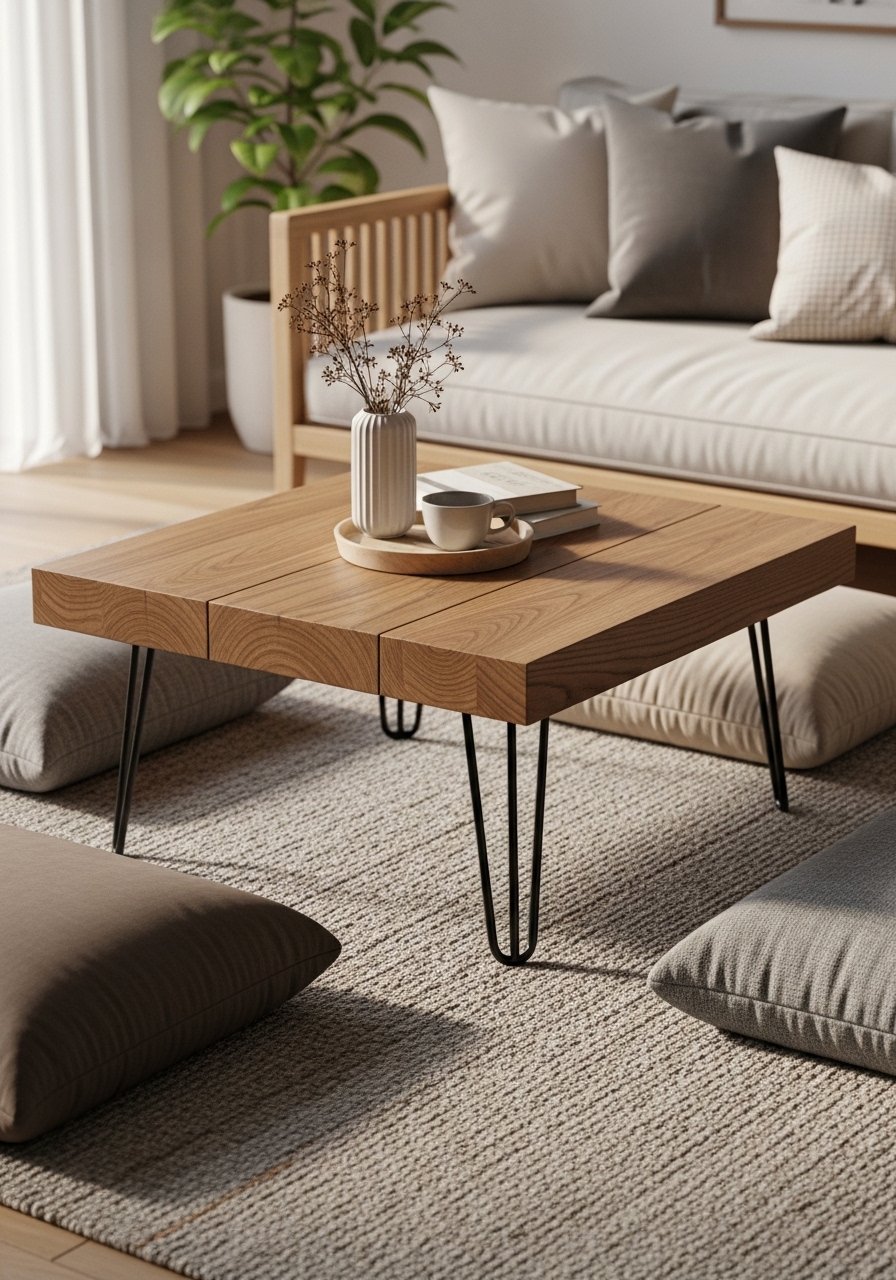
This low platform creates a relaxed, lounge-friendly vibe. Great for layering rugs and floor cushions.
Materials
- Thick top, 42" x 20" x 1.5"
- 4 hairpin legs, 10"
- Orbital sander
- Clear matte sealant
- Sanding sponge
- Screws and drill
Instructions
- Prepare thick top—sand and finish with two coats of matte sealant.
- Attach 10" hairpin legs set slightly inset to tuck them visually under the top.
- Allow final cure 24 hours before placing heavy objects.
How to Display or Gift It
- Layer with floor cushions and a low tray for snacks.
- Gift a set with a matching floor pillow for a cozy starter pack.
- Store horizontally to avoid warping.
I’ve packed these 28 projects with realistic materials, measured dimensions, dry and cure times, and styling ideas so you can pick a weekend build that fits your skill level and decor. Try one or mix techniques—maybe a live edge top with brass accents or a painted sunburst with a resin seam. Save or pin your favorite designs for later and share the article with craft-minded friends who’d love a DIY coffee table with hairpin legs too. What style are you most excited to make—a sleek walnut slab, a colorful mosaic, or a resin river? Trust me, grabbing a quality hot glue gun with temperature control and a good orbital sander will speed up a lot of these builds and save headaches.
Helpful tools to keep on hand across projects: a reliable cordless drill, a set of hairpin legs in the heights you prefer, and a foam brush set for even finishes. Happy building—and don’t forget to pin the project you’ll make first!


