Welcome — if you love thrifty projects that look like they cost a fortune, you’re in the right place. These 24 budget DIY coffee table ideas show how to build charming, custom-looking coffee tables from everyday materials, pallet scraps, thrifted finds, and a few smart supplies. You’ll find styles from farmhouse and boho to Japandi and modern minimal, plus step-by-step instructions, exact measurements, drying times, and troubleshooting tips.
I use tools like my Cricut Explore cutting machine for precise veneer inlays and a low-temp hot glue gun for quick assembly on delicate pieces. Each project lists realistic material quantities and mentions a helpful product where it truly speeds things up. Pin the ones you like and try one this weekend — these budget DIY coffee table ideas are designed so you can make something gorgeous without spending much.
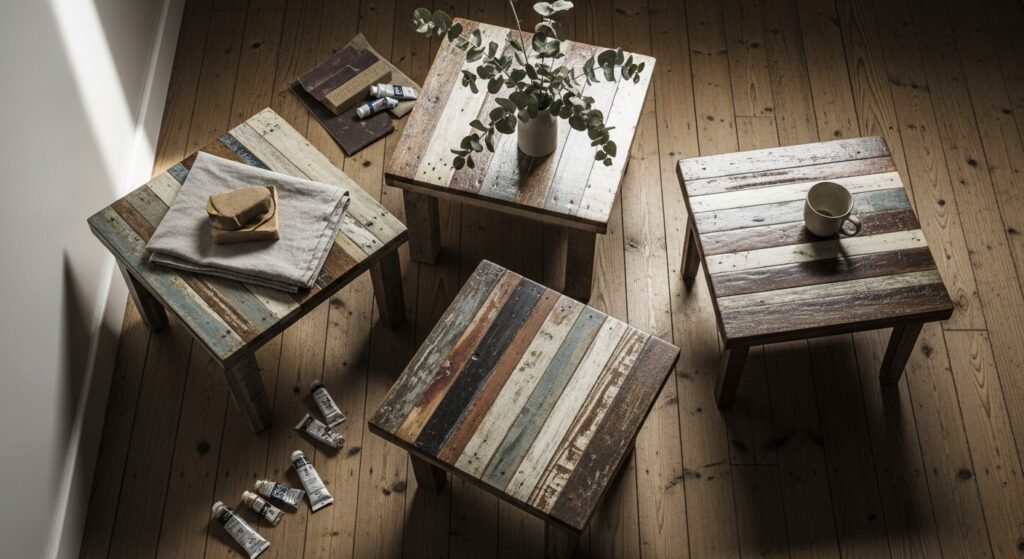
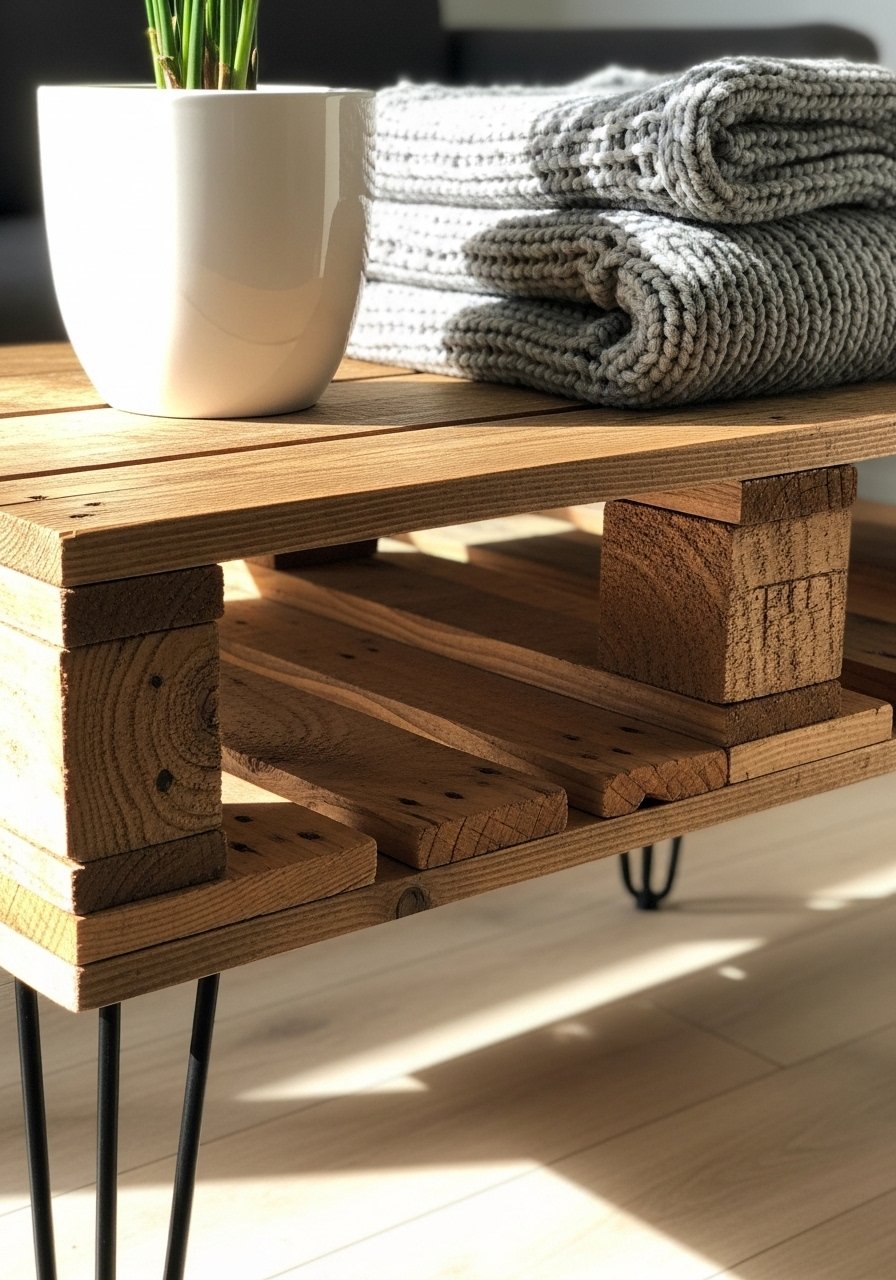
- Rustic Pallet Top Coffee Table
An easy starter: a pallet-top coffee table gives you the textured, reclaimed look for next to nothing. The top is made from disassembled pallet slats, sanded to a soft grainy feel and sealed for warmth. Perfect for beginners or weekend woodworkers who like tactile surfaces and farmhouse vibes. The surface feels slightly rough yet smooth to the palm after sealing.
Materials
- 6 pallet slats (approx 48" x 5.5" x 3/4") or equivalent reclaimed boards
- 2 1×3 pine cleats, 48" long
- 4 hairpin legs, 16" height
- 1/2 cup wood glue (liquid hide glue or PVA)
- 12 wood screws, 1-1/4"
- 120 and 220 grit sandpaper
- 1/2 pint satin polyurethane (or water-based poly)
- Foam brush for poly
- Optional: staining oil (1/4 pint)
Instructions
- Disassemble pallet; remove nails and cut slats to 48" length.
- Lay slats edge to edge, gap as desired (0–1/8"). Clamp or hold in place.
- Screw the two 1×3 cleats across the underside, 4" from each end, countersink screws.
- Sand top with 120 grit until flat, then finish with 220 grit for smoothness.
- Wipe dust with tack cloth. If staining, apply one coat, wipe after 2–5 minutes, let dry 4–6 hours.
- Apply 2 coats satin polyurethane with a foam brush, lightly sanding between coats with 220 grit. Dry time 2–4 hours between coats.
- Attach hairpin legs with provided screws; test stability on flat surface.
How to Display or Gift It
Set this table on a jute rug for a cozy farmhouse look. Add a small tray and candle cluster to style. If gifting, wrap legs separately and include a small hardware kit in a kraft bag. Store unfinished tops flat to avoid warp; I keep mine in a stackable craft organizer until assembly.
- Midcentury Crate Coffee Table with Shelf
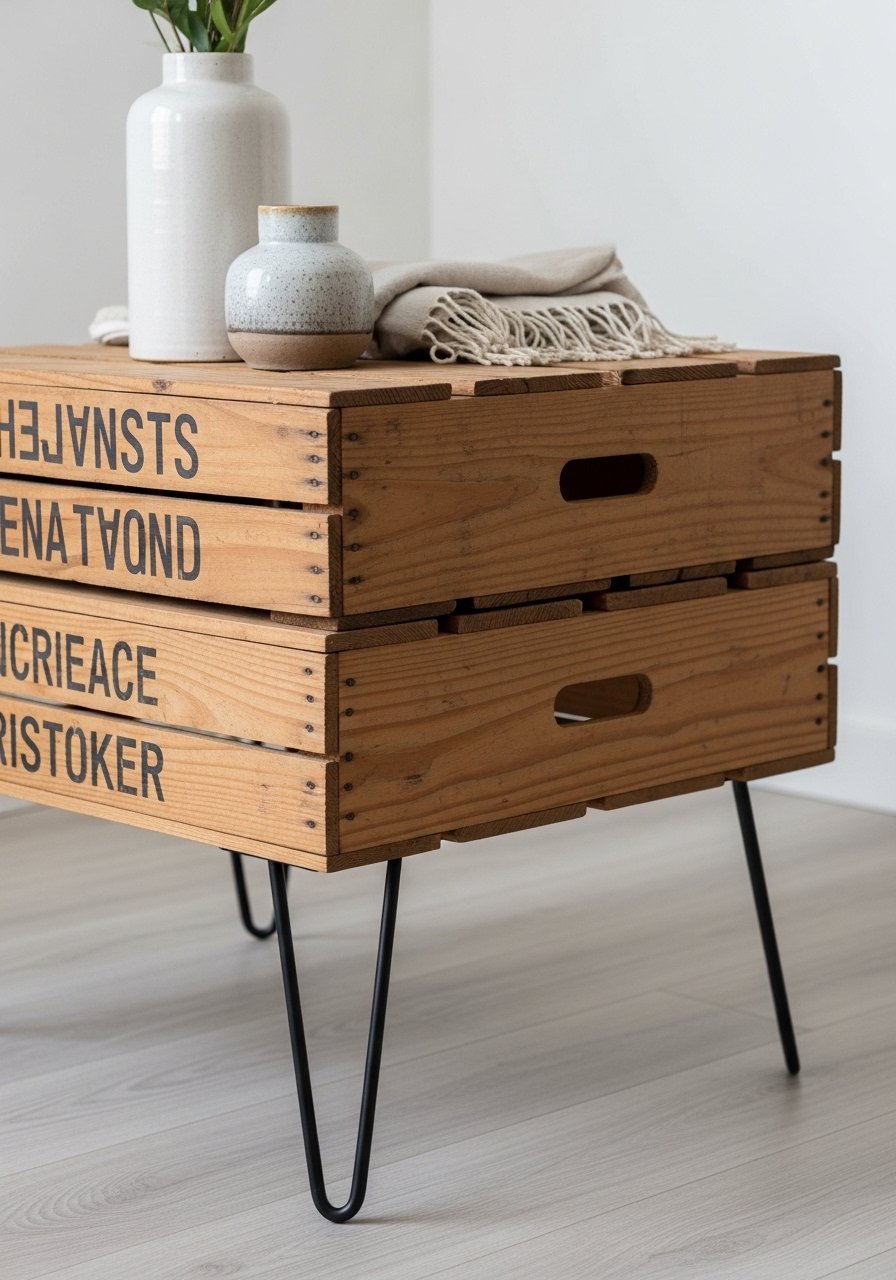
Using thrifted wooden crates gives instant character and hidden shelf space. This project stacks two crates, secures them, then adds tapered legs for a clean midcentury silhouette. It’s lightweight, portable, and feels substantial thanks to a matte finish.
Materials
- 2 wooden crates, each 18" x 12" x 10"
- 4 tapered legs (12" height) or hairpin legs
- 1 can matte spray sealer (9 oz)
- 1/2 cup wood glue
- 8 small corner brackets
- Painter’s tape (1 roll)
- Sanding block, 120 and 220 grit
- Soft cloth for wiping
Instructions
- Clean crates; sand edges lightly to remove splinters.
- Stack crates flush; mark bracket positions inside and secure with corner brackets and screws.
- Reinforce center seam with a bead of wood glue; clamp 30 minutes.
- Attach legs to underside, ensuring tabletop height about 16–18".
- Mask crate lettering with painter’s tape if leaving raw wood, or flush-spray inside/outside with matte sealer, 2 thin coats, 15 minutes between.
- Let cure 24 hours before heavy use.
How to Display or Gift It
Display with a basket tucked into the lower crate for storage. For gifting, nest a set of coasters inside and wrap with twine. Keep extra brackets and hardware in a small jar for future projects — clear Mason jars work great.
- Minimal Slab Coffee Table — One-Board Build (budget DIY coffee table ideas)
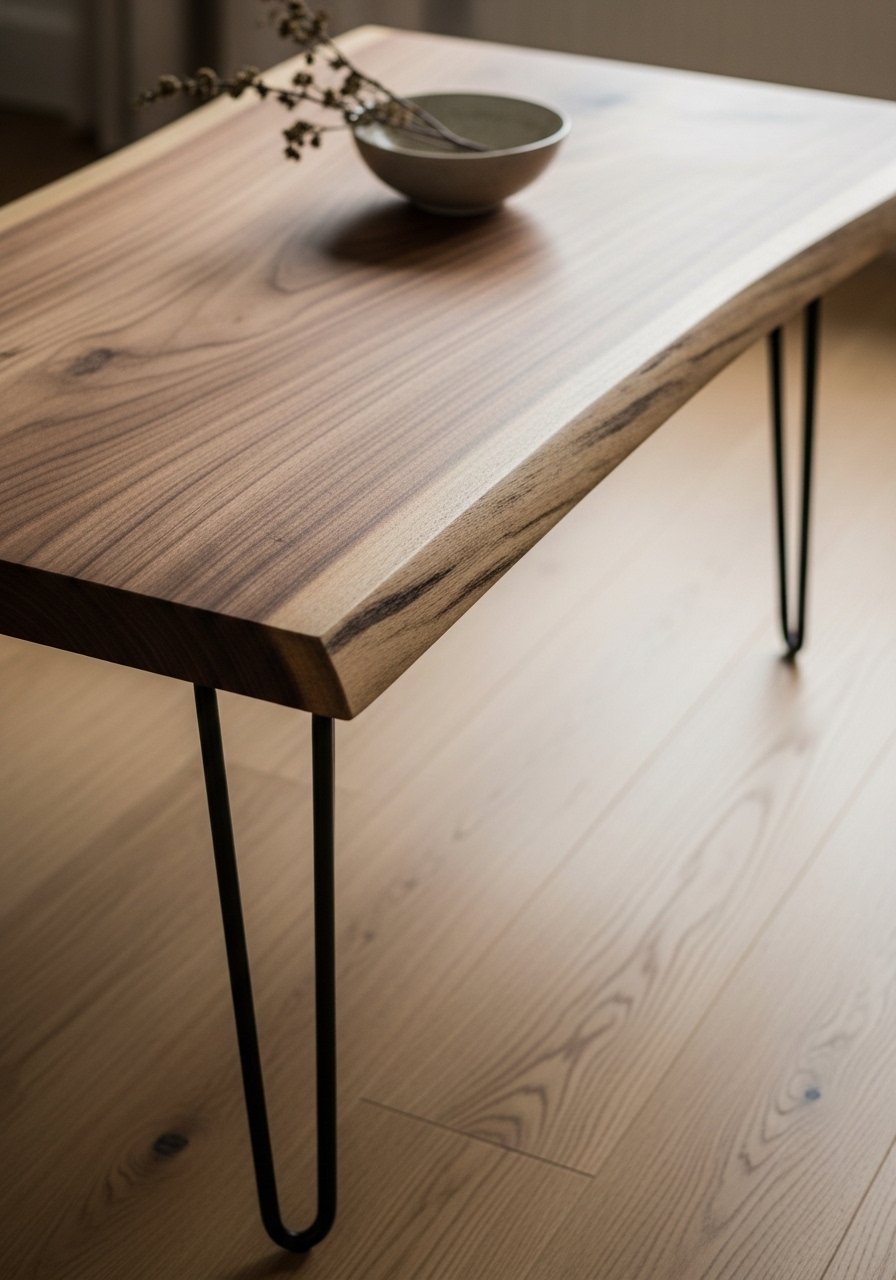
This one-board slab table looks custom-built yet is a weekend build. Use a straight, planed board or a live-edge scrap and attach stout legs. It's perfect for Japandi and modern interiors, offering a warm tactile feel under the hands.
Materials
- One solid wood board (48" x 18" x 1" or 1.25")
- 4 hairpin or tapered legs (16")
- 8 wood screws 1-1/2"
- Wood filler (2 oz)
- Sandpaper 120/220
- Water-based clear satin finish (8 oz)
Instructions
- Plane or sand board flat; fill knots with wood filler and dry 30–60 minutes.
- Sand to 220 grit. Wipe with damp cloth, dry.
- Attach legs centered 4" from ends, pre-drill pilot holes.
- Apply 2 coats clear satin finish with foam brush, 2–4 hours drying between. Fully cure 24–48 hours.
- Test weight-bearing capacity before adding heavy items.
How to Display or Gift It
Place centrally on a low-pile rug. Add a decorative tray and a small stack of books. For gifting, include wood care instructions and a small jar of finishing oil. Use a small woodworking clamp set while gluing or attaching legs.
- Tile-Inset Coffee Table with Scrap Wood Frame
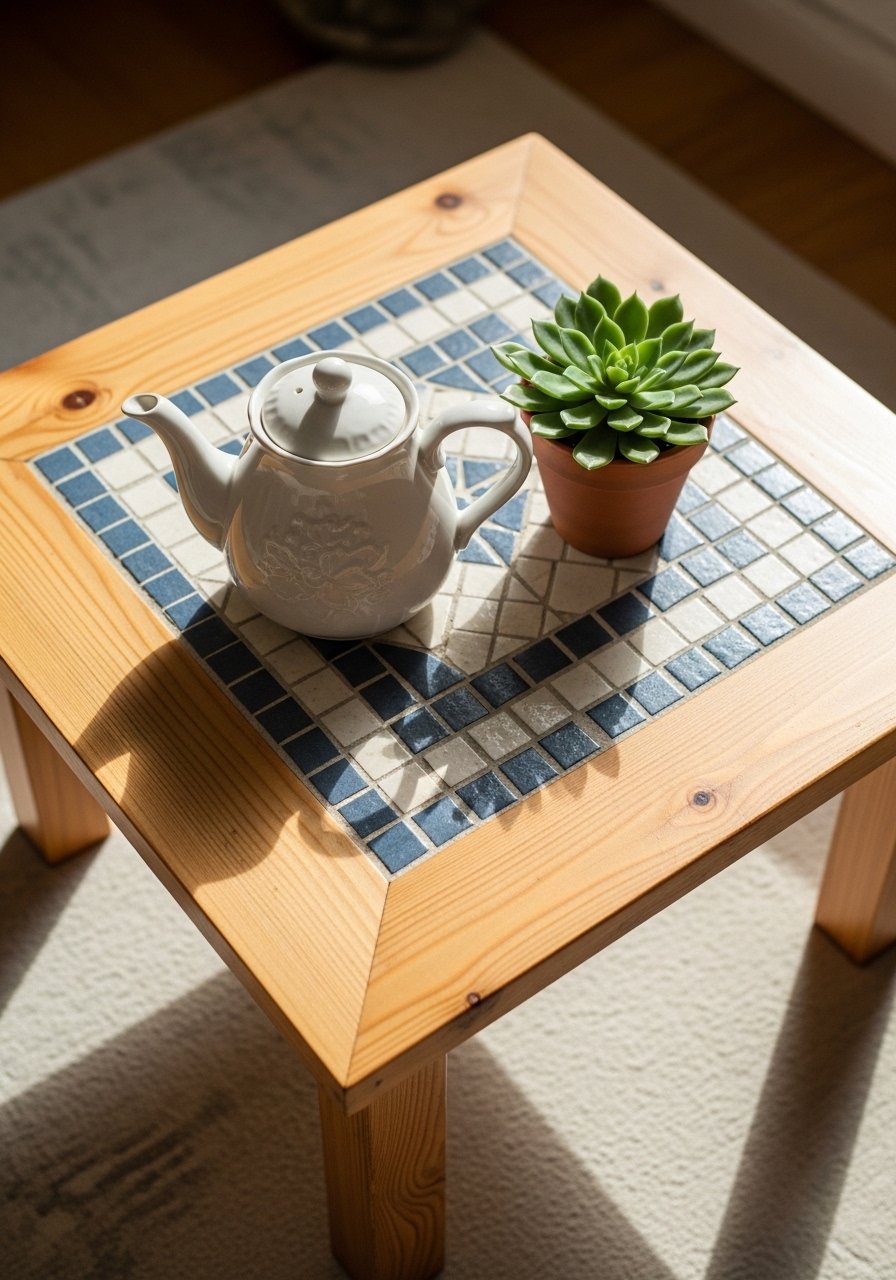
Tile gives an upscale custom look at low cost. Use leftover tiles or thrifted tile sheets inset into a framed top. The ceramic tiles add texture and a cool, tactile surface.
Materials
- 12 ceramic tiles (4" x 4") or one small tile sheet
- Plywood top (1/2" x 24" x 24")
- 1×2 pine framing strips, 4 pieces to make a lip
- Tile adhesive (8 oz)
- Grout (8 oz)
- Sandpaper 120
- Clear sealer or epoxy resin (optional, 8 oz)
- Drill and screws for base
- Legs: 4 hairpin legs (12–16")
Instructions
- Cut plywood to 24" square. Dry-fit tiles on plywood leaving 1/8" grout gap.
- Apply tile adhesive with small trowel; press tiles firmly and let set 24 hours.
- Grout with a rubber float, remove excess, let grout dry 24 hours.
- If desired, seal tile and grout with two coats of clear sealer or thin resin layer; sealer dries 2–4 hours.
- Construct a 1×2 frame to surround tiles and screw to underside.
- Sand frame lightly and attach legs.
How to Display or Gift It
Style with a patterned runner or tray to highlight tiles. For gifting, include a tile cleaner and microfibre cloth. Protect grout by placing felt pads under vase bases.
- Coffee Table from an Old Door
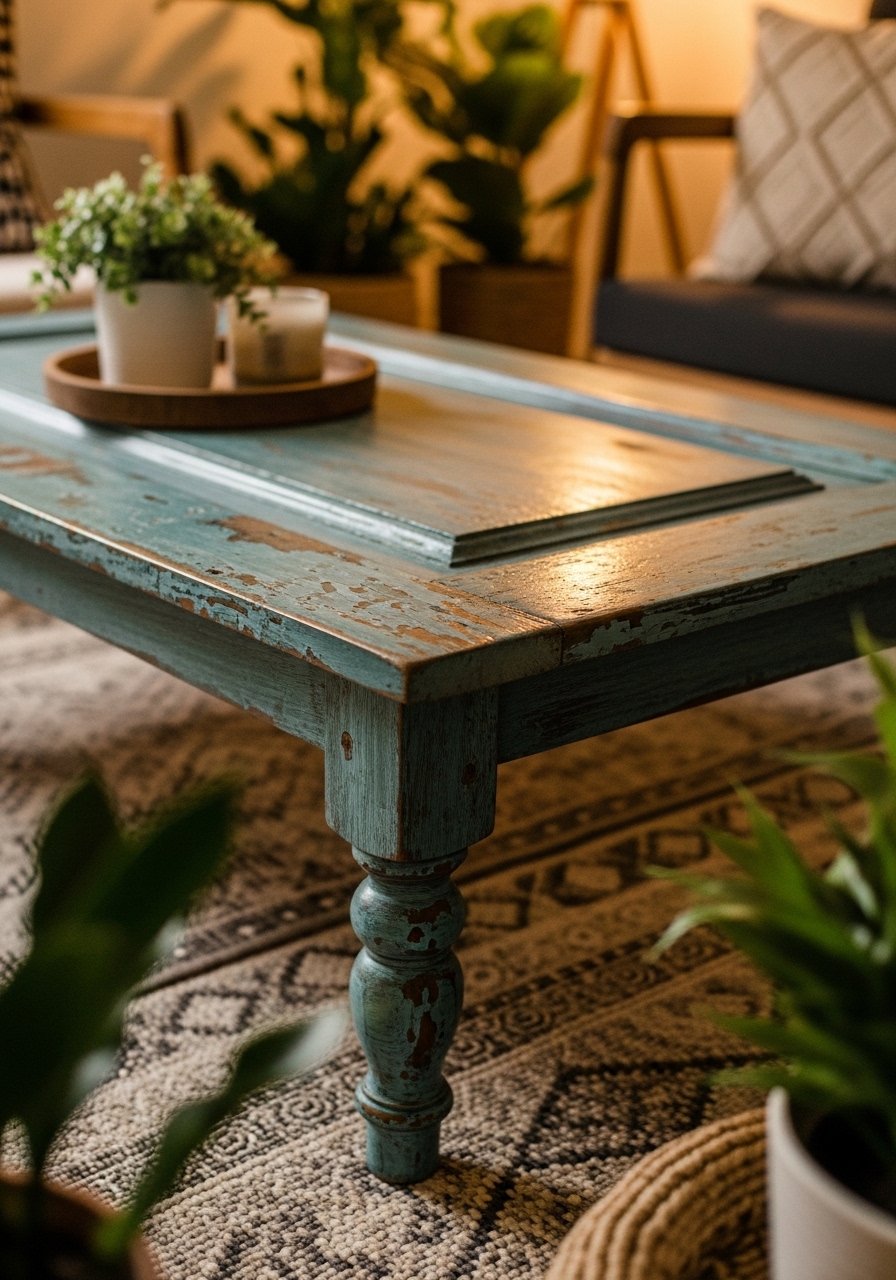
A salvaged door becomes a statement top when trimmed and finished. This project uses a small old door, cuts to size, and mounts legs for a bold cottage or boho centerpiece. The surface has a tactile, weathered feel.
Materials
- One old door (solid wood), trimmed to 48" x 20"
- 4 turned table legs (16" height)
- Wood screws 1-1/2"
- Electric jigsaw or circular saw
- 80/120/220 grit sandpaper
- Paint or stain (1/2 pint)
- Polycrylic sealer (8 oz)
Instructions
- Cut door to desired size using circular saw; sand edges with 80 grit then refine with 120–220.
- Fill any large gaps with wood filler; dry 30–60 minutes.
- Paint or stain in 2 thin coats; dry times 2–4 hours per coat.
- Attach legs after pre-drilling; check level on flat floor.
- Seal with two coats polycrylic; light sand with 220 between coats; final cure 24 hours.
How to Display or Gift It
Pair with woven baskets underneath for storage. For gifts, include a small jar of finishing oil and a sanding sponge. Use a precision craft knife for trim work on veneer or edging.
- Crate-and-Glass Coffee Table (Hidden Storage)
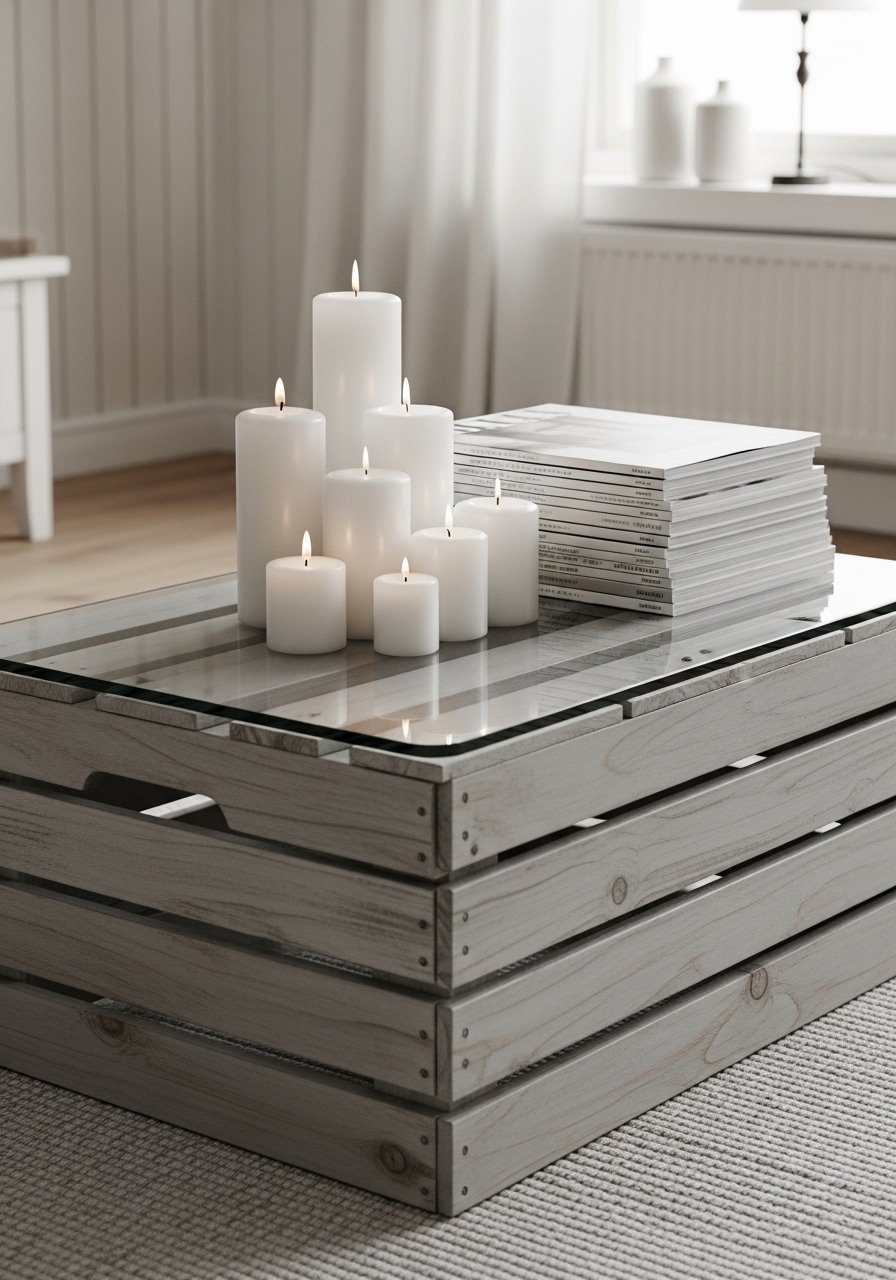
Glass over a crate creates a chic look with visible storage inside. The glass top feels cool and smooth while the crate below provides function.
Materials
- Wooden crate (24" x 18" x 10")
- Tempered glass top cut to 24" x 18" with rounded corners
- Felt pads 8
- Paint (chalk paint) 8 oz
- 4 adhesive rubber bumpers
- Sandpaper 120 grit
- Paintbrush foam
Instructions
- Prep crate: sand lightly and paint 2 thin coats of chalk paint; dry 1–2 hours between coats.
- Place felt pads at the top corners to protect the glass.
- Center tempered glass on crate, press down gently over rubber bumpers.
- Let paint cure 24 hours before heavy use.
- For security in transit, add small removable loops of museum putty at corners.
How to Display or Gift It
Use as a display case for curated collections. Gift with a small glass cleaner cloth and a simple care note. Store glass between cardboard sheets if not installed.
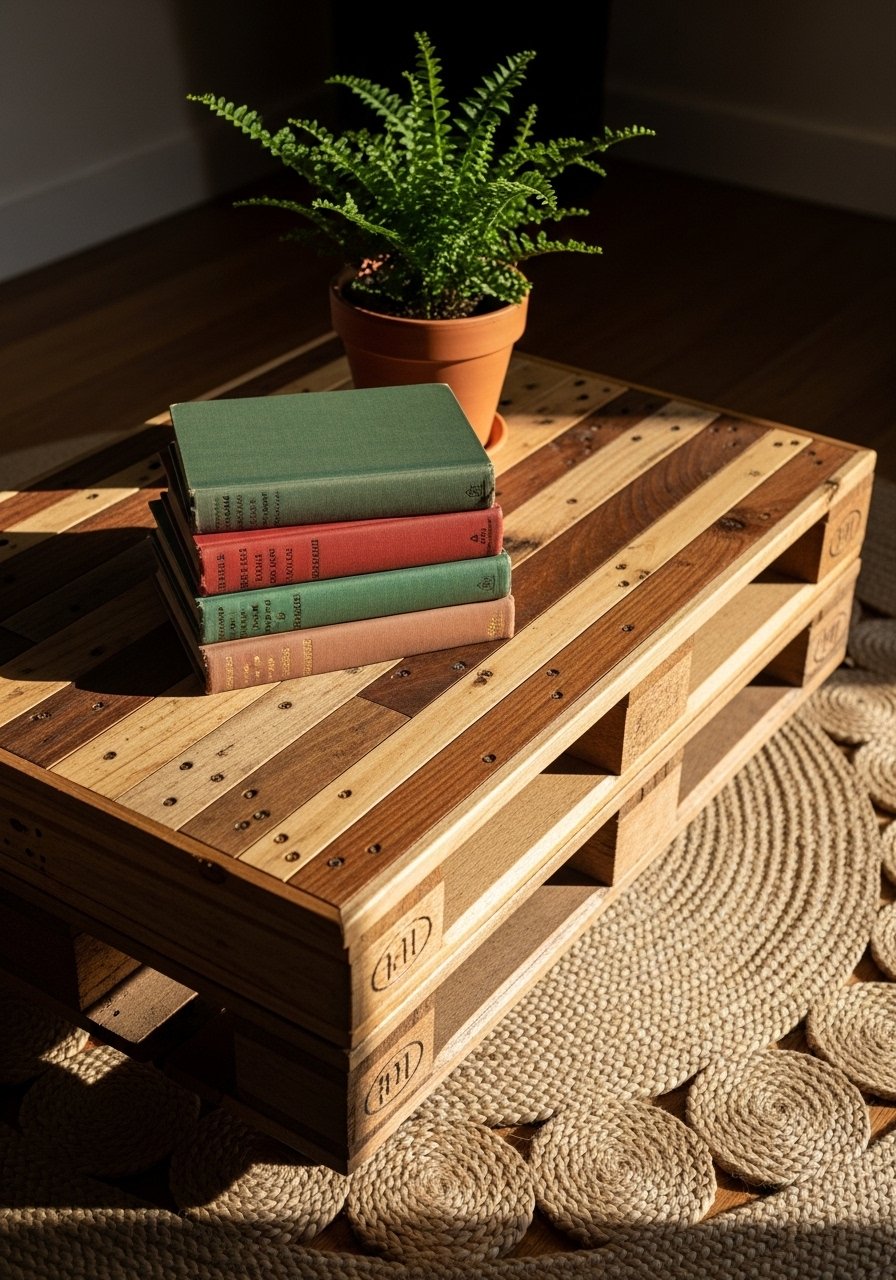
- Hairpin-Leg Pallet Coffee Table with Mid-Rise Shelf
Add a middle shelf for books and remotes. This pallet table has sturdy hairpin legs and a useful lower shelf, blending farmhouse with industrial.
Materials
- 8 pallet slats for top (48" x 5.5" x 3/4")
- 4 slats for lower shelf (36" length)
- 4 hairpin legs (18" height)
- 1/2 cup wood glue
- 20 wood screws 1" and 1-1/4"
- Sandpaper: 120/220
- Matte varnish 12 oz
Instructions
- Assemble top as in Project 1; attach two cleats underneath.
- Build lower shelf frame at 8" from floor level; secure slats.
- Sand all surfaces to 220, wipe dust.
- Apply 2 coats matt varnish; dry 2–4 hours between coats; cure 24 hours.
- Attach legs to underside and test stability.
How to Display or Gift It
Stack coffee table books on the lower shelf. For gifting, include a small set of faux book weights and a care tag.
- Faux-Marble Painted Coffee Table
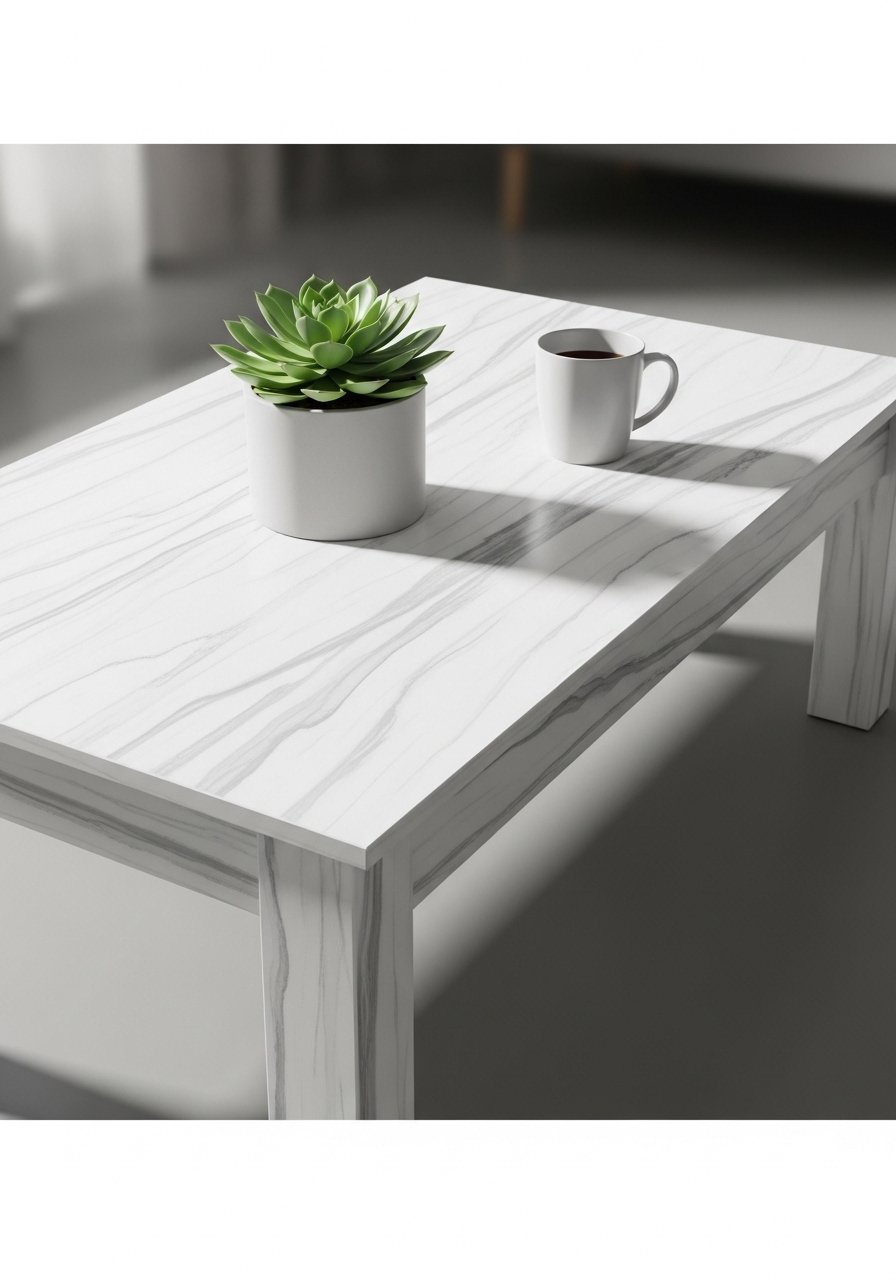
Faux marble paint makes an inexpensive top look luxe. This technique uses layering and a soft brush or feather to create realistic veining.
Materials
- Plywood top (48" x 18" x 1/2")
- Chalk paint base (white) 8 oz
- Grey acrylic paint for veins 2 oz
- Glazing medium 2 oz
- Soft bristle brush and feather or fan brush
- Clear polycrylic satin 8 oz
- Sandpaper 220
Instructions
- Prime plywood with a thin coat of chalk paint; dry 1–2 hours.
- Mix grey paint with glazing medium 3:1 for translucent veining.
- Apply veins with a feather or fine brush, drag lightly and blur with a damp sponge.
- Layer until desired depth, letting each glaze set 30–60 minutes.
- Seal with 2 coats polycrylic, drying 2–4 hours between coats; cure 24 hours.
How to Display or Gift It
Pair with brass accents and linen coasters. If gifting, include a small sample of marble cleaner and a microfiber cloth.
- Tray-Top Coffee Table on Thrifted Base
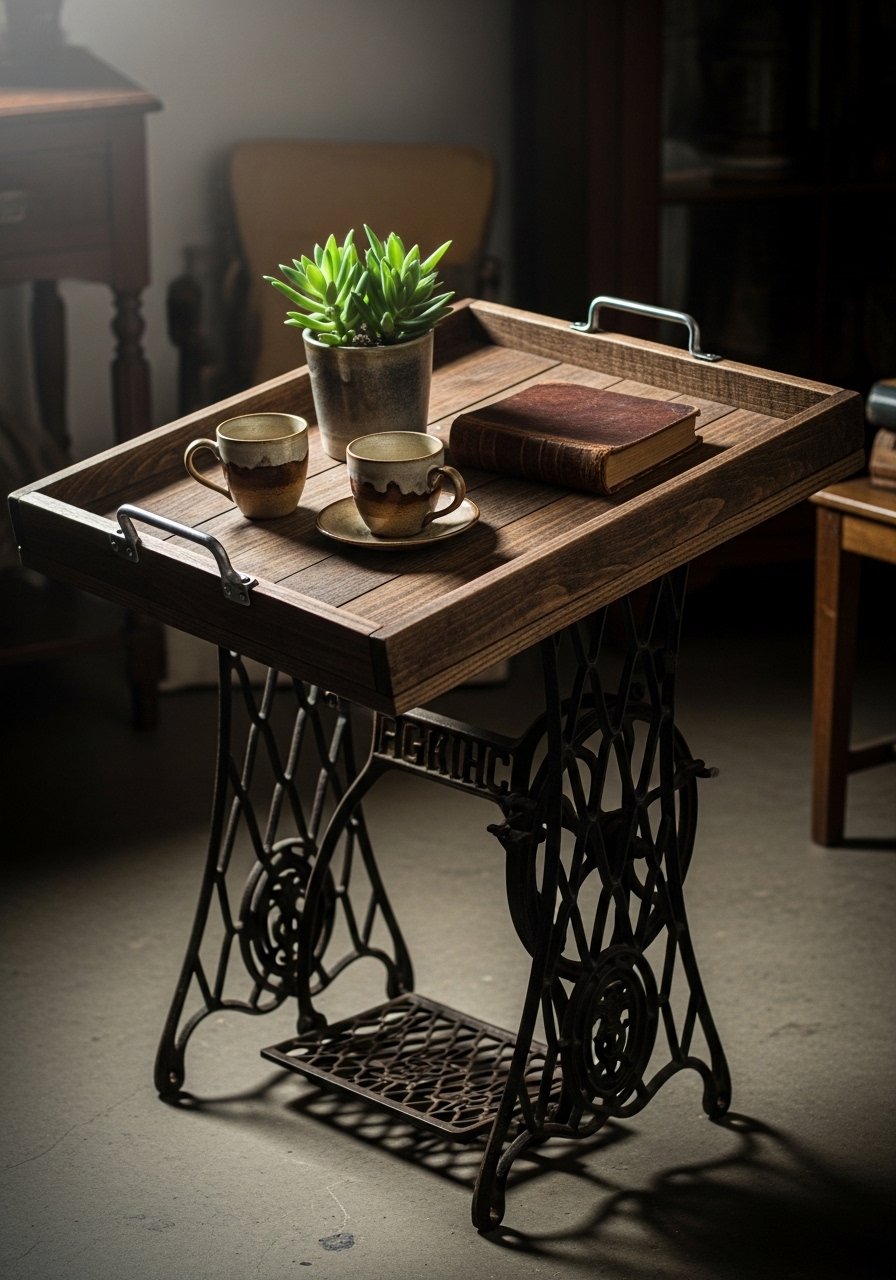
A tray top lets you remove the surface for easy cleaning or serving. Mount a painted or stained tray on a thrifted metal base for character.
Materials
- Plywood or MDF tray top (30" x 18" x 1")
- 2 metal handles
- Thrifted sewing machine base or metal legs
- Paint or stain 8 oz
- 4 corner brackets
- Wood glue 1/4 cup
- Drill and screws
Instructions
- Cut top to size; round edges with router or sand smooth.
- Paint or stain tray; add 2 coats, dry 2–4 hours between coats.
- Attach handles at ends for carrying; install brackets to secure to base, but not permanently (use removable screws).
- Let finish cure 24 hours before heavy use.
How to Display or Gift It
Use as both coffee table and serving tray. For gifting, include decorative napkins and a small jar of tea. Store in a padded area to protect paint.
- Reclaimed Window Pane Coffee Table
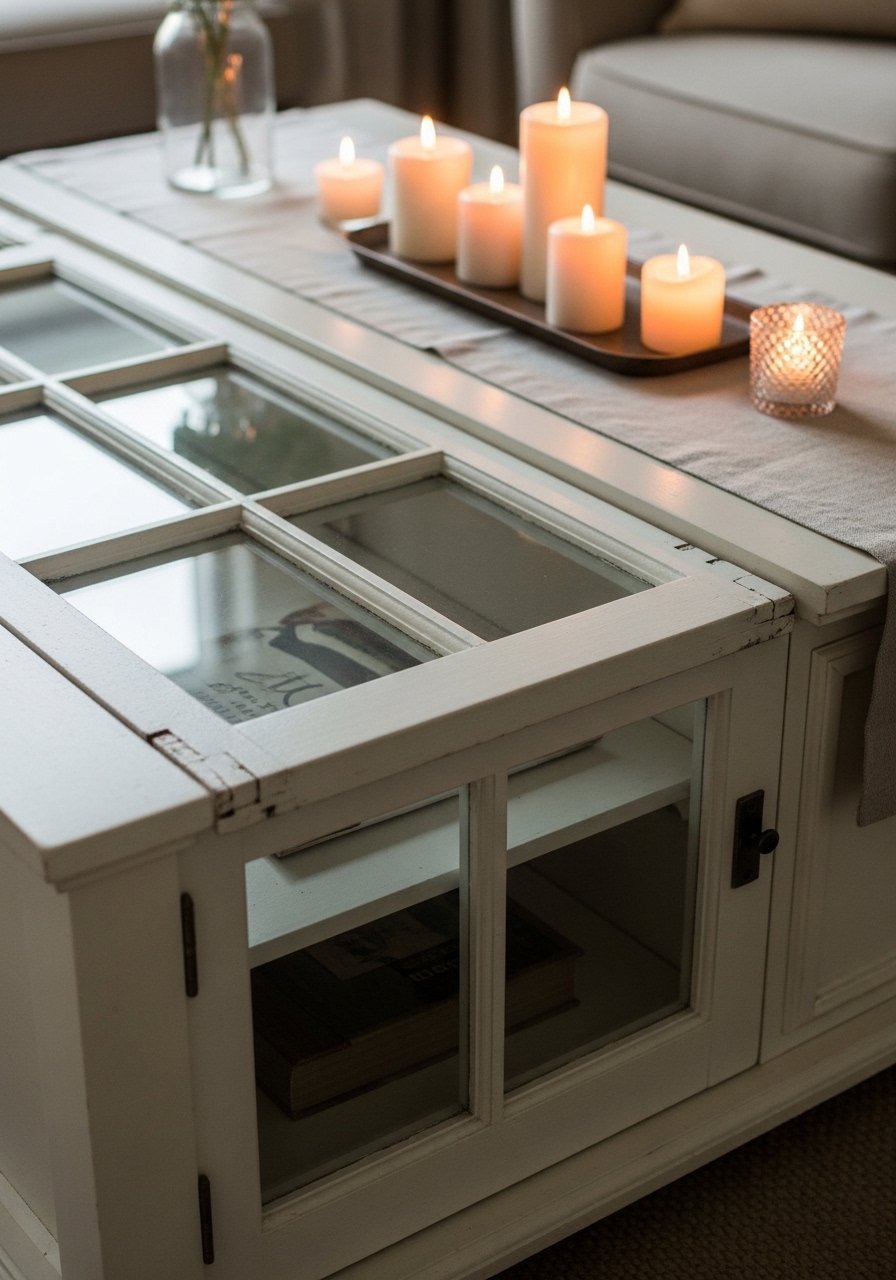
A window pane top adds visual depth and display space underneath. The glass is smooth and cool, and the display shelf shows collectibles.
Materials
- Old window pane with glass (36" x 20")
- 1/2" plywood for shelf (36" x 20")
- 4 short block legs or metal legs (12")
- Paint or stain 8 oz
- Clear silicone adhesive for glazing 1 tube
- Felt bumpers 8
- Sandpaper 120/220
Instructions
- Clean window glass and frame; remove loose paint.
- Paint frame and shelf; apply 2 coats, dry 1–2 hours between.
- Place felt bumpers on shelf where glass will rest; center glass and secure with small spots of silicone (dry 24 hours).
- Attach legs and test stability.
How to Display or Gift It
Use for curated displays under the glass. For gifting, include a microfiber glass cloth and a small card describing care.
- DIY Concrete-Topped Coffee Table
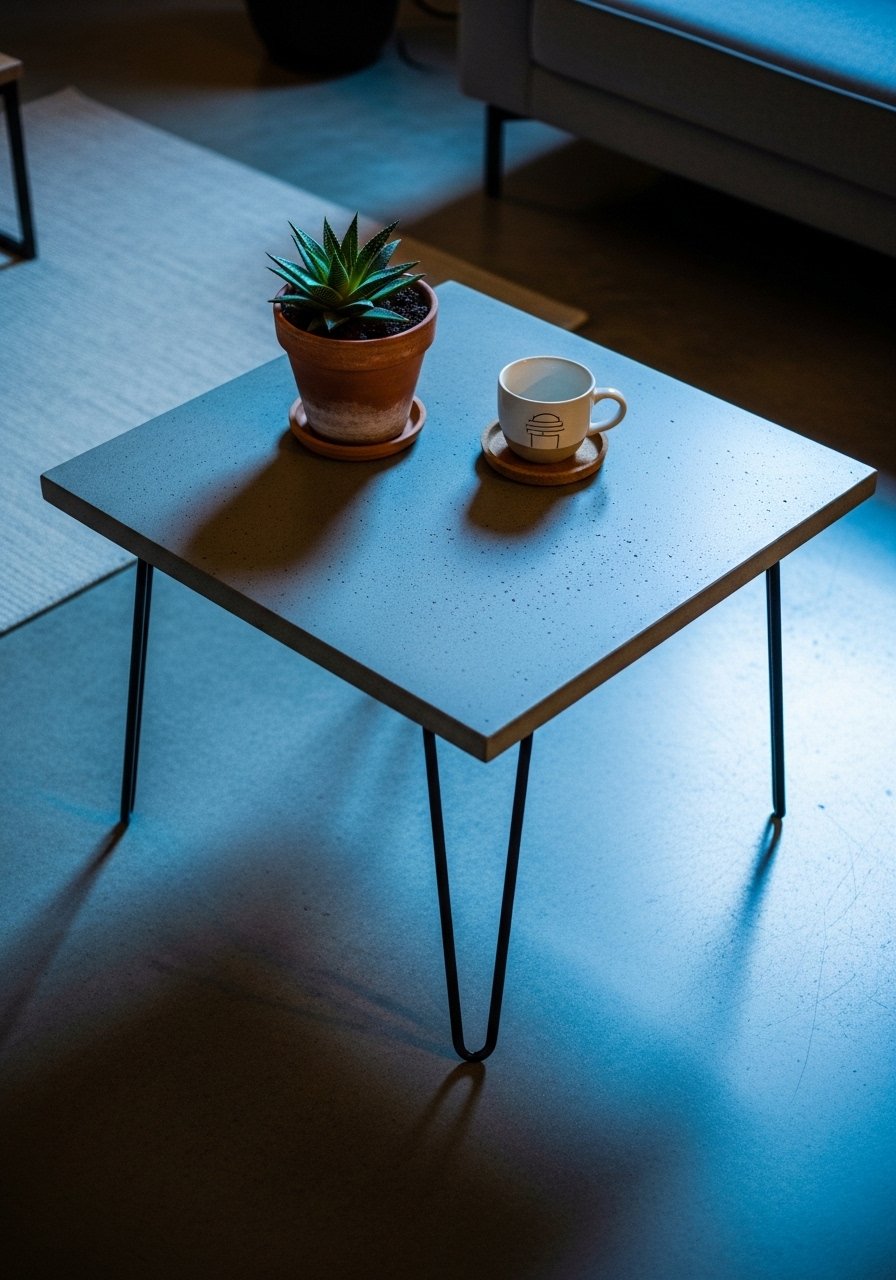
Concrete gives a high-end designer look on a budget if you use a thin topping over plywood or a mold. The top feels heavy, cool, and substantial.
Materials
- Melamine-faced plywood mold (24" x 24")
- 20 lbs microcement or countertop mix
- Reinforcing mesh cut to size
- Release agent (vegetable oil or form release)
- Grinder or sanding block for edges
- Polyurethane sealer for concrete 8 oz
- Metal legs 4 with mounting plates
Instructions
- Build melamine mold to size and coat with release agent.
- Mix microcement per directions; pour into mold to 3/4" depth with mesh embedded.
- Smooth surface with trowel; let set 24–48 hours depending on product.
- Demold, sand edges smooth; apply two coats concrete sealer; dry 2–4 hours between coats and cure 72 hours before heavy use.
- Attach legs after full cure.
How to Display or Gift It
Pair with soft textiles to contrast concrete texture. For gifting, include a care card for sealing and cleaning cement surfaces.
- Geometric Inlay Coffee Table (budget DIY coffee table ideas)
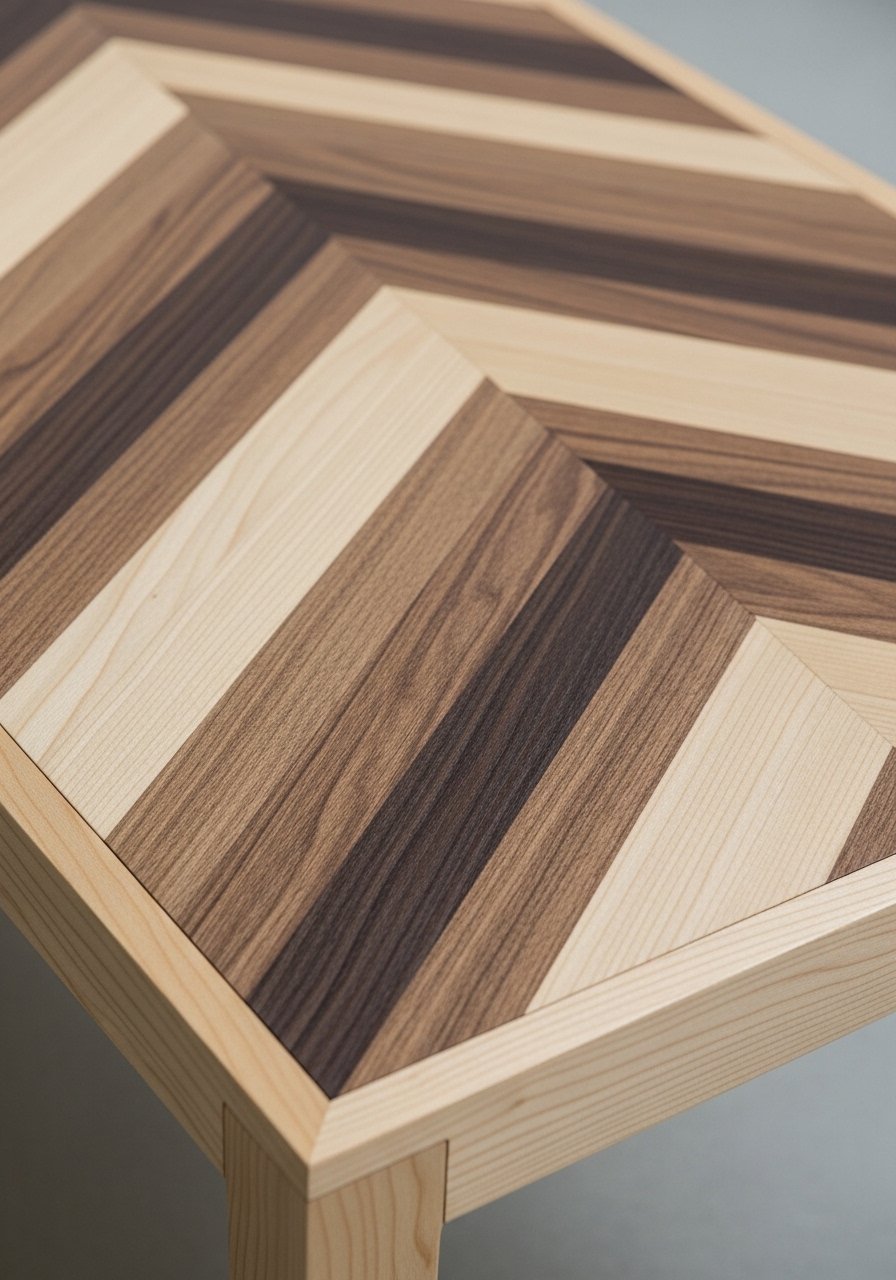
A striking inlay looks custom-made. Using thin veneer strips or contrasting paint, you can create chevron or herringbone patterns that read expensive.
Materials
- Plywood top (36" x 18" x 3/4")
- Veneer strips or reclaimed thin wood strips (total 3–4 yards of veneer)
- Contact cement 4 oz
- Precision craft knife
- Straight edge ruler 36"
- Sandpaper 220
- Clear water-based polyurethane 8 oz
Instructions
- Plan pattern on paper to calculate strip widths; cut veneer to length.
- Apply contact cement to both surfaces per instructions; let set 10–20 minutes until tacky.
- Press strips into place using a brayer roller for even adhesion.
- Trim edges with precision knife and straightedge.
- Sand lightly and apply 2 coats clear polyurethane, drying 2–4 hours between coats.
How to Display or Gift It
Display in a modern living room with sculptural decor. Gift with a small brayer roller and care instructions. Use a self-healing cutting mat when trimming veneer.
- Industrial Pipe Base Coffee Table with Wood Top
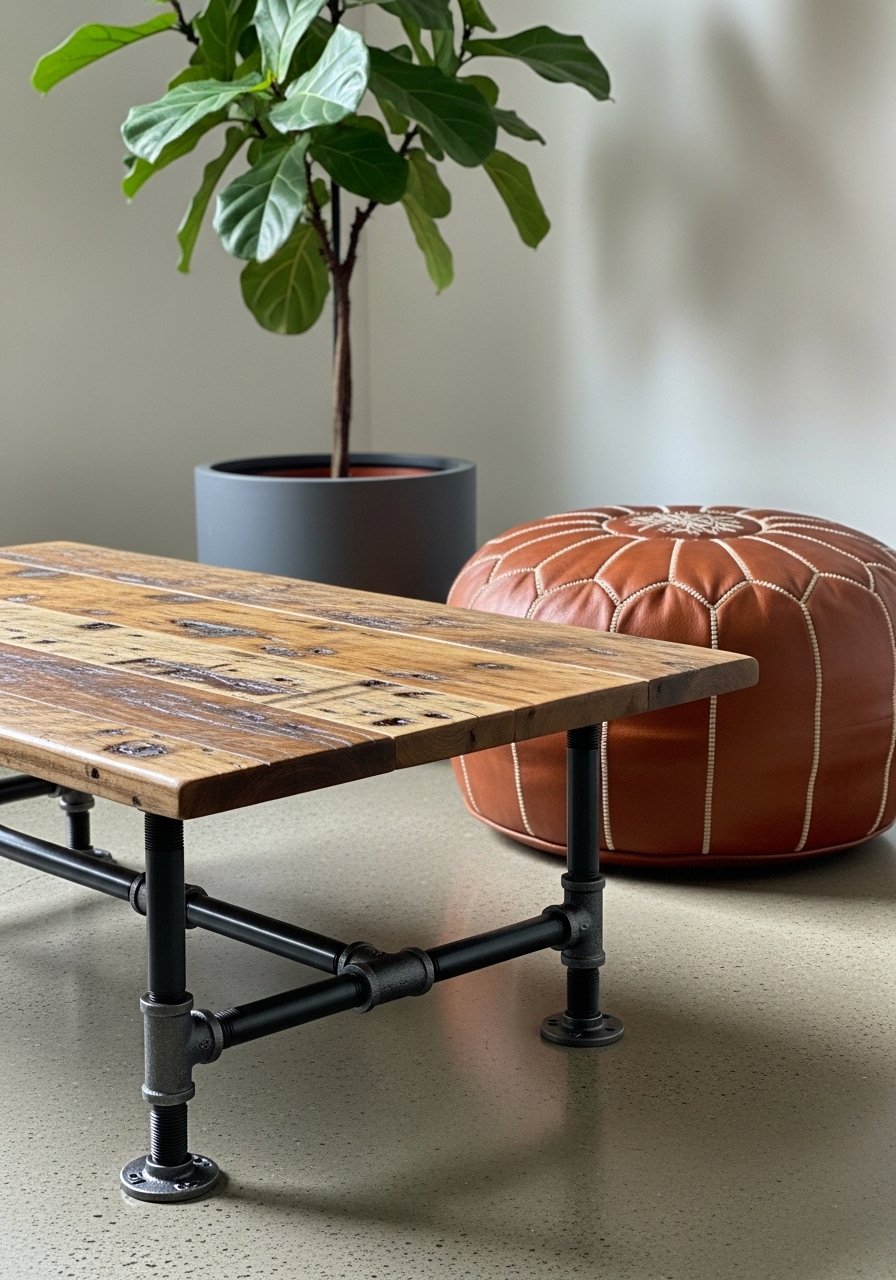
Pipe fittings create a sturdy, industrial base that pairs well with any top. It’s adjustable and easy to assemble for a custom height and shape.
Materials
- Wood top (48" x 18" x 1")
- Pipe legs kit (black iron, includes fittings) — enough for four legs and braces
- Felt pads 4
- Screws and mounting plates for top
- Sandpaper 120/220
- Rust-inhibiting spray paint if needed
Instructions
- Assemble pipe base according to kit, check for wobble.
- Sand and finish wood top with stain and two coats poly; dry between 2–4 hours.
- Attach mounting plates to underside and screw base in place.
- Add felt pads to pipe feet to protect floors.
How to Display or Gift It
Combine with metal accessories and a leather tray. For gifting, include small bottle of metal cleaner and a polishing cloth. Use a heat gun to loosen old paint from pipe fittings safely.
- Ottoman-Coffee Table Hybrid (Upcycled Bench)
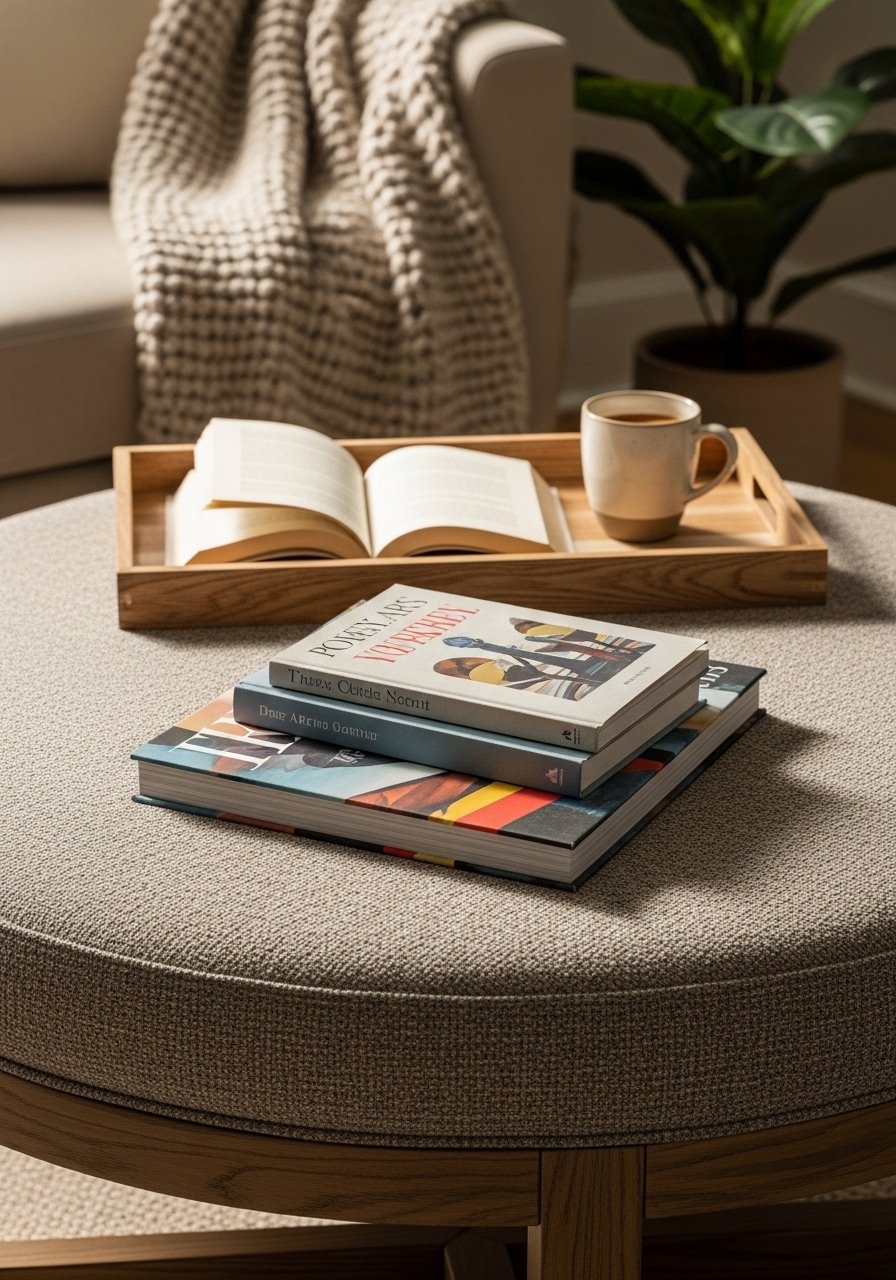
Turn an old bench into a cushioned coffee table—soft on the hands and great for family rooms. Add a removable tray for drinks and stability.
Materials
- Old bench or thrifted ottoman base (36" x 24")
- Foam pad 2" thickness, cut to size
- Upholstery fabric 1.5 yards
- Staple gun and 1/2" staples
- Removable wooden tray cut to fit
- 1/2 yard batting
- Scissors and fabric tape
Instructions
- Cut foam to top dimensions and wrap in batting.
- Lay fabric right-side down, center foam and staple fabric on underside in even pulls.
- Attach tray with small rubber feet to keep it stable on top.
- Vacuum and spot-clean fabric per instruction; let glue or staples set 1 hour before heavy use.
How to Display or Gift It
Works well near a sectional for extra seating. For gifting, include a small fabric care card. Store extra staples and fabric scraps in a small craft organizer.
- Painted Striped Coffee Table with Wash Finish
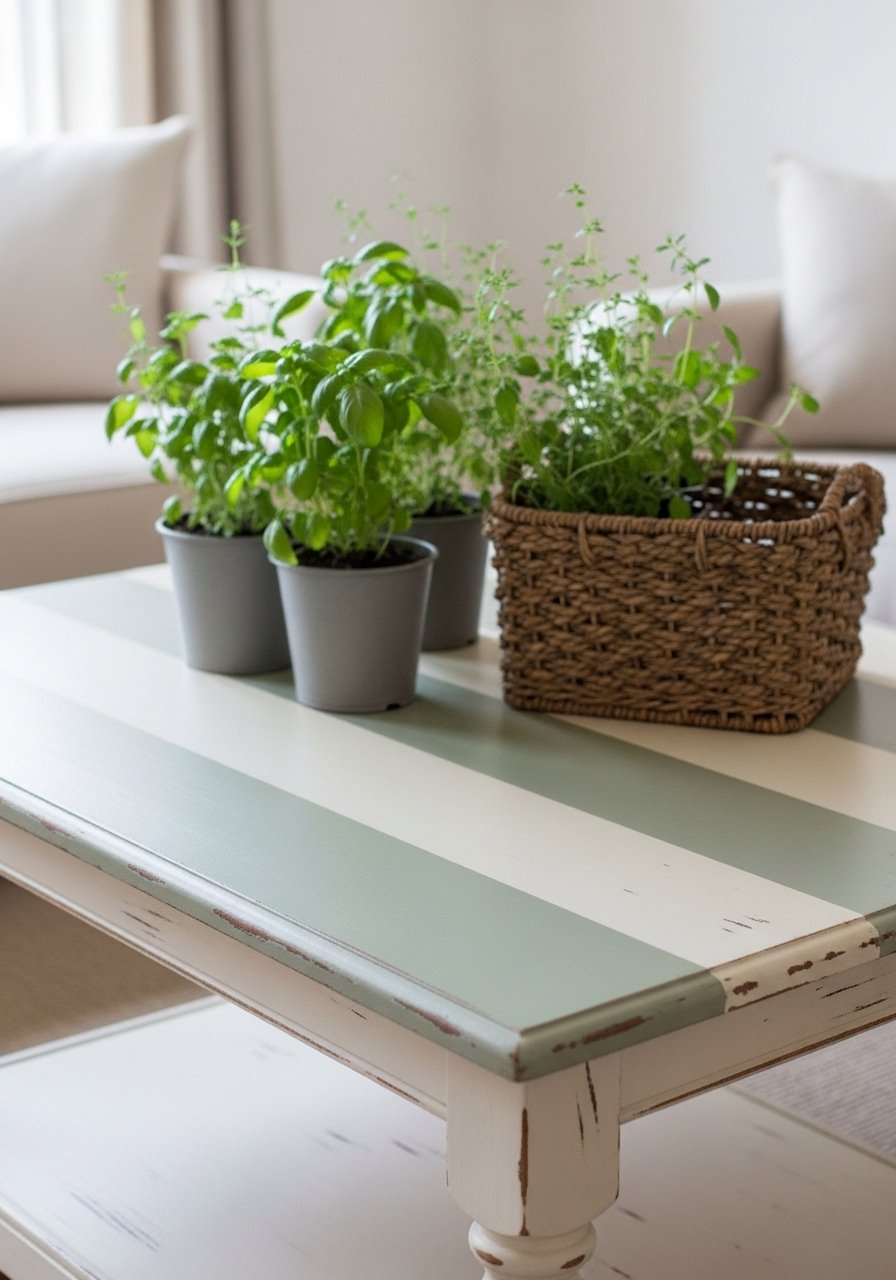
Painted stripes are graphic and forgiving. Use painter’s tape for crisp lines and then lightly sand for a vintage feel.
Materials
- Plywood or thrifted tabletop (36" x 18")
- Chalk paint in two colors (8 oz each)
- Painter’s tape 1 roll
- Sanding block 120/220
- Foam brush and small angled brush
- Clear wax or polycrylic 8 oz
Instructions
- Sand surface; apply base coat 2 thin layers; dry 1–2 hours.
- Measure and mark stripes; apply painter’s tape.
- Paint secondary color in stripes; remove tape after 10–15 minutes for crisp edges.
- Lightly sand edges for worn look; apply clear wax or polycrylic; cure 24 hours.
How to Display or Gift It
Style with herb pots and woven coasters. When gifting, bundle a mini brush set for touch-ups. Keep taped, labeled sample pieces in a drawer for color matching.
- Folding X-Leg Coffee Table (Portable)
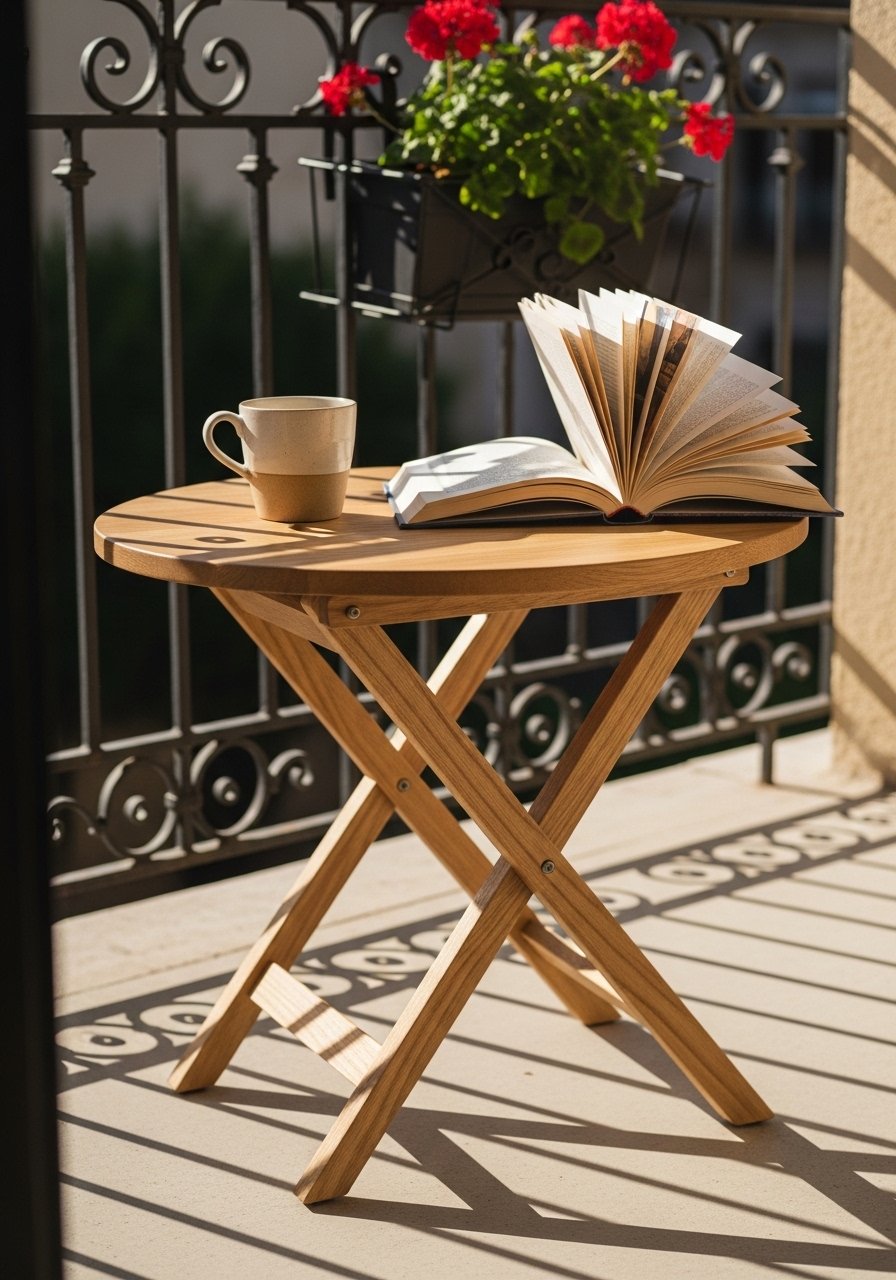
A folding X-leg table is great for small spaces or outdoor use. It packs flat for storage and feels custom when painted or stained.
Materials
- Round top (30" diameter) or rectangle (30" x 18")
- Two X-leg frames (pre-cut or purchased)
- Hinges 2
- Wood screws and brass fasteners
- Clear exterior sealer 8 oz
- Sandpaper 120/220
Instructions
- Attach hinges to allow legs to fold under top; test stability.
- Sand and finish top with exterior sealer; two coats, dry 2–4 hours between.
- Add brass fasteners or safety latch to prevent accidental collapse.
- Allow cure 24 hours before outdoor use.
How to Display or Gift It
Use on the balcony or as an occasional table. For gifting, include a small carrying strap. Store flat under a bed or couch.
- Upcycled Washer Drum Coffee Table with Glass Top
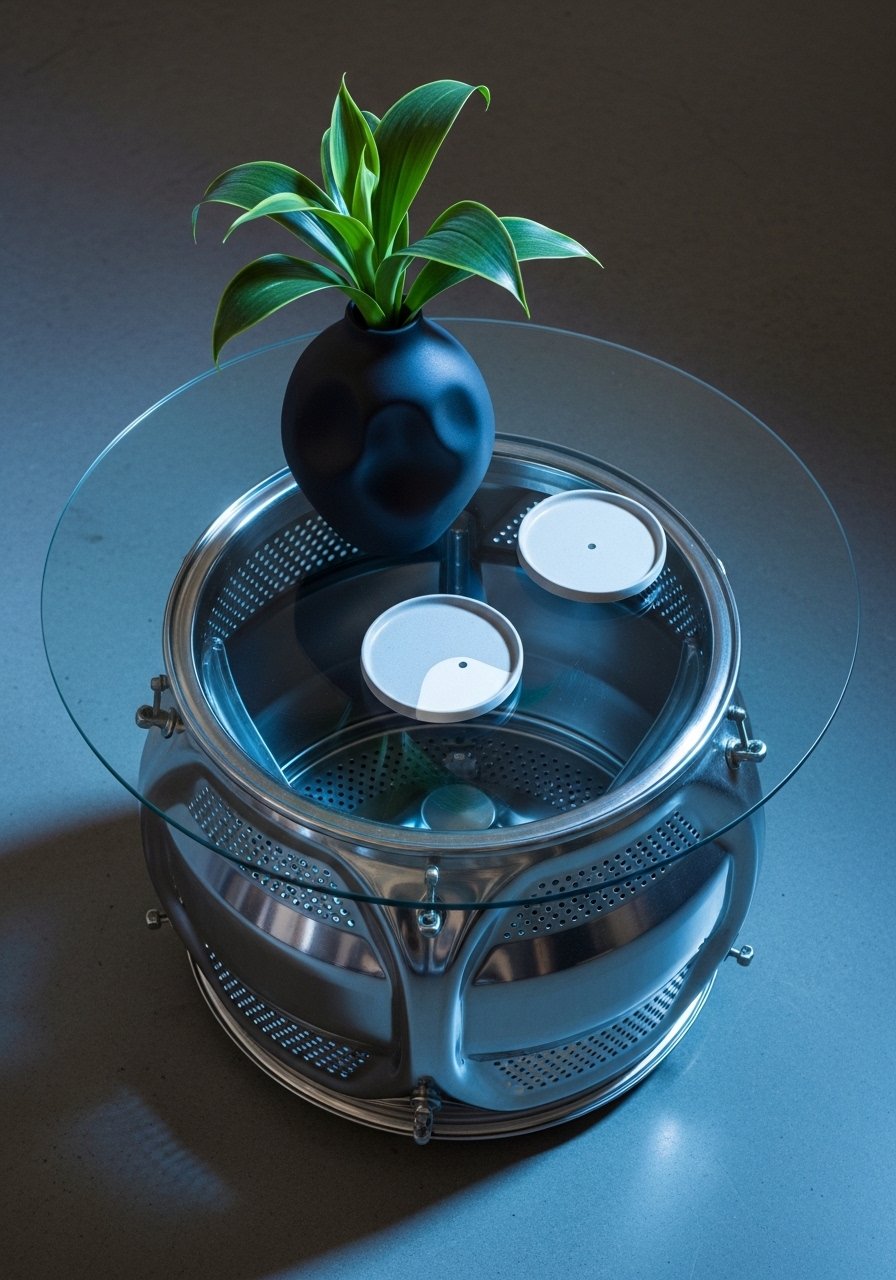
A washer drum is a stunning, reflective base. Add a tempered glass top for a modern, airy result. The surface feels cool and sleek.
Materials
- Stainless steel washer drum (cleaned)
- Round tempered glass top (30" diameter)
- Rubber bumpers 8
- Metal polish 4 oz
- Soft cloth
- Optional: LED puck lights for interior (battery)
Instructions
- Clean drum thoroughly and polish with metal polish and soft cloth.
- Place rubber bumpers evenly to protect glass and prevent slipping.
- Center tempered glass on top. For stability, apply small removable museum putty to perimeter.
- If adding lights, secure battery puck lights inside; test after installation.
How to Display or Gift It
Use in modern loft or industrial spaces. For gifting, include a small metal polish sample and cloth. Store drum upright to avoid dents.
- Cork-Topped Coffee Table (Cork Insert)
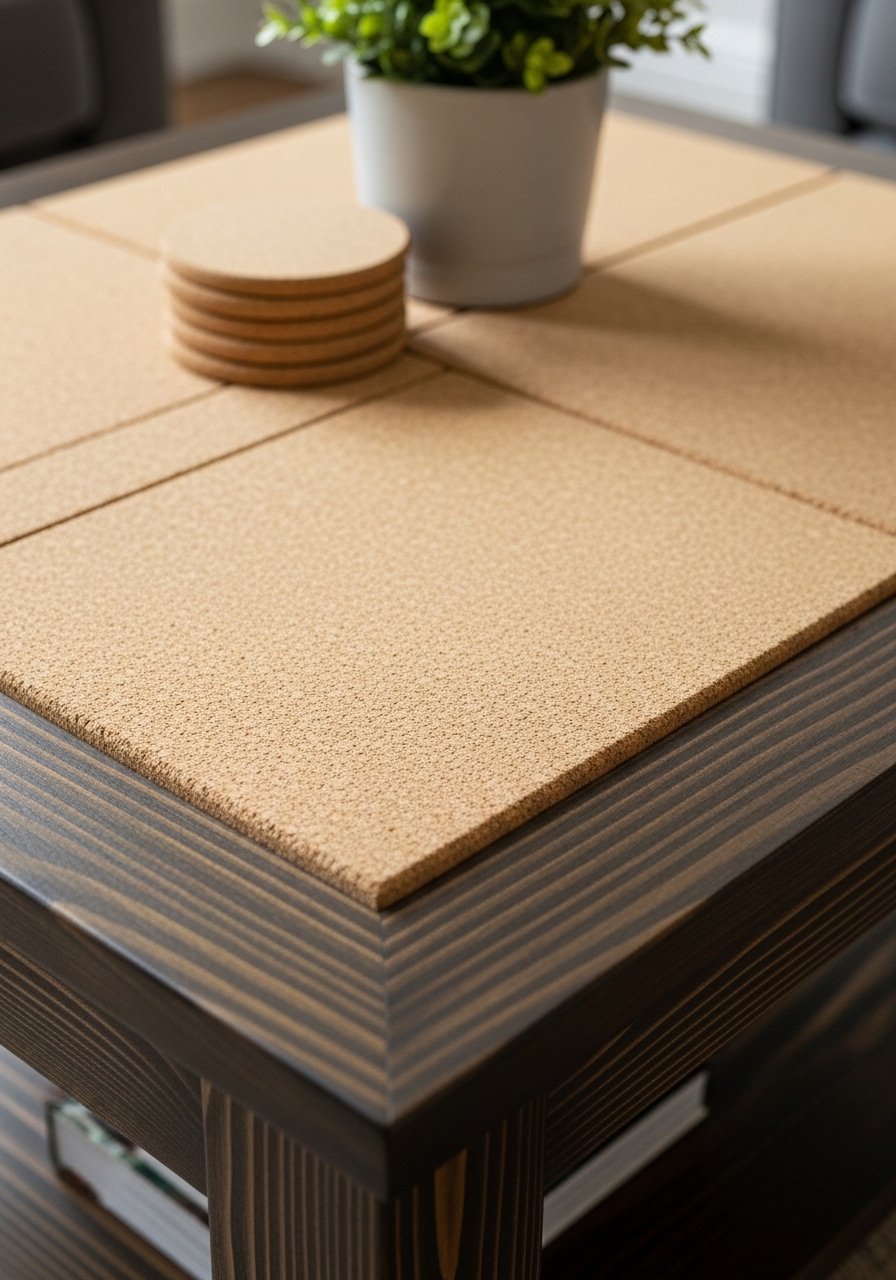
Cork provides a warm, soft surface that’s great for trays and plant pots. Use cork tiles inset into a wood frame for a tactile, Scandinavian look.
Materials
- Plywood top (36" x 18")
- Cork tiles (12" x 12" x 1/2"), total 3 tiles
- Wood frame strips 1×2 to create inset lip
- Contact cement 4 oz
- Clear sealer for cork 8 oz
- Sandpaper 220
Instructions
- Cut plywood and frame to size; glue frame strips to create 1/4" inset lip.
- Glue cork tiles into inset with contact cement; press firmly.
- Seal cork with two thin coats water-based sealer; dry 1–2 hours between coats.
- Attach legs and allow full cure 24 hours.
How to Display or Gift It
Cork is ideal for plant pots and coasters. For gifting, add a set of cork coasters. Store cork flat to avoid warping.
- Mosaic Pebble Coffee Table (Outdoor/Patio)
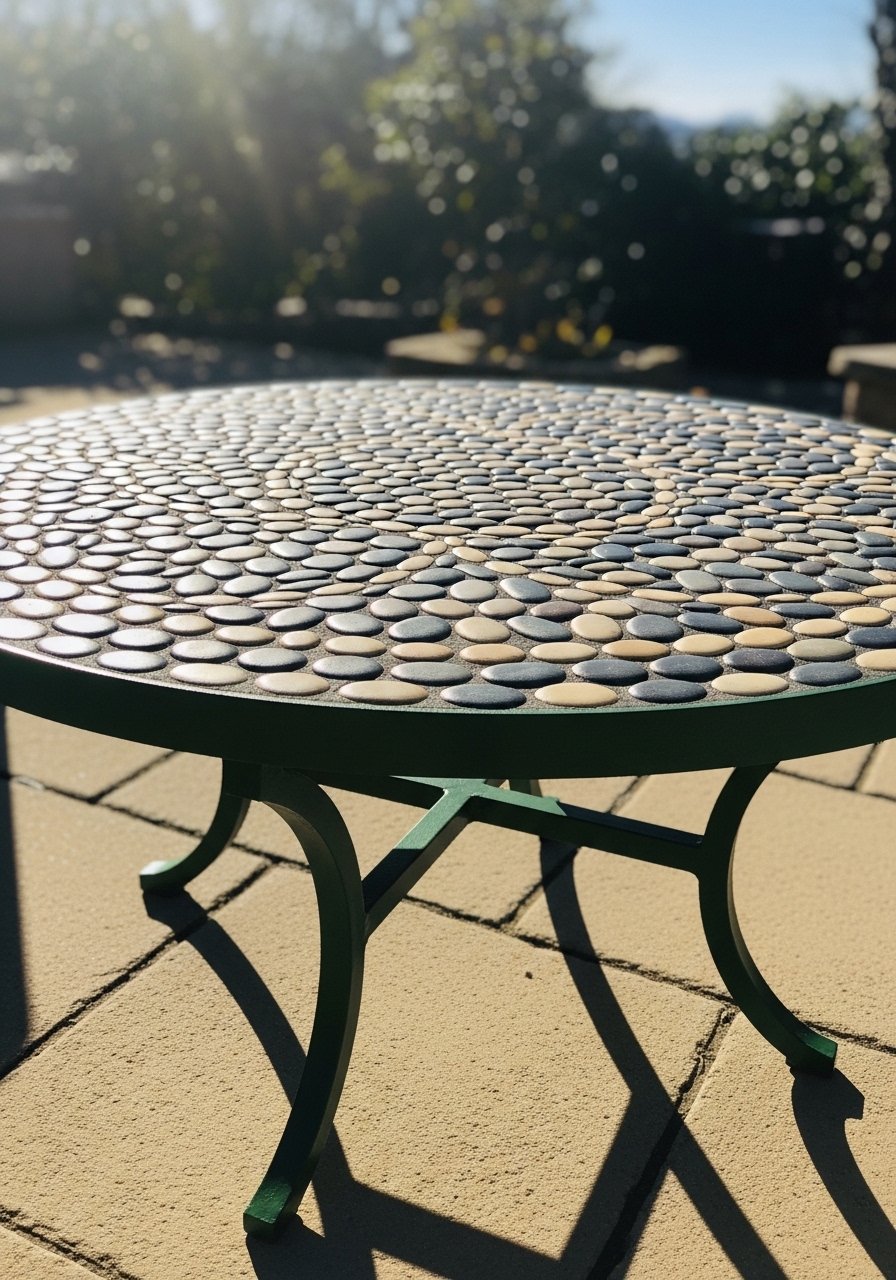
Pebbles create a tactile mosaic that’s great for patios. Use thinset and grout for outdoor durability.
Materials
- Plywood or concrete round top (30" diameter)
- River pebbles 2–3 lbs
- Thinset mortar 1–2 lbs
- Grout 8 oz
- Polyurethane sealer or outdoor sealer 12 oz
- Trowel and grout float
Instructions
- Prepare top surface; draw layout pattern.
- Apply thinset in small sections; press pebbles firmly into mortar.
- After 24 hours, grout between stones and wipe excess.
- Seal with outdoor sealer; 2 coats, dry 2–4 hours between; cure 48–72 hours.
How to Display or Gift It
Looks great poolside; pair with outdoor pillows. For gifting, include grout sealer sample and care instructions.
- Ladder Shelf Coffee Table with Built-In Planter (budget DIY coffee table ideas)
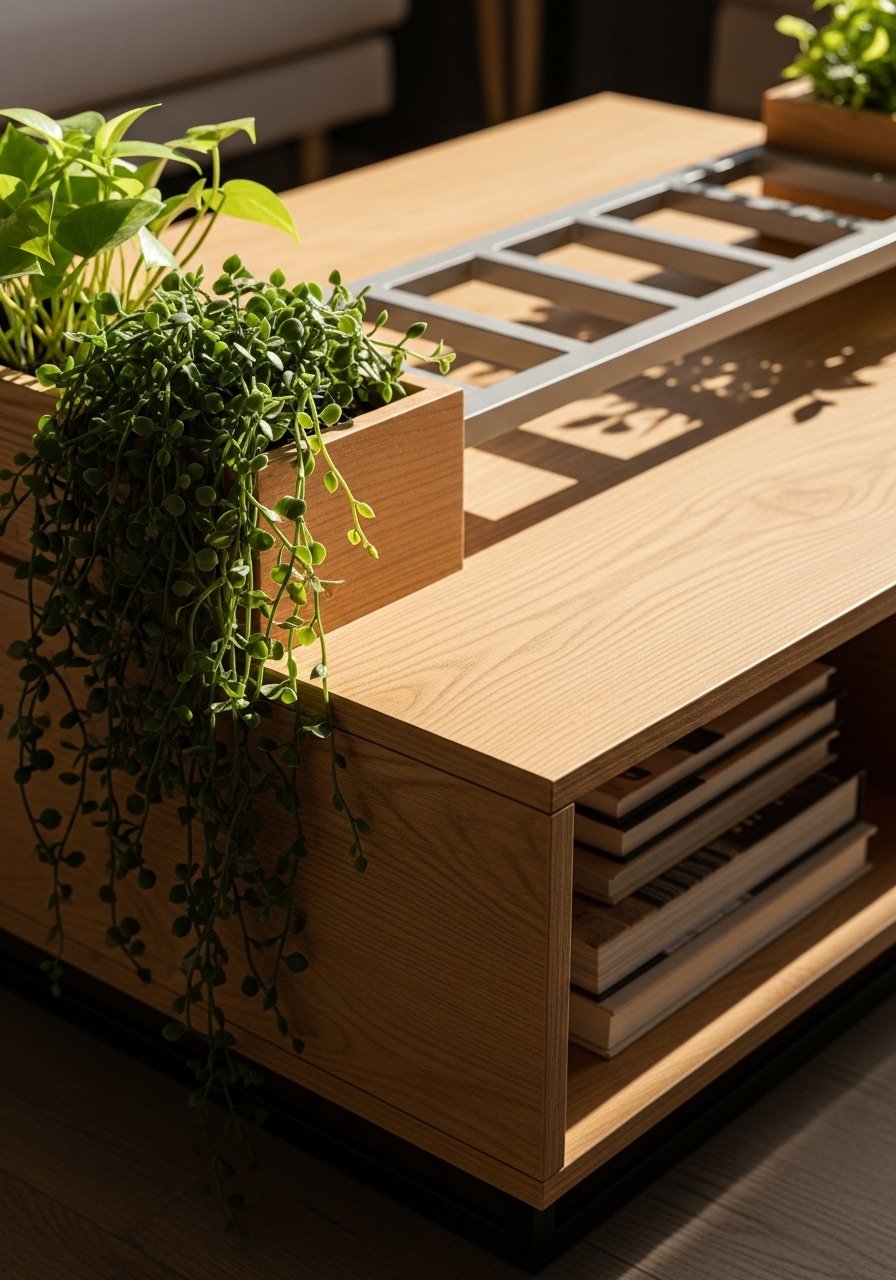
A ladder shelf built into the table creates layered storage and a built-in planter for green styling. It feels like a custom piece found at a boutique.
Materials
- Plywood top (48" x 18")
- Short ladder rungs or slatted shelf material
- Small planter box (10" x 6" x 6"), lined with plastic
- Wood glue 1/2 cup
- Screws and brackets
- Exterior sealer or paint 8 oz
- Sandpaper 120/220
Instructions
- Build ladder-style shelf to fit centered under the top; secure with screws and glue.
- Line planter box with plastic and attach to one side of shelf using brackets.
- Finish with paint or sealer; let dry 2–4 hours between coats.
- Allow full cure 24 hours before planting.
How to Display or Gift It
Perfect for plant lovers; style with trailing pothos. For gifting, include a small plant and care card. Store planter separate when moving to avoid soil spills.
- Industrial Rebar and Wood Coffee Table
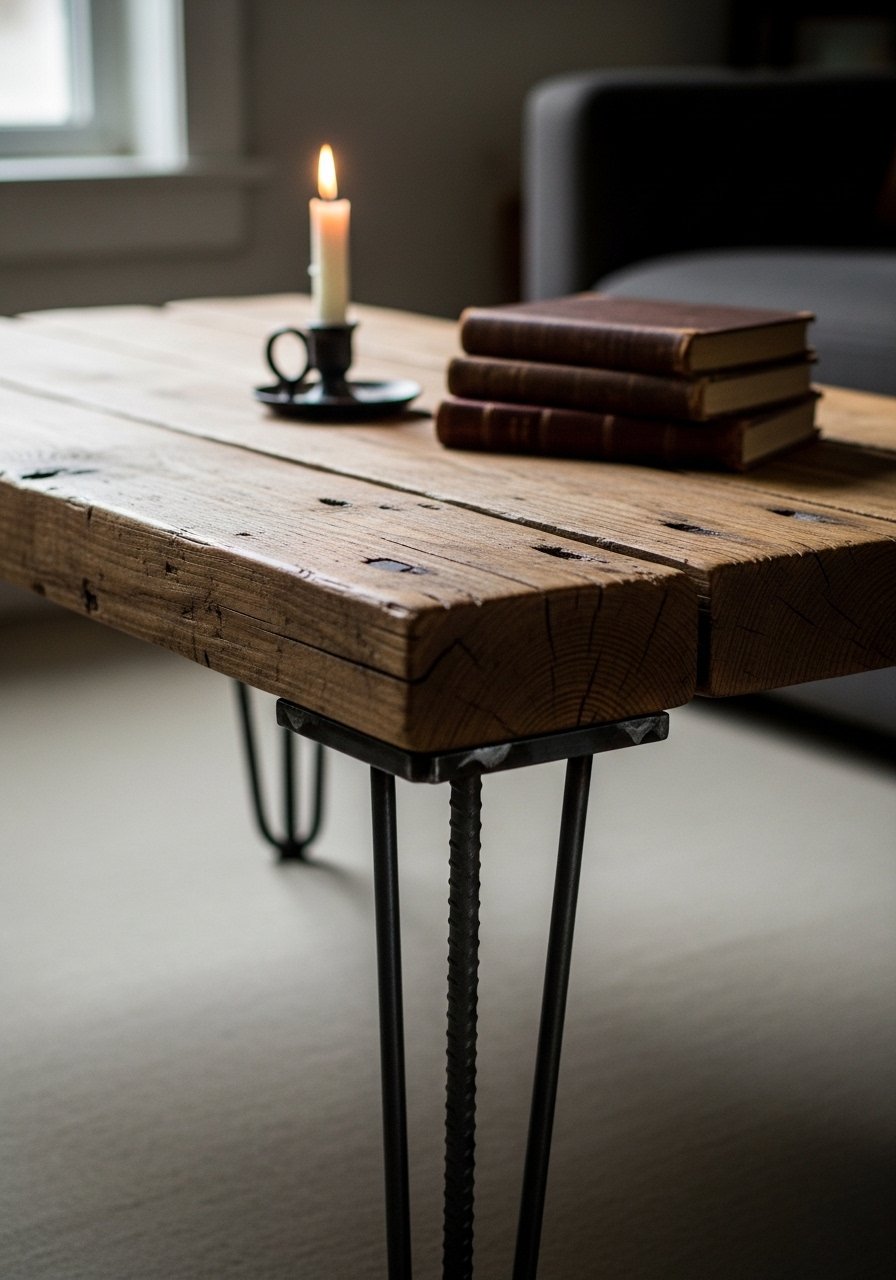
Rebar legs give an edgy, raw look. Bolt the rebar to a top or weld for permanence. The top should be robust to match the heavy base.
Materials
- Solid wood top (48" x 18" x 1.25")
- Rebar legs set 4 (pre-made or custom)
- Bolts and washers 8
- Metal primer and spray paint 9 oz
- Polyurethane for wood 8 oz
- Drill and metal-bit set
Instructions
- Prime and paint rebar legs; let cure 24 hours.
- Pre-drill holes in underside of top; bolt legs in place.
- Seal wood with two coats polyurethane; dry 2–4 hours between coats.
- Tighten bolts and add felt pads under base.
How to Display or Gift It
Style with leather accents and warm textiles. For gifting, include a small bottle of metal protectant and care note.
- Domino Coffee Table (Upcycled Game Board Look)
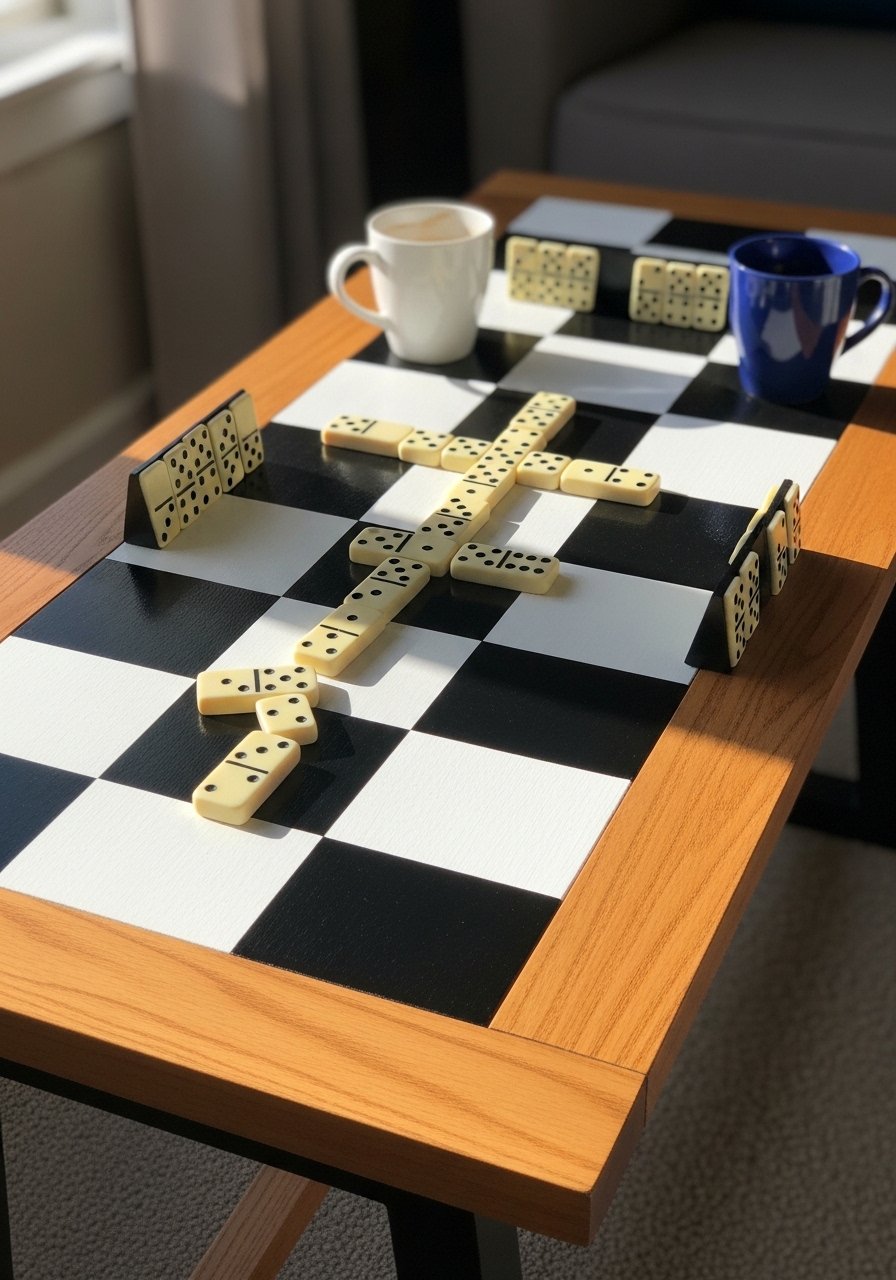
Painted blocks create playful patterning. This table is fun for family game night while keeping a low-key craft budget.
Materials
- Plywood top (48" x 18")
- Painter’s tape
- Black and white acrylic paint 4 oz each
- Clear satin sealer 8 oz
- Sandpaper 220
- Small paint roller and angled brush
Instructions
- Prime and paint base coat white; dry 1–2 hours.
- Mark squares and tape off; paint alternating squares black.
- Remove tape after 10–15 minutes; touch up edges with small brush.
- Seal with two coats satin sealer; drying 2–4 hours between.
How to Display or Gift It
Add matching dominoes for game night gifting. Keep spare paint samples for touch-ups.
- Fabric-Upcycled Coffee Table with Decoupage
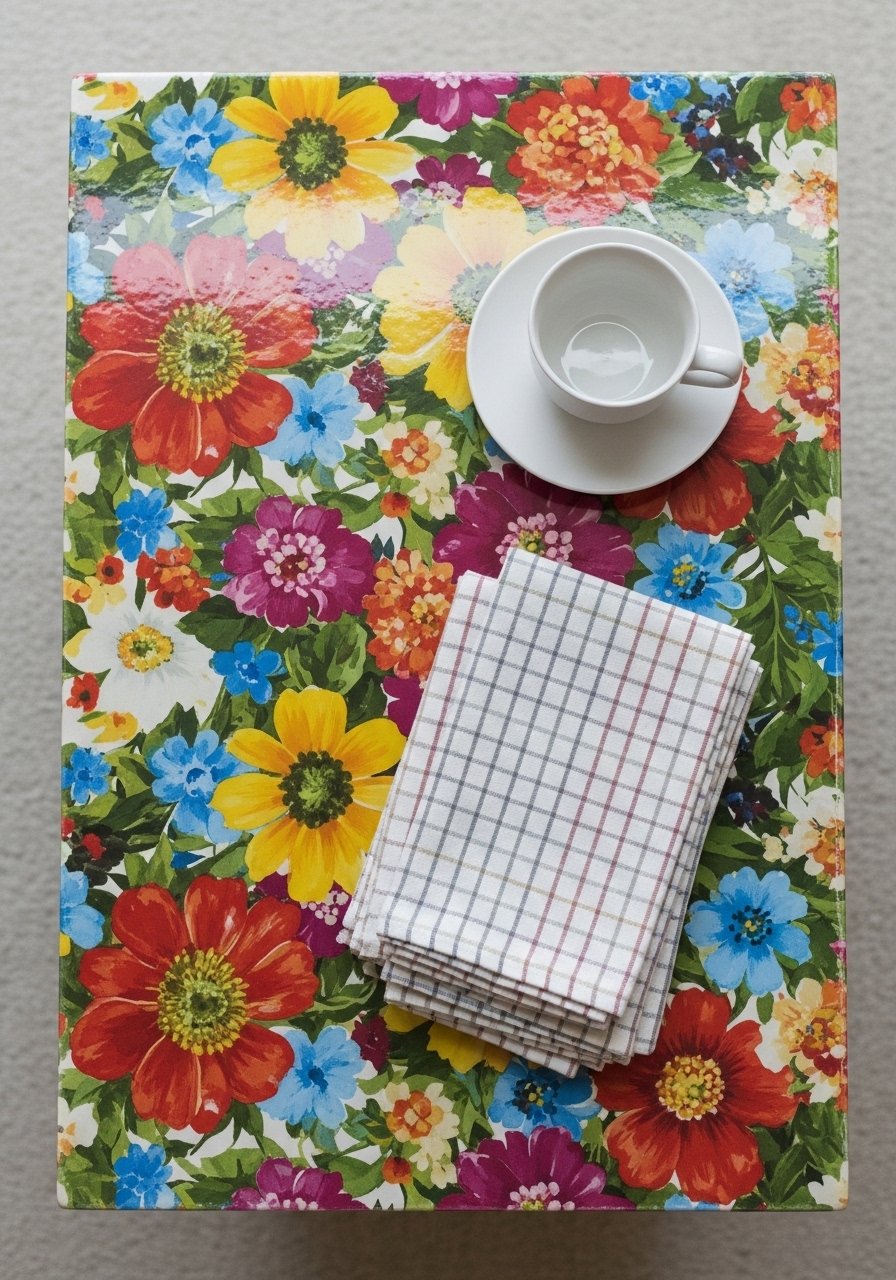
Decoupage fabric under a clear sealer gives rich pattern and texture without upholstery. The surface feels smooth and glossy.
Materials
- Plywood top (36" x 18")
- Cotton printed fabric 1 yard
- Mod Podge gloss 8 oz
- Foam brush and brayer roller
- Scissors and heavy-duty craft knife
- Sandpaper 220
Instructions
- Lay fabric over top and trim leaving 1–2" overhang.
- Brush a thin coat of Mod Podge on top surface, smooth fabric with brayer.
- Trim excess fabric flush with craft knife after adhesive sets 10–15 minutes.
- Apply 3 thin top coats of Mod Podge, drying 15–30 minutes between. Final cure 24–48 hours.
- Lightly sand between coats for ultra-smooth finish.
How to Display or Gift It
Use in a bright living room or sunroom. For gifting, include small packet of fabric swatches. Store flat in a dry area until use.
- Upcycled Suitcase Coffee Table (Vintage Luggage)
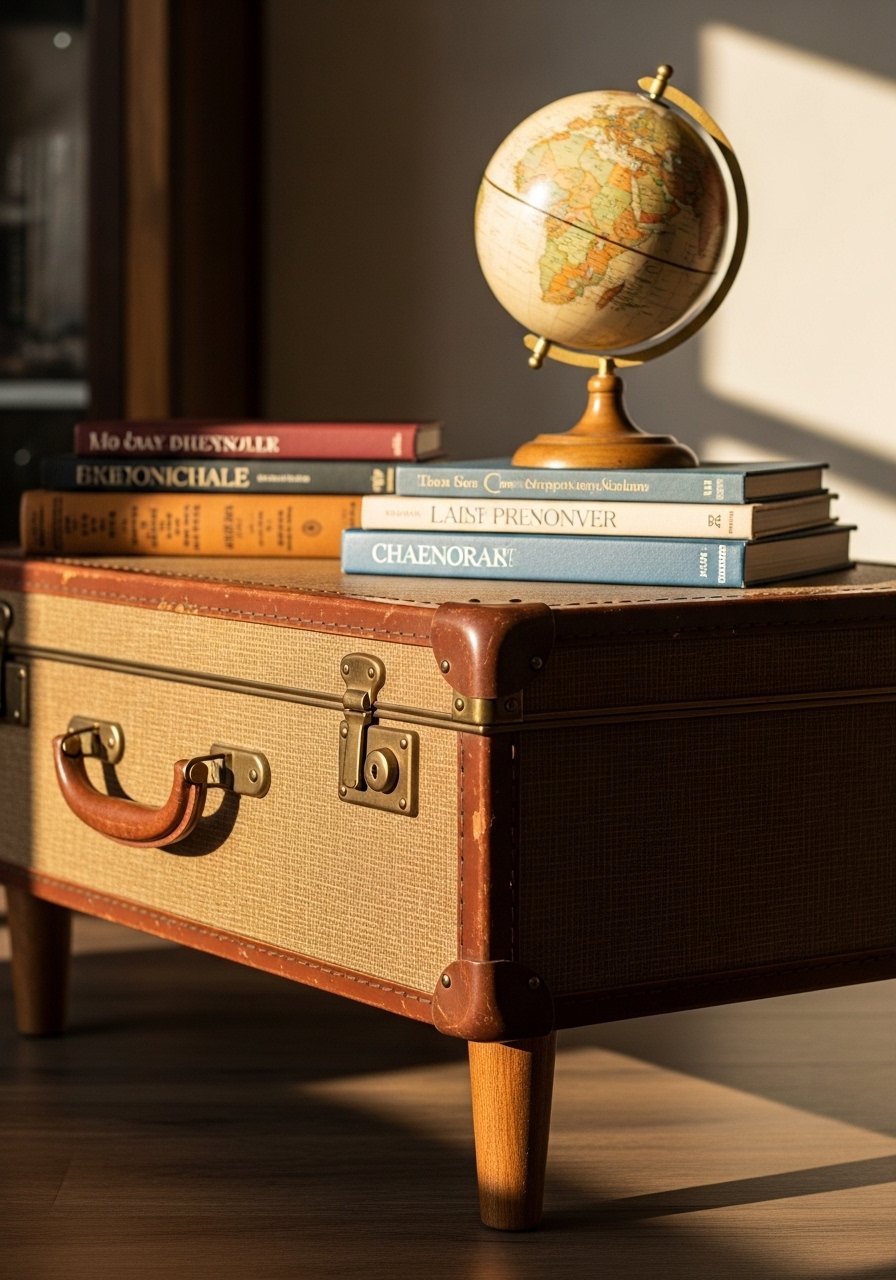
Vintage suitcases make instantly charming tables with hidden storage. Add short legs and a secure top for a retro look.
Materials
- Vintage hard-sided suitcase (36" x 18")
- 4 short legs (4–6" height) or low casters
- L-brackets and screws
- Felt pads and protective bumpers
- Paint or polish for hardware optional
- Drill with small bit
Instructions
- Clean suitcase and secure any loose fabric lining.
- Attach legs with L-brackets screwed into the suitcase base; reinforce with washers.
- Add felt pads and rubber bumpers inside to protect items.
- If paint/polish used on hardware, let dry 24 hours before placing items on top.
How to Display or Gift It
Use in eclectic living spaces. For gifting, fill with travel-sized goodies or a book. Store vertically to save space.
Trust your curiosity and give one a try this weekend — you’ll be surprised how custom these budget builds can feel. If you try several, a temperature-controlled hot glue gun and a reliable precision craft knife will speed up so many steps and reduce mistakes. Which style will you pin first — tile-inset, faux-marble, or a reclaimed door top? Share your photos or tag a friend who’d love these.
Trust me, picking up a quality hot glue gun with temperature control changed how every single one of these projects turned out — no more stringy mess, no more burns.


