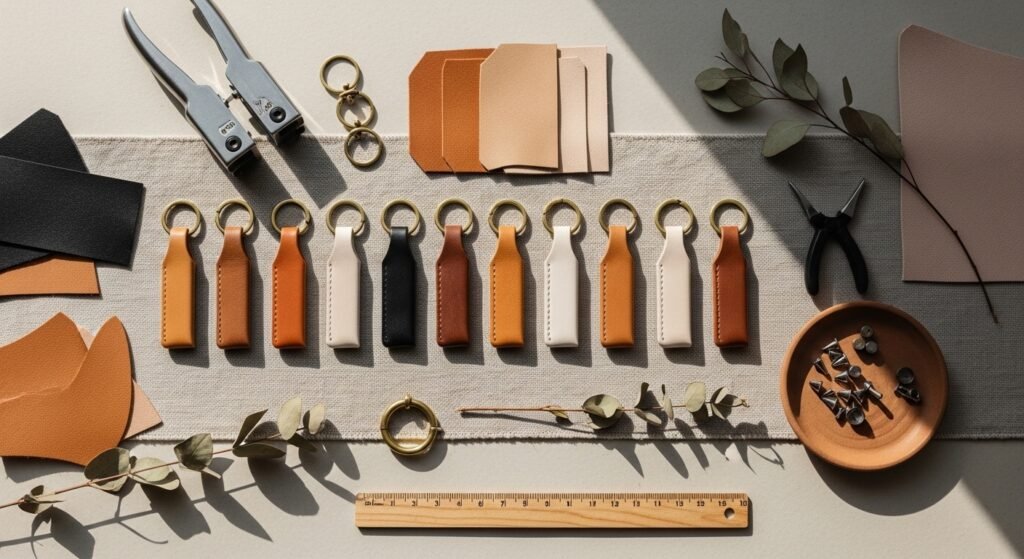
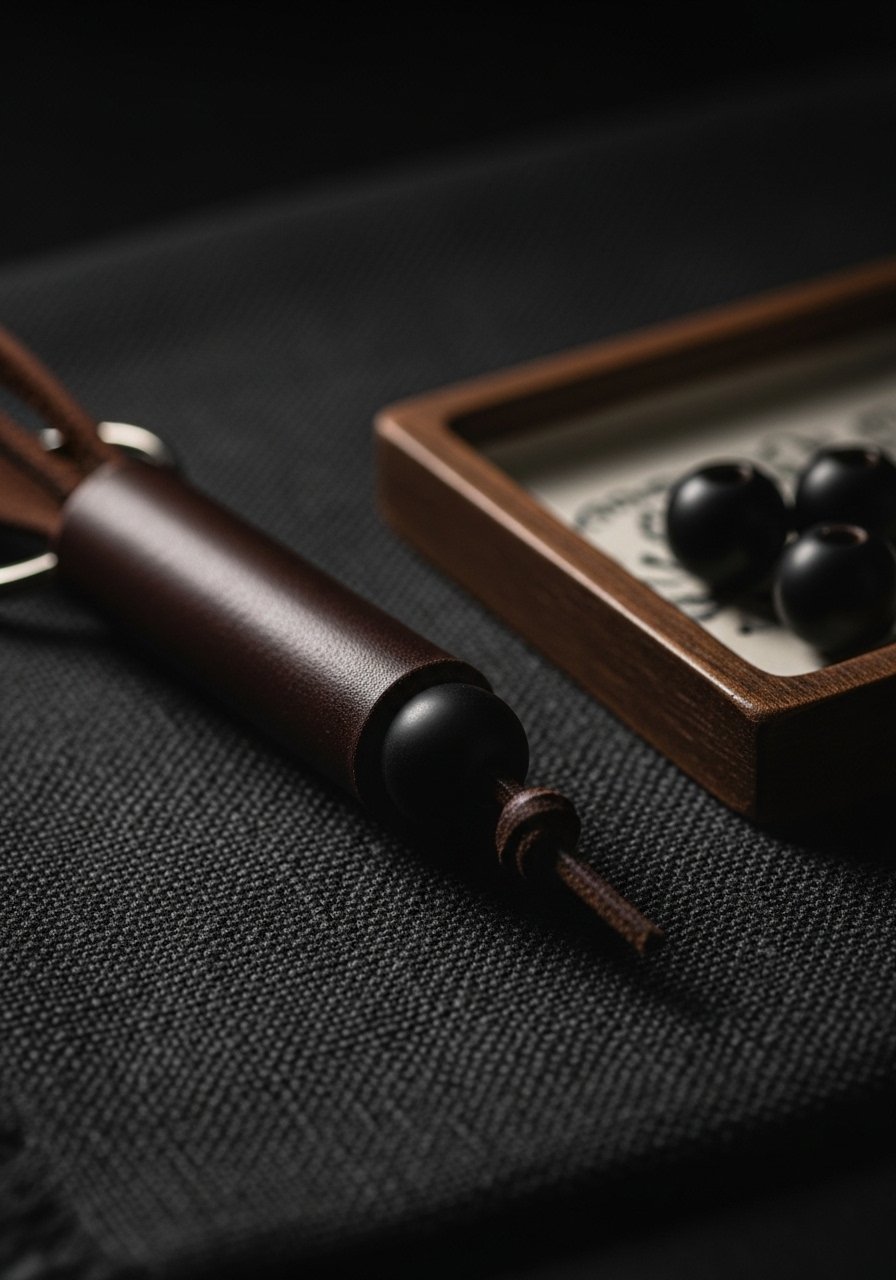
You probably tuck your keys into a jumble of receipts and loose change. A simple leather keychain can change that feel overnight — tidy, tactile, and quietly high-end. These 20 DIY leather keychain ideas show how little material and a few smart tools get you results that look boutique, not homemade.
You’ll find: fold-over straps, stamped initials, resin inlays, braided loops, tiny pouches, and chic hardware finishes. Each project lists exact quantities, realistic prep times, and step-by-step instructions, so you can make a batch in an afternoon. I often cut shapes with my Cricut Joy cutting machine for speed, but a precision craft knife works perfectly for one-offs.
Grab a leather punch and some split rings, and let’s make keychains that feel weighty in your hand and look like they belong in a design shop.
1. DIY leather keychain ideas: Folded Strap Minimalist Fob
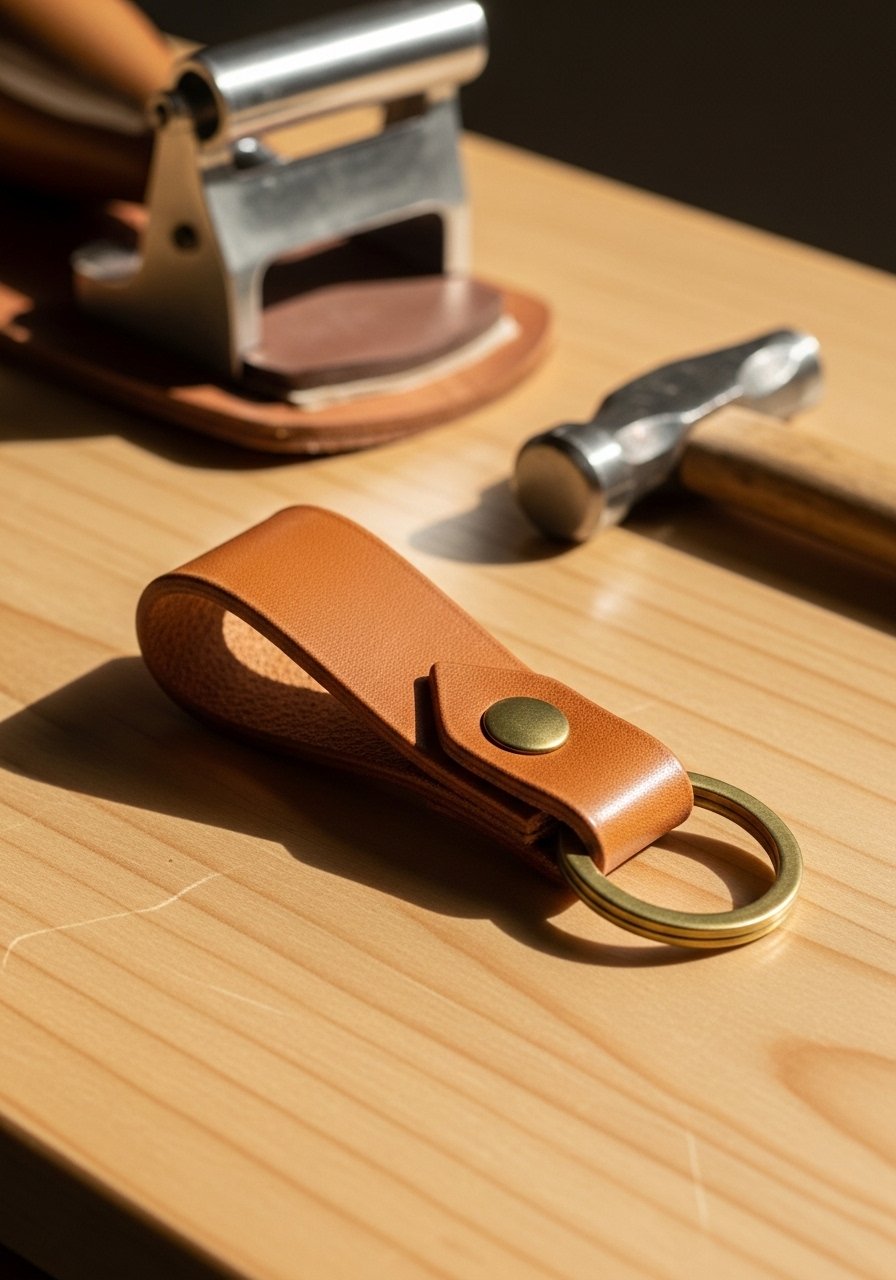
This folded strap is the first thing I make when I want something sleek but sturdy. It’s a simple two-layer fold with a rivet or screw post, giving the look of a boutique fob without fuss. Beginners love it; makers who batch gifts will appreciate how fast this goes.
Materials
- Vegetable-tanned leather scrap, 3–4 oz (1.2–1.6 mm) — 1 piece (4" x 1" per keychain)
- Brass Chicago screw or small rivet — 1 set
- Split key ring, 25–30 mm — 1
- Beeswax or leather conditioner, 5 mL for burnish — small amount
- Edge beveler — for soft corners
- Leather hole punch (3–4 mm)
- Cutting mat and straight ruler
Instructions
- Cut a 4" x 1" strip of leather. Use a self-healing mat and ruler for clean edges.
- Round both ends with scissors or an edge beveler. Burnish the long edges lightly with a slicker or folded scrap.
- Fold the strip so ends overlap by 3/8"; mark the center for the rivet.
- Punch a 3–4 mm hole through both layers where marked.
- Set the Chicago screw or rivet with a setter and mallet until snug — no wobble.
- Run a tiny amount of beeswax along the edges and buff for a soft sheen.
- Thread the split ring through the fold.
How to Display or Gift It
Keep finished pieces in a small kraft box with tissue paper for a boutique look. For storage, stack flat in a craft organizer drawer. Tie a thin twine bow around the ring for gifting. A small set of kraft gift boxes works beautifully for multiples.
2. Slim Geometric Hex Keychain

Sharp lines and a matte finish make this hex keychain feel architectural. Cut precise edges for that high-end look. This project shines when you use a ruler and a sharp blade.
Materials
- Vegetable-tanned leather, 3–4 oz — 1 piece (3" diameter hexagon)
- Matte brass rivet, 6 mm — 1
- Split key ring, 25 mm — 1
- Precision craft knife
- Metal ruler, 6" or longer
- Cutting mat
- Edge slicker or burnishing gum
Instructions
- Draw a 2.5" across hexagon template on card. Trace onto leather.
- Cut slowly with a precision craft knife against the metal ruler.
- Bevel the edges lightly with an edge beveler.
- Punch a 3 mm hole near one edge for the ring.
- Insert rivet and set with a setter and cloth underlay.
- Burnish edges with gum or beeswax until smooth and slightly glossy.
- Attach split ring.
How to Display or Gift It
Pair with a matching leather luggage tag in a gift set. Display on a small wooden dish or slate tile when gifting. Use a craft organizer tray to keep finished smalls tidy.
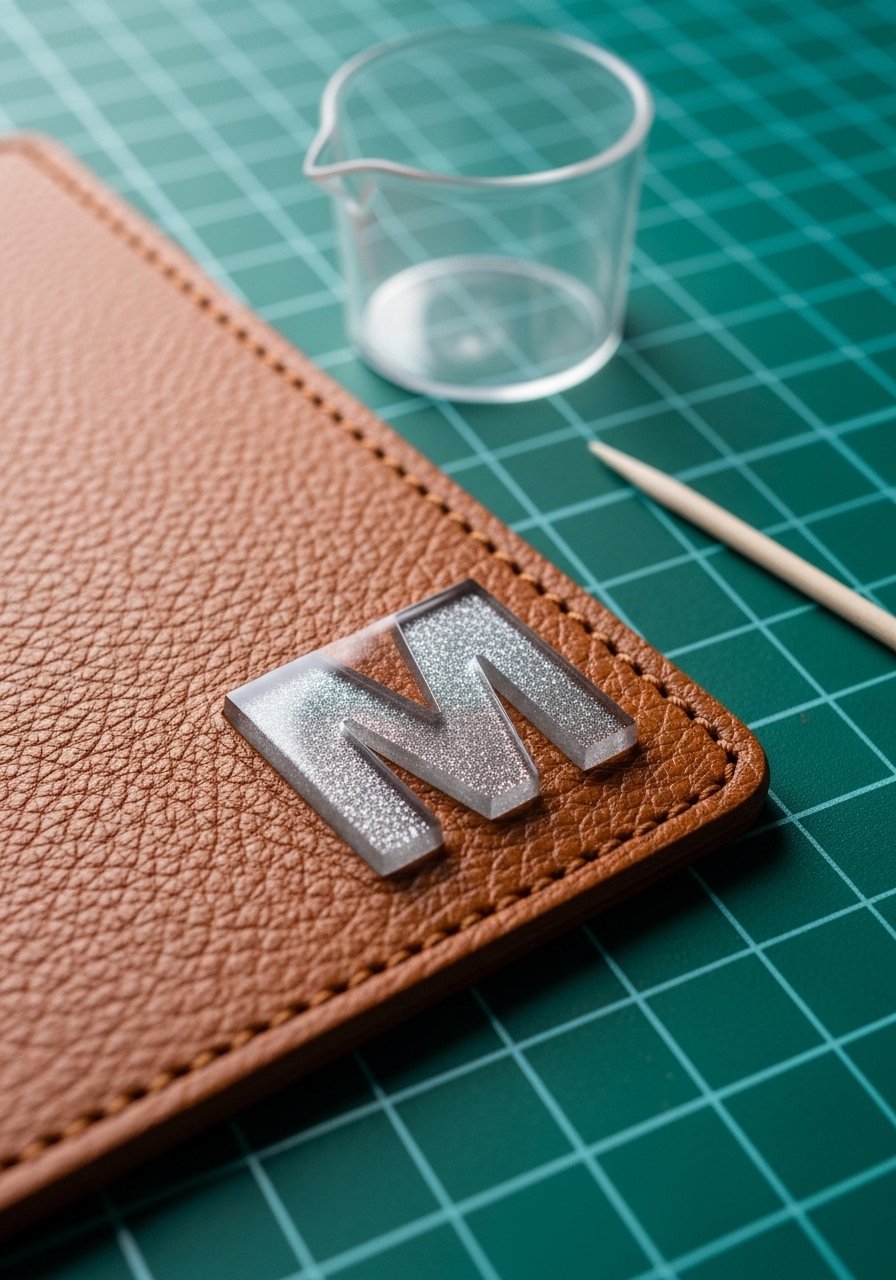
3. Stamped Initial Tag (Monogram)
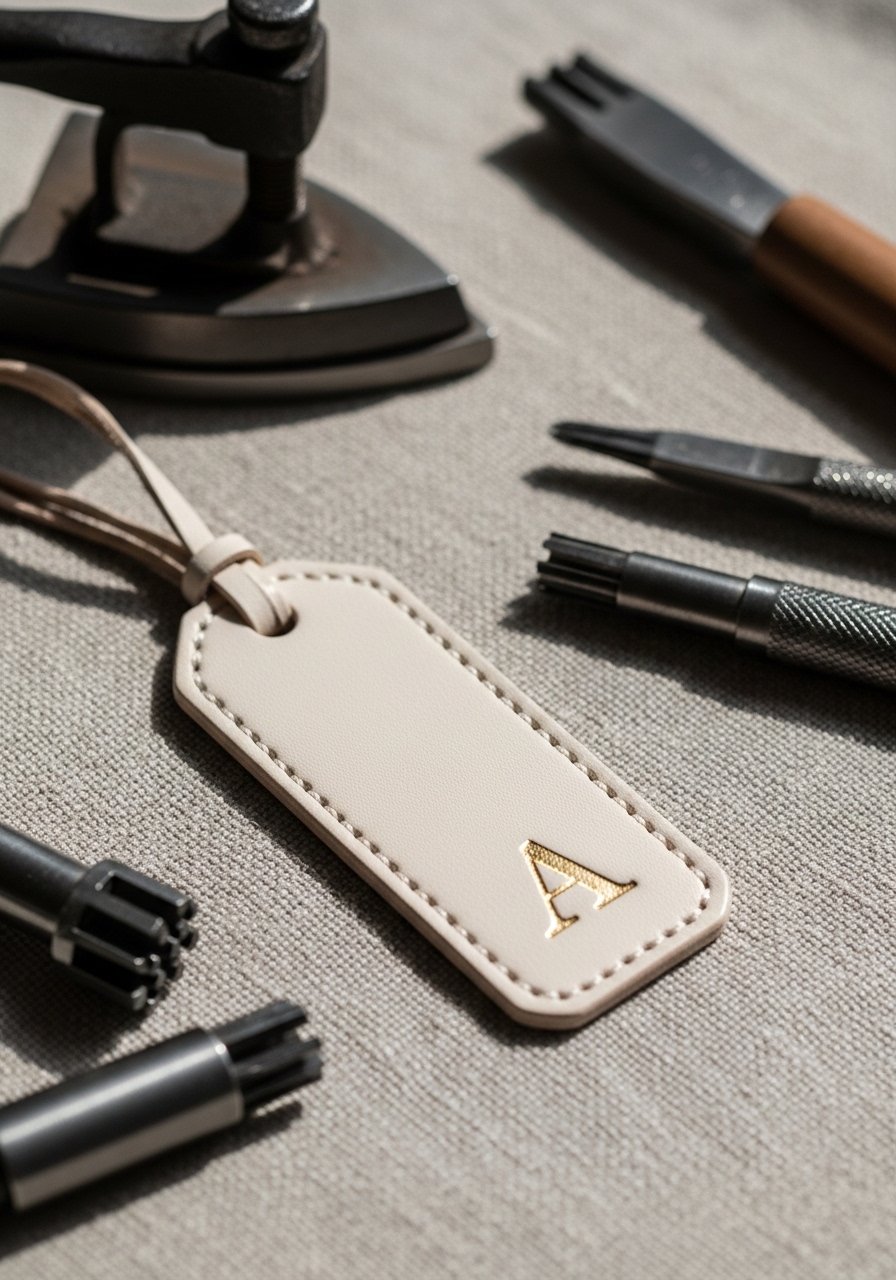
Personalized stamped initials look expensive but are surprisingly simple. The key is firm, even stamping and the right heat or foil for contrast. This is a top seller at craft fairs.
Materials
- Vegetable-tanned leather, 3–4 oz — 1 piece (2.5" x 1.25")
- Metal alphabet stamps — set
- Leather dye (antiquing brown) — 5–10 mL optional for offset contrast
- Gold foil or gold leaf (optional)
- Pricking iron or ruler for guides
- Mallet
- Edge burnisher
Instructions
- Cut a 2.5" x 1.25" rectangle. Round corners.
- Lightly dampen surface with a barely-wet cloth if using stamp on veg-tan (this helps the impression).
- Position letter stamp using a ruler as a guide.
- Hit stamp firmly with a mallet (1–2 strikes) until you see a clear impression.
- If using dye, apply lightly around the letter and wipe off excess immediately for contrast; dry 15–20 minutes.
- For foiling, apply adhesive size into stamp impression, wait tacky (5–10 minutes), press gold foil and rub off.
- Punch hole (3–4 mm) and attach split ring.
How to Display or Gift It
Wrap in tissue and tuck into a kraft envelope for a tasteful small gift. Monogram sets pair well with a leather care kit. Use a small wooden easel to photograph multiples for online listings.
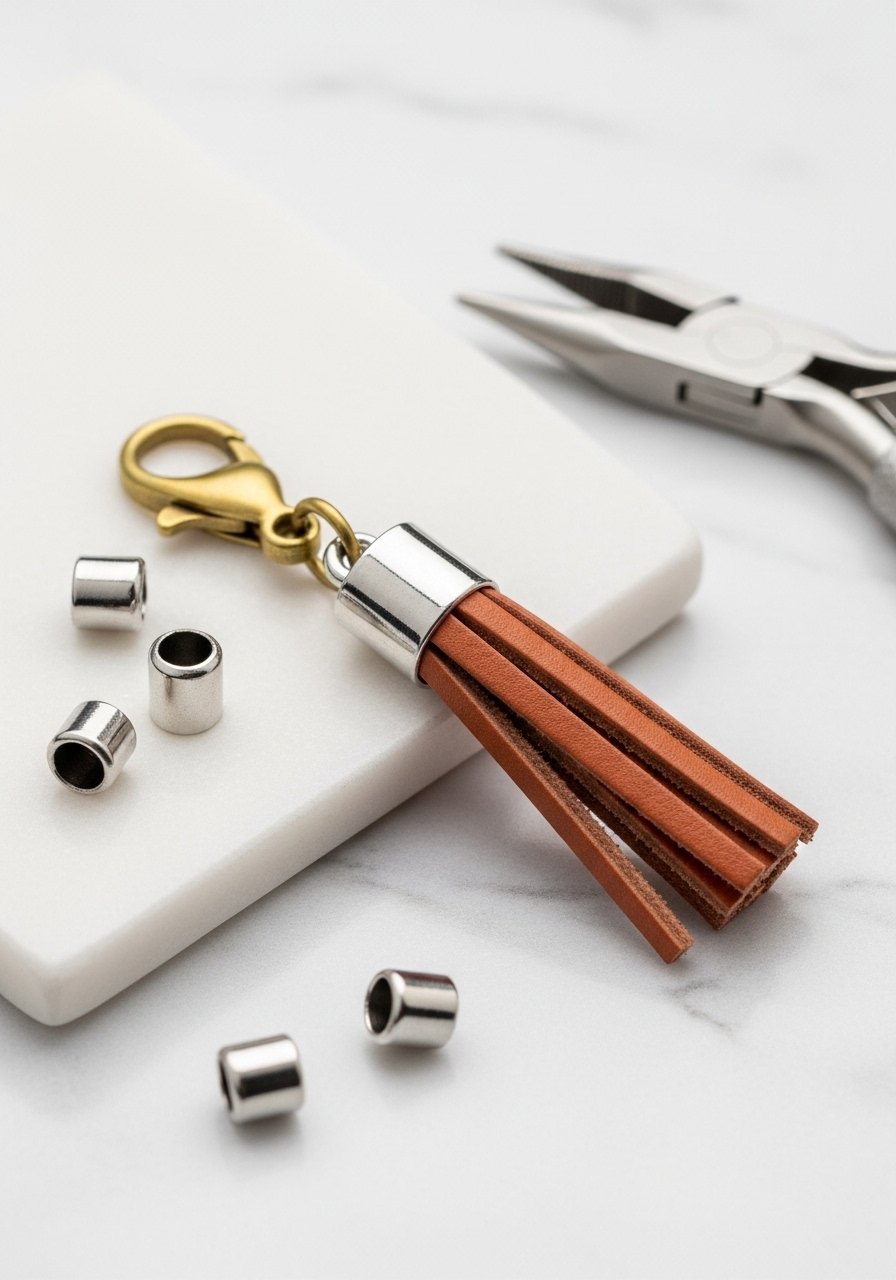
4. Leather Tassel Keychain
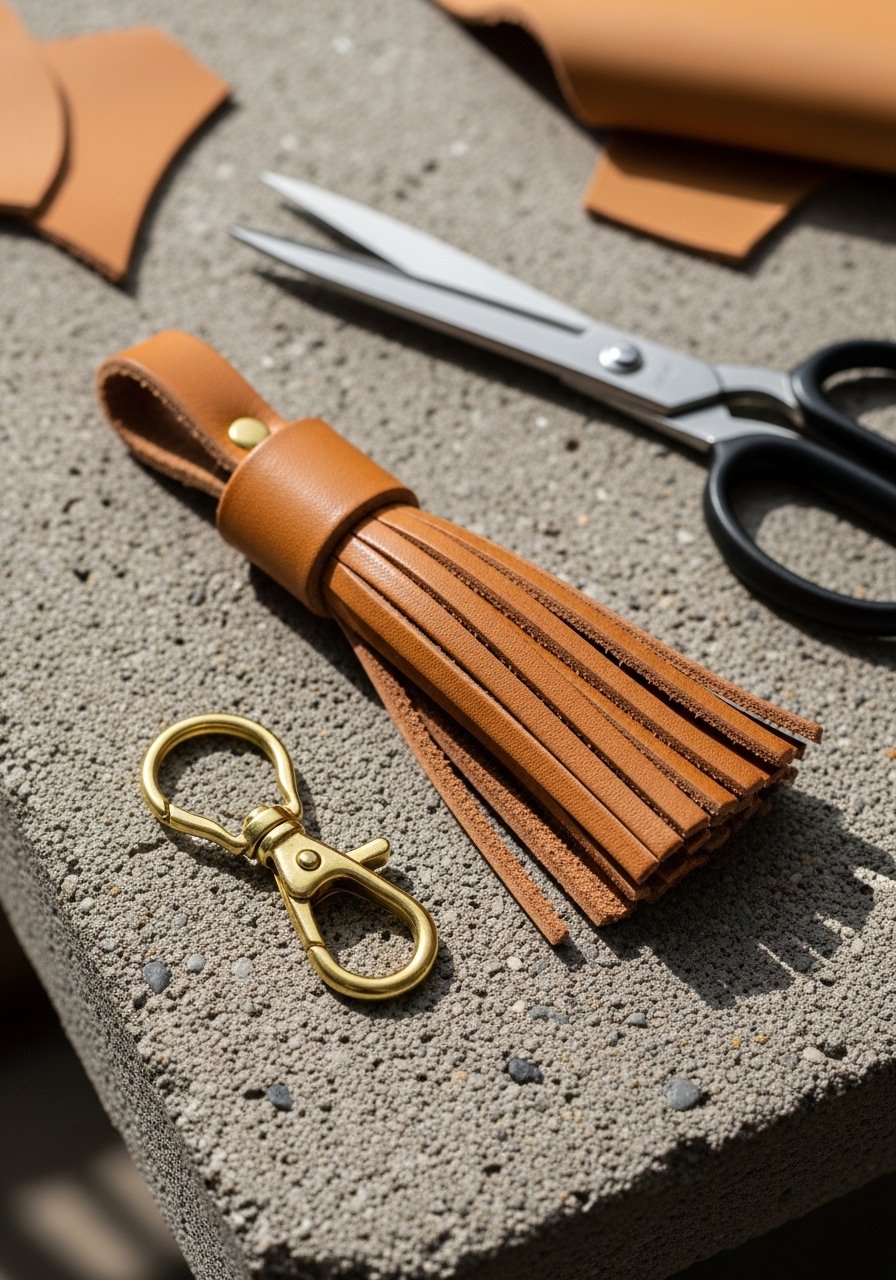
Tassels bring movement and texture without being fussy. Cut evenly for neat fringe and wrap the top tightly for a luxe finish. This is quick to make in multiples.
Materials
- Leather sheet, 1.2–1.6 mm — 1 piece (4" x 2.5")
- Lobster clasp or swivel clasp, 30 mm — 1
- Split ring, 20 mm — 1
- Sharp scissors or rotary cutter
- Ruler and pencil
- Glue (contact cement or E6000), small amount
- Small scrap for wrap, 1" x 0.5"
Instructions
- Cut a 4" x 2.5" rectangle. Draw parallel fringe lines 1/8" apart from the long edge, leaving 3/4" uncut at the top.
- Cut fringe carefully with sharp scissors or rotary cutter.
- Apply a thin line of glue to the inside of the top uncut edge.
- Roll from the fringe toward the uncut edge, keeping fringe even.
- Wrap the small scrap around the top tightly; secure with glue and press until set (5–10 minutes).
- Trim ends and attach lobster clasp and split ring.
- Let glue cure fully (E6000: 24 hours full cure; tack-free in 2–4 hours).
How to Display or Gift It
Pair tassels with a matching leather wallet or bag charm. Store flat to avoid flattening the fringe. Use a small gift box set for presentation.
5. Minimal Circle Tag — DIY leather keychain ideas
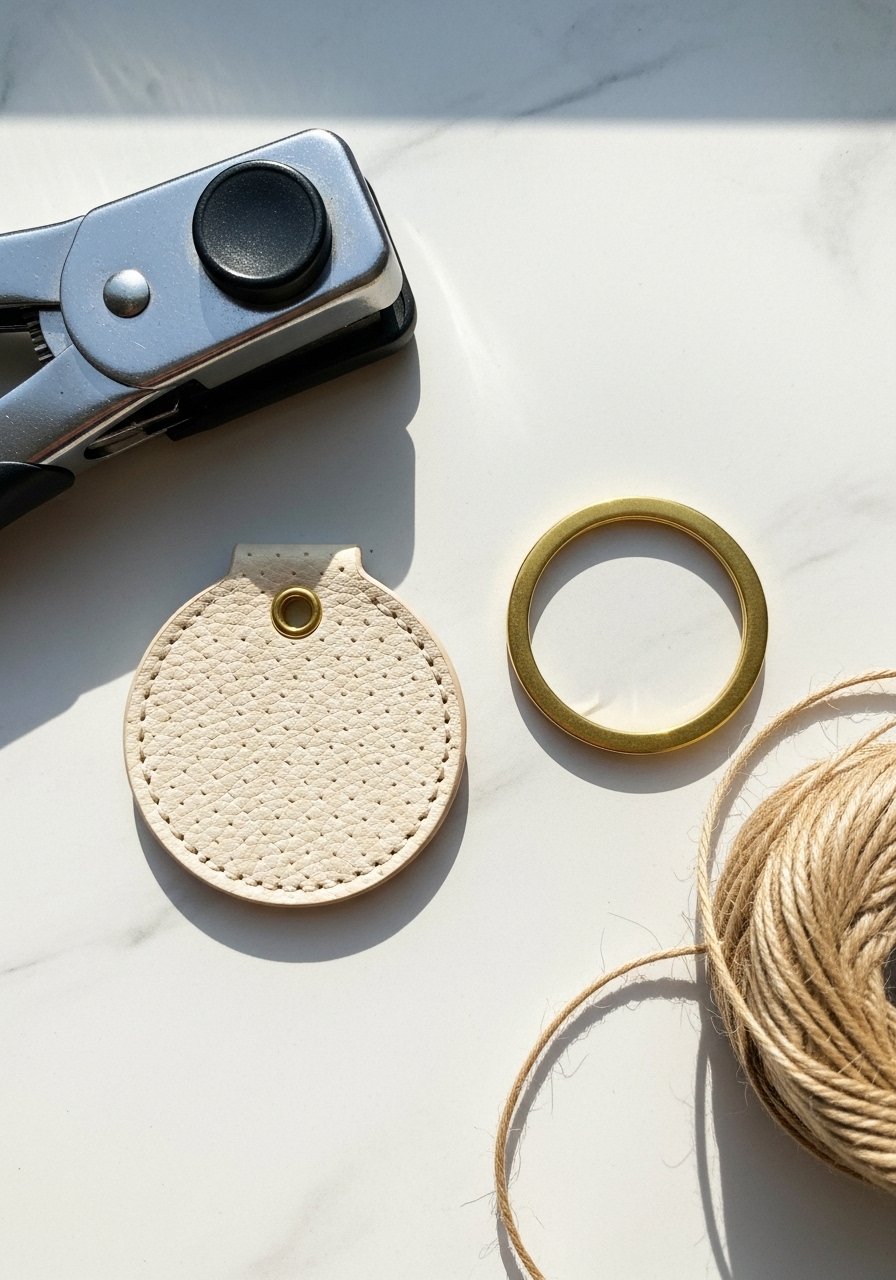
A clean round tag with a deboss or tiny detail reads modern and premium. Circles are forgiving for beginners and great for stamping or painting small motifs.
Materials
- Leather, 3–4 oz — 1 piece (2" circle per keychain)
- Circle punch (1.75" or 2") or Cricut blade
- Split ring, 25 mm — 1
- Acrylic paint pen or leather paint (optional)
- Edge ink or dye, matte black — 5 mL
- Foam brush
Instructions
- Use a 2" circle punch or cut with a template and a craft knife.
- Sand edges lightly and bevel.
- If painting, sketch design and apply leather paint pen; dry 20–30 minutes.
- Apply edge ink with a foam brush; allow to dry 10–15 minutes between coats. Two thin coats recommended.
- Punch a center-top 3 mm hole and attach split ring.
- Buff the surface with a soft cloth for a soft sheen.
How to Display or Gift It
Group circles on a ring for a layered look. Wrap in tissue and tuck into a kraft envelope for gifting. Store unpainted tags flat in a craft box to avoid warping; stackable craft organizers keep them safe.
6. DIY leather keychain ideas: Braided Leather Loop
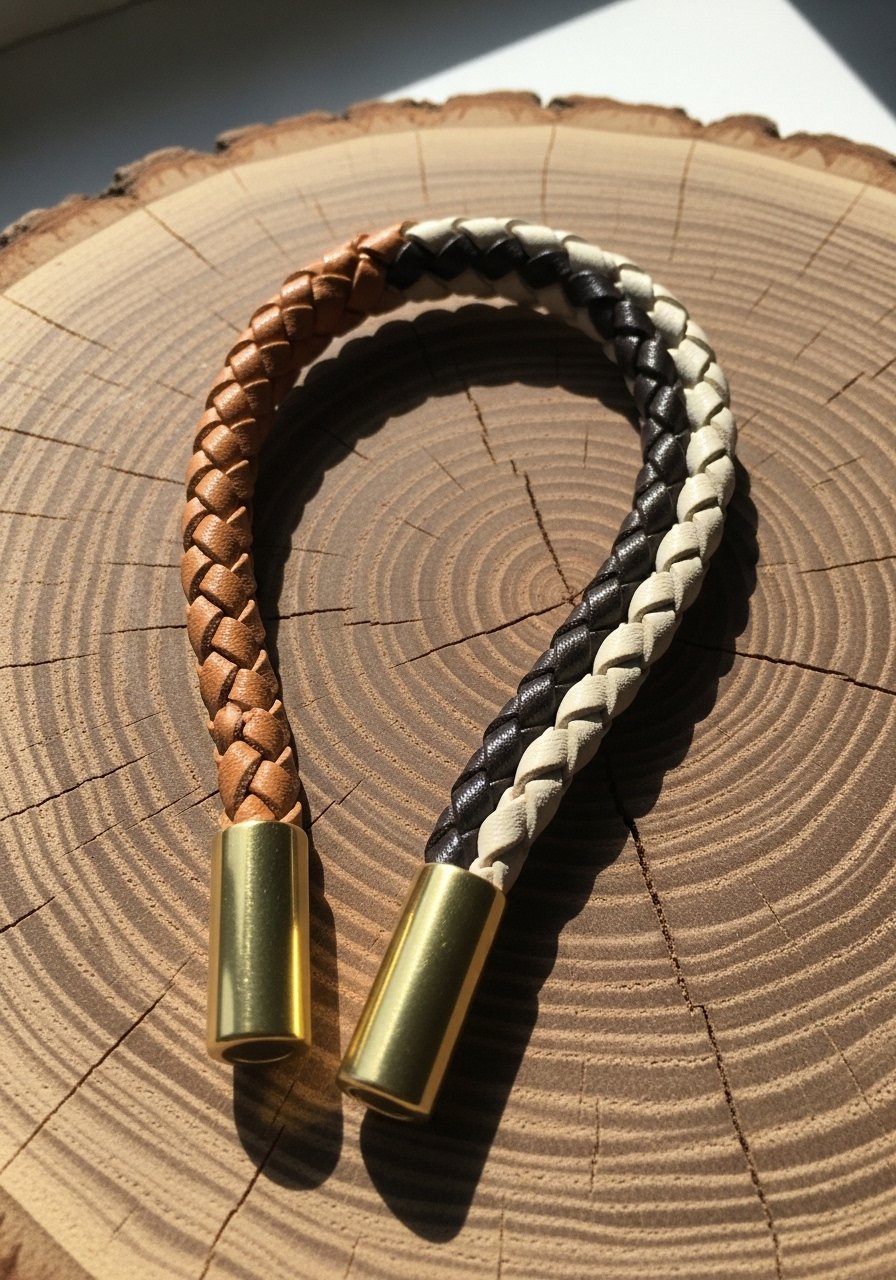
A small three-strand braid in thin leather cord feels artisanal but modern. It’s lightweight and tactile — great for people who fidget with rings. Use waxed leather cord for a smooth braid.
Materials
- 3mm leather cords, waxed — 3 strands, each 8" long
- Brass tube end cap, 10 mm — 1
- Split ring, 20–25 mm — 1
- Super glue or contact cement — tiny amount
- Scissors
- Needle-nose pliers
Instructions
- Cut three 8" cords. Burnish ends with a lighter touch if synthetic; trim cleanly.
- Secure ends together with a small piece of tape to a work surface.
- Braid tightly for 3–3.5", keeping even tension.
- Trim braid end to neat angle; dab a tiny drop of super glue on the tip to stop fray.
- Insert both ends into the brass tube cap; press and let glue set 10 minutes.
- Attach split ring to loop.
How to Display or Gift It
Group braids in sets by color for gift-ready bundles. Store in a small glass jar to keep cords from tangling — try a mason jar kit for display.
7. Painted Edge Gold Accent Tag
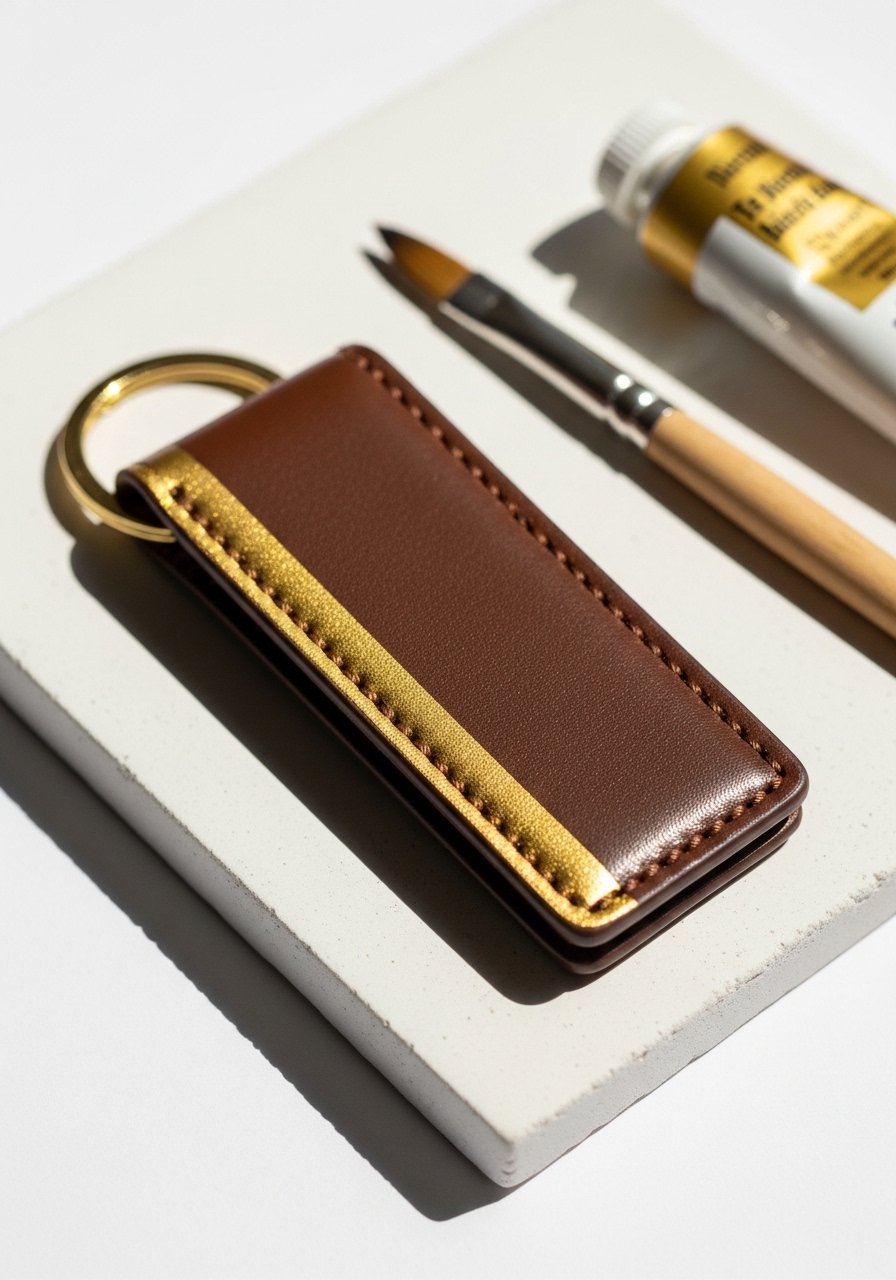
A single painted edge can read like upscale hardware. Use a steady hand and thin coats for crisp lines. Great when paired with matte black leather for contrast.
Materials
- Leather rectangle, 3–4 oz — 1 piece (3" x 1.25")
- Gold acrylic leather paint, 5 mL
- Fine flat brush, 1/8" width
- Painter's tape
- Split ring, 25 mm
- Edge slicker or burnisher
Instructions
- Cut 3" x 1.25" rectangle and round corners.
- Mask both long edges with painter's tape, leaving only the edge exposed.
- Paint a thin coat of gold along the exposed edge; dry 10 minutes.
- Repeat 1–2 more thin coats until opaque; dry 15 minutes between coats.
- Remove tape slowly for crisp edge.
- Burnish lightly and add split ring.
How to Display or Gift It
Pair with a matching leather wallet or luggage tag for a coordinated gift. Store painted items flat while paint cures (24 hours for full hardness). A small drying rack is handy when making multiples.
8. Riveted Loop with Leather Accent
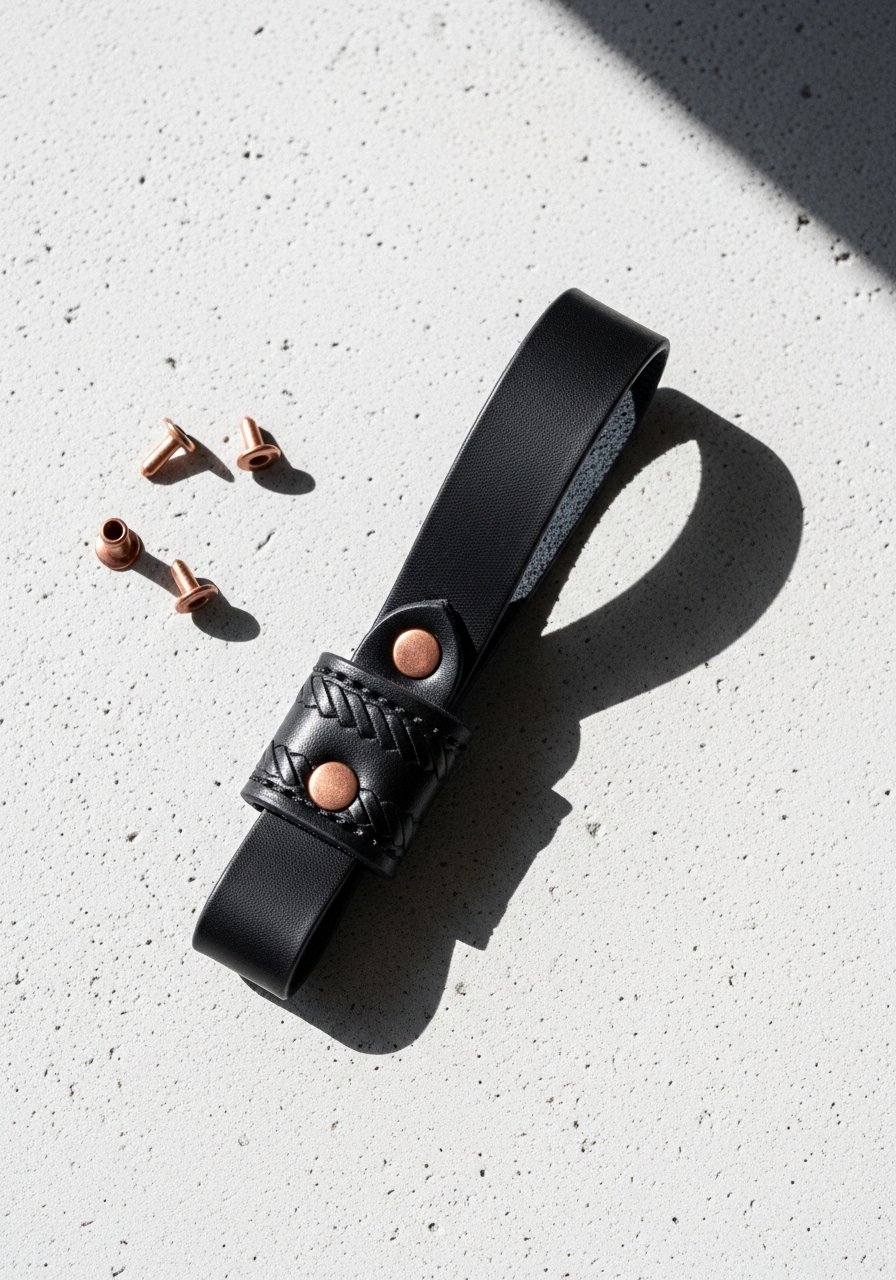
This look is all about hardware. Add a contrasting wrap band and two rivets for a detail that reads expensive. Adjustable rivet placement lets you tweak proportions.
Materials
- Leather strip, 3–4 oz — 1 piece (3.5" x 0.75")
- Contrasting leather band, 1" x 0.5"
- Two copper rivets, 6 mm — 2
- Split ring, 25 mm
- Rivet setter
- Hole punch
Instructions
- Cut main strip 3.5" x 0.75" and band 1" x 0.5".
- Fold main strip into a loop leaving 3/8" overlap.
- Center band over overlap and mark two rivet holes 6–8 mm apart.
- Punch holes and insert rivets; set with rivet setter and mallet.
- Trim any excess band and sand edges.
- Attach split ring.
How to Display or Gift It
Group with similar rivet-tone accessories for a matching set. Store riveted items in a shallow tray to avoid denting. A magnetic tool tray keeps metal bits organized.
9. Knotted Leather Fob (Sailor’s Knot)
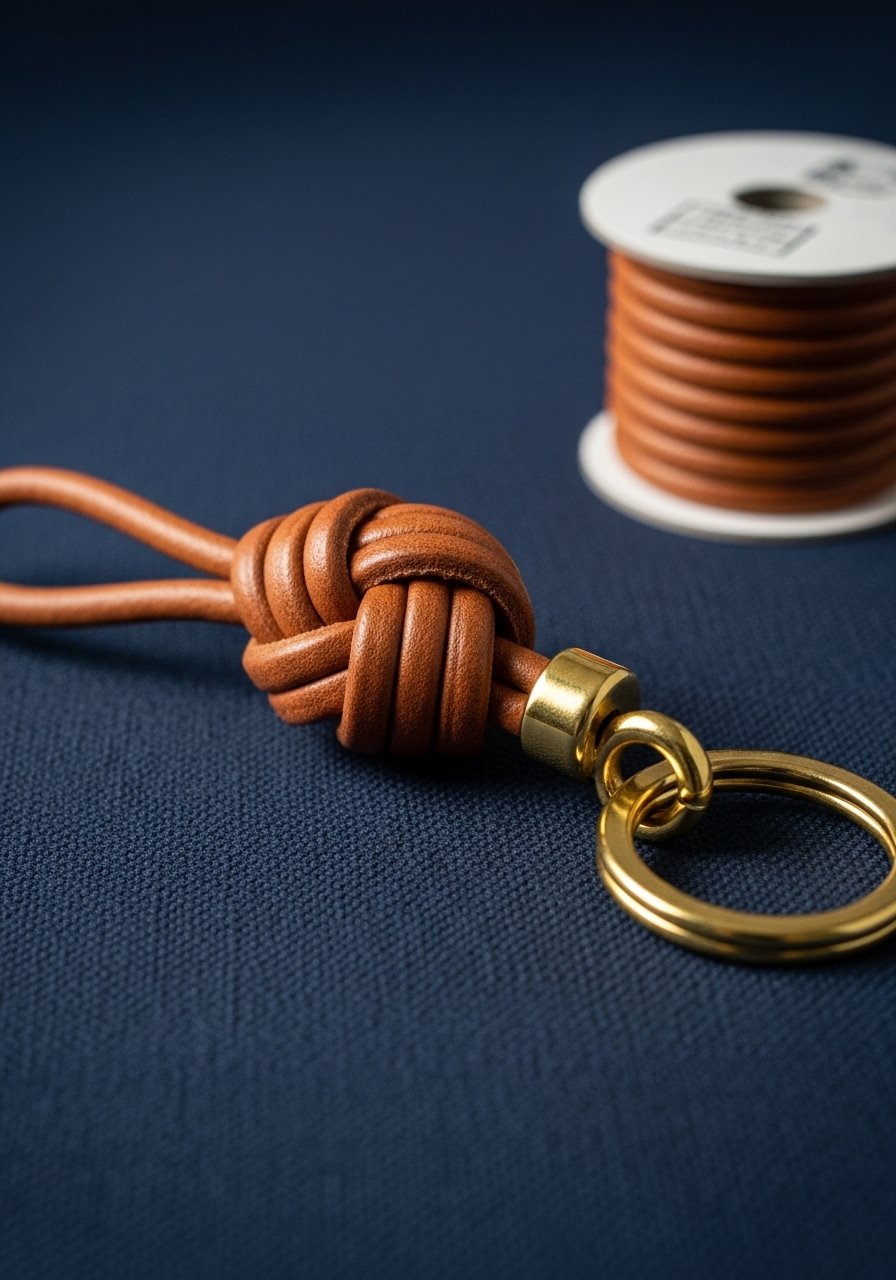
Knots add texture without cutting shapes. This sailor’s knot fob uses one cord and ends finished with a tube cap for a clean look.
Materials
- 3mm leather cord, waxed — 1 piece (10" long)
- Brass tube cap, 8–10 mm — 1
- Split ring, 25 mm — 1
- Scissors
- Light adhesive to secure ends
Instructions
- Cut a 10" cord and fold in half. Use a knot tutorial to tie a tight sailor’s knot about 2" down.
- Trim extra cord leaving 1/4" tails.
- Add a dab of glue to tails and insert into tube cap; press until set (10 minutes).
- Attach split ring.
How to Display or Gift It
Tie a small note card to the ring for gifting. Store coils flat to prevent kinks. A small zip pouch keeps knotted fobs tidy.
10. Resin Inlay Initial — DIY leather keychain ideas
Resin inlay gives a glossy, dimensional accent that contrasts beautifully with matte leather. Use thin layers and cure fully for a smooth result.
Materials
- Leather rectangle, 3–4 oz — 1 piece (2.5" x 1")
- Two-part epoxy resin, small kit (10 mL total)
- Mini silicone mold or indented letter stamp
- Fine toothpick for mixing
- Split ring, 25 mm
- Painter's tape to mask area
- Sandpaper, 400–600 grit
Instructions
- Cut leather 2.5" x 1" and mark where the inlay will sit.
- Create a shallow recess using a craft knife or small gouge (about 0.5–1 mm deep).
- Mix 2-part epoxy according to directions (usually 1:1) — small batches only.
- Tint resin if desired with mica powder; pour into recess carefully.
- Remove bubbles with a heat gun held 6–8" away for 3–5 seconds.
- Let cure fully (check resin brand; typically 24 hours for full cure, tack-free in 4–6 hours).
- Sand any rough spots with 400–600 grit paper and buff gently.
- Punch hole and add split ring.
How to Display or Gift It
Let resin-cured pieces rest 48 hours before packing. Present on a small card tucked into a kraft gift box for safe shipping.
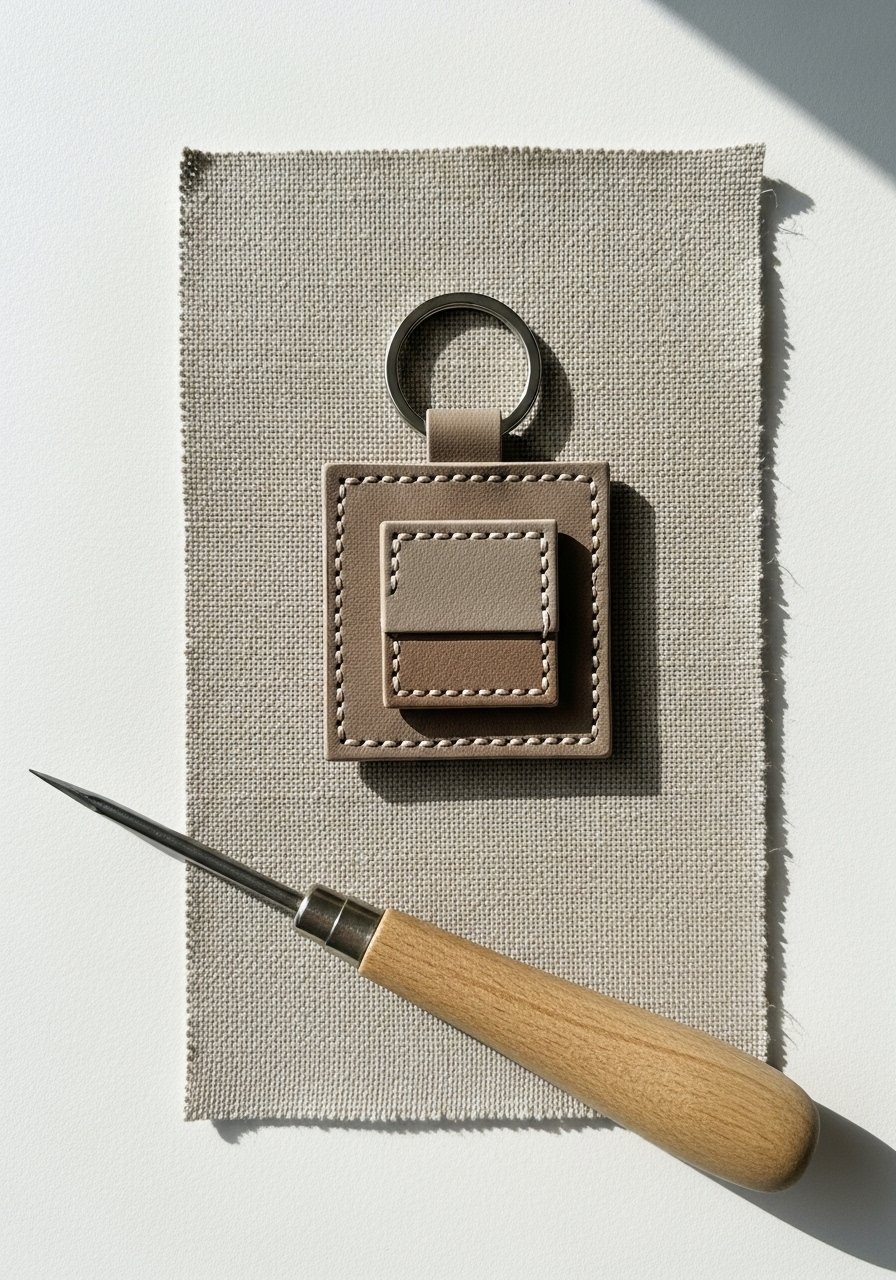
11. Stitched Mini Wallet Key Fob
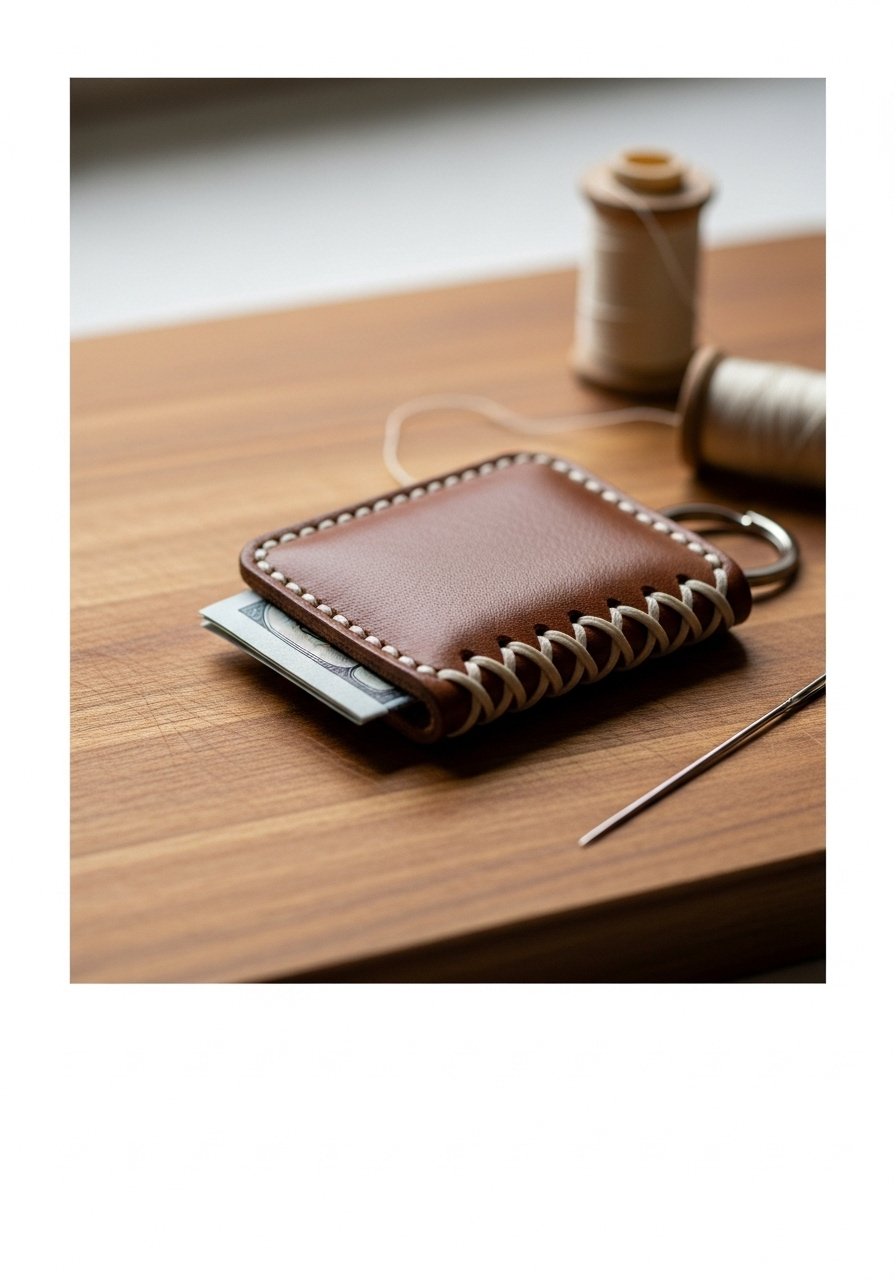
This fob doubles as a micro wallet for emergency cash or a folded transit card. Saddle-stitching gives a handcrafted, durable edge.
Materials
- Vegetable-tanned leather, 3–4 oz — 1 piece (3" x 2")
- Waxed thread, 0.8 mm — 2-3 feet
- Saddle stitching needle (2)
- Pricking iron or chisel
- Edge beveler
- Split ring, 25 mm
- Bone folder
Instructions
- Cut 3" x 2" rectangle; fold into a wallet (fold at 1" in from one short edge).
- Mark and punch stitch holes every 6 mm along open edge.
- Thread needles and saddle stitch through holes, keeping tension even.
- Trim thread and burnish knots into the edge; apply small dot of glue to secure ends.
- Bevel and burnish outer edges for smooth hand-feel.
- Punch hole and attach split ring.
How to Display or Gift It
Include a tiny card explaining the stitch and care. Store flat to prevent creases. A compact sewing kit is handy when stitching on the go.
12. DIY leather keychain ideas: Ombre Dyed Strap
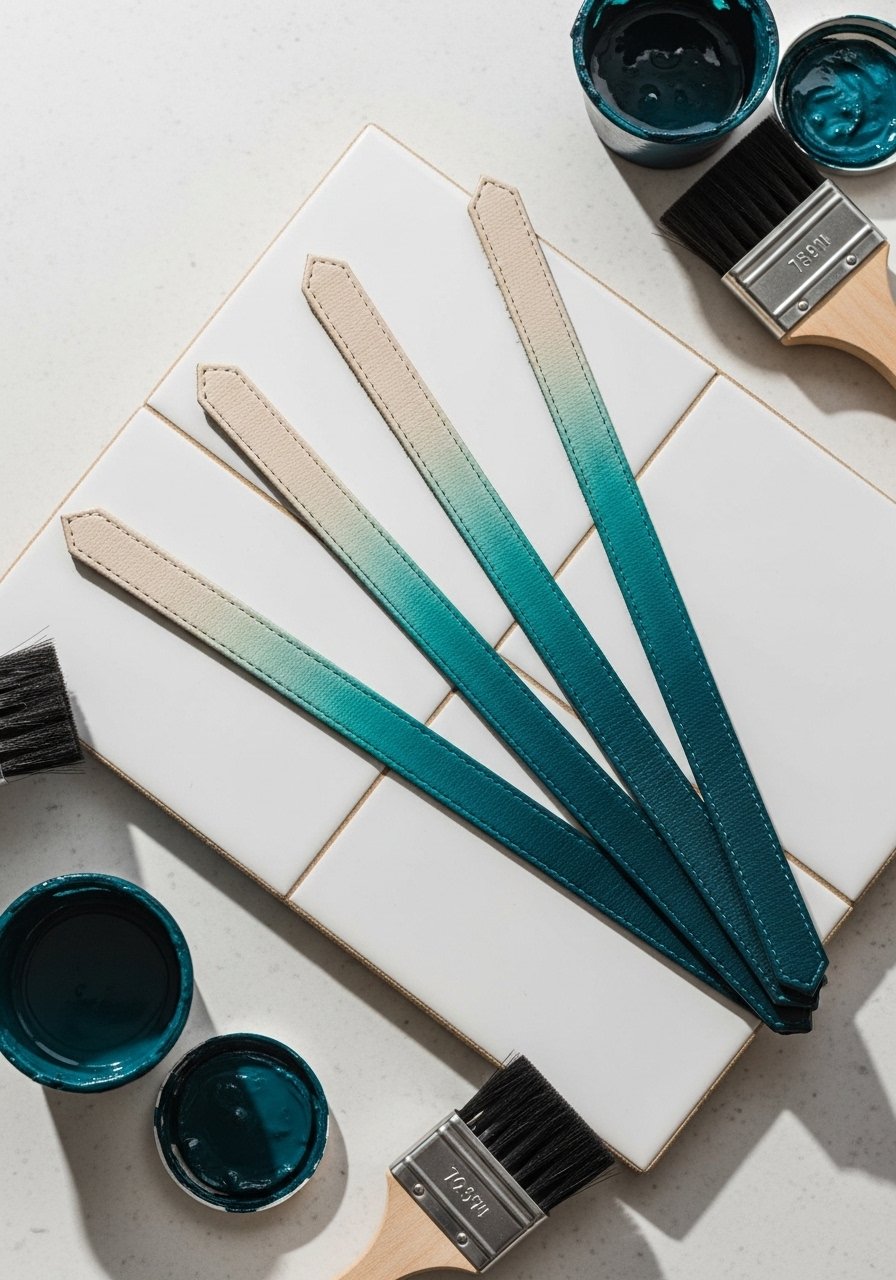
Ombre dyeing adds subtle color depth. Use diluted leather dye and layered applications for a smooth gradient. This suits japandi or boho palettes beautifully.
Materials
- Leather strips, 3–4 oz — 3 strips, each 4" x 0.75"
- Alcohol-based leather dyes (two shades) — 10 mL each
- Small foam brushes
- Mixing cups
- Split rings, 25 mm — 3
- Protective gloves
Instructions
- Cut strips 4" x 0.75" and tape down the top edge.
- Mix dye shades: base color and darker color.
- Apply base color thinly across entire strip; let dry 10–15 minutes.
- Add darker shade at one end and feather with a clean foam brush to blend; let dry 15 minutes.
- Repeat thin coats until desired gradient; allow 24 hours for full color cure.
- Seal with a thin coat of leather conditioner or matte finish; dry 30 minutes.
- Punch hole and add split ring.
How to Display or Gift It
Bundle ombre pieces together for a color set. Wrap in tissue with a small care note about dye transfer prevention. Store dyed items flat; a stackable organizer helps.
13. Tiny Coin Pouch Keychain
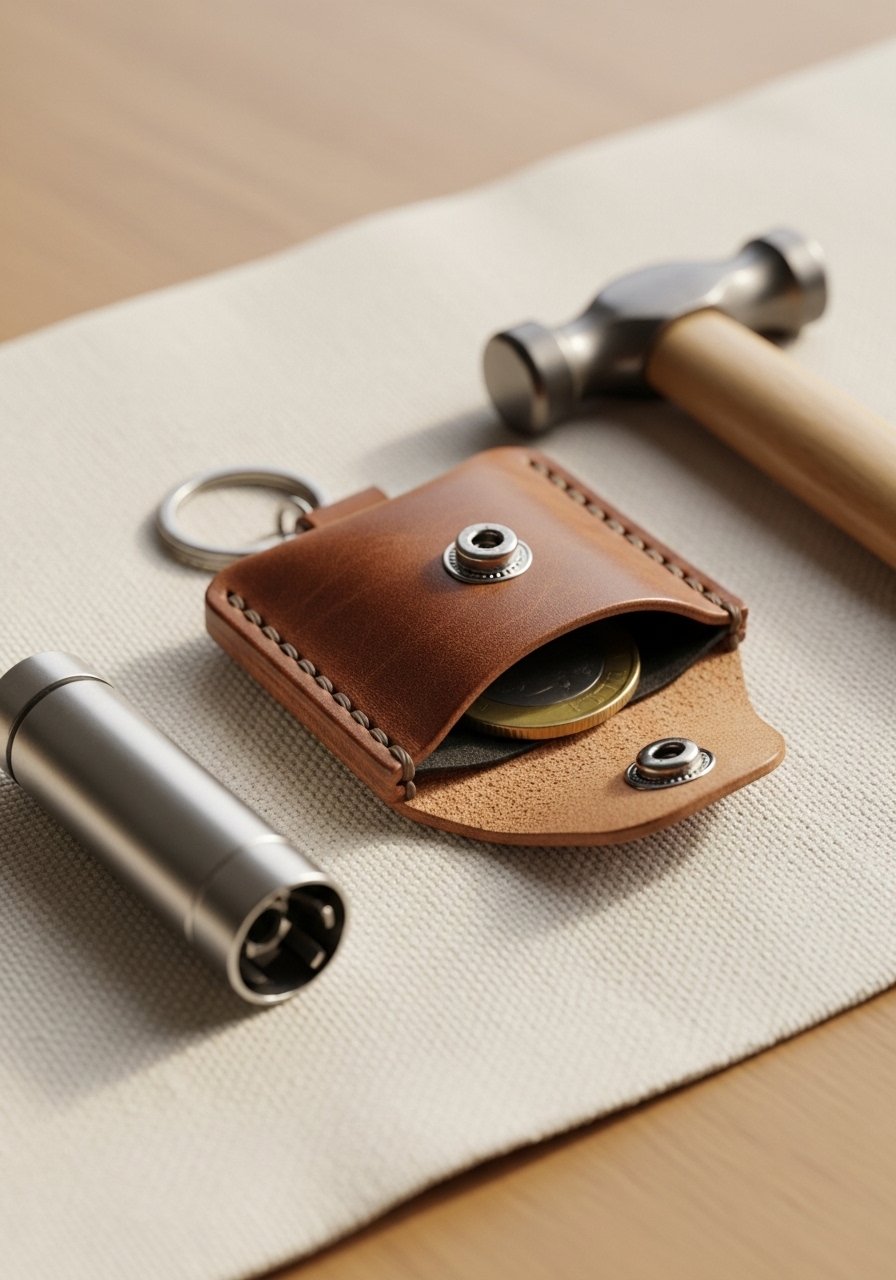
A micro pouch feels practical and luxe—perfect for lip balm or a single key. Use a snap for secure closure and edge finishing for a polished look.
Materials
- Leather, 2–2.5 oz — 1 piece (3.5" x 3")
- Snap set (male/female), 8–10 mm — 1 set
- Split ring with swivel — 1
- Contact cement (small tube)
- Snap setter and mallet
- Scissors
- Edge paint or burnishing gum
Instructions
- Cut a 3.5" x 3" square and round two opposing corners for a pouch flap.
- Fold bottom up to create pocket, leaving 3/4" flap.
- Glue side seams with a thin bead of contact cement; press 60 seconds.
- Mark snap positions and set snaps with setter and mallet.
- Paint or burnish edges for finish.
- Attach split ring to a punched hole in the flap.
How to Display or Gift It
Slip in a mini note or charm for gifting. Store pouches flat to avoid creases. A snap tool kit is handy for multiple pouches.
14. Double-Layered Contrast Square
Layered squares are graphic and modern. Topstitching adds a tactile line that reads professional when done neatly.
Materials
- Two colors of leather, 3–4 oz — 1 large square 2.5" x 2.5", 1 small square 1.25" x 1.25"
- Waxed thread, small amount
- Sewing awl or stitching saddle kit
- Pricking iron
- Split ring, 25 mm
Instructions
- Cut squares to size and bevel edges.
- Center small square on large one and mark stitch holes with pricking iron.
- Use a sewing awl to topstitch with waxed thread; secure knots beneath.
- Burnish edges and buff leather for soft sheen.
- Punch hole at top and attach split ring.
How to Display or Gift It
Display stacked by color on a ring. Gift in a small pouch with a care card. Use a small fabric drawstring bag for presentation.
15. Painted Minimalist Heart
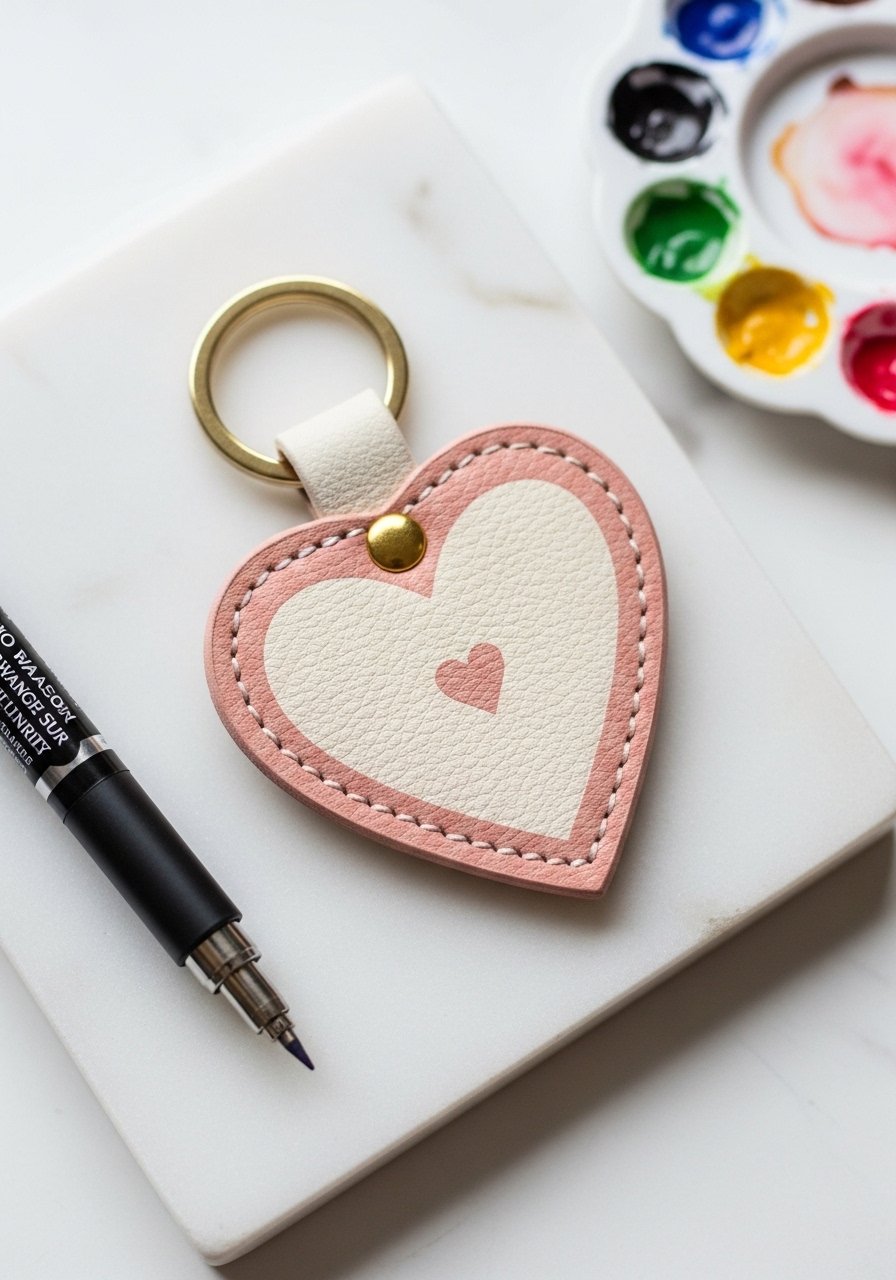
Hand-painted accents feel personal and boutique. Use a steady pen for clean shapes and seal the paint for durability.
Materials
- Leather hearts, 2–3 oz — 1 piece (1.75" wide)
- Fine-tip paint pen, white or blush
- Clear matte sealer, 5 mL
- Split ring, 20 mm
- Scissors
- Edge ink (optional)
Instructions
- Cut heart shape 1.75" wide; sand edges lightly.
- Sketch small heart center and fill with paint pen; let dry 10 minutes.
- Apply light coat of clear matte sealer; dry 15–20 minutes.
- Paint edge if desired and dry.
- Punch hole and attach split ring.
How to Display or Gift It
Pair hearts with matching tags for Valentine-style sets. Wrap in tissue and tie with twine. A small gift tag set makes it feel finished.
16. Leather + Wood Combo Tag

Contrast leather with a thin wooden disc for tactile interest. Use a small rivet or screw to combine materials securely.
Materials
- Thin birch wood disc, 1.5" — 1
- Leather strip, 3–4 oz — 1 piece (2.5" x 0.5")
- Mini brass screw or rivet, 6 mm — 1
- Drill with small bit for wood
- Wood stain (optional)
- Split ring, 25 mm
Instructions
- Lightly sand and stain wood disc if desired; dry 30 minutes.
- Cut leather strip 2.5" x 0.5", punch hole through one end.
- Align leather over wood disc, mark where screw will go.
- Drill pilot hole through wood and leather; insert screw/rivet and set.
- Attach split ring.
How to Display or Gift It
Pair wood + leather pieces in a set for gift boxes. Keep wood discs flat to avoid warping; thin wood supply packs are great for projects.
17. Stamped Coordinates Key Tag
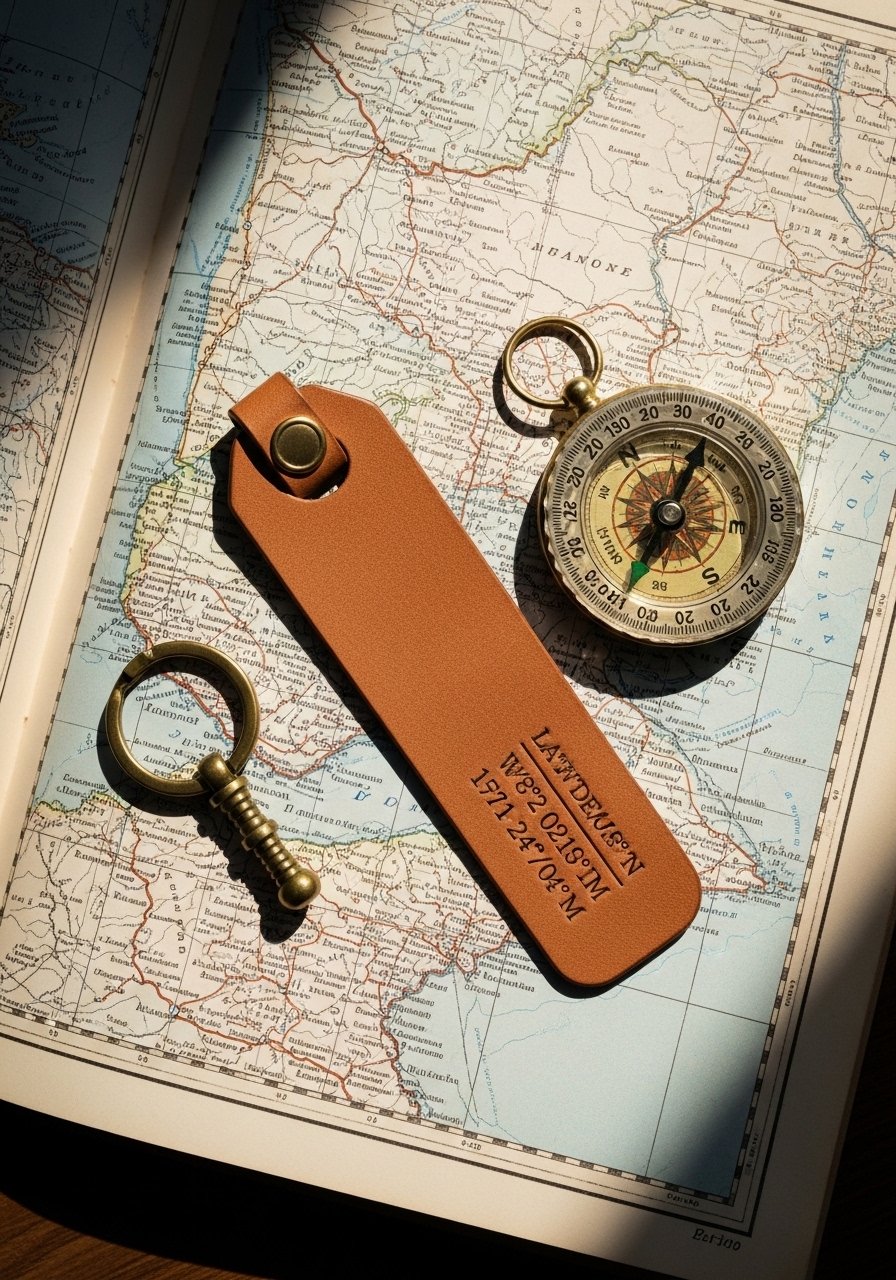
Stamped coordinates turn a keychain into a meaningful keepsake. Use a guide and firm hits for consistent impressions.
Materials
- Leather strip, 3–4 oz — 1 piece (3" x 0.9")
- Number/letter stamp set
- Mallet
- Ruler and pencil
- Split ring, 25 mm
- Leather dye (optional) for contrast
Instructions
- Mark center line and location for each number to keep alignment.
- Secure leather on a hard surface; stamp each character with firm strikes.
- If desired, rub a bit of dark dye into impressions and wipe surface clean for contrast.
- Punch hole and attach split ring.
How to Display or Gift It
Include a small card explaining the coordinates’ significance. Store stamped tags in a shallow tray to keep impressions sharp.
18. Leather Tube with Bead Accent
A tubular leather sheath threaded through a bead reads modern and luxe. It’s lightweight and great on minimalist bags.
Materials
- Leather strip, 2–3 oz — 1 piece (4" x 0.5")
- Wood or ceramic bead, hole 2–3 mm — 1
- Split ring, 20–25 mm
- Glue (super glue)
- Scissors
- Needle or awl to help bead thread
Instructions
- Cut strip 4" x 0.5" and roll into a tight tube; glue seam and let set 10 minutes.
- Thread bead onto tube or thread bead on cord, slide tube over.
- Punch a 3 mm hole and attach split ring.
- Trim ends clean and burnish lightly.
How to Display or Gift It
Group with beaded jewelry or bracelets for a set. Store tubes flat in a drawer organizer to prevent crushing.
19. Tiny Tassel with Metal Cap
A metal cap makes a tiny tassel read polished. Use fine, uniform cuts and crimp the cap properly for a professional finish.
Materials
- Thin leather sheet, 1–1.2 mm — 1 piece (3" x 1.5")
- Tiny metal cap, 4–6 mm — 1
- Lobster clasp, 20–25 mm — 1
- Super glue
- Pliers
- Scissors
Instructions
- Cut rectangle 3" x 1.5" and fringe at 1/16" to 1/8" spacing, leaving 3/8" uncut.
- Roll fringe tightly, apply small amount of glue to top, and slide metal cap on.
- Crimp cap gently with pliers if needed; wipe any excess glue.
- Attach lobster clasp.
How to Display or Gift It
Tuck into a small jewelry card inside a mini box for gifting. Use a jewelry gift box set for presentation.
20. Braided Leather + Metal Tube Keychain
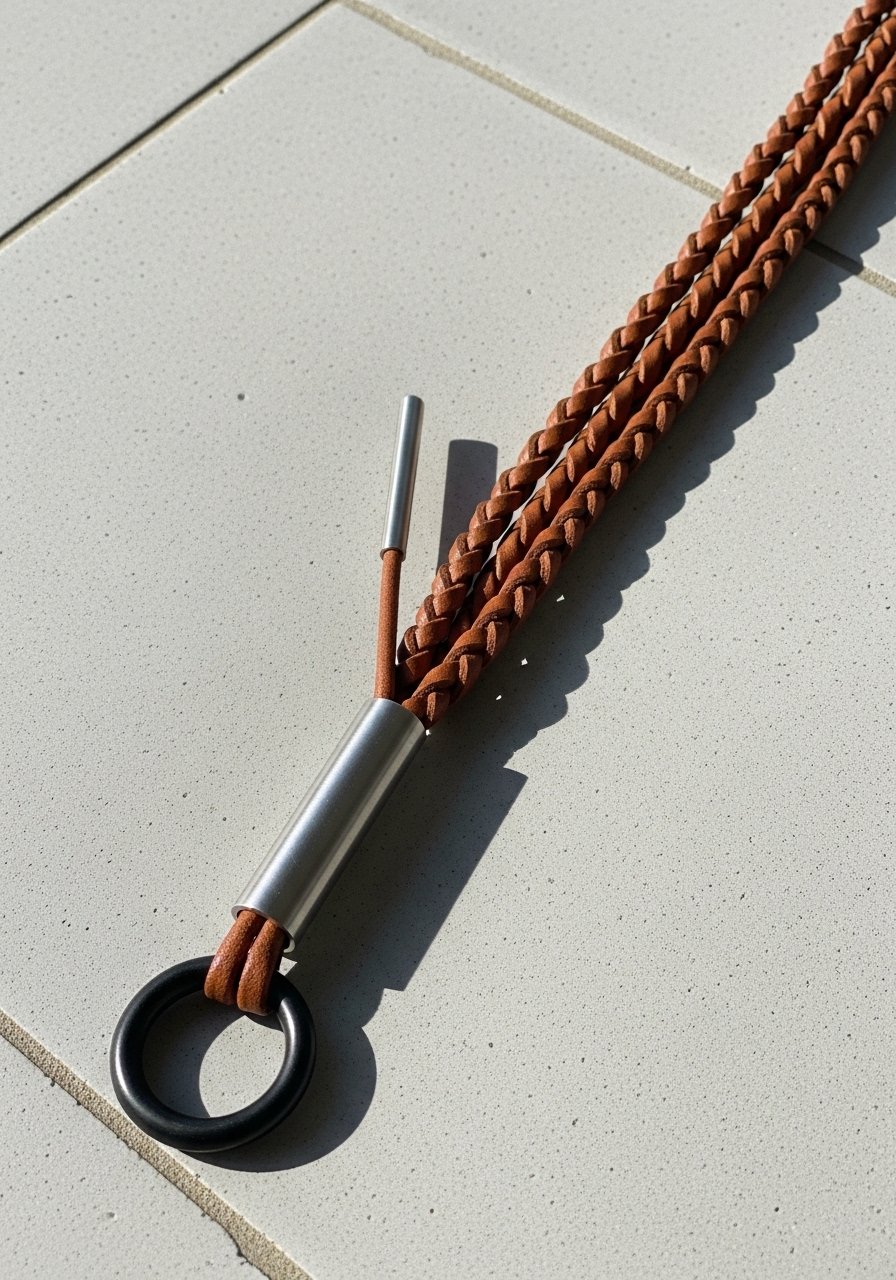
This design mixes braided texture with sleek metal ends for a refined contrast. It feels urbane and holds up to daily use.
Materials
- 3mm leather cord, three colors — 3 strands, each 10–12"
- Long metal tube end cap, 20 mm — 1
- Split ring, 25 mm
- Super glue
- Scissors
Instructions
- Cut three cords at 10–12" depending on desired loop length.
- Tape or clamp one end and braid tightly for 4–5".
- Trim braid ends neatly and add a dab of glue to prevent unraveling.
- Insert braid end into metal tube cap with glue; press until set.
- Attach split ring.
How to Display or Gift It
Pair with coordinating leather accessories. Store braided pieces flat or hung to keep shape. A small hanging organizer works well.
You just finished 20 sleek, minimal projects that all share the same goal: high-end looks from simple moves. From folded straps and stamped initials to resin inlays and braided loops, you’ve got options for gifts, market stalls, or quick weekend makes. Save this for your next craft day and pin a few favorites so you can build a curated set.
Which project will you try first — a stamped monogram or a resin inlay? Share your makes with a friend or bundle a few for a thoughtful gift set. Trust me, picking up a quality precision craft knife and a sturdy leather hole punch makes every one of these projects easier and neater.


