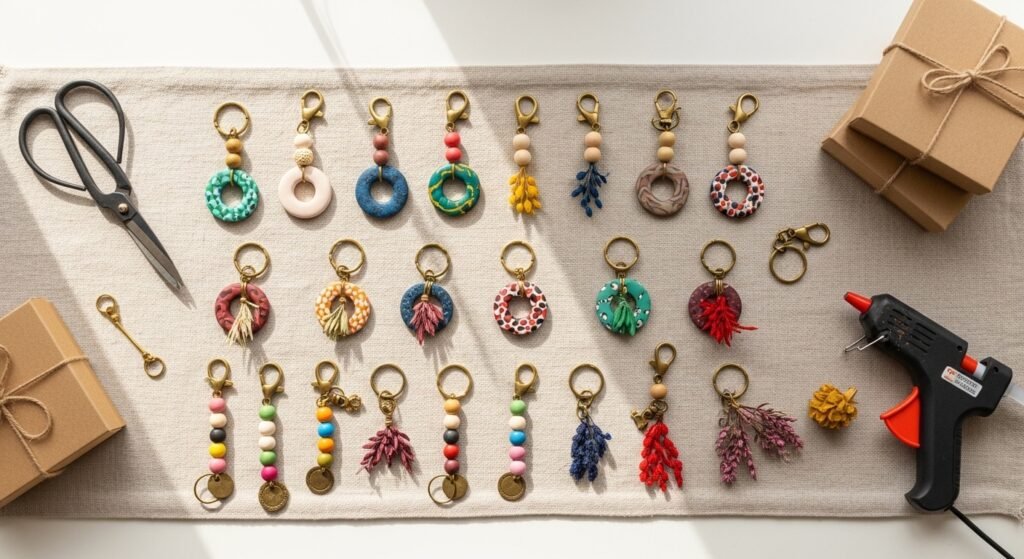
If you love small, satisfying crafts that make sweet gifts, you’re in the right place. These 25 DIY keychain ideas are perfect for using up little scraps, practicing new techniques, and making thoughtful presents that don’t cost a fortune. You’ll find everything from polymer clay charms to tiny macramé tassels and quick photo resin pendants—projects that suit beginners, kids, and experienced crafters alike.
I usually start simple: cut shapes with my Cricut Joy cutting machine for vinyl accents, or mix a small batch of resin with a compact epoxy kit for shiny photo charms. Each project below lists realistic materials (with sizes and quantities), step-by-step instructions with drying and curing times, and display or gifting tips so your keychains look shop-quality. Pin the ones you love and try one this afternoon—keychains come together fast and make great last-minute gifts.
- DIY keychain ideas: Polymer Clay Heart Charm
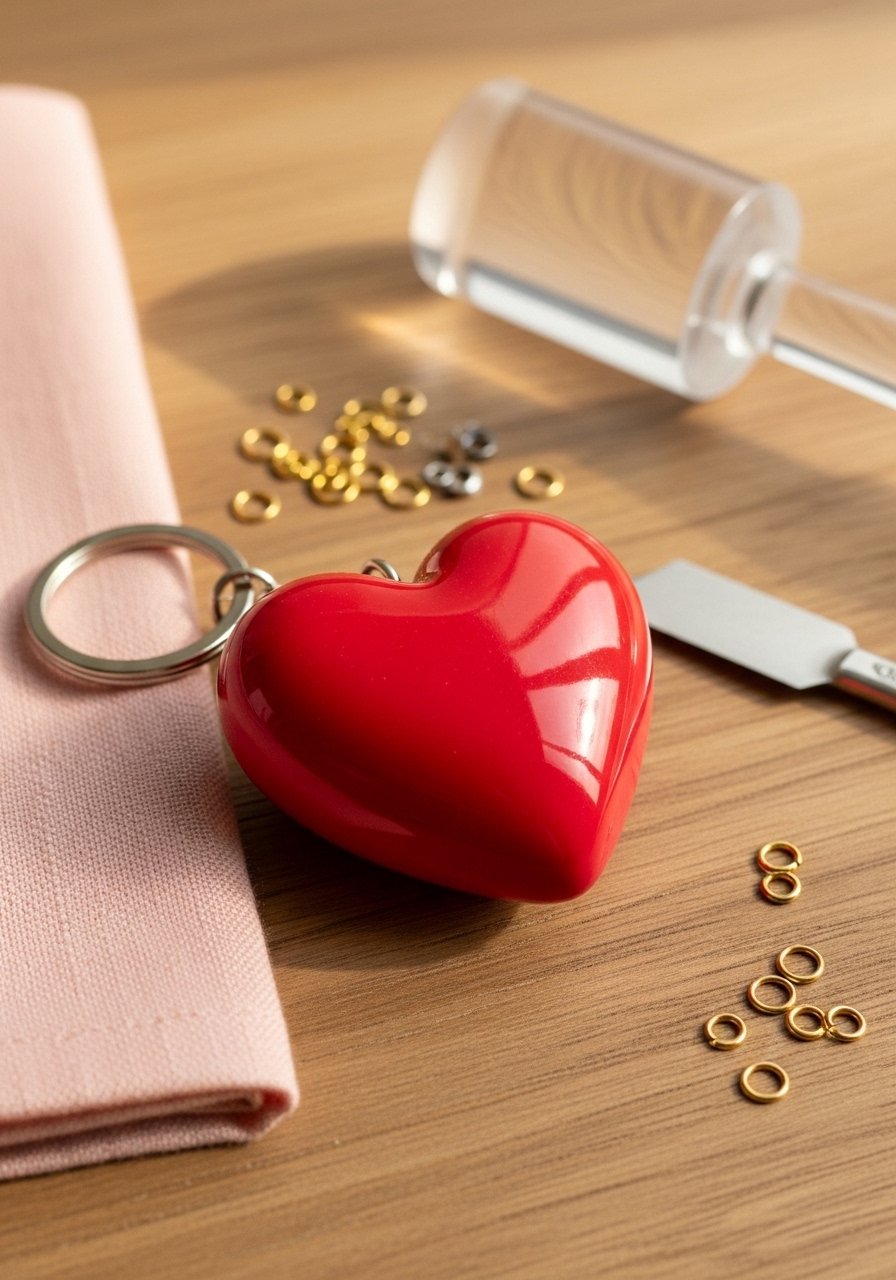
This tiny polymer clay heart is glossy, lightweight, and sweet as a handmade Valentine or everyday charm. The heart has a soft matte center and shiny glaze edge for contrast. Beginners will appreciate the forgiving dough; kids can make the shapes with cookie cutters. I smooth edges with a flexible acrylic roller for neat curves.
Materials
- Premo or Sculpey polymer clay, 1/4 lb in two colors
- Small heart cookie cutter or scalpel for cutting
- Gold 10mm split ring (1)
- 6mm jump ring (1)
- Liquid clay or thin gloss varnish, 1 tsp
- Sandpaper 400–600 grit (for smoothing)
- Oven for baking (per package temps)
Instructions
- Condition 20–30 g clay until soft and pliable.
- Roll to 3–4 mm thickness with an acrylic roller.
- Cut hearts with cutter; smooth edges with fingertips.
- Bake on parchment at package temperature (typically 275°F / 130°C) for 15–20 minutes per 1/4" thickness.
- Let cool 10 minutes, sand lightly if needed for smoothness.
- Apply liquid clay or gloss varnish thinly; cure/air-dry per product directions (varnish ~24 hours to fully harden).
- Insert jump ring into a small punched hole (make hole pre-bake with needle) and attach split ring.
How to Display or Gift It
- Tie the keychain to kraft gift tags with thin twine and tuck into a small kraft box.
- Bundle a set of colorways on a single ring as a purse charm.
- Store finished pieces flat in a shallow craft organizer until varnish cures.
- A small jewelry gift bag keeps them safe when shipping.
- Wood Slice Engraved Keychain
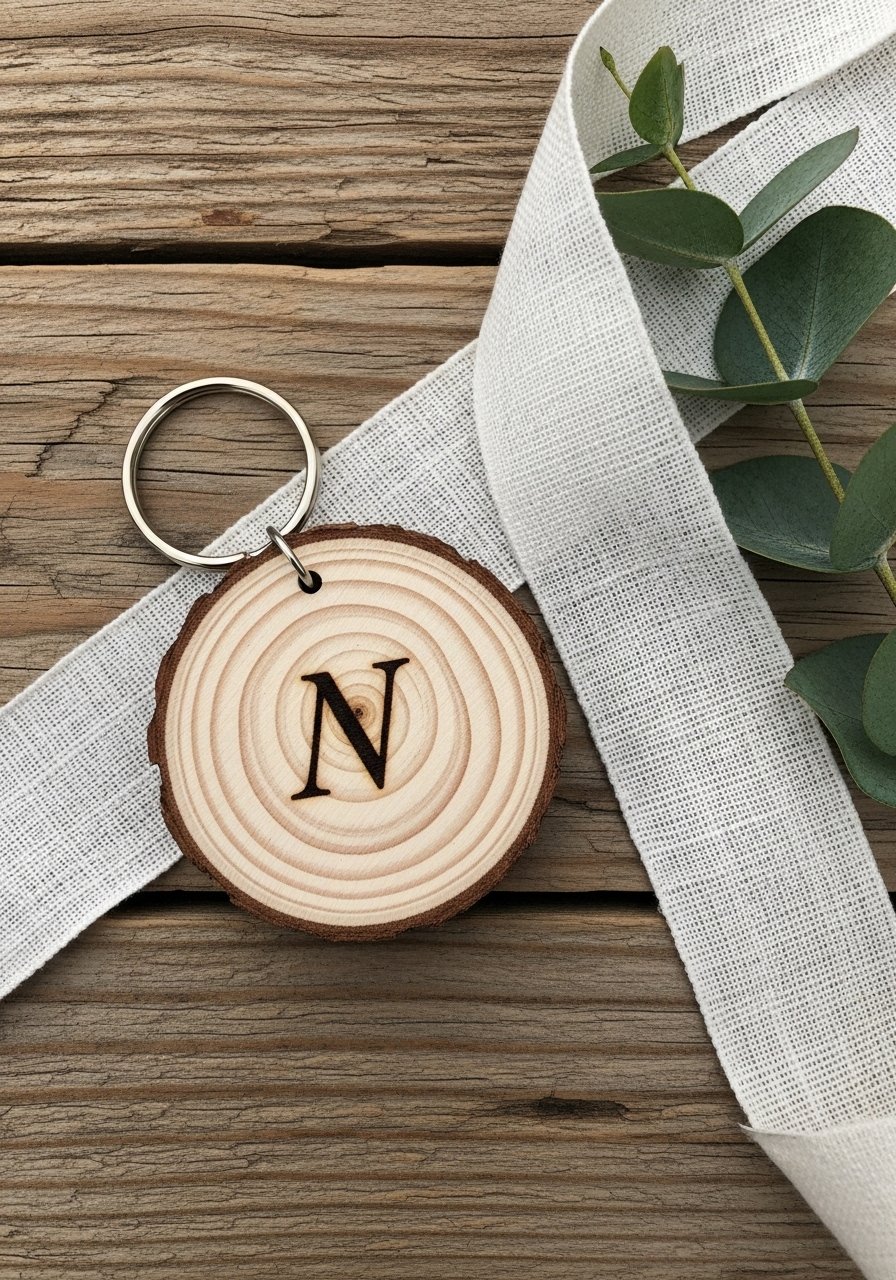
A sanded wood slice with a crisp engraved initial feels cozy and timeless—great for cottagecore and farmhouse lovers. You can engrave by hand with a fine-tip woodburning pen or order pre-cut blanks. I use a fine-gauge sandpaper to get a smooth finish before sealing for a clean engraved look.
Materials
- 1.5" unfinished basswood round (1)
- Woodburning tool or fine-tip permanent marker
- 3mm leather cord or 15mm split ring
- Matte outdoor Mod Podge, 1 oz (for sealing)
- Fine sandpaper (220–320 grit)
- Drill with 1.5mm bit (for hole)
Instructions
- Sand both sides until smooth and edges crisp.
- Drill a small hole near edge with 1.5mm bit.
- Lightly pencil an initial or design as a guide.
- Burn design with woodburning tool, or trace with permanent marker.
- Wipe off dust, then brush 1 thin coat of Mod Podge; let dry 20–30 minutes.
- Add a second coat for protection; cure 24 hours.
- Thread cord or attach split ring when fully dry.
How to Display or Gift It
- Attach to a small wooden gift tag or hang on a mini easel for display.
- Tuck a dried sprig into the cord loop as a finishing touch.
- Pack in kraft tissue and a small kraft box for gifting.
- Store extras in a small craft drawer to keep them flat.
- Resin Floral Photo Keychain
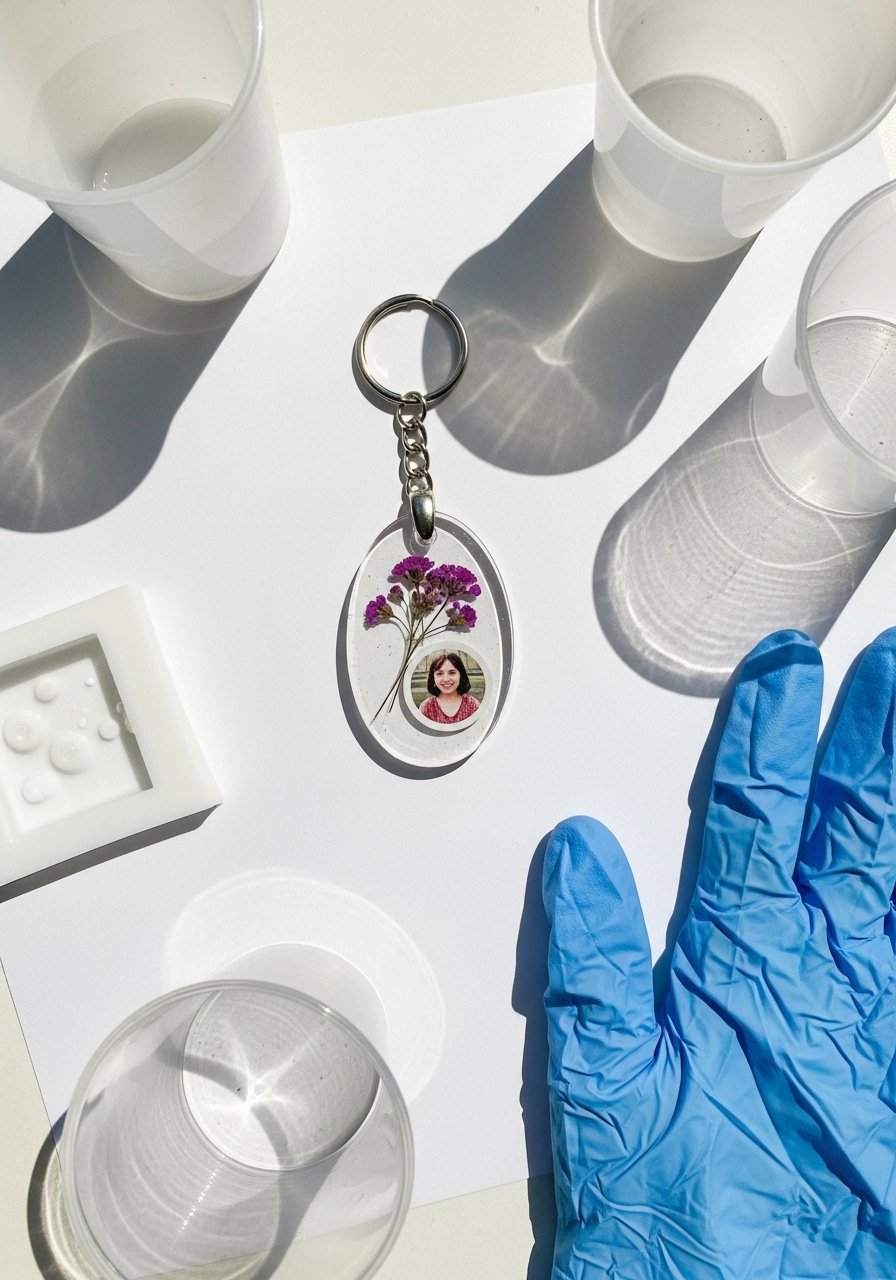
Encapsulate a tiny pressed flower and a photo for a tear-worthy keepsake. I use a clear epoxy resin for durable clarity and a silicone oval mold for consistent results. Work in a dust-free space and use nitrile gloves—resin is sensitive and needs careful mixing to avoid bubbles.
Materials
- 2-part clear epoxy resin kit, 30 ml (small batch)
- Silicone oval mold (approx 35 x 25 mm)
- Pressed flower or tiny dried bloom (1)
- 10mm photo printed on glossy photo paper, laminated or sealed
- 10mm bezel or drill hole after cure
- Nitrile gloves, mixing sticks, small disposable cups
- Fine sandpaper 600–800 grit (for leveling)
Instructions
- Press flowers for at least 48 hours or use pre-pressed.
- Mix epoxy resin per manufacturer ratios exactly; stir for 2–3 minutes slowly.
- Pour 1–2 mm base layer into mold; pop bubbles with a heat gun for 3–5 seconds.
- Place flower and photo, then pour remaining resin to fill.
- Torch lightly to remove bubbles; cover for 24–48 hours to cure fully.
- Demold and sand edges smooth; drill 1.5mm hole if needed.
- Attach jump ring and split ring.
How to Display or Gift It
- Present in a small white kraft box with tissue and a note about the memory inside.
- Hang the finished keychain on a mini card and tie with twine.
- Store in a dust-free box until fully cured.
- Pair with a coordinating mini notebook for a sentimental gift.
- Mini Macramé Tassel Keychain
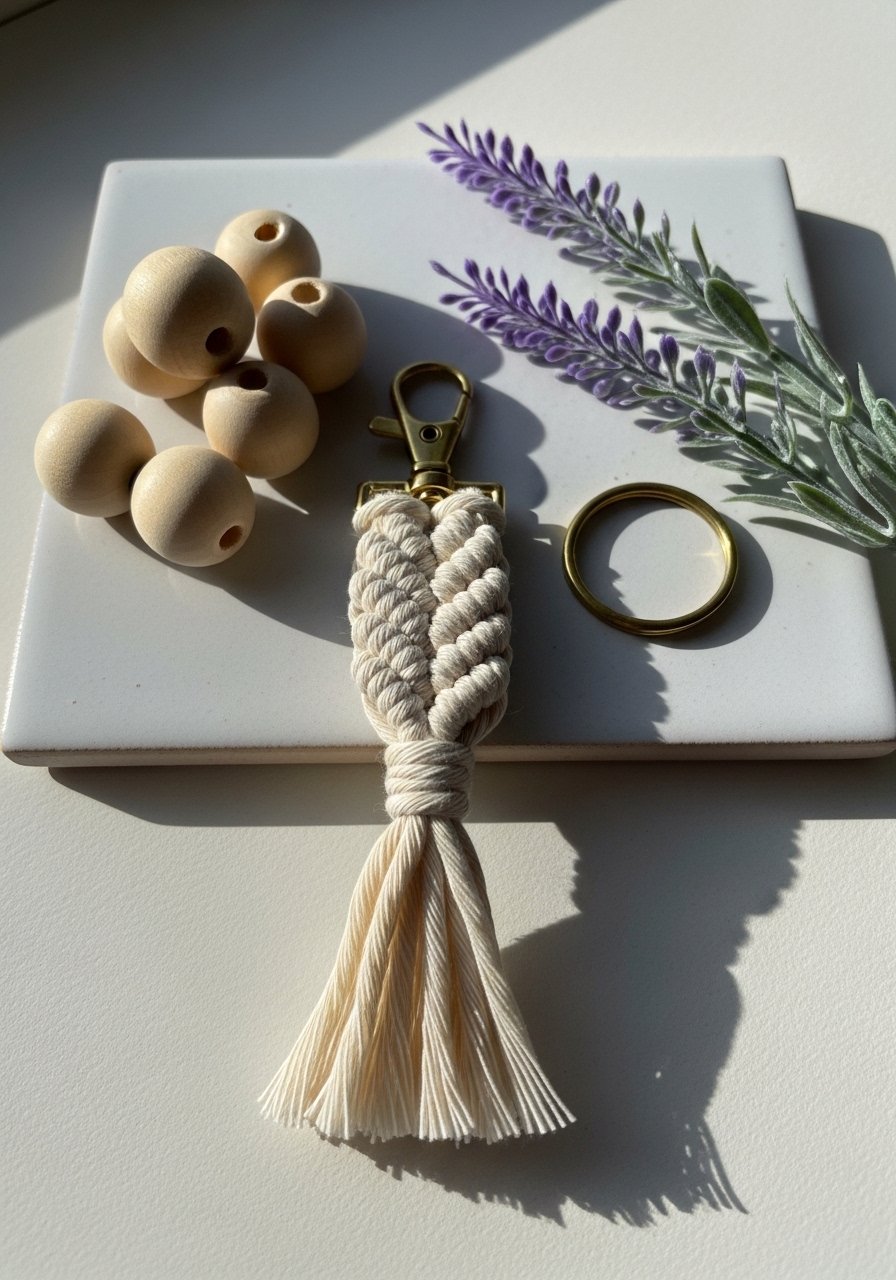
This mini macramé tassel is soft, tactile, and perfectly boho. Using 3mm cotton cord keeps the tassel compact but full. It’s a great beginner knotting project (just square knots and half-hitches) and makes a sweet bag charm.
Materials
- 3mm single-strand cotton macramé cord, 5 yards (cut into segments)
- 10mm wooden bead (1)
- 20mm brass key ring (1)
- Sharp scissors and a small comb for fringing
- Tape or clipboard to hold while knotting
Instructions
- Cut one 30 cm center cord and four 20 cm working cords.
- Fold the center cord loop over key ring and secure.
- Use square knots: take the two outer cords over and under the center pair; repeat 6–8 times.
- Slide the wooden bead onto center cords; continue a few knots below it.
- Trim bottom to 2.5–3 cm tassel length.
- Comb ends gently and tidy with scissors to shape.
How to Display or Gift It
- Tie onto a small kraft tag or slip it into a glassine bag for a sweet presentation.
- Make colors to match seasons—soft neutrals for Japandi or dusty pinks for cottagecore.
- Store tassels flat or hanging to avoid tangles; a small craft organizer tray works well.
- Leather Tassel Keychain with Brass Cap
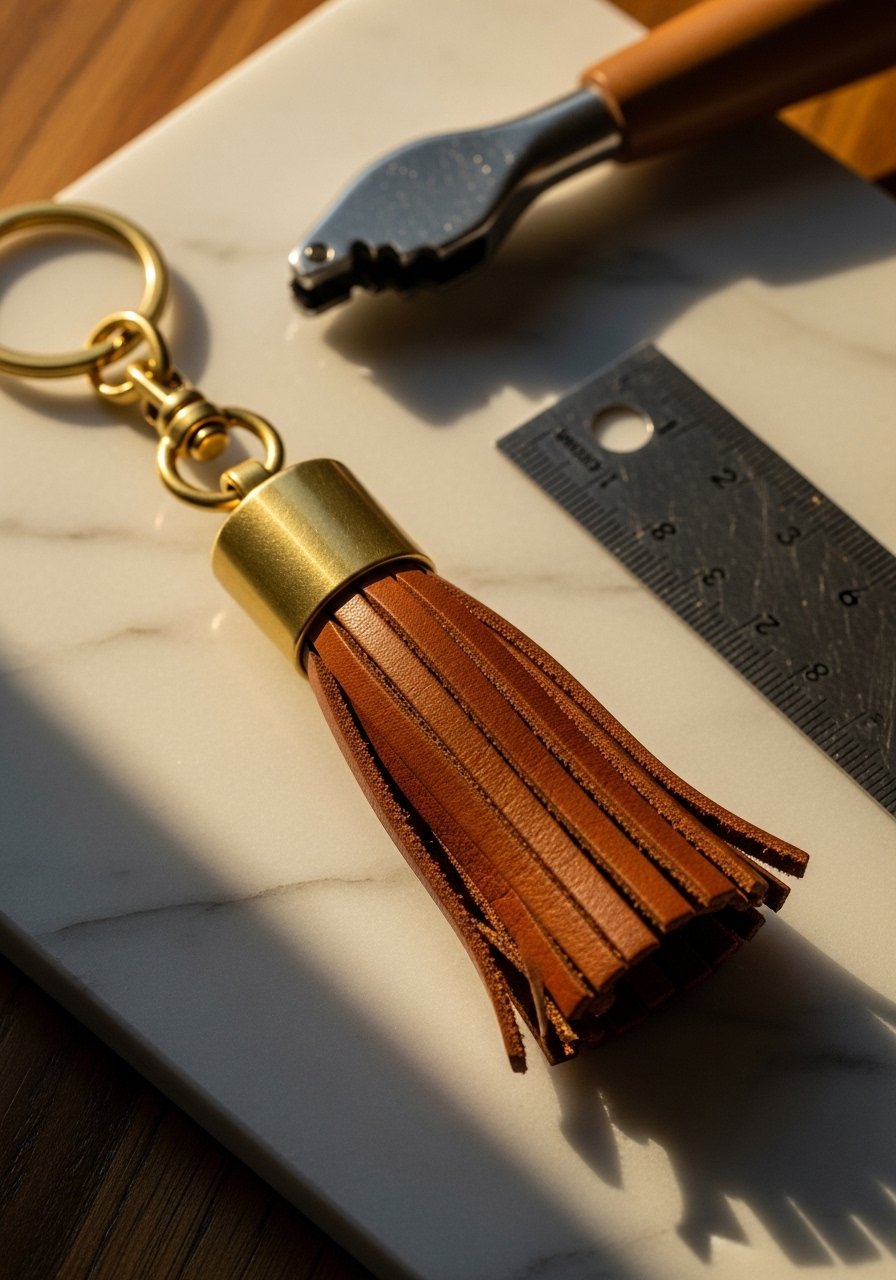
A leather tassel feels luxe without being fussy. You can use vegetable-tanned leather scraps, a brass cap, and a rivet for a tidy look. A rotary punch makes clean holes for your hardware and speeds the process.
Materials
- Genuine leather scrap, 10 cm x 6 cm (one)
- Brass tassel cap (14–16 mm) and small rivet
- Metal rotary punch or leather punch
- Ruler, craft knife, cutting mat
- 20mm lobster clasp or split ring
- Leather glue or strong craft glue (E6000 works well)
Instructions
- Cut leather to 10 x 6 cm; mark fringe lines at 3–4 mm intervals leaving 1.2 cm uncut at the top.
- Roll fringed leather tightly and add a drop of glue to secure.
- Insert into brass cap and set rivet per cap instructions; press firmly.
- Attach lobster clasp or split ring to cap loop.
- Trim fringe to even length and smooth edges with a small file if needed.
How to Display or Gift It
- Attach a tiny gift tag and tuck into a kraft gift box.
- Leather ages nicely—pair with a small leather-care card.
- Store in a shallow drawer to keep the fringe from flattening.
- Shrink Plastic Cute Animal Charm

Shrink plastic charms are fast, playful, and great for kids. Draw your design larger to allow for shrinkage—most sheets reduce to about 40% of the original size. Oven-bake times are short, so you’ll finish a batch quickly.
Materials
- Clear/white shrink plastic sheets, 3–5 sheets
- Permanent fine-tip markers or colored pencils
- 2mm hole punch (pre-bake)
- Oven or toaster oven (per package directions)
- 10mm jump ring and split ring (per charm)
Instructions
- Draw designs at 2–2.5x the final intended size.
- Punch a hole near the top before baking (holes shrink too).
- Bake according to package (usually 1–3 minutes); watch through door—pieces curl then flatten.
- Press flat with parchment if needed immediately after removal.
- Once cool, attach jump ring and split ring.
How to Display or Gift It
- Thread onto a small ring with matching ribbon.
- Punch multiple hole positions for dangling charm clusters.
- Keep a finished set in a small acrylic organizer for gifting.
- Beaded Initial Keychain (Glass Beads)
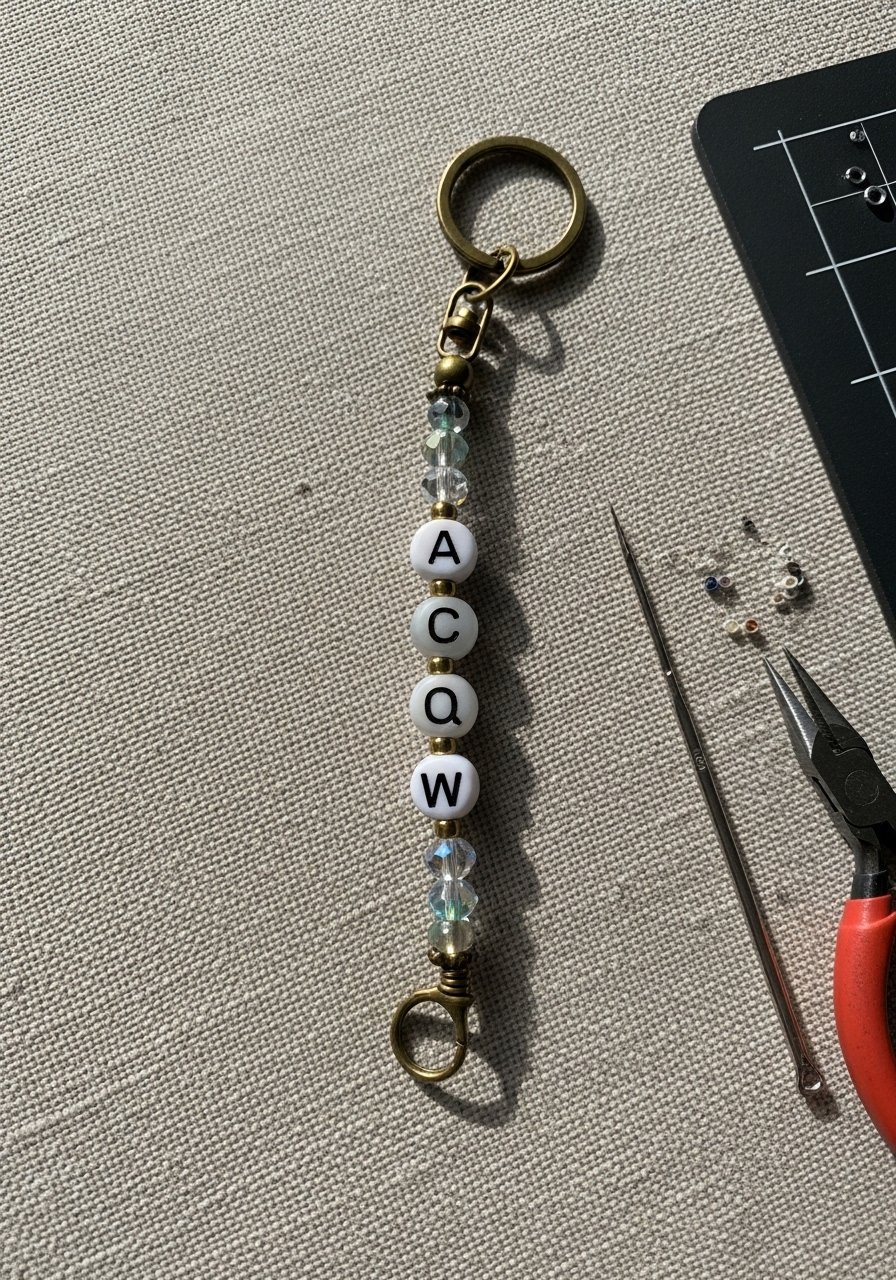
This bead and letter keychain is colorful and customizable—great for teacher gifts and kids. Use strong beading cord and crimp beads to keep everything secure. A needle helps threading glass beads quickly.
Materials
- 0.5mm nylon beading thread, 50 cm
- Alphabet glass beads (3–6 letters)
- Czech glass spacer beads (8–12)
- Crimp beads and crimping pliers
- 20mm split ring or clasp
Instructions
- Cut 50 cm of beading thread and double-knot at one end leaving a small tail.
- Thread alphabet beads and spacers in a pleasing order.
- Slide on a small crimp bead and loop through split ring; pinch crimp with pliers.
- Trim excess thread and hide knot with a drop of clear-drying craft glue.
- Tug gently to make sure crimp is secure.
How to Display or Gift It
- Attach to a ribbon-wrapped card for a classroom gift.
- Keep sets of letters in a compartmentalized bead organizer for easy future builds.
- Pair with a small matching bracelet for a gift set.
- Faux Terrazzo Polymer Clay Tag
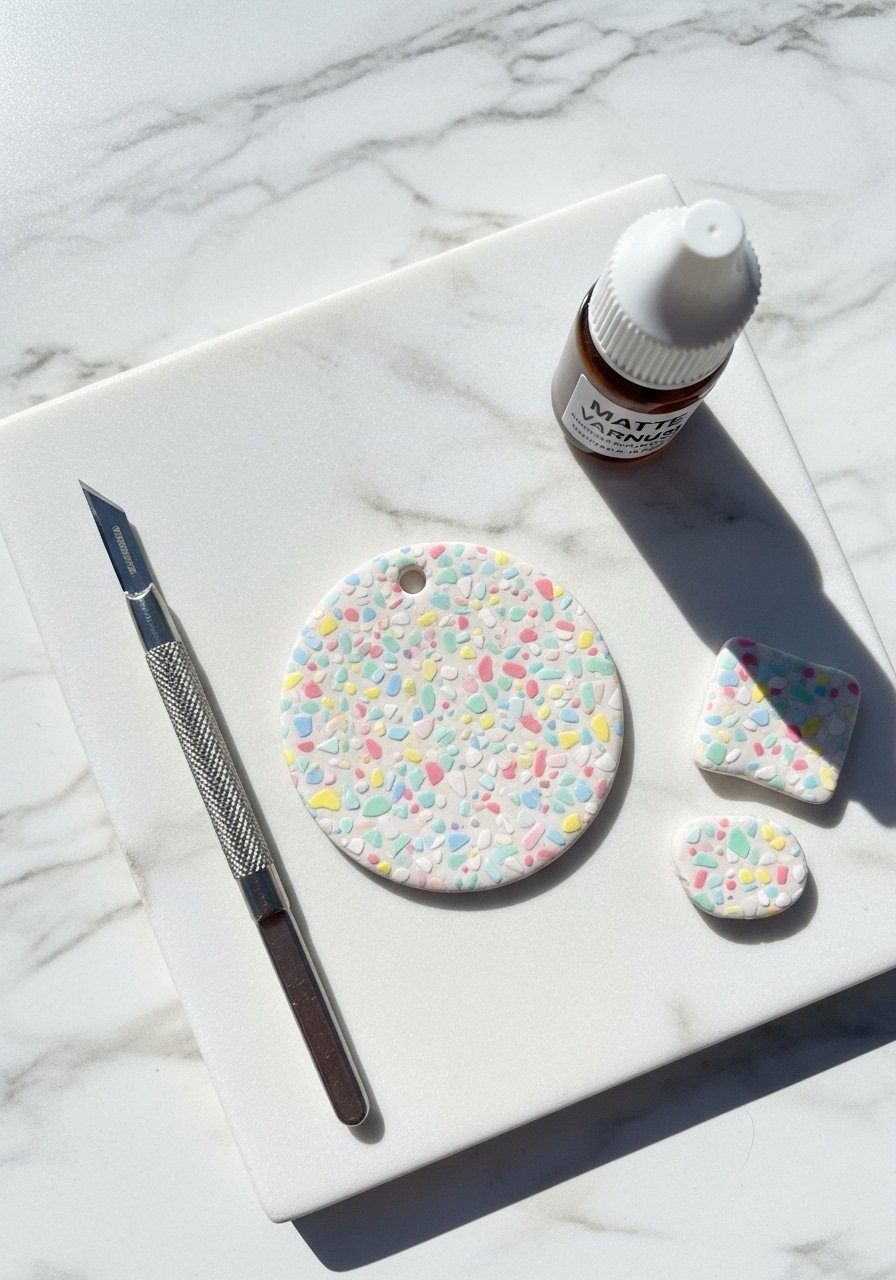
Faux terrazzo uses tiny clay flecks mixed into a base for a modern look that pairs with Japandi and minimal styles. It’s tactile and holds up well after baking and sealing.
Materials
- Polymer clay—base color 15 g, accent scrap colors several small bits
- Round tag cutter 30 mm or craft knife
- Matte varnish or resin gloss (1 tsp)
- 6mm jump ring and 15mm split ring
- Roller and baking tray
Instructions
- Condition base clay and create tiny flecks by pulling small bits from accent colors.
- Gently press flecks into the base and roll to flatten to 2–3 mm thickness.
- Cut tag shape and make a hole; bake per clay directions (15–20 minutes at 275°F).
- Cool 10 minutes, sand lightly if needed.
- Seal with one thin coat of matte varnish; dry 24 hours.
- Attach jump ring and split ring.
How to Display or Gift It
- Pair with a neutral linen pouch for a chic gift.
- Make a set in complementary palettes.
- Store on a small craft tray until varnish cures.
- Etched Metal Stamped Tag
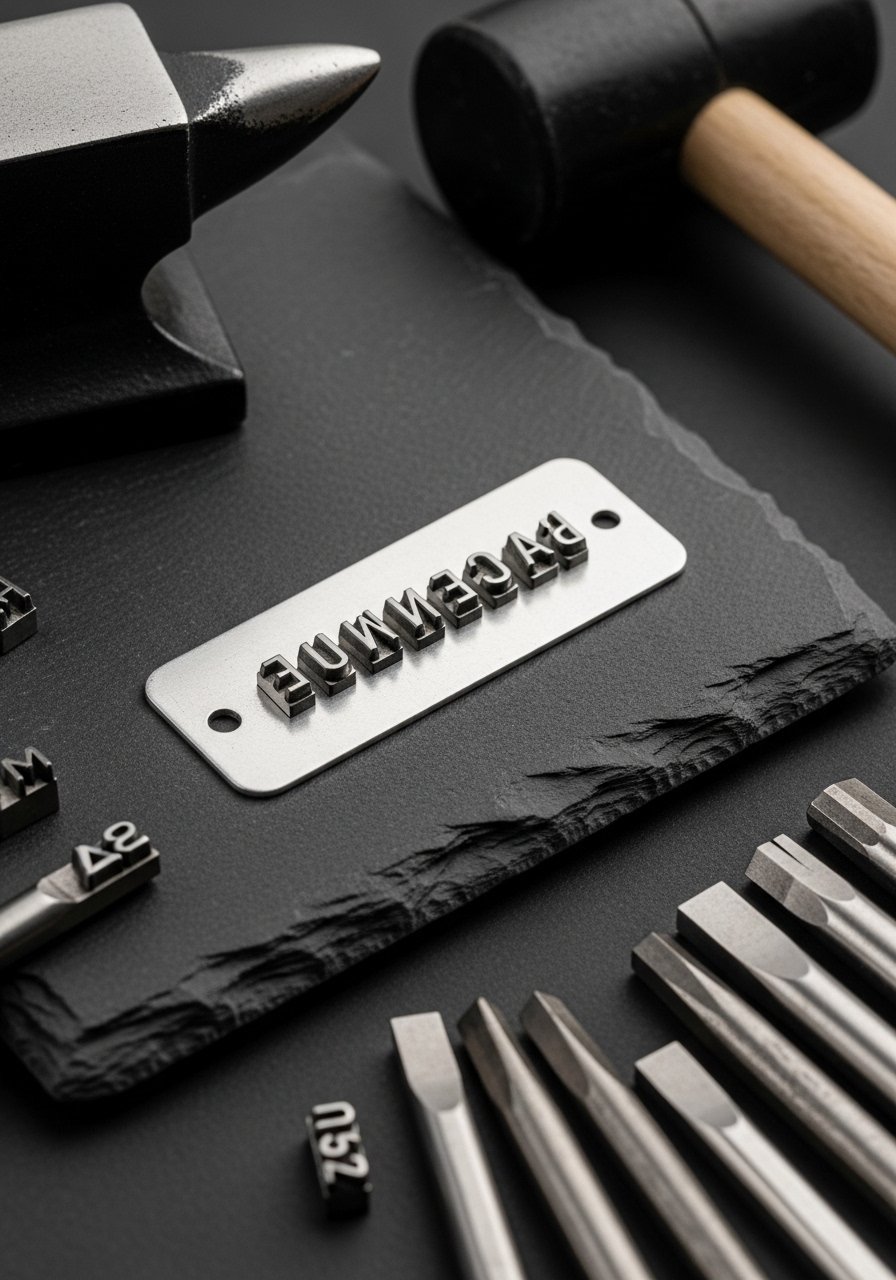
Stamped metal tags are durable and personalized. Use aluminum blanks for easy stamping and sand before inking to show contrast. A steel bench block and ball-peen hammer give crisp impressions.
Materials
- 20 x 10 mm aluminum blank (1)
- Metal letter stamps (individual letters)
- Ball-peen hammer and steel bench block
- Black permanent ink or antiquing gel
- 8mm jump ring and 15mm split ring
Instructions
- Clean and sand the blank to remove oils.
- Place on bench block and align stamp; strike firmly with hammer once.
- Repeat for each letter, keeping spacing even.
- Rub ink over letters, wipe surface gently to leave ink in impressions.
- Attach jump ring through hole and add split ring.
How to Display or Gift It
- Mount on a small black card with twine for contrast.
- Group multiple stamped tags on one ring for a travel bag tag set.
- Store unused blanks in a small labeled tray.
- Wire-Wrapped Sea Glass Keyring
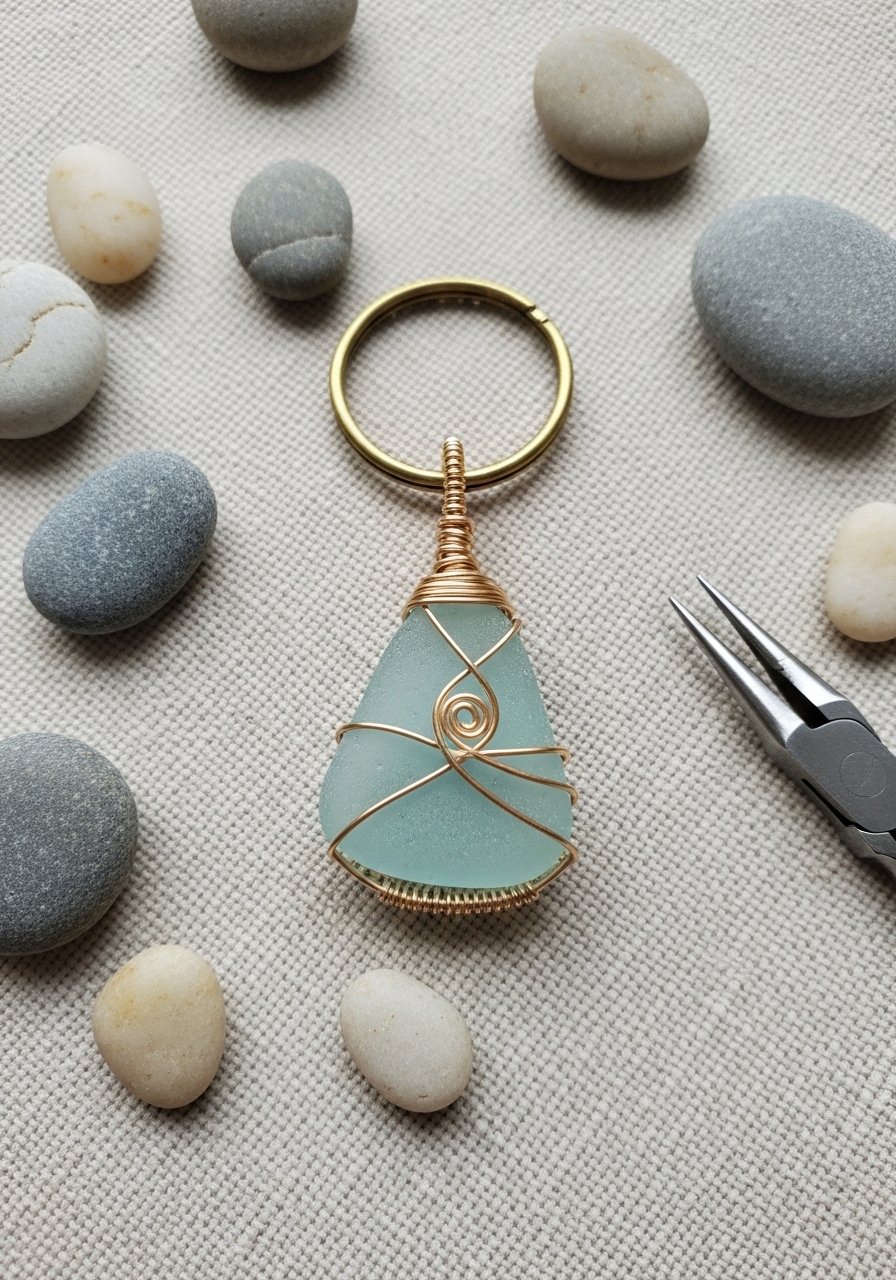
Wire-wrapping sea glass creates an organic, beachy keepsake. Copper or brass wire complements sea glass colors. A round-nose plier and flushing cutters make neat loops and ends.
Materials
- Tumbled sea glass piece 20–30 mm (1)
- 20–24 gauge copper or brass wire, 30 cm
- Round-nose pliers and flush cutters
- 12mm jump ring and 20mm split ring
Instructions
- Center the glass on the wire and wrap once lengthwise to hold it.
- Twist and make decorative loops securing glass from both sides.
- Trim excess wire and tuck ends with pliers.
- Make a loop for the jump ring at top, attach jump ring and split ring.
- Check for sharp edges and file if needed.
How to Display or Gift It
- Tie to a small kraft card with a tiny tag saying “from the shore.”
- Pack in a small organza bag for a beach-themed gift.
- Store individually in soft tissue to prevent scratches.
- Mini Cross-Stitch Hoop Keychain
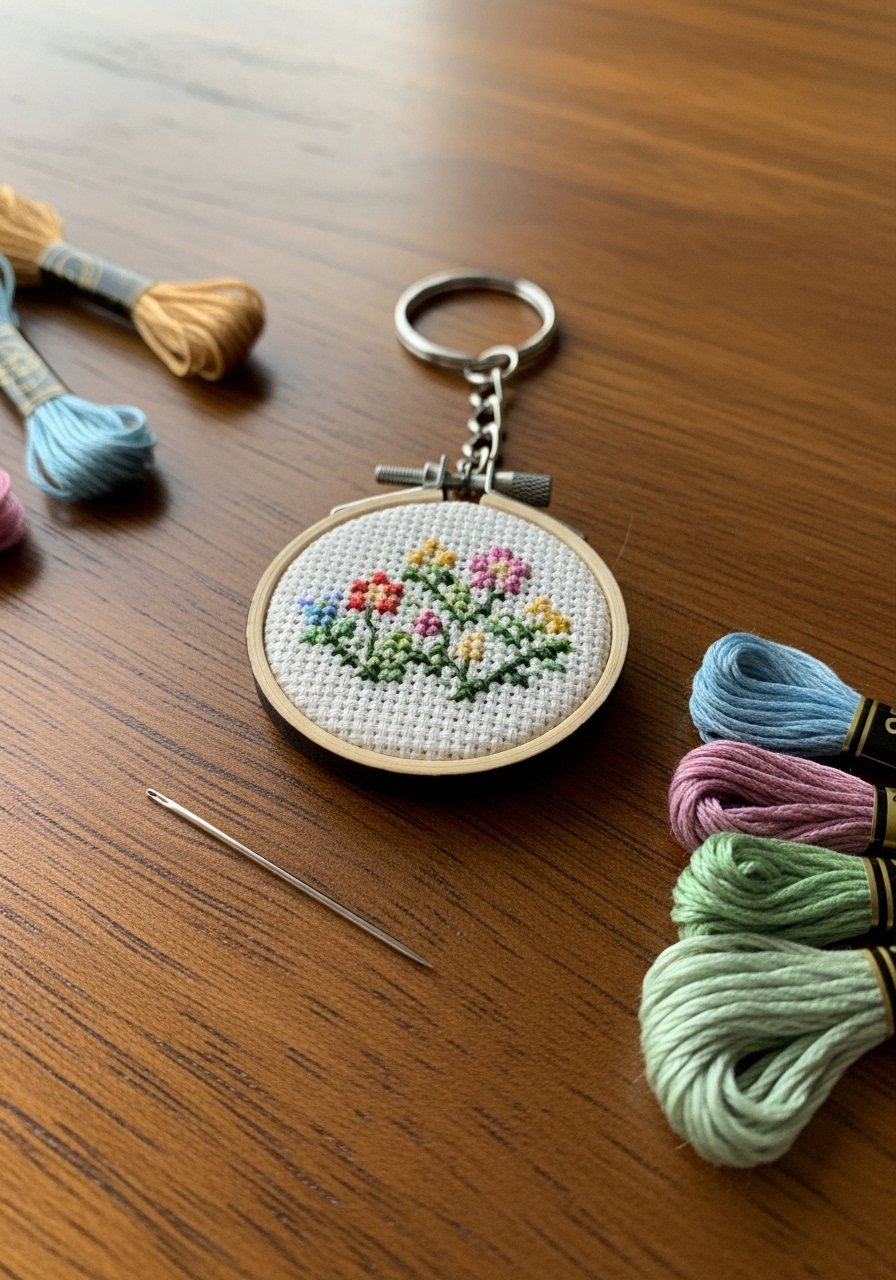
Mini cross-stitch hoops are charming and portable. Use 14-count Aida and small embroidery hoops for a finished look. The tactile stitched surface gives a cozy, handmade feel.
Materials
- 14-count Aida fabric, scrap 5 x 5 cm
- Mini wooden embroidery hoop 25–30 mm
- Embroidery floss (various colors)
- Tapestry needle size 24
- Jump ring and split ring
Instructions
- Trace hoop onto fabric and stitch a small pattern (approx 12 x 12 stitches).
- Remove excess fabric leaving 5 mm around edge.
- Secure fabric in hoop and glue backing fabric to hide raw edges.
- Make a small hole in hoop top or use hoop hardware to attach jump ring.
- Add split ring.
How to Display or Gift It
- Attach to vintage-style cards with a short note.
- Make sets in seasonal colorways and pack in a small kraft box.
- Store finished hoops in a flat drawer to avoid hoop warping.
- Button Flower Keychain
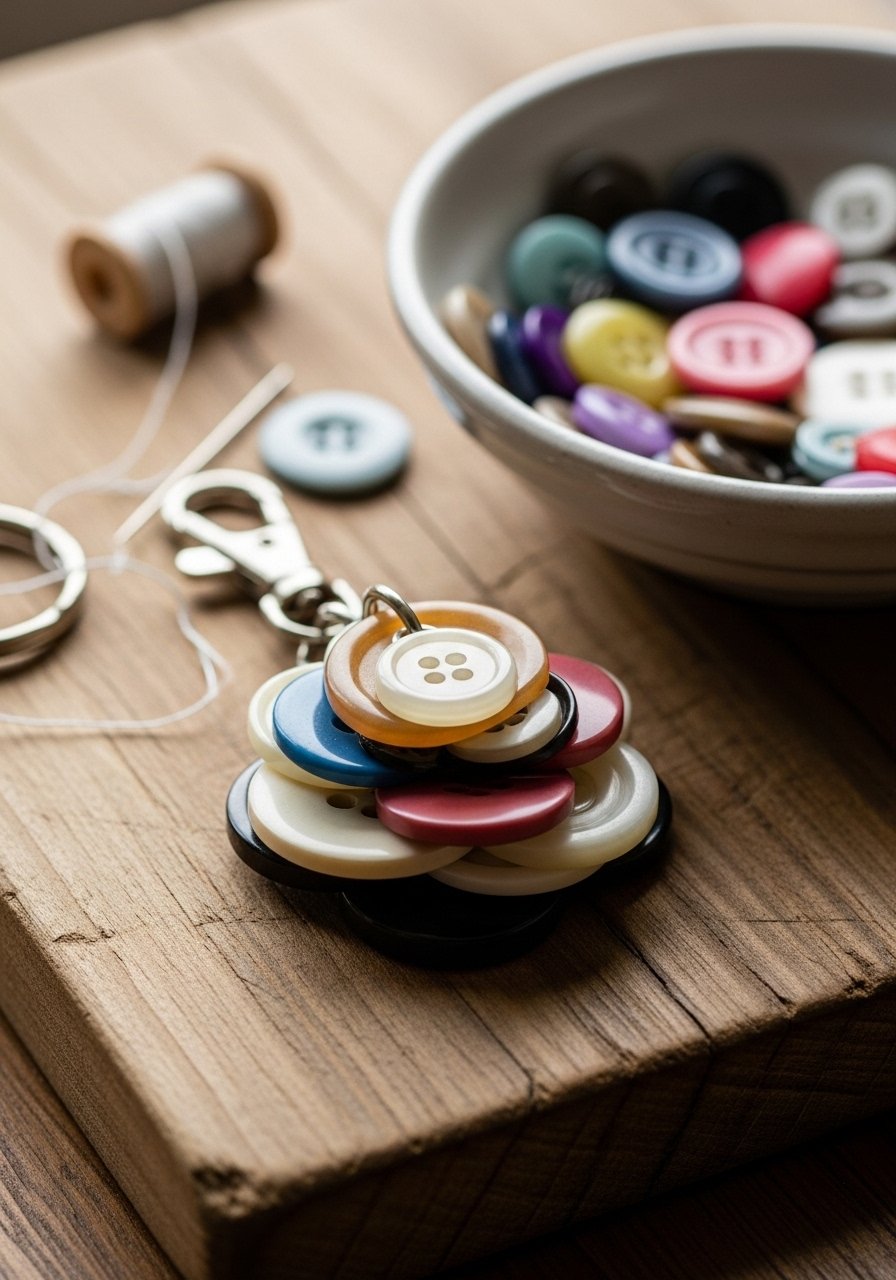
Button flowers are nostalgic and quick. Layer 3–4 buttons and sew them together for a vintage vibe. They’re ideal for using button stashes and making upcycled gifts.
Materials
- Assorted flat buttons (3–4 per charm)
- Strong nylon thread or embroidery floss
- Small felt circle backing 25 mm (1)
- Hot glue or craft glue
- Jump ring and split ring
Instructions
- Stack buttons and sew through center three times with strong thread.
- Apply a dot of glue to the felt backing and press button stack into place.
- Glue a small jump ring to the back felt or sew a loop for the ring.
- Trim excess felt and let glue cure 1–2 hours.
- Attach split ring.
How to Display or Gift It
- Loop onto a ribbon-tied card for a thrifted-chic presentation.
- Combine with other small fabric scraps in a gift bundle.
- Keep buttons organized in small jars for future builds.
- Perler Bead Pixel Art Keychain
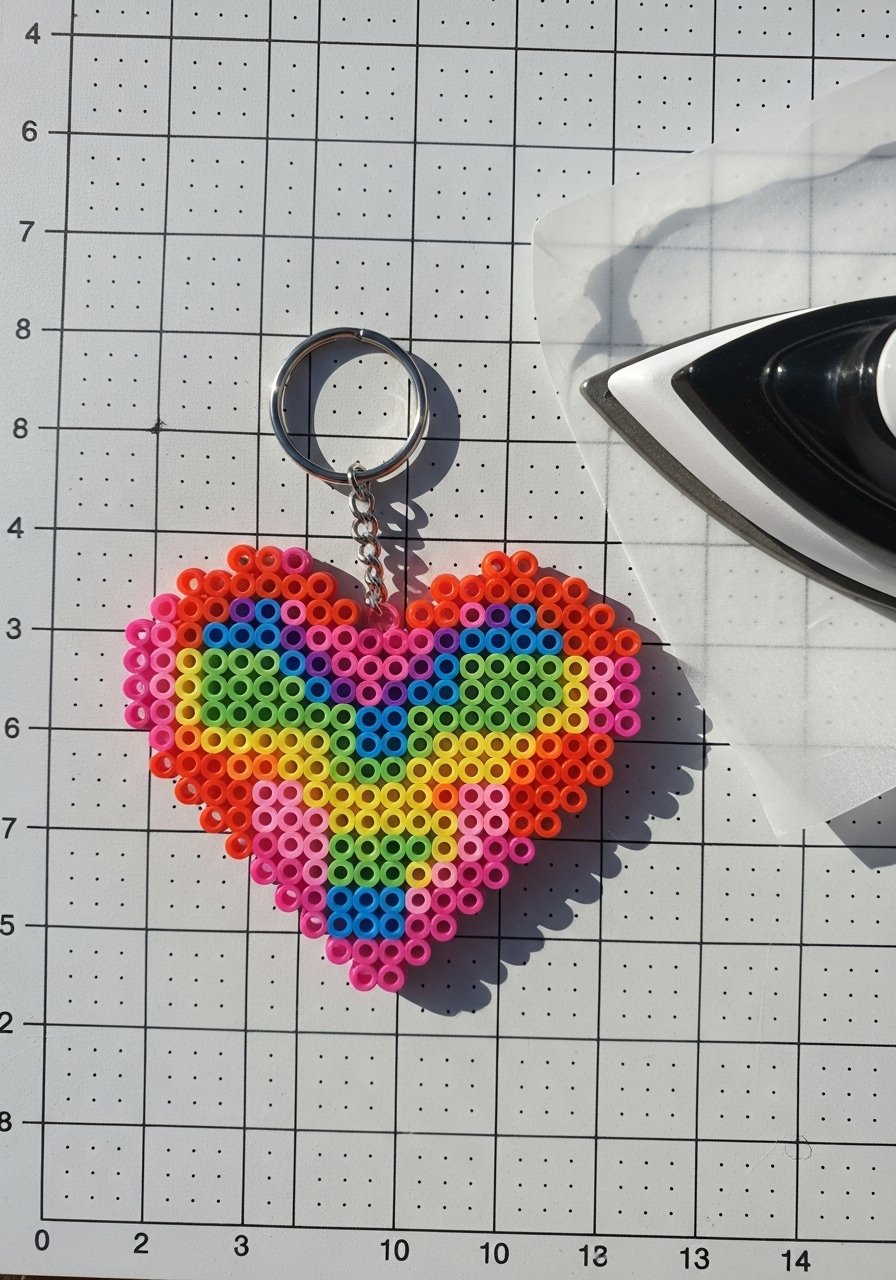
Perler bead keychains are great for pixel art and last-minute gifts. Iron on parchment and press flat for sturdy pieces. A small photo or icon translates well to this medium.
Materials
- Perler beads (assorted colors)
- Perler pegboard 6 x 6 cm
- Iron and parchment paper
- Split ring and small jump ring
Instructions
- Arrange beads on pegboard to create design.
- Cover with parchment paper and iron per bead maker instructions (usually 10–20 seconds each side).
- Let cool, remove from pegboard, and iron the other side for durability.
- Punch a hole with a heated needle if needed and attach jump ring.
- Add split ring.
How to Display or Gift It
- Bundle with a mini pattern card for gift recipients to recreate.
- Store cool, dry to avoid bead warping.
- Make holiday-themed designs for seasonal swaps.
- Cork Disc Engraved Keychain
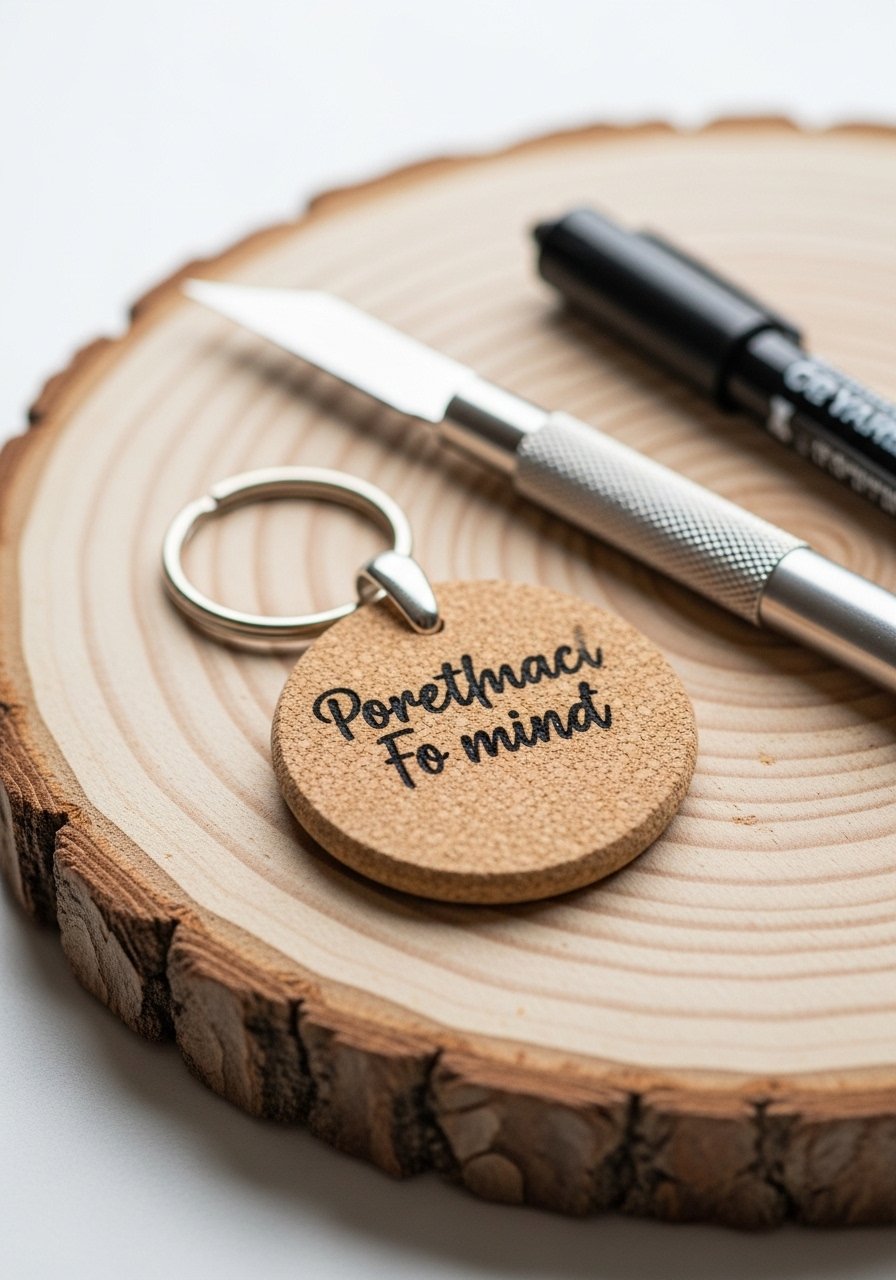
Cork is lightweight and sustainable—perfect for neutral, earthy keychains. It cuts easily with a craft knife and takes ink well for stamped or hand-lettered messages.
Materials
- Cork sheets 2 mm thick, cut into discs 30 mm
- Craft knife and cutting mat
- Permanent fine-tip marker or stamp set
- Clear seal spray (optional) 1 light coat
- Split ring and jump ring
Instructions
- Trace discs and cut cleanly with craft knife.
- Stamp or write message lightly in pencil, then ink over with marker.
- Spray one light coat of clear seal spray if desired; dry 30 minutes.
- Punch a small hole and attach jump ring and split ring.
How to Display or Gift It
- Add a tiny dried flower as a finishing flourish.
- Pair with a sustainable-themed gift such as a reusable straw set.
- Store flat and avoid prolonged sun to prevent fading.
- Faux Leather Stamped Tag
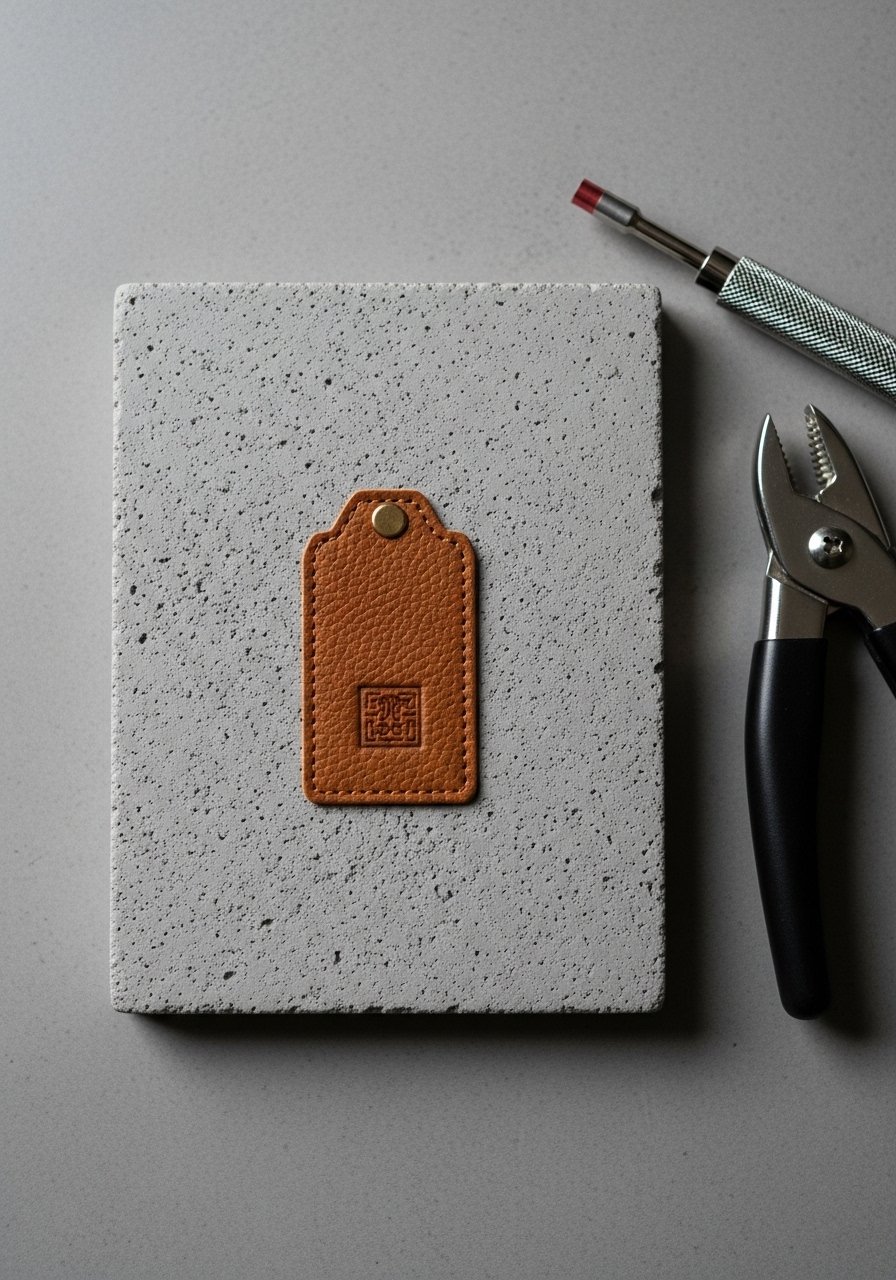
Faux leather responds well to heat stamping and dye. Use a mini embossing tool for clean marks; finish edges with a quick burnish for a polished look.
Materials
- Faux leather sheet, 10 x 6 cm
- Mini embossing/heat stamp or metal stamp set
- Hole punch and split ring
- Edge paint or burnishing tool (optional)
Instructions
- Cut tag shape and heat stamp your design on a heatproof surface.
- Punch a hole and burnish edges if desired.
- Attach jump ring and split ring.
- If using paint on edges, let dry 30–60 minutes before handling.
How to Display or Gift It
- Slip it into a small kraft bag with tissue paper.
- Add coordinating ribbon to attach to gift wrap.
- Keep scraps for future tags in a labeled drawer.
- Mini Embroidered Felt Animal
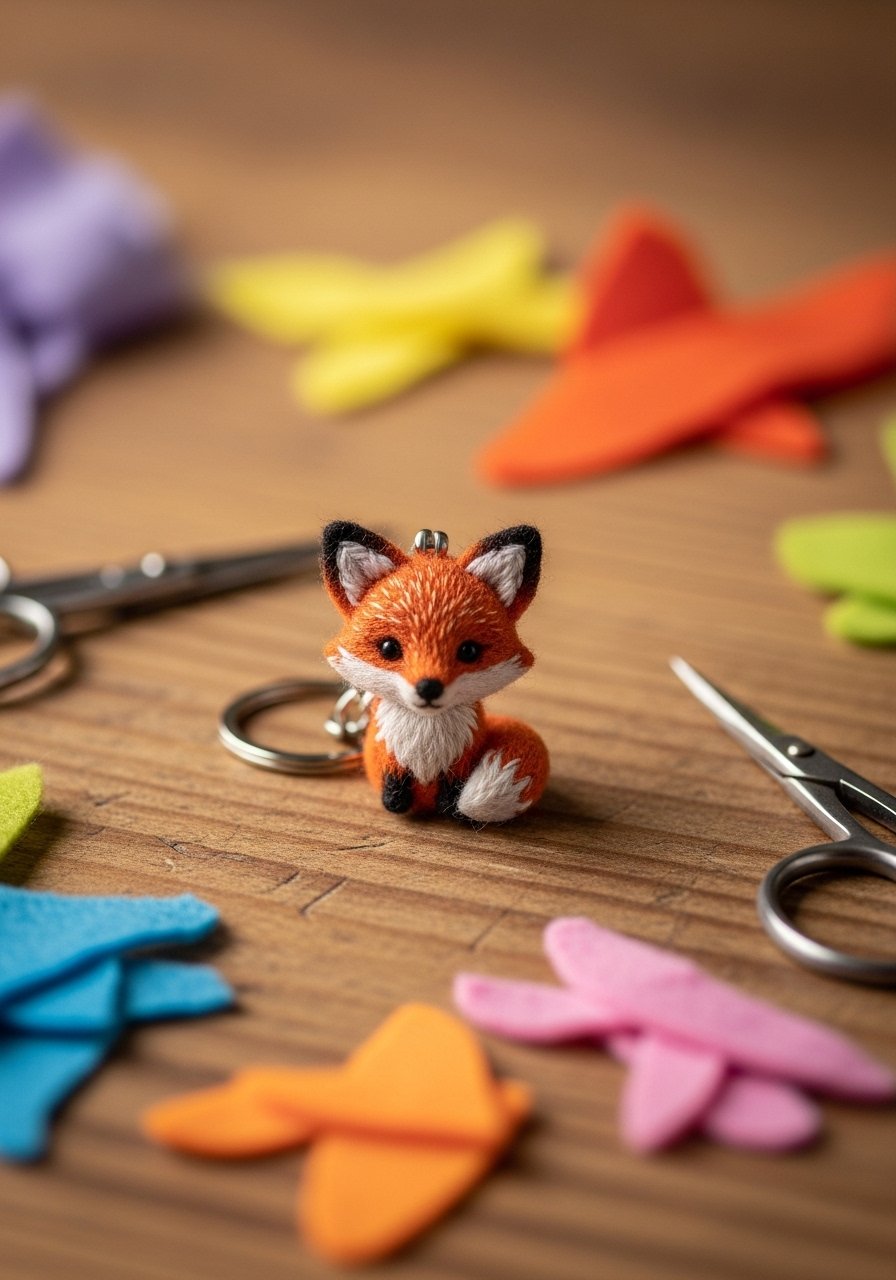
Felt animals are soft and tactile—great for kid-friendly keychains. Use wool-blend felt for durability and contrast embroidery floss for tiny details.
Materials
- Wool-felt scraps (two colors) 5 x 5 cm each
- Embroidery floss (small amounts)
- Needle and fine scissors
- Small stuffing fiberfill (pinch)
- Split ring and small jump ring
Instructions
- Cut two identical felt shapes and stitch around three sides with blanket stitch.
- Add facial details before stuffing.
- Stuff lightly and close the final edge.
- Sew a small loop at the top for jump ring and attach split ring.
How to Display or Gift It
- Place in a small cellophane bag with a backing card.
- Make a matching set of animals for siblings.
- Store in a fabric box to avoid dust.
- Epoxy Photo Cube Keychain
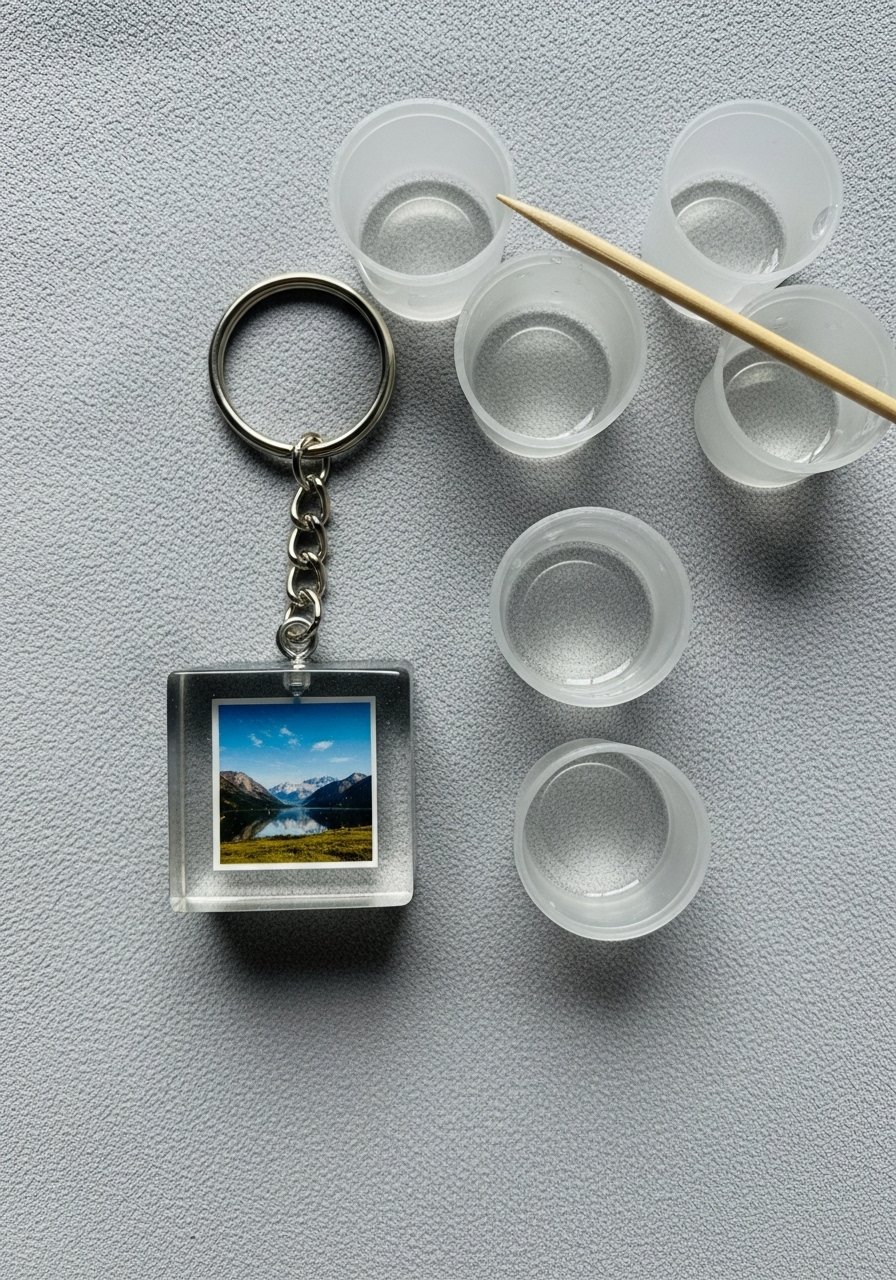
Tiny epoxy cubes hold micro-photos and are excellent for preserving memories. Use a clear epoxy resin and micro-photo prints sealed with a thin layer of resin before casting to avoid bleeding.
Materials
- Clear epoxy resin small kit 30 ml
- Micro photo circles 6–8 mm, sealed with thin resin layer
- Silicone cube mold 10-12 mm
- Nitrile gloves and mixing cups
- Jump ring drilled or molded in place
Instructions
- Mix resin exactly per instructions and pour a thin base layer.
- Place sealed photo centrally, then fill to top.
- Use a heat gun for surface bubbles; cover while curing 24–48 hours.
- Demold, sand small seams if necessary, and attach jump ring through drilled hole or molded loop.
How to Display or Gift It
- Mount on a small gift tag and include the snapshot story.
- Store in a padded box if mailing.
- Make a few at once to create photo-keychain mini albums.
- Braided Paracord Mini Key Fob
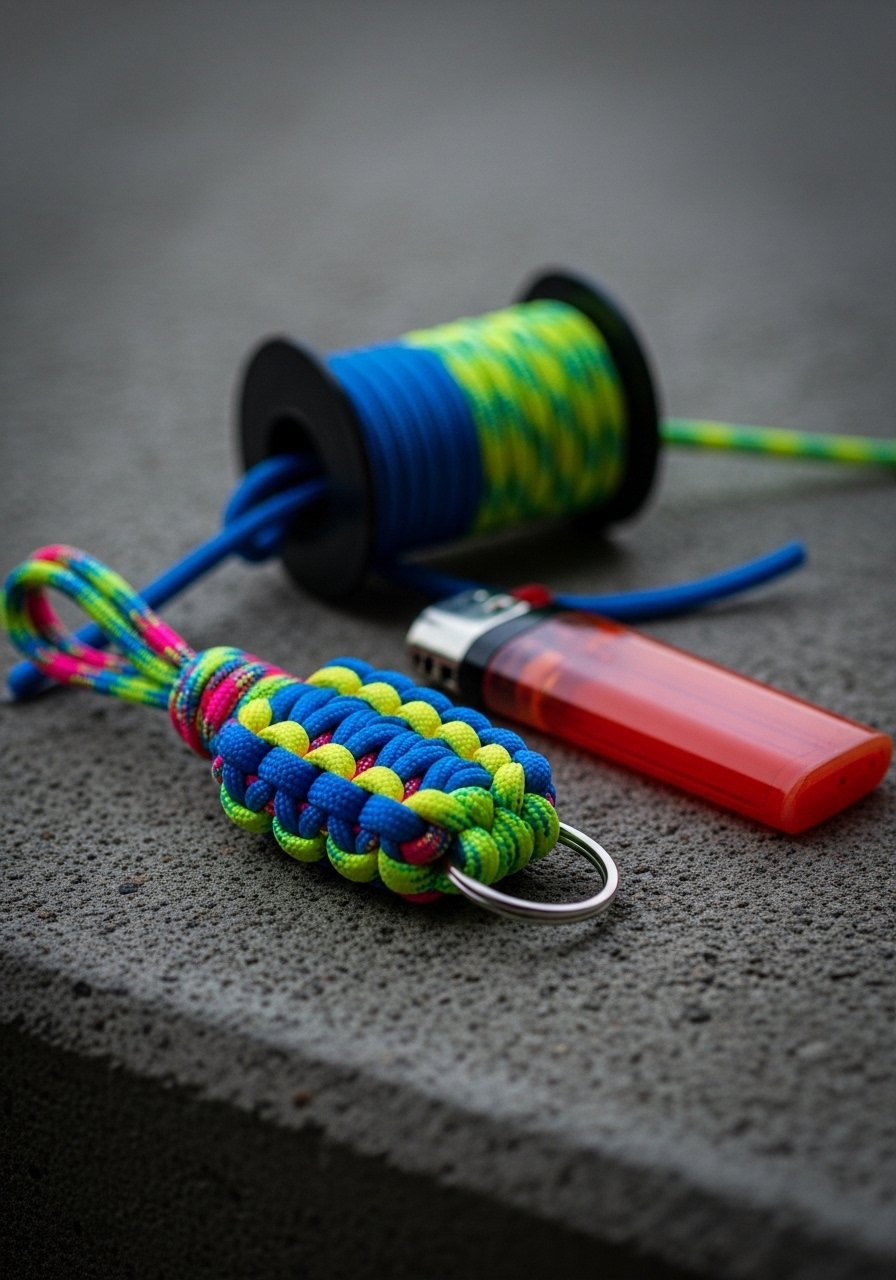
Paracord key fobs are rugged and ideal for outdoor lovers. A simple cobra knot braid takes a few minutes and yields a sturdy handle that’s easy to grab.
Materials
- 550 paracord in two colors, 1.5 m total
- Lighter for melting ends
- Scissors and a small ruler
- Split ring 25 mm
Instructions
- Cut two cords 75 cm each.
- Fold in half and loop through split ring with a cow hitch.
- Tie cobra knots for 6–8 cm length.
- Melt ends carefully and press to secure knots.
- Trim neatly.
How to Display or Gift It
- Pair with a small pocket knife or multi-tool.
- Pack in a small organza bag for a minimalist gift.
- Keep extras in a small bin for quick gifts.
- Cork and Bead Mini Tassel
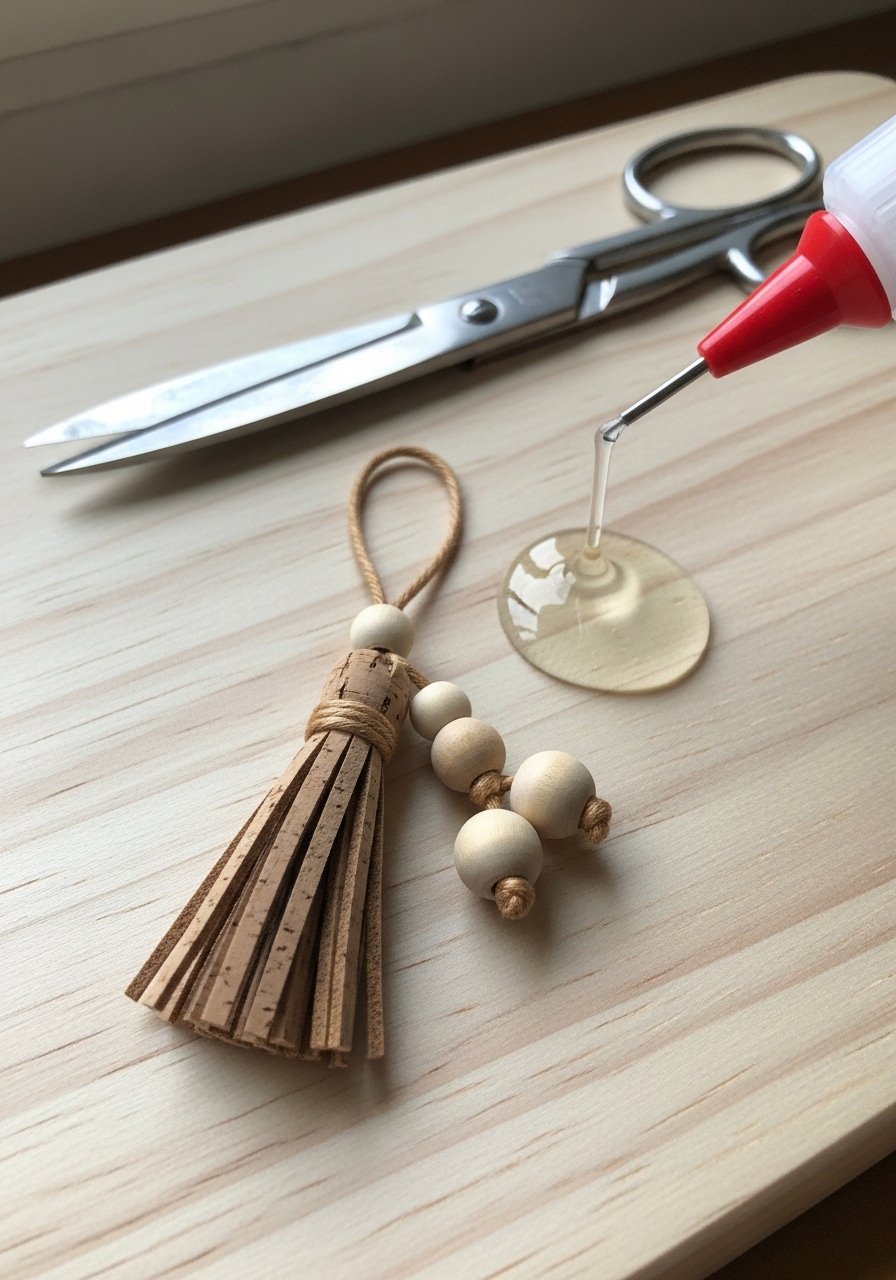
Combine cork and beads for a lightweight summer keychain. Cork fringe is easy to cut and resists moisture better than fabric tassels.
Materials
- Thin cork sheet 10 x 6 cm
- Small wooden beads (3)
- Hot glue gun and glue sticks
- Split ring and jump ring
- Scissors and ruler
Instructions
- Cut cork into thin fringes leaving 1 cm at top.
- Roll and secure with hot glue.
- Glue beads onto the top and add jump ring loop.
- Attach split ring and trim fringe evenly.
How to Display or Gift It
- Tuck into a small kraft box with tissue for a warm, natural gift.
- Make sets in earth tones for holiday gift-giving.
- Store in a dry place to prevent warping.
- Painted Wooden Disc Keychain
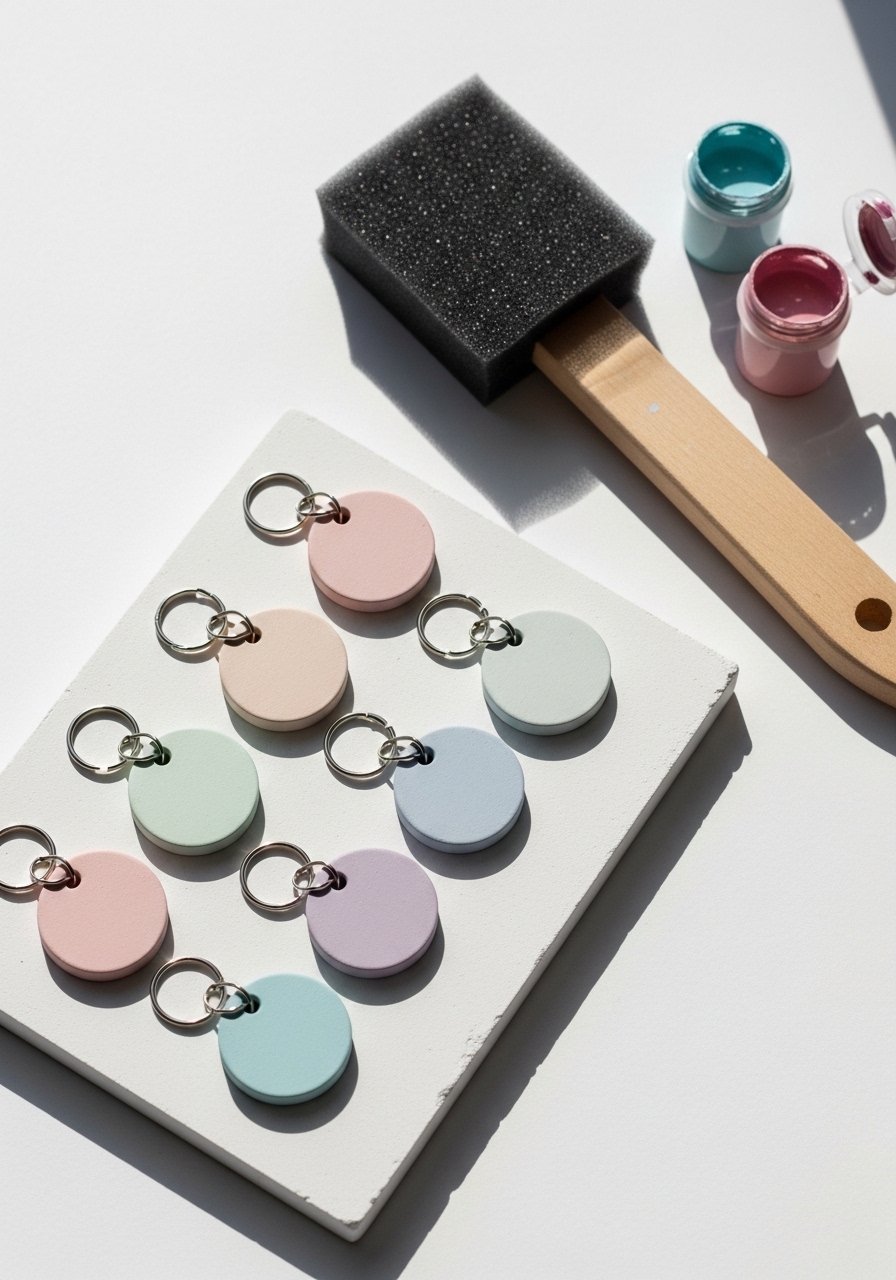
Hand-painted wooden discs are quick and lend themselves to playful patterns or minimalist dots. Acrylic craft paint dries fast and layers well.
Materials
- Wooden discs 30 mm (1 per keychain)
- Acrylic craft paints (small palette)
- Foam brush and fine detail brush
- Matte Mod Podge for sealing (1 thin coat)
- Jump ring and split ring
Instructions
- Sand disc lightly, then paint base color; dry 15–20 minutes.
- Add details with fine brush; let each layer dry.
- Seal with a thin coat of Mod Podge; dry 20–30 minutes and fully cure 24 hours.
- Drill a small hole and attach jump ring and split ring.
How to Display or Gift It
- Pair a painted disc with a small coordinating notebook.
- Bundle multiple discs on a single ring for a layered look.
- Keep paints and brushes in a labeled tray for touch-ups.
- Miniature Button Bouquet Keychain
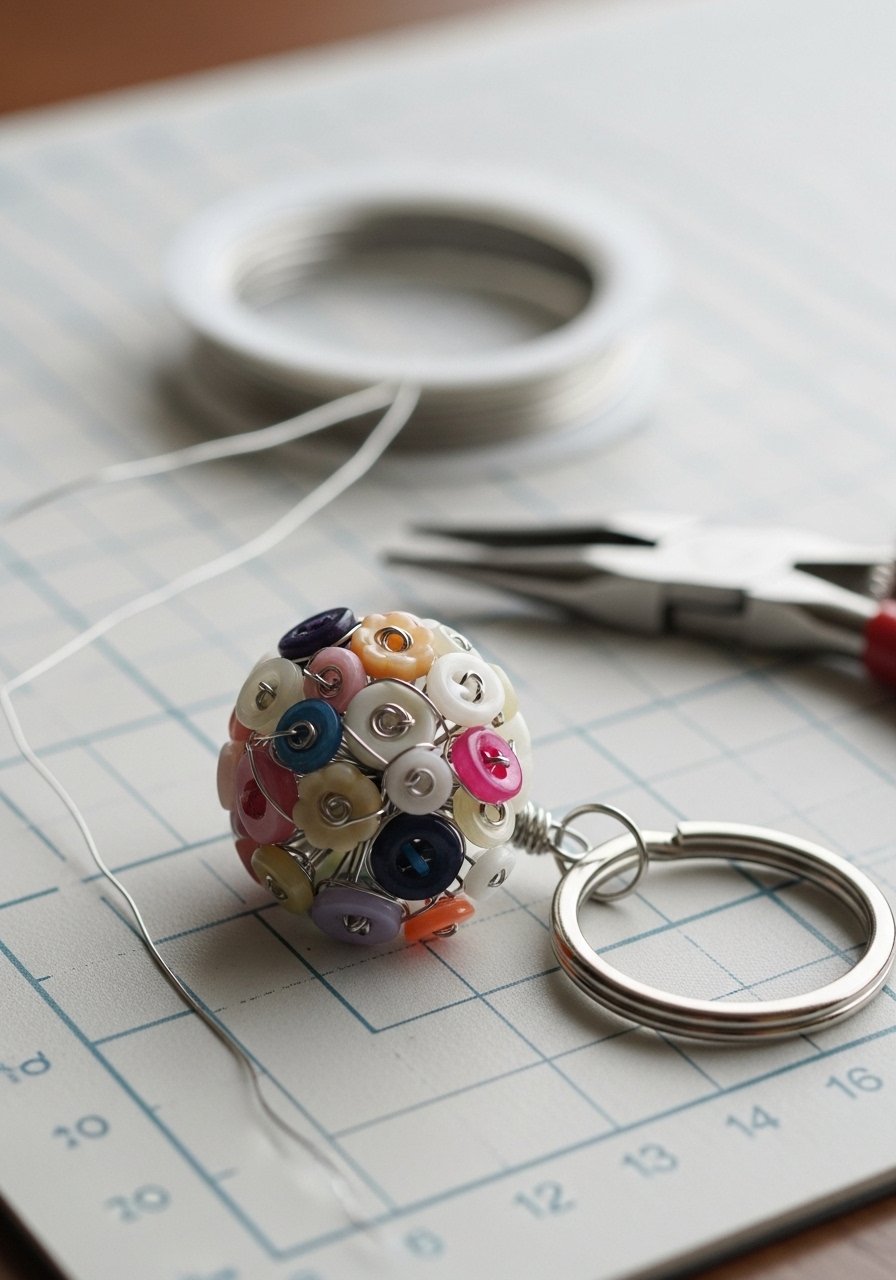
Make a tiny bouquet by wiring buttons together for a sweet retro charm. Floral wire gives structure, and a dab of glue secures loose pieces.
Materials
- Assorted small buttons (5–8)
- Floral wire 24 gauge, 20 cm
- Round-nose pliers and wire cutters
- Tiny felt backing circle
- Split ring and jump ring
Instructions
- Thread button onto wire and twist to secure; repeat for each button.
- Gather wired buttons into a bouquet and wrap stems together with leftover wire.
- Glue felt circle to cluster base and drill a tiny hole or add a wire loop.
- Attach jump ring and split ring.
How to Display or Gift It
- Tie the bouquet to a gift box ribbon.
- Make color-coordinated sets.
- Store buttons in a divided organizer for easy selection.
- Air-Dry Clay Initial Disc
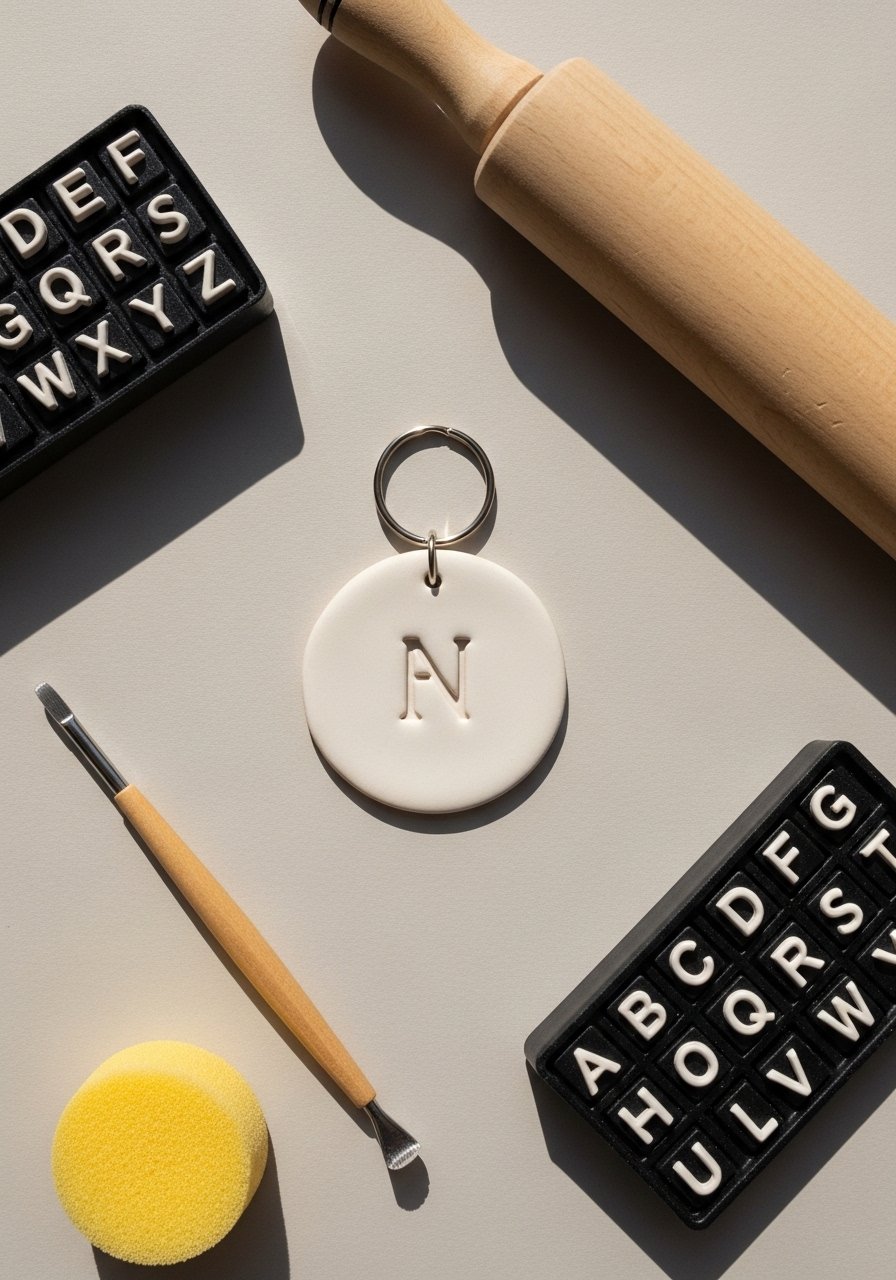
Air-dry clay gives a handmade ceramic feel without firing. Stamped initials look professional; smooth the surface before stamping for crisper letters. Cure times vary—allow adequate drying to prevent cracking.
Materials
- Air-dry clay 20 g per disc
- Alphabet stamp set or small cookie cutter letters
- Rolling pin and parchment paper
- Sandpaper 400 grit (optional)
- Split ring and jump ring
Instructions
- Roll clay to 3–4 mm thick and cut discs 30 mm.
- Stamp initial lightly but decisively; smooth edges.
- Dry flat for 24–48 hours depending on humidity.
- Sand lightly and paint or seal with thin Mod Podge coat; dry 24 hours.
- Attach hardware.
How to Display or Gift It
- Add a small care card explaining not to submerge in water.
- Make sets with different paint finishes for variety.
- Store on a flat tray while curing to prevent warping.
- Glitter Epoxy Heart Keychain
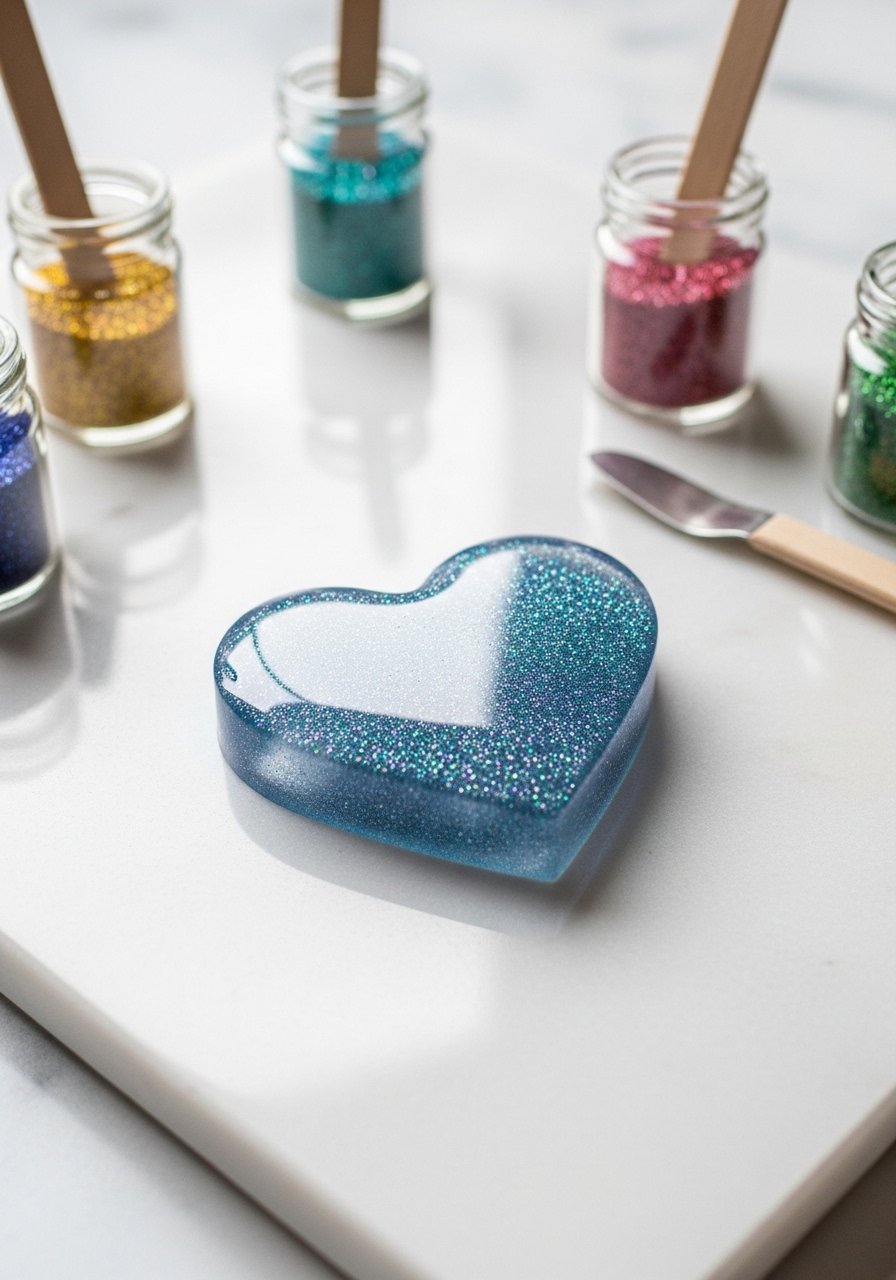
A glitter epoxy heart sparkles and feels special. Use a small resin mold and mix in fine craft glitter. Wear protective gloves and mix carefully to minimize bubbles.
Materials
- Small epoxy resin kit 30 ml
- Fine craft glitter (small pinch)
- Silicone heart mold 25 mm
- Nitrile gloves, mixing cups, mini spatula
- Jump ring and split ring
Instructions
- Mix resin per instructions and stir in glitter.
- Pour into mold, use a toothpick or heat gun briefly to remove bubbles.
- Cure 24–48 hours covered from dust.
- Demold, sand seams, and attach hardware.
How to Display or Gift It
- Present in a clear tiny box to show the sparkle.
- Pair with a coordinating glitter-coated gift tag.
- Keep in a dust-free container while curing.
- Sewn Mini Felt Heart with Bead Detail

Sewn felt hearts are charming and customizable. Add bead accents for sparkle. This is a great scrap-busting project and approachable for kids with supervision.
Materials
- Wool felt scraps (two colors) 5 x 5 cm each
- Embroidery floss and tiny glass beads
- Needle and sharp scissors
- Small stuffing fiberfill pinch
- Split ring and jump ring
Instructions
- Cut two heart shapes and stitch around three sides with blanket stitch.
- Add beads as you go, then stuff lightly and close.
- Make small loop at top for jump ring and attach split ring.
- Secure threads with a dab of craft glue.
How to Display or Gift It
- Slip into mini muslin bags for a sweet presentation.
- Make a set in different color combinations.
- Store in a small fabric box to prevent dusting.
- Tiny Mosaic Tile Tag
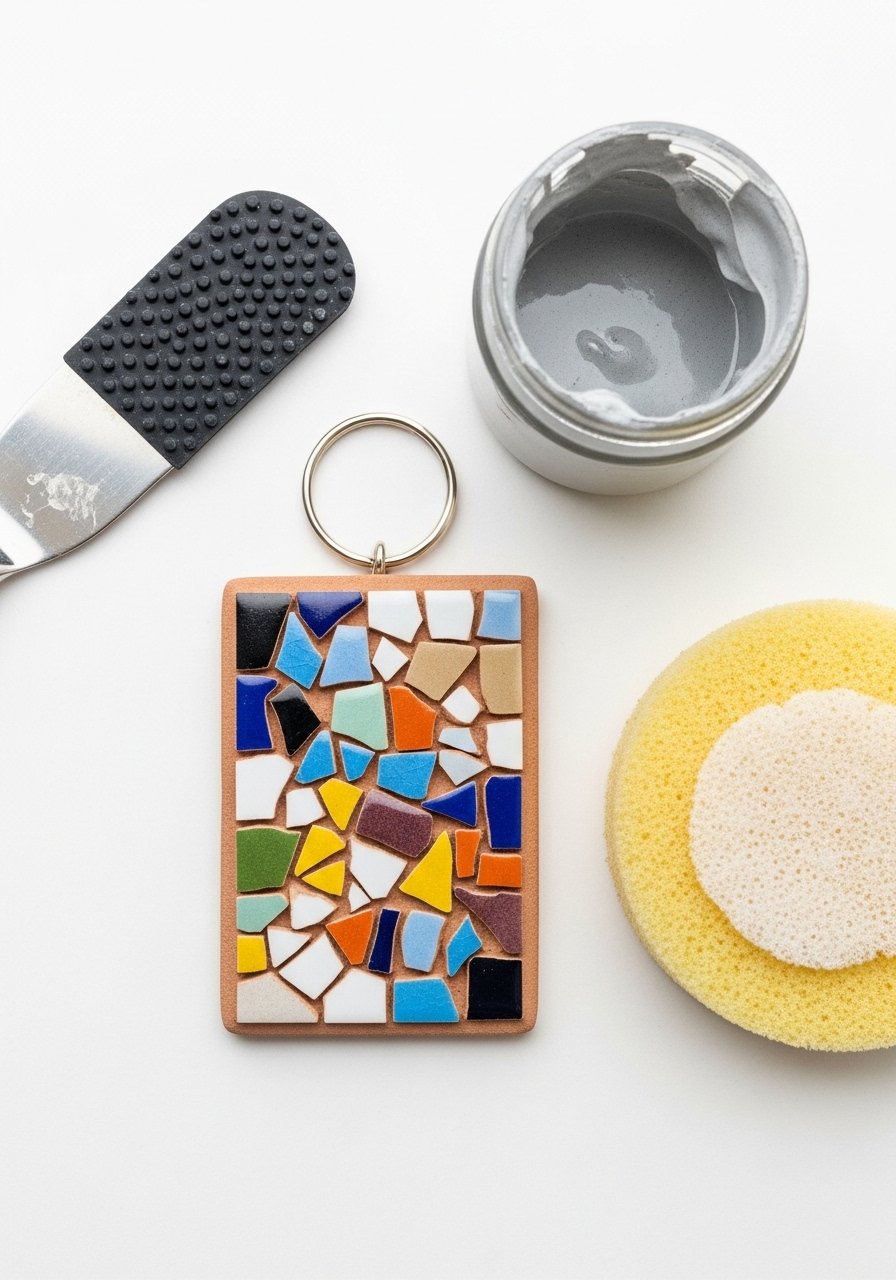
Mosaic tile tags use small ceramic shards for a colorful, tactile look. Use a small base tile and thin-set grout for best adhesion. Clean grout from tiles promptly to keep edges bright.
Materials
- Small ceramic tile base 30 mm (1)
- Tiny ceramic or glass shard pieces (assorted)
- Quick-set grout 10 g (small amount)
- Toothpick or mini spatula, damp sponge
- Jump ring and split ring
Instructions
- Arrange small shards on tile base dry until design satisfies.
- Mix a tiny amount of grout and press into gaps with a toothpick.
- Wipe excess grout with a damp sponge; let set 15–30 minutes.
- After 24 hours, polish tiles with a soft cloth and attach jump ring through a pre-drilled hole or glued loop.
- Add split ring.
How to Display or Gift It
- Present on a small card showing the color palette.
- Make a group set with matching tile accents.
- Store tiles flat during grout cure to avoid slippage.
Thank you for staying with me through 25 delightful projects—everything from simple bead tags to resin photo keepsakes. Whether you try one or a dozen of these DIY keychain ideas, you’ll have lovely handmade pieces to gift or keep. Pin this list to save your favorites and share with a crafty friend who loves low-cost, high-charm projects. Which style will you make first?
Trust me, picking up a quality hot glue gun with temperature control changed how every single one of these projects turned out — no more stringy mess, no more burns.


