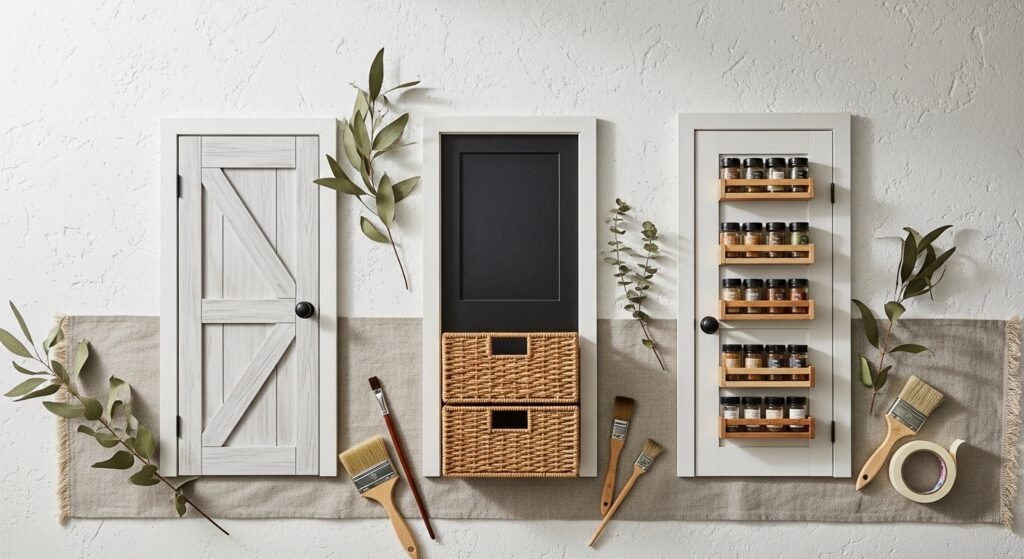
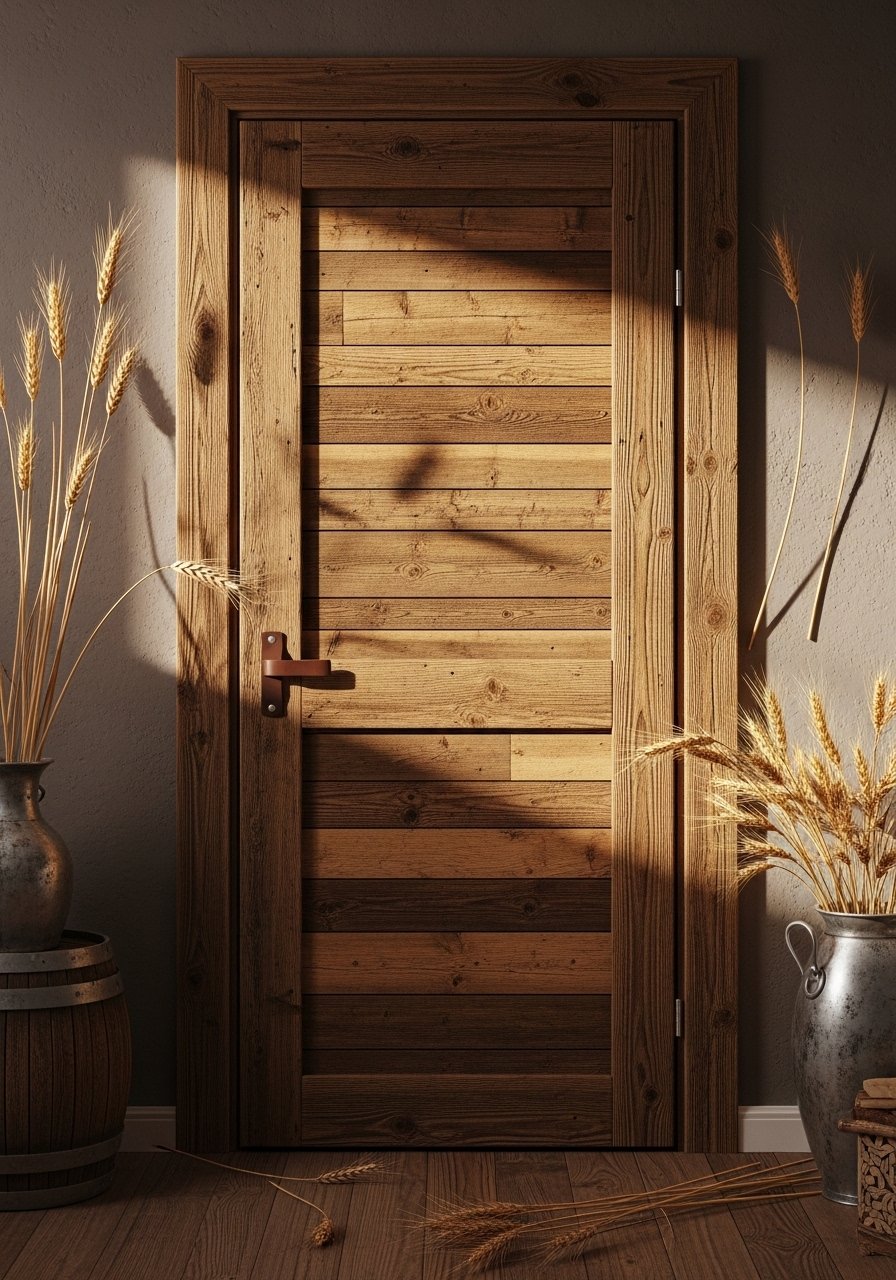
You open the pantry to chaos: spice jars toppled, snacks lost in the abyss, and a plain old door that wastes valuable square footage. Small pantry door ideas give you a chance to fix storage and add real personality to the kitchen—without a full remodel. Whether you want a sleek japandi look, a farmhouse feel, or a boho basket wall, these projects turn that tiny door into useful real estate.
Inside you'll find 28 practical, stylish projects that work for condo pantries, narrow closets, or small galley kitchens. Each idea includes exact materials, realistic measurements, drying times, and step-by-step instructions. I mention tools that actually make the job easier—like a compact cutting machine for vinyl labels or a foam brush for smooth chalkboard paint—and link to them so you can grab the same gear I use.
Grab your hot glue gun and a roll of painter's tape, and let’s reimagine that pantry door into storage and style you’ll love.
- Slim Sliding Spice Rack Door
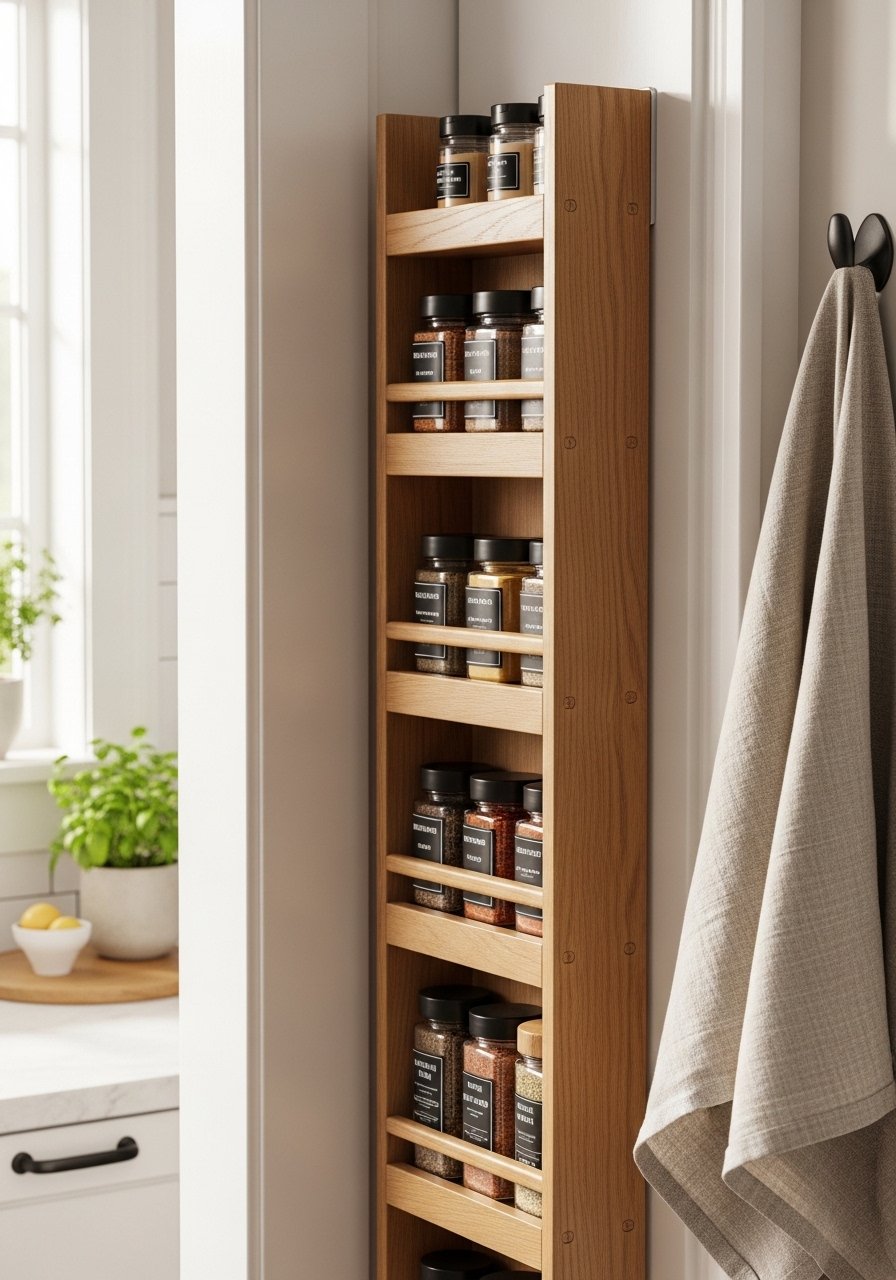
This sliding spice rack converts wasted door depth into tidy, visible spice storage. It pulls out a few inches for reachability but keeps the pantry footprint intact. Beginner-friendly and great for anyone who loves visible, organized jars. Use a small drill for pilot holes to keep mounting neat.
Materials
- 3/4" pine board cut to (3) shelves: 24" x 4"
- 2 1" x 24" wooden cleats for runners
- 12 small wood screws (1¼")
- 12 1" small shelf brackets
- 12 4 oz amber spice jars with lids
- Sandpaper 120 and 220 grit
- Wood stain (1/2 pint) or water-based finish
- Painter's tape (1 roll)
- Spray polyurethane (satin, 1 can)
- Drill and 1/8" and 3/16" bits
Instructions
- Sand boards smooth with 120 grit, then finish with 220 grit for a soft touch.
- Stain or paint shelves; allow 2 coats, 2 hours dry between coats, then 24 hours cure before handling.
- Attach cleats vertically to the door inside about 1" from edge, using pilot holes drilled with a 1/8" bit.
- Mount brackets to underside of each shelf at 3" intervals; screw shelves to cleats so they slide on the cleat edges.
- Place jars in rows; leave 1/4" clearance at front for easy grab.
- Apply a coat of satin polyurethane; dry 4–6 hours and cure overnight until firm to the touch.
How to Display or Gift It
- Style jars with uniform labels for a polished look. Use a label maker or plain white vinyl labels.
- Mount a small herb clip on the door exterior for fresh garnish.
- Wrap the set of jars in kraft paper as a housewarming gift.
- Store extra jars in a stackable craft organizer while you finish staining.
- Chalkboard Menu Pantry Door
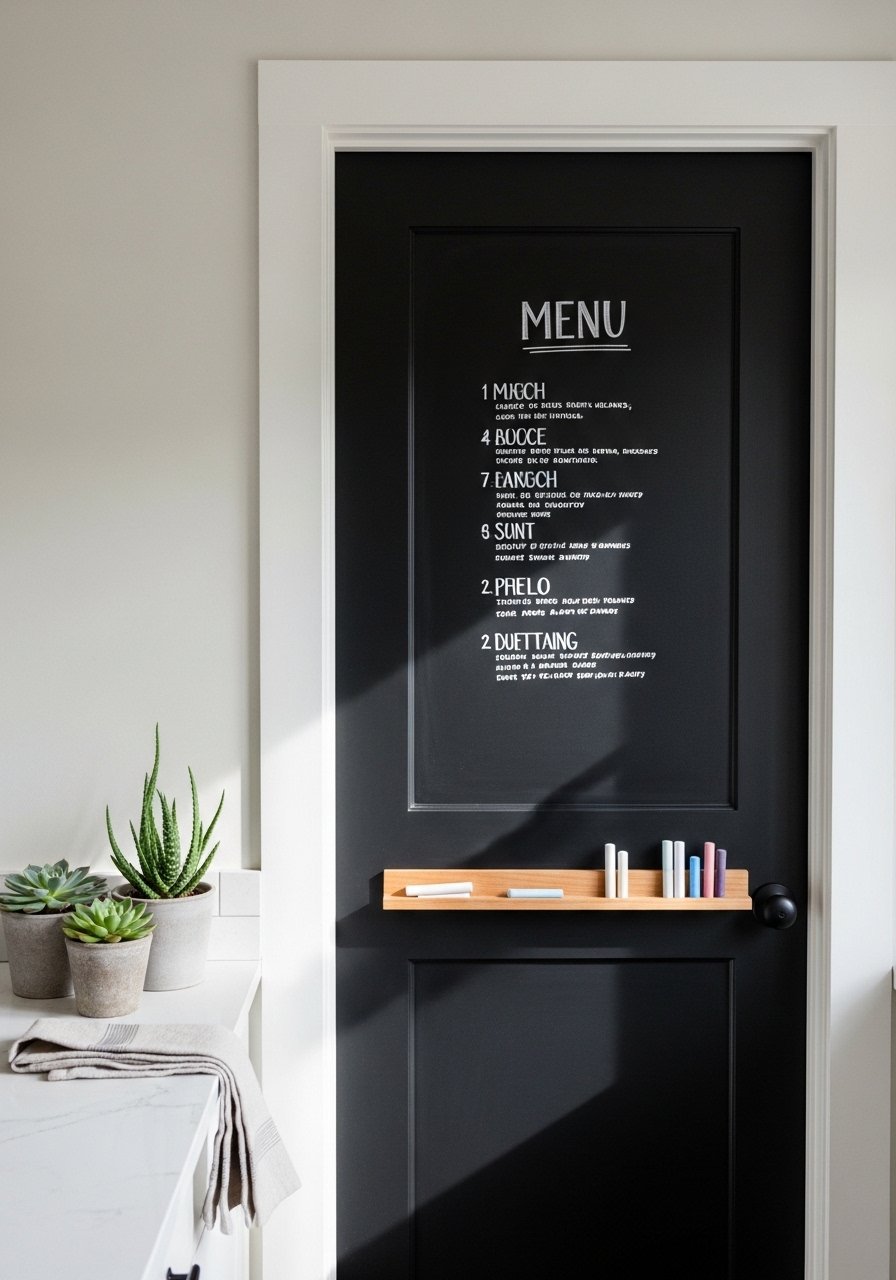
A chalkboard menu on the pantry door keeps meal plans and grocery lists front-and-center. The matte finish feels tactile under your hand and invites weekly updates. A foam roller helps you get smooth, streak-free coverage.
Materials
- 1 quart chalkboard paint (matte)
- 1 foam roller (4" mini foam)
- 1/2" painter's tape
- Sandpaper 150 grit
- Chalkboard primer (if painting over glossy finish)
- Chalk ledges or small wooden tray (24" or cut to fit)
- Liquid chalk markers set
Instructions
- Lightly sand door area to scuff glossy surfaces; wipe with damp cloth.
- Tape off a rectangular area leaving a 1" frame.
- Prime with chalkboard primer if needed; dry 1–2 hours.
- Apply 2 thin coats of chalkboard paint with the mini foam roller; 2 hours dry between coats.
- Remove tape carefully; allow paint to cure 24–48 hours before writing.
- "Season" the chalkboard by rubbing whole side of chalk and erasing to prevent ghosting.
How to Display or Gift It
- Mount a small tray for chalk beneath the board using small wooden trays.
- Use liquid chalk markers for bright, smudge-free lists.
- For gifting, pair with a chalk marker set in a kraft bag.
- To keep things tidy, store extra chalk in a drawer organizer.
- Over-the-Door Hanging Basket System
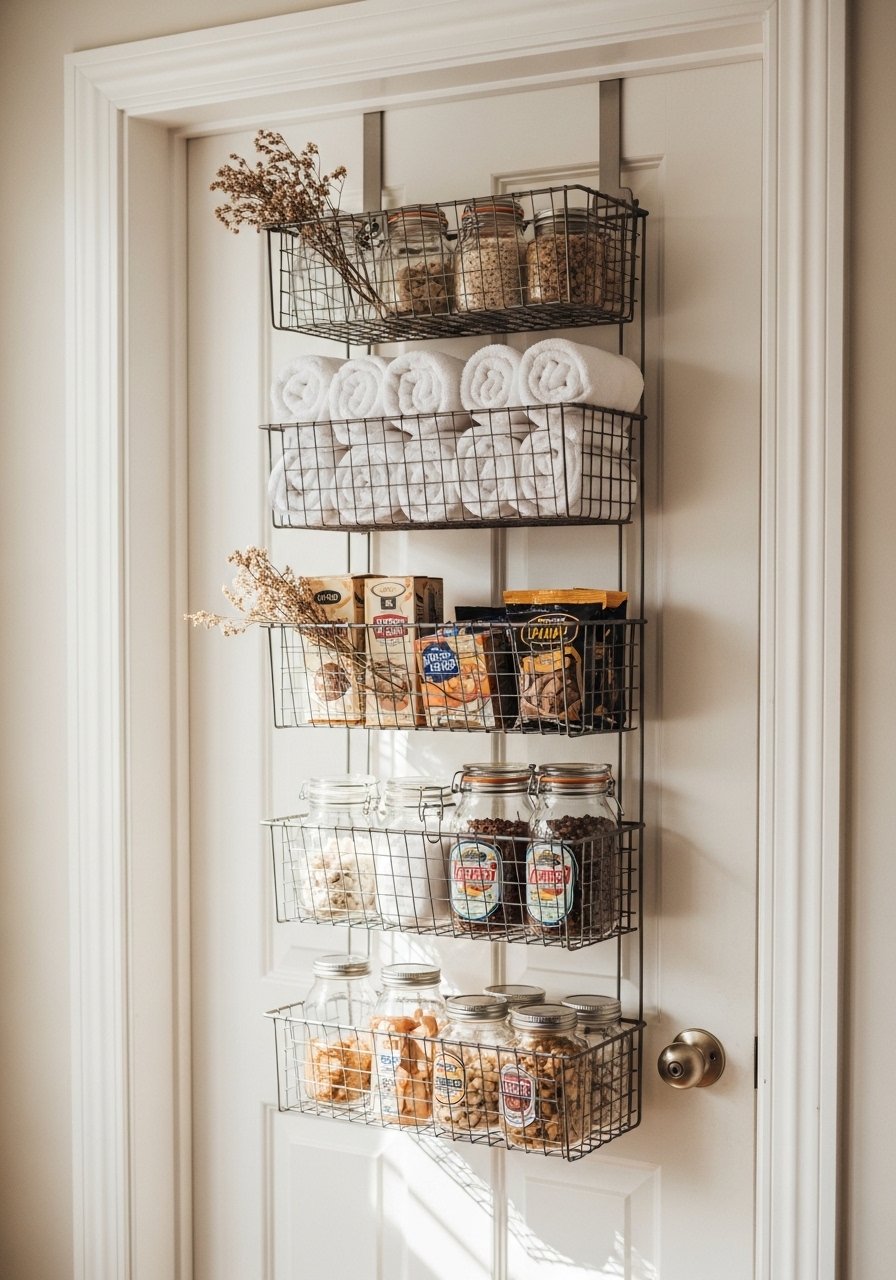
This lightweight hanging basket system is perfect if you rent or can’t drill into doors. It gives immediate corralling for snacks and produce. Use a pair of pliers to adjust hooks and a ruler to space baskets evenly.
Materials
- Over-the-door hanger (fits 1.25" doors)
- 3 wire hanging baskets (12" x 6" x 4")
- Zip ties (pack of 50)
- Felt pads to protect door paint
- Small chalkboard labels (12)
- Scissors and pliers
Instructions
- Fit the hanger over the door and mark basket locations.
- Attach baskets to hanger using zip ties; trim excess ties with scissors.
- Place felt pads where hanger meets door to prevent paint rub.
- Arrange items by weight—heavier items low.
- Re-check zip ties after one week and tighten if needed.
How to Display or Gift It
- Tuck a dried sprig or ribbon on a basket for seasonal decoration.
- Use chalkboard labels to identify snack zones.
- Fold like items flat to maximize space.
- For gifting, include a matching set of reusable snack bags.
- Fold-Out Cutting Board Door Insert
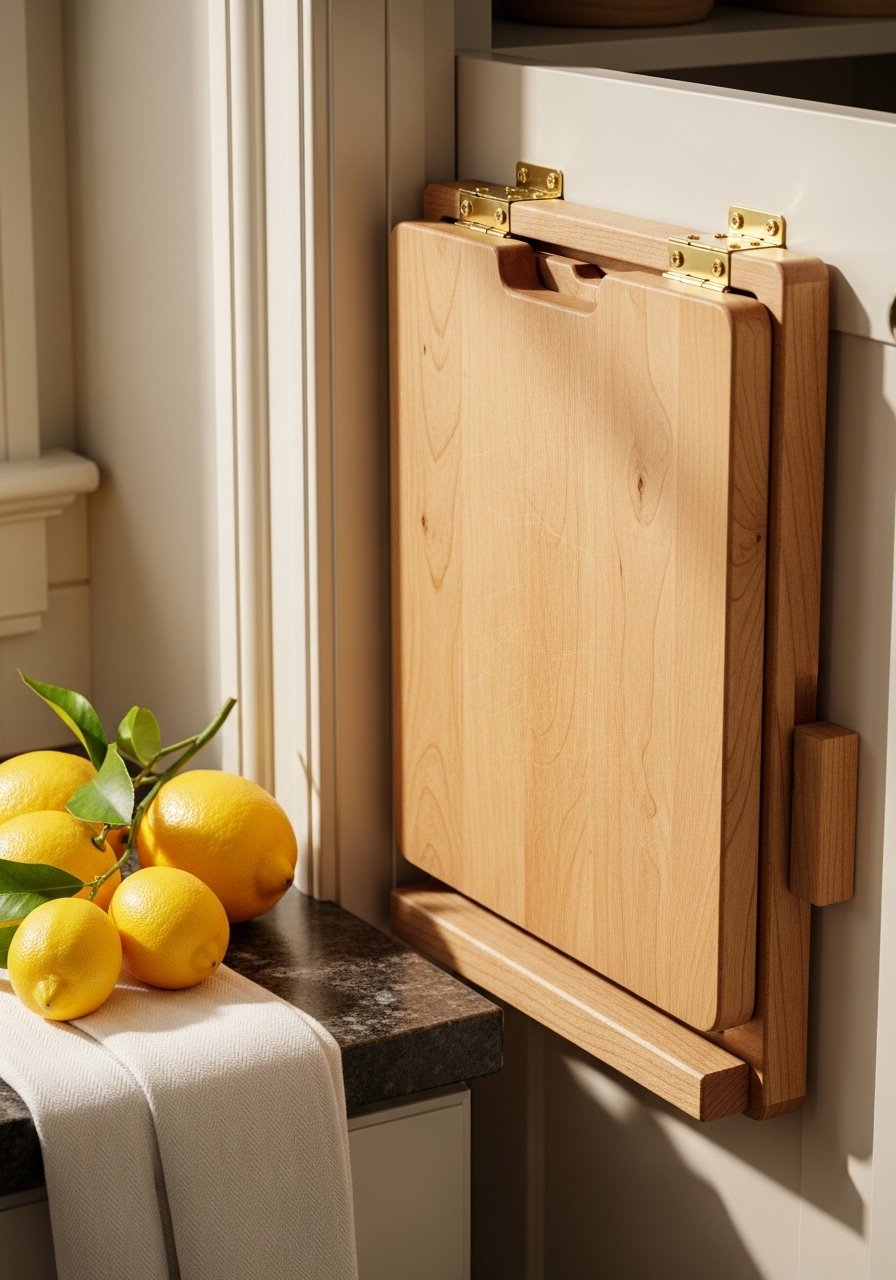
Add a hinged fold-out cutting board to your pantry door for instant prep space. It’s sturdy and folds flush when not in use—perfect for tiny kitchens. A small biscuit joint or wood glue keeps it strong.
Materials
- 1 hardwood board cut to 16" x 12" x 3/4"
- Brass folding hinges (2)
- Small support chain (6" with eye screws) or folding bracket
- Wood glue (PVA)
- Sandpaper 120 and 220 grit
- Food-safe oil (e.g., mineral oil, 8 oz)
- Screws appropriate for hinges
- Drill and countersink bit
Instructions
- Sand board smooth; round edges slightly for comfort.
- Apply 2 coats of food-safe mineral oil, rubbing in and waiting 30 minutes between coats. Cure overnight.
- Mount hinges centered on bottom of pantry door inside; pre-drill and countersink holes.
- Attach cutting board to hinges; add support chain or folding bracket to hold board flat when open.
- Test load with a gentle press; adjust chain length until angle feels stable.
- Refinish oil every 3 months with a quick rub to maintain moisture resistance.
How to Display or Gift It
- Add a leather hanging strap for a handcrafted look.
- Keep a small knife roll inside the pantry for grab-and-go prep.
- Package as a housewarming gift with mineral oil and a small cutting guide.
- Store extra cutting boards in a vertical organizer until ready to mount.
- Magnetic Knife Strip Built Into Door
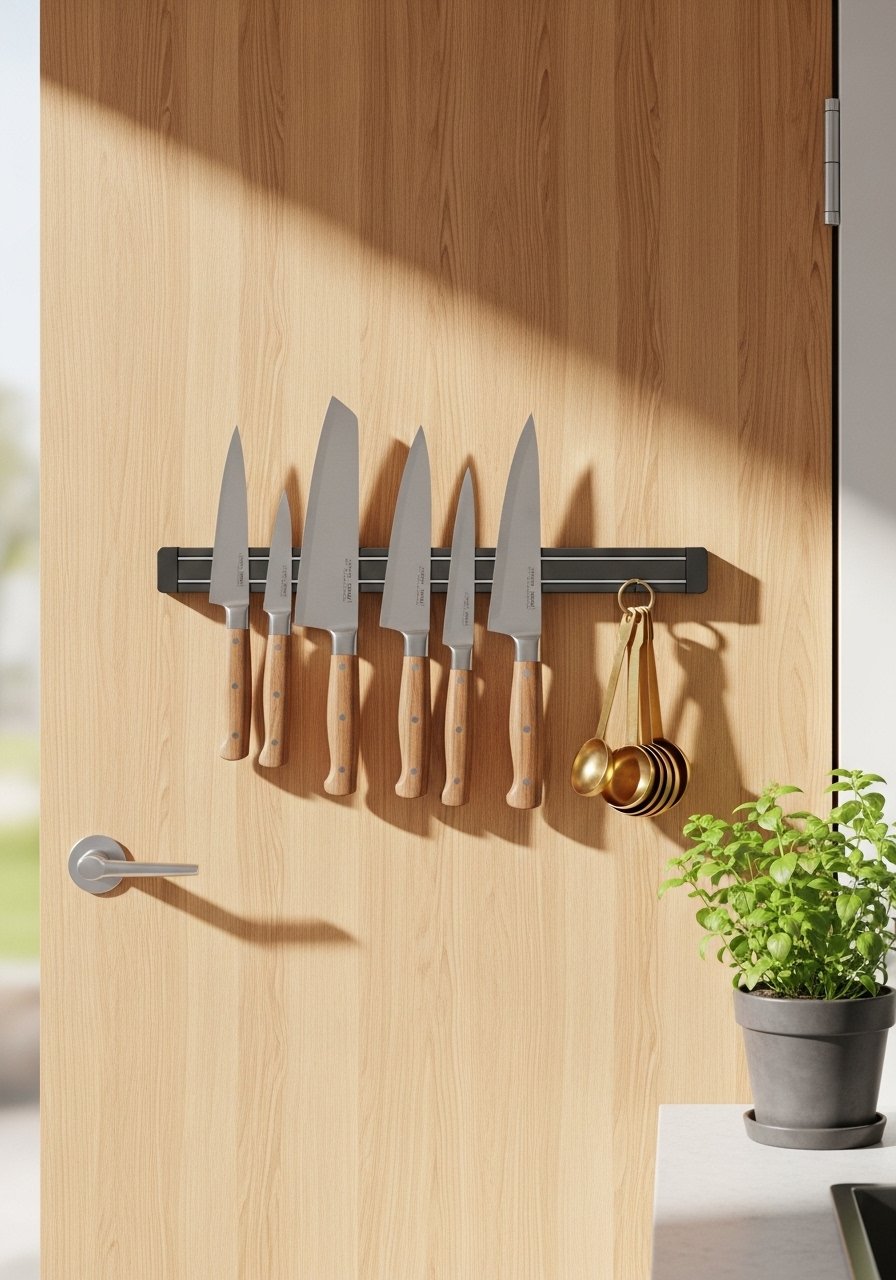
Free up drawer space and keep knives visible and accessible with a recessed or surface-mounted magnetic strip. Use a level and a stud finder when installing heavier strips.
Materials
- 18" magnetic knife strip
- 2 mounting screws and anchors (if not hitting a stud)
- Stud finder
- Small level
- Soft towel for padding while aligning knives
- Screwdriver or drill
Instructions
- Decide height so handles sit above countertop—typically 36" from floor.
- Locate studs; mark screw positions.
- Drill pilot holes and install anchors if needed.
- Mount strip level using screws.
- Place knives on strip by handle; open blades away from you.
- Test secure hold by gently tugging each knife.
How to Display or Gift It
- Label zones for different knives with tiny wood tags.
- Pair with a magnetic knife strip and a set of bamboo knife dullers as a gift.
- To keep handles tidy, add a small hook for a towel.
- Store extra kitchen tools in a nearby utensil jar.
- Slim Pantry Door Pull-Out Step Stool
A pull-out step stool gives you reach without a bulky free-standing stool. Simple drawer slides make it smooth; use locking slides for safety.
Materials
- Cut plywood for stool: 15" x 10" x 3/4"
- 2 drawer slides (12" full extension, rated 75 lb)
- 1 small handle or pull
- Wood glue
- Sandpaper 120/220
- Paint or stain (enough for one coat)
- Safety latch (optional)
- Drill and screws
Instructions
- Assemble stool box with plywood; secure with wood glue and screws.
- Sand, finish with stain or paint; allow 2 hours dry between coats.
- Attach drawer slides to stool sides and inside door bottom with pilot holes.
- Insert stool into slides, test smoothness and full extension.
- Install handle and optional safety latch to prevent accidental pull-out.
- Test with a weight equal to a 200 lb person standing briefly; check stability.
How to Display or Gift It
- Stow a small non-slip pad on top of the stool.
- Paint a contrasting stripe for a pop of color.
- Gift with a matching small hand towel and a note.
- Store repair screws in a labeled craft drawer for quick fixes.
- Vertical Herb Garden Pocket Door
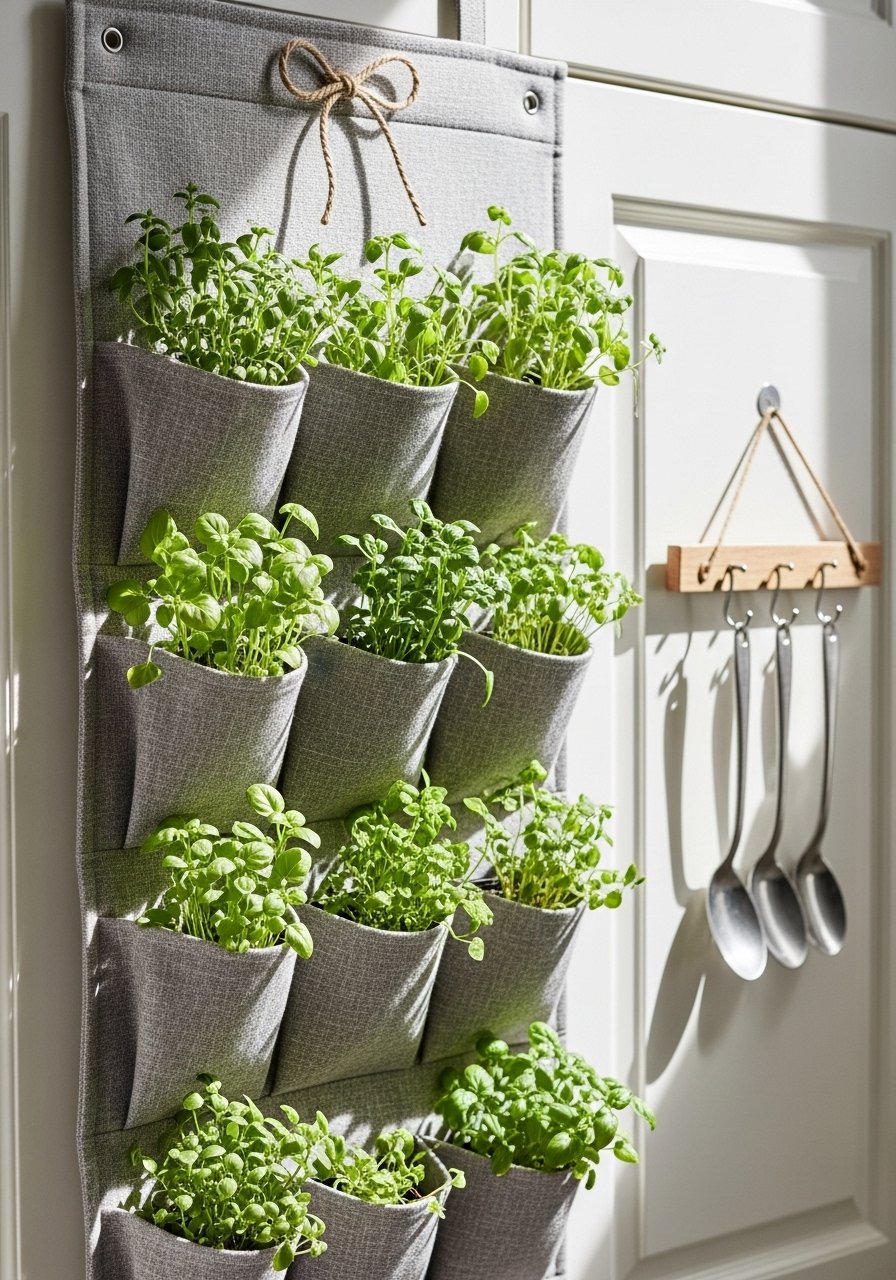
Grow fresh herbs in fabric pockets attached to a pantry door. This adds scent and greenery to the kitchen and is ideal for renters. Use a moisture-resistant liner to protect the door.
Materials
- Fabric pocket planter with 6 pockets (15" x 34")
- Small plastic pots (3" diameter) x 6
- Potting mix for herbs (3 quarts)
- S-hooks or over-the-door hanger
- Plastic liner or saucers
- Hand trowel
- Herb seedlings (6 small plants)
Instructions
- Hang the fabric planter using over-the-door hooks or screws if permanent.
- Line each pocket with a thin plastic liner or a small saucer to catch moisture.
- Fill pots with potting mix; plant seedlings.
- Slide pots into pockets; water lightly—just enough to moisten soil.
- Water frequency: once every 5–7 days depending on light.
- Prune herbs weekly to encourage growth.
How to Display or Gift It
- Add small laminated labels for each herb.
- Gift with a watering can and small pruning shears.
- Rotate herbs seasonally—basil in summer, rosemary in winter.
- Store spare seedlings in labeled seed trays.
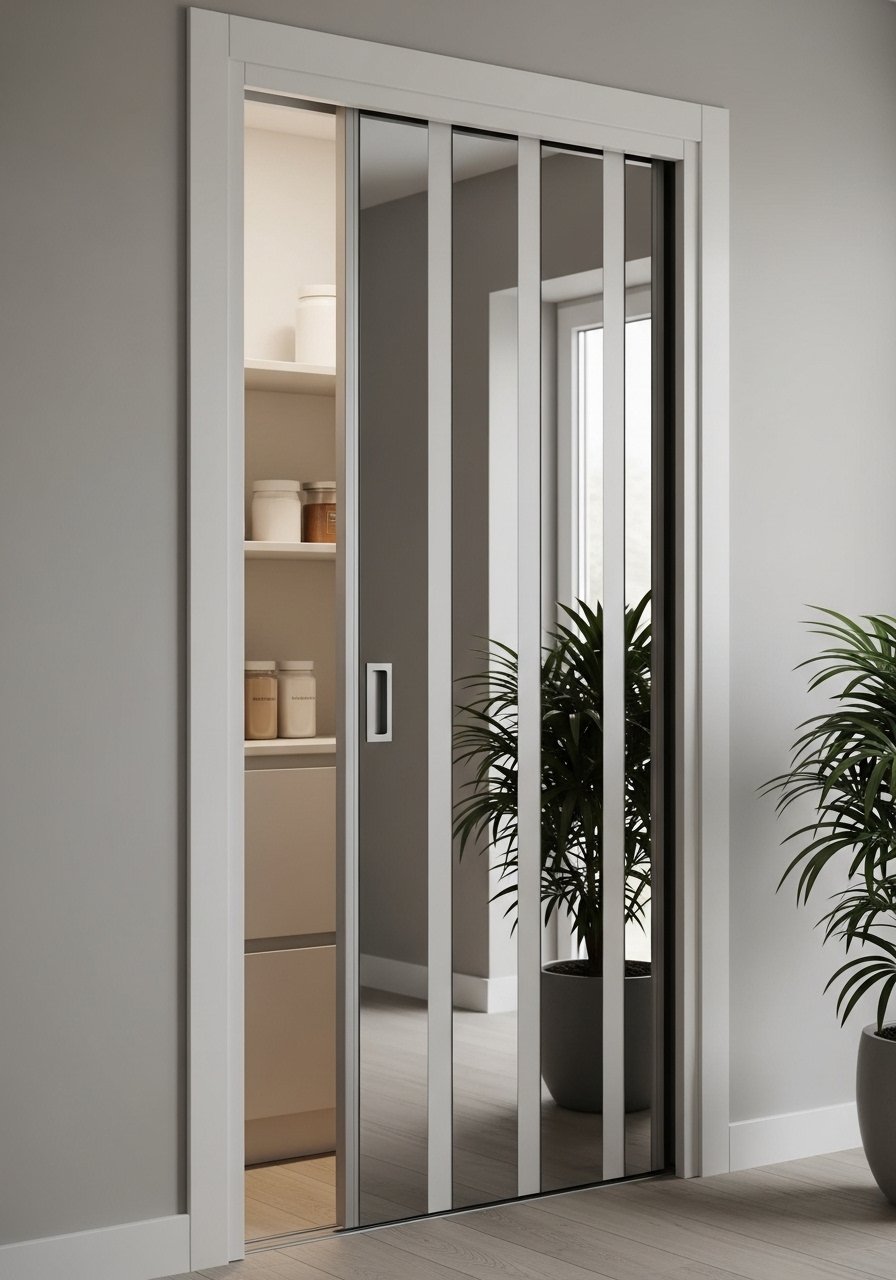
- Glass Pane Insert with Frosted Vinyl
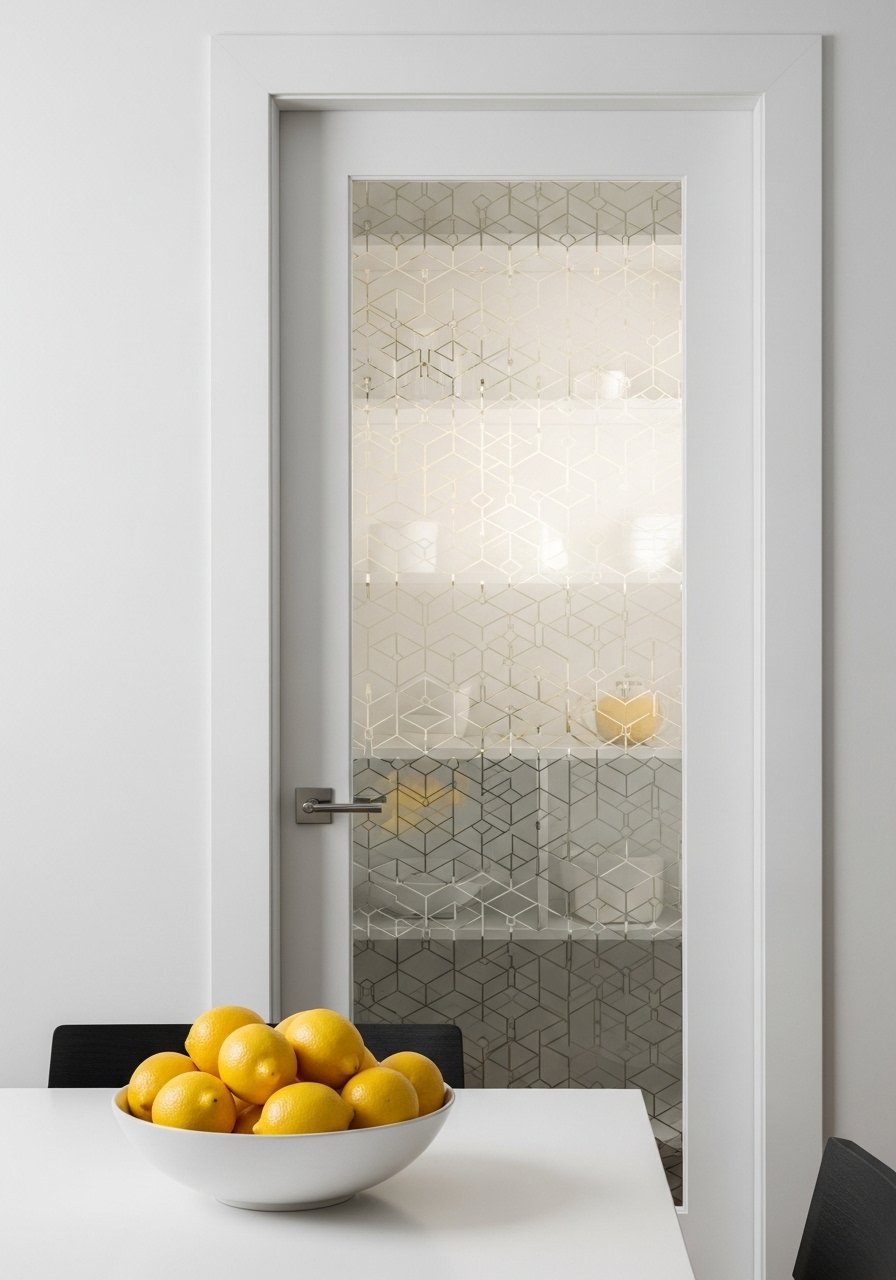
Replace a solid door panel with glass and apply frosted vinyl for privacy and light. Vinyl lets you add patterns like lattice or simple stripes. A squeegee prevents bubbles.
Materials
- Glass pane cut to fit door (tempered recommended)
- Frosted window film (one 24" x 36" roll)
- Clear silicone caulk
- Caulk gun
- Squeegee (small)
- Measuring tape
- Gloves and safety glasses
Instructions
- Measure and order tempered glass to fit door opening.
- Clean glass thoroughly with rubbing alcohol.
- Cut frosted film to size, leaving 1/4" overlap.
- Apply film using soapy water spray, then squeegee from center outward to remove bubbles.
- Set glass into door frame and seal with clear silicone; allow 24 hours to cure fully.
- Trim any excess film with a precision craft knife.
How to Display or Gift It
- Add a removable wreath hook for seasonal decor.
- Use frosted film with a subtle pattern for privacy.
- For gifting, include a small squeegee and cleaning kit.
- Keep extra film in a flat craft organizer to avoid creases.
- Mirrored Pantry Door for Light Bounce
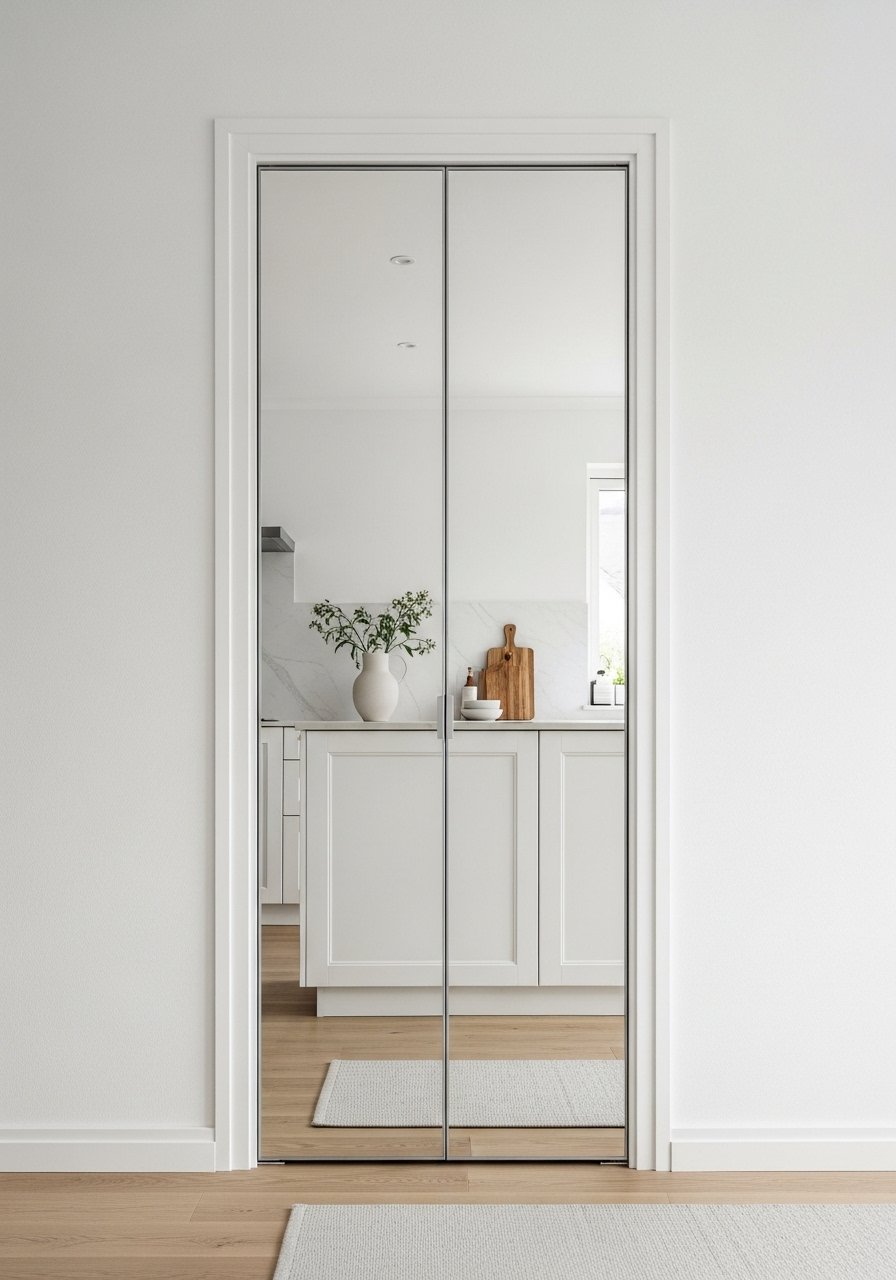
A mirrored pantry door opens up small kitchens by reflecting light. Opt for a lightweight shatterproof mirror panel for safety. A foam backer prevents rattles.
Materials
- Lightweight shatterproof mirror panel cut to door size
- Mirror mounting clips (4)
- Foam adhesive tape (1/8" thick)
- Silicone adhesive for mirrors
- Measuring tape
- Level
Instructions
- Measure and fit mirror to door size; leave a 1/8" gap for expansion.
- Apply foam adhesive tape to back in strips.
- Place mirror carefully and secure with mounting clips.
- Do not stress mirror edges; allow adhesive to set 24 hours.
- Test door swing and adjust hinges if mirror adds weight.
- Clean with a non-abrasive glass cleaner.
How to Display or Gift It
- Add a small wreath hook for seasonal styling.
- Use a decorative frame molding around the mirror for a finished look.
- Gift with a microfibre cloth and glass cleaner.
- Store mirror panel flat until installation to avoid warping.
- DIY Louvered Faux Vent Door
Create louvered panels on a flat door for airflow and a coastal look. Lightweight battens and angled slats simulate the style without full louver construction.
Materials
- 1 flat hollow-core door
- 1×2" pine battens (quantity to cut slats)
- Wood glue
- Finish nails and small hammer
- Paint (semi-gloss, 1 pint)
- Painter's tape
- Miter saw or hand saw
- Sandpaper 120 grit
Instructions
- Cut battens into slats angled at 30 degrees; sand edges.
- Mark door front with equally spaced horizontal lines where slats will sit.
- Glue and nail slats on the door with spacing of 1/2" between slats.
- Fill nail holes with wood filler; sand smooth.
- Prime if needed and paint 2 coats, allowing 2 hours dry between.
- Rehang door and test airflow.
How to Display or Gift It
- Paint louvers a contrasting color for interest.
- Use a wreath hanger for understated decor.
- Store spare slats in a slim organizer box.
- Gift with small jars of paint and a brush.
- Beadboard Paneled Pantry Door (small pantry door ideas)
Beadboard adds cottagecore charm and texture to any pantry door. It’s lightweight and easy to glue onto a hollow-core door. A brad nailer speeds the job and keeps visible fasteners minimal.
Materials
- Beadboard panel cut to door size (3mm MDF or plywood)
- Construction adhesive (tube)
- Brad nails (18 ga)
- Caulk for seams
- Paint (chalk or latex, 1 pint)
- Sanding sponge
- Brad nailer or hammer and small nails
Instructions
- Prime beadboard if raw; paint the backside to prevent warping.
- Apply construction adhesive to the door surface in vertical beads.
- Press beadboard onto door and secure with brad nails every 6–8".
- Caulk seams and nail holes; sand smooth after drying.
- Paint 2 coats, 2 hours dry between.
- Reattach hardware.
How to Display or Gift It
- Mount a small wooden sign or chalkboard menu.
- Pair with coordinating shelf baskets inside pantry.
- Wrap as a gift with hardware and paint for a DIY kit.
- Store leftover beadboard in a dry place upright.
- Rustic Reclaimed Plank Overlay Door
Give a plain door a reclaimed plank look using thin planks or shiplap. The texture feels tactile and fits farmhouse, boho, or industrial styles. A jigsaw is useful for trimming.
Materials
- Thin reclaimed wood planks or thin shiplap (enough to cover door)
- Construction adhesive
- Finish nails and hammer
- Stain or clear coat (1 pint)
- Orbital sander or sanding sponge
- Jigsaw for trimming
Instructions
- Remove door hardware and lay planks across door to plan layout.
- Cut planks to fit edges with a jigsaw.
- Apply construction adhesive and press planks onto door.
- Secure with finish nails along edges and seams.
- Sand edges lightly for a worn look; apply clear coat or stain.
- Reattach hardware and hang.
How to Display or Gift It
- Add a leather or rope pull for rustic charm.
- Accent with a small vintage clip to hold recipes.
- Gift reclaimed planks with stain and nails for a DIY set.
- Keep extra planks in a flat, dry storage tub.
- Industrial Pipe Shelves on Door
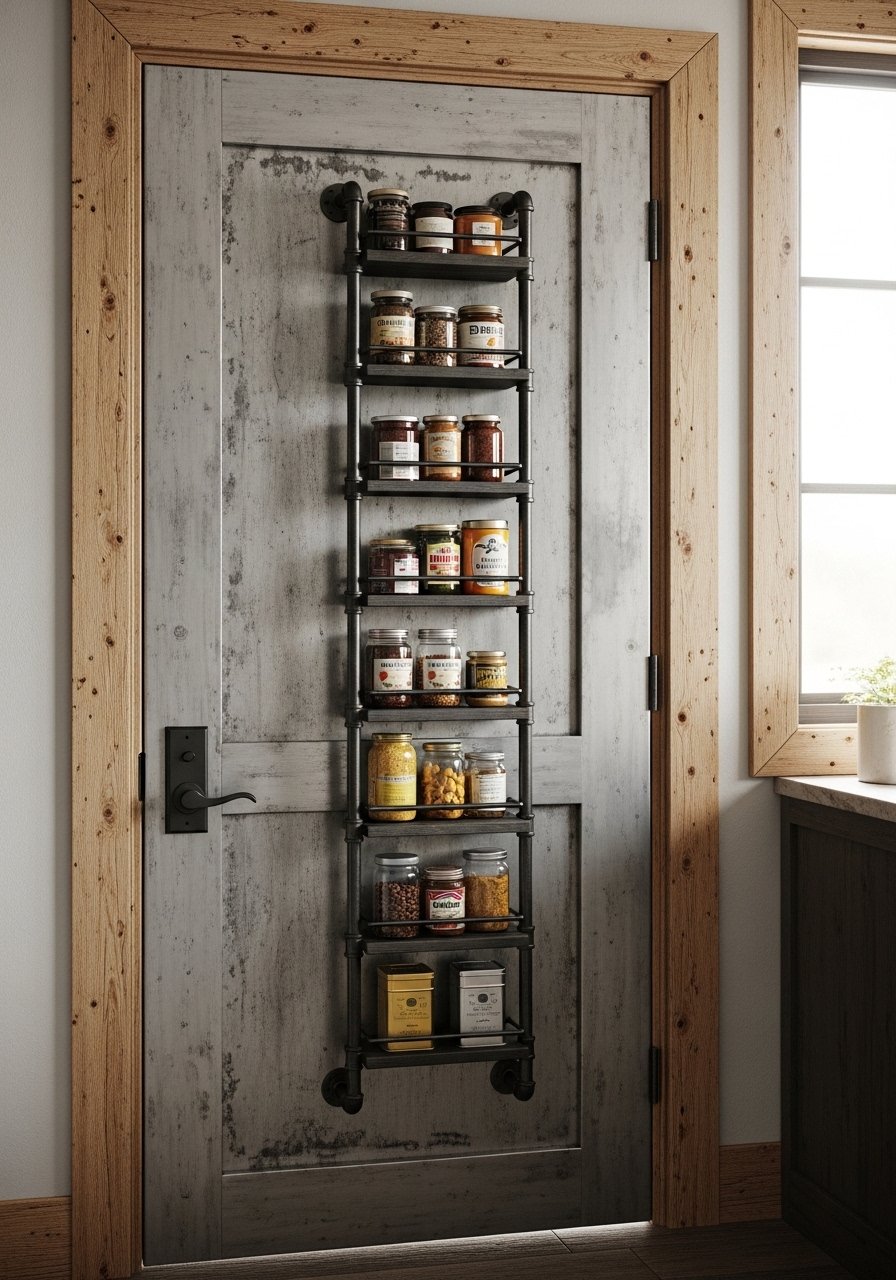
Pipe-mounted shelves bring an industrial edge and sturdy storage for heavy items like cans. Threaded fittings provide strength but pre-plan weight distribution.
Materials
- 2 black steel pipe flanges
- 2 short pipe sections (6")
- Thin wooden shelf boards (3) 12" x 4"
- Screws for flanges
- Wood stain or paint
- Anchors if no studs
- Drill and level
Instructions
- Stain or paint wooden shelves; allow 2 hours between coats.
- Mark flange locations and ensure alignment.
- Attach flanges to door with screws or anchors.
- Screw pipes into flanges and mount shelves atop pipes, securing with small brackets or screws.
- Test weight capacity with canned goods gradually.
- Tighten fittings after a week of use.
How to Display or Gift It
- Style with metal canisters for cohesive look.
- Gift with a set of jars filled with baking essentials.
- Use a small label maker to identify contents.
- Store extra pipe fittings in a hardware organizer.
- Pegboard Command Center Door
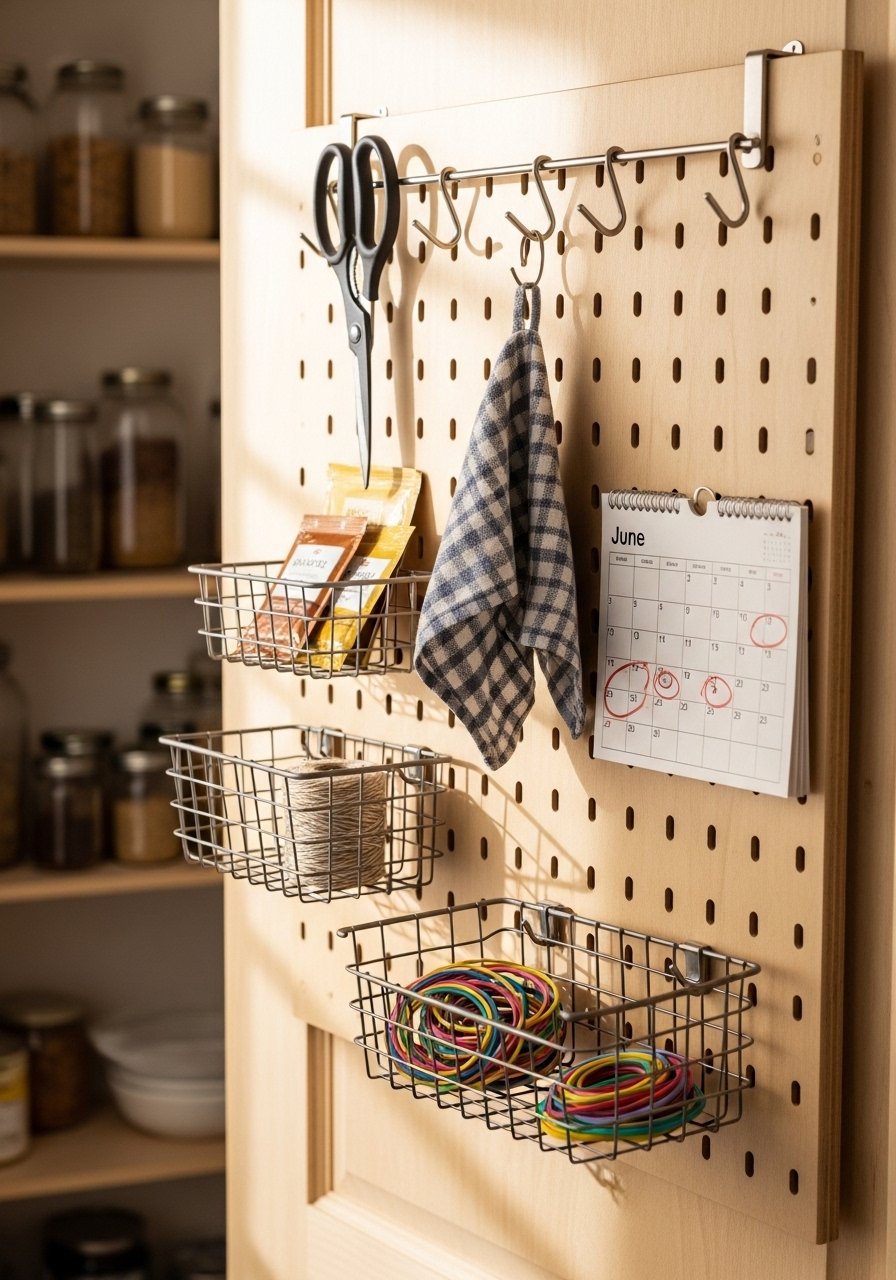
Pegboard turns the door into a command center for tools, grocery lists, and small baskets. Use wooden pegboard for a Scandinavian touch. A measuring tape ensures even spacing.
Materials
- 12" x 36" pegboard (wood or metal)
- Pegboard hooks and small baskets (set)
- Adhesive spacer blocks (to create gap)
- Screws for mounting
- Paint (optional)
- Cord clips for charging cables
Instructions
- Paint pegboard if desired and allow to dry 2 hours.
- Mount spacer blocks behind pegboard to create a 3/4" gap for hooks.
- Secure pegboard to door with screws at corners and midpoints.
- Arrange hooks and baskets for scissors, notepads, and markers.
- Clip cords neatly with adhesive cord clips.
- Rearrange as needs change—pegboard is flexible.
How to Display or Gift It
- Add a small clipboard for grocery lists.
- Gift with a set of pegboard accessories.
- Store seasonal hooks and baskets in a labeled bin.
- Use it to hang reusable grocery bags for easy grab.
- Framed Fabric Panel Door for Soft Texture (small pantry door ideas)
Cover a door with a framed fabric panel to add pattern and softness. The tension in the frame keeps fabric taut, and staple guns make attachment fast.
Materials
- Lightweight wooden frame built to door inset dimensions
- Fabric (1 yard) cotton or linen
- Staple gun and staples
- Foam batting (optional, 1/4" thick)
- Small upholstery tacks (optional)
- Scissors and measuring tape
Instructions
- Build or buy a wooden frame sized to door panel.
- Lay fabric face-down, add foam batting, then place frame on top.
- Pull fabric tight and staple along back edge every 1–2".
- Trim excess fabric and rehang frame on door using brackets.
- For added security, tack upholstery tacks around outer edge.
- Spot clean fabric as needed.
How to Display or Gift It
- Switch fabric seasonally for a quick update.
- Gift with a small sample of coordinating fabric and a staple gun.
- Store extra fabric in a flat craft organizer.
- Add a small hook for a sachet or ornament.
- Painted Geometric Accent Door (small pantry door ideas)
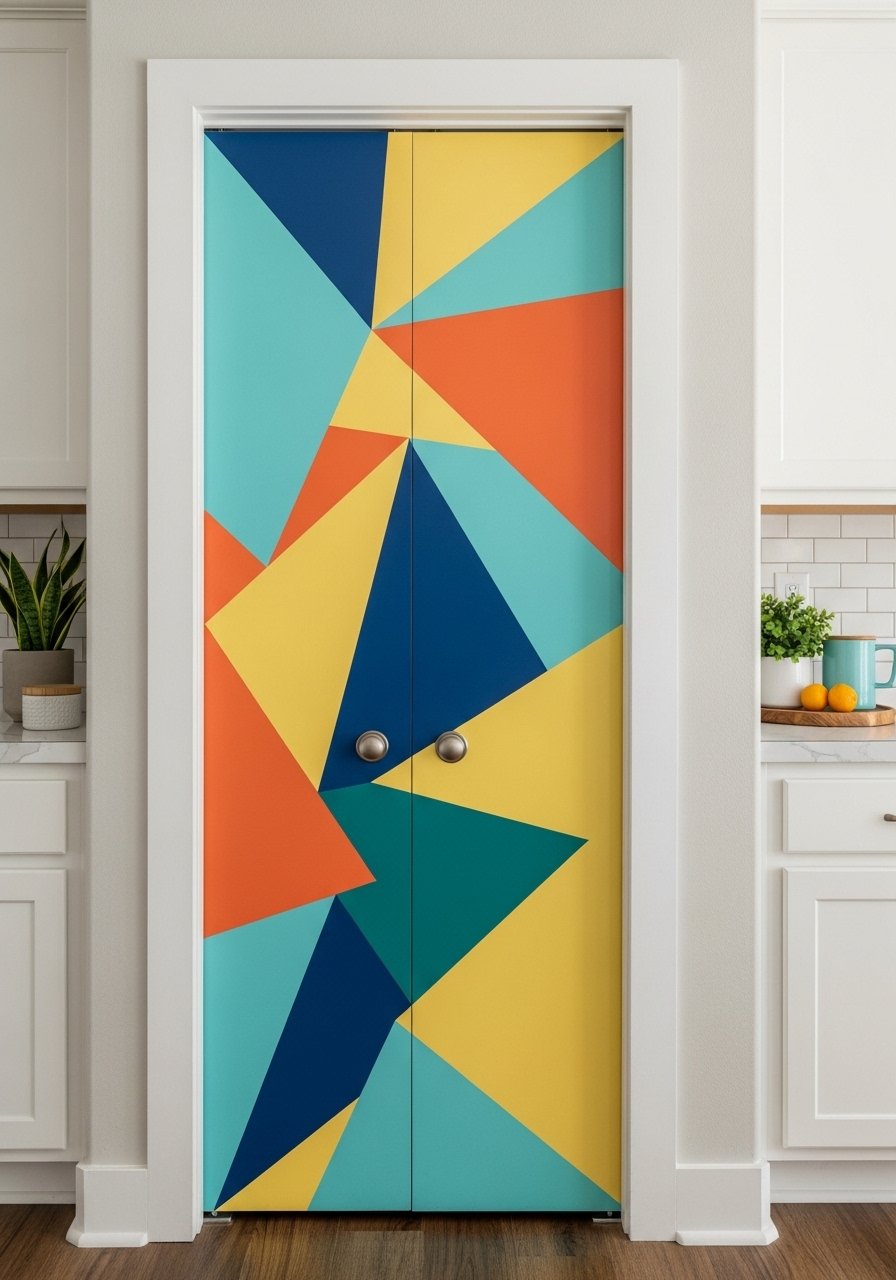
Bold geometric paint gives a small pantry door a major style boost. Painter’s tape and a brayer roller get crisp lines. This project is great for a creative splash.
Materials
- Painter's tape (1 roll)
- Accent paints (sample pots, 3 colors)
- Mini brayer roller
- Drop cloth
- Pencil and ruler
- Foam brushes for touch-ups
- Primer if door is dark
Instructions
- Prime door if needed; allow 2 hours to dry.
- Sketch geometric pattern with pencil and ruler.
- Apply painter’s tape along pattern edges; burn tape edges with a fingernail or bone folder.
- Paint first color with mini roller in thin coats; dry 30–45 minutes.
- Repeat for additional colors, removing tape promptly after each section dries slightly.
- Seal with a clear coat if desired; allow 24 hours cure before heavy use.
How to Display or Gift It
- Pair with a matching painted tray inside the pantry.
- For gifting, include a small paint sample set and tape.
- Store leftover paint in labeled jars for touch-ups.
- Use geometric pattern as a seasonal color scheme guide.
- Bifold Door Basket Organizer
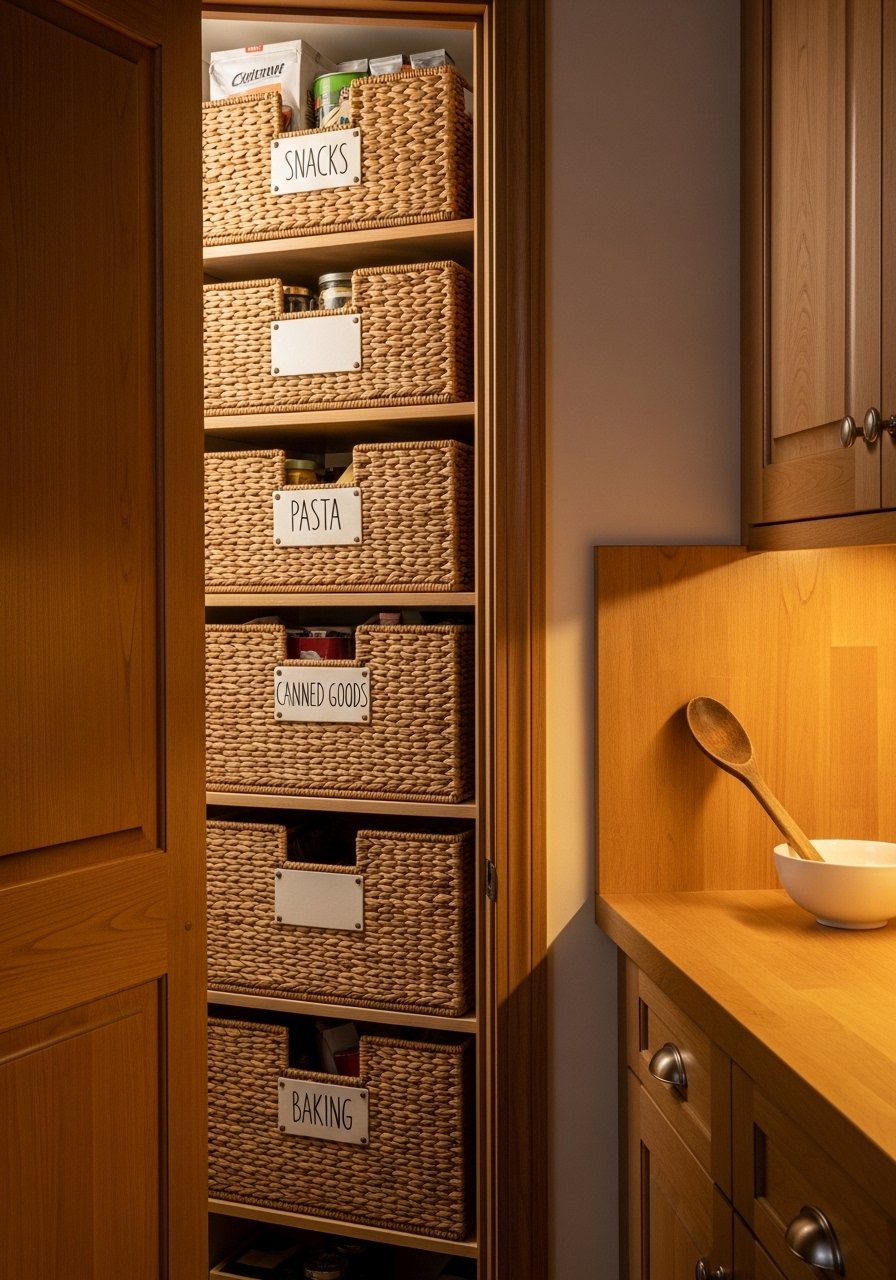
Attach baskets to bifold door panels to divide and contain snacks, produce, and wraps. Toggle clamps or zip ties keep baskets secure through folding action.
Materials
- Woven basket organizers sized for door panels (6)
- Zip ties (100 pack)
- Measuring tape
- Small label tags
- Velcro strips (optional for quick removal)
- Lint-free cloth
Instructions
- Measure panel widths and position baskets for even spacing.
- Use zip ties through basket holes to attach to panel slats; trim excess neatly.
- For removable baskets, use Velcro strips on basket backs and door panels.
- Label baskets for contents—snacks, wraps, bags.
- Fold doors slowly to test clearance.
- Re-secure ties after a week to ensure no loosening.
How to Display or Gift It
- Line baskets with fabric for a neater look.
- Gift with a set of labels and a small pen.
- Store spare zip ties and Velcro in a small hardware box.
- Make-ahead option: pre-fill baskets with party snacks for events.
- Sliding Barn Door with Built-In Shelves
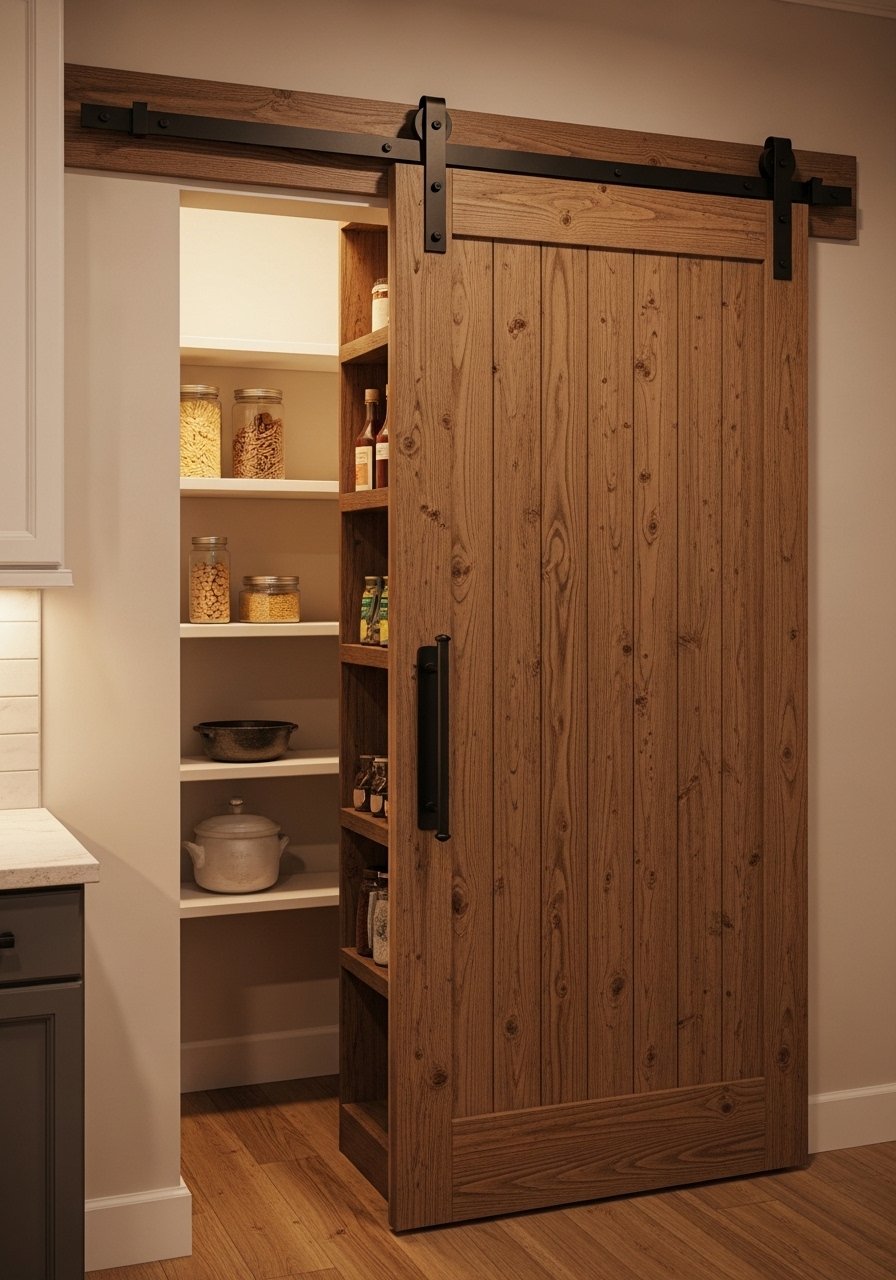
If you have the space for a sliding barn door, integrate slim shelves into the back panel for frequently used items. Barn door hardware needs secure wall mounting.
Materials
- Barn door slab (solid or hollow core reinforced)
- Barn door hardware kit (track and rollers)
- 3 slim shelf boards (24" x 4")
- Brackets for shelves
- Lag bolts and anchors for track
- Stud finder
- Drill and impact driver
Instructions
- Measure door opening and purchase appropriate barn door slab.
- Install track according to kit instructions, securing to studs with lag bolts.
- Mount slim shelves to back of door using brackets and wood screws.
- Check door swing and clearance for wall-mount items.
- Test roll and adjust roller tension per kit guidelines.
- Recheck bolts after one week of use.
How to Display or Gift It
- Style shelves with jars or spice racks.
- Complement with a matching wall hook nearby for aprons.
- For gifting, include a small set of magnetic spice jars.
- Store extra bolts in a labeled hardware organizer.
- French-Inspired Glass-Pane Grid Door
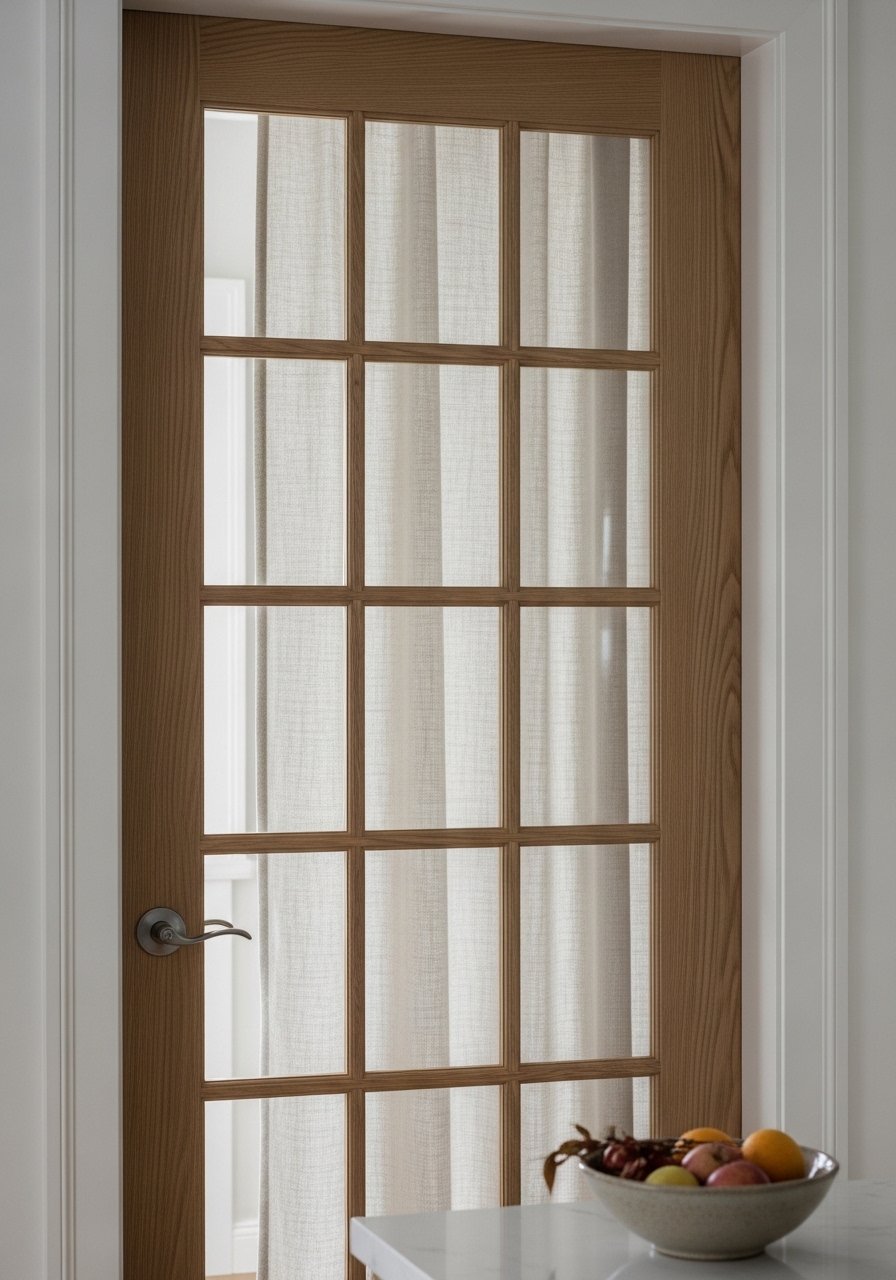
Create a French-inspired look by building a grid overlay on a glass pane. Paint the trim in a soft color for a chic look. Use a mitre saw for clean corner cuts.
Materials
- Glass pane for door
- Thin wooden molding strips for grid (1/4" x 3/4")
- Clear construction adhesive
- Paint for grid strips
- Caulk
- Precision miter saw
- Sandpaper 220 grit
Instructions
- Measure glass and plan grid layout.
- Cut molding strips with 45-degree ends for neat corners.
- Paint strips ahead of time; let dry 2 hours.
- Adhere strips to glass using construction adhesive; press firmly.
- Caulk seams and wipe excess; allow 24 hours to cure.
- Install glass into door frame and seal.
How to Display or Gift It
- Add a sheer curtain behind for softness.
- Pair with brass or antique hardware for a cohesive look.
- Gift the grid kit with pre-cut molding and adhesive.
- Store leftover molding flat to avoid warping.
- Moroccan Screen-Inspired Cutout Door

Add a decorative laser-cut panel to a pantry door for a Moroccan vibe. Pre-cut MDF panels make installation simple. Use a heat gun briefly on edges to remove any burrs.
Materials
- Laser-cut MDF panel sized to door inset
- Construction adhesive
- Paint or metallic leaf for finish
- Sandpaper 220
- Small rollers and detail brushes
- Mounting screws and clips
Instructions
- Paint or gild panel before mounting; allow 2 hours to dry.
- Apply adhesive to door inset and press panel into place.
- Secure with small screws into hidden clips for extra hold.
- Touch up paint and sand any rough edges lightly.
- Allow adhesive cure 24 hours before handling.
- Reattach door hardware.
How to Display or Gift It
- Backlight the pattern with LED strip for dramatic effect.
- Gift with a small LED puck light kit for instant mood lighting.
- Store spare panels flat and wrapped in kraft paper.
- Swap panels seasonally for fresh looks.
- Woven Wicker Panel Door
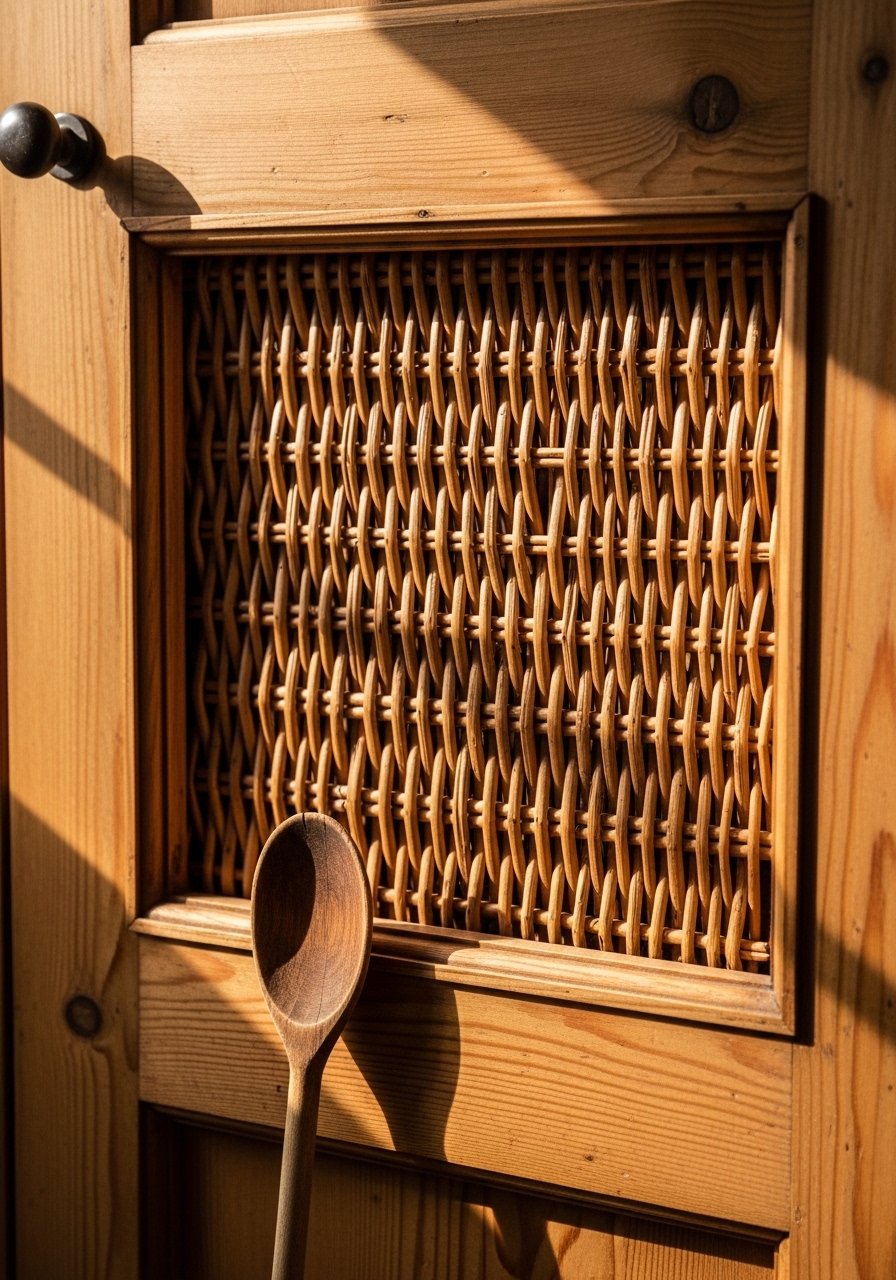
Wicker panels create organic texture and breathability. Use pre-woven cane or rattan panels sized to your door. A staple gun and wood glue hold panels in place.
Materials
- Wicker/rattan panel cut to inset size
- Wood glue
- Staple gun and staples
- Trim molding to conceal edges (optional)
- Clear lacquer for protection
- Measuring tape and scissors
Instructions
- Fit panel to inset and trim any excess.
- Apply wood glue and staple edges to secure.
- Add trim molding around inset to hide raw edges.
- Spray or brush on clear lacquer; dry 2 hours between light coats.
- Rehang door and avoid heavy splashes of water.
- Dust woven areas weekly to prevent buildup.
How to Display or Gift It
- Tuck a dried sprig into the weave for seasonal flair.
- Gift with a small maintenance kit for wicker care.
- Store extra wicker panels flat to prevent warping.
- Pair with woven baskets inside the pantry.
- Fold-Down Ironing Board Hidden in Door
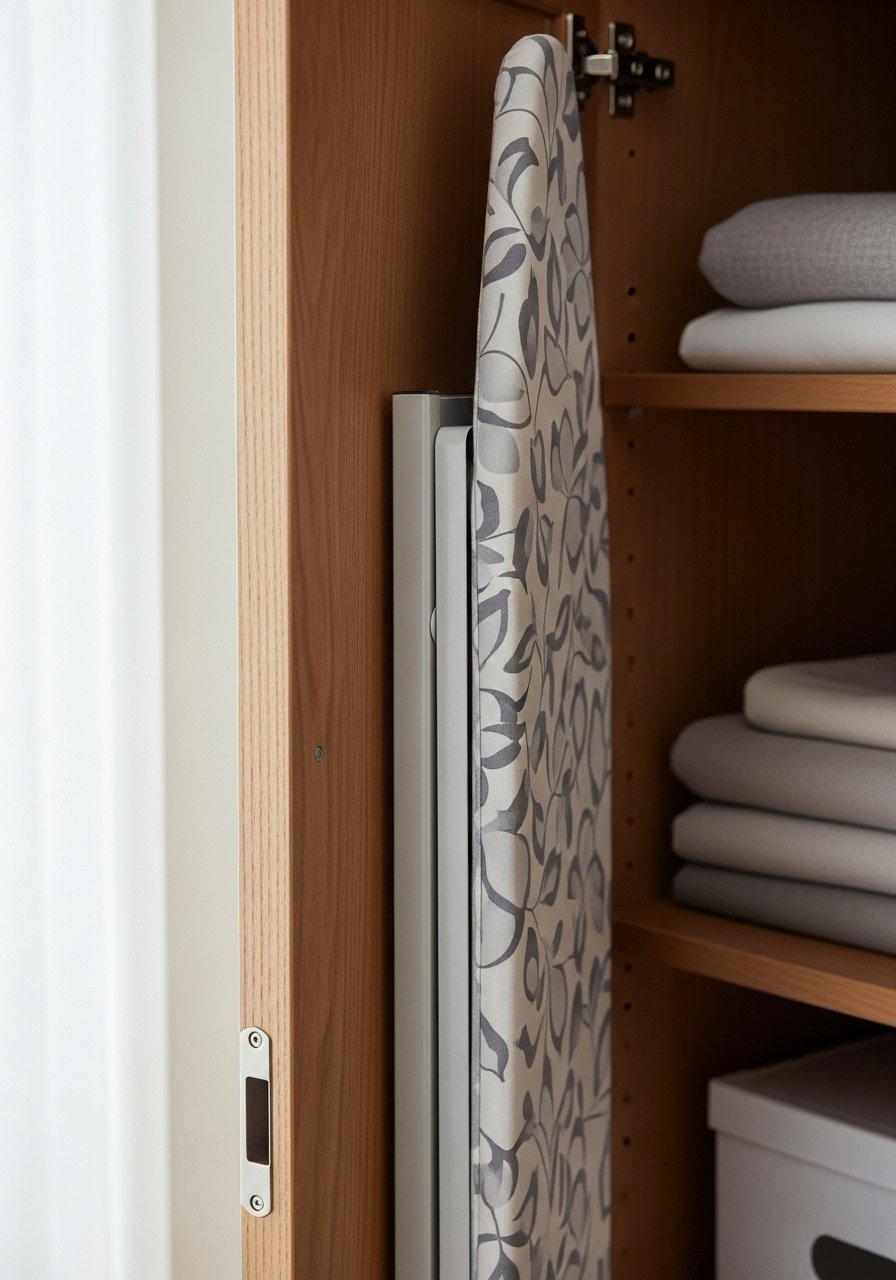
A slim fold-down ironing board is perfect if you lack a dedicated laundry room. Use a piano hinge and a folding bracket that locks in place.
Materials
- Slim ironing board surface cut to 24" x 10"
- Piano hinge (24")
- Locking folding bracket
- Screws and small bolts
- Heat-resistant cover (pre-made)
- Drill and pilot bits
Instructions
- Attach piano hinge to board and inside of door at desired height.
- Install locking folding bracket to support board when open.
- Fit heat-resistant cover and secure edges.
- Test fold and lock several times.
- Reinforce door edge where hinge screws seat.
- Tighten screws after a week of usage.
How to Display or Gift It
- For a tidy look, store a small iron in a nearby cabinet.
- Gift with an ironing board cover and travel iron set.
- Keep extra screws in a labeled hardware jar.
- Make-ahead: pre-cut board and cover for quick install.
- Fabric Pocket Organizer with Clear Pockets
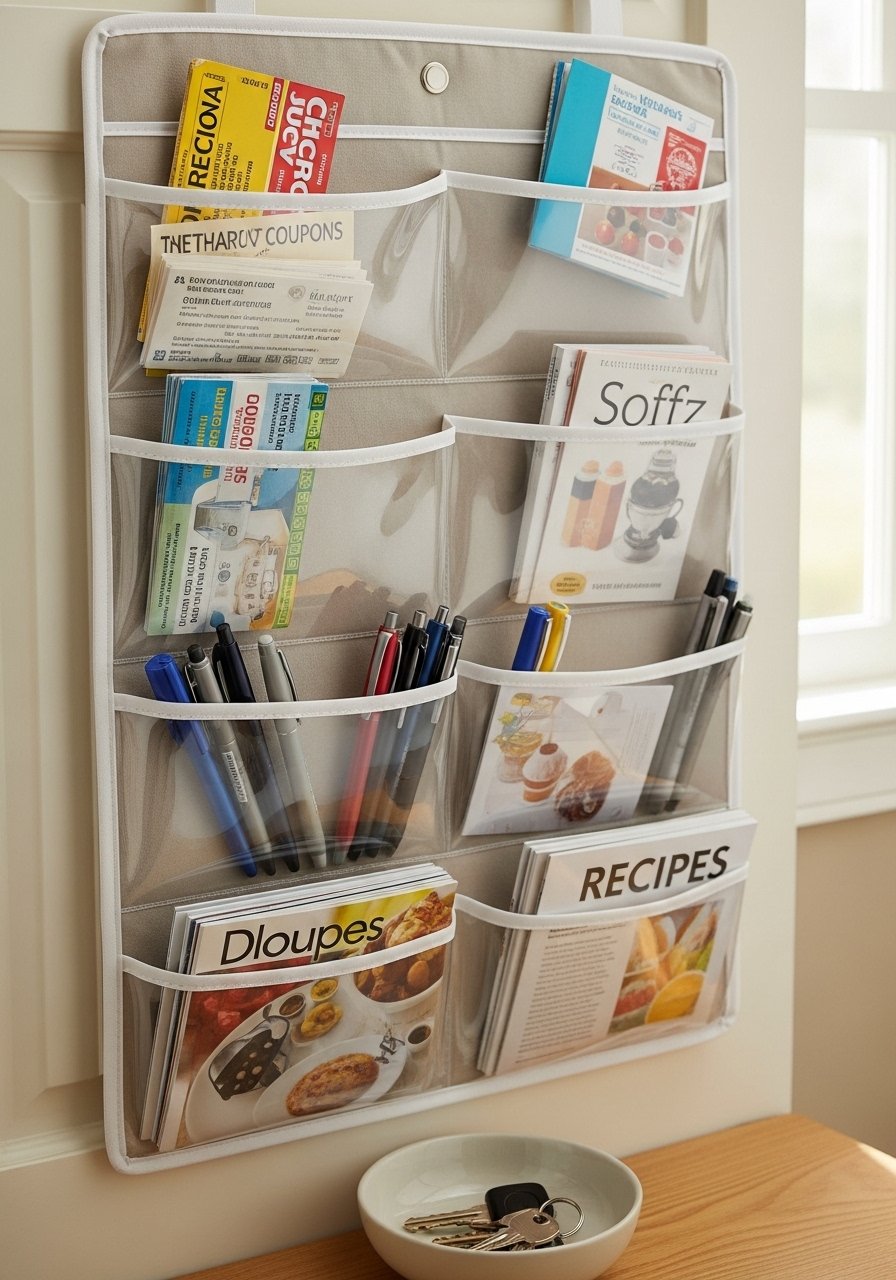
Clear vinyl pockets keep small items visible—perfect for coupons, pens, and recipe cards. Sewn fabric pockets are easy if you have a sewing machine.
Materials
- Fabric pocket organizer with clear vinyl pockets (15" x 30")
- Sewing machine or pre-made option
- Over-the-door hooks
- Clip-on label tags
- Scissors
Instructions
- Hang organizer using over-the-door hooks.
- Insert items by category for quick visibility.
- Wipe clear pockets with a damp cloth when dusty.
- Replace pockets that show wear after 1–2 years.
- Remove organizer seasonally and launder if fabric is washable.
- Sew on extra loops for keys if desired.
How to Display or Gift It
- Pair with a small pen holder and printable shopping list.
- Gift with a set of magnetic list pads.
- Roll up spare organizers and store in a fabric storage box.
- Use clear pockets to display rotating seasonal recipes.
- Painted Mural Door (small pantry door ideas)
A hand-painted mural turns the pantry door into a focal point. Use acrylic paints and a sealant for durability. A projector helps if you want to trace a design.
Materials
- Acrylic paint set (assorted colors)
- Small brushes and detail brushes
- Projector (optional) or graphite transfer paper
- Clear water-based sealer
- Pencil and eraser
- Drop cloth
Instructions
- Sketch mural lightly on the door or use projector to transfer design.
- Block in base colors; allow 30–45 minutes between thin coats.
- Add details with fine brushes once base is dry.
- Let paint cure 24 hours, then apply two thin coats of sealer, 2 hours apart.
- Touch up edges after sealing if needed.
- Avoid harsh scrubbing—clean gently.
How to Display or Gift It
- Frame the mural with corner molding for a gallery look.
- Gift with a small paint set and instruction card.
- Store leftover paints labeled for future touch-ups.
- Make-ahead option: paint mural panels for quick swap.
- Hidden Peg Rail for Aprons and Tools
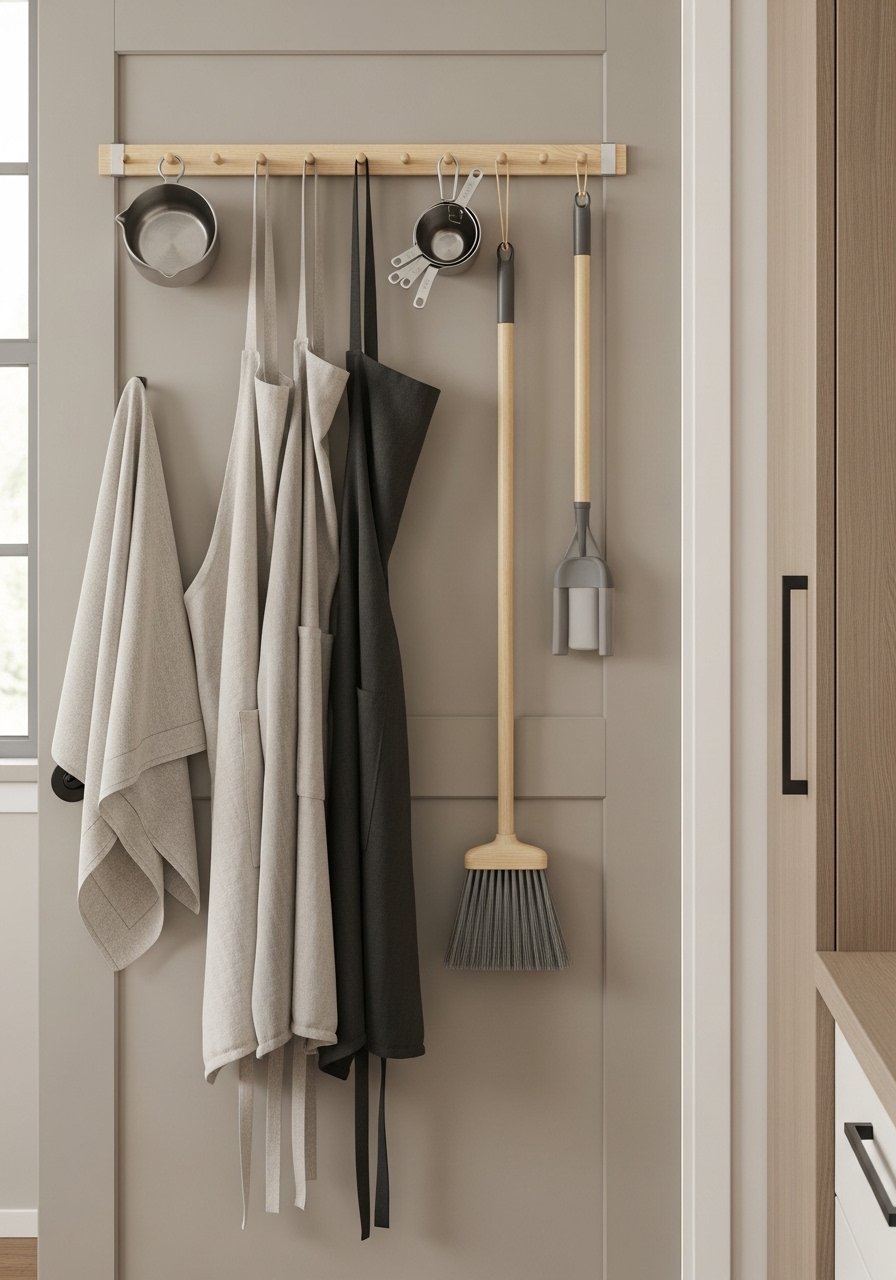
A slim peg rail is a minimalist way to hang aprons, bags, and tools. Wooden pegs can be spaced for items of varying sizes. A drill and forstner bit make clean peg holes.
Materials
- Wooden peg rail (24" length)
- 4–6 wooden pegs (2" diameter)
- Mounting screws
- Wood glue
- Small level
- Forstner bit (if drilling holes into rail)
Instructions
- Mark peg spacing on rail and drill peg holes if making pegs flush.
- Glue pegs into holes and allow glue to set 24 hours.
- Mount rail at convenient height using screws into studs or anchors.
- Hang aprons and measuring tools; avoid overloading pegs.
- Check pegs periodically and re-glue if loosening.
- Sand and seal rail for durability.
How to Display or Gift It
- Paint pegs contrasting colors for a playful look.
- Gift with a set of matching aprons.
- Keep extra pegs in a small hardware container.
- For seasonal decor, swap items on pegs quickly.
- Sliding Pocket Door with Built-In Mirrors
If you can convert to a pocket door, inset mirrors make the space feel larger while keeping access. Pocket door hardware must be measured precisely.
Materials
- Pocket door slab with inset groves for mirrors
- Mirror strips (3) pre-cut
- Pocket door hardware kit
- Adhesive for mirrors
- Router for groove if needed
- Level and tape measure
Instructions
- Install pocket door track per kit instructions into wall cavity.
- Create grooves in door slab for mirror strips with a router or buy pre-routed door.
- Adhere mirror strips and seal edges with clear caulk.
- Hang door on track and test smoothness.
- Adjust rollers until door slides without rubbing.
- Allow mirror adhesive to cure 24 hours before heavy use.
How to Display or Gift It
- Add a small hook inside pocket run for a hanging plant.
- Gift the hardware kit with pre-cut mirror strips if giving as a contractor-style present.
- Store extra rollers and screws in a labeled parts box.
- Use mirrors to brighten dim kitchens.
- Reversible Two-Tone Paint Door
Keep the option to flip your look with a reversible two-tone finish. Tape clean lines and use a brayer for crisp edges. Painter’s tape and a smooth roll are your best friends.
Materials
- Painter's tape
- Two paint sample pots (contrasting colors)
- Mini foam roller and brush
- Drop cloth
- Sanding sponge 220 grit
- Clear coat (optional)
Instructions
- Sand lightly and wipe clean.
- Measure midpoint and apply painter’s tape along the line.
- Paint top color first in thin coats; dry 30–45 minutes.
- Remove tape and re-tape if needed to paint bottom color.
- Apply clear coat if door will get heavy wear; dry 2 hours between coats.
- Reattach hardware and enjoy the new vibe.
How to Display or Gift It
- Pair with matching dish towels or small accessories.
- Gift with a sample paint set and brush.
- Store leftover paint for future touch-ups in labeled jars.
- Make-ahead: test colors on a cardboard sample.
- Decorative Switchboard with Hooks and Clips
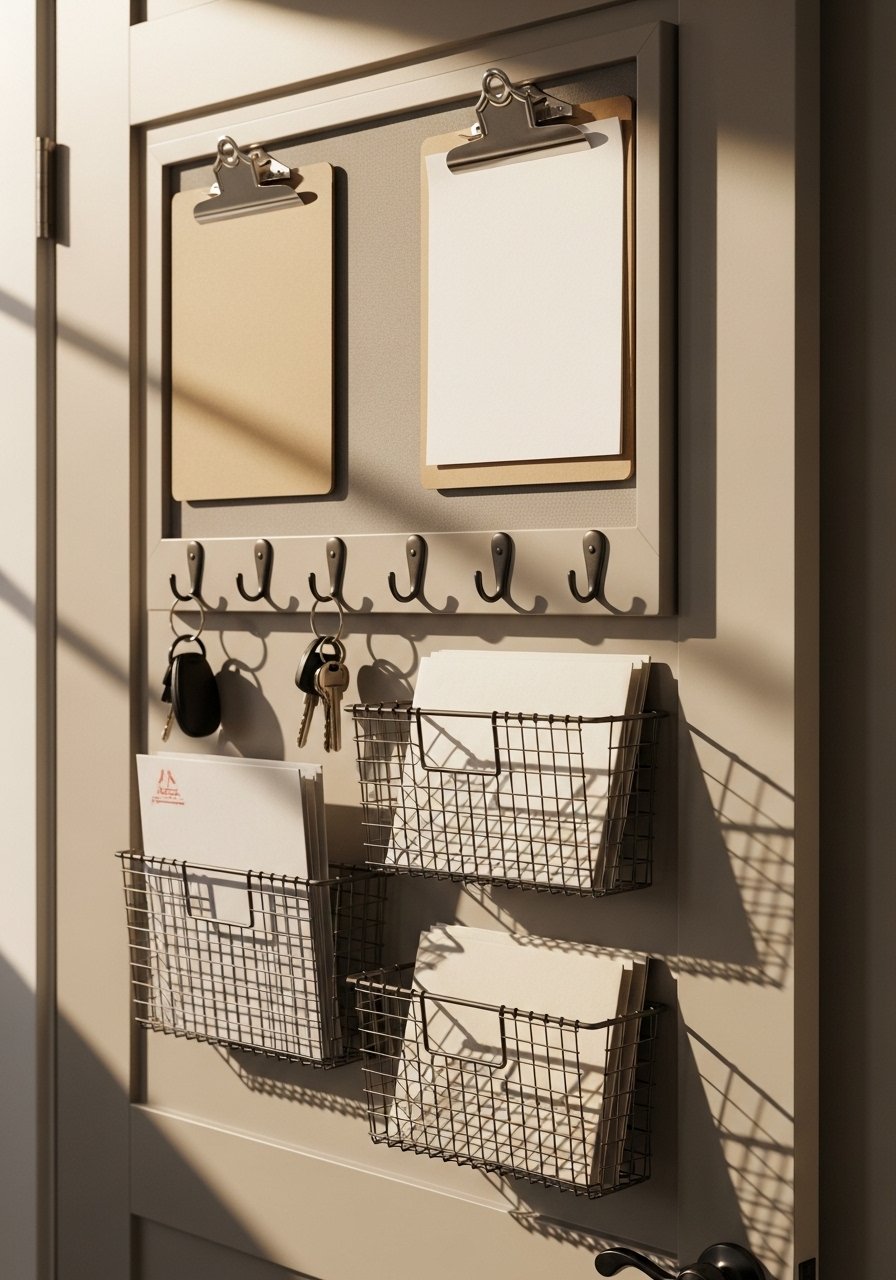
A switchboard organizes mail, coupons, keys, and lists all in one compact zone. Use small clipboards and baskets for modularity. A label maker keeps things tidy.
Materials
- Small pegboard or corkboard (12" x 18")
- Mini clipboards (3)
- Small wire baskets (2)
- Command hooks or screws
- Label maker or printable labels
- Adhesive strips
Instructions
- Mount pegboard/corkboard centrally using screws or strong adhesive.
- Attach clipboards and baskets to board with hooks or brackets.
- Label each clipboard for bills, coupons, and meal plans.
- Add a small key hook and pen holder.
- Check adhesive weight limits to avoid falls.
- Refresh labels seasonally.
How to Display or Gift It
- Gift with a label maker or a set of mini clipboards.
- Place near the door for quick mail sorting.
- Store spare clips and labels in a desk drawer.
- Rotate content based on family routines.
You made it through 28 ways to turn a once-forgotten door into storage and style. From sliding spice racks to glass inserts, these small pantry door ideas span rustic, modern, boho, and minimalist tastes so you can pick what fits your kitchen. Try one project this weekend—start small, like a chalkboard menu or magnetic knife strip—and pin this list for later when you're ready for a bigger build.
Which idea will you try first? Share a photo and tag a friend who’d love a pantry refresh. Trust me, picking up a quality hot glue gun with temperature control changed how every single one of these projects turned out — no more stringy mess, no more burns. Here’s a compact hot glue gun and a set of painter's tape if you want quick links to get started.
Happy building—and don’t forget to pin your favorite small pantry door ideas for later!


