You probably want that custom-built pantry look without the custom price tag. These 24 budget small pantry ideas prove you can get the built-in, edited feel using thrifted finds, paint, and a few clever hacks. Whether you’ve got a slim closet, an awkward corner, or a tiny alcove, you’ll find one-shelf miracles, faux built-ins, and storage tricks that make the space read like a design feature.
I lean on simple tools—my Cricut Joy cutting machine for labels and a low-temp hot glue gun for quick fixes. You’ll see affordable brands, exact measurements, drying times, and troubleshooting tips so each project works first time. Pin a few favorites, grab the supplies, and let’s make your pantry look custom without the contractor bill.
- Floating Spice Ledge Makeover (budget small pantry ideas)

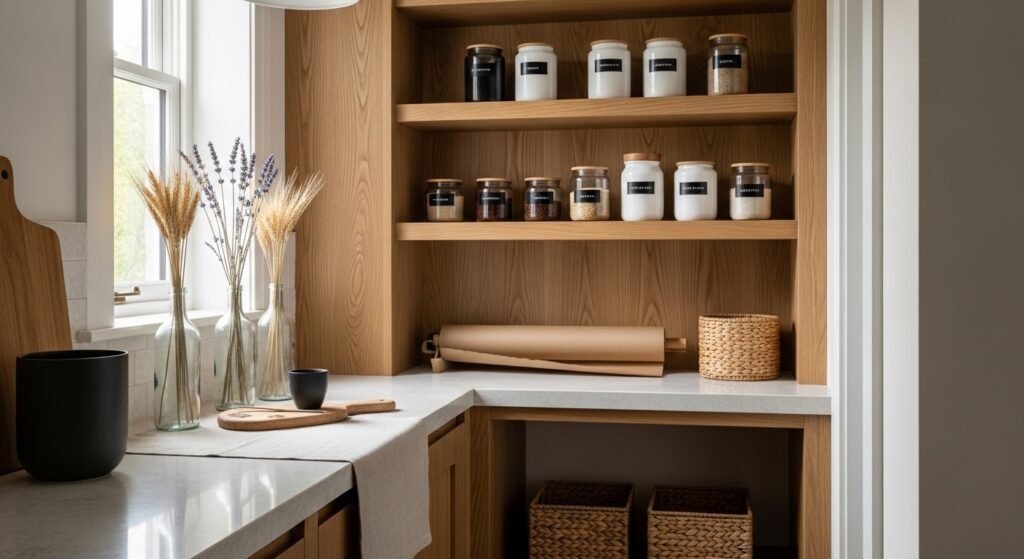
This slim ledge makes spice storage look built-in and edited. It’s a narrow shelf that reads custom when painted to match your pantry wall. Beginners and renters will love how it adds visual calm and texture—wood grain blends with a matte paint finish for a soft, tactile look. I cut the labels on my Cricut Joy so each jar feels boutique.
Materials
- 1 1×4 pine board, 24" long, planed
- 2 floating shelf brackets, 8" projection
- Sandpaper 120 and 220 grit
- Acrylic chalk-style paint, 4 oz (matte white)
- Wood filler, small tube
- 3 2" wood screws and wall anchors
- Small amber spice jars, set of 12
- Clear matte varnish, 1 light coat
- Painter’s tape
Instructions
- Sand the 1×4 board smooth with 120 grit, then finish with 220 grit for a soft touch.
- Fill any knots with wood filler; let cure 30 minutes, sand smooth.
- Apply one thin coat of chalk-style paint; dry 30–45 minutes. Add a second coat for full coverage; dry 1 hour.
- Seal with one light coat of clear matte varnish; cure 2 hours (firm to the touch).
- Mount brackets to wall using anchors at stud height or at 16" spacing. Screw the shelf to brackets from underneath.
- Arrange jars and add labels cut with your cutting machine or printed stickers.
How to Display or Gift It
- Line jars by frequency of use: daily essentials at eye level.
- Add a tiny dried thyme bundle tied with twine for a scent detail.
- For gifting, fill jars with exotic spices and pack in a kraft box.
- Store extra jars in a clear mason jar set until needed.
- Faux Built-In Crate Cubby
An inexpensive wooden crate becomes a cubby when painted and stacked. The slatted texture looks artisanal, and once painted to match shelves it disappears into a built-in aesthetic. You'll love the tactile slats and how the crate slides out for quick access—great for kids’ snack duty. I use a foam brush for even coats.
Materials
- 1 wooden apple crate, 13"x18"
- Chalk paint, 8 oz (color matched to shelves)
- Foam brush, 2"
- Sandpaper 120 grit
- Velcro strips (optional) to secure crate
- 2 small felt pads for base
- Labels or chalkboard tags
Instructions
- Lightly sand the crate to remove roughness.
- Paint two thin coats of chalk paint with a foam brush; dry 45 minutes between coats.
- Lightly distress edges with sandpaper for a snug built-in feel.
- Add felt pads to the bottom to prevent scratching.
- Place crate in cubby; secure with velcro if it shifts.
How to Display or Gift It
- Use crates for linens, baking staples, or kids’ snack bins.
- Stack two crates vertically for a custom column.
- Gift as a pantry starter kit: crate filled with artisanal snacks wrapped in kraft paper.
- Store extra crates flat in a stackable craft organizer.
- Cost-Effective Pegboard Pantry Command Center
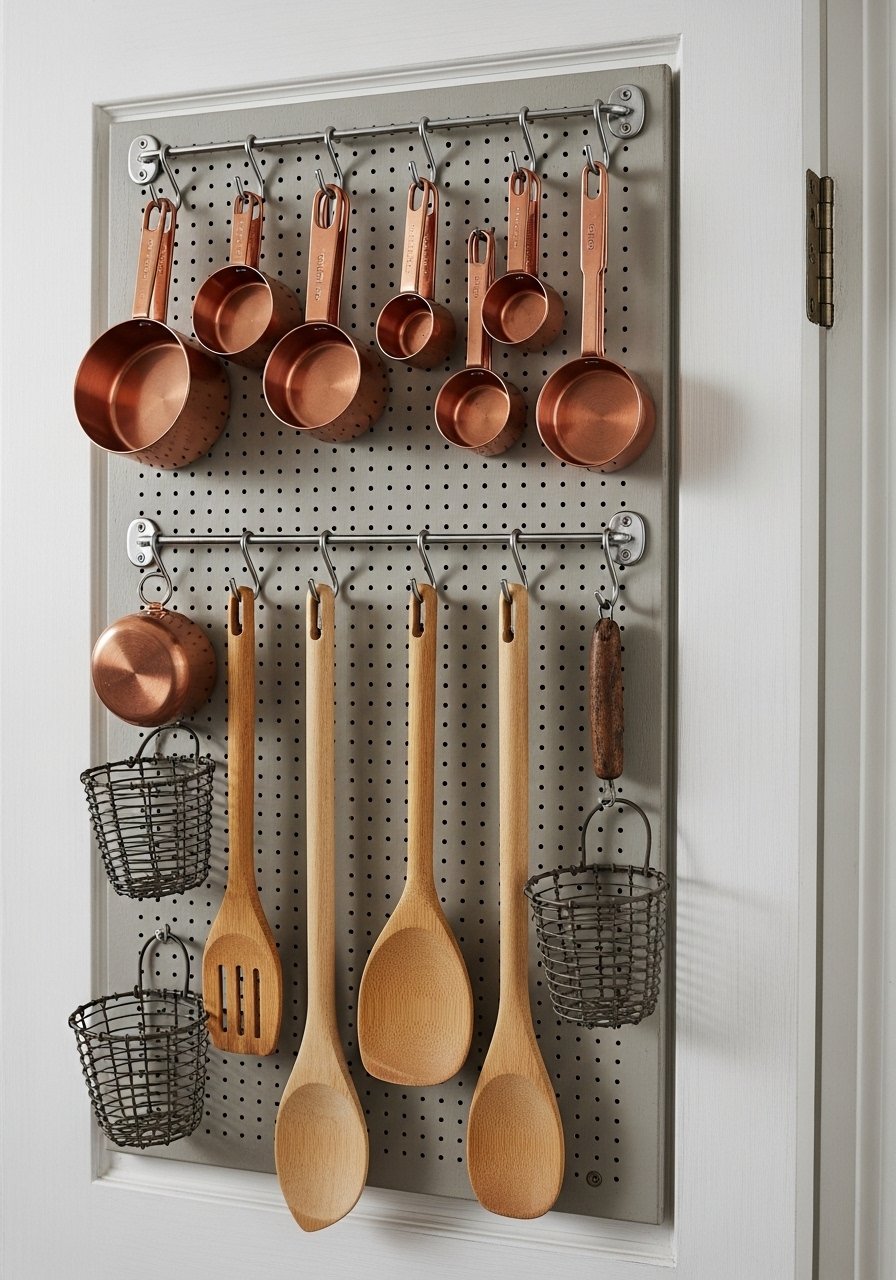
Pegboard turns chaos into a gallery wall of tools. Paint the board to match trim for a built-in look. Hooks and baskets keep everything visible and tidy. This is perfect for small pantries where wall space matters. I recommend a drill and pegboard hook set for quick installation.
Materials
- 1 sheet pegboard, 24"x48"
- Pegboard hooks & baskets, assorted set
- Primer (if raw MDF pegboard)
- Semi-gloss paint, sample size
- Wood shims, for spacing
- 4 sheet metal screws & anchors
Instructions
- Prime pegboard if needed; dry 1 hour.
- Paint two coats; dry 1 hour between coats.
- Mount with wood shims behind for 1/2" gap so hooks sit flush.
- Arrange hooks and baskets; hang utensils and cups.
How to Display or Gift It
- Use labeled baskets for baking tools, tea, and coffee.
- Add small chalkboard tags for a farmhouse look.
- Great as a housewarming gift when styled with kitchen tools.
- Store extra hooks in a small plastic organizer tray.
- Contact Paper Backsplash for Instant Built-In
Peel-and-stick backsplash makes open shelves read like a designed alcove. Choose faux marble or subway tile prints to mimic a built-in. It’s a renter-friendly trick that adds depth and polish. A plastic scraper helps smooth seams without bubbles.
Materials
- Peel-and-stick backsplash, 3 sq ft
- Measuring tape
- Utility knife with fresh blade
- Plastic squeegee
- Ruler (metal)
- Painter’s tape
Instructions
- Measure back panel area precisely and cut adhesive sheet 1/4" over on one edge.
- Peel backing a few inches; align and press in place.
- Use squeegee to smooth; trim edges with utility knife.
- Wait 24 hours before adding heavy jars to allow adhesive set.
How to Display or Gift It
- Match backsplash to countertop tones for cohesion.
- Frame edges with thin molding for a custom look.
- Wrap leftover sheets around a gift box for a coordinated present.
- Store extra sheets flat in a craft portfolio.
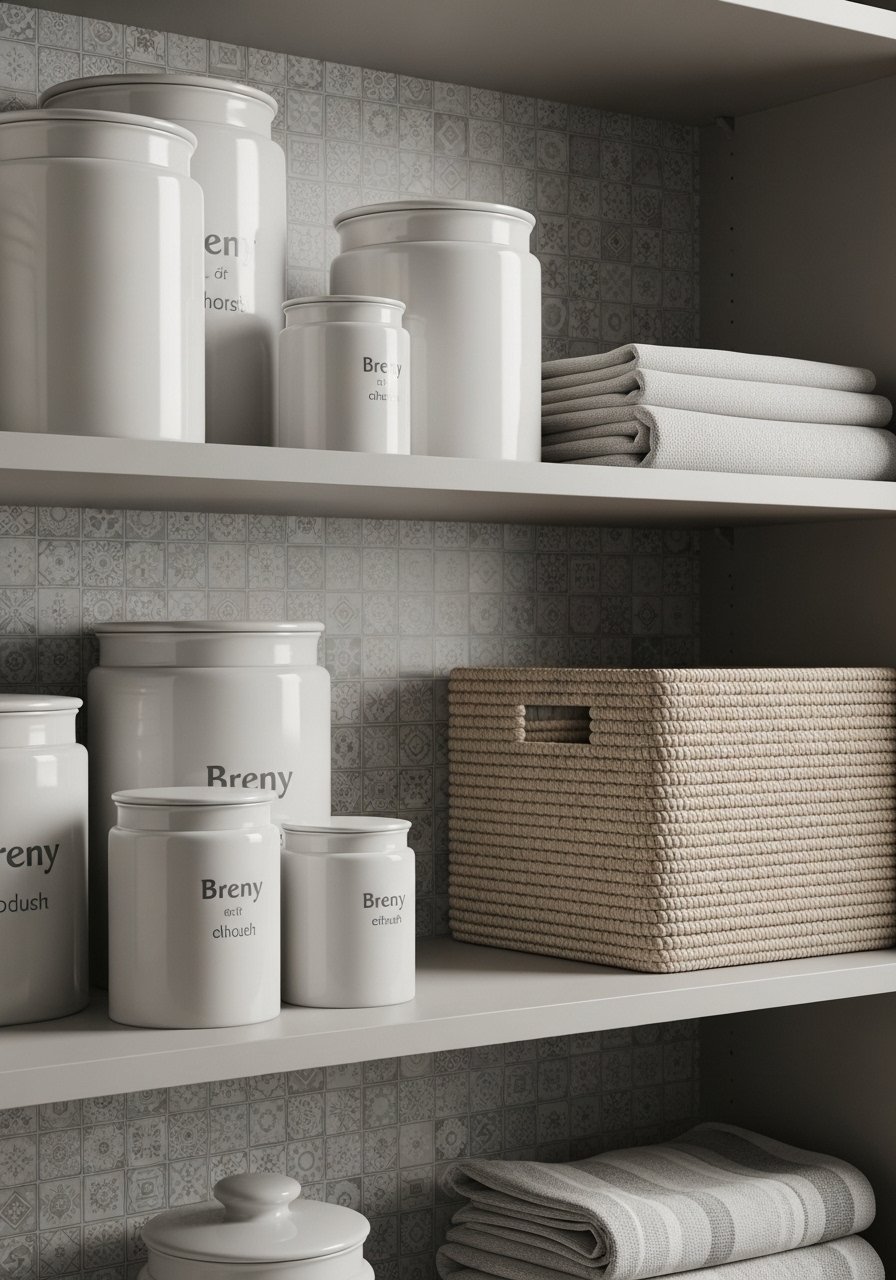
- Open Basket Row with Labeled Liners
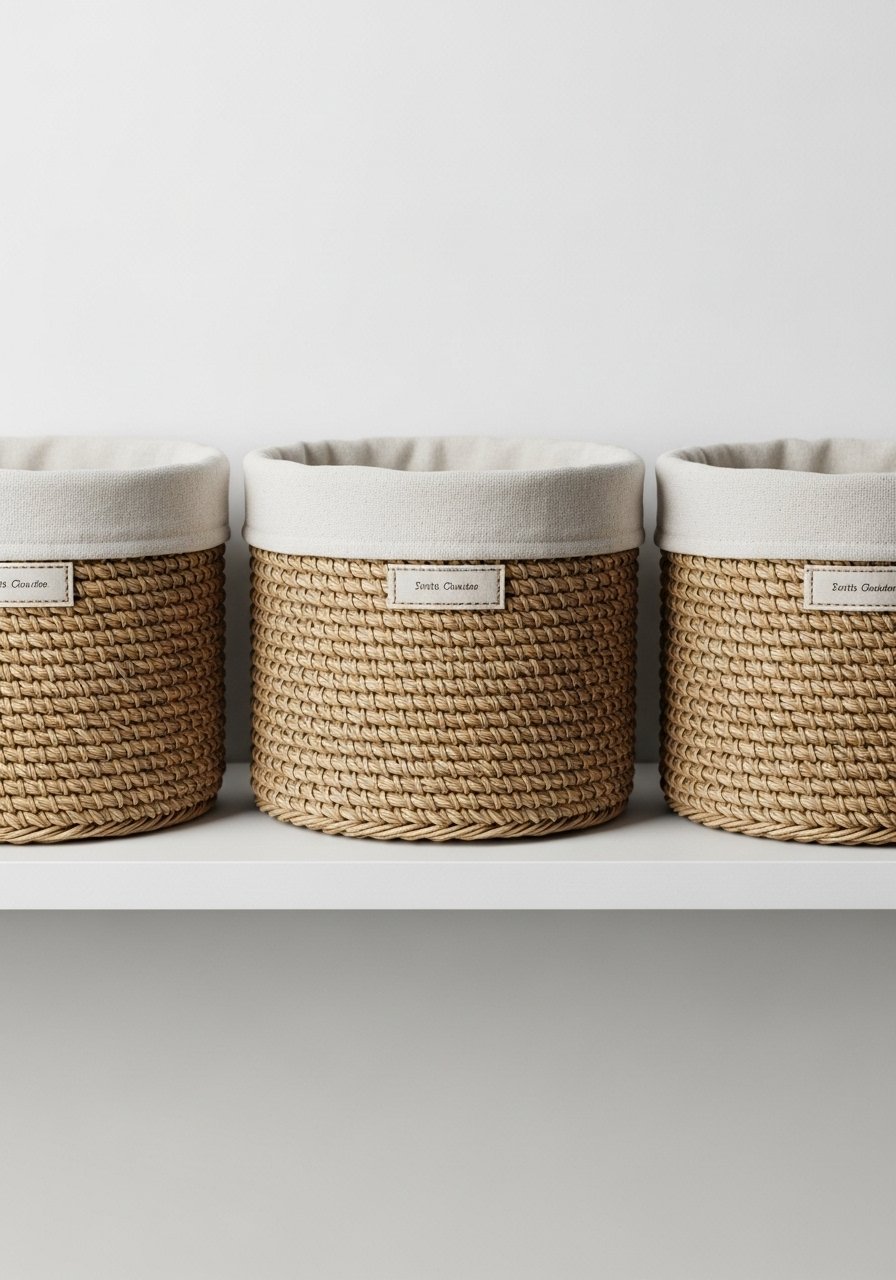
Woven baskets create uniformity and hide small items while still looking intentional. Lined baskets soften the texture and prevent spills. They’re budget-friendly and perfect for a cottagecore or farmhouse pantry. I stitch liners from muslin or use pre-made ones for speed.
Materials
- 3 woven baskets, 12"x10"
- Muslin fabric, 1/2 yard
- Thread (contrasting), spools
- Sewing needle or sewing machine
- Label tags, 3
- Fabric glue (optional)
Instructions
- Cut muslin liners to basket measurements with 2" seam allowance.
- Sew side seams and hem top edge; attach label tag.
- Slip liners into baskets and fold hem over rim.
- Place baskets on shelf and fill.
How to Display or Gift It
- Use for snacks, linens, and baking cups.
- Add a small dried flower sprig tucked into each label.
- Gift filled with specialty tea in a kraft box.
- Store liners flat in a fabric storage box.
- DIY Pull-Out Pantry Drawers from File Drawers
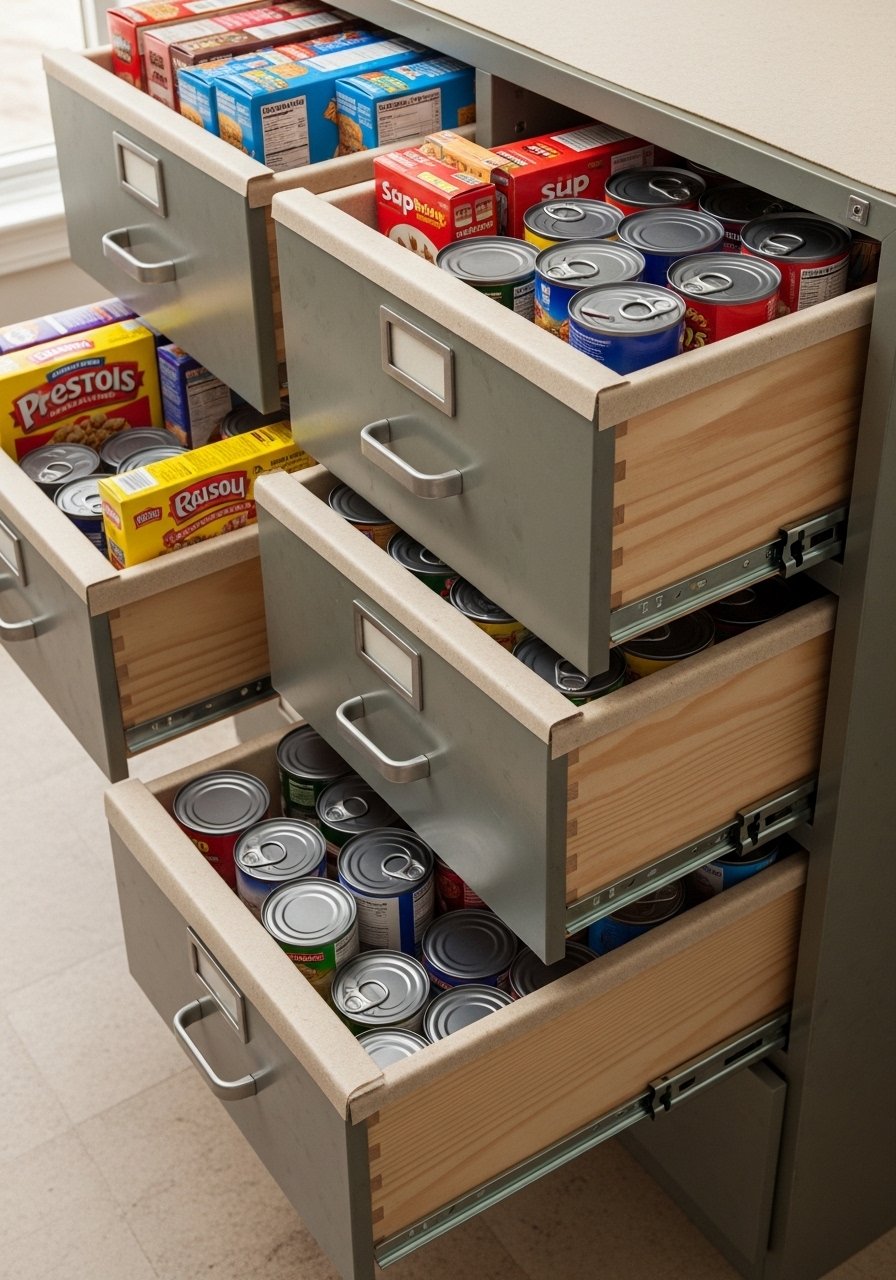
Convert metal file drawers to slim pull-outs for canned goods. They slide smoothly on DIY wooden runners and give a custom, built-in vibe. This solves tight-depth storage problems and keeps labels facing out. A drill and a bit set help secure drawer fronts.
Materials
- 2 vintage metal file drawers
- Plywood strips 1×4 for runners, cut to depth
- 3M double-sided tape
- Non-slip shelf liner, 24"
- Screws for front mounting
- Paint for drawer fronts (optional)
Instructions
- Cut runner strips to pantry depth; sand and seal.
- Attach runners to sides of pantry with screws.
- Line drawer bottoms with non-slip liner and slide into runners.
- Paint fronts if desired; dry 1 hour.
How to Display or Gift It
- Use for canned goods, snacks, or pet food.
- Label the front edge with chalk paint.
- Gift as a pantry organizer by filling with pantry essentials.
- Store extra liners in a slim drawer organizer box.
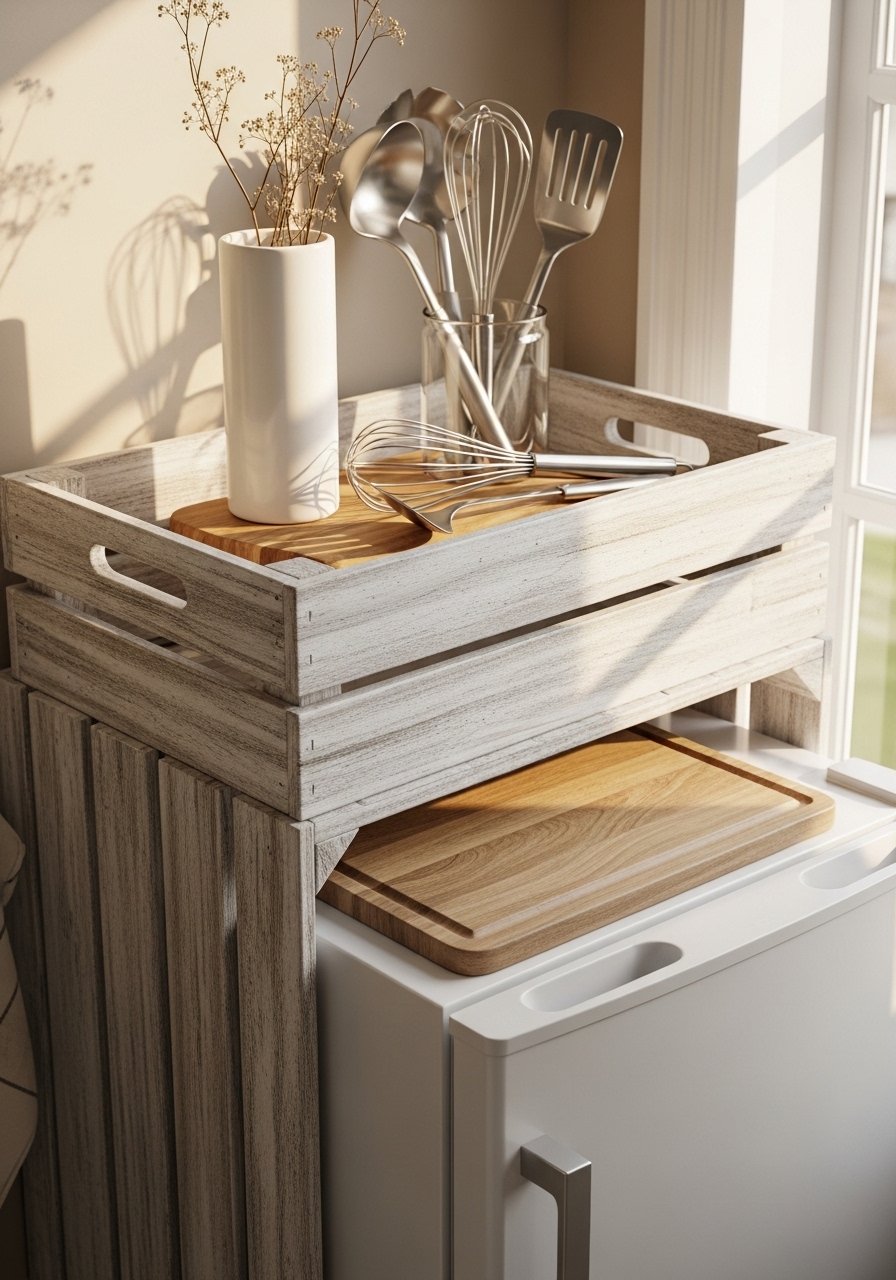
- Slim Roll-Out Cutting Board Station (budget small pantry ideas)
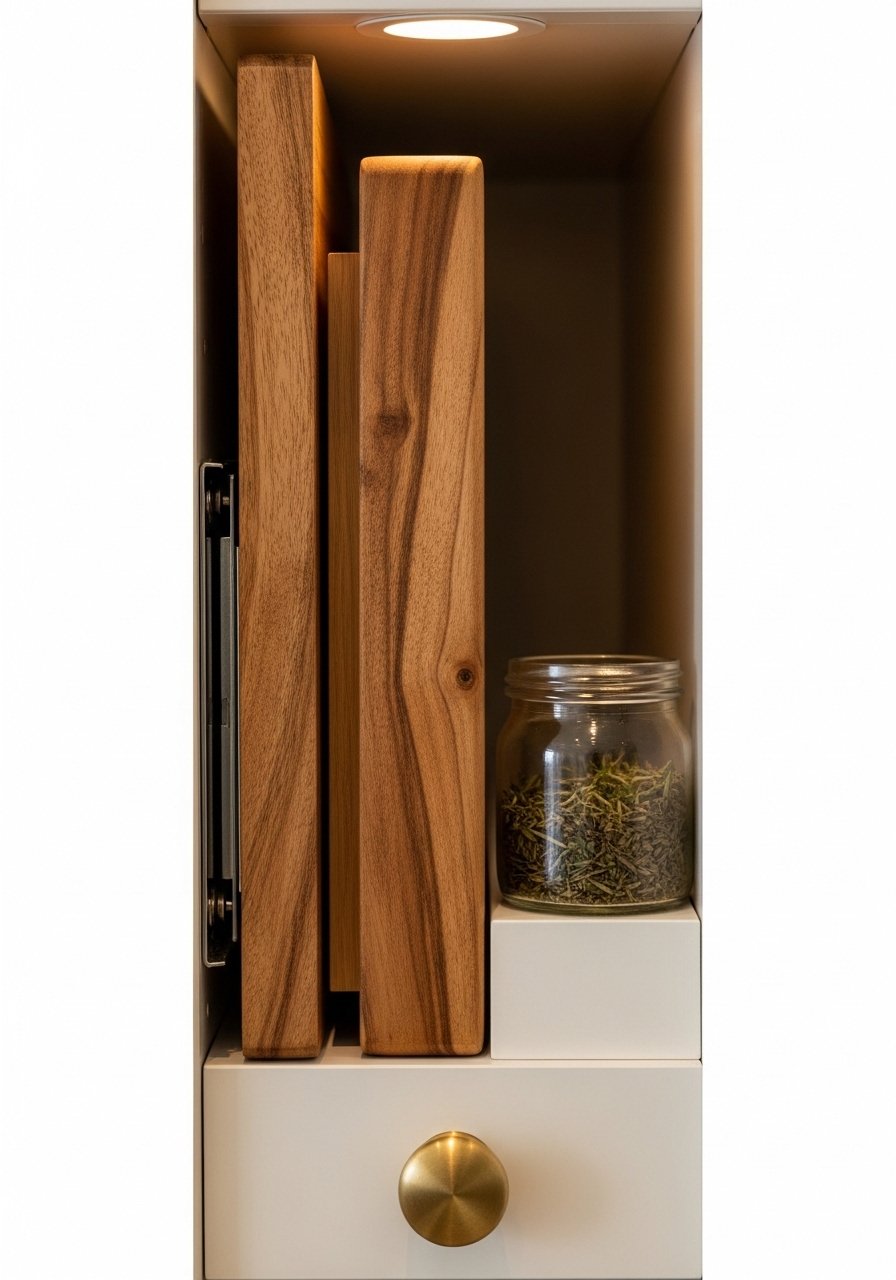
A slide-out cutting board tucked into a slim slot reads custom and practical. It frees counter space while looking like a purpose-built feature. Finish with mineral oil for food safety. A router or jigsaw helps cut the slot; use a felt pull for a soft touch.
Materials
- 1 hardwood cutting board, 18"x7"
- Wooden dowel 1/2" for stop
- Mineral oil, 8 oz
- Felt pull or small knob
- Sandpaper 220 grit
- Wood glue
Instructions
- Sand board edges and apply mineral oil; soak 1 hour, wipe, repeat twice over 24 hours.
- Measure slot space and install vertical runners with a small gap for board thickness.
- Add felt pull or knob to top edge.
- Insert board and slide to test; add dowel stop at bottom.
How to Display or Gift It
- Keep board beside coffee station or chopping zone.
- Tie with twine and a dried herb sprig as a gift.
- Store extra mineral oil bottles in a small kitchen caddy.
- Peg Rail for Mugs and Utensils
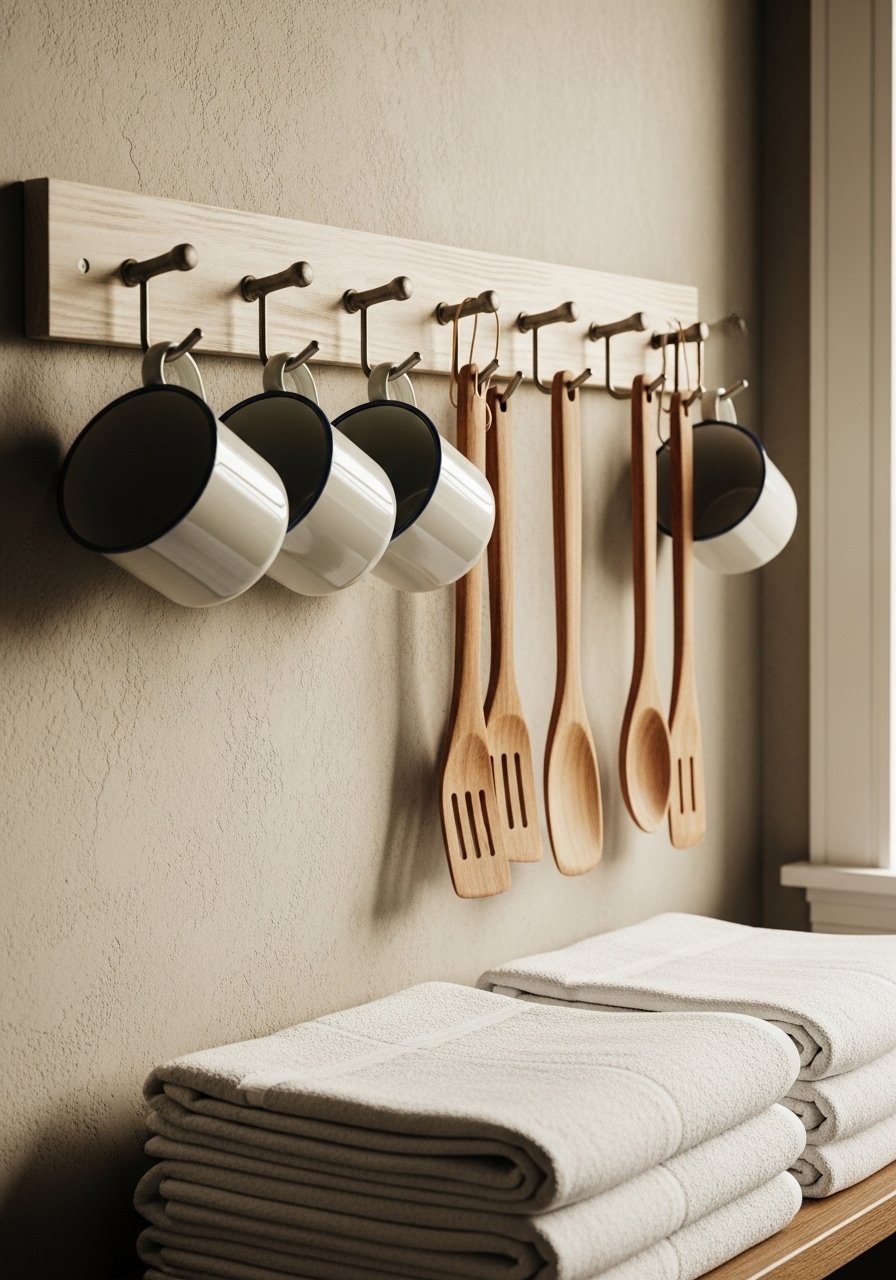
A peg rail mimics built-in rails in custom kitchens. It’s perfect for mugs, measuring cups, and wooden spoons. Space pegs 3–4" apart and paint the rail to match trim for cohesion. A brad nailer speeds installation.
Materials
- 1 strip of poplar, 3/4"x3", 36" long
- Wooden pegs, 10 (3/4" diameter)
- Drill with paddle bits
- Paint to match trim
- Wood glue
- Mounting screws
Instructions
- Mark peg spacing and drill holes to peg depth.
- Tap pegs in with wood glue; let dry 30 minutes.
- Paint rail; dry 1 hour between coats.
- Mount to wall at desired height.
How to Display or Gift It
- Hang frequently used mugs at eye level.
- Add small hooks for towels or oven mitts.
- Gift with a set of enamel mugs wrapped in kraft paper.
- Use a small wooden easel to display a recipe card nearby.
- Mason Jar Lid Magnetic Spice Storage
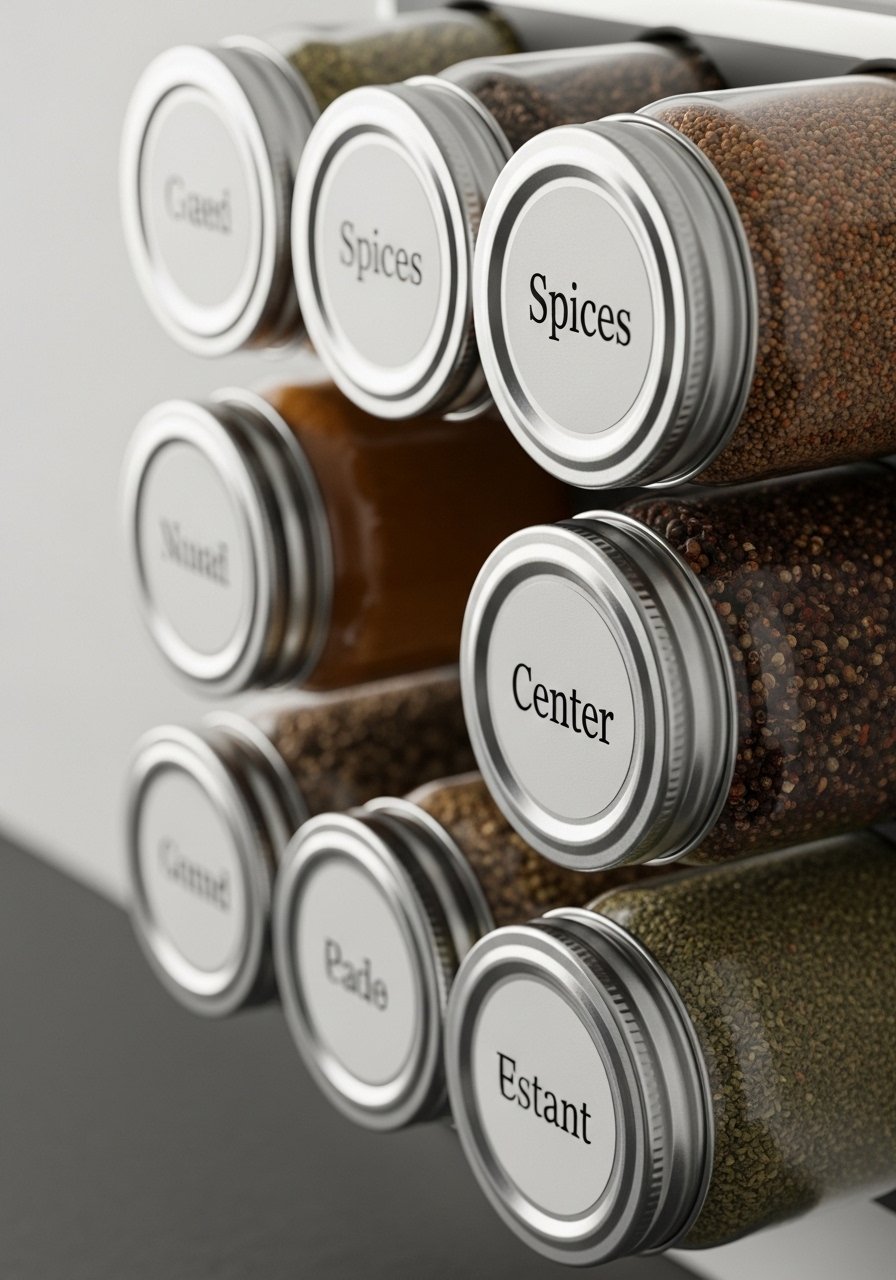
Use mason jar lids with magnets to store spices on a metal strip. It saves shelf space and looks like a purpose-made rail. Epoxy sets firmly—allow full cure for safety. Great for tiny pantries where every inch counts.
Materials
- 12 mason jar lids (wide)
- Small disc magnets, 12
- Epoxy syringe, 2-part (5-minute set)
- Metal strip or repurposed file cabinet face
- Labels
- Rubbing alcohol for cleaning
Instructions
- Clean lids with rubbing alcohol and roughen with sandpaper.
- Mix epoxy per instructions; glue magnet to center of each lid. Cure 24 hours for full strength.
- Screw metal strip to pantry wall and attach lids with filled jars.
How to Display or Gift It
- Arrange alphabetically and label lids.
- Bundle a set of filled jars as a gift for a baker friend.
- Store extra lids and magnets in a small magnetic organizer.
- Chalkboard Pantry Panel for Weekly Lists
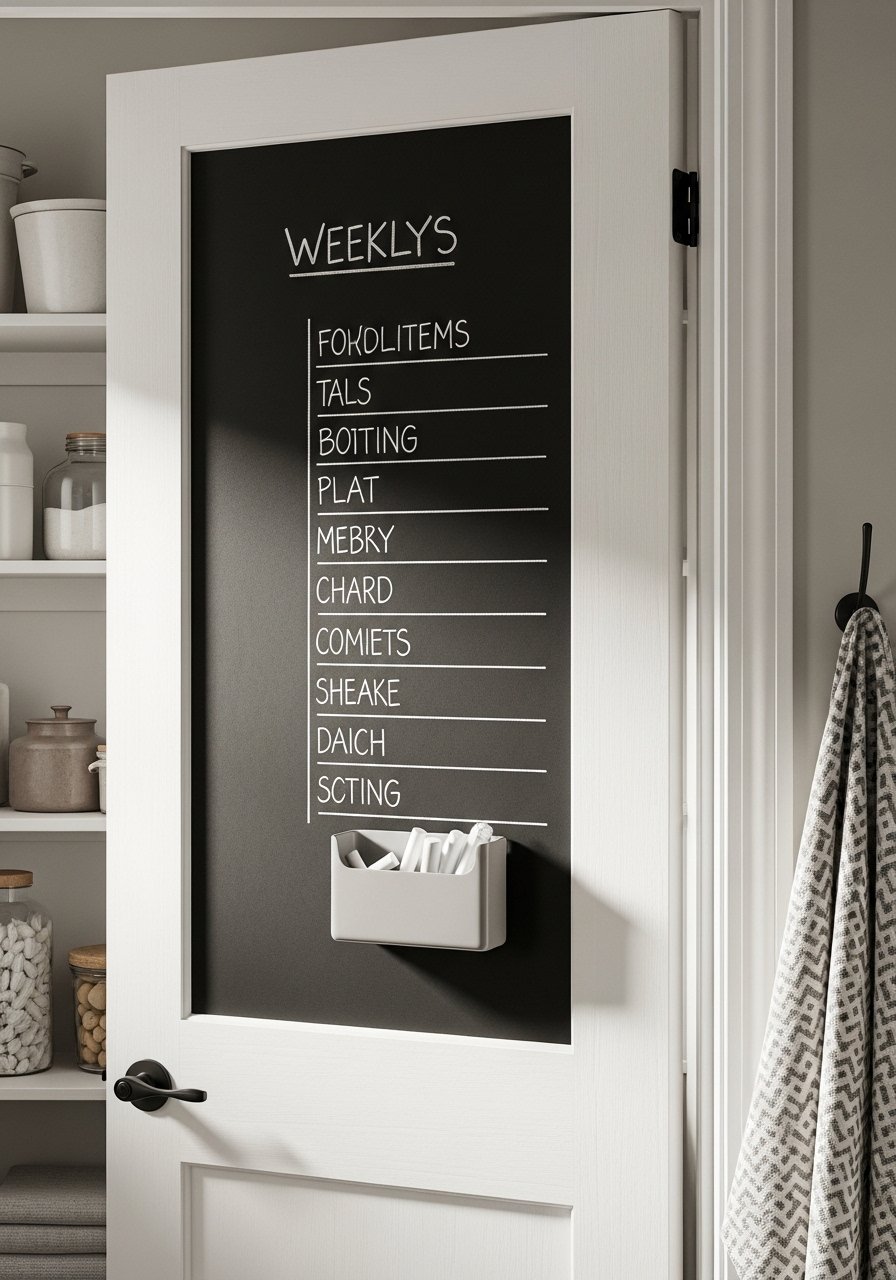
A chalkboard panel on the inside of a pantry door provides an instantly custom-feel command center. Use a chalkboard paint for durability. It’s tactile, useful, and budget-friendly. A chalk holder keeps dust minimal.
Materials
- Chalkboard paint, sample size
- Foam roller, 4"
- Painter’s tape
- Chalk tray or cup
- Soft cloth for seasoning board
- Liquid chalk marker (optional)
Instructions
- Tape off area and apply two coats of chalkboard paint; dry 1 hour between coats.
- Season board by rubbing the side of a chalk stick over the surface, then wipe.
- Mount chalk tray and store chalk.
How to Display or Gift It
- Use for meal plans or grocery lists.
- Attach a small magnet cup for pens.
- Gift paired with a set of liquid chalk markers.
- Hidden Roller Rack for Wrapping Paper
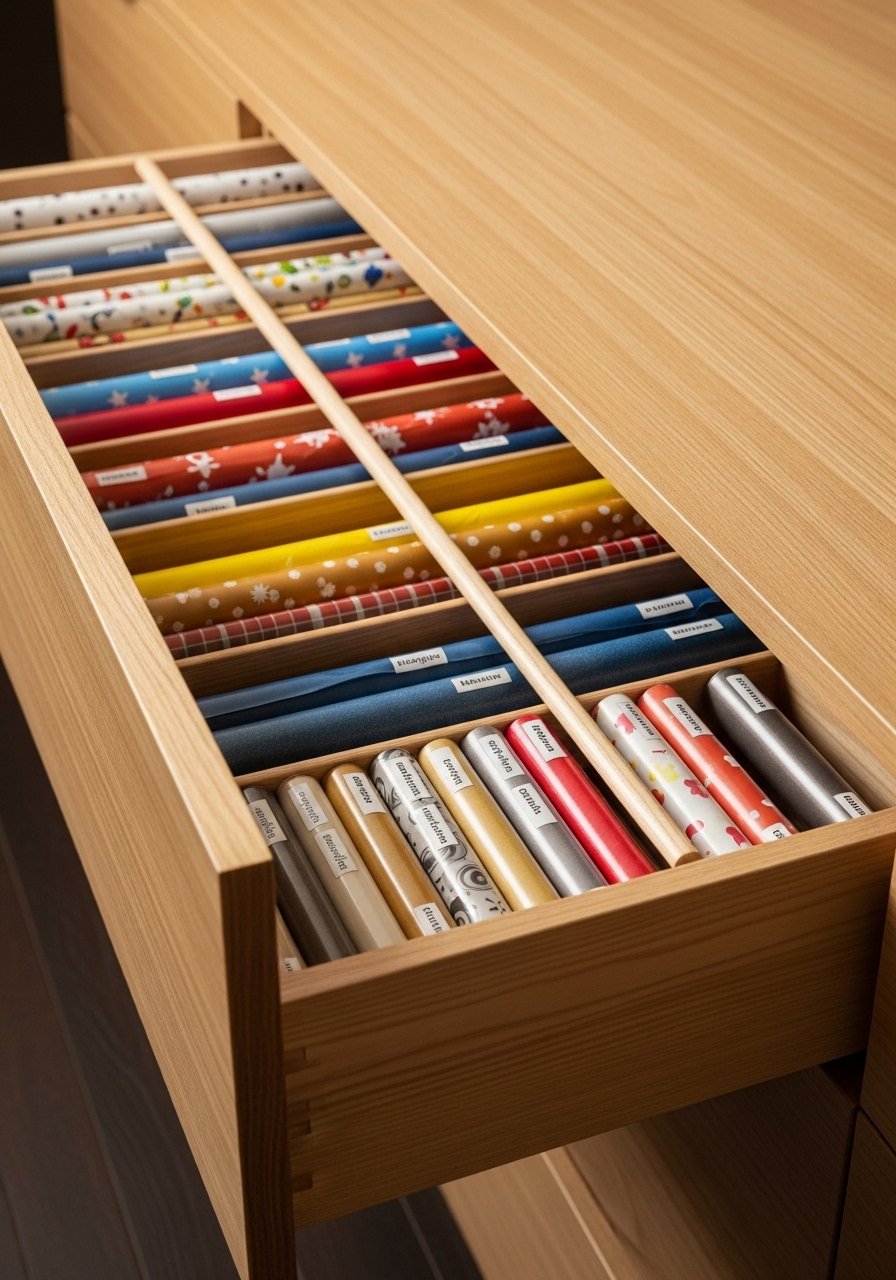
A roller rack stores gift wrap vertically, hidden behind a door. Dowels keep rolls upright and tidy. It feels custom because it’s tailor-made for a single task. A handheld drill and dowel jig make this straightforward.
Materials
- 1 shallow drawer or slide-out board, 6" deep
- Wooden dowels, cut to drawer depth, 3/4" diameter
- Screws
- Measuring tape
- Sandpaper
- Paint or stain (optional)
Instructions
- Measure spacing and drill holes for dowels.
- Insert dowels and secure with glue.
- Add slides if making a roll-out, test smoothness.
How to Display or Gift It
- Store seasonal wrap and ribbon spools in the rack.
- Add labels for quick pull.
- Gift by pairing a roll of artisanal paper with a tag set.
- Keep spare dowels in a small hardware organizer.
- Upcycled Drawer as Bread Bin with Vent Holes
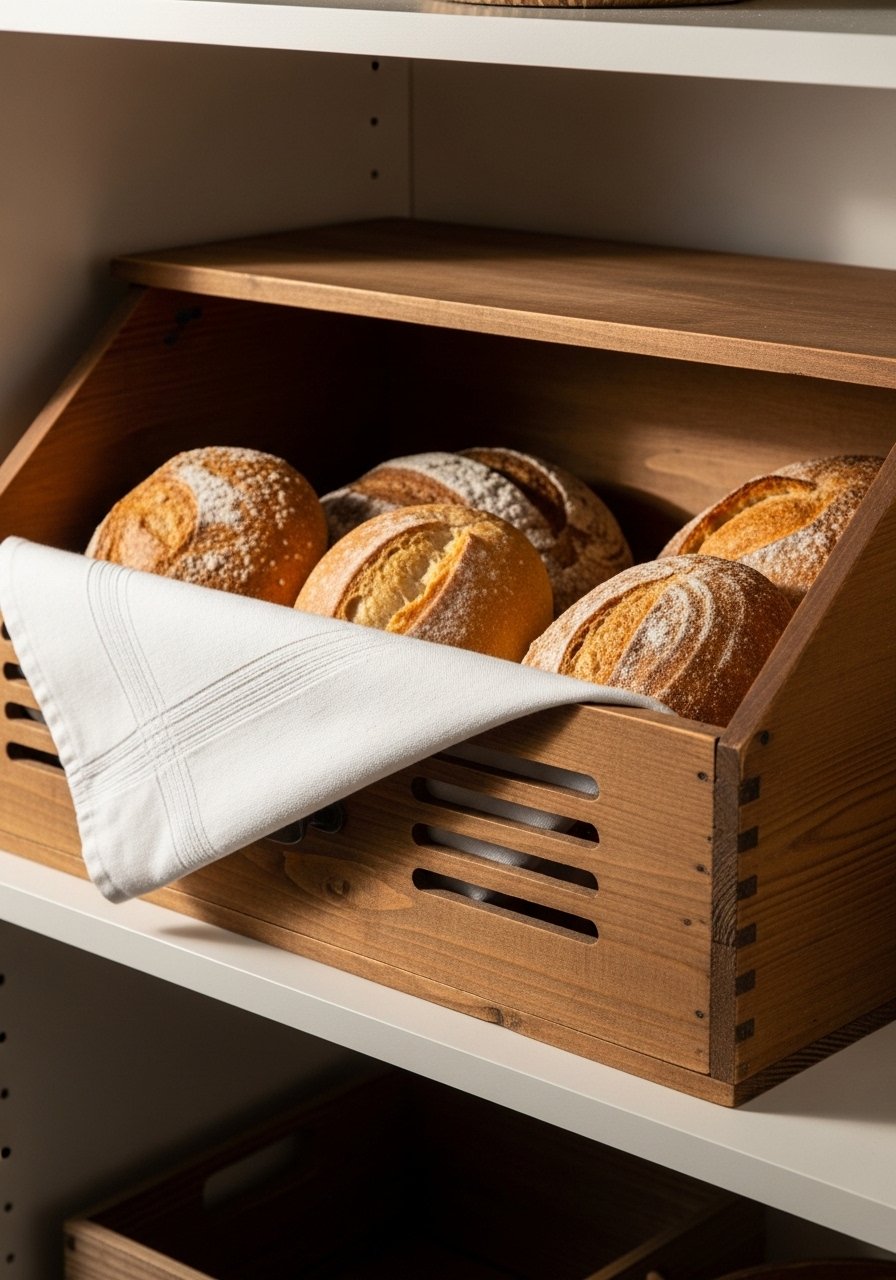
An upcycled drawer becomes an accessible bread bin when fitted with a cotton liner and drilled vent holes. The drawer front gives a built-in look while allowing airflow to prolong bread freshness. Drill holes must be small to avoid crumbs escaping.
Materials
- 1 shallow wooden drawer, 20"x12"
- Cotton towel or liner
- Drill with 1/4" bit
- Sandpaper
- Food-safe wood oil or mineral oil
Instructions
- Sand interior and drill a row of 1/4" vent holes near the back.
- Oil interior with mineral oil; let soak 1 hour, wipe excess.
- Fold cotton towel as liner and place bread inside.
How to Display or Gift It
- Stack two drawers for a custom bread-pastry station.
- Add a small chalk label on front.
- Gift as a bakery box with artisan bread wrapped inside.
- Tiered Can Display Shelf (budget small pantry ideas)
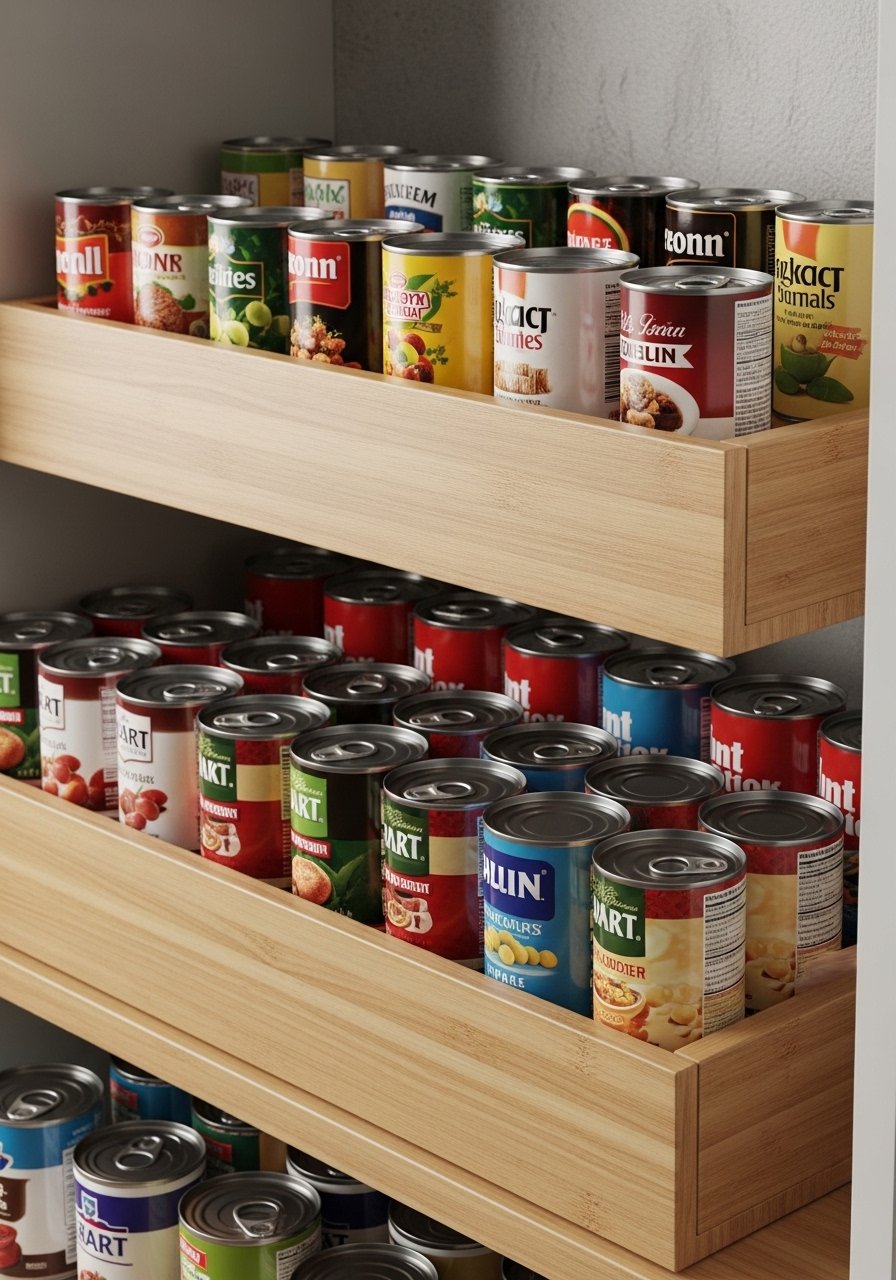
A small riser turns a deep shelf into a tiered display so labels face forward. The stepped look reads custom because it’s edited and uniform. It’s a simple woodworking cut-and-assemble project—great for beginners.
Materials
- Plywood sheet 1/2", cut to 10"x24" and riser pieces
- Wood glue
- Finish paint or stain, 4 oz
- Sandpaper 120/220
- Brad nails or small screws
Instructions
- Cut base and two risers of equal height.
- Sand, glue, and fasten risers to base; clamp and let glue set 30 minutes.
- Paint or stain; dry 1 hour between coats.
- Place on shelf and load cans.
How to Display or Gift It
- Use for canned soups, sauces, or spices.
- Paint risers to match shelf color for a built-in look.
- Gift with a selection of gourmet canned goods.
- Store extra paint in a small paint tray.
- Removable Wallpaper on Interior Shelves

Lining shelves with removable wallpaper adds pattern and depth. Match the print to your kitchen aesthetic—botanical for cottagecore or simple geometrics for japandi. Use a craft knife to trim precisely.
Materials
- Removable wallpaper, 3 sq ft
- Measuring tape
- Utility knife
- Straight edge ruler
- Plastic squeegee
Instructions
- Measure shelf interior and cut wallpaper slightly oversized.
- Peel and stick, smoothing with a squeegee.
- Trim edges with utility knife; wait 24 hours before heavy loading.
How to Display or Gift It
- Coordinate wallpaper with countertop color.
- Use small framed labels in front for a boutique look.
- Wrap leftover wallpaper around a gift box for cohesive gifting.
- Chalk-Painted Crate Fridge Hideaway
Paint a crate in chalk paint and use it as an enclosed hideaway for small appliances or a mini-fridge. The crate reads like a built-in drawer when painted to match cabinetry. Chalk paint dries quickly and sands softly for a vintage feel.
Materials
- 1 wooden crate, 20"x14"
- Chalk paint, 8 oz
- Sandpaper 220 grit
- Felt pads for base
- Small handles (optional)
Instructions
- Paint two coats; dry 45 minutes between coats.
- Sand edges for a softly worn look.
- Mount handles if desired and place crate over appliance.
How to Display or Gift It
- Use to conceal mixers or slow cookers.
- Add a label and a small bowl of fresh lemons on top.
- Gift by filling crate with kitchen tools and tying with twine.
- Store extra crates in a stackable bin.
- Rustic Ladder Shelf Insert
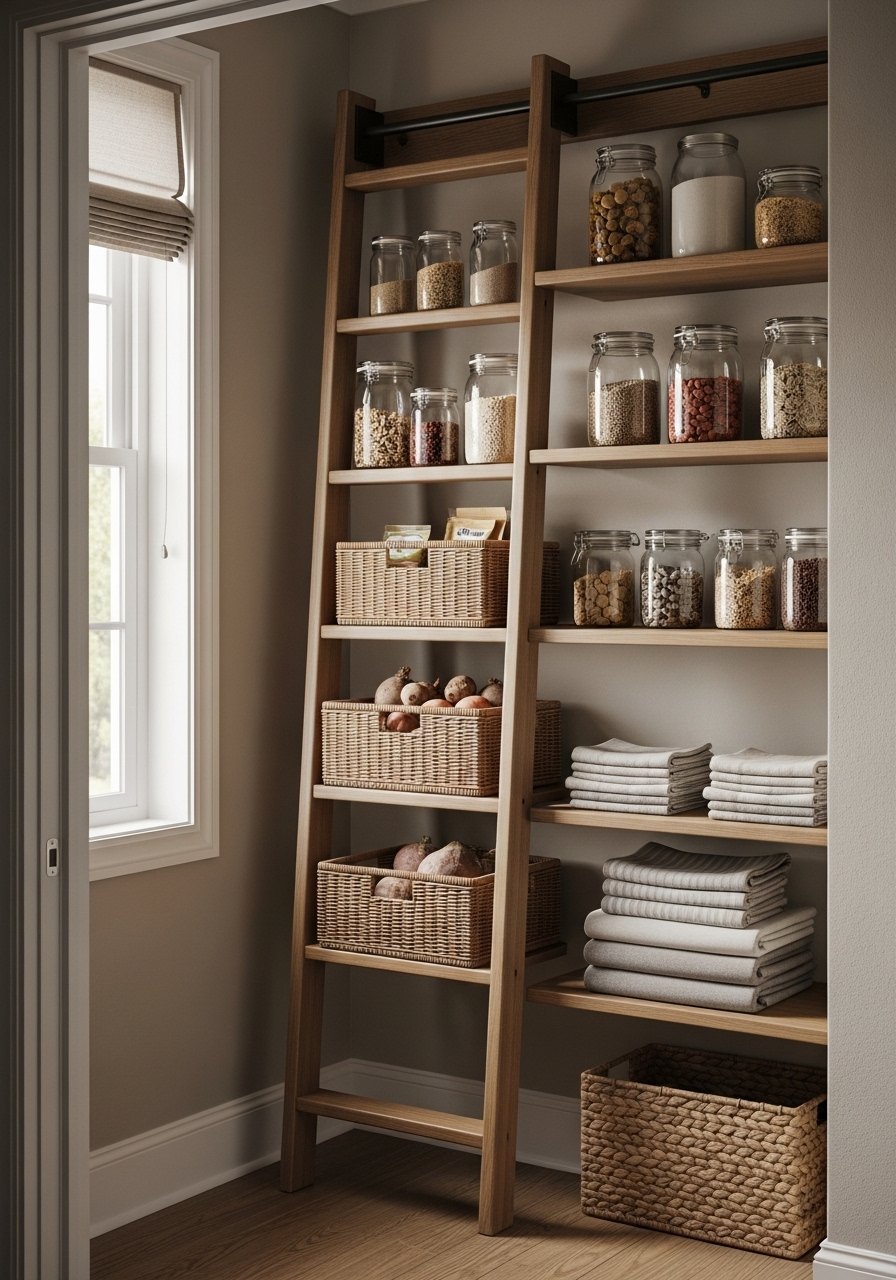
A slim ladder shelf fits into awkward pantry corners to create built-in vertical storage. The staggered step look adds interest and keeps small items accessible. Lightweight construction makes it easy to move.
Materials
- 2 ladder side rails (1"x2")
- 3 shelf slats, cut to width
- Wood screws
- Stain or paint
- Sandpaper 120/220
- Wood glue
Instructions
- Cut side rails and slats to pantry height and width.
- Assemble with wood glue and screws; clamp and dry 30 minutes.
- Stain or paint; dry 1 hour between coats.
- Slide into corner and style.
How to Display or Gift It
- Use for oils, vinegars, and decorative trays.
- Add small baskets to tame clutter.
- Gift a mini ladder with a set of artisanal oils.
- Store hardware in a labelled compartment box.
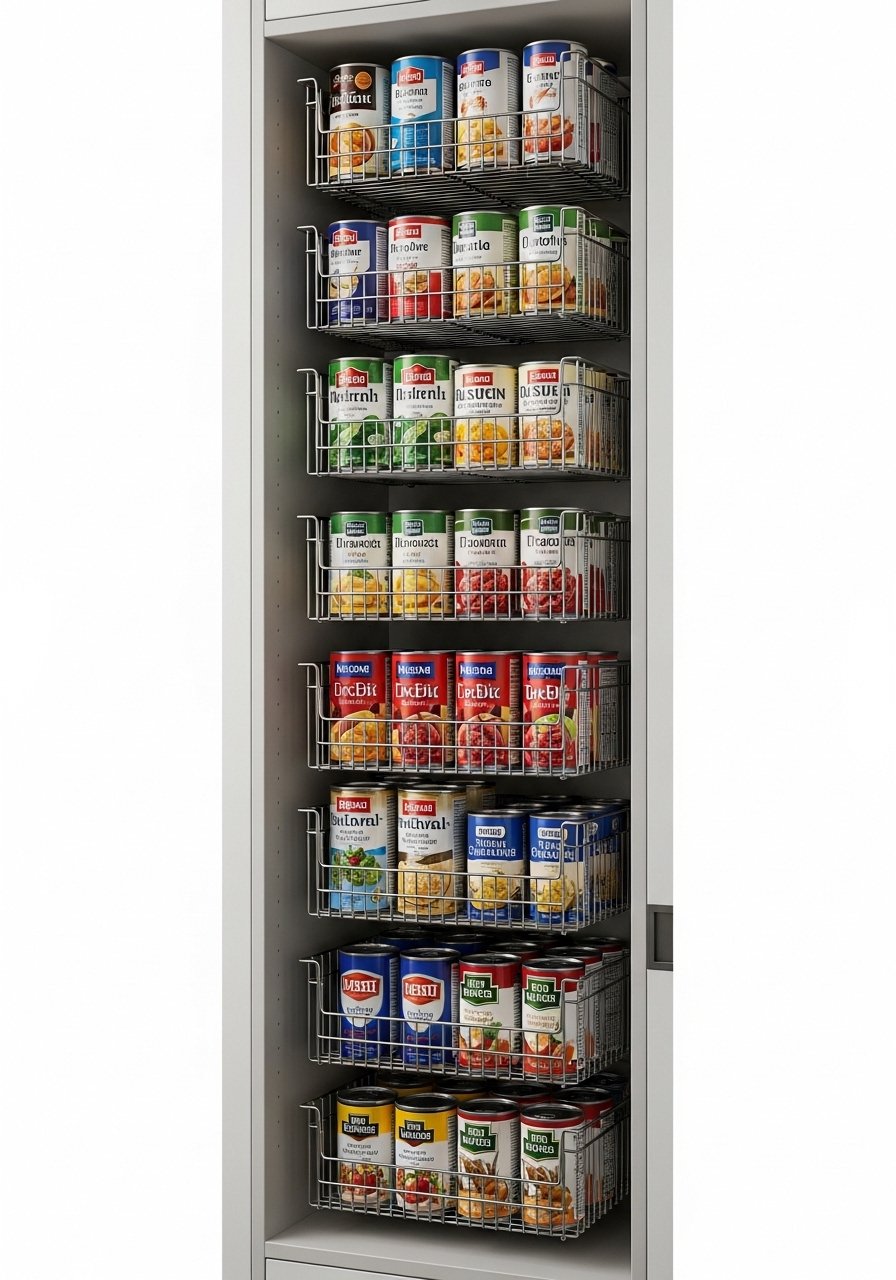
- Wire Basket Slide-Outs
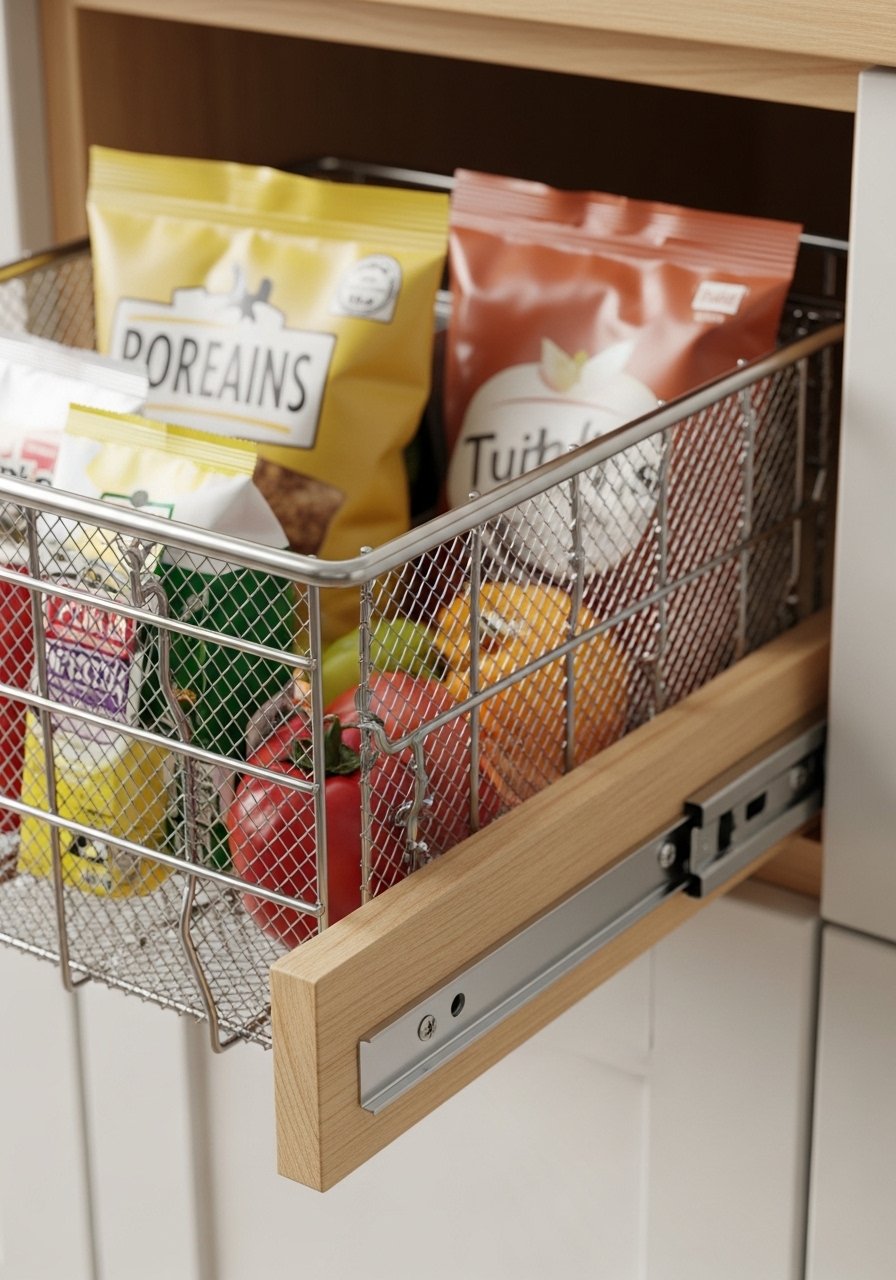
Wire baskets on slides create a professional pantry pull-out effect. The airy sides let you see contents at a glance. Install with drawer slides rated for light loads.
Materials
- 3 wire baskets, 16"x10"
- Drawer slides, 16" (pair)
- Screws
- Measuring tape
- Drill
Instructions
- Mount drawer slides to side walls at measured heights.
- Attach baskets to slides or build a shallow wooden platform to hold them.
- Test and adjust alignment.
How to Display or Gift It
- Use for produce, snacks, or pet supplies.
- Line baskets with small fabric liners for delicate items.
- Gift a basket set filled with specialty snacks.
- Keep spare slides in a hardware organizer.
- Tiny Appliance Garage with Roll-Up Door
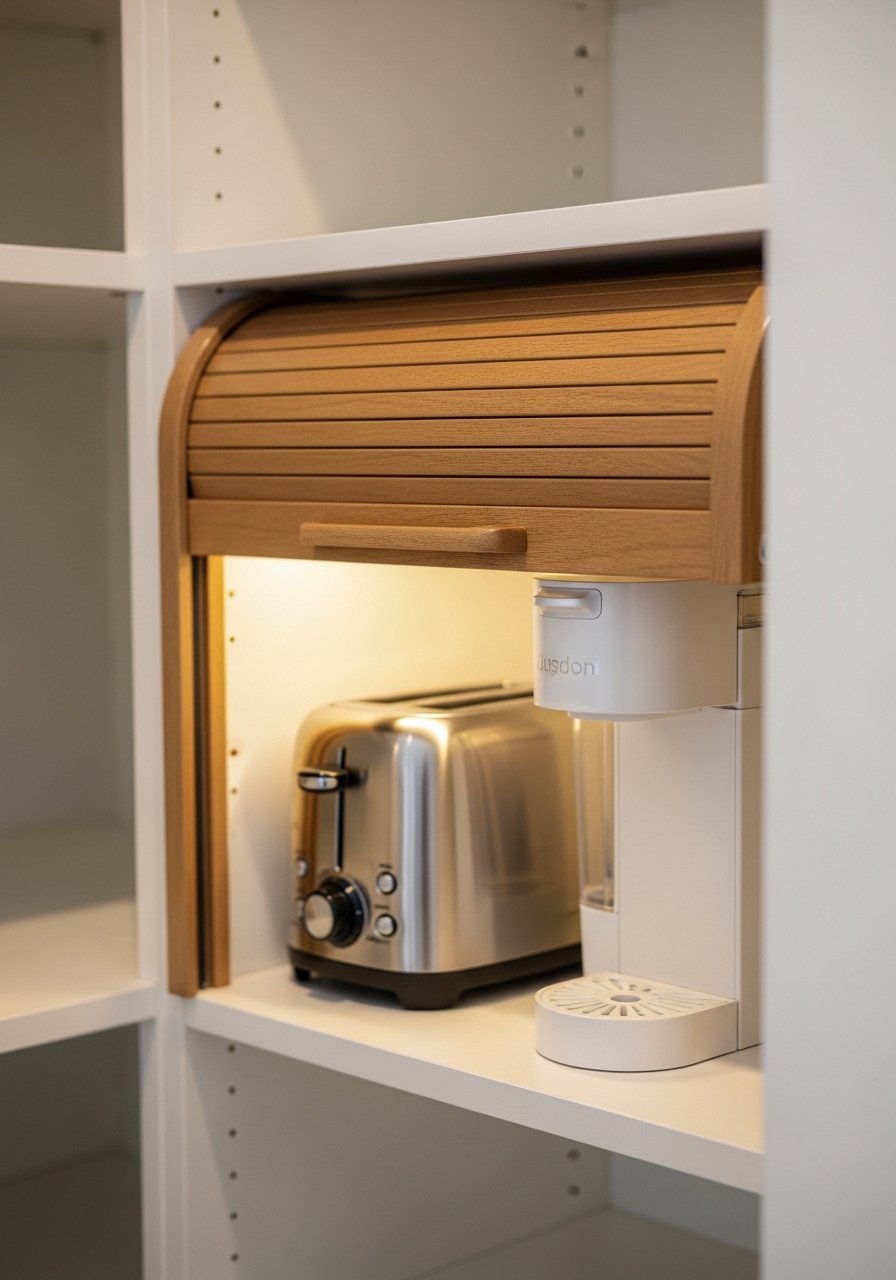
A tambour-style roll-up door hides small appliances and reads custom. Use thin slats glued to fabric backing or buy a ready-made roll-up shade. A small handle and guided channel keep it smooth.
Materials
- Thin slat panel or roll-up shade, cut to opening
- Channel rails, 2
- Small knob
- Glue
- Measuring tape
Instructions
- Fit slat panel into channel rails and test roll-up action.
- Secure front knob and mount assembly.
- Hide appliances and leave ventilation space.
How to Display or Gift It
- Use for coffee station with labeled jars on top.
- Add a small herb pot nearby.
- Gift with a bag of specialty beans and a manual grinder.
- Store small tools in a kitchen caddy.
- Tiered Wire Can Organizer (Stacked Vertical)
Stackable wire organizers turn a deep shelf into an organized vertical display. They look built-in when painted or finished uniformly. Assembly is quick—nest them side by side or stack for height.
Materials
- 3 stackable wire can organizers
- Spray paint (optional)
- Label strip for fronts
- Measuring tape
Instructions
- Dry-fit organizers and spray paint if desired; dry 1 hour.
- Stack and load cans, keeping labels forward.
How to Display or Gift It
- Use color-coded labels by type: soups, beans, tomatoes.
- Gift a set with a can opener wrapped in twine.
- Store extra labels in a label maker tape set.
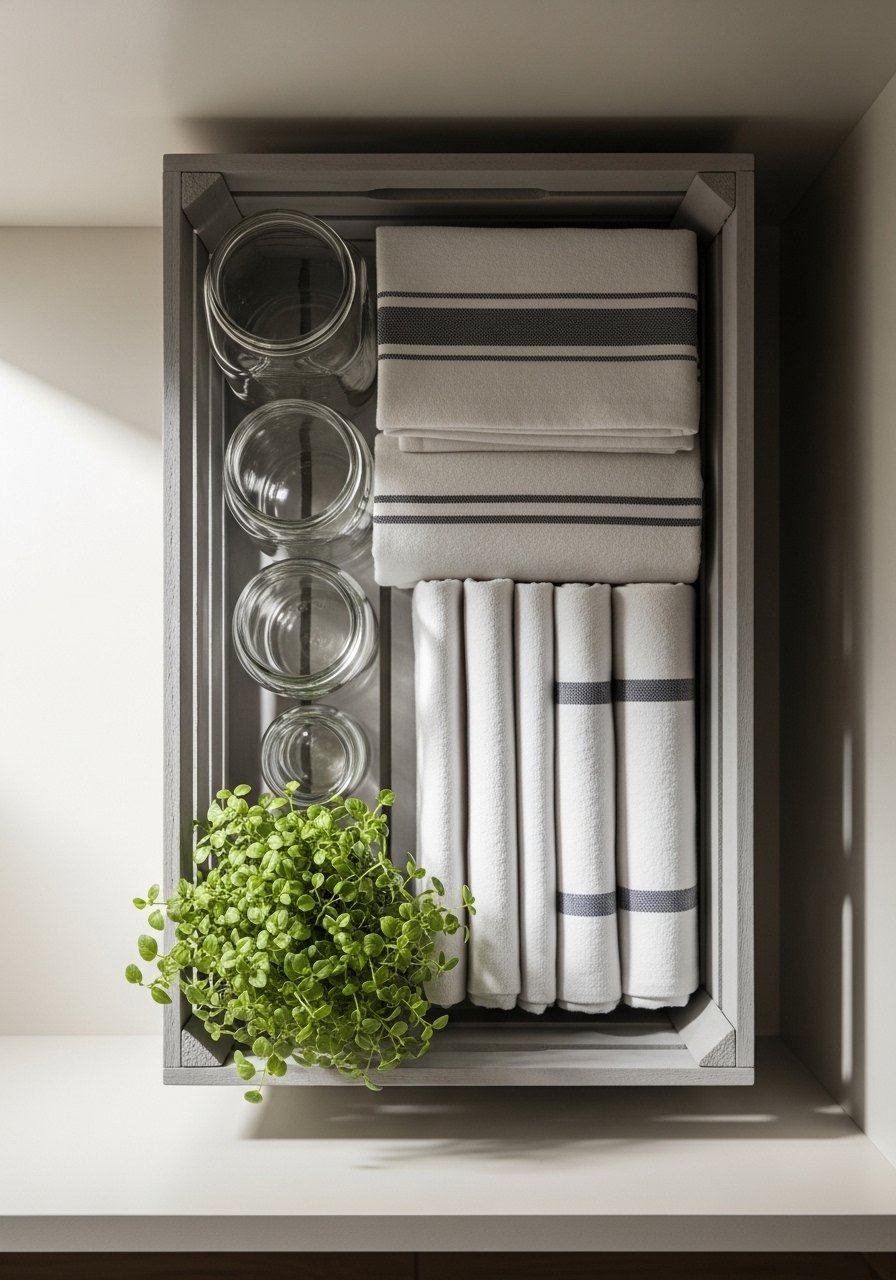
- Small-Batch Baking Station Drawer
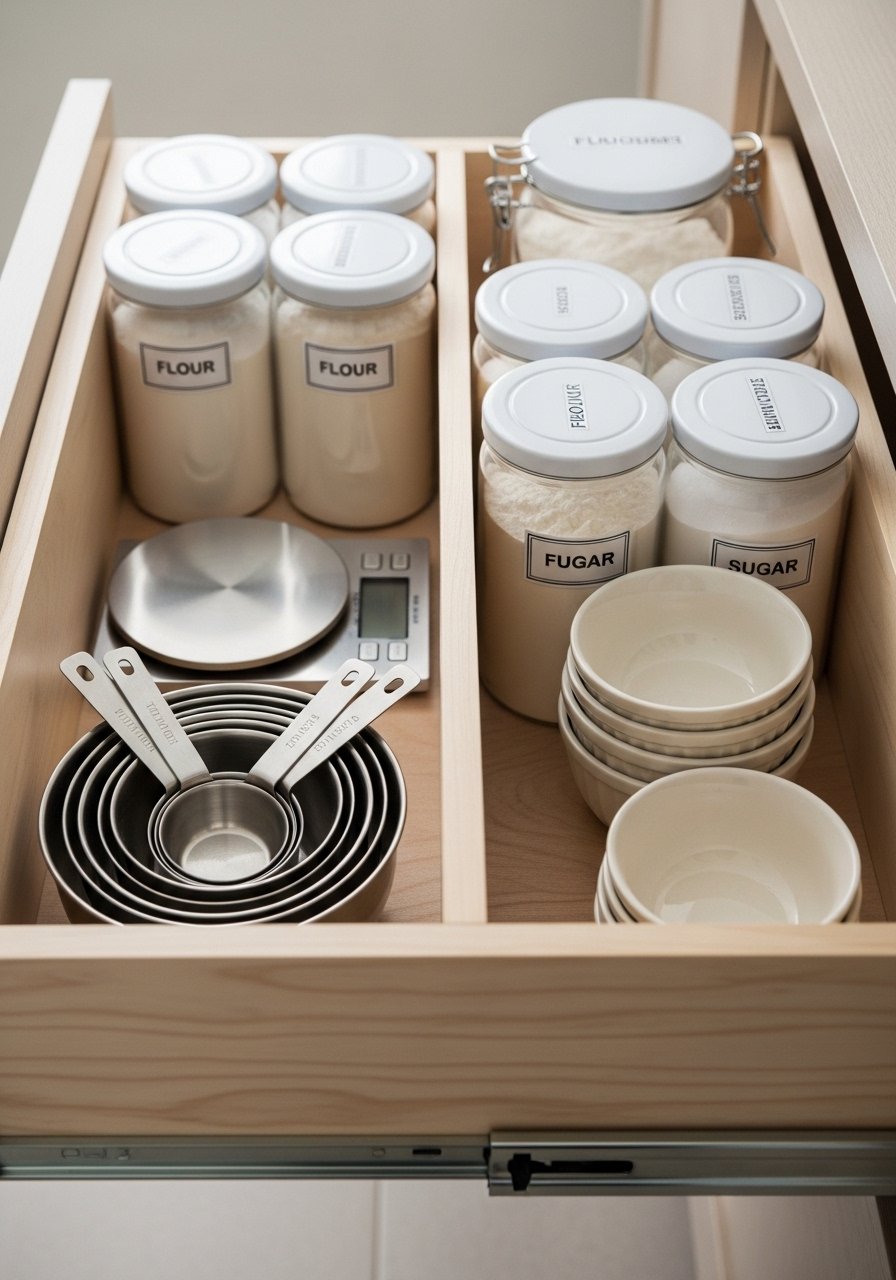
Turn a drawer into a baking station with nested trays and labels. Each item has a home, making the pantry feel custom. Use shallow dividers to keep utensils sorted.
Materials
- 1 deep drawer or organizer tray
- Plastic dividers
- Canisters for flour and sugar (1–2 qt)
- Measuring cup set
- Small digital scale
Instructions
- Place dividers in drawer to create zones.
- Add canisters and measuring tools.
- Label each zone with a liquid chalk marker.
How to Display or Gift It
- Keep frequently used ingredients near the front.
- Bundle as a baking starter pack for gifting.
- Store extra dividers in a drawer organizer tray.
- Mountable Herb Drying Rack
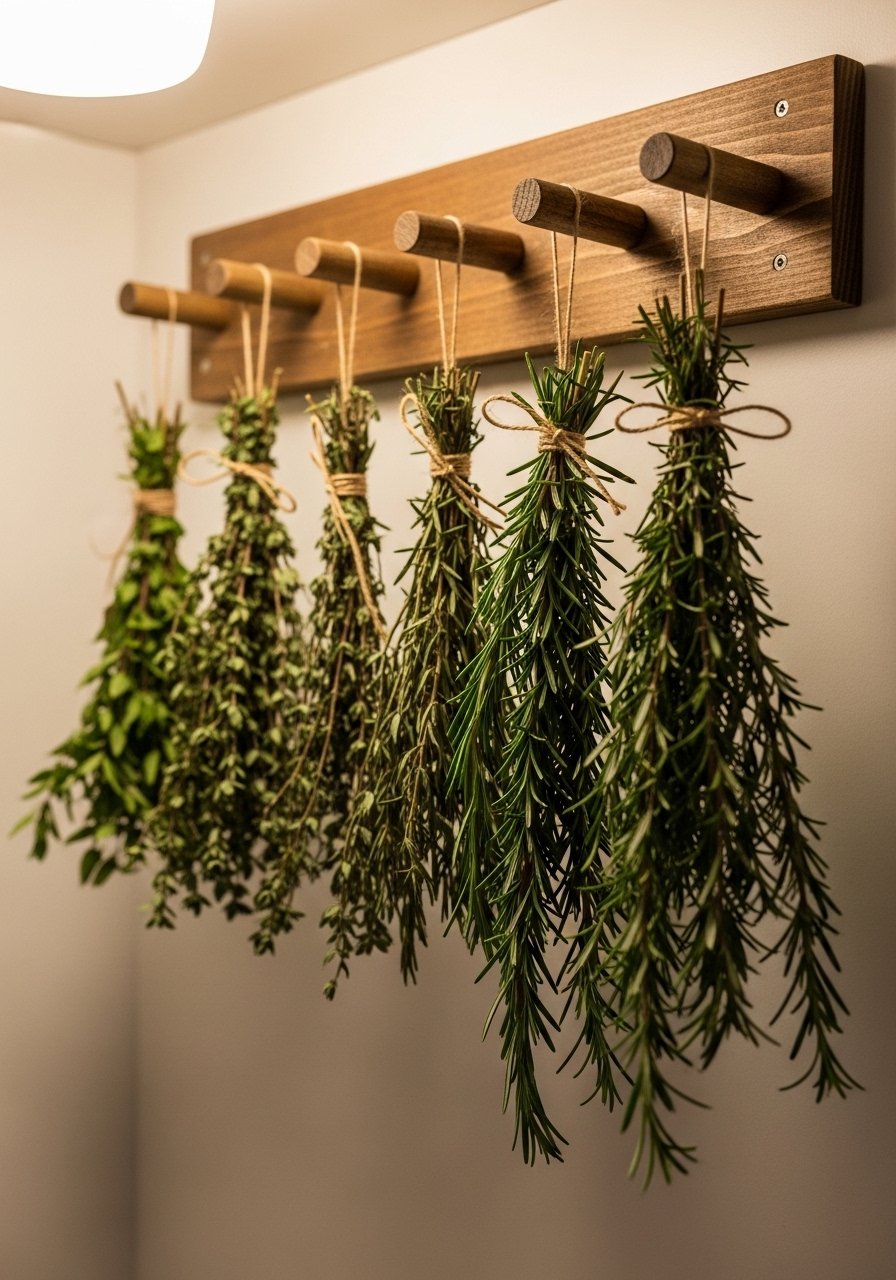
A simple hanging rack dries herbs and looks like a purposeful pantry detail. Use small clips or clothespins and leave 2–3" spacing between bundles for airflow. A coffee filter under bundles catches crumbs.
Materials
- Wooden dowel 18"
- Twine 6 ft
- Small clips or clothespins, set of 12
- Hooks for mounting
- Scissors
Instructions
- Mount hooks and tie dowel with twine across the space.
- Clip herb bundles with 2–3" spacing.
- Dry for 7–14 days depending on humidity.
How to Display or Gift It
- Use dried herbs in labeled jars near spice rack.
- Bundle herbs with a small recipe card as a gift.
- Store extra clips in a small clip box.
- Slim Wine Rack Using Wood Crates
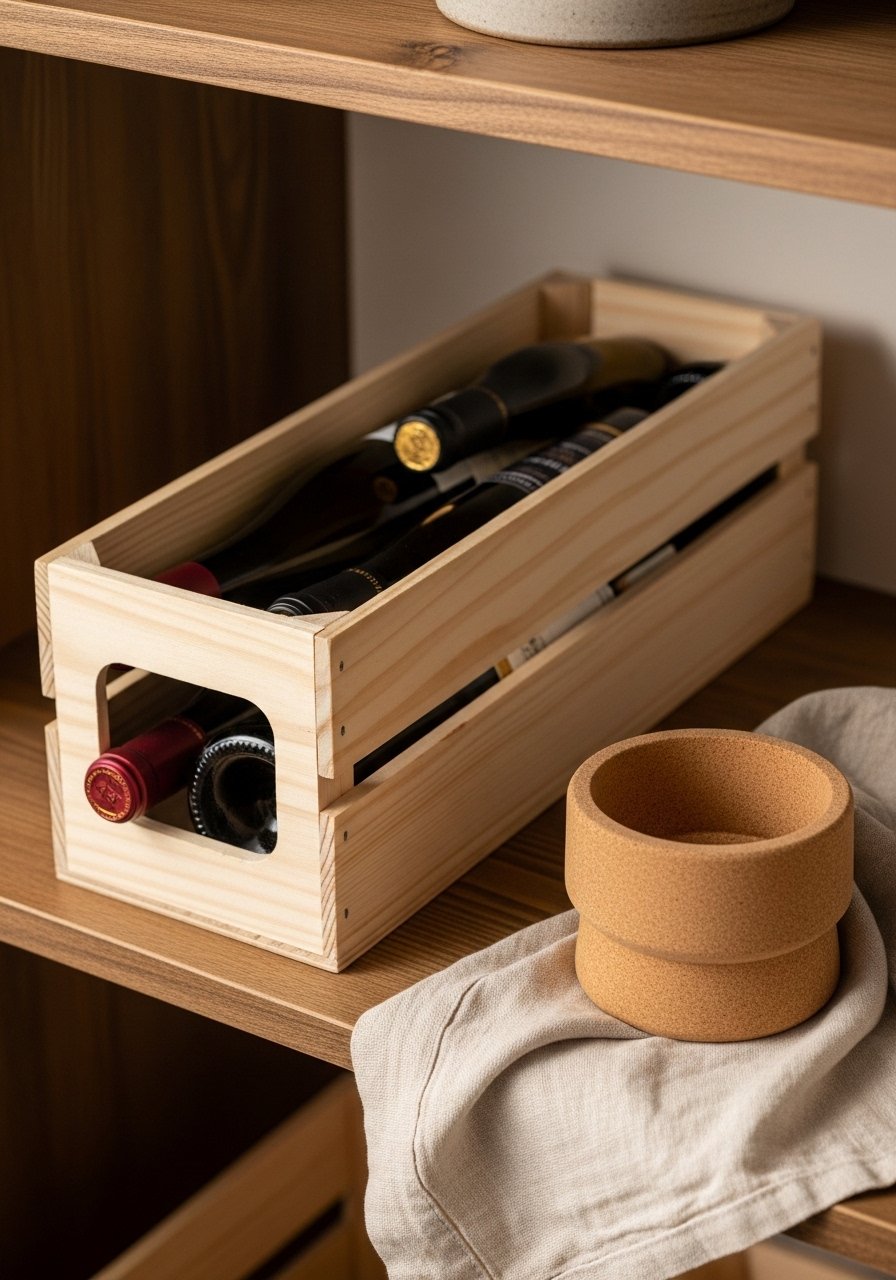
A sideways crate stores wine and reads like a built-in cubby. Bottles rest safely on slats, and crates stack for more capacity. Sand slats smooth to protect labels.
Materials
- 1 wooden crate, 18"x12"
- Sandpaper 120/220
- Small felt pads
- Wine labels (optional)
Instructions
- Sand interior and add felt pads where bottles rest.
- Slide crate sideways onto shelf and place bottles.
How to Display or Gift It
- Pair with a cork bowl and wine opener for a hostess gift.
- Use crates to corral specialty oils or vinegars as well.
- Store corks and small tools in a small cork jar.
- Pantry Lighting Upgrade with LED Puck Lights
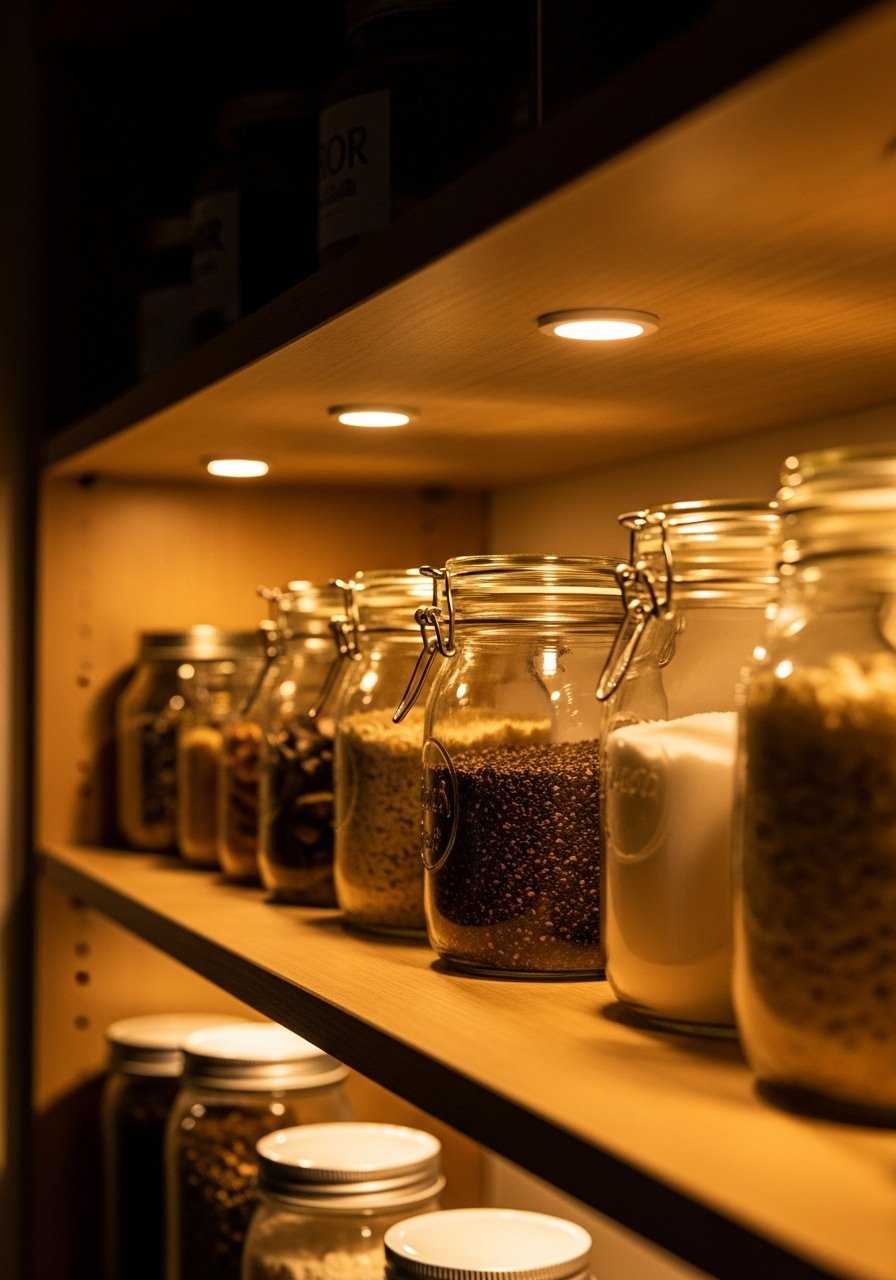
Add under-shelf LED puck lights to create depth and the feel of high-end cabinetry. Battery-powered stick-on pucks are easy and removable. Warm white (2700–3000K) reads cozier than bright white.
Materials
- 3–6 LED puck lights (battery)
- AAA batteries or rechargeable base
- Double-sided mounting tape
- Small remote (if included)
Instructions
- Test lights and insert batteries.
- Mount with tape under each shelf, spaced evenly.
- Set to warm white and test at night for desired glow.
How to Display or Gift It
- Use to highlight special jars or decorative items.
- Gift a set along with a small battery charger.
- Store spare batteries in a battery organizer.
- Slim Door-Mounted Organizer for Cleaning Supplies
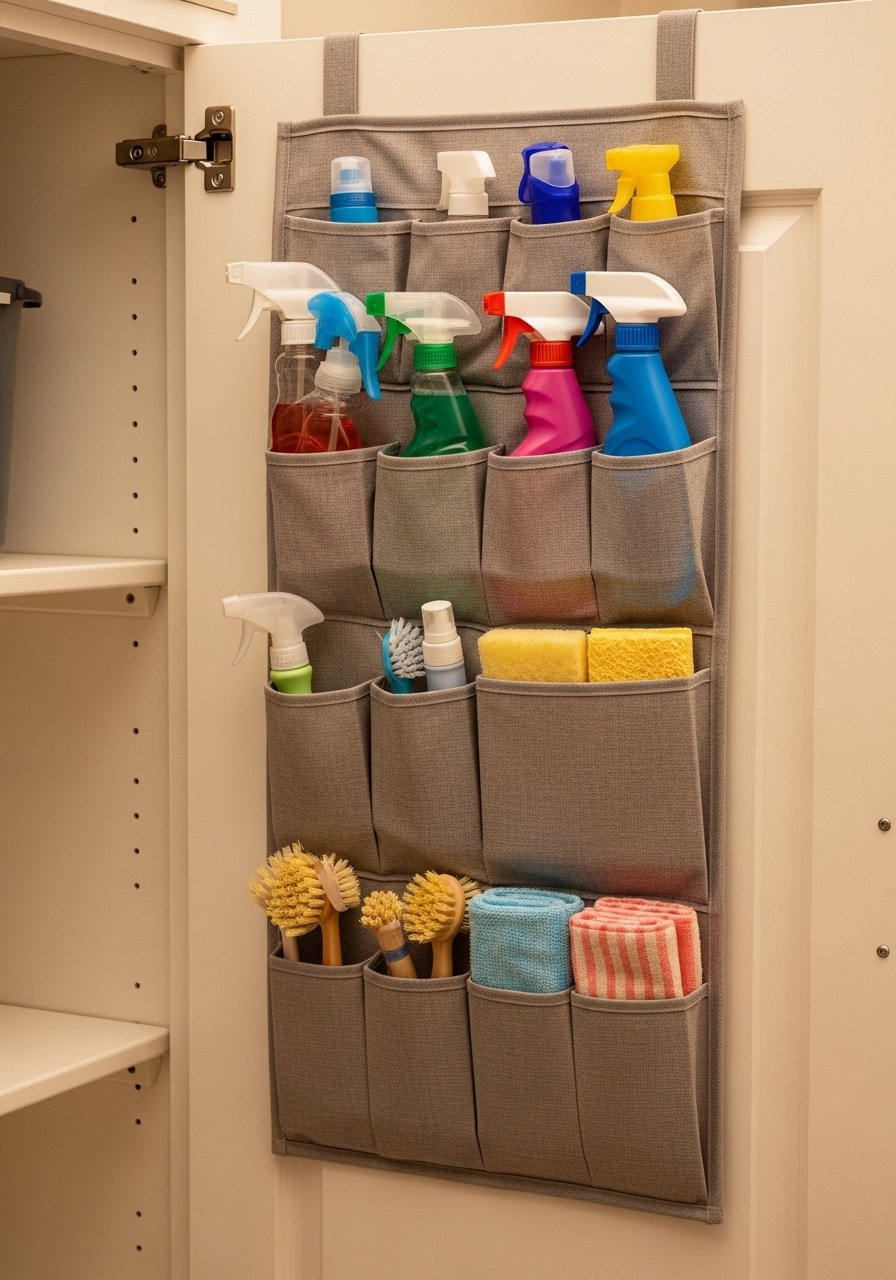
A door-mounted organizer creates usable space for taller bottles and cleaning items, making the pantry feel custom because every item has a place. Look for canvas or mesh pockets that breathe.
Materials
- Over-the-door organizer, slim profile
- S-hooks for extra hanging
- Velcro straps for securing bottles
- Label tags
Instructions
- Hang organizer over door and adjust pockets.
- Secure large bottles with Velcro.
- Add S-hooks for brush storage.
How to Display or Gift It
- Keep cleaning supplies away from food with labeled pockets.
- Gift as a cleaning kit with natural cleaners and brushes.
- Store spare hooks and straps in a utility box.
These 24 budget small pantry ideas show how a few materials, careful measurements, and a bit of paint can make a tiny pantry look thoughtfully built-in. Try one project or mix a few: a peel-and-stick back, labeled jars, and a floating spice ledge go a long way together. Pin this for later so you can come back with a shopping list. Which idea fits your pantry space—the pegboard command center or the pull-out drawers? Share this with a friend who’s nesting or gift one of the ready-made pantry kits to someone starting out.
Trust me, picking up a quality hot glue gun with temperature control changed how every single one of these projects turned out—less string, more control, and faster finishes. Happy crafting!


